Home › Forums › Chat Forum › Cheap 3d printer kits – Experiences?
- This topic has 690 replies, 36 voices, and was last updated 4 years ago by zilog6128.
-
Cheap 3d printer kits – Experiences?
-
stumpy01Full MemberPosted 6 years ago
Did some individual temp test pieces today. The read back on the control box was telling me that 240 couldn’t be maintained. It dropped down to 230, which is a bit crap.
Also the bridging worked ok but had gaps between it, as if it’s still under extruding even though I have supposedly calibrated the extruder. More work there.
I did prints at 200, 220 and 240 (probably 230). There is very little between them. The highest temp one was quite stringy before the print started (a lot of oozing) so I’ll probably give that a miss. But 200-220 are almost the same. Will probably just go for the middle ground!
WCA – congrats on getting your first thing on Thingiverse! It’s quite a satisfying thing to do. Here is my one and only thing…
https://www.thingiverse.com/thing:2796742
Northwind – those Delta printers look great. Intriguing design!
NorthwindFull MemberPosted 6 years ago@AlexSimon- yep, saw that, but even if my kit has the same issue (should find out tonight!) it’s about a 5 minute fix. I think a lot of the internet printer experts are good designers but useless at the mechanics of it tbh.
AlexSimonFull MemberPosted 6 years agoI think a lot of the internet printer experts are good designers but useless at the mechanics of it tbh.
Yes, although 3D Maker Noob is neither to be honest. I nice guy and very watchable, but just prints downloaded things most of the time.
Maker’s Muse, Make Anything and Tom Sanladerer are my favs. Tom being the most technical.
SammyCFree MemberPosted 6 years agoWould any of the more experienced peeps on here be able to take a look at my design to pick up on any obvious problems? I’d have to email it to you as its for work and not exactly sharable.
stumpy01Full MemberPosted 6 years agoSammyC – I’ve just noticed your post. No idea if the message function is still working after the forum update, but feel free to drop me a message or reply on here.
One of my colleagues has been researching 3D printers for work & about a week ago we took delivery of an Ultimaker 3 Extended.
It’s a dual extruder so we’ve got PLA & PVA support material loaded in currently.
It prints pretty well, but I bought some models in today to do a direct comparison & there isn’t a massive amount in it (with PLA). I suspect the differences will become more obvious when we want to print more challenging materials.
So far though, I am not over enamoured with it. The user-interface is not quite automated enough to be completely fool-proof, but automated enough to be frustratingly locked down at times. Bit of a learning curve though at the mo.
SammyCFree MemberPosted 6 years agoI took the plunge and got it printed anyway locally, pretty pleased with the result. A few minor problems that need to be fixed in the next incarnation but the main problem is getting some PETG in the correct colour (RAL1018).
WorldClassAccidentFree MemberPosted 6 years agoRS Components have sent me the wrong filament so I have 2x500g of this Clear M-ABS which is like normal ABS but better.
https://uk.rs-online.com/…/p/3d-printing-materials/8320557/…
The two boxes are still sealed in plastic and completely as delivered..
£12 posted to anyone in the UK..
email in my profile.
Cheers
papamountainFree MemberPosted 6 years agoWas messing around with vase mode in Cura last night and accidentally changed some settings on my normal profile.
Could one of you with cr-10/cura let me know your basic settings for:
1. Combing mode (in Travel section) – cant remember if I had it off, all, or no skin. I hadn’t changed it before, I think it was set to all.
2. Retract at layer change (in material section) ticked or not? It’s not ticked at the moment and I think that is how it was..
You might need to enable them if you cant see them.
Just want to make sure as I was happy with the setup.
Also I’ve set my acceleration/jerk settings in cura to 500/8 for print, 1000/15 for travel. Closer to the overriding stock firmware settings. Now cura time estimates are much closer to actual. First few prints after have been fine.
Thanks for any assistance.
AlexSimonFull MemberPosted 6 years agopapmountain – didn’t see your post before (new forum obvs).
Are you still wanting this info?AlexSimonFull MemberPosted 6 years agoPosted this in the ‘Last thing you made’ thread, but I guess it should go in here too.
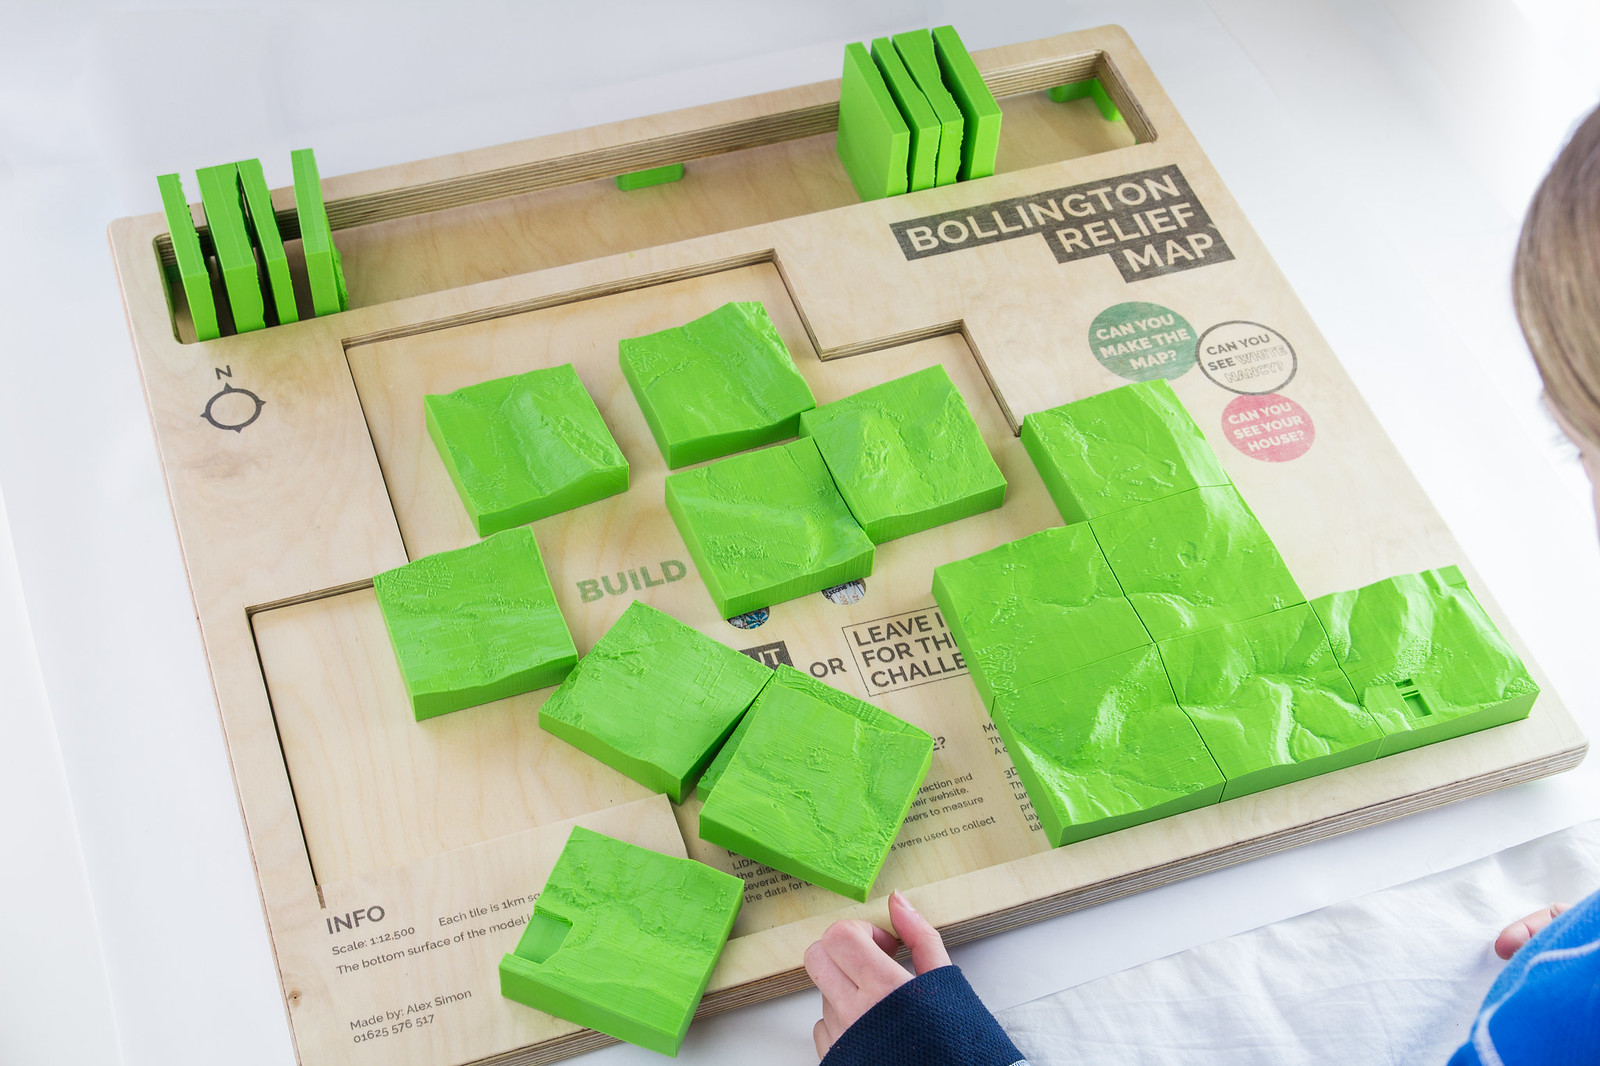
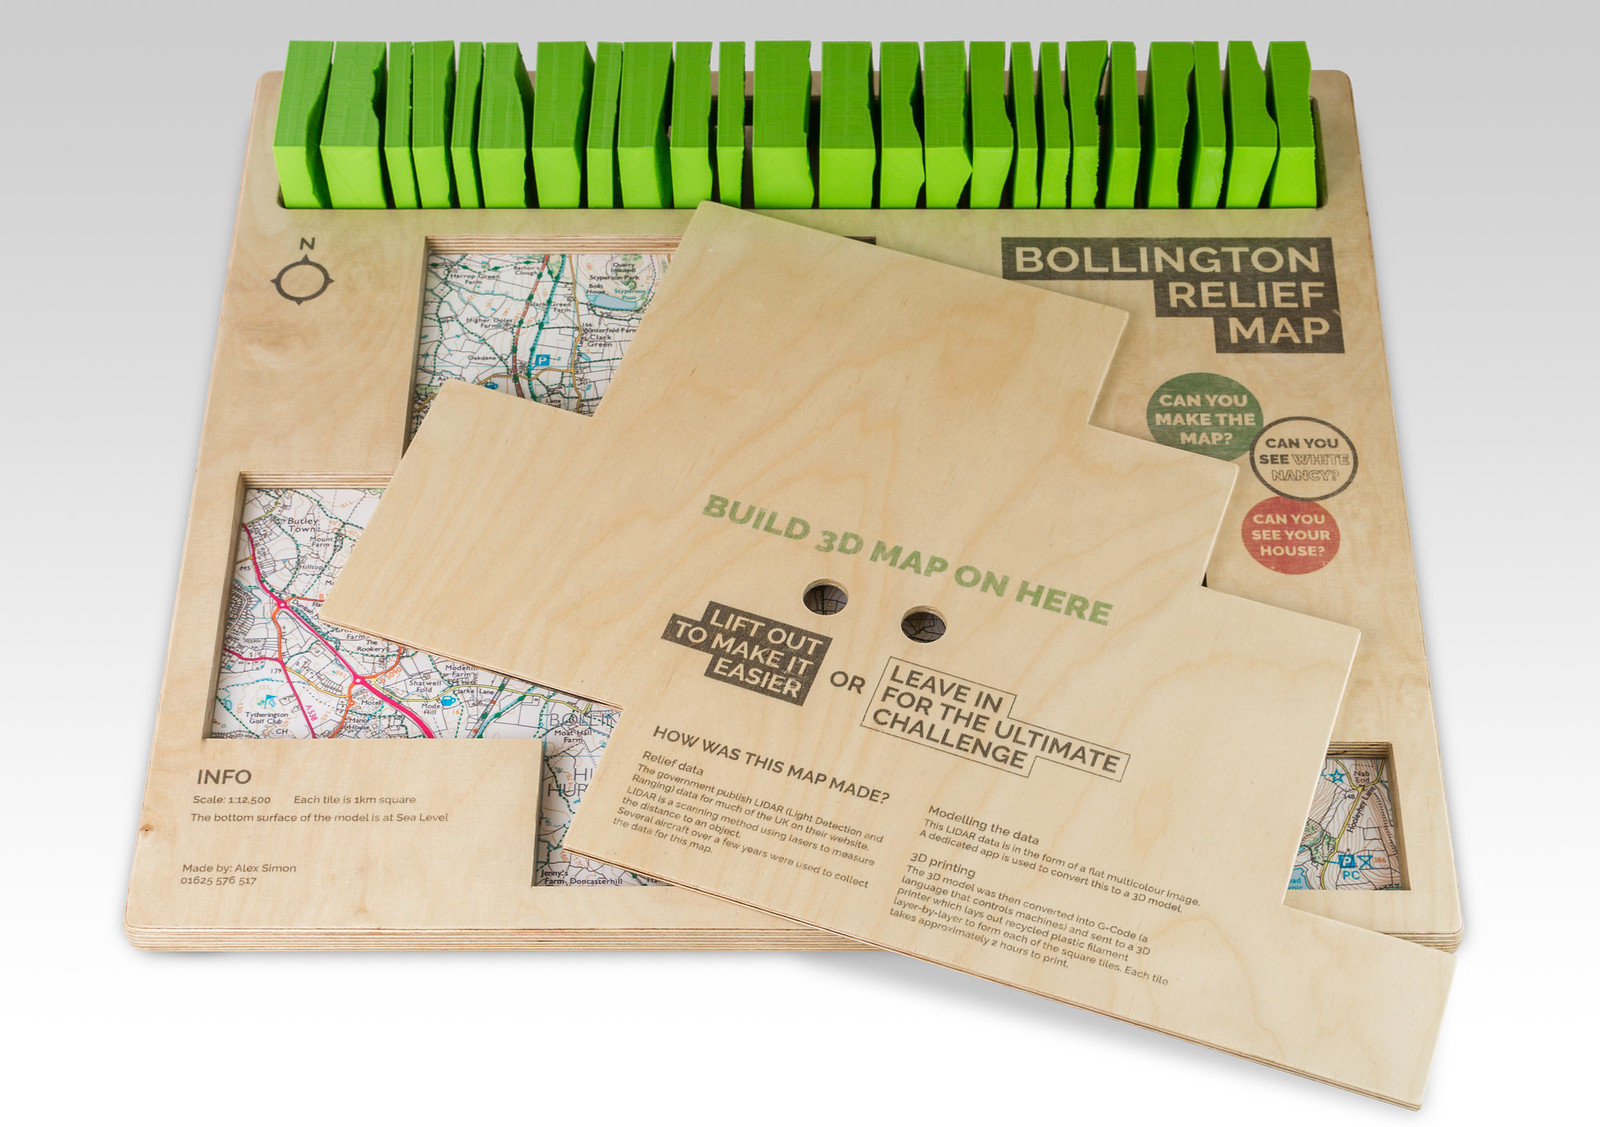
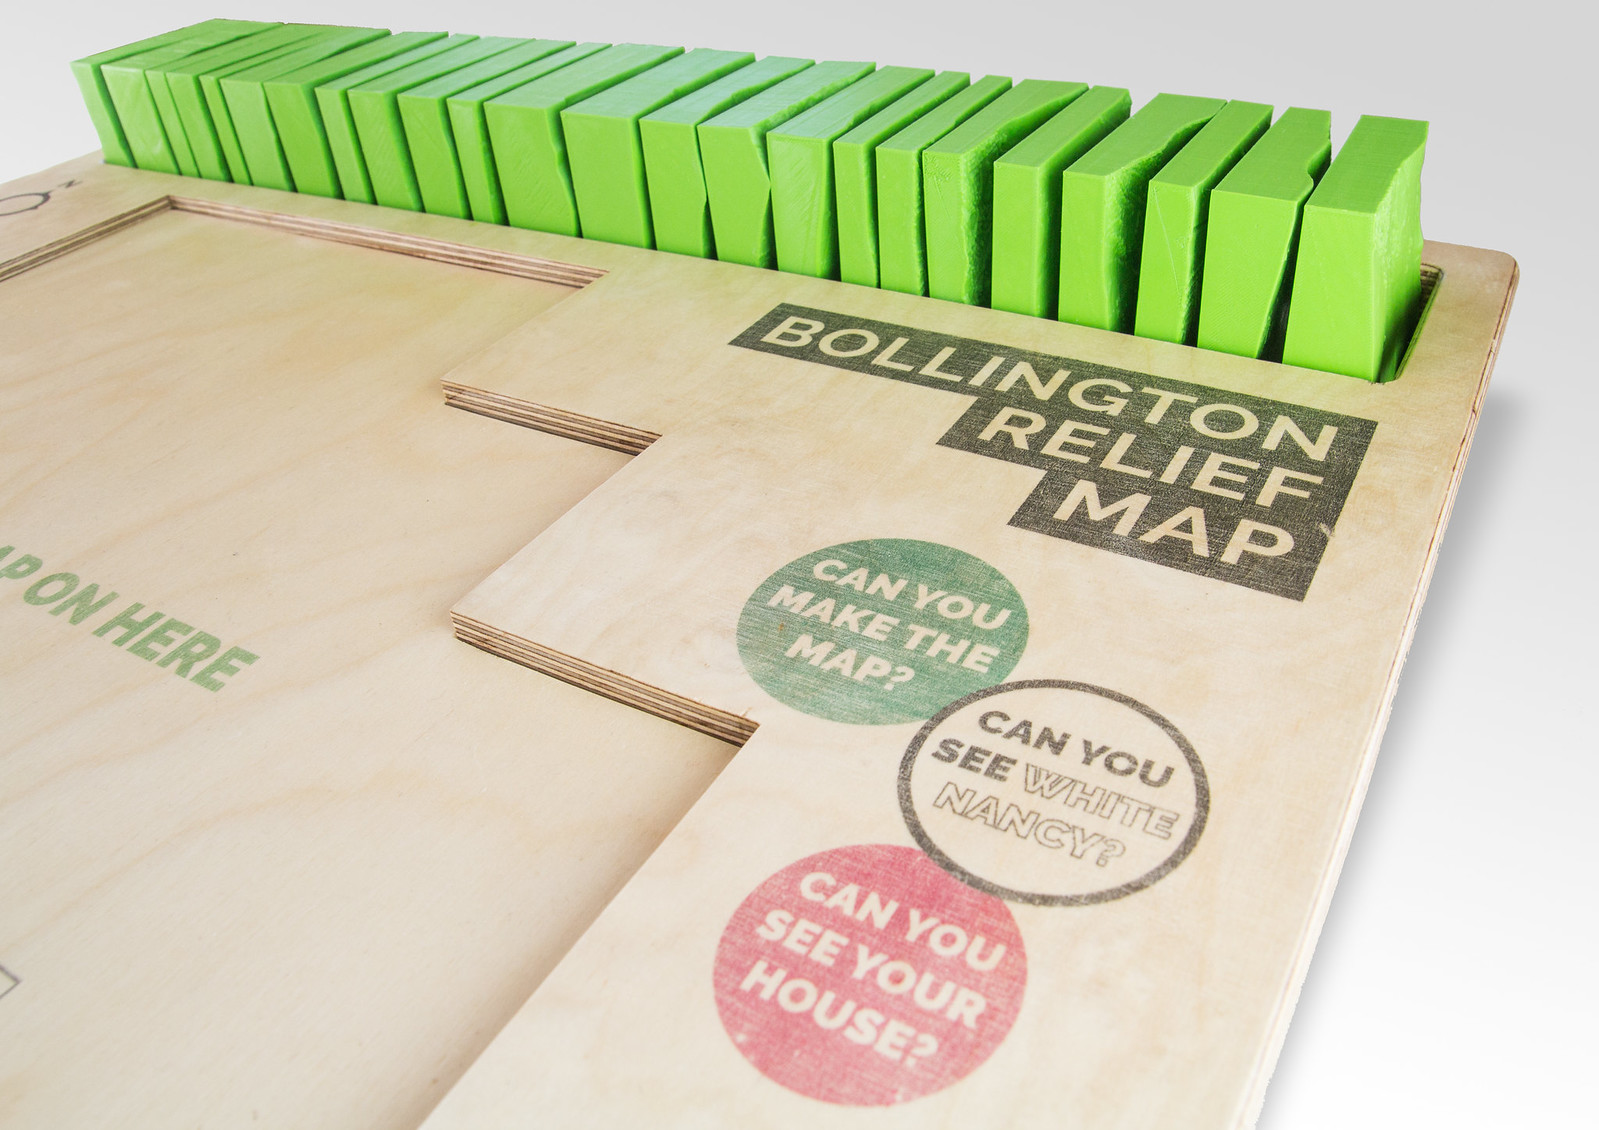
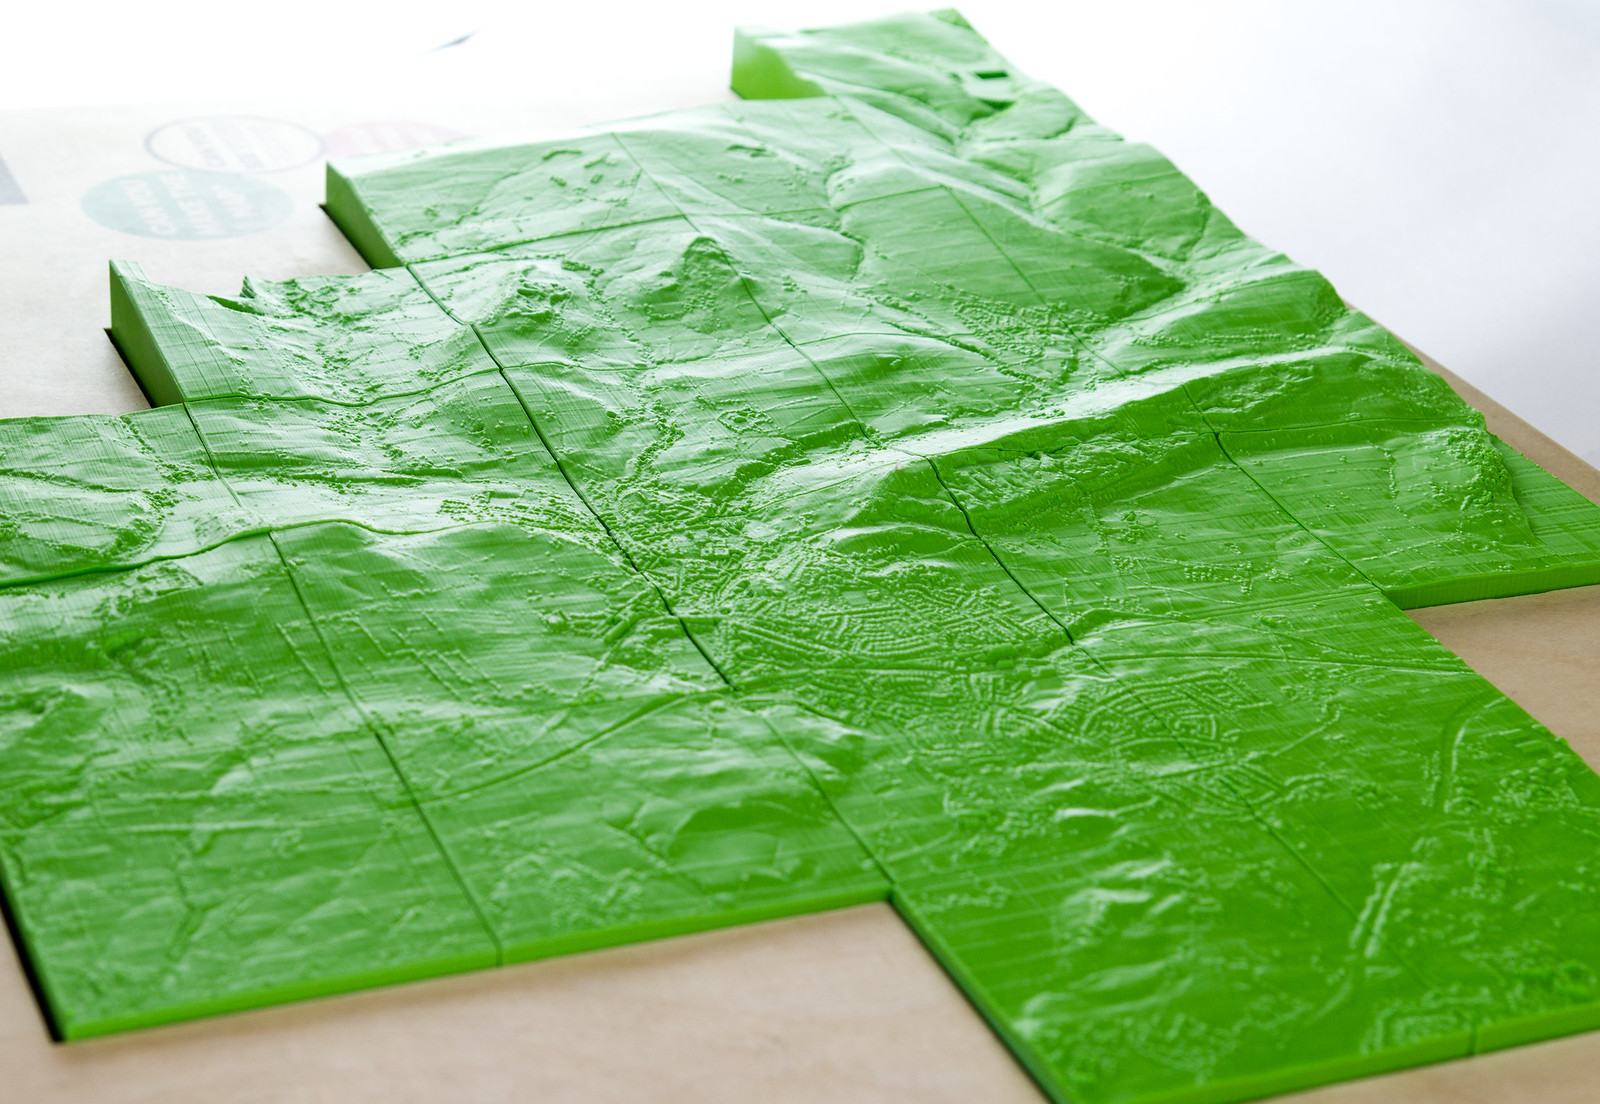
Made an exhibit for local Library and schools.
It’s a 3D Relief map of the local area.
1) Got UK LIDAR data from environment.data.gov.uk/ds/survey/#/survey
You can get it with or without buildings. This is with.
2) Converted data into .stl using AccuTrans 3D – http://www.micromouse.ca/
(instructions here: 4.2 : edutechwiki.unige.ch/…/3D_printing_of_digital_eleva…)
3) Print each 1km square VERTICALLY (I did 6 at a time) So that you keep a clean lithophane-type surface.
4) Used Bing maps to screenshot the OS map and got it laminated.
5) Made frame from plywood + some 3D printed bits. Used this technique for doing the printing. http://www.youtube.com/watch?v=Zq2O66QGCwg&t=16s
Then OSMO oiled over the top.
 Relief-map-12 by Alex Simon[/url], on Flickr
 Relief-map-3 by Alex Simon[/url], on Flickr
 Relief-map-8 by Alex Simon[/url], on Flickr
 Relief-map-14 by Alex Simon[/url], on FlickrNorthwindFull MemberPosted 6 years ago
I love that, cheers for sharing!
A wee update on my Anet delta- I ran into some minor feeding issues and didn’t really have the will to fix it so it’s been on the backburner but I just discovered that the filament throat was fitted upside down 😛 It comes assembled so at least it wasn’t me. Basically one end was solid metal for the heat, the other has a wee ptfe interface for the filament tube, so if you turn it upside down you get a) melty ptfe when you print petg and b) filament not feeding smoothly into the throat, in a way that tricks you into thinking you have an extruder issue.
Easy fix if I hadn’t decided to clean up the thread and broken it 😛 But new part was £1 and arrived today so as soon as I can be bothered, I’ll have it up again and I think now pretty much operational. Setting the bed height’s been a pain- Anet did a rolling modification to the printer which actually added 10mm of print height and stiffened up the frame, which is great, but it means some of the published stats are wrong meaning that basically the print height was also 10mm higher than designed, so the bed was out of its range of useful adjustment- it was right on the top of the tension springs. A Cura plugin dropped the print height for me so that’s fixed, talk about unintended consequences though.(really I should fix it in firmware but I’m not good with firmware so I’ll just build it into the gcode)
But, I’ll still say these are reasonable issues for a £130 printer. And I could have resolved all of this in a day, if I’d been working at it rather than building a remote control car and shitposting on STW
AlexSimonFull MemberPosted 6 years agoI feel your pain Northwind.
Still need to replace the heat rod on mine as well as the heatblock cooling fan. Don’t like soldering, so I’ve bought some 3M connectors https://www.amazon.co.uk/dp/B00480PLMU/ref=pe_3187911_189395841_TE_dp_1
In fact the whole printer needs a bit of a tune-up. Making the gantry square on mine for those map squares up there, make it bind a bit and produced some z-axis inaccuracies 🙁
bigdeanFree MemberPosted 6 years agoWell went to boot the printer up for first time in ages, z stepper blew. Bought some more but got updated vrrsions, unfortunatley this means changing steps per mm so need to re image the arduino. Couldn’t find the original scetch and cant be bothered to go through writing down all the settings.
That map is ace!
papamountainFree MemberPosted 6 years agoAlex, yes, still after this info. Been busy this week so haven’t been playing with it anyway. Cheers.
siwhiteFree MemberPosted 6 years agoAlex – that map is epic. If I didn’t live in a flat part of the country I’d make one for home. Perhaps it’d make a good present for my farmer brother-in-law!
siwhiteFree MemberPosted 6 years agoWell, inspired by this thread I have joined the 3D Printer club; I’d always thought they were pretty cool but I didn’t know what I’d make with one, aside from fun little trinkets. The link someone posted to the printed CNC router changed my mind – finally I had a genuine excuse.
Anyway, I bought a Tevo Tarantula from Amazon – my patience couldn’t have survived a dispatch from China for a toy like this! The build was challenging owing to dreadful instructions, but I found it quite fun in a Lego Technic kind of way.
I’ve printed a few things so far – some fun little toys for my son, a long thin nozzle for my parent’s Dyson and a little bracket for my Echo Dot. I’ve started making an enclosure from an Ikea Lack table https://www.thingiverse.com/thing:2667444 as my printer lives in the workshop with all my carpentry tools, so quite a dusty environment which the printer won’t like. I suppose it’ll take about 30 hours of printing. Has anyone else noticed Cura over-estimating print times by about 25%?
I’ve ordered a few replacement parts from AliExpress – I’m most looking forward to an aluminium Y axis bed to replace the flexy acrylic stock bed.
WorldClassAccidentFree MemberPosted 6 years agoThese are still up for grabs
RS Components have sent me the wrong filament so I have 2x500g of this Clear M-ABS which is like normal ABS but better.
https://uk.rs-online.com/…/p/3d-printing-materials/8320557/…
The two boxes are still sealed in plastic and completely as delivered..
£12 posted to anyone in the UK..
email in my profile.
Cheers
AlexSimonFull MemberPosted 6 years agopapamountain:
1) Everything in the Travel section is turned off in mine
2) Retract at Layer Change also off for me
My speed settings are:
Print speed: 60
Travel speed: 120
Initial Layer Speed: 30 (although this doesn’t seem to work – I manually speed down on the printer while it’s doing the first layer) – anyone else?
Print acceleration: 800
Travel Acceleration: 1000
Print Jerk: 8
Travel Jerk: 30sebFree MemberPosted 6 years agoI am interested in purchasing both reels of filament.
I sent you a message earlier today.
WorldClassAccidentFree MemberPosted 6 years agoHi Seb – Two rolls will be posted to you on Monday… I am not sure how to do a Paypal request but just send the money to the email address you used and I am sure it will work.
stumpy01Full MemberPosted 6 years agoLoving that relief map! I have looked at doing a terrain map, but it’s quite a way down my to do list.
I’ve printed a few mods for my CR10 mini; a filament guide that stops the filament passing too close to the Z-screw, bigger knobs for adjusting bed height and a Z-axis quick adjuster wheel.
I fitted the Z-axis quick adjuster and the filament guide, but still need to give the bed level knobs a bit of a sand down – not strictly necessary, but if they are going to be permanently fixed to the machine, they might as well be nicely finished.
I’ve also printed 3 headphone stands! A mate saw my first print and asked for one in red to go with his Beats headphones so I did that one. And yesterday my Sis-in-law was over and asked to see the printer. When she saw the headphone stand she asked for 2! So, I’ve done one with another to do! Should be selling them really!!
I’m currently designing a Nespresso pod holder and have made 2 test pieces. One is a sliding fit test to check the dims of the Nespresso pods in the groove I modelled. The other is a test for fit of the tapered roller bearing I intend to use.
Something I hadn’t considered is that the bore the bearing cup fits in needs supports to print. I tried it last night and the bottom face that the cup sits on isn’t very flat (because of the supports making a bit of a mess). So when assembled, because the cup isn’t completely square in the plastic, it wobbles slightly as it rotates. Needs a bit more thought to get working correctly.
I think I’ll use a bigger diameter bearing for a start because that will reduce the wobble.
papamountainFree MemberPosted 6 years agoThanks Alex. My initial layer speed is 50% of print speed in cura. It does still seem to print the first layer quite fast so maybe its not working like you say. Do you just wind it down with the knob on the control box? May have to experiment.
stumpy01Full MemberPosted 6 years agoI haven’t fiddled with the knob on the control box for adjusting the feedrate, but I do set the initial layer a lot slower than the other layers within Ideamaker.
I usually set my first layer to a max of 30mm/s. I have tried it at 20mm/s too, but bloody hell it takes ages if you have a decent sized part to make!!
AlexSimonFull MemberPosted 6 years agoI’m on Cura 2.7, but there’s no way the half speed first layer is working for me.
Yes, I just dial down with the knob – and then have to remember to dial back up!stumpy01Full MemberPosted 6 years agoWow! That looks great!
Been meaning to try vase mode for a while.
Any particular issues with it?
papamountainFree MemberPosted 6 years agoI was gobsmacked tbh. It’s a bit thin being only 1 perimeter thick but not too bad. I did first layer at 20mm/s then 50 for the rest. It did seem to be slower on the first layer this time.
No issues as such. Set infill to 0 but it possibly ignores infill when using spiralize outer anyway. You have to start with a solid model stl, then choose spiralize, then look at it in layer view to see what it will look like.
I got the leveling pretty good on this one, bottom is perfect. Did 4 bottom layers and printed at 0.2.
Just noticed wall thickness set to 0.8. Not sure if it ignored that or not. It was set to 0.8/wall line count 2 before choosing spiralize which then changed the wall line count to 1. I think the wall is 0.4mm thick so it probably ignores the wall thickness when using spiralize. (need some new digital calipers).
AlexSimonFull MemberPosted 6 years agoYep, I’ve had great success with vase mode too. Tried printing my map squares in that as a test and it came out absolutely perfectly in the wood filament I’ve got. Thought I was onto a winner as long as I could find some way to strengthen it after (considered filling it with plaster of paris). However, it kept clogging and taking nearly an hour to clear (atomic pull technique) 🙁
I don’t think I’ll try wood filament again until I’ve got a 0.6mm nozzle.It’s a shame I’m just not into vases really 🙂
Need to find another use for the technique.papamountainFree MemberPosted 6 years agoHaha, yeh i’m not into vases either really. Next up will be the Terminator T-800 head in vertigo galaxy filament hopefully. The front fan started making some funny noises during the last print. Everything’s tight so could be on its way out already 🙁
morphioFree MemberPosted 6 years agoInspired by this thread I placed an order back in February which turned up earlier this week. 2 evenings of assembly later I’m almost there, hopefully finish it tonight if I escape work in time.
 papamountainFree MemberPosted 6 years ago
Cool, another one to the fold. How did it go?
Awaiting benchy..
stumpy01Full MemberPosted 6 years agomorphio, what is it? Prusa i3?
As above, awaits Benchy!
I’ve not really been printing much lately. Done some odds & sods.
Seem to be getting more & more requests for ‘oh, can you just print this?’ from people who previously ‘couldn’t see the point’ of a 3D printer.
Currently got some bike related bits on the go.
morphioFree MemberPosted 6 years agoYep Prusa i3 MK3.
Alas I cursed it by using the phrase “if I escape work in time”…
Was out most of the weekend but managed to finish it Sunday morning. I’ve only had time to run the setup tests and print a Prusa logo. The build was fiddly at times, but enjoyable while taking my time with some good music in the background.
Hoping to carve out some time this coming weekend once I get back from Canada.
siwhiteFree MemberPosted 6 years agoI thought I’d share my setup – a Tevo Tarantula that has been upgraded somewhat over recent weeks. I’ve printed loads of brackets to improve the stiffness and squareness of the printer, as well as adding an aluminium bed to improve the flatness of the bed and a second Z axis motor and leadscrew. I also bought a Raspberry Pi Zero W to add Octoprint – this works fairly well but the Pi doesn’t seem able to run a webcam as well as the printer. I’ve also added an Ikea Lack enclosure to keep the printer clean and dust free, although I’m still looking for some material for the enclosure sides. The best upgrade was a glass plate for the bed, which gives a lovely smooth finish. Occasionally I use some green tape if adhesion is a problem, but the glass works well most of the time without any glue etc.
 Screen Shot 2018-05-02 at 15.46.56 by Scgwhite[/url], on Flickr
I made a quick benchy a few weeks ago, which was promptly pinched by my two year old son and now lives with the rest of his bath toys! Came out nicely I think.
 Screen Shot 2018-05-02 at 15.47.38 by Scgwhite[/url], on Flickr
The longest print I have done was a new saddle for my son’s balance bike – the stock saddle and seat post were quite tall, and he wouldn’t have fitted for months yet. Amazingly, someone had uploaded a design for a clip-on saddle for the exact bike we have, so I downloaded it and started the 14 hour print!
 Screen Shot 2018-05-02 at 15.48.06 by Scgwhite[/url], on Flickr
It needed a good deal of support, but it printed cleanly and is very strong. The fit is perfect.
 Screen Shot 2018-05-02 at 15.48.17 by Scgwhite[/url], on Flickr
One happy little fellow!
 Screen Shot 2018-05-02 at 15.48.41 by Scgwhite[/url], on FlickrMilkieFree MemberPosted 6 years ago
Printed a pair of Snowboarding Wall Brackets:

Surprisingly bigger than I expected, took 3 hours each with 35% infill.
Printed a couple of GPU brackets for a mining rig and PCI-E locking clips.
Still have to re-design and print some Logitech pedal covers for a sim rig, but I’ve lost interest in designing them. I have some new filament to try, but don’t have anything to print!
WorldClassAccidentFree MemberPosted 6 years agoI did this – still work in progress so I will hopefully show it with the camera mounted tomorrow
At about 10 seconds and 12 seconds you can see where I turn it sideways and the gimbal catches the camera mount so that is why I am printing a larger version.
My prototype was a different design using a water bottle as ballast but then I decided the camera was good enough ballast itself if I just inverted the design..
The topic ‘Cheap 3d printer kits – Experiences?’ is closed to new replies.


