Home › Forums › Bike Forum › Sick as a dog so, show me you Bivi / Bikepacking / Adventure racing gear…..
- This topic has 2,850 replies, 7 voices, and was last updated 6 years ago by NZCol.
-
Sick as a dog so, show me you Bivi / Bikepacking / Adventure racing gear…..
-
u02sgbFree MemberPosted 12 years ago
Thanks s8tannorm, already read the blog :).
The MSR one is heavier than the pole I’m currently using and I think the Ultralight will be too flexible.
I’ve been using the longer pole tarp from Mountain Laurel designs for the entrance (which is an Easton Carbon Fibre one) but it needs something chunkier to hold the tarp up inside.
I was hoping somebody had made a “tent pole like one” out of reasonable diameter carbon fibre but haven’t found anything yet.
Stu.
PS- incidentally your Blog is responsible for me buying a Freeload rack so you’ve been leading me astray already…
vorlichFree MemberPosted 12 years ago@TBC where are the PO bags from? Their site seems to be down.
@Miki Thanks. A Canon 5d mkII – the one I complain about in my blog post for being too heavy 😉
nickswolvesFree MemberPosted 12 years agojamest – Member
I have just bought myself a pocket stove, yet to fire it up, but have used a bush cooker quite a bit and really like the wood fuel option, the pocket stove just seems smaller and lighter, look fwd to getting it lit.Let me know what you think of it as I’m considering buying one of these. Pics would be good too 😉
jamestFree MemberPosted 12 years ago@ nickswolves: Have a look here:
http://www.theoutdoorsstation.co.uk/2012/02/the-2012-pocket-stove-stainless-steel-and-titanium/I have heard on another podcast that backpacking light uk are soon to release another wood burning stove that like the bush cooker uses regasification (means you get maximum burn from the wood) except it will be much smaller, it’s going to be called the wilderness stove and out anytime soon, might be worth the wait..
ojomFree MemberPosted 12 years ago@Vorlich – i can get you some from madison if you like,
Scrub that – they have run out. Sorry!
vorlichFree MemberPosted 12 years ago@TBC
No worries. Having just bought a 29er frame off here to build I’m skint anyway. 🙁
daleftwFree MemberPosted 12 years agoCompleted my first ever kip in a bivi last night. Admittedly, it was in my back garden, but still enjoyed it.
Hoyed it down about 3am, but was kinda cool and the Hunka kept me dry.
Definitely looking forward to venturing further afield.
ojomFree MemberPosted 12 years agoAmazingly the sun just came out here in the Burgh so excited now about a potentially drier night than originally thought.
Will report later or tomorrow of whisky n stuff depending on the 3g’s.
daleftwFree MemberPosted 12 years agoHere’s a question for you – Do you put your mat in your bivi bag too, or leave it out?
stills8tannormFree MemberPosted 12 years agoHere’s a question for you – Do you put your mat in your bivi bag too, or leave it out?
Opinion is pretty divided … much depends on the mat and bag. Some bags have a thicker, more durable base so are suited to the mat inside. A mat on the inside may reduce the bags breathability and might even limit your sleeping bags loft if it’s a squeeze.
MikiFree MemberPosted 12 years agoFor me, it depends on how wet the ground is. If it’s soaking, i’d cram the mat into the bivi as i reckon it’s more water proof, and i don’t want my mat to get soaking. But if the ground is fairly dry, the mat goes on outside, as i have a tendency to roll around an awful lot in my sleep.
hoojumFree MemberPosted 12 years agoI just thougth I’d share some pics of a South Downs shake down bivvy ride a few of us did in preperation for the WRT. Focus, as usual, wasn’t on milage but the food and rum. I’m sure that our relaxed training regime will ultimately lead to us being punished in the hills of Wales, but ah, it’s not a race.
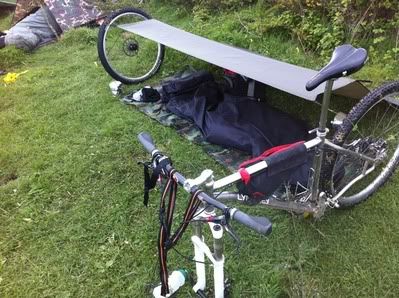
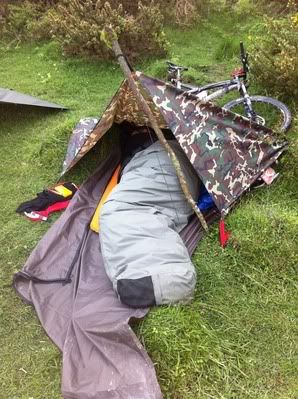
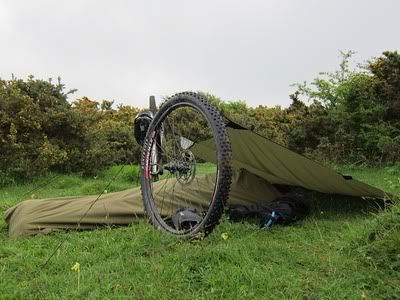
And a nice dawn view.
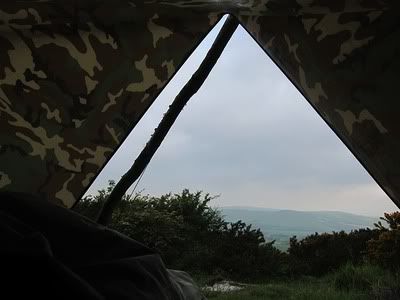 pedalheadFree MemberPosted 12 years ago
nice pics, Hoojum.
Here’s a question for you – Do you put your mat in your bivi bag too, or leave it out?
My preference is to put the mat inside the bag, but I make sure I only buy bivy bags that have enough space in them to allow it. If it’s going to be a squeeze I’d rather have the mat outside.
stills8tannormFree MemberPosted 12 years agoHoojum does that big stick fold down and go inside the frame bag? 😉
hoojumFree MemberPosted 12 years agoThat was a friends clever design. All he needed was a scavenged stick 5 pegs and a single guy line. I thought it worked well.
I don’t think he plans to stow the stick away for his next camp… 🙂
hoojumFree MemberPosted 12 years agoPedalhead – I always put my mat inside the bivvy, otherwise I end up chasing it around all night. I know there’s loads of reasons for having it outside but I prefer to have a groundsheet and mat inside.
faz083Free MemberPosted 12 years agonice pics, looks a laugh. Whereabouts on the SDW is this? Approximately, if you prefer.
blooshmooFree MemberPosted 12 years agoLocation is East of Southease Station, East Sussex across the A26 Beddinghsm – Newhaven road, overlooking the River Ouse – Up there on that there hill…
We ate well that night, veggie and chorizo kebabs, snags and morrocan rice, desert custard, brownies, caramel rocky biscuits, blueband wafers, just chucked it all in with a splash o rum, yum yum!
Woop Woop 29er coming through!!!
AlexSimonFull MemberPosted 12 years agoWent out Tuesday night for a night in my hammock.
Weather forecast was so good, I didn’t bother taking any wet-weather gear or particularly warm layers.Headed out to the Goyt Valley again.
6:00am in the morning

I packed slightly differently from before. I put more weight on the bike and much less in the backpack. Last time my back was a bit achy. This made it a slight struggle to lift one-handed over kissing-gates, but it was still doable.

I was using my Wildcat Gear Mountain Lion for the first time proper. It was a little fiddly to set up, but was rock solid. Being able to detach the bag at night and pop it back in in the morning, with no fiddling, was really nice.

As soon as I set off in the morning, I found a huge patch of Wood Sorrel, which was super-tasty.

Cycled along the reservoirs

Then climbed out of the valley towards the cat&fiddle

Headed to Three Shires Head for breakfast

Where I used my home made double-wall woodgas stove with some random packet of dehydrated mush 🙂

Was absolutely spent when I got back (and a little burnt), but what an incredible day! So lucky to have all this within a 15k radius.
druidhFree MemberPosted 12 years agoNot a trip report, but I’m so excited that my Revelate Viscacha and new Sweet Roll handlebar bag just arrived from Anchorage!
AlexSimonFull MemberPosted 12 years agoDammit – why is it whenever I want something from Alpkit, it’s out of stock! With a couple of months leadtime!
Every year!
I wouldn’t mind, but I only want a couple of Airlok XTras – fairly perennial items./minor rant over
stills8tannormFree MemberPosted 12 years agoEvery year!
I wouldn’t mind, but I only want a couple of Airlok XTras – fairly perennial items.Alex, it’s getting close to the WRT, it always happens 😉
AlexSimonFull MemberPosted 12 years agoit always happens
Exactly why I can’t understand why Alpkit aren’t prepared!
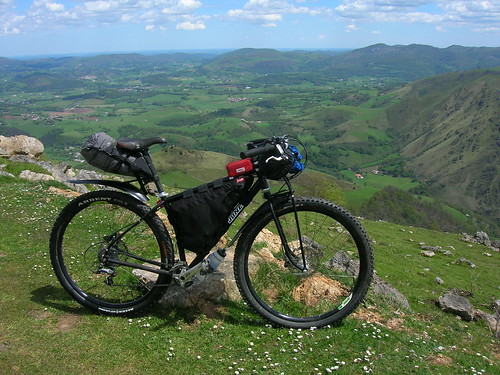
jamesoFull MemberPosted 12 years agoAlpkit make a nice framebag though.. Thanks to Jim and Anna there for one of their first ones, made to fit my steel Jones and used along 600-odd miles of dirt tracks and rocky fun in the french/spanish border area of the Pyrenees and into N Spain to the W coast. Made in the UK and although not VX21 type material, very light (240g for this bag, vs 200-ish for my smaller VX21 spaceframe bag and 500g for the buggybag of similar dimensions).
 [/url]
DSCN8499[/url] by james-o[/url], on FlickrIt put up with my over-stuffing, ham-fisted zip operating and general ability to wreck rucsacs through careless use anyway, all good so far.
 [/url]
DSCN8549[/url] by james-o[/url], on Flickr [/url]
DSCN8940[/url] by james-o[/url], on Flickr [/url]
DSCN8525[/url] by james-o[/url], on FlickrGreat trip – 2 nights under a roof and the rest in the woods and hills. Big fan of a tarp i/o a bivi bag now, for summer overnighters it’s a tarp only.
hoojumFree MemberPosted 12 years agoAlex. Great pics and your bivi ride sounds great. Your a lucky man to have all that on your doorstep.
Do you always use a hammock?
AlexSimonFull MemberPosted 12 years agoDo you always use a hammock?
So far, yes.
I have a Hunka ready and was tempted on Tuesday because it was so warm and windless, but I still headed for the trees! Birds were noisy though 🙂There’s something about being off the ground and swaddled that I really like. It feels like a luxury. I find sleeping bags/bivi bags constrictive – I like to stick limbs out all over the place. In my hammock I use a top quilt and can sprawl anyway I like!
Note that I only really like hammocks that allow you to sleep flat on the diagonal (sometimes called asym), then you can lie on your side, front, etc.
Otherwise, my knees didn’t like the straight hammock position – I had to put a bag under them to stop them aching.I’ve got a new one coming in the post this week! It’s got an integral midge net, which was a weakness on my current one (had a separate net, but it wasn’t tiny midge-proof).
This is the new one – ultralight although pretty minimal compared to my current Nomad XXL one!
jamesoFull MemberPosted 12 years agoSo if we’re talking about ultralight set-ups for a 1-2 night summer trip, what pack weights have people got?
I’ve thinned it all down to 8.75lb / 3980g not inc food and water for my first local SS 2 day trip. Compares well to the 18lbs all-up kit weight I used for the spain ride. 8.75lb plus a bike that’s about 23lbs (not weighed it but it’s a Ti Jones SF SS, pretty light anyway) – so still not the 30lb or less I thought I could get to.
I think I’ve got enough to be comfy enough – fleece bag liner and warm, light jacket to sleep in, a small 150g-ish tarp to keep dew off and leave the bivi bag out, a foam mat that’s ok for a couple of nights as long as there’s soft dry stuff to gather up and go underneath, ipod / phone etc, Tikka head torch, MytiMug and Ortleib coffee filter with MSR pocket rocket stove and small gas can as I like a fast faff-free roacket-fuel morning brew. So maybe there’s room to save a pound or so still?
AlexSimonFull MemberPosted 12 years agoCome on then everyone – show us your photos from the weekend!
Or are you still out?slugwashFree MemberPosted 12 years agoCome on then everyone – show us your photos from the weekend!
Oh, alright then. Southern Dartmoor trip……


 AlexSimonFull MemberPosted 12 years ago
Is that 2 nights? Looks great. The orange sun with absolutely no clouds looks stunning!
That last photo is a beaut too.stills8tannormFree MemberPosted 12 years ago@jameso … I recall the lightest set-up at last years WRT belonged to Nick from AlpKit and was about 32lb … that included everything, bike, luggage, kit, food and water.
I’m expecting something sub 30lb this year.
ShinythingsFree MemberPosted 12 years agoBetter add to Slugwash’s…. We certainly had a cracker to make up for a crap April with no bivvies.

It was hot…

Amazes me how few people come out here
 AlexSimonFull MemberPosted 12 years ago
Here’s some close-ups of my stove kit.
It works a treat. Weighs very little indeed and cost about 50p
(one can of tesco value potatoes and 2 cans of peas I think)
I could bring myself to eat the canned potatoes 🙂It fits perfectly inside an Alpkit mytimug.
It also fits a pop-can stove (made from a Budweiser word cup beer can) inside, a bit of vasalene-rubbed cotton wool and a tiny bottle of meths as a backup.The only real requirement is that you’ve got a bit of time on the journey to faff a little – finding wood, setting the fire, getting it hot enough to ignite the woodgas, then constantly feeding it small twigs, etc.
But I enjoy doing all that – it’s a highlight of my trips. [/url]
Homemade stove kit[/url] by thingswelike[/url], on Flickr [/url]
Stove kit[/url] by thingswelike[/url], on FlickrThis shows the warm air comping back into the top of the stove and igniting the woodgas.
 [/url]
Woodgas ignited[/url] by thingswelike[/url], on FlickrHere’s a shot showing the pot-stand/windbreak on top and the room to put new twigs in
 [/url]
IMG_1642[/url] by thingswelike[/url], on Flickr [/url]
Homemade woodgas stove[/url] by thingswelike[/url], on FlickrBasically you need a cooking pot and a hole drill like this one ebay link. Take it to a supermarket. Find a cheap can that fits inside your pot and 2 smaller ones that will leave a nice gap inside the 1st one.
The inner can has holes top and bottom, whereas the outer only has holes at the bottom.
I used the top of a can to make a raised floor (full of holes) and the 2nd small can to make the potstand/windbreak. Just bend it in a little to fit inside the pot when not in use.I can’t remember whether I used scissors or a stanley knife to cut the potstand legs, but it wasn’t difficult.
jamesoFull MemberPosted 12 years agoI must ask Nick about that set up, ie were they pooling gear or if he could do a solo trip on it.
slugwash, did you catch dinner or have to use back-up food? )
RestlessNativeFree MemberPosted 12 years agoI went for a little spin along the Tweed valley the other weekend. Left home at 16:00 on Saturday and landed in a pub at 15:00 ish the next day. Rode from Midlem (Selkirk way) to Broughton where I used to live by the most off road route taking in some of the classic Tweed valley views.
Bowhill House

Duchess Drive

SUW

Camp

View from camp

Traquair

View to Peebles from Gypsy Glen

JBW

🙂

The topic ‘Sick as a dog so, show me you Bivi / Bikepacking / Adventure racing gear…..’ is closed to new replies.
