Home › Forums › Chat Forum › How to support work surface in utility cupboard?
- This topic has 18 replies, 11 voices, and was last updated 8 years ago by andyl.
-
How to support work surface in utility cupboard?
-
slimjim78Free MemberPosted 9 years ago
So, new bathroom has just been installed and as a nice side product we now have a decent size utility cupboard for housing the washing machine and tumble drier.
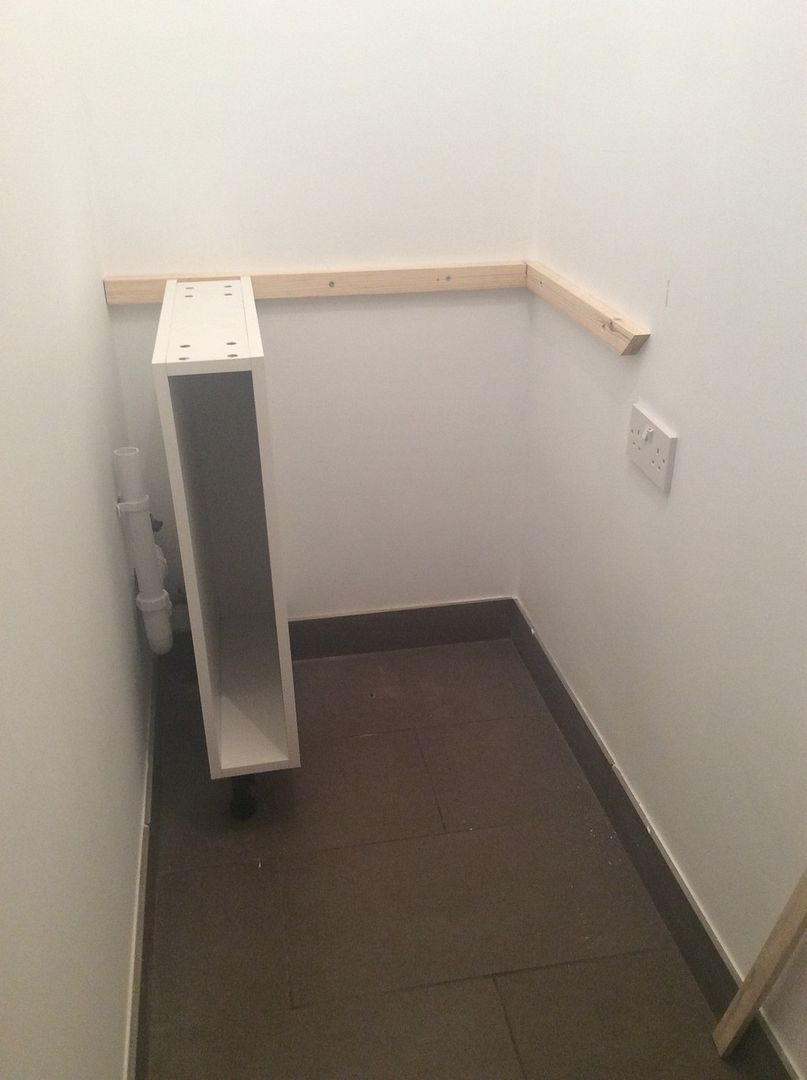
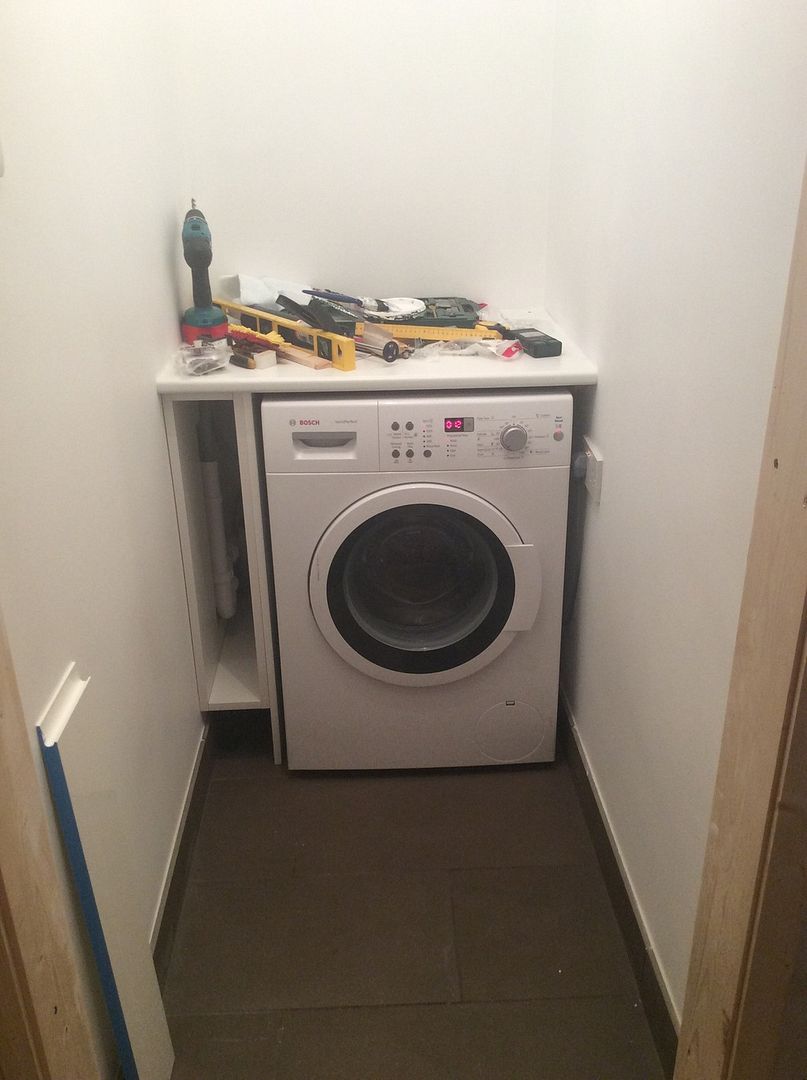
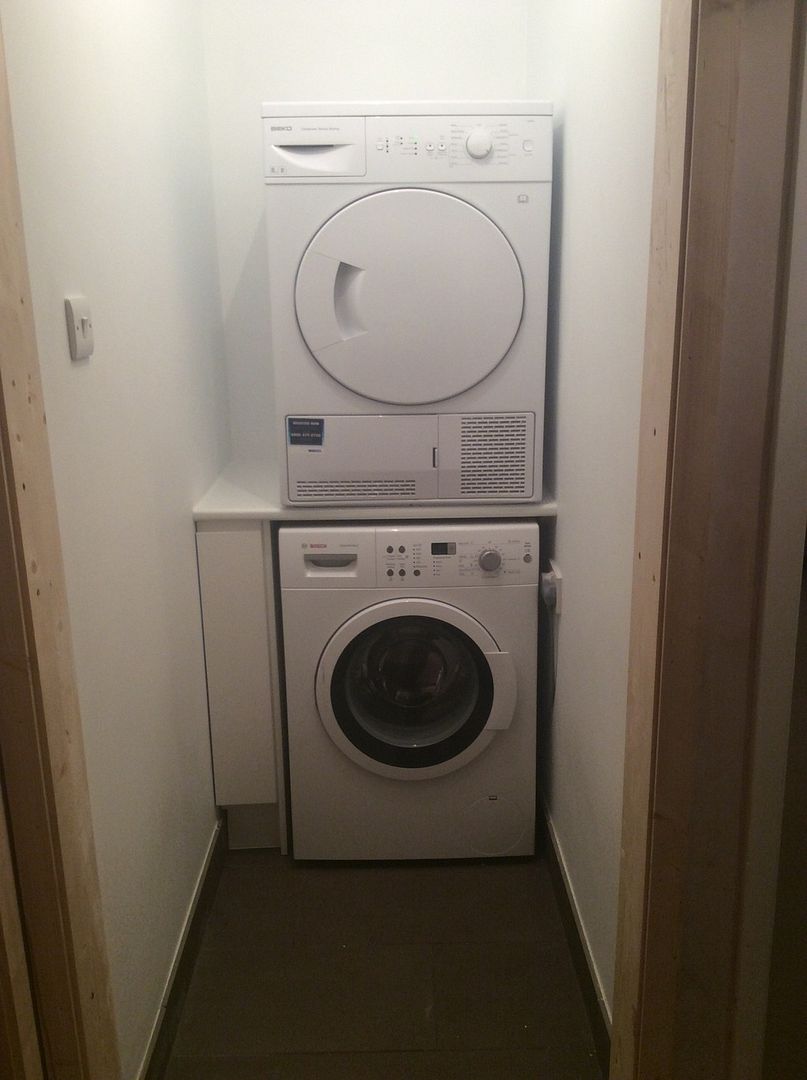
Cupboard is approx 85cm wide and 230cm tall (about 150cm deep). So the tumble drier will sit atop the washing machine.I’ve considered using the same joiner that built our stud wall to build a dedicated shelving type thing from Mdf but I’m also inclined to give it a go myself. In order to keep things simple my current plan is to buy a cheap length of kitchen work surface and install width ways in the cupboard, washing machine under, and you guessed it, drier on top. Then another length above the drier in order to use as shelf for linen etc.
Now, left side wall is new stud wall, with a few pipes running internally for shower valve. Right side wall is solid engineering bricks. My untrained mind suspects batons along both wall would be best to support the work surface, but, what kind of size should they be? Remembering that the first shelf will need to support full weight of drier. Also, I don’t really want to be firing big chunky fixings into stud wall as I’m nervous about hitting the pipe work.
Ideally whatever solution I go for should be neat and tidy as I’d rather not be staring at a crude Heath Robinson affair every time I look up towards upper shelf.
I have little experience of fixings required for this type of thing, but have a reasonable supply of power tools.
Any suggestions ?ernie_lynchFree MemberPosted 9 years agoMy untrained mind suspects batons along both wall would be best to support the work surface, but, what kind of size should they be?
2X1 PAR
Cut the visible ends at 45 degrees if you a more ‘finished look’. You can add a chamfer (on the 45 cut edge) if you want to go the whole hog.
You are going to have to go into the studs to get a decent fixing to take the weight of a tumble dryer – just don’t hit any pipes!
EDIT : Something like 3 inch 10 screws into the studs and something similar or a little shorter with brown rawlplugs in the solid wall.
EDIT 2 : Personally I would use gripfill for added security but don’t rely simply on it to support the weight of a tumble dryer. It should support the weight of linen though.
slimjim78Free MemberPosted 9 years agoPAR?
How short from the front edge of the work surface could I feasibly run the baton, in order to go stealth? Several inches?
ernie_lynchFree MemberPosted 9 years agoPAR is planed timber as opposed to sawn timber. I would stop about an inch from the front edge of the worktop. Do a 45 degree cut if you want to go more “stealth”.
jefflFull MemberPosted 9 years agoYou could also add a couple of vertical legs at either end of the worktop for a belt and braces approach.
ernie_lynchFree MemberPosted 9 years agoA very good point – you won’t need to screw into the studs if your bracing is supported by 4 nr legs. I would go something like 3X1 for the legs, fixed flat against the wall. You only need to gripfill the legs and braces then, just lightly fix them with pins/small lostheads to hold them in place til the gripfill goes off.
timbaFree MemberPosted 9 years agoWorktop is a whole load of weight, and tumble driers aren’t that heavy. 25mm MDF for the shelves???
IAFull MemberPosted 9 years agoYou’re maybe over-thinking it.
Just sit the drier on top of the washer. Some brands even do trays to support them like this properly:
http://www.johnlewis.com/browse/electricals/washing-machines/laundry-stacking-kits/_/N-2tqy
etc.
midlifecrashesFull MemberPosted 9 years agoEasy enough to take the plasterboard off the stud wall in order to put sufficient struts in the right place, and make sure you avoid bad guesses and hitting pipework. Plasterboard is cheap, and Wickes sell it in more manageable sizes.
slimjim78Free MemberPosted 9 years agoalas, plasterboard is freshly plastered and painted. I do however have photos of bathroom progress, which show the other side of stud wall during installation – and therefore relative stud positions. Should be straightforward to transfer them to other side of wall.
Unfortunately, I fear valve is bang in line with where i’d be intending to fit a baton. So, a metal leg may be called for on one side of lower shelf. Not necessarily a bad thing as waste connection and water feeds are located down in that corner of cupboard.
IA – I almost certainly am over-thinking it. I have seen and considered those stacking units. However, I want to make maximum possible use of available space hence shelving idea. I may even be able to squeeze in a slimline 150mm kitchen unit on drier shelf level – for housing all those washing related things.
Essentially, I want any future prospective house-wife/husband purchaser of my property to open the cupboard door and instantly say:
”wow! the utility cupboard of my dreams! they have thought of everything – hunny, let’s buy this place for full asking price NOW!”A nice by-product of said perfect utility cupboard – Mrs Slim has a happier experience whilst tending my undies.
GrahamSFull MemberPosted 8 years agoLooks good.
Small point: if your tumble drier is a condenser (rather than a vented) then now would be a good time to check if it has an option for the collected water can be plumbed to that same waste pipe you have the washing machine running to.
That saves having to constantly empty the reservoir under it.
hammyukFree MemberPosted 8 years agoGood call Graham. Use the same hole you cut to run the power cable though so it isn’t on show at the front.
If it was me – I’d look at removing the leg on the cupboard and allowing a drawer under there as well – simple box from the same chipboard for all the detergent balls, cloths, etc as well. You’ve added a board to the side which you didn’t actually need so take advantage of it to hold a drawer runner and brownie points from Mrs slimjim 😉
Never anything wrong with more storage – why waste the space!projectFree MemberPosted 8 years agoLove that idea, going to remember and use that for my customers.
slimjim78Free MemberPosted 8 years agoGood shout Graham, I’ll check the model and if so, route the water outlet next weekend.
Re extra cupboard, I’m using the 2x cupboard legs for support (as well as extra side panel) so unfortunately there’s no space below for slidey drawer. There is however bunches of space above the tumble drier that I’ll make good use of on next project.
There’s also a shelf in the cupboard now so good useable space in there.Mrs Slim is loving her ‘laundry room’ already. Top banana
GrahamSFull MemberPosted 8 years agoFWIW my drier is a Beko too and it had a plumbing in option – via an access panel at the back.
I did a similar project in a slighty smaller cupboard. I went for the easy option of just stacking them on top of each other and putting in one big shelf above them. The space down the side of them is used to store the ironing board and clothes racks.
I added a splitter on the waste pipe to avoid having to cram both hoses into one pipe:

http://s1.postimg.org/rj5rspse7/image.jpg(forgive the cobwebs – I don’t clean round the back of the washing machine too often!)
slimjim78Free MemberPosted 8 years agoYeah I did see evidence of a fairly narrow gauge pipe at the back of the drier in the bottom corner, possibly same thickness as yours. Thanks again, will definitely use that option for collected water
andylFree MemberPosted 8 years agoSomething I am planning on doing is building a slide out drawer under the tumble drier to rest the laundry basket on. Also a top lip on the shelf to stop the tumbe drier falling off, or at least you might want to think about fitting some kind of chain.
Got the idea for the pull out shelf from Bosch’s more expensive (£200) stacking bracket.
Hand’t thought about a drain for the condensing drier, will take a look at ours when we do it. We do tend to use the water for plants though, might just have it run down into a watering can instead as it will be easier them pulling the container out.
The topic ‘How to support work surface in utility cupboard?’ is closed to new replies.


