
Scrolling through Instagram one day, I spotted a photo of a partially built frame; nothing hugely unusual there, I follow quite a few frame builders who regularly post their works in progress. I then spotted that this was the handiwork of my mate Jim. Like many of us, he’s the kind of guy that lives for riding bikes. He’s always great company on the trail and keen to help you avoid trail obstacles: “this is where the muppets crash”… “oooph”. Fortunately Jim’s as quick to take the piss out of himself, as he is others. He’s (usually) a talented and quick rider who also pays a lot of attention to his bikes. Jim likes them to work perfectly and enjoys putting in the workshop hours to make sure that’s the case.
I knew Jim had already built himself a hardtail mountain bike frame, with no formal training. Ever the modest type, he was quick to point out its faults. In Jim’s eyes, it was all part of the learning process though. So, when he got to frame number two, his expectations were much higher. This frame was a real step up: internal cable routing, TIG welding, integrated seat post binder. Now the bike is complete, I got in touch with Jim to talk us through how he went from rider to bike builder.
Over to Jim
Jim, tell us a bit about yourself. Where are you based, how long have you been riding?
“I’m a South African import who has been living in Kent for the past 20 years. Some of my earliest memories as a kid are of riding bikes and falling off, so not much has changed there! I grew up around BMX, so the first bike I had was a hand me down Raleigh Burner, weighed a ton but was bulletproof. I can remember letting it roll down the road on its own and over jumps just to see what happened, I still think that it jumped better without me on it!
“I’ve ridden bikes in one shape or another since a young age but things really clicked when I saved up and bought a second hand Alpina road bike when I was 14, It had the shittest colour scheme you’ve ever seen but it was light and fast so it seemed amazing, I did my paper-round in half the time so I loved that bike.”
What do you do as a day job?
“My day job is a bit unusual but is best described as traditional metal roofing so sheet metal such as lead, copper and zinc handcrafted to suit all sorts of roofs and sometimes other applications. I work on all sorts of buildings ranging from old listed properties to very modern bespoke houses.
“I’m used to handcrafting metal so this has helped me quite a bit with the bike as I’m used to making my own tools or coming up with my own methods to solve problems. Being my own boss allows me some freedom to decide how best to get over things and a level of creativity in the layout or aesthetic.”
What attracted you to building a frame?
“I’ve always been fascinated by the fabrication side of the bike industry and have often dreamed about building my own bike. Over the years I’ve picked up the skillset to work mechanically on bikes and build wheels so making my own bikes seemed the next logical step.
“My other half, Chloe and our friends have always been very supportive and encouraging so that helped to coax me along. I think my day job has often forced me outside my comfort zone and I’ve learned over the years to accept some form of failure as a big part of learning and challenging yourself, so in many ways that made me think: why not, just have a go and see if you enjoy it?
“Enjoying the process has helped me arrive at finished bike that I’m pretty happy with, although there is always room for improvement which I feel will come with time and more bikes.”
How many frames had you built before this one?
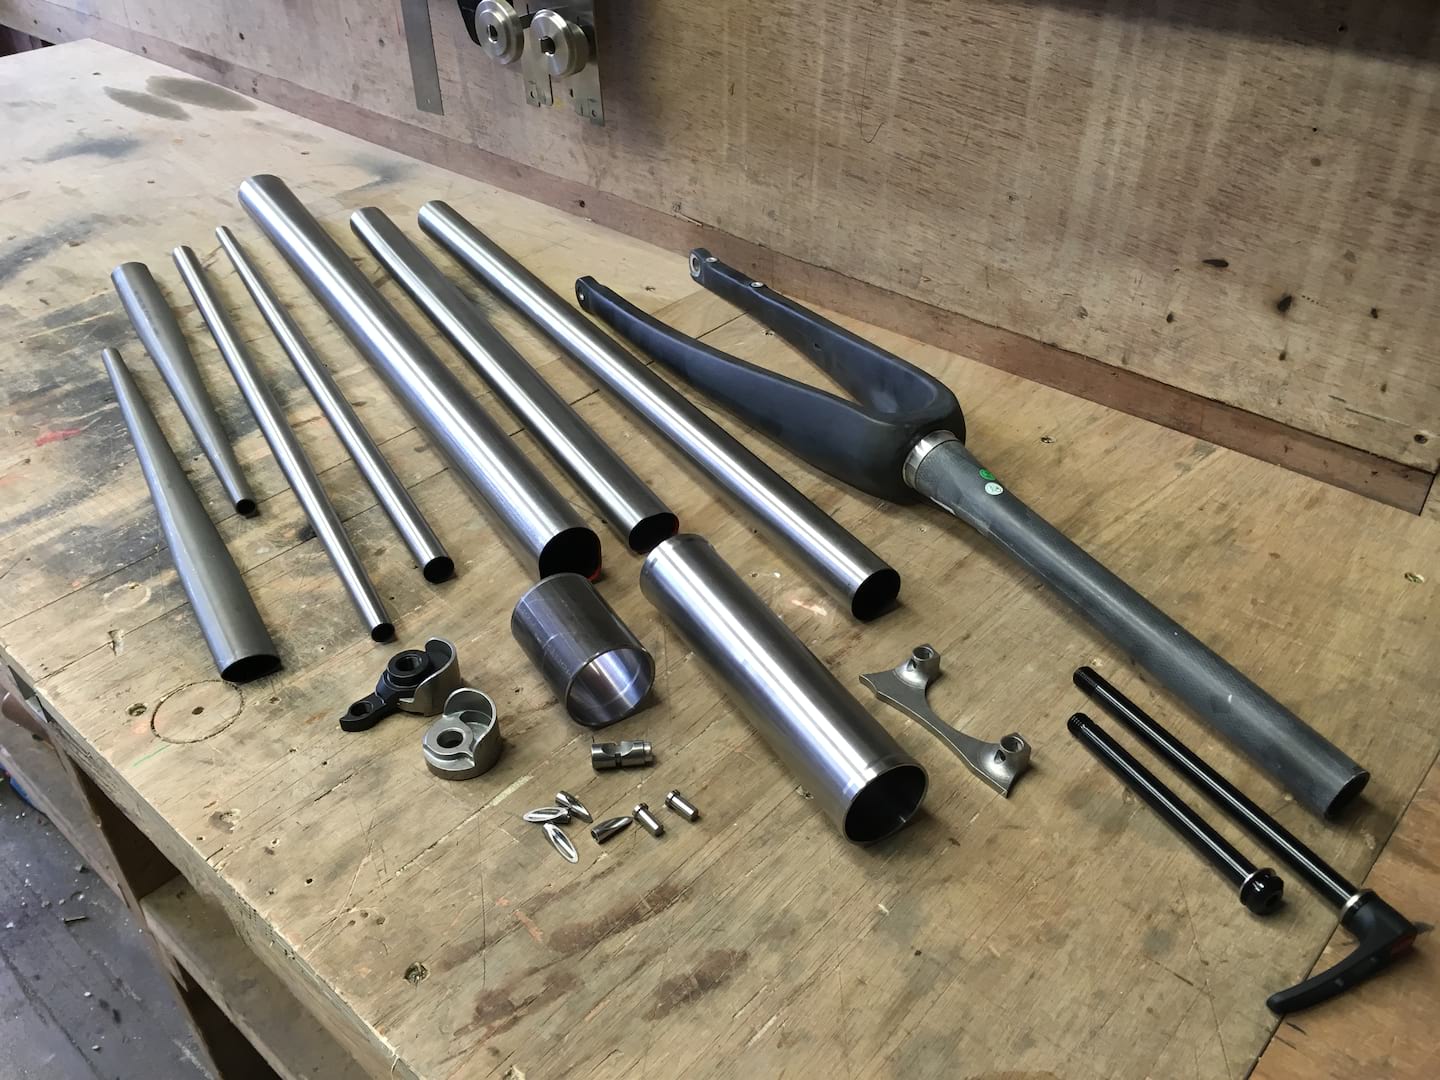
“Prior to this bike I built myself a hardtail mtb frame using Reynolds 853 and some very slack angles, I learned a lot on that bike and although it is far from perfect I felt very satisfied to ride something around that I had actually made rather than purchased from a shop.”

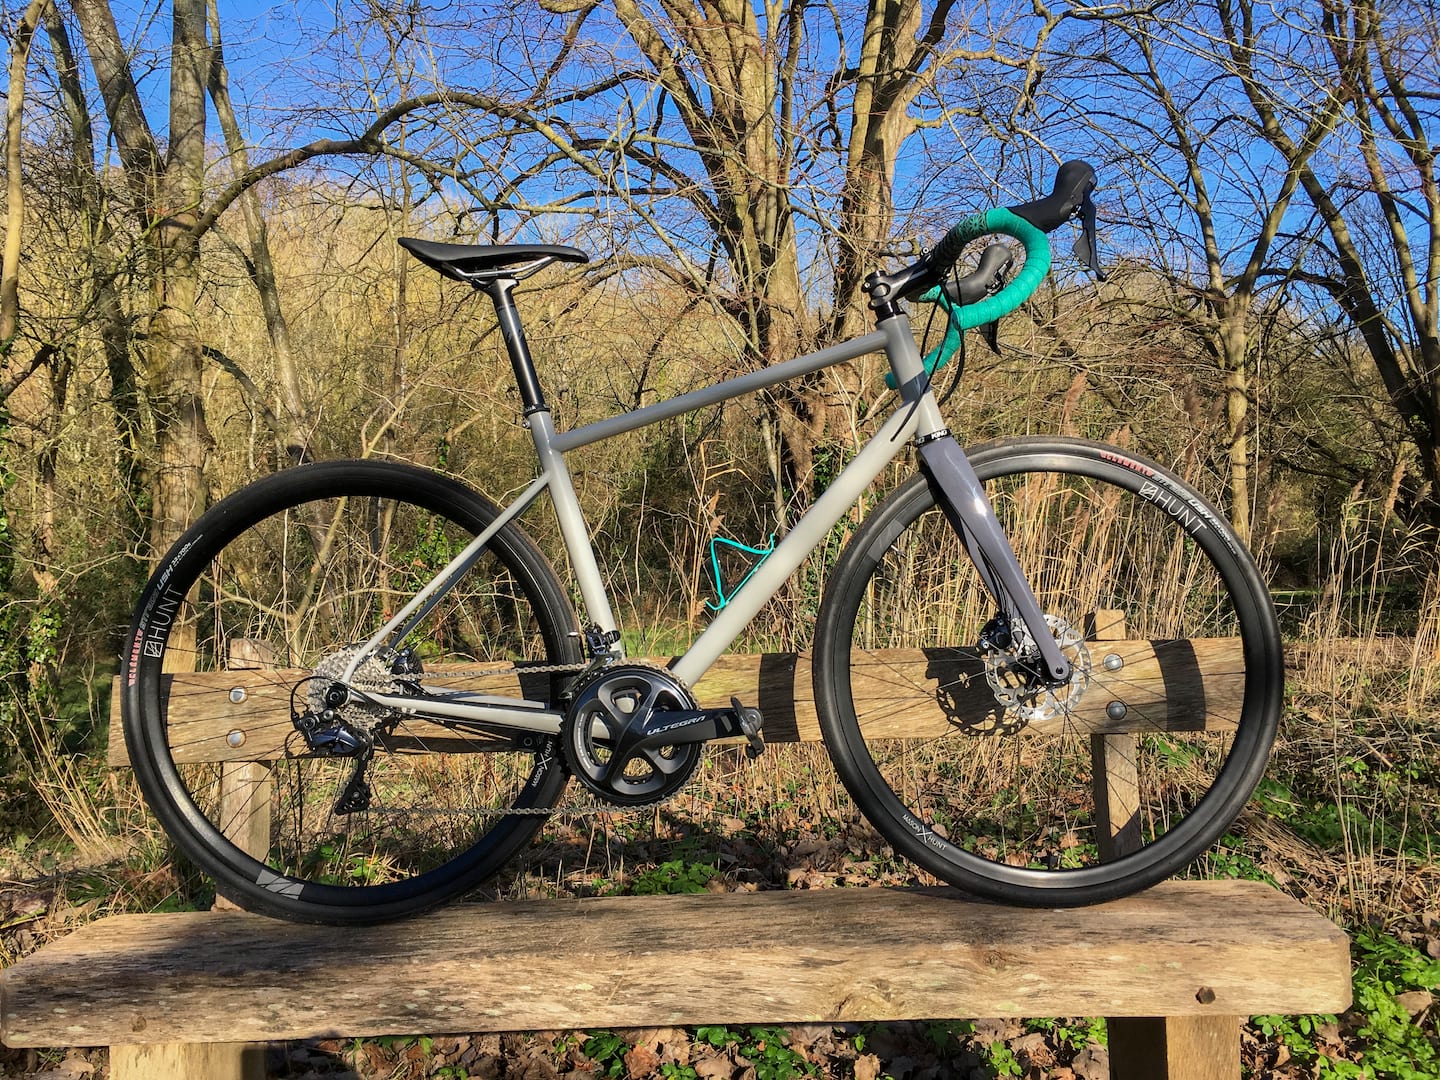
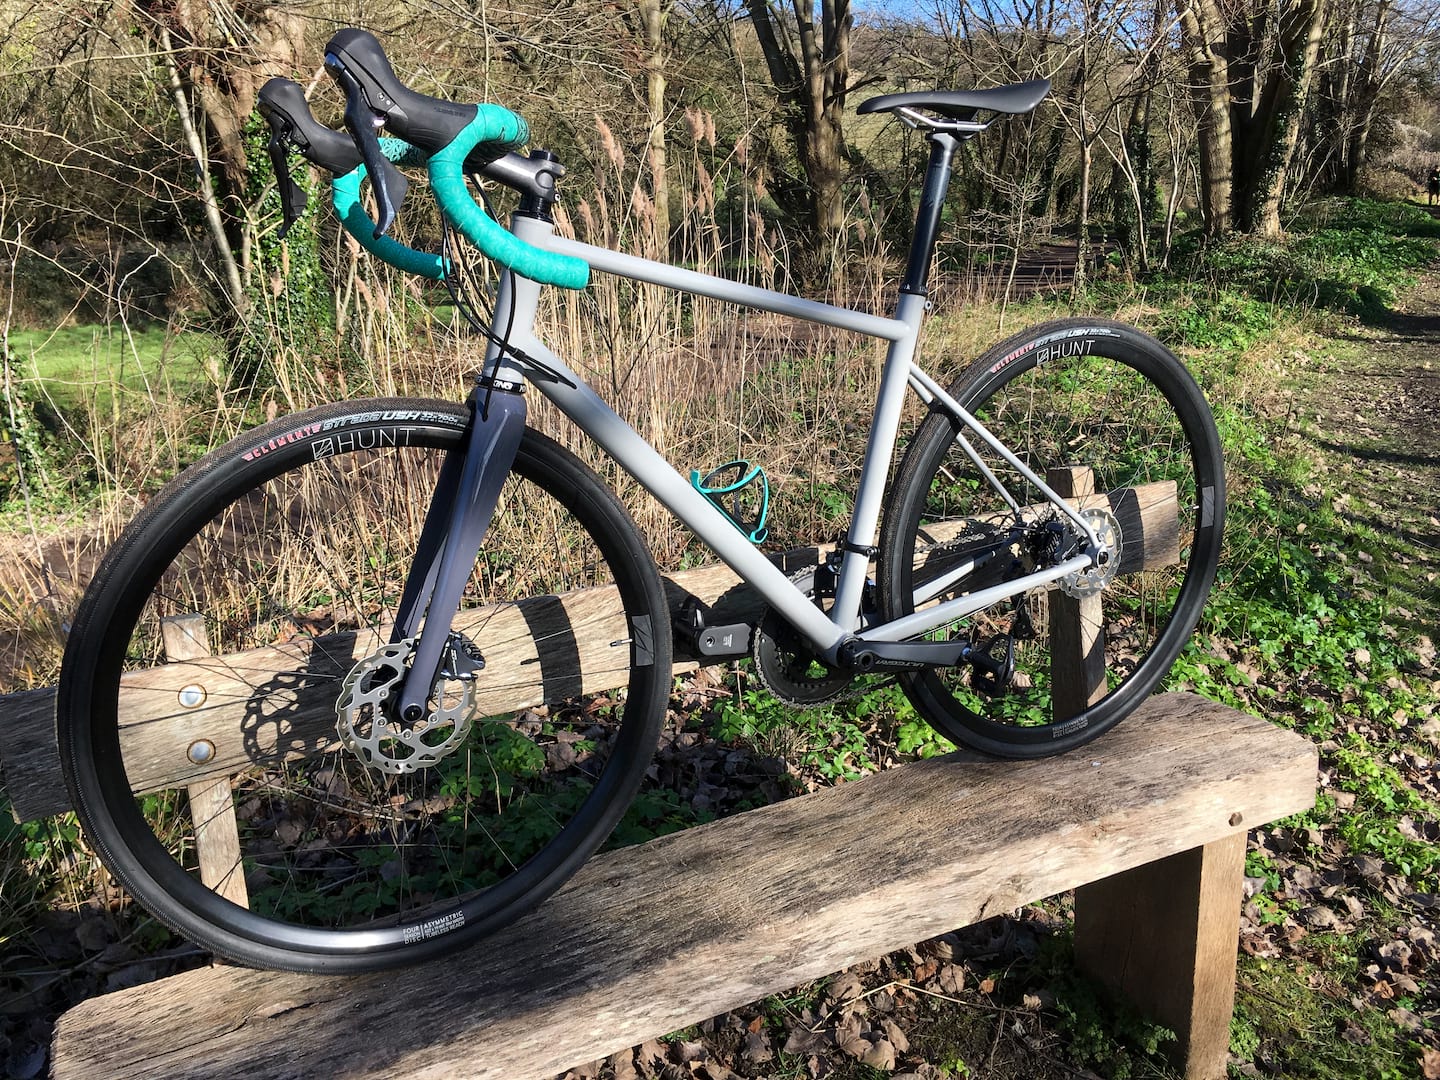
Chloe’s gravel bike
What was the design remit for Chloe’s frame? Why choose a gravel bike?
“The gravel bike idea came about when Chloe started looking at new bikes to replace her old Trek Madone road bike, which was starting to get a bit tired. Some of the things that we came up with from day one were that the new bike needed to to be a reasonable weight comparable to her old bike, comfortable in terms of riding position.

“When we talked about what she liked and disliked about her old bike other ideas like disc brakes and bigger tyres seemed logical in order to make the bike more modern in its design.”
When you started, what did you have in mind? Has it turned out as you planned?
“When I started with the design I had planned to use Reynolds tubing on the whole frame but as I started to add weights up I realised that although the bike weight was near to target and aesthetically it looked a bit too old fashioned (I know, I know a bikes a bike right?).
“We had to either accept a standard looking bike given my limited tooling resources or look elsewhere for inspiration. I found some tubes in the Columbus catalogue that looked really nice and fitted the bill and then worked out where I’d use Reynolds and where I’d use Columbus. The fork was always going to be a carbon Columbus one so it all starting stacking up nicely.”
How did you go about the design process? Where did you get your angles, tube lengths etc from?
“I used the the free BikeCad software for the design and liked it so much I bought the Pro Version. Chloe’s old bike played a part in tube lengths as we knew where it fitted her, and also where it wasn’t ideal. The one area that I had to pay attention to in particular was standover height. We wanted to lower it but this can affect other angles – I also lowered the BB to give it a bit more stability. One great thing about BikeCad was the fit finder which uses the a riders measurements to check the fit of the frame.”
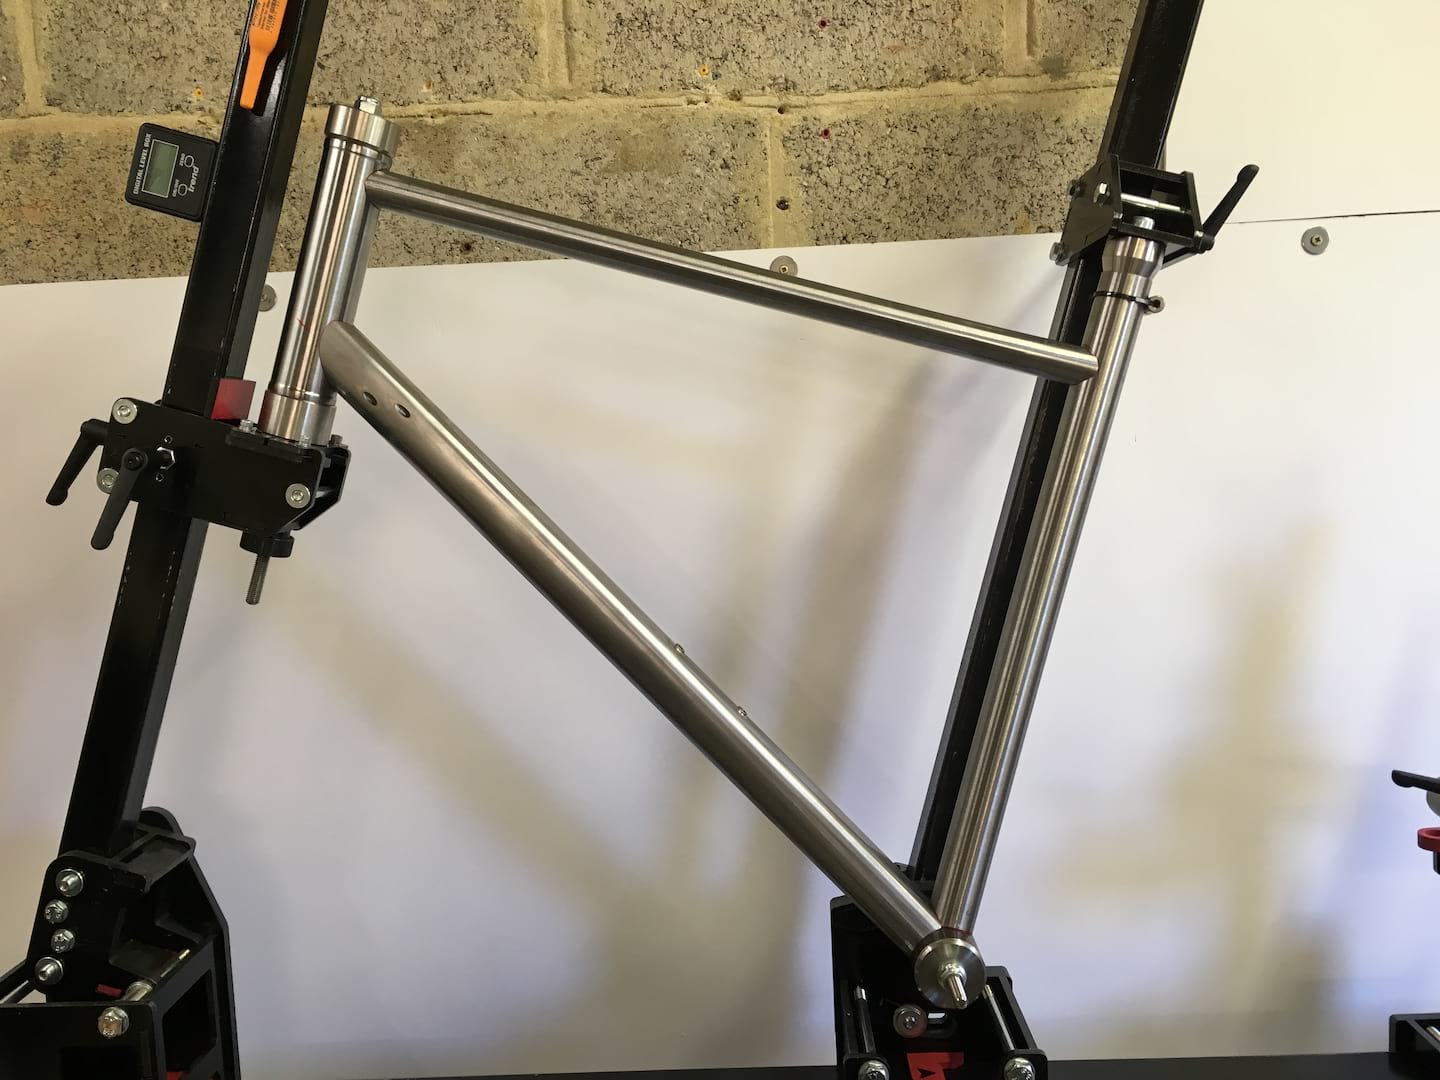
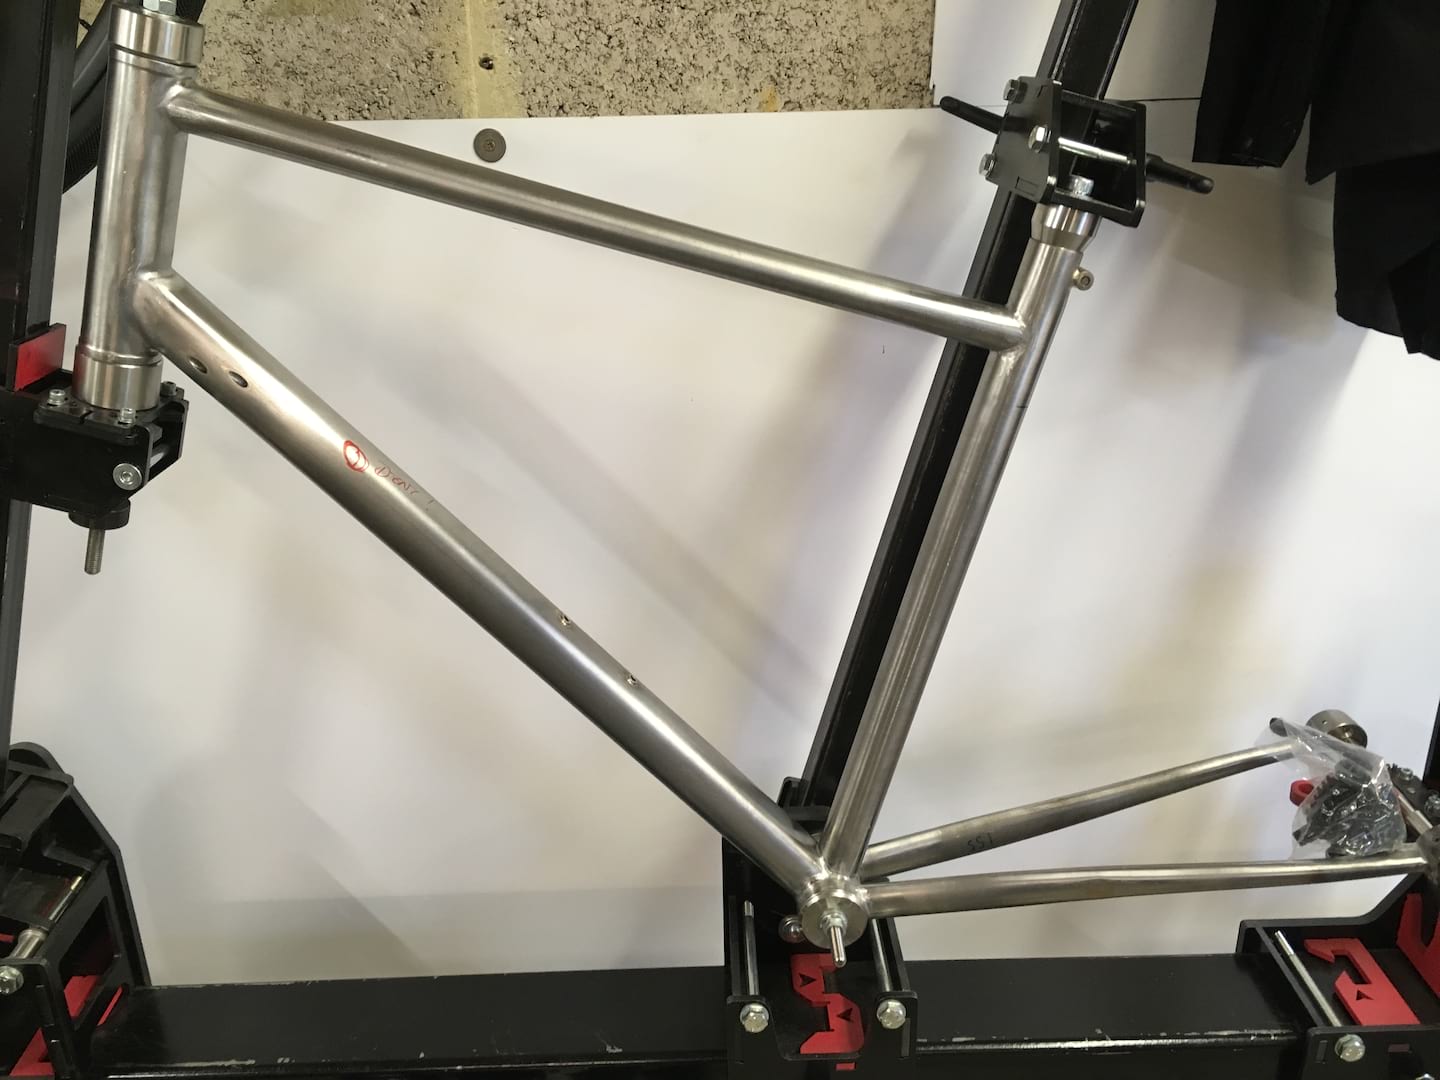
What material is it made out of? How are the tubes joined?
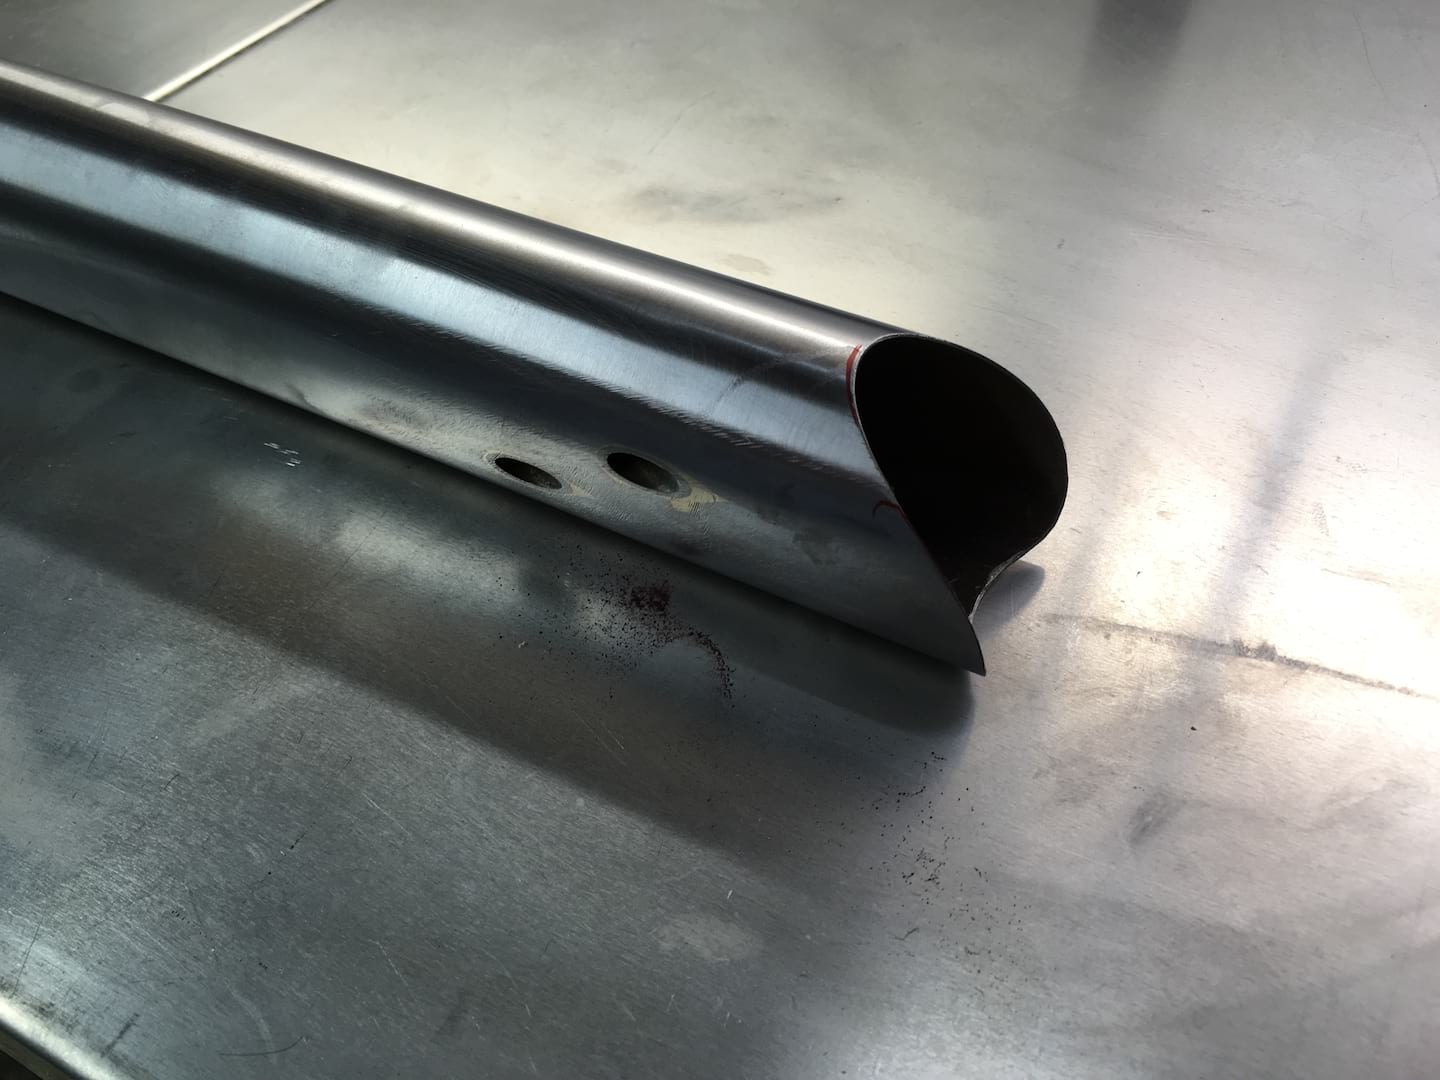
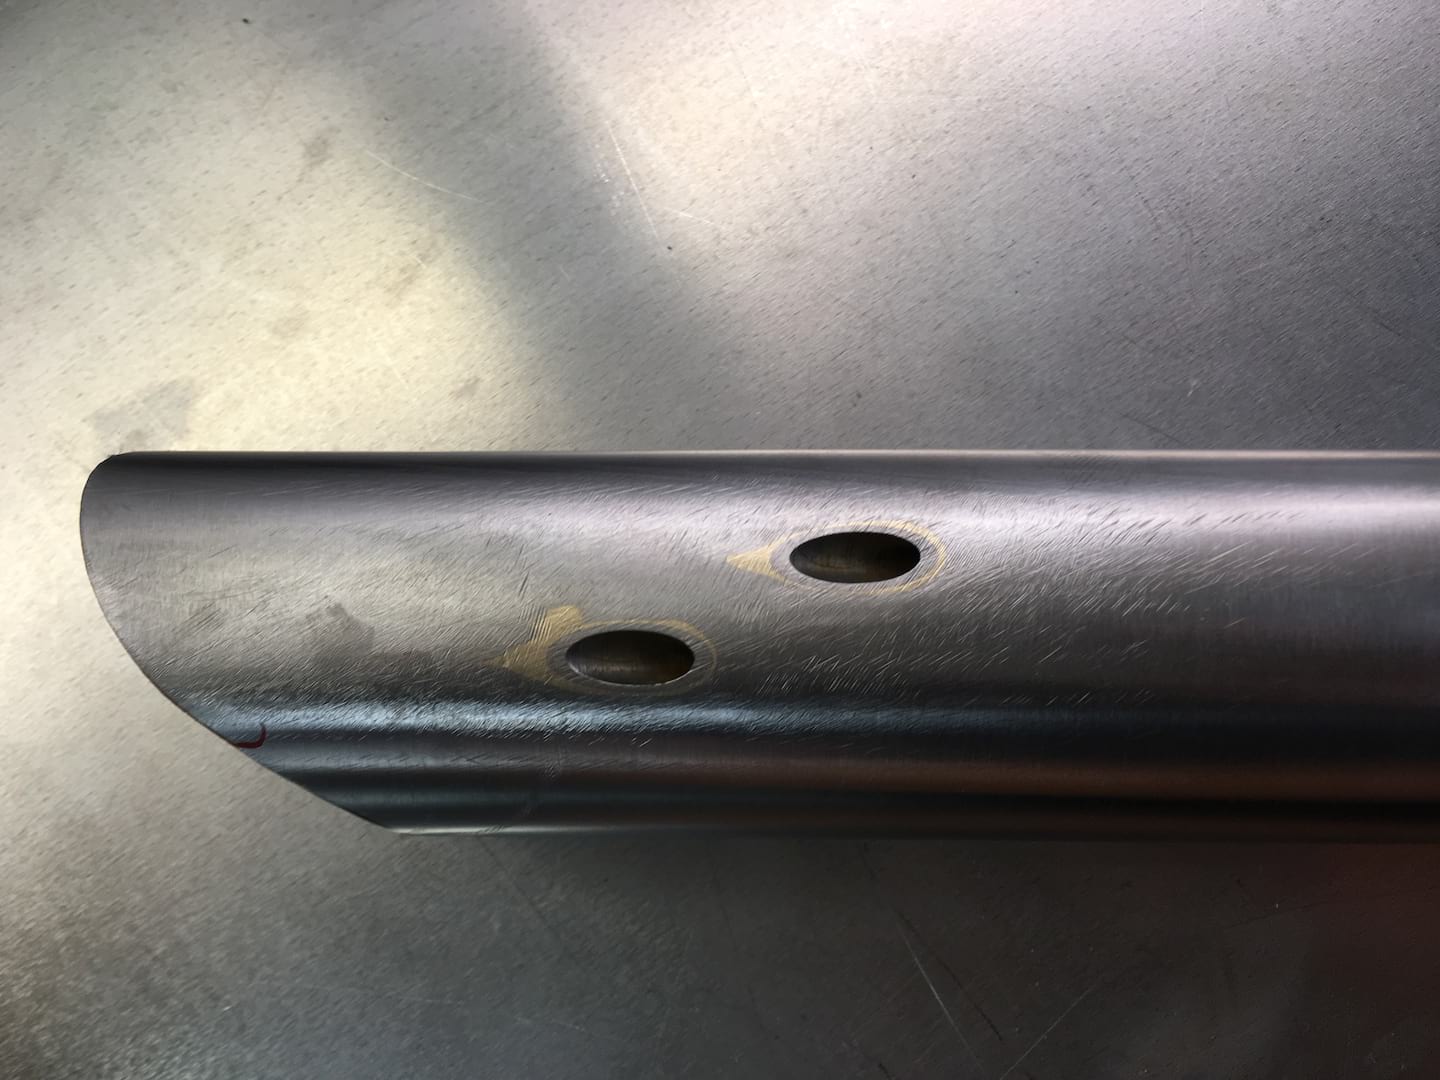
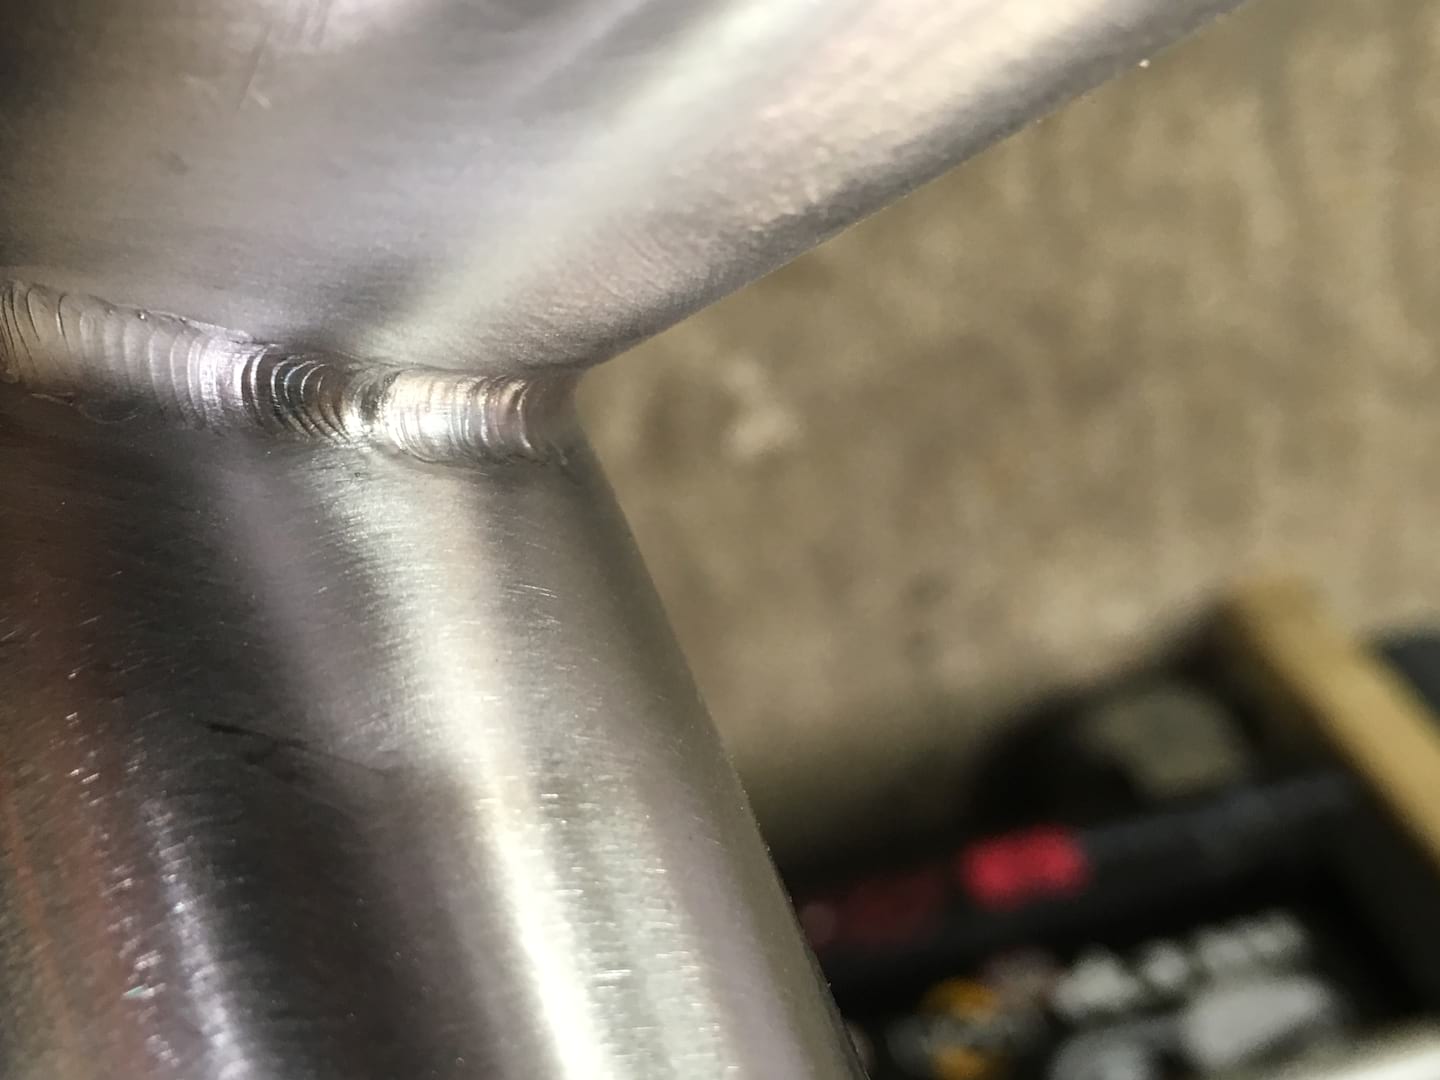
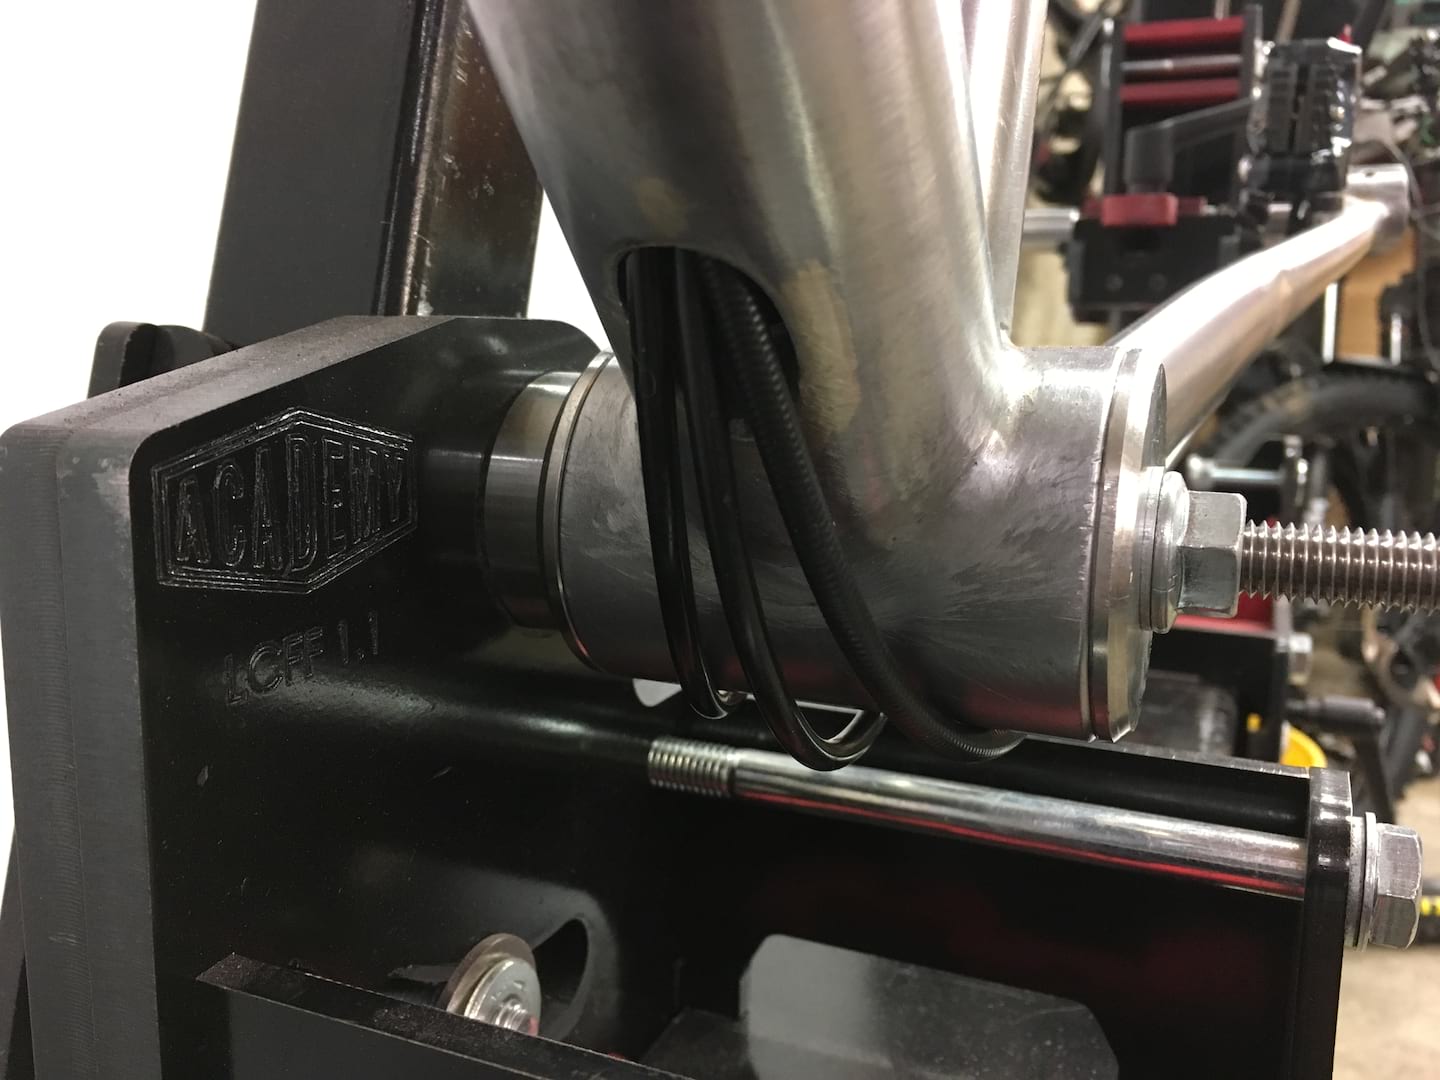
“The frameset is a mix of Reynolds and Columbus chromoly steel tubing. The method I used for the frame junctions was TIG welding and a little bit of silver soldering for the small cable guides etc. One area that I wasn’t that happy with was the consistency of the beading of my TIG welds, although they were good enough they didn’t all look perfect so I decided to lightly file and rub them smooth, which ironically has made the bike look a bit better anyway.”
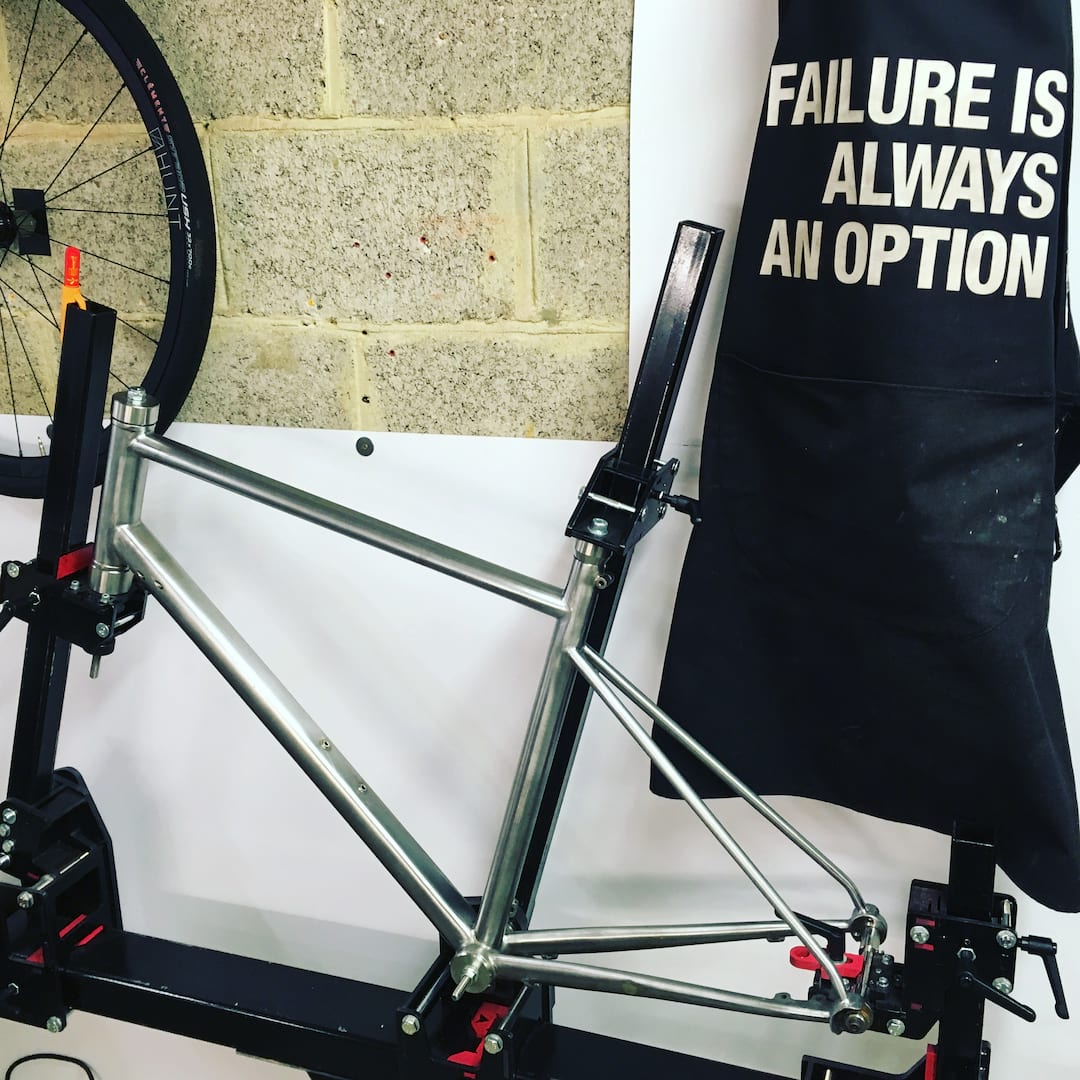
How did you go about the build? Where did you build the frame?
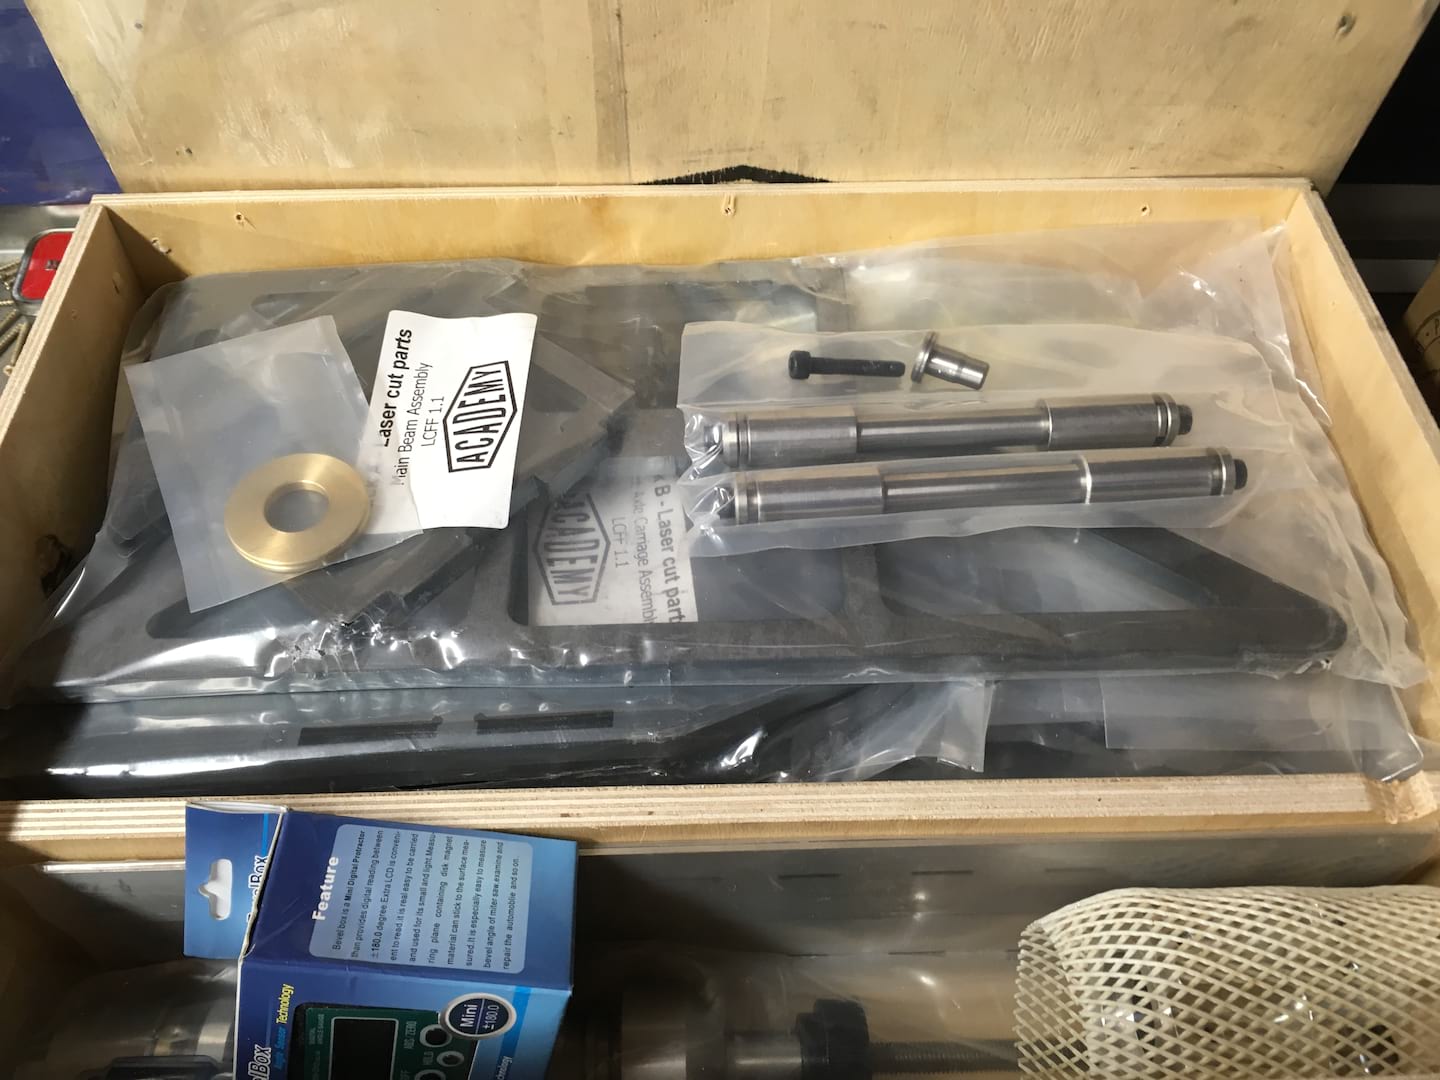
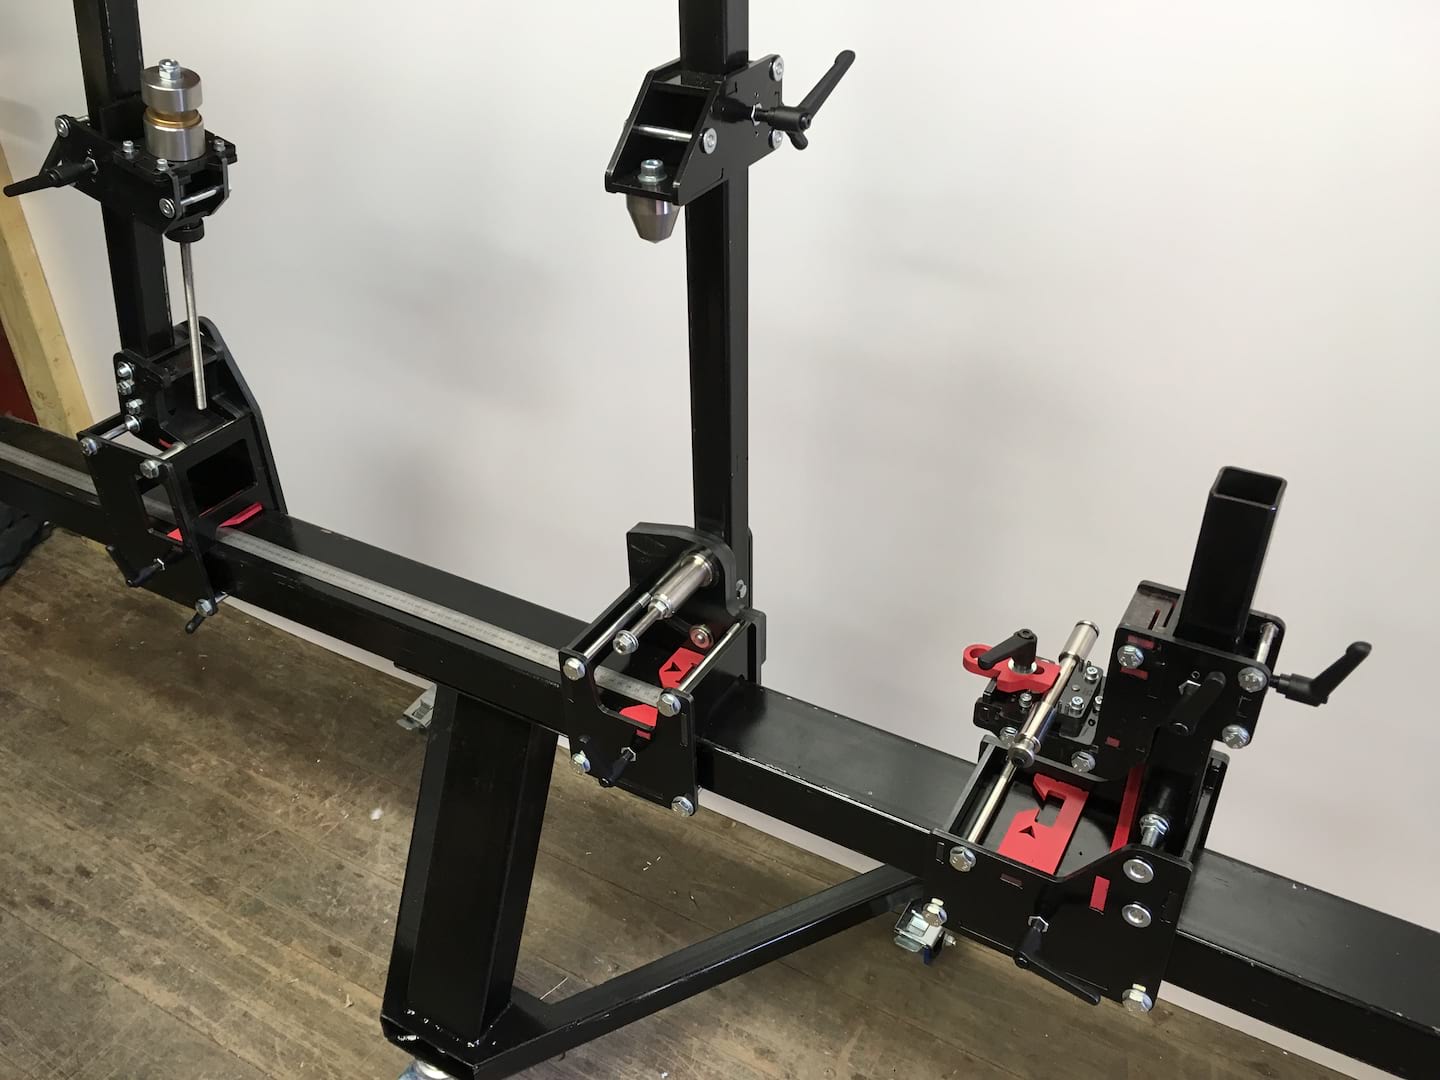
“I’ve always had small workshop for work but decided it would be nice to have a workshop at home, so the garage had a remodel. This has been great as I can tinker whenever I want, especially on those dark winter days, the only downside is whenever I go in the garage I get distracted and forget what I went in there for!”
How long did it take?
“From start to finish around six months, but I have only done it in my spare time and I have had to teach myself quite a lot along the way. The next one, which will be for me, will be quicker if I can commit the time in one block. A week off work? Maybe…”
What were the biggest challenges?
“By far the biggest challenge for me was getting my TIG welding to a standard where I felt happy with the strength and consistency, oh and not burning through 0.6mm tubing!
How have you built up the whole bike? What forks/wheels/groupset?
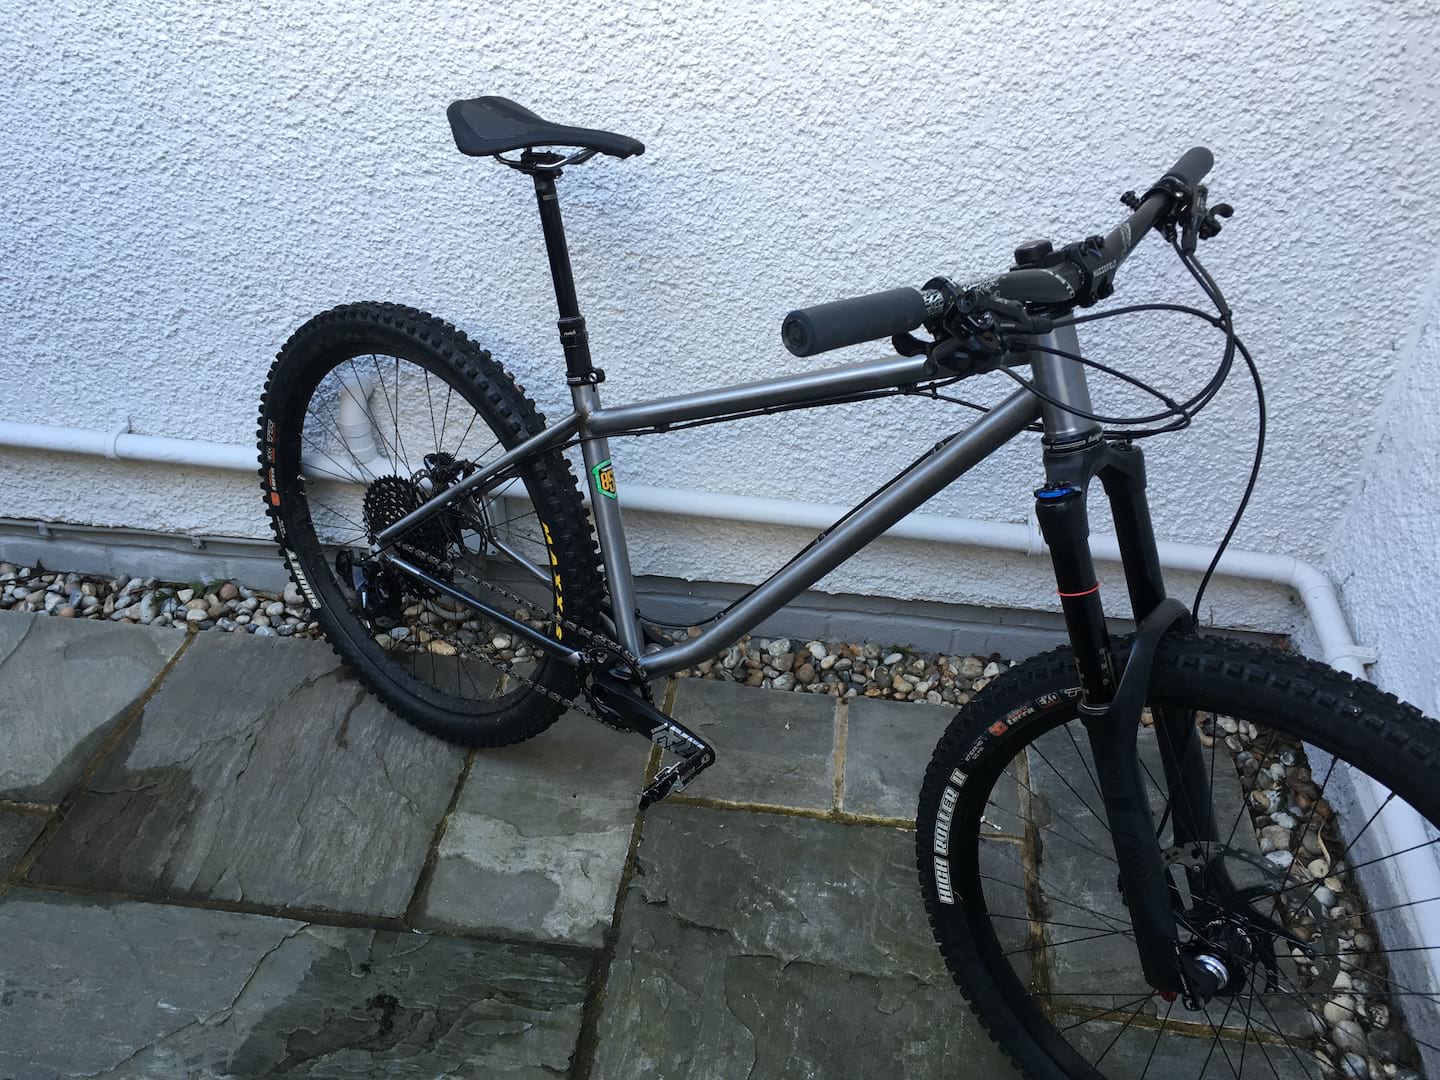
“Columbus Futura disc fork , Full Ultegra disc groupset, Chris king bottom bracket and headset, Hunt Mason X disc wheels, Easton EA70 seatpost, stem and gravel bar.”

The Future
How happy are you with how it’s turned out?
“Chloe’s very pleased with the finished bike and the ride quality, I’m my own biggest critic so I feel there’s always room for improvement. But, in truth I’m chuffed with it and look forward to building more.”
What’s next?
“The next bike will be for me and then hopefully a few for friends or paying punters!
“Long term goal would be to do this part time and reduce my day job hours and eventually build to the level where I can build in Titanium, plenty of learning between here and there though!”
Knowing Jim’s work ethic and level of commitment, we are sure we’ll see more of his bikes on the roads and trails in the future. Good luck Jimbo! If you want to follow the progress of future builds, he is on Instagram as @jimbuildsbikes.
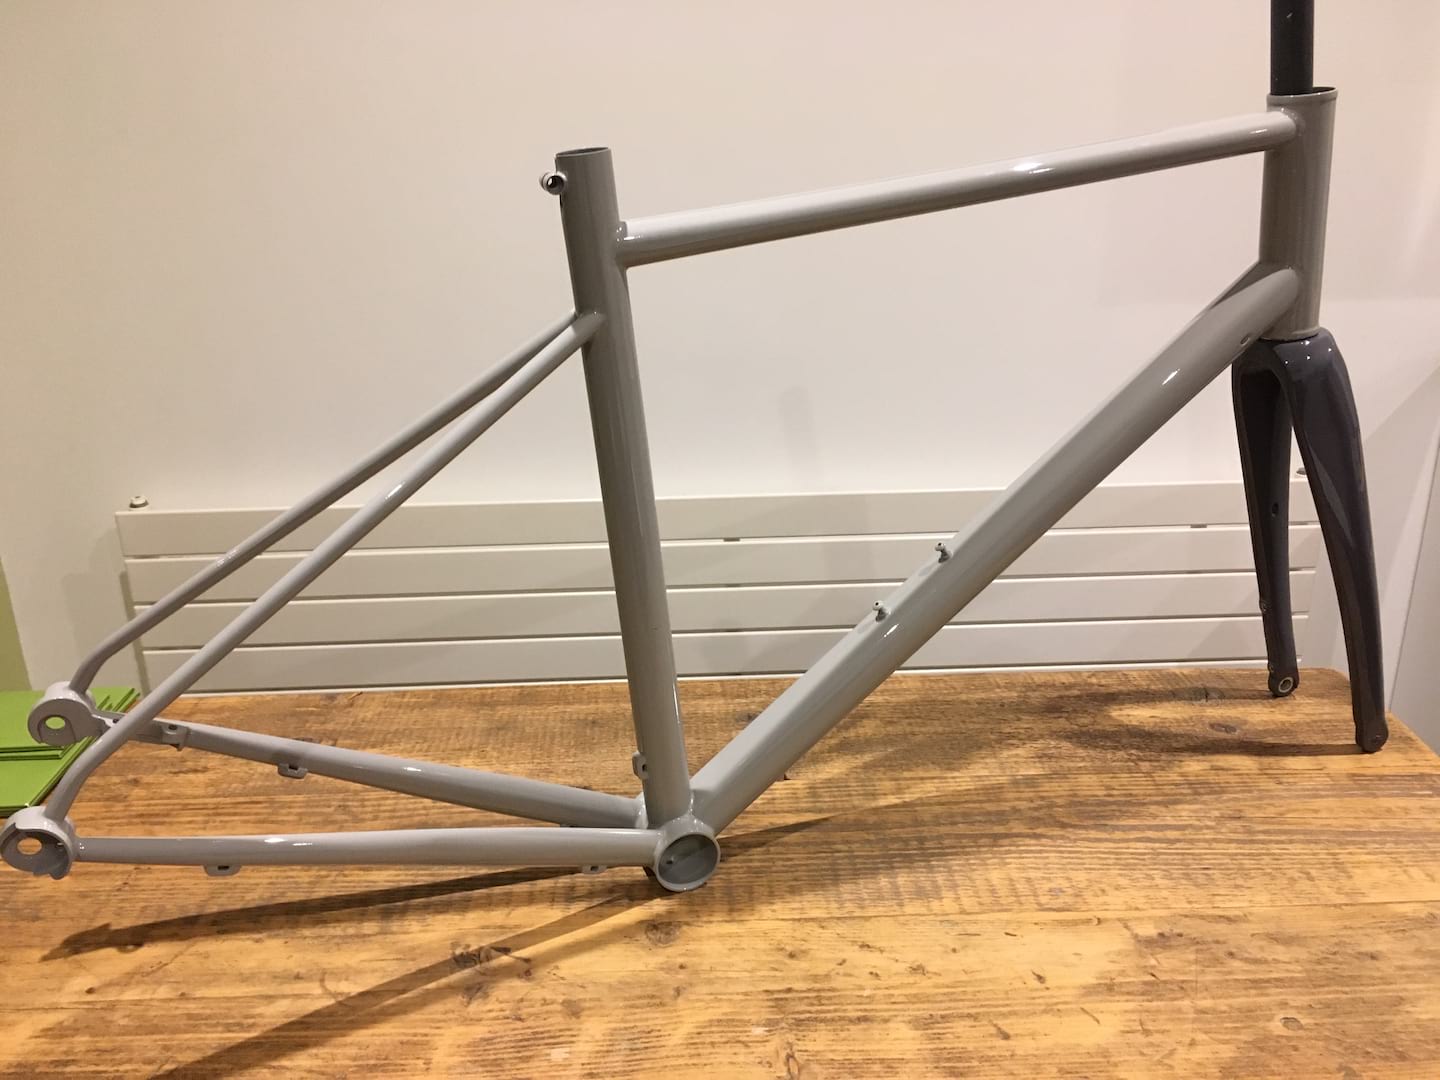
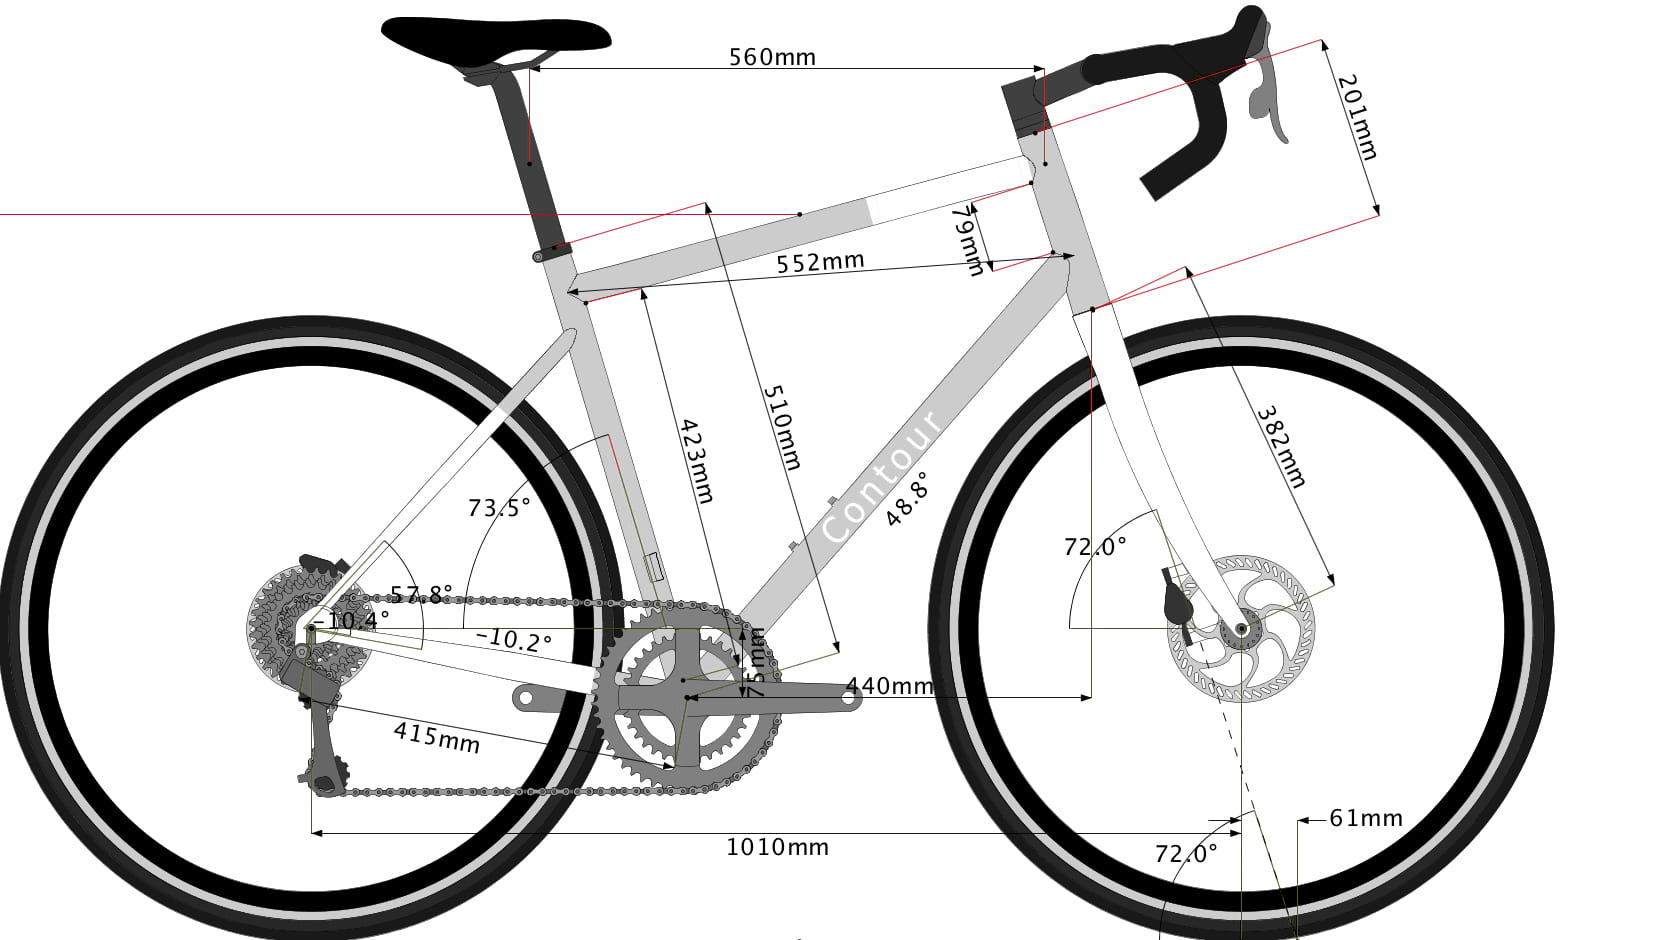
The finished product
- Bolt-through Columbus Futura disc fork
- Post-mount disc brakes front and rear
- Internal cable routing front triangle exiting below bottom bracket
- Head angle 72º, BB drop 70mm, chainstays 420, wheelbase 1030, standover 770mm
- Hooded dropouts , DT Swiss bolt-through axle
- Integrated seat post binder bolt / collar
- Total bike weight 9.7kg

Comments (1)
Comments Closed
That is a lovely bike!