- This topic has 2,328 replies, 145 voices, and was last updated 2 days ago by natrix.
-
Christmas Airfix!
-
ChrisLFull MemberPosted 3 years ago
Once again I will lower the tone by posting a Warhammer model rather than a meticulously rendered scale replica of a real thing. So here’s Magos Logus Torvolts, Dominus Ultima of the Nyarlax Cluster forgeworlds, AKA a kit bash of GW’s Canoptek Reanimator and Tech Priest Dominus kits, with added green stuff tentacles and of course an animal skull mask:

More pictures on flickr.
timbog160Full MemberPosted 3 years agoPersonally the thing I like most about models is the painting and the quality of some of the Warhammer stuff is breathtaking so post away!
Inspired by the model show I’ve raided my stash for this. The plan is for it to be completely out of the box (the only extra I have is a mask set), and hopefully (very!), have it completed for Christmas!!
sobrietyFree MemberPosted 3 years agoA question for those of you who actually know what you’re doing, is there a knack to getting acrylic paint to take to clear plastic? I’m having real trouble getting the canopy frame to look solid and not like badly painted clear plastic, I’d like to not move my decidedly average jet provost from “decidedly average” to “rubbish” by ballsing up the last step of the model (except lacquer and decals…)
timbog160Full MemberPosted 3 years agoAre you using a brush or airbrush? I use an airbrush which makes life a bit easier if you get your masking right. My approach as follows:
Step 1 – dip canopy in Future (also called Klear) floor polish. This makes it look really clear and shiny and once dry also a bit more robust.
Step 2 – masking – either with precursors masks as bought, or very thin slivers of tamiya tape that are built up so as just to leave the framing visible
Step 3 – paint! I use an airbrush and reasonably viscous paint so as to minimise bleeding under the tape. If you are really OCD about it your first coat should be the inside colour of the canopy framing, so that when you look through the glass it looks like you are seeing interior metalwork.If you are brushing then again I think reasonably thick paint to stop the masks bleeding. There’s no way I would try and paint a canopy freehand. Masking takes time but you can always start again which is more difficult once you’ve put paint to plastic…!
sobrietyFree MemberPosted 3 years agoCheers! I was masking with blue tack and brush painting – the kit is an airfix one that came with the paints, and the issue I think is that the paint doesn’t seem to “take” to the clear plastic like it does to the other parts – so even after many coats I can still see through it if I hold it up to the light.
I do have an airbrush, so I might try masking the canopy with tape and doing it that way.
Biplanes – I made a hawker hart when I was a kid and even the minimal rigging on that drove me insane, so nope 😉
johndrummerFree MemberPosted 3 years agoYou could use Matt enamel paint for the inside colour as timbog describes. Then your acrylics should stick to the enamel – think of it as a primer
sobrietyFree MemberPosted 3 years agoThanks again, I masked up the canopy parts with some pinstriping masking tape that I had for doing motorbike panels, hopefully it’ll do the job, then checked out matt enamel prices on the interweb, which vary between out of stock and reasonable and in stock an taking the piss.
I wandered into my basement and my eyes settled upon a can of halfords etch primer, left over from doing motorbike panels, which will take to anything, so that is what I’ve used. The inside lines should be matt grey and the outside red lines are sticking nicely now. Cheers!
spursn17Free MemberPosted 3 years agoI’ve been a bit stuck with the F105 as I didn’t fancy masking the SEA scheme, after a few weeks of it sitting on the desk I bit the bullet and airbrushed it freehand! I surprised myself as it didn’t turn out too bad, I’m starting to love my Harder and Steenbeck airbrush.
ChrisLFull MemberPosted 3 years agoI didn’t fancy masking the SEA scheme
That’s come out really well!
Some years ago I built up the old Airfix Vulcan kit (the particular boxing dated from the ’80s) and I use blutak sausages to get a soft edge to the camo pattern. I did the painting with rattle cans rather than an airbrush so I’d have had no chance doing it freehand.

It came out fairly well:
johndrummerFree MemberPosted 3 years agoRemember the plasticine disaster? 1/48 Hasegawa A-7D?
I think I’ve recovered it!
It’ll probably never be my best work but I’ve now got it to the stage where it’s ready for the aftermarket decals I bought 🙂
Photos to follow when I’ve got the decals ongarage-dwellerFull MemberPosted 3 years agoHi @chrisl or @johndrummer I think you’ve both done/mentioned the blu tack and “soft edge”. Would you mind briefly explaining what it is how it works? Got a few camo things to paint and we are VERY amateur here! 🙂
johndrummerFree MemberPosted 3 years agoBasically you paint the whole model with one colour of the camouflage pattern, then when it’s dry, roll up some blu-tac into a very thin sausage & use that to mark off your camouflage pattern. You can then fill in between with Maskol or even masking tape – see the Vulcan above. Then use an airbrush or rattle cans to paint the other colour. If it’s a three colour camouflage pattern then repeat
ChrisLFull MemberPosted 3 years agoThere are some pictures of what I did with the Vulcan on Flickr. John’s description seems spot on, the idea is that the blu tak sausages result in an overhang and when you spray the next colour less paint will get under the overhang than will get onto the fully exposed areas, resulting a diffuse edge.
spursn17Free MemberPosted 3 years ago@ChrisL that Vulcan looks big enough (and clean enough) to eat your dinner off! Nice smooth paint job.
@garage-dweller it also depends what you’re making. Some subjects had hard edge camouflage (Spitfire, Hurricane) as rubber mats were used to mask the paint in the factory. Another consideration is the scale, a soft edge in 1/72 is a lot different to a soft edge in 1/32.
If it looks good from 4 foot away then you’ll have done a good job.My F105 has stalled again! The Revell decals disintegrated when I applied them, aftermarket ones now ordered. I really wanted to use the kit one’s as the were for ‘Arkansas Traveller’ that had the pilots kill markings from WWII under the cockpit, I can’t get them on an aftermarket sheet. I’m starting to get a bit disheartened with this kit, it’s got a few flaws and it seems like a step backwards build. It might fly towards the bin soon! 😂
ChrisLFull MemberPosted 3 years agoI think there’s a decent chance the Vulcan actually should have had hard edged camo and properly scaled a soft edge in 1/72 probably looks pretty hard anyway. However soft edges do tend to look a bit nicer on model kits and I wanted to try the technique out so I gave it a shot.
spursn17Free MemberPosted 3 years agoHowever soft edges do tend to look a bit nicer on model kits
Yep, that’s another way of looking at it. Replicating a hard edge can leave a minute raised lip which looks weird, you got the Vulcan spot on!
Whatever looks good is the right way to go about it, it’s more about looking at it when it’s finished and feeling happy with it. Some of the kits I made as a kid I would look upon with horror now, but I’ve still got fond memories of them.
Build to suit yourselves (and your shelves)! 😂
garage-dwellerFull MemberPosted 3 years agoThanks for the explanations on the paint. 🙂 lots of things on the go in our house with three boys all keen. I have a Defiant and a Blenheim progressing very slowly as I assist with unpicking a few mix ups from the boys. I’m fairly methodical on building but the paint and detail is what I find challenging.
I understand the Airfix Blenheim kit is a bit of a pig so that was a good choice 🤣 although I’ve not yet hit a really difficult spot or I’m not good enough to notice.
Impulse purchase of a F104 and a Russian helicopter today along with some vehicles as youngest likes trucks. I shouldn’t be allowed in shops. Mrs gd thought I had popped in for some varnish, walked out with a massive carrier bag of kits, paints etc. It’s a good thing she really likes the people who run the shop and doesn’t mind me supporting their business.
johndrummerFree MemberPosted 3 years agoHere’s the first WIP photo of the A-7D plasticine disaster:
That’s the port side & upper surface decals done. Only took three hours.
Yes, the canopy is still masked
garage-dwellerFull MemberPosted 3 years agoThat is a good save. I like that era of aircraft, I guess they were the in service planes of my youth when I had a really serious (= very nerdy and unattractive to girls thus setting a pattern for most of my teenage years) interest in flight and planes.
johndrummerFree MemberPosted 3 years agoI’m calling this finished now.
BMD-4 by Trumpeter, commander figure from the Meng Russian Armed Forces Crew set
paints by Mig & AK Interactive, pigments by Mig. Airbrushed with Neo by Iwata
carpet monster ate one of the return rollers and one of the hooks from front L/h side.
individual track links were so much fun, my next armour kit will have wheels & tyres. 4 of them.I do like the modern Russian 3 tone camouflage, it’s certainly a lot more interesting than overall green or sand
More here: https://imgur.com/gallery/u87sSNv
CountZeroFull MemberPosted 3 years agoIt’s a very clever and robust bit of kit, not at all what you’d expect from the regime that gave us the Lada!!
Depends on the Lada! I can, and will attest to the fact that Lada cars based on the Fiat 124 were truly awful, nasty, hateful things! Nothing worked very well, steering, brakes, gearshift*…
The Niva, on the other hand, has a reputation as a slow, basic but very capable off-road 4×4
*Cheapskate boss bought two as company cars. #rollseyesspot1978Free MemberPosted 3 years agoI’m a massive fan of the warhammer 40k miniatures also. Taking quite a lot of time to learn painting techniques etc.
The is my latest effort. A relic leviathan dreadnought with storm cannons. The weapon arms are magnetised so the load out can be swapped out easily.
By far one of my favourite models and builds to-date.
Edit: need to work out how to post Flickr photos on an IPhone
johndrummerFree MemberPosted 3 years agoEdit: need to work out how to post Flickr photos on an IPhone
That’s why I use imgur 😉
johndrummerFree MemberPosted 3 years agoSorry, I forgot to mention. It’s another 1/35 kit. No interior this time but with 80+ track links per side, I don’t think I could face an interior as well
Still on the workbench:
Hasegawa 1/48 A-7D Corsair II in SEA colour scheme.
Meng 1/35 SAM system.
Tamiya 1/48 Crusader III in western desert scheme.In the stash:
Meng 1/35 Russian ‘Typhoon’ armoured car – I guess their equivalent of a HummveeZvezda 1/72 Russian Iskander mobile ICBM system. I don’t normally work in Braille Scale but if I did this in 1/35 it would (a) cost an arm & a leg and (b) need it’s own space on the drive
Zvezda Russian 1/35 Pantsir mobile SAM system (truck based)
garage-dwellerFull MemberPosted 3 years agoLoving those vehicles and whatever that is above (WH40k I assume). Not sure I have the patience or dexterity for tracked armour though and definitely not in 1/72.
Maybe next time once I’ve whittled down the “to build” pile a bit I might do a truck or two.
RockhopperFree MemberPosted 3 years agoWithout even discussing it with me my Mrs bought me the Airfix vintage classic re issue of HMS Victorious. I built this kit when i was about ten years old and I often think about it. We were on holiday in one of my dads workmates static caravan somewhere in North Wales. I remember the tiny little aircraft (1/600 scale).
I’ve just started building it. Its taken me nearly an hour just to fit the two halves of the hull together 🙂
To me thats what Airfix is all about, re living memories of kits I built many years ago often with the help of my dad.spursn17Free MemberPosted 3 years agoI love this thread!
…and me, it’s the first thread I look for! It’s great to see all of the different stuff that people are making, things that I wouldn’t normally be interested in.
The only thing that I don’t like is the amount of kits that @johndrummer gets through, he makes me feel ashamed at the pace I plod along at! (I’ve been trying to put a laughing emoji here but can’t do it, feel free to use your imagination!). LOL
johndrummerFree MemberPosted 3 years agoI have a few kits on the go at the same time, means they often get finished around the same time.
The A-7D I’ve been working on is now almost complete. Undercarriage & gear doors on. No ordnance in the kit other than a pair of Sidewinders, so I bought some aftermarket. Only trouble is, 12x Mk82 bombs means 12 lots of decals. And the rest…Next up, this: https://www.modelhobbies.co.uk/meng-models-135-russian-k-4386-typhoon-vdv-armored-vehicle–vs-014-276658-p.asp
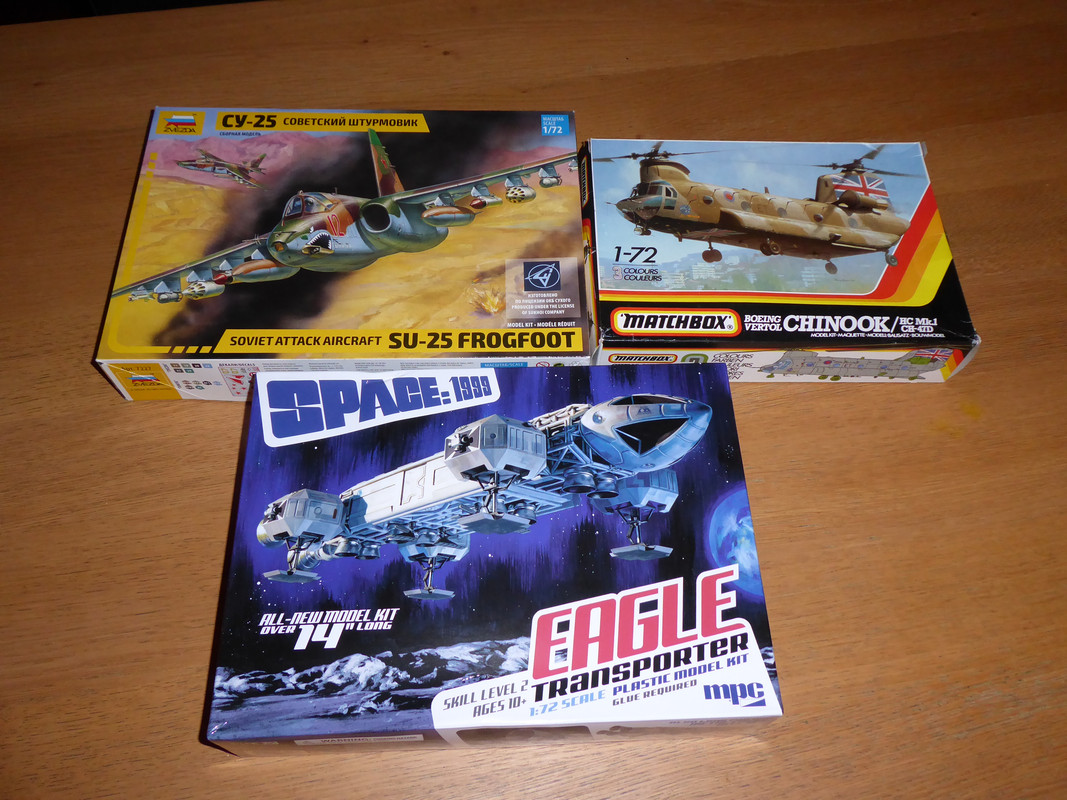
Harry_the_SpiderFull MemberPosted 3 years agoChristmas Stash.
Looking forward to having the time to getting back to building in the New Year.
nickcFull MemberPosted 3 years agoI’ve the Special Hobby spit mk12 coming. In a few days hopefully
CoyoteFree MemberPosted 3 years agoI sometimes wonder how accurate the sizing / scaling is, anyone any ideas? For example the Bell Huey UH1 is smaller than I would expect against say a WW1 or WW2 fighter.
garage-dwellerFull MemberPosted 3 years agoI guess must be on scale within sensibly tight limits/constraints of moulding. When you look at the geekery around some of the builds on places like britmodeller people are looking at which air intake inlet the model kit had and therefore which ‘batch’ the plane came from. Level of knowledge very scary!
What always gets me (as an interested in planes generally person) is how small a Spitfire or an early post war jet looks against (say) an F-16.
I always think about the American hall at Duxford and you’ve got an F-15 strung up on the ceiling and compare that to some of the bombers below it on size. It’s pretty eye opening.
 [ 1/35 Dragon Panther G Late" />


You must be logged in to reply to this topic.