DON'T DO IT! sheesh, what a pain in the arse.
For starters it's not a standard cable. I though it was a standard brake cable (1.5mm dia) until I removed it and found it had a stop on the end like a gear cable. I say 'like' because it isn't the same as the stop on gear cable either, it's 3.5mm dia where as a gear cable is 4.5mm dia. "No big deal" you think but you'd be wrong! The cable stop sits inside another part which acts as the main pin to lock the seatpost in its positions which has an internal dia of 4.1mm.
That elbow joint on the 2013 model which allows the cable to exit parallel to the post actually bends the cable round a pin only about 4mm in diameter. It's under a pretty high tension so the cable is being bent past its elastic range and has a kink in it because of this. This is important because when you pull the cable through the elbow as I did you end up with a piggy tail of a cable in ball of mess. Sadly I didn't realise this at the time and just assumed it was a poor quality cable and thought it would be better to replace it with a gear cable....
..So out came the drill. I drilled out the main pin so it would take a gear cable and then set about trying to thread the cable back through the elbow. I spent ages trying to work out how to get the cable through using various guides, bits of wire, pliers, scredrivers, etc. In the end I had to hammer the pin out of the elbow to do it. You also need to put a bend in the cable at the elbow or you can't get the pin back in.
The downside of drilling out the main pin means the tiny plastic cap which slides up and down the post no longer fits. In time I guess this means the metal on metal rubbing might cause some wear but it seems to still work ok. Given the spring pressure on the pin I doubt the plastic cap would last very long anyway.
So as you can see the cable can be replaced but it is far from simple!
As others have said the rest of the construction is very straight forward. Several people have mentioned the need to strip and grease it but the main spring in mine was lathered in grease so I just put it back in.
Anybody want to see pictures? Won't bother posting them otherwise.
Hopefully it saves someone the grief! 🙂
Thanks for that. Any idea where replacement cables can be found?
Pics would be great. I've got one that needs a bit of tlc.
Modified mine, their 90* is a bad idea, breaks cables so I replaced with following. I also didn't like the lever so got a suntour remote fork lever on ebay. Also drilled the cable end hole out a bit so it fits standard brake cable. Now works much better but can't seem to find replacement sliders for it and I find the spring is very stiff compaired to my Gravity Dropper. Still it's ok for £70.
[img] 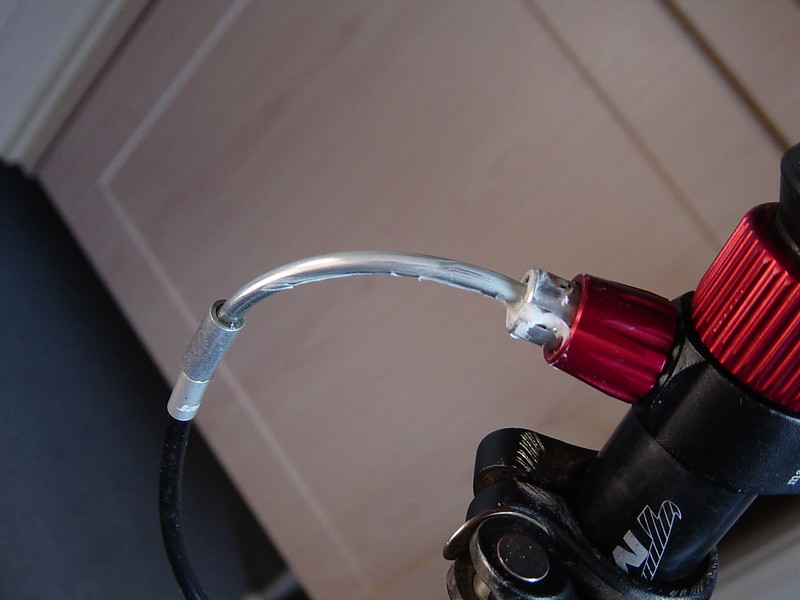 [/img]
[img] 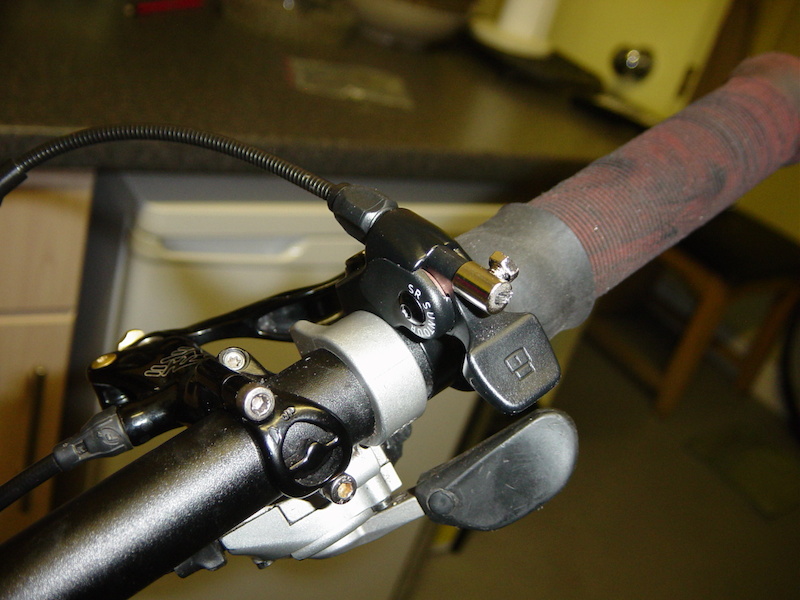 [/img]
Wobbem, did you have a cable fail? How long did it take?
I agree the 90* bend is just crude and lazy. The movement is quite small, I reckon they could've created a nice little rocker (think woodpecker) to do this and still have a tidy parallel cable.
dant - no idea where to get parts.
I find the spring is very stiff
also agree, I wouldn't want to be much less than my current 80kg or I'm not sure I'd get to the bottom stop.
some pics:
[img]  [/img]
[img]  [/img]
[img]  [/img]
I did finally get to use my brake cable mounts though 🙂
[img]  [/img]
is it a campag gear cable?
edit: nope, seems shimano is bigger. what about a double ended brake cable and cut off the rounded end? Clarks do them with a barrel end and a rounded end.
OK, so first ride out today, it's going to take a bit of getting used to! Towards the end of the ride it wasn't always finding the highest setting so I figured I'd try some light oil in top sleave - any suggestions?
ok, one last picture to show the rest of the internals:
[img]  [/img]
I stripped it and replaced the heavy grease with a light oil and it now returns to the top easily. If you wanted to stick with a heavy grease you could also increase the spring tension via the botton of the seatpost but this might also make it harder to get to the bottom stop.
Thread resurrection time; I have one of these posts, last night it wouldn't release properly, in a ham-fisted trailside attempt at adjusting the cable I managed to fray it so had to replace it earlier. Could find no instructions anywhere so I did a search here and found this thread, my heart sank a bit when I read v8 shinprints tale but figured I would give it a go anyway as my original cable was no good.
My post seems to be a different design where the cable enters - there's a little black box and the cable goes straight in, no 90deg. bend (its this one http://item.mobileweb.ebay.co.uk/viewitem?itemId=251247848914&index=1&nav=SEARCH&nid=95221221946 )
For the benefit of anyone searching the forum for help replacing their cable on the same model tmars as I have [b]don't panic a standard gear cable fits fine[/b] and its a 20 second job - undo the cover on the little box on the post, remove the old cable and thread the new one in and Bobs your uncle, job done.
EDIT: also the post works better than ever now its got a decent quality cable.
Hey Wobbem - the little clamp you used to secure the cable to the Suntour trigger - could you tell me where you got it, or what I need to search for?
Many thanks,
BTM
I've just replaced the cable on my traildrop post using a standard gear cable. Had to file the end-stop down a bit to get it to fit in the pin, and I'm a bit concerned that it may snap if things get sticky and i have to give it some welly as the cable is thinner.
Only replaced it cos I'm a tart and wanted matching cable outer...
I got one a few weeks ago with the new style cable entry and despite needing some tweaking to get rid of play I'm quite impressed. I think it might benefit from an extra position between the top and middle ones. Has anyone tried drilling one yet?
I used a standard gear cable on mine with no problems.
Can anyone help me diagnose what's wrong with my new tmars post?
The problem is when I am riding I can't get the post to stay locked in any position, if I understand how this post operates that means to me that the locking pin isn't fully engaging in the post when cable tension is removed.
I have the newer version with the box on the post rather than the cylinder for the cable.
I've let out all of the cable tension, even removed the cable, and I can't get the post to lock. I swapped the cable for an old shimano shifter cable I had laying around that was too short for one of my other bikes after I changed the handlebars, but no difference.
I played a bit with the spring tension at the base of the post - also took the spring out and removed the plastic baggy over the spring - and setting the tension really high or really soft just changes the speed which the post comes back up.
What next?
Send it back
I had a similar problem with mine but not quite as bad. It would lock but any movement of the saddle would make it spring back up. I think the problem is the holes in the post are punched rather than drilled so the edges of the holes are chamfered and the taper on the end of the locking pin means there are two angled faces contacting. I took a file to mine to make the edge of the hole more right angled which cured the problem. Sounds like yours is more severe so may need sending back.
http://singletrackworld.com/wp-content/uploads/2013/11/rsp-releases-sub-100-dropper-post/ looks interesting for not much more money. The remote appears more user friendly anyway
I cleaned up the holes on the wife's (and added an extra hole for 25mm drop). Also gave it a good greasing. It is still pretty sensitive to cable tension but it locks ok. There is a bit of technique in terms of weighting and unweighting.
dammit they aren't helpful at all and want me to send it back to taiwan to get repaired....oh well gonna be awhile before I get to try out a dropper post it looks like.
decided to take it apart just for shits, think I got it fixed...will know next time I ride but it passed the sit on it and jump up and down a few times test at the top and the partially down setting. I think I have the spring tension a little too high now as the lowest drop wouldn't lock in unless I was off the bike and forced it down by hand.
I think what happened to mine is the sleeves near the pin were blocking the pin from dropping into the position holes.
Recently bought the Origin8 dropper (same as Tmars,ICE and Forca branded posts) hoping the lowtech Gravity Dropper cloned mechanism wouldnt have as many issues as my previous KindShock dropperpost. Ended up making 12 modifications to get it working nicely....
[img] 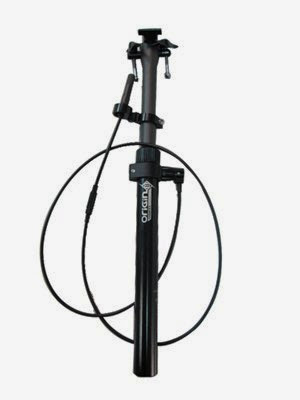 [/img]
[img]  [/img]
mod1
Remove plastic bag from spring. It was gets stuck between the coils preventing smooth movement
mod2
Romove the rubber dustboot as it doesnt keep water and mud out. I replaced it with a dustwiper made from a sheet of felt
mod3
Get rid of the 90 degree bend in the cable. Stupid design, started fraying after one ride! Use a vbrake tube to make the bend.
mod4
Get a better lever. The original one was either too tight (sudden evil for nuts) or too loose (lever rattles). I used an oldschool bmx brakelever. Still light but more leverage.
mod5
Thinner less sticky oil. This improves movement and attracts less dirt
mod6
Better sealing at the top of the stanchion tube. It has a plastic plug to stop dirt going into the internals from the top, but plug was loose. I ended up filling the stanchion tube with part of a broomhandle and epoxy resin to stop any dirt from reaching the internals via any of the holes.
mod7
Bigger holes so pin finds positions easier
mod8
Chamfered edges to the holes so pin slips into the holes easier
mod9
Polish stanchion to make it slide smoother
mod10
Move holes and cable from the rear to the front of the post to reduce mud contamination. You will need to make new holes and fill in the old ones with resin.
mod11
Without the rubbersock it is possible to drill the lower setting a little lower than the original. I prefer a low as is goes setting for riding park. I also decided to make 4 settings instead of the original 3 and happy with that!
[img]  [/img]
[img]  [/img]
[img]  [/img]
[img]  [/img]
[img]  [/img]
[img]  [/img]
[img]  [/img]
[img] 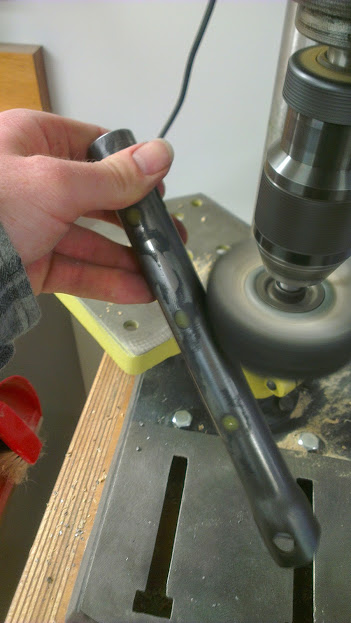 [/img]
[img] 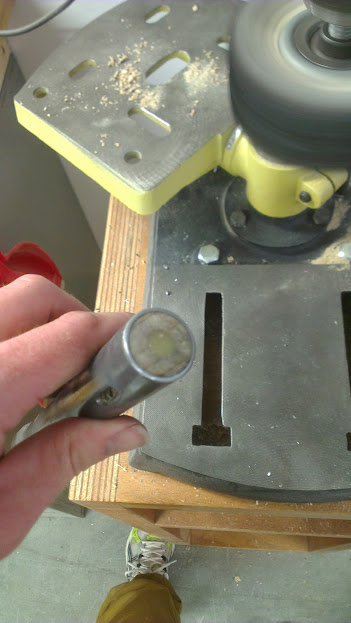 [/img]
[img]  [/img]
[img]  [/img]
[img]  [/img]
[img] 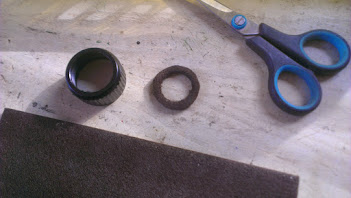 [/img]
[img]  [/img]
[img]  [/img]
[img]  [/img]
[img]  [/img]
[img]  [/img]
[img]  [/img]
raceday:
[img]  [/img]
I applaud the effort, but bloody hell! It wouldn't be my first thought to stick more holes in something that was designed to take my fat arse landing on it occasionally. 2nd-hand GD for piece of mind for me.
