- This topic has 167 replies, 50 voices, and was last updated 7 years ago by monkeyboyjc.
-
New bike day – just need to build it….
-
bikebouyFree MemberPosted 8 years ago
This is excellent.
I would like to know if you woke up with your left hand stuck to your left buttock cheek?
monkeyboyjcFull MemberPosted 8 years agocookeaa – it’d be pretty easy to mod the dropout secton of the jig – you only need to move the dropout positions by 2.5mm either side and it’s onlt 6mm mdf – you could do the non drive side with a file and just pack up the drive side.
I would like to know if you woke up with your left hand stuck to your left buttock cheek?
Nope but one hand has brown splodges (gorilla glue) and the other is covered in flaky bits of epoxy.
monkeyboyjcFull MemberPosted 8 years agoRight – update time…
Took the frame out of the jig which, predictably, was smashed apart in the process. The drive side isn’t to bad….
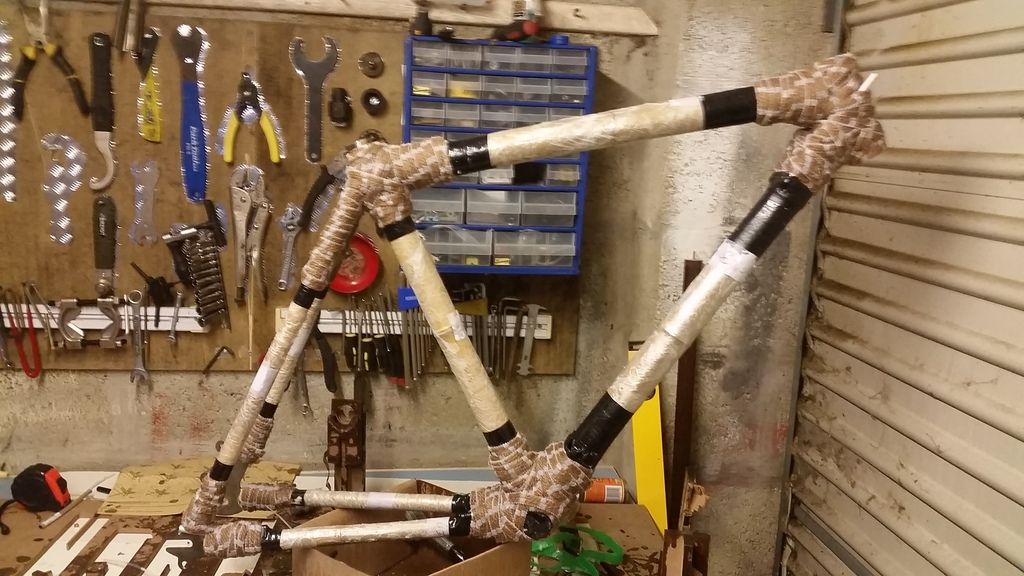
Non drive side (which I couldn’t see when wrapping up the joints) is a different story…
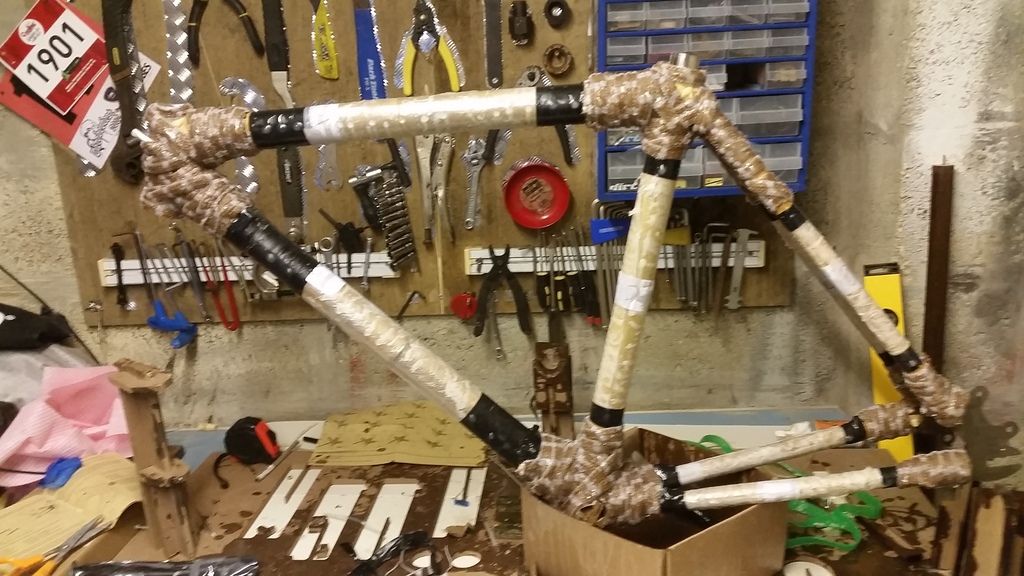
Looks ok on the face of it, but there are lots of gaps and bits of visible metal/bamboo so will need a fair bit of filling…
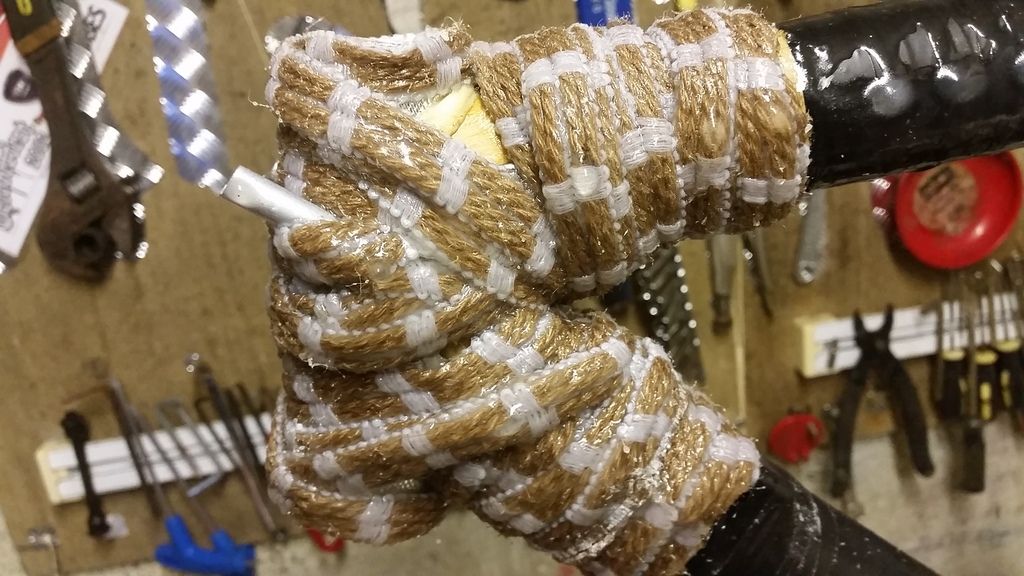
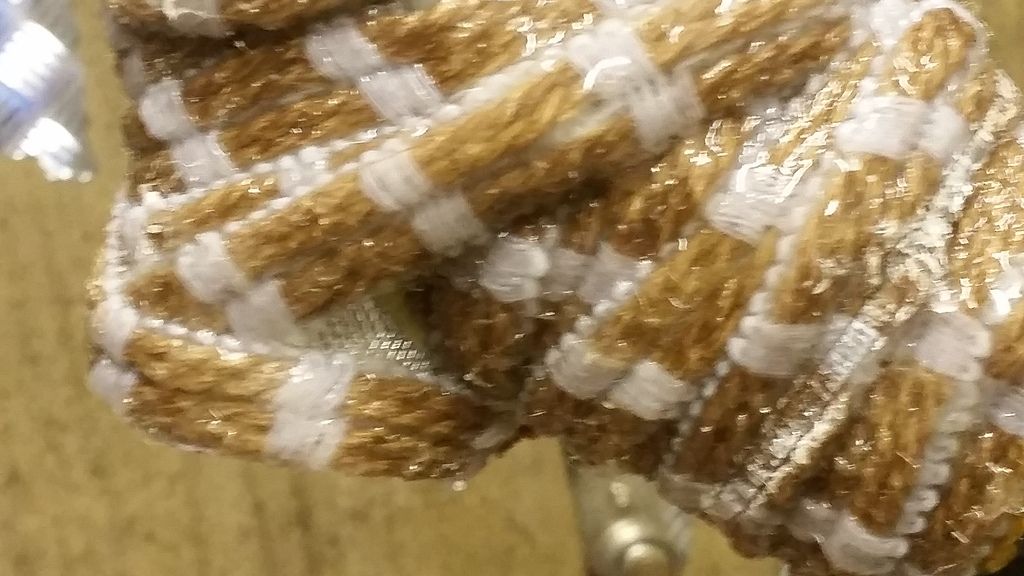
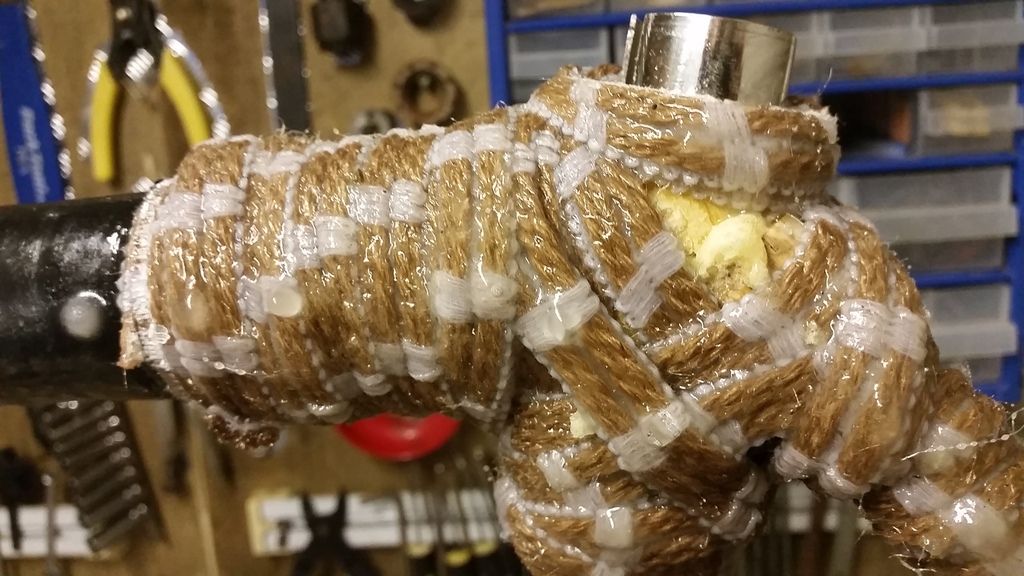
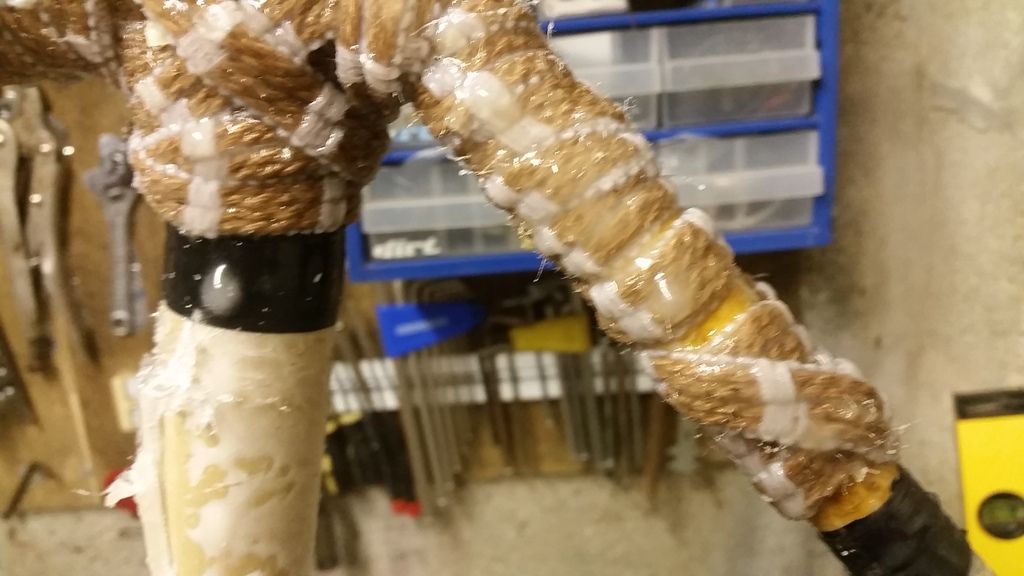
It’s still a little tacky (too cold and wet for a decent 12 hr cure in my garage), but initial 30 secs with the file supplied in the kit suggest it’ll be ok to file down. However i probably won’t get a chance to give it ago untill next week when I have some time off. I’m going to rough sand back as much as I can before I fill any of the holes on the non drive side as I may well expose some more in the process.
I aim to fill with an epoxy hemp mix as well as the bamboo sawdust collected from rasping the joints.
Haven’t decided if ill do another (thinner) hemp cloth layer after that – I’ll see how I feel once the first lot of sanding is done.
I also need to do a couple more hemp wraps for the bottle cage / cable mount bolts and anot her hose guide for the rear brake on the chain stay so I guess I’d better order some more epoxy.Oh, and my 2nd hand Chris King headset turned up and some 1&1/8th straight steerer carbon disc forks are in the post so I guess I’ll have to do the head tube first.
mrsfryFree MemberPosted 8 years agoCan you use a hairdryer to speed things up or not ?
Looks pretty 🙂nikkFree MemberPosted 8 years agoCould you not have epoxied the tubes in place in the jig, then removed from the jig for the wrap? Then you could have had 360 degree access for that part.
racefaceec90Full MemberPosted 8 years agothat’s flipping awesome 😀
cannot wait to see it fully built.
monkeyboyjcFull MemberPosted 8 years agoCould you not have epoxied the tubes in place in the jig, then removed from the jig for the wrap? Then you could have had 360 degree access for that part.
Yes…. but the chances of it moving one of the joints would have been high as you need to wrap as tight as possible.
The pros like calfee and bamboo bicycle club or Web works all seem to have vertical jigs which are accessible from both sides. For a one time use jig that came in the kit it’s fine, but wrapping the frame when horizontal has its limitations.
When I’ve spent a couple hundred on a kit I didn’t really want to spend a few hundred more on making a decent vertical jig.
It shouldn’t impead the strength of the frame, just means I have more work to finish it off.monkeyboyjcFull MemberPosted 8 years agoWell I can see where the 60 hrs of finishing comes from…. This is about 30mins work of sanding and filing by hand…
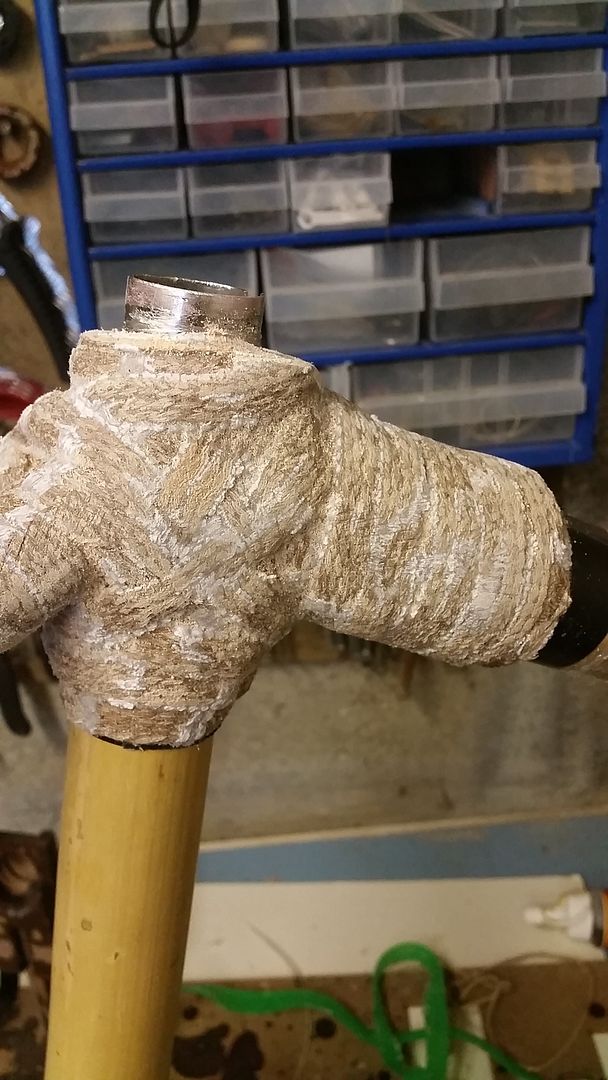 monkeyboyjcFull MemberPosted 8 years ago
Certainly won’t build into a light weight frame – in its unfinished form it’s almost 7lbs!
monkeyboyjcFull MemberPosted 8 years agoWell….. its getting there…
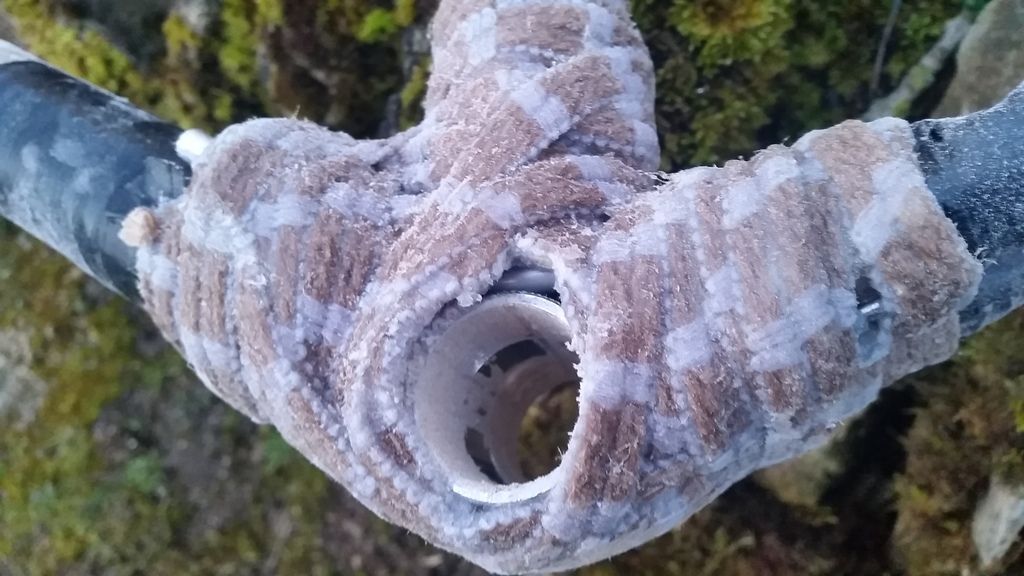
Drive side BB joint with the bulk of the sanding done:
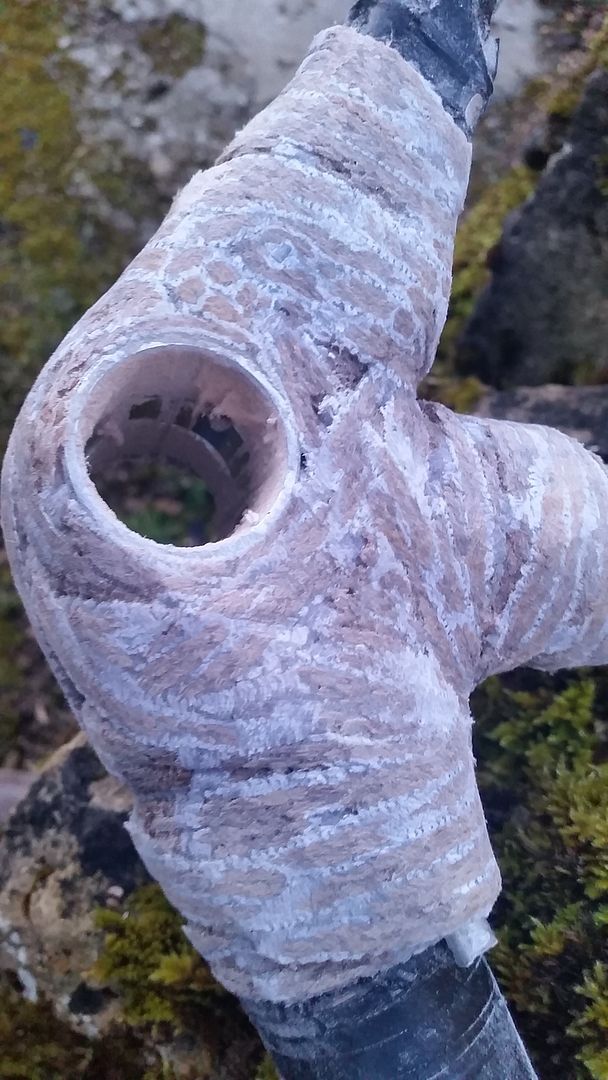
Vs non drive side (unsanded)
 DaffyFull MemberPosted 8 years ago
I so could not be arsed with this – you have the patience of a saint!
Did you used to paint all of your Airfix models on the spru before assembling?
DaffyFull MemberPosted 8 years agoOh and White Industries make a 130mm CX Disk hub. I used to have one.
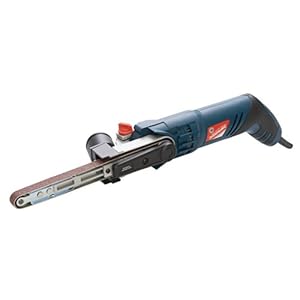
monkeyboyjcFull MemberPosted 8 years agoIt’s not all hand finished, I did the seat tube junction by hand for a bit to see how hard it is – but I’ve been using the dremel and finger belt sander since. To do the drive side BB as above was about 30mins with these (just not had the time to put into the project over the last week).
As for hubs, it’ll be a budget built and Novatech do a 130mm disc hub. It’ll be interesting getting disc alignment right. I expect either shimming or shaving of the disc adapter.
mtbtomoFree MemberPosted 8 years agoDid it come with the disc drop out? Its not clear on the website unless I’ve missed it?
monkeyboyjcFull MemberPosted 8 years agomtbtomo – It’s the standard ‘XC’ kit which comes with disc dropouts. And is essentially a cyclocross kit – you could also do conventional rim brakes with a bit of missing. There are other kits avaliable on the wen site as Etsy, Inc a MTB kit, but they don’t ship to the uk only the US.
I’ll try to get some more photos up later. However if I was doing it again I’d use half the rope that they supply on a 1st cure and also wrap it with perforated electrical tape. And the either get some hemp cloth or tow for a second cure. It’s really hard to get a good tight joint with the rope as it’s so large. This means i have loads of finishing to do and I’ll still need to sort out some pretty bit dips and holes on the none drive side – then a second load of sanding. Smaller rope / string will get a much cleaner join early on. Also the instructions recommend doing all the joints in one hit, mixing up over a ltr of epoxy for this. This means I had to rush through the joints to get them wrapped up and secure be for the epoxy started to set. If I build another I’d experiment more with a bit of fiberglass first maybe.
Also thinking I may add dried coffee granules along with my orriginal bamboo sawdust to my filler mix to bulk it out! Mainly because I don’t want to use any of the sawdust I’m making as it has epoxy already in it, but also because it’ll give it a darker look.
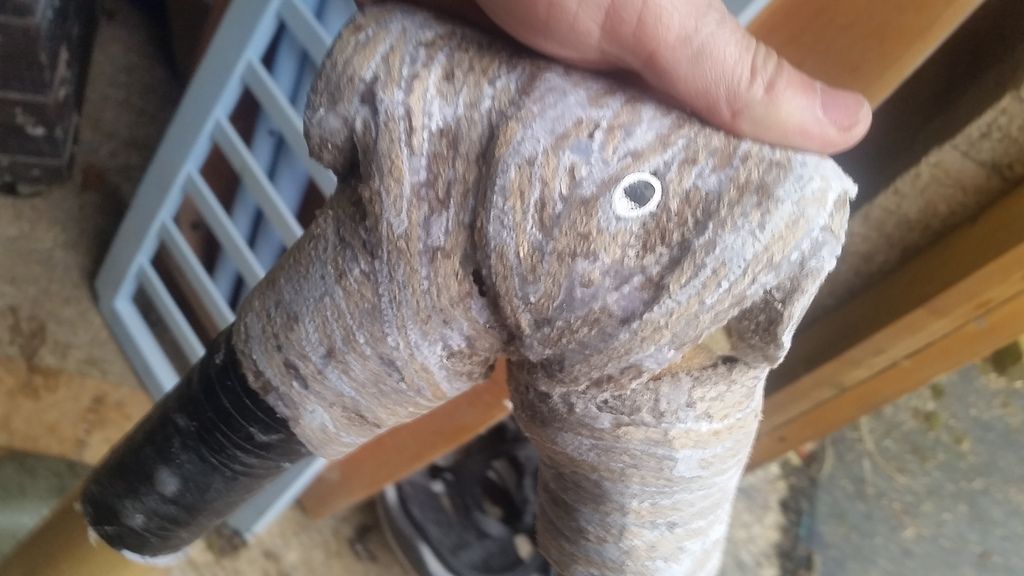
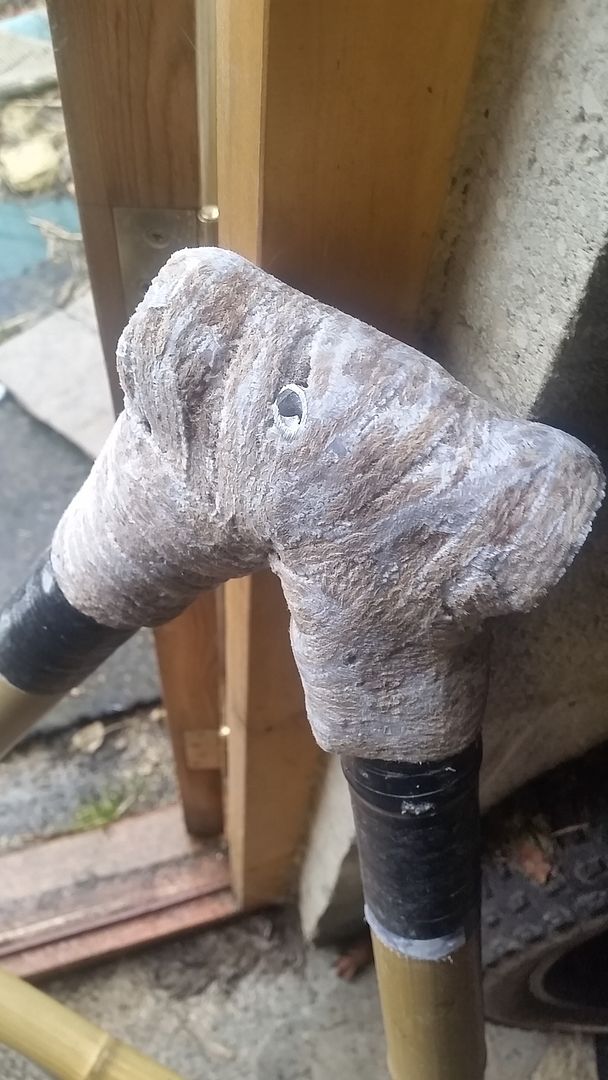
monkeyboyjcFull MemberPosted 8 years agoHere’s some pics of where I am now.
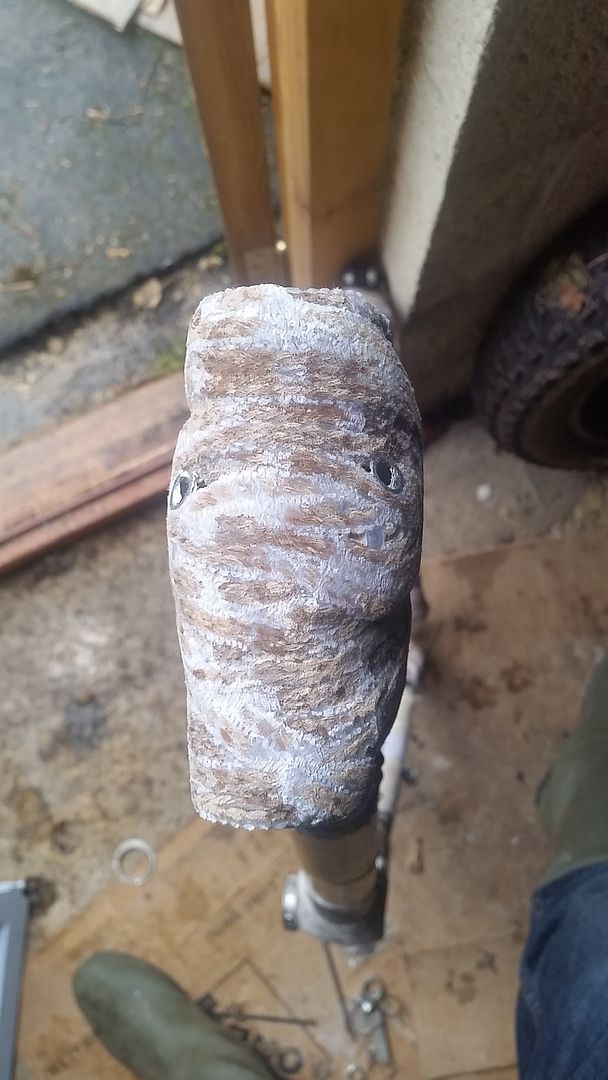
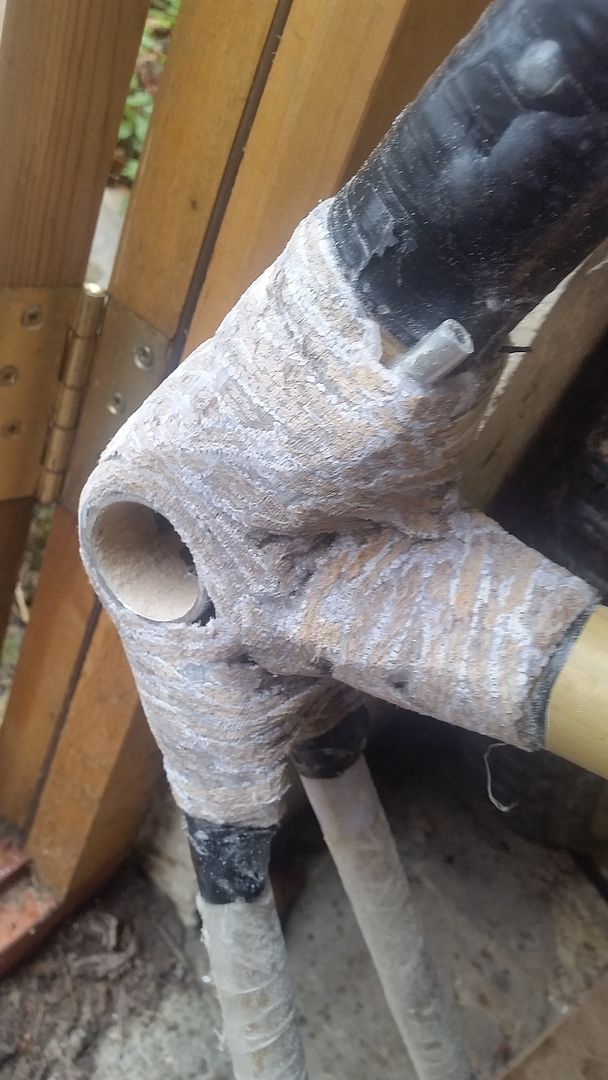
You can see how uneven the wrap was on the none drive side of the headtube. This will need another wrap of hemp to keep the strength. Which means I’m having to sand evtra channels into the drive side to maintain the new fibre lengths around the headtube.
 monkeyboyjcFull MemberPosted 8 years ago
Here’s what the BB joint looks like at the mo…
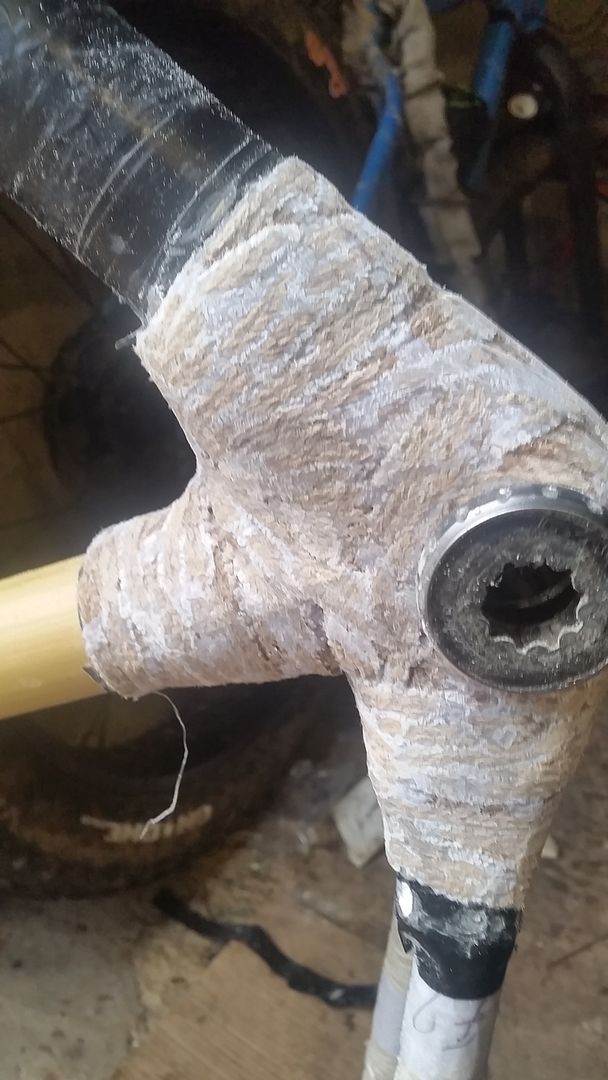
The BB is in just to help keep the threads clean
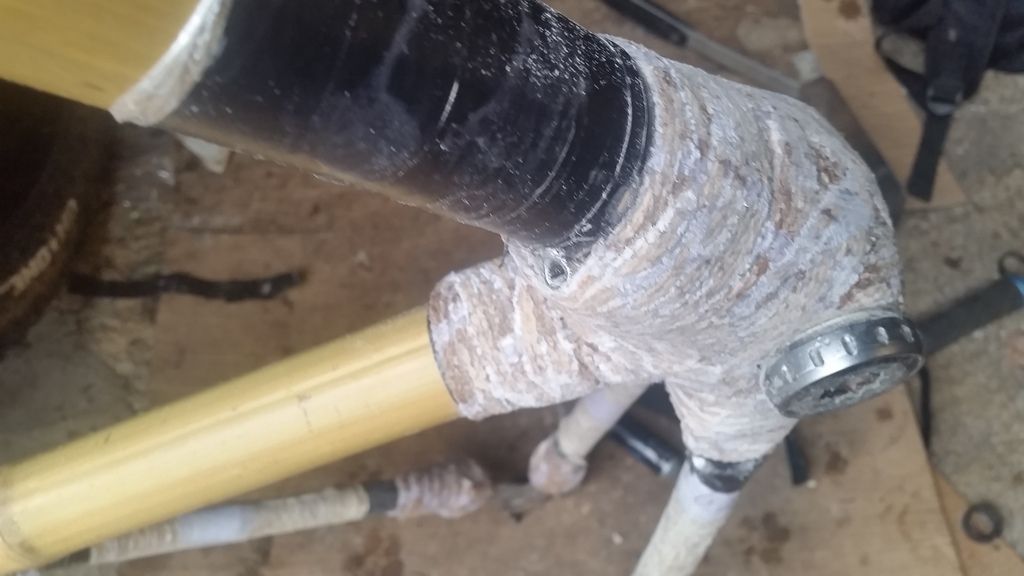
And here’s the non drive side now…
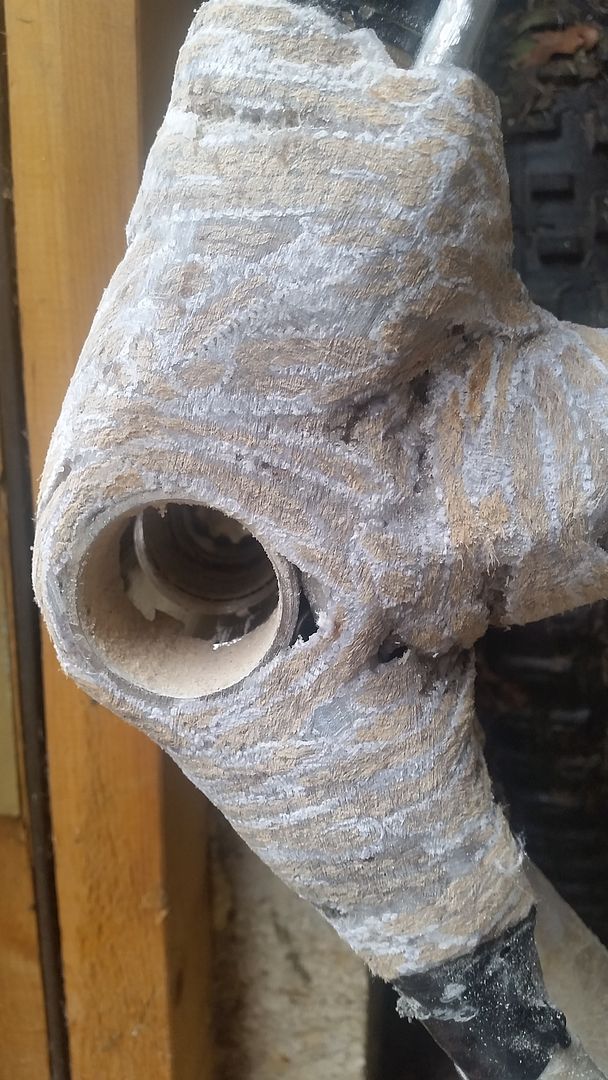
You can really see how the large hemp rope causes big areas of epoxy to form which won’t give the best strength.
 bikebouyFree MemberPosted 8 years ago
I guess if you sand that too far down you’ll loose the strength.. So how do you know when to stop sanding?
Clearly you’ll end up with a bumpy finish at best rather than smooth.. ?
monkeyboyjcFull MemberPosted 8 years agohow do you know when to stop sanding?
Guess work – but if I go too far i’ll be doing a second wrap with smaller hemp string in those areas anyway so the joint will be strengthened back up.
Most home built bamboo bikes use either carbon tow or hemp fibre tow. I’d like to experiment with different joints if I were doing another build. The reletivltly thick hemp and cotton mix supplied with the kit is ok, but dosent give the best or easiest finish.
Clearly you’ll end up with a bumpy finish at best
Pictures don’t do it justice – I’m only 1/2 way through and they should end up like this but with a more structured/stripy look:
bikebouyFree MemberPosted 8 years agoAh ha, then thats pretty cool I have to say.
I’m still intrigued buy the strength around the joints, but it’s looking good have to say.
honourablegeorgeFull MemberPosted 8 years agoYou’ve got a LOT of sanding to do, judging by that pic. Can#t say I’d want one, but I’m interested to see how it goes.
monkeyboyjcFull MemberPosted 8 years agoYou’ve got a LOT of sanding to do, judging by that pic.
That’s where one of these comes in handy 😉
[
TBH to get the BB area to that point has taken less than an hour with 40 grit (and I’ve gone through about 5 belts) – considering how out of place the rope was its not that bad. I must had had to sand it back by around 10mm or so in the BB area.
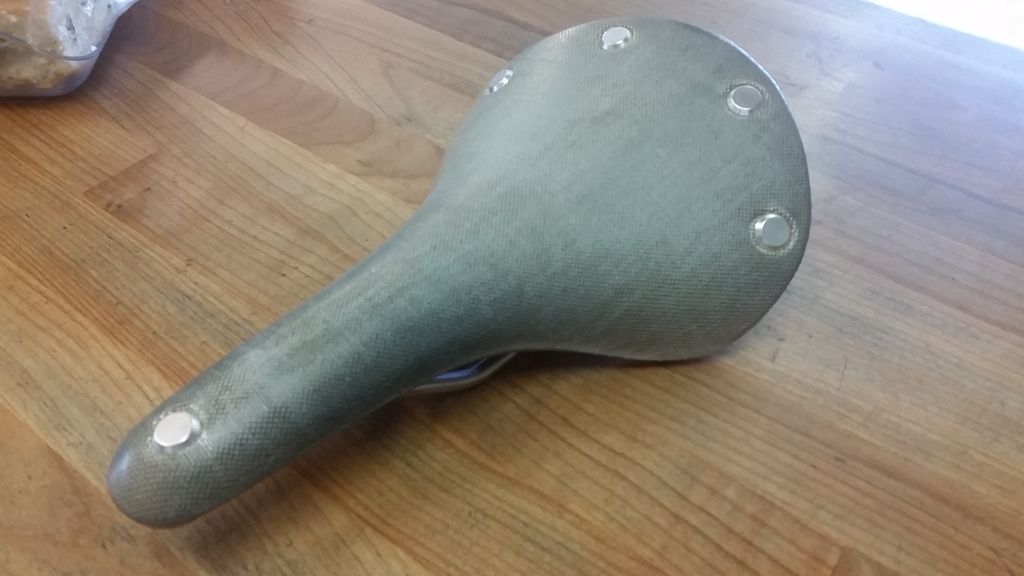
Also just had this turn up in the post:
 cookeaaFull MemberPosted 8 years ago
Since your first post I have been getting all bamboo geeky, not sure I want to buy the same kit you have now, I am fancying sourcing stuff for myself, either ‘Tonkin’ or ‘Moso’ bamboo, joints smoothed off with fibreglass, with some strategically placed UD carbon tape wrapped over with carbon tow, and compress it all using heat shrink tape (no vac bagging kit).
I might look at cheating a bit and using prefabed carbon for the seat and head tubes…
There are some more eco-friendly epoxies available now too…
Biggest issue though will be making a jig first…
monkeyboyjcFull MemberPosted 8 years agoI was going to go down the full on carbon route – but this is a relatively cheap and easy way of ‘giving it a go’ first.
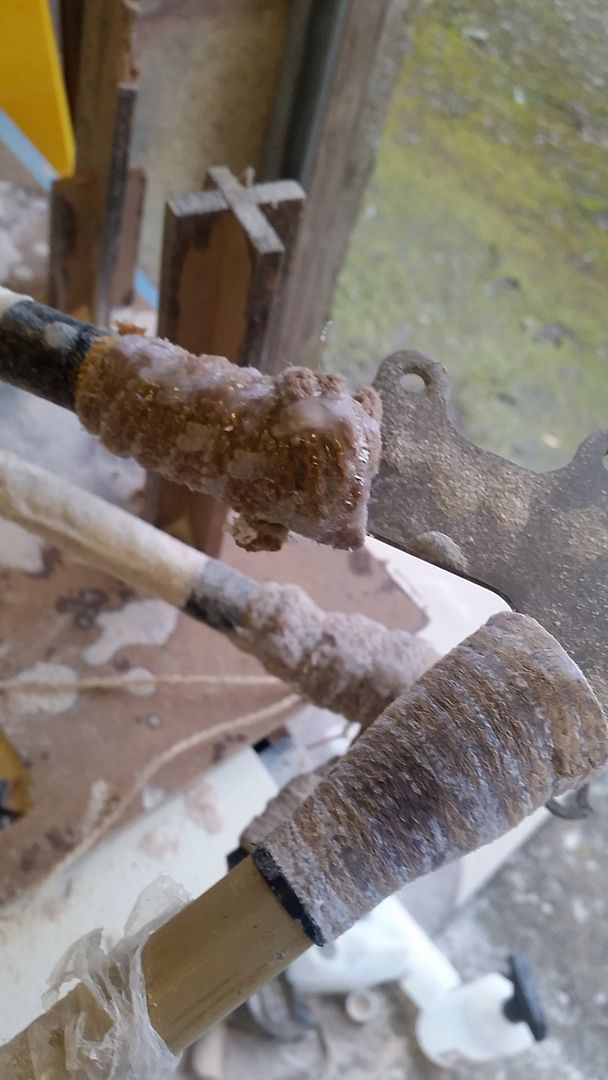
If you go straight into buying carbon tubes etc it could be one expensive F up.monkeyboyjcFull MemberPosted 8 years agoHere’s quite a good pic of the dropouts – the chain stay drop out has had about 10mins work with the sander and 40 grit belt – seat stay is untouched.
 WooksterFull MemberPosted 8 years ago
Looking good mate that chain stay has cleaned up beautifully.
monkeyboyjcFull MemberPosted 8 years agoStarting to look a little more ‘frame like’ – just cleaning it up today before s second wrap of hemp and a fill of the holes and low spots (more epoxy).
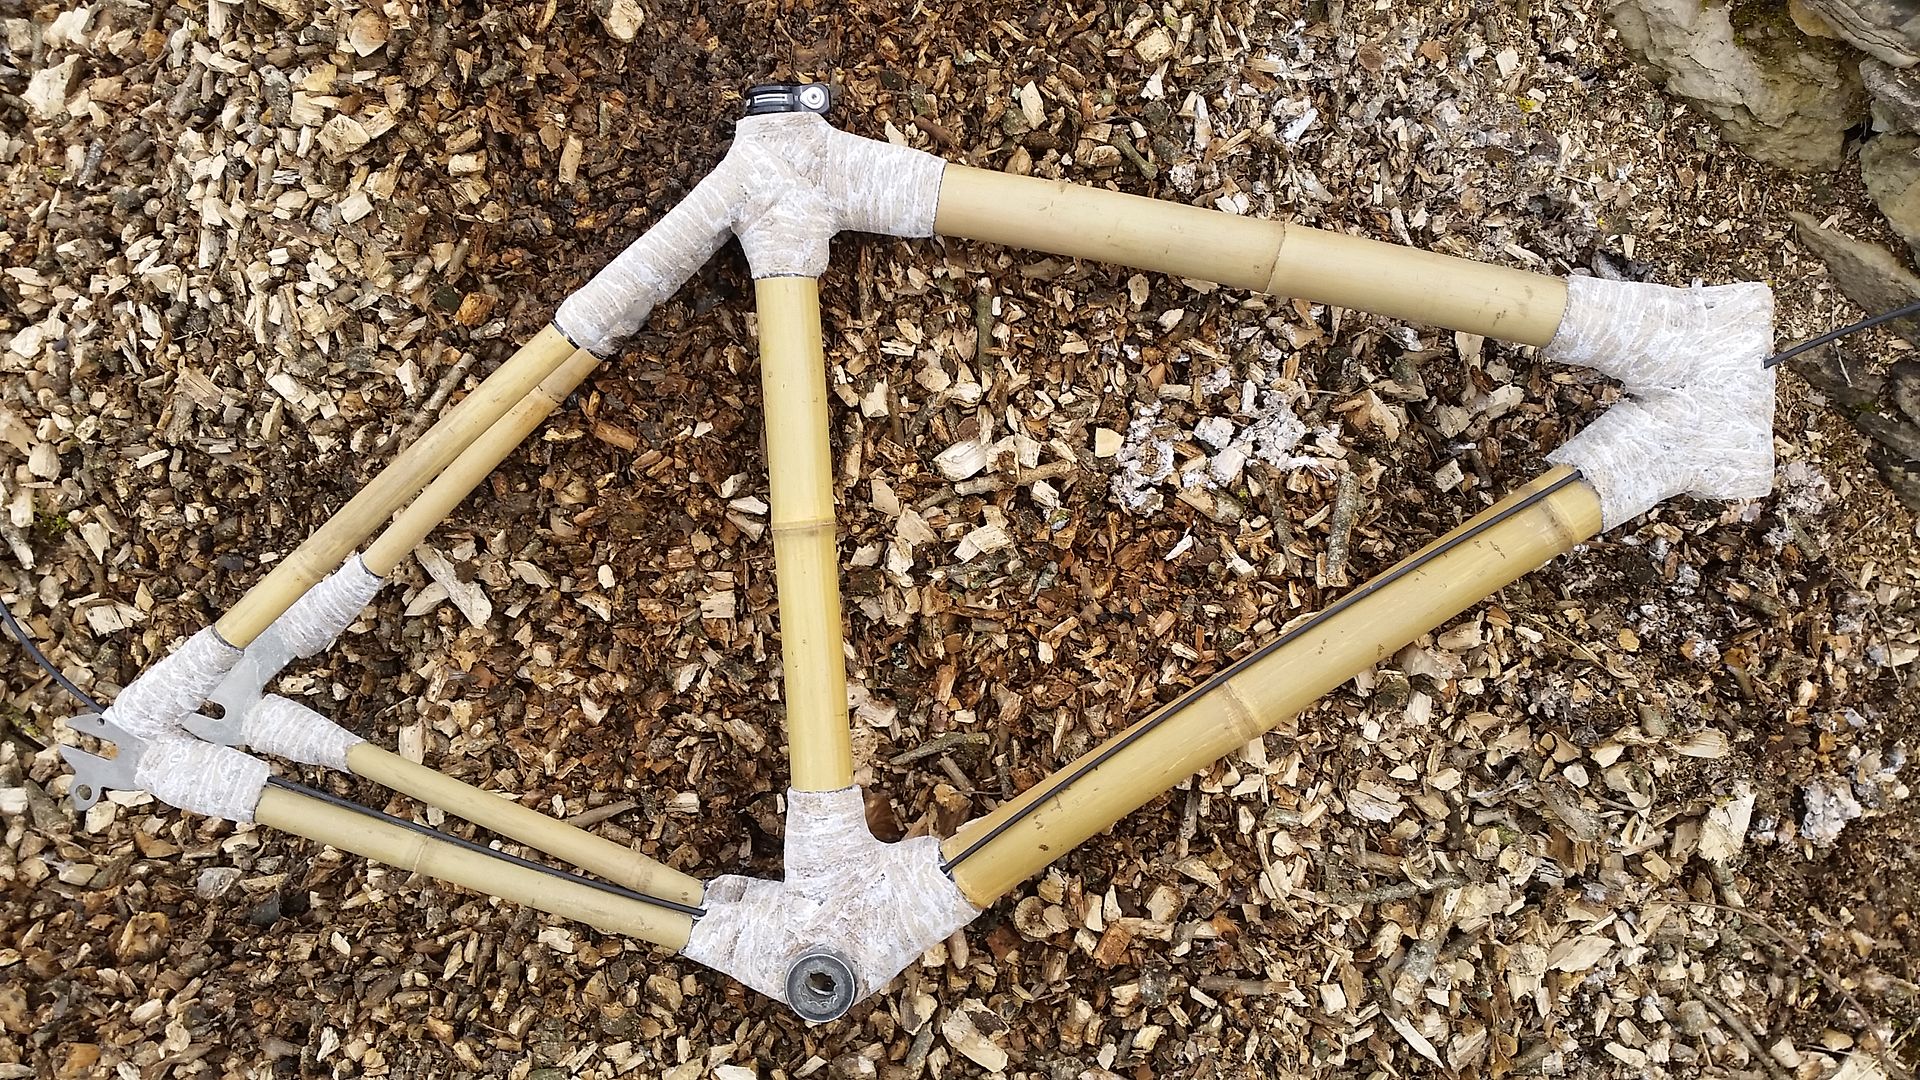
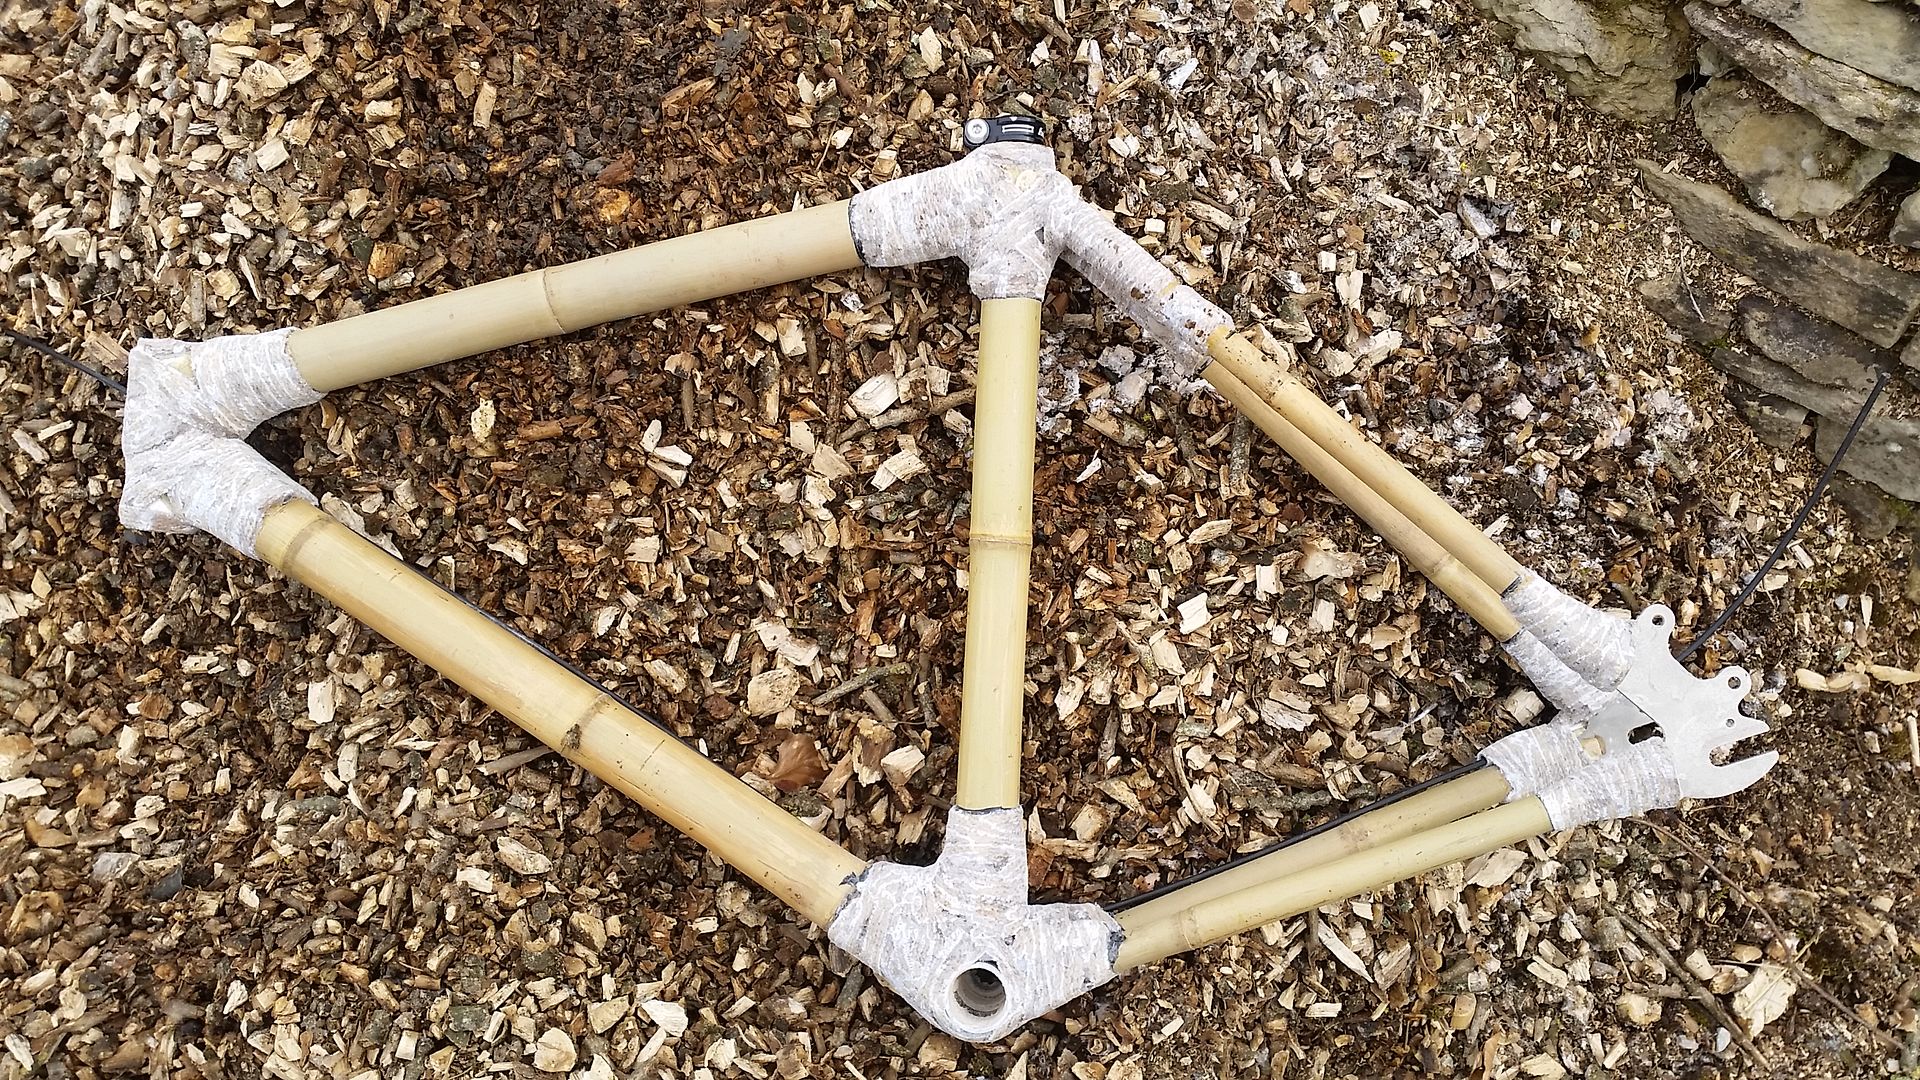
I stuck the gear cable in to work out my cable routing and if ill need any additional guides. I think I’ll end up with a crossover over the top of the down tube and use the bottle cage bolts (yet to be fitted).bikeytomFree MemberPosted 8 years agoThis is seriously impressive, cant wait to see the finished article built up!
singlespeedstuFull MemberPosted 8 years agoThat’s starting to look really good.
Can’t wait to see it when it’s finished.
Suppose it’s one of those things you can just keep going and going with the finish and need to know when to stop. 🙂monkeyboyjcFull MemberPosted 8 years agoThere’s a fair bit to go yet – I could just build it up now and ride it I guess but id like to get it as nice as I can first.
I need to get hold of a 130mm disc rear wheel next just to check the alignment is ok on the back end – if it’s out, i’d rather take the rear end apart now than after more work. I will try to get the headtube area rewrapped with 1mm hemp twine in the low spots this week – I’ve sanded back additional material on the drive side to accommodate the extra material I’m just waiting on the hemp to turn up in the post. I’ll also try to compress the second wrap with electrical tape to try to get as smooth and tight a finning as possible (less sanding and a stronger joint).
If/when I build another i’ll use my own joint material, as I said in earlier posts the stuff in the kit is ok, but If your sanding it back it’s way too thick.
Skankin_giantFree MemberPosted 8 years agoThis looks amazing, I would love to give it ago but my wife doesn’t trust me…..
Will watch this to see how you get on, really looking forward to the results.
Cheers, Steve
monkeyboyjcFull MemberPosted 8 years agoJust bought a set of these Vision hubs for a bargain price in the Planet X sale – just need to fined some suitable rims.
The topic ‘New bike day – just need to build it….’ is closed to new replies.
 [
[