I live in a wooden bungalow on brick pillars.
It's all a bit wobbly, so I'm doing some major repairs which include building a brick plinth wall around the outside to support it.
However, digging the footings for the new wall is undermining the existing pillars, which aren't too solid to begin with.
As if that wasn't bad enough, there were two tree stumps right where I want to build the wall.
I pulled them out today.
The first stump
[img]  [/img]
Knocking the ground anchor pins in.
[img]  [/img]
Trewhella winch set up and ready to go.
[img]  [/img]
Whoops, looks like the pillars coming with it.
[img]  [/img]
A bit of temporary shoring and we're ready to carry on.
[img]  [/img]
Out comes the stump and pillar in one lump.
[img]  [/img]
The other one was a safe distance from the pillar and far less exciting.
[img]  [/img]
"I'm sat in a pile of rubble and broken wood as my house has just fallen down. Just thought I should post this. lol." @myhouseisdead
Belt'n braces stuff...love it!
Was going to comment on the state of the garden, but don't know where to start...although the bike tyres look a bit big 😉
I live in a wooden bungalow
Your mother obviously never told you the story of the Three Little Pigs.
I'll huff, and I'll puff, and I'll blow your house in.
That's next weeks MTG's photochallenge sorted then....
.... "Take a photo of your bike in front of your blue wooden house"
[img] 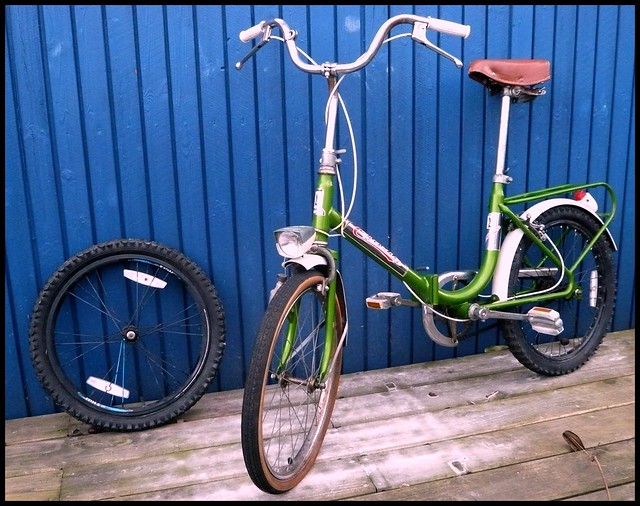 [/img]
The front (nor back) of ours hasn't fallen down as yet though 😉
(Get brushing with some algicide on that cladding man!)
Why too many things wrong with the garden/ground/walls etc. Don't even know where to start with the traditional.
Umm, window sills need painting...
Yes, the garden is a bit of a mess at the moment isn't it ?
Do you think mowing the lawn might help ?
I think napalming the lawn might help.
I live in a [s]wooden bungalow[/s] big shed on brick pillars.
I think you're sexing up the bungalow bit I think.
[img]  [/img]
And breath and start again, might get the crow at the same time.
you got a banjo by any chance, Graham ?
😯
Mol has a banjo you can borrow if you need one to complete your 'look' you've got the rickety wicker rocking chair out front (or what was out front right)?
Pull the lot down and start again?
That would be a proper project!
Is that your permanent home?
It looks liek you put the winch in about 3 years ago to do this job and then lost interest until yesterday.
um, you might want to put some concrete in the trenches asap before the whole house collapses. especially if it starts raining.
i'm hoping hte pillars on the remainder of the house go down deper then the trench you have dug.
quality epic bodging.
MTG - there's still time to get your house nominated for Shed of the Year along with mcmoonter's pool palace.
Or you could get mcmoonter in to do the "building" work on your place....
That shed in the background looks more habitable than your 'bungalow' 😉
Looking forward to seeing the progress on the rebuilding work though, I'd love to do some quality bodging like this.
I haven't got a rocking chair, although I did have a verandah until I pulled it down to gain access to the front wall.
I'm not allowed to pull it down and start again as there are strange rules covering chalets in the Wyre Forest. I'm allowed to "clad" it with a self supporting cladding on a brick plinth, so that is what I am doing.
Yes, I live here permanently.
The pillars are all about the same. It looks a bit a bodge, but it's stood for at least 60 years like that. I don't know when it was built, probably shortly after the second world war, although I've heard that some were built shortly after the first world war.
Was there a big bad wolf seen in the vicinity of your house yesterday?
The shed should look better than the bungalow, I only built it a few weeks ago.
Half finished.
[img]  [/img]
With barge and door.
[img]  [/img]
As you can see from the pictures, it's chaos round here at the moment, there's no room to move.
Apart from the fact that the shiplap on the entrance wall of shed doesn't line up with the shiplap on the side, that shed looks ace.......well done ! 8)
That banking behind your shed could do with a bit of support! The weight of that collapsing could wipe out your lovely shed.
Ah, there's a reason for that...
The timber supplier I used doesn't stock treated shiplap, but they have got there own pressure treater, so I bought regular timber and got them to treat it.
When I collected it it was still soaking wet.
I guessed it would shrink when it dried, so I just tacked it on with a couple of nails in each length.
After a couple of weeks it had dried and all the gaps had opened up.
I pulled all the boards back off the front, slid them down to close up the gaps, and cut them all to fit round the door and gable end so I could fit the barge.
I can't get to the sides to do them yet.
The banks been like that for years and not moved. It's a lot more solid than it looks.
Is that your permanent home?
I think "permanent" is a bit optimistic.
Keep the updates coming. I love a DIY building project.
Would agree that you want to get some concrete in that trench pretty sharpish though.
Location, location ,location.
I think it all looks very interesting (A tad cold in winter? ) Keep us up to date with the progress 🙂
One of them sheds is quite nice
I love this place 😐 "I'm still paying in pints of blood to a crippling mortgage for the souless barratt box on an identikit estate in a drab new town, and lack the ability to hang a picture myself, so I must mock your abode in order to supress my profound envy."
That's some fair grubbing to get those stumps out, fair play. I'm sure you will prevail.
Apart from the fact that the shiplap on the entrance wall of shed doesn't line up with the shiplap on the side, that shed looks ace.......well done !
Blimey I actually understood that.
Poor muddypuddle - she's made of stern stuff.
Nice shed btw.
I would move into the shed, looks far nicer!
If you look closely at the shed, the boards are level at the bottom with a 30mm error at the top. Each board has shrunk by about 2mm over it's width.
Once I've moved all that stuff piled up against it, I'll slide the side boards down to match the front ones, they are only tacked on at the moment.
Anyway, I've moved on to bricklaying now.
The plan is to get the back wall finished, the trench backfilled and the concrete made good up to the wall. This will give me more room to work and unload and store materials.
The first course of blocks. These will be hidden below ground level.
[img] 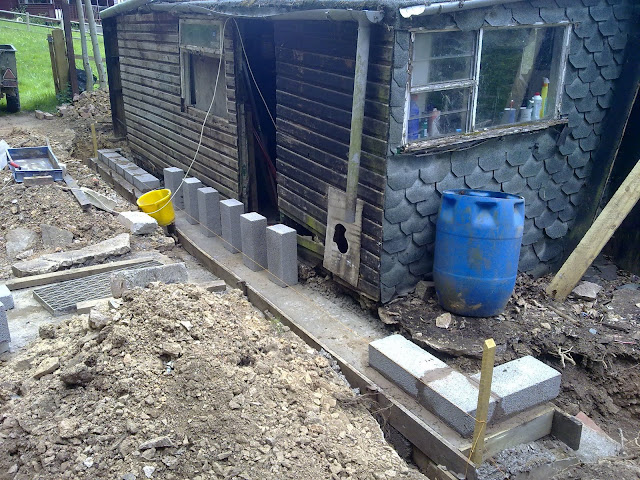 [/img]
Only three courses high at the back, enough to keep the timber wall at least 150mm off the ground.
[img]  [/img]
English bond, two courses of reds with a course of blue plinth headers and blue corners.
[img]  [/img]
I do like running water that comes through a pipe and tap, rather than through the roof
Men eh?
Must be romantic though for the odd night 🙂
MTG - will you be rennovating the actual house a bit? It does look a bit fally downy
[i]"If you look closely at the shed, the boards are level at the bottom with a 30mm error at the top. Each board has shrunk by about 2mm over it's width.
Once I've moved all that stuff piled up against it, I'll slide the side boards down to match the front ones, they are only tacked on at the moment."[/i]
Don't forget that the timber will swell back as summer turns to autumn and we get some decent rain - have seen far too many dry timber boards nailed down tight in the summer which have then decided to make a break for it in the winter once they've sucked in some moisture and expanded.
Diane, yes I'll be building what any normal person would call new walls around the existing walls, however, to meet the planning regulations, I will be calling it a "self supporting cladding".
Tony, yes, I've heard of that happening too. The boards really were soaking wet when I collected them. I butted the front ones up tight a few weeks ago and nailed them after they had dried out a bit. I just had a look now after we've had a couple of weeks of hot, mostly dry weather and they have got slight gaps between them again. I think I've hit the happy medium.
Each board has shrunk by about 2mm over it's width.
Once I've moved all that stuff piled up against it, I'll slide the side boards down to match the front ones
Despite my leg-pulling, based on the fact that I couldn't find anything else wrong with it, I really wouldn't worry about about a 2mm shrinkage in the shiplap - that's the point of shiplap, it can shrink without affecting its performance. And its a bleedin' shed ffs......your house needs more sorting out !
Although if ever you build another simular shed you might consider putting vertical battens on the corners - it will take the eye away from any possible misalignment, and cap the end-grain and any potential gaps caused by the shiplap's profile - I can't see from the pic any detail or how it's turned out.
That would have looked tidier wouldn't it.
One day, when I'm not so busy, I might go back and trim 25mm off the ends of the front boards with a tenon saw and put a strip of 25x15 vertically up each corner.
My first attempt at bricklaying.
[img]  [/img]
They only had 15 plinth bricks in stock, I'll finish that course when I get the rest.
Priority now is to get the front pillars shored up before we get any significant rain.
[img]  [/img]
Once I've got them secure, I'll start on the sides.
[img]  [/img]
[img]  [/img]
Re the wall picture, I jiggled the dimensions a bit and made the wall 8090mm long so it works out as whole bricks with no cuts.
While I was bricklaying, MuddyPuddle was working on the spoil heap, backfilling the trench with the soil and putting the stones on the track.
I've now got part of my track covered in natural Worcestershire sandstone that looks like it would cost £150 a tonne from a garden centre. 😀
All is safe now, or it will be by the morning when the concrete has fully set.
The shuttering.
[img]  [/img]
The trench was a bit deeper at this end, which meant the sides of the shuttering were steeper so the concrete started to slump. I had to shutter the top as I went to keep it in.
[img]  [/img]
All four buttresses in place. The pillar at this end came out with the stump. The corner of the building is currently cantilevered off the next two pillars.
[img]  [/img]
The buttresses are not just relying on mass, they go the full width of the trench to brace against the hard packed stony clay the other side.
I wish I could get away with those foundations on my extension, to meet building regs I have to go down 2.5 metres for a singlestory 🙁
Good luck with the project.
Keep posting with pics, this is great stuff.
Thanks
Do you live in a swamp ?
There's only about 200 - 300mm of top soil here, below that is dense, hard packed clay with more and more 25 - 150mm stones in it the deeper you go.
Do I live in a swamp, no, I live in civilisation & they want things to last 😉
