
MegaSack DRAW - This year's winner is user - rgwb
We will be in touch
Had a productive couple of hours today, with the help of my Dad (got to give him a project whenever they come up to visit), turning this:
[URL= http://i914.photobucket.com/albums/ac342/Proutster/IMG_0408_zps1225d064.jp g" target="_blank"> http://i914.photobucket.com/albums/ac342/Proutster/IMG_0408_zps1225d064.jp g"/> [/IMG][/URL]
Into this:
[URL= http://i914.photobucket.com/albums/ac342/Proutster/IMG_0409_zps2a4c1e21.jp g" target="_blank"> http://i914.photobucket.com/albums/ac342/Proutster/IMG_0409_zps2a4c1e21.jp g"/> [/IMG][/URL]
Just got to trim a few of the coach-bolts and add the shelf at the bottom. Total material cost = just over £61 and I've got half of the bag of 50 coach-bolts left over!
Apologies to the STW Vice-istas but it's a "no name Chinese vice" that only cost me £31 on E-Bay, have to admit it's slightly larger than I expected but it all works smoothly and will do the job.
Now to start on the wiring for the lights and sockets.....
Is the bench secured to the wall in some way? It's quite tall compared to depth. Mine is like that but designed it that way (max floor space) and have fastened it to the wall.
It is great to build your own bench.
Looks very weak compared to the vice.....
Rate my Workbench!
Nah!, I'd best not for the sake of forum etiquette 😉
Grass needs work...
Looks very weak compared to the vice.....
Looks mighty strong compared to the hinges.
I hope you're not keeping owt of value in there?
Chinese vice from Ebay?? Nah, I reckon the bench is stronger TBF. 🙂
Good effort mate.
😆 😀
Good idea about fixing to the wall, was going to fix to the floor only but will now fix to the wall as well.
There will be external hinges (fixed through with coach bolts) fitted too before anything valuable gets in there. That's in addition to the full, wired, alarm....
Needs a brown stain on the floor and spaff on the walls.
Why don't you advertise to thieves?
Quick look on here and we know about the hinges, shed shackle, the halfords tool box you got on offer...
Haven't looked further to see what bikes you have to steal.
backinireland - Member
Why don't you advertise to thieves?Quick look on here and we know about the hinges, shed shackle, the halfords tool box you got on offer...
Haven't looked further to see what bikes you have to steal.
Is it on StreetView though? 😉
backinireland
Ah, but I've got my eye on your wooden wheelbarrow and your Landrover 😉
Why did you put your tools in the Sauna?
You got Halfords tool boxes that weren't crushed on the pallet before delivery? Even their display ones were damaged. what were you saying? Something about a bench..
Needs a solid wood top some triangulation and fixed to floor/wall.
Yeah, looks good but I'd have thought some triangulation would be a good idea.
Oh, and that vice is a monster (for the size of the bench!)....!
Ta everyone!
Right then, triangulation at the back and wall/floor fixing it is. Oh, and the shelf.
The worktop's easily replaceable, so if it shows signs of weakening etc. then I'll replace with solid wood.
I wouldn't worry too much about strength, if it is like any other workbench it will be covered in crap for 99% of its life so wont be used as a workbench much 😉
If it's not flush against the wall (hard to tell from pic) consider an upstand or baton or something across the back. So when it's got a shelf full of boxes of crap and you drop a small bolt it doesn't roll off the back and down behind it never to be seen again.
it needs to look a bit more 'lived in' 😉
[URL= http://i239.photobucket.com/albums/ff167/LukeBurstow/001_zps418c3940.jp g" target="_blank"> http://i239.photobucket.com/albums/ff167/LukeBurstow/001_zps418c3940.jp g"/> [/IMG][/URL]
What timber did you use and where did you get it from? Trying to make one myself but cannot seem to find decent timber online from somewhere close by.
Nice work too. 7/10 if it's you're a beginner to these things.
"Trying to make one myself but cannot seem to find decent timber online from somewhere close by."
stop trying to buy wood online then
wood is one of those old fashioned things taht you really want to get on the phone and speak to someone about - you also want to be collecting your self or as a ordinary punter you have a high risk of getting the warped pish that no tradesman would accept on their job.
[img]  [/img]
my first home brew bench .....which morphed into below with some scraps a damaged pack of laminate flooring and some old decking i rescued from a friends.
[img]  [/img]
and before we knew it - a twin was born.... as once the pillar drill and bench grinder were mounted on the first one there wasnt much room.
[img]  [/img]
dont you fancy a mid shelf under there ? i think youll find you waste alot of space or end up moving stuff loads when you drop a small bit.....
Legs were 3" x 3" fence posts (2 @ 2.4 metres) and braces were 3" x 2" CLS (3 @ 2.4 metres).
Got it, and the worktop offcut, all from Savoy Timber in Wigan - total wood cost was £39.29. It's cheap in Wigan!
Miss Proutster did piss on my chips by pointing out that I'd spent £20 on fuel getting there though 😥
If it's not flush against the wall (hard to tell from pic) consider an upstand or baton or something across the back. So when it's got a shelf full of boxes of crap and you drop a small bolt it doesn't roll off the back and down behind it never to be seen again.
Great advice, and something that's been on my to-do list for the past couple of years 😳
wwaswas, your workbench is just like mine 😉 I bet you know exactly where every last nut and bolt is too.
Its weird how the scruffy it gets, the easier it is to find things..
Finally took a picture of mine - all stuff scrounged where possible (friends and Freecycle). I did buy the magnet strips and workbench itself (a cheap offer from Lidl at £60 for all of it, supplemented with bracing made from chipboard flooring panels (also used to create the backboard).
[img]  [/img]
Got it, and the worktop offcut, all from Savoy Timber in Wigan - total wood cost was £39.29. It's cheap in Wigan!
Cheaper than Berrys in Leyland (which is where I normally go)?
Thanks for the tip, I'm planning out my own workbench now and Savoy Timber is nice and close.
Feel free to critique my benches, mostly made from what was to hand or freely/cheaply available.
Recent addition is the extention to the main bench with some 2x4 and an Ikea Pax wardrobe side panel (from the scrap pile) for the top. Nice wipe clean and easily replaced. Main section where the vice is bolted has some serious timber underneath (section of base from a shipping crate for machinery). Rear upstands are the bases from an old set of drawers.
[img] 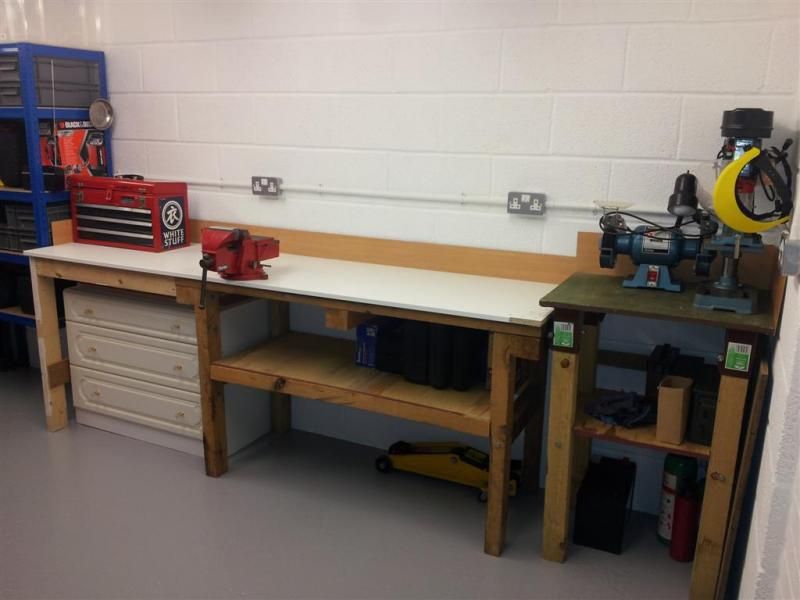 [/img]
ourmaninthenorth
Got it, and the worktop offcut, all from Savoy Timber in Wigan - total wood cost was £39.29. It's cheap in Wigan!
Cheaper than Berrys in Leyland (which is where I normally go)?
No idea, it took all of my bravery to venture up to Wigan from leafy South Manchester 😉
Good effort OP
Here's mine
[img][URL= http://i924.photobucket.com/albums/ad88/RichMTB77/20141108_184010_zps89e4a5d5.jp g" target="_blank"> http://i924.photobucket.com/albums/ad88/RichMTB77/20141108_184010_zps89e4a5d5.jp g"/> [/IMG][/URL][/img]
With tool board
[URL= http://i924.photobucket.com/albums/ad88/RichMTB77/20141116_203413_zps8a782d74.jp g" target="_blank"> http://i924.photobucket.com/albums/ad88/RichMTB77/20141116_203413_zps8a782d74.jp g"/> [/IMG][/URL]
Frame is 2x4s with 4x4 fence posts for legs, top is inch thick CLS
I still need to fit a vice (i'll re-enforce the area underneath the vice with the offcut CLS I have left over) and make a shelf across the leg braces but I'm pretty happy with it for a days work
I can see a picture of my work bench is in order 🙂
3 metres wide, 1 metre deep, top made of 6mm steel plate welded to a frame made of 10x10cm 5mm steel box section, all rawl-bolted to a concrete floor.
Maybe tomorrow if I am down the "shed"
That looks good richmtb, really like the CLS as the worktop.
Seems like we used the same plans - wikihow by any chance?
Seems like we used the same plans - wikihow by any chance?
Yeah I think so. I was going to use kitchen worktop for the bench top but I wanted something a little bit deeper.
Not sure how long it will be as neat as those photos though!
Ha! Mine's already a mess because I started on fitting the wiring and trunking to the cabin last night 😳