- From: Handpresso.co.uk
- Price: £88.00 (Or £79.00 New via Ebay)
For some of us, waking up in the morning consistently includes three things.
- Open eyes and wait a moment to recall where you are
- Reach for phone
- Think about/plan/get coffee
These are not variables. They are constants of life. As regular and important as respiring.
But not every morning starts the same way. Location is often a variable and when that variable contains the value, ‘in a tent’ the third point on this list can become a source of stress. A stove, instant coffee and tepid milk are the worst things to realise are your only options when you are on your own and too far from a good latte from a chain.
Your location variable may sometimes contain the value, ‘festival’, which can often be fine, if bloody expensive. The truth is that where location = ‘tent’ the two functions of ‘Good coffee’ and ‘Cheap coffee’ rarely add up to both being true. At best you can pick one, rarely both.
That’s where this device steps up.
This is clearly a shock pump for a mountain bike. I mean, that’s obvious – just look at it. It turns out the inventor is a cyclist and myth has it that this is indeed what gave him the idea.
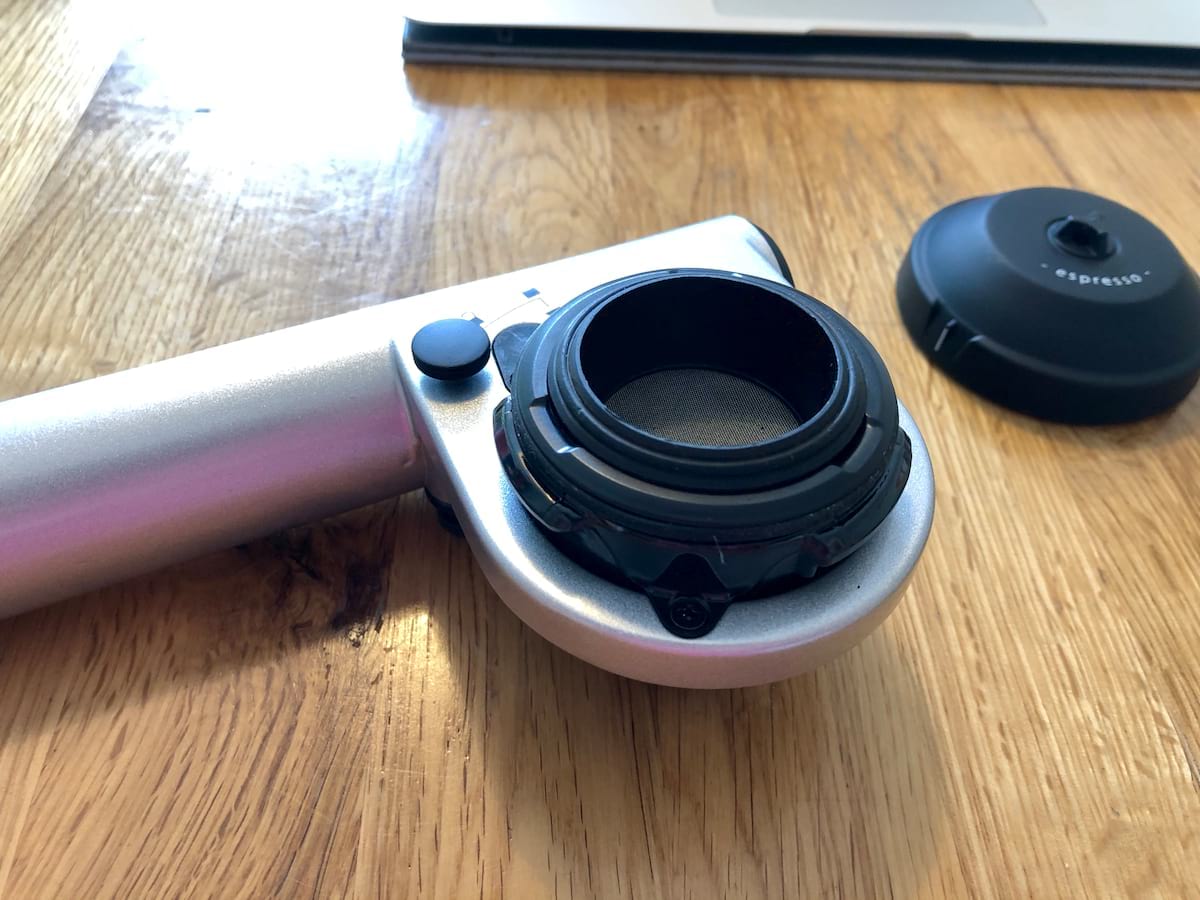
Both a French press and an espresso machine work by passing hot water through ground coffee but the reason they both taste so different is because an espresso machine uses pressure – 12 bar of pressure to be precise. Just as a shock pump is used to pressurise a shock the Handpresso charges a reservoir that is then used to force hot water through the coffee to produce an espresso.
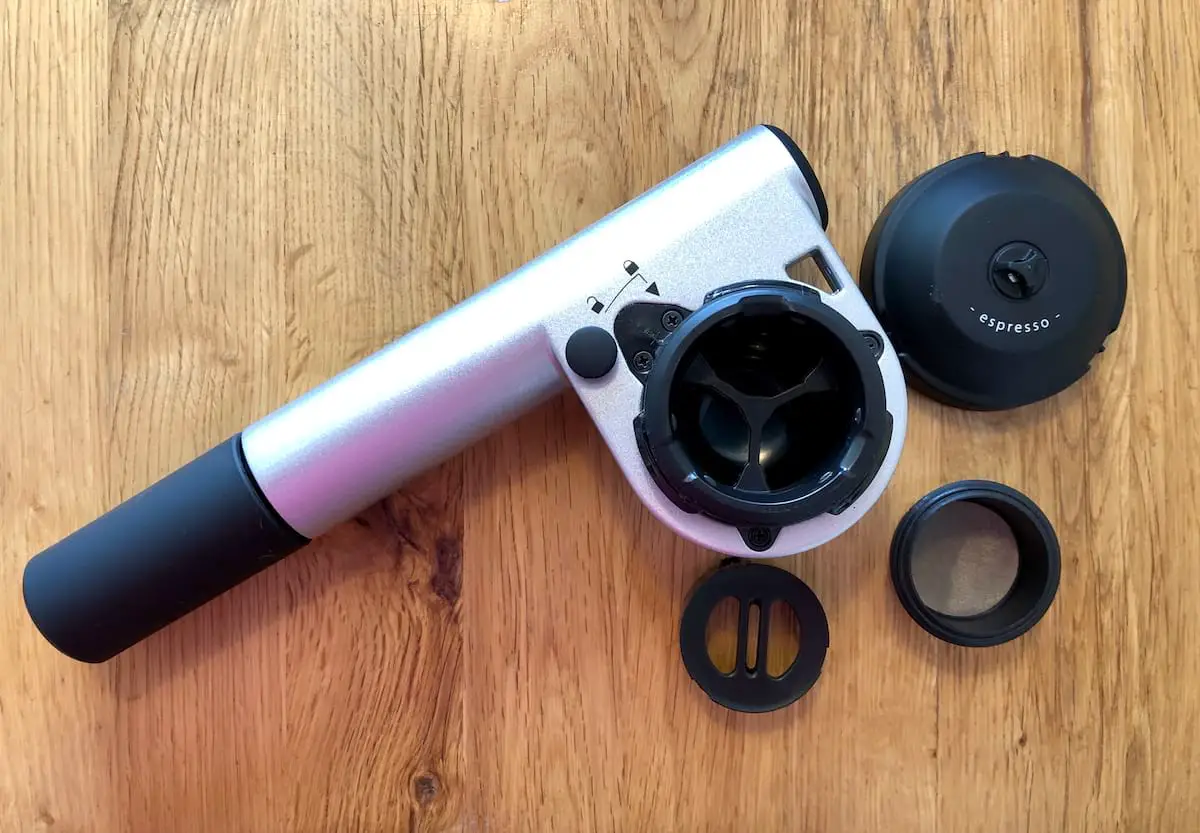
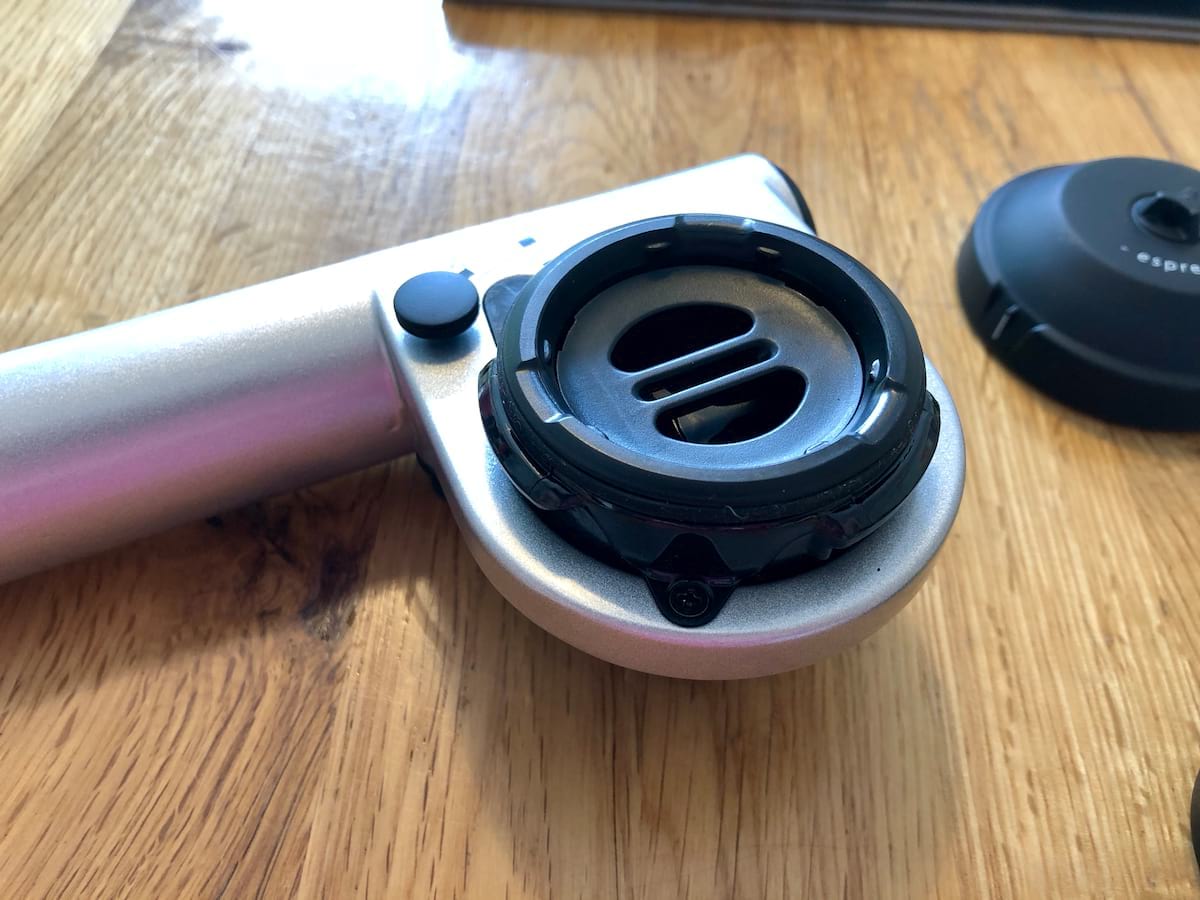
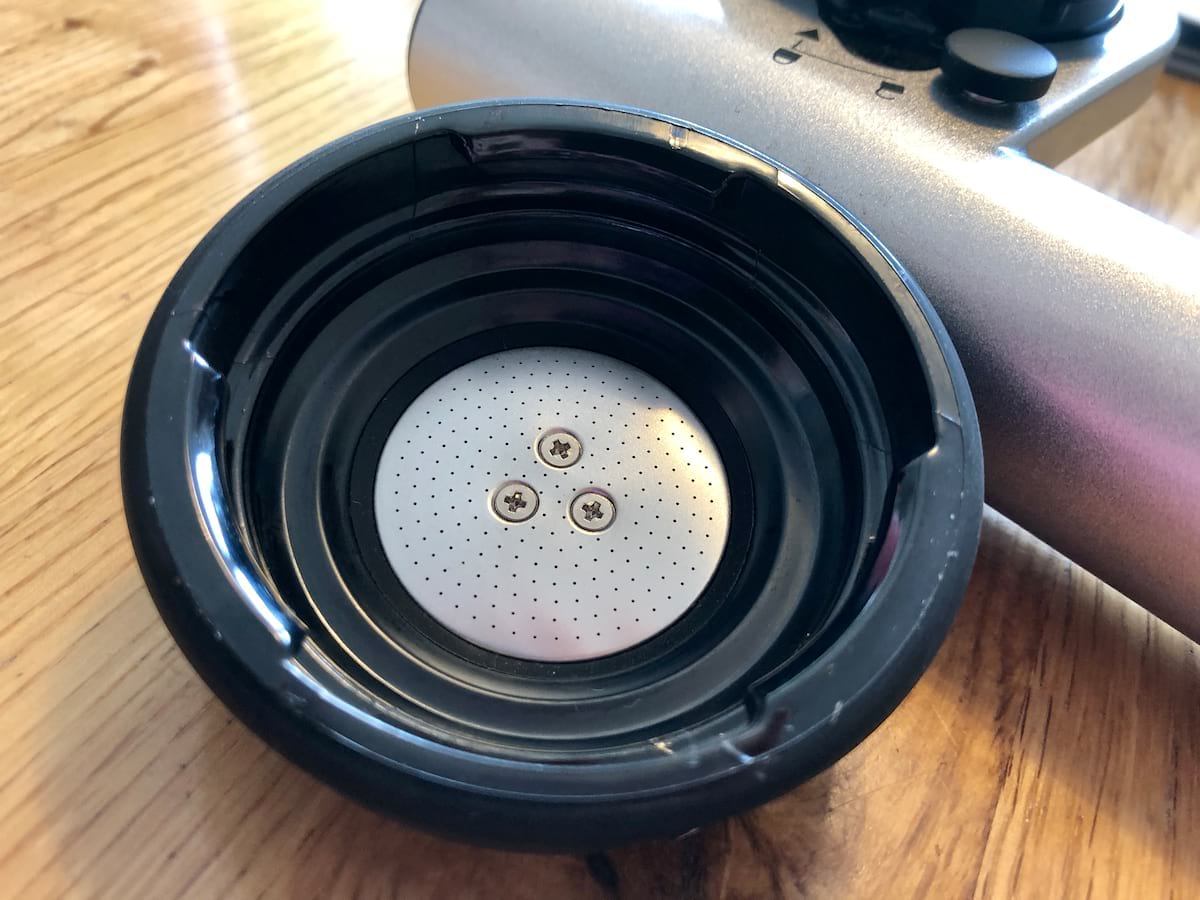
You can use pre-ground coffee, but just like with an espresso machine you will get poor results if you buy ground coffee designed for a French press. So, you can either buy good machine ready coffee like Illy or you can grind your own beans and take them with you. It’s a bit fiddly to load the coffee in the hopper and it’s a lot smaller than the hopper on your machine at home, but you can use ESE pods with the supplied adaptor if you want. I found that the pods were really easy to use and obviously a no mess option but using pre-ground coffee, while messy, got better coffee results. It depends how much of a coffee snob you are and how much mess you are willing to put up with.
Now, the device itself handles the pressure delivery side of things but you need pre heated water. My preferred camping option is to boil a small kettle on a gas stove but you can buy a matching flask with a temperature gauge on the top and take your hot water with you. Boiling from fresh is always going to get better results though.
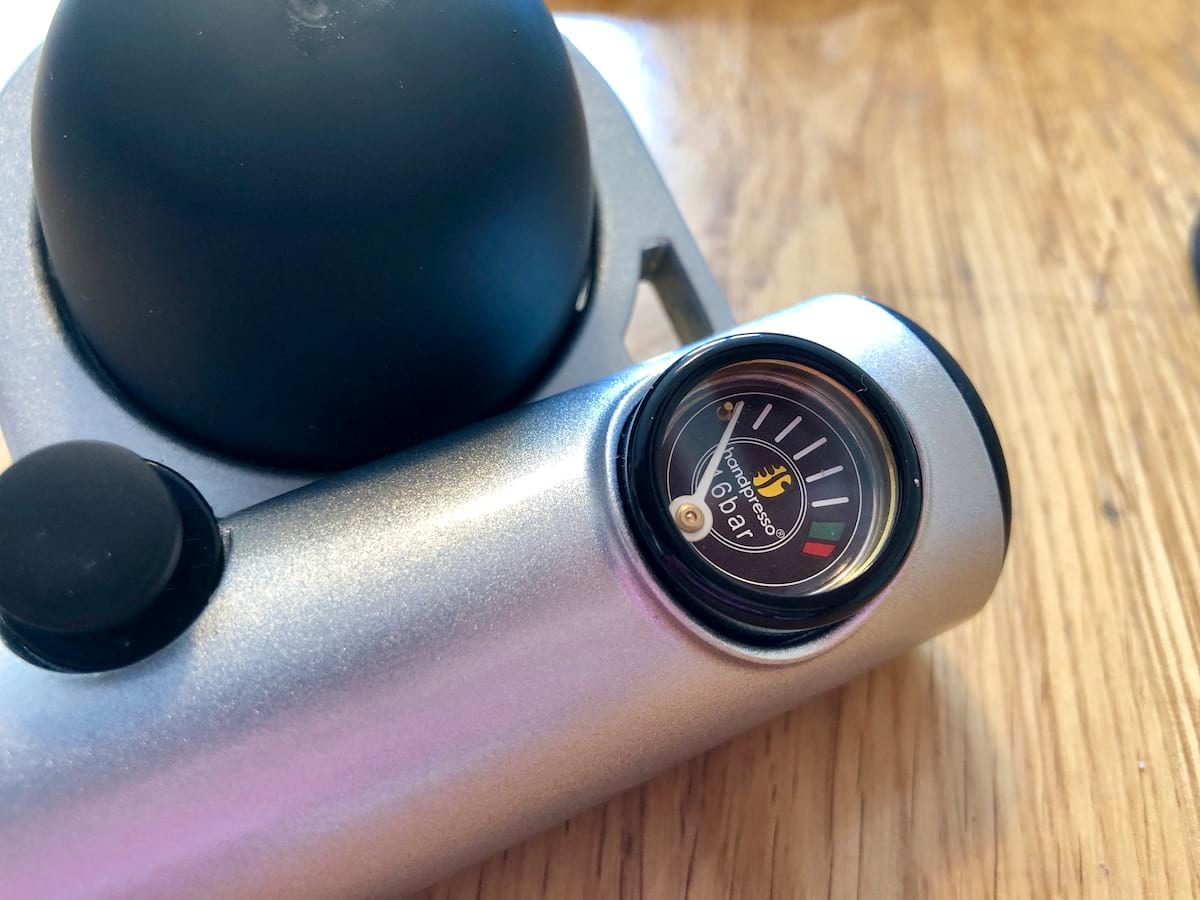
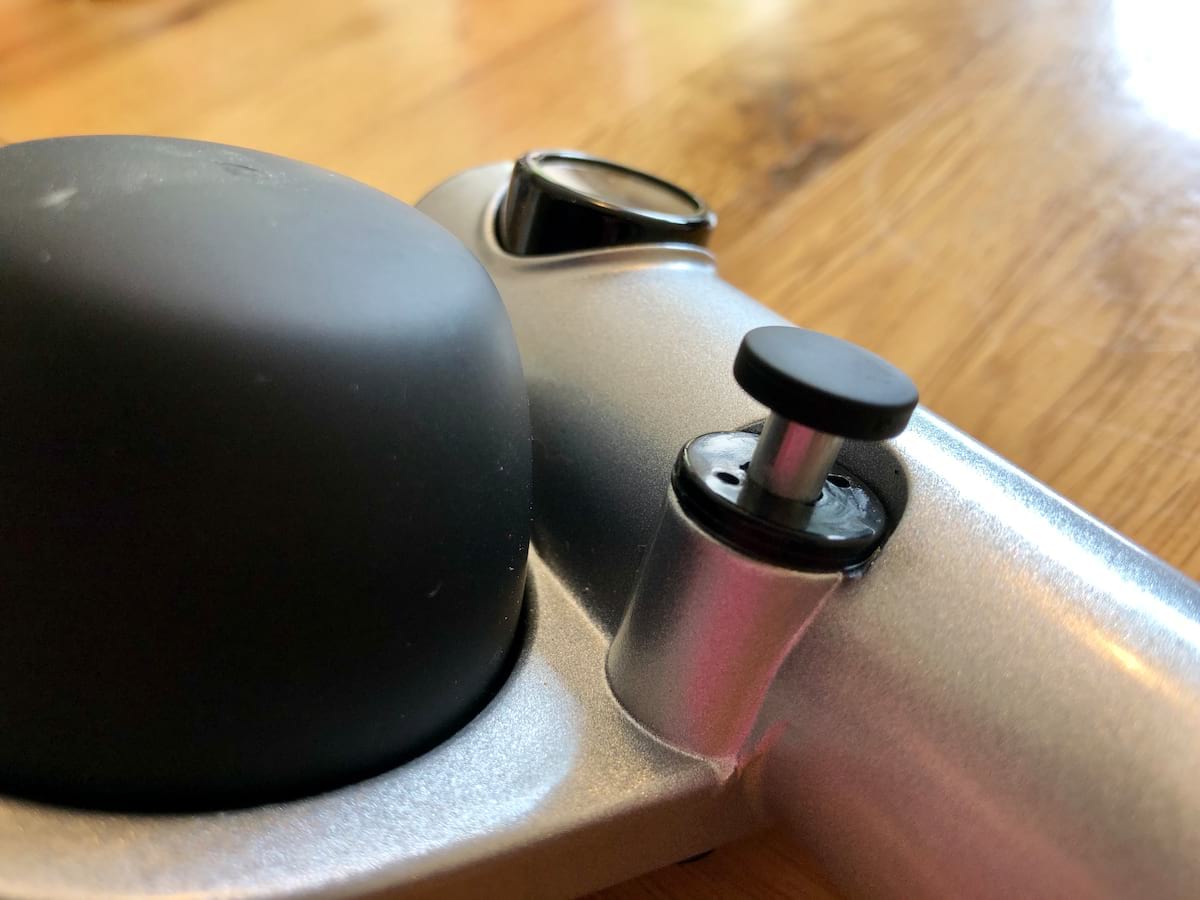
So, you load the hopper with hot water and then place the pod or hopper on top. Screw on the lid, make sure the pressure trigger is in the ready position, then turn it over and start pumping. It’s not easy storing up 12 bar or pressure and you’ll have a renewed sense of appreciation for what your home machine has to do after you’ve created a few of these camping shots. There’s a tiny gauge with a green and red zone marked on it for those with great vision. Try to avoid the red zone if you can.
If you happen to have the trigger in the wrong position you’ll quickly become aware of the fact when you start pumping. The clue will be the dribble of hot coffee in your lap as each pump blows the coffee out. Make sure the trigger is in the up position when you are looking at the gauge before pumping. Believe me, it’s an easy thing to forget and I’ve lost a few coffees and gained disapproving looks after swearing a bit too loudly. But at least the learning curve is steep.
Once you have the required 12 bar of pressure it’s time to hold the hopper over your cup and let all that compressed air do it’s magic with your coffee. After all the effort of pumping it up I have say I was disappointed at the lack of dramatic hiss that came out. For my efforts I was at least hoping for something a little more explosive but it turns out that’s not what you want for your coffee. The pressure is carefully released over a good 15 – 20 seconds and as every good Barrista knows that’s pretty much what is required for a single shot of espresso.
When all the air was gone I was pretty impressed at the look of what was in my cup. Yes, it was a single shot and mostly in the morning I need to crank it way up higher than that to jump start some life into my day, but none the less it was a good looking espresso with a reasonable crema on top.
Topped up with water from the kettle and what you get is a reasonable crack at an Americano. Certainly much nicer than anything freeze dried and definitely a lot cheaper than the pseudo gourmet coffee guy knocking out small lattes for £4 in the main arena.
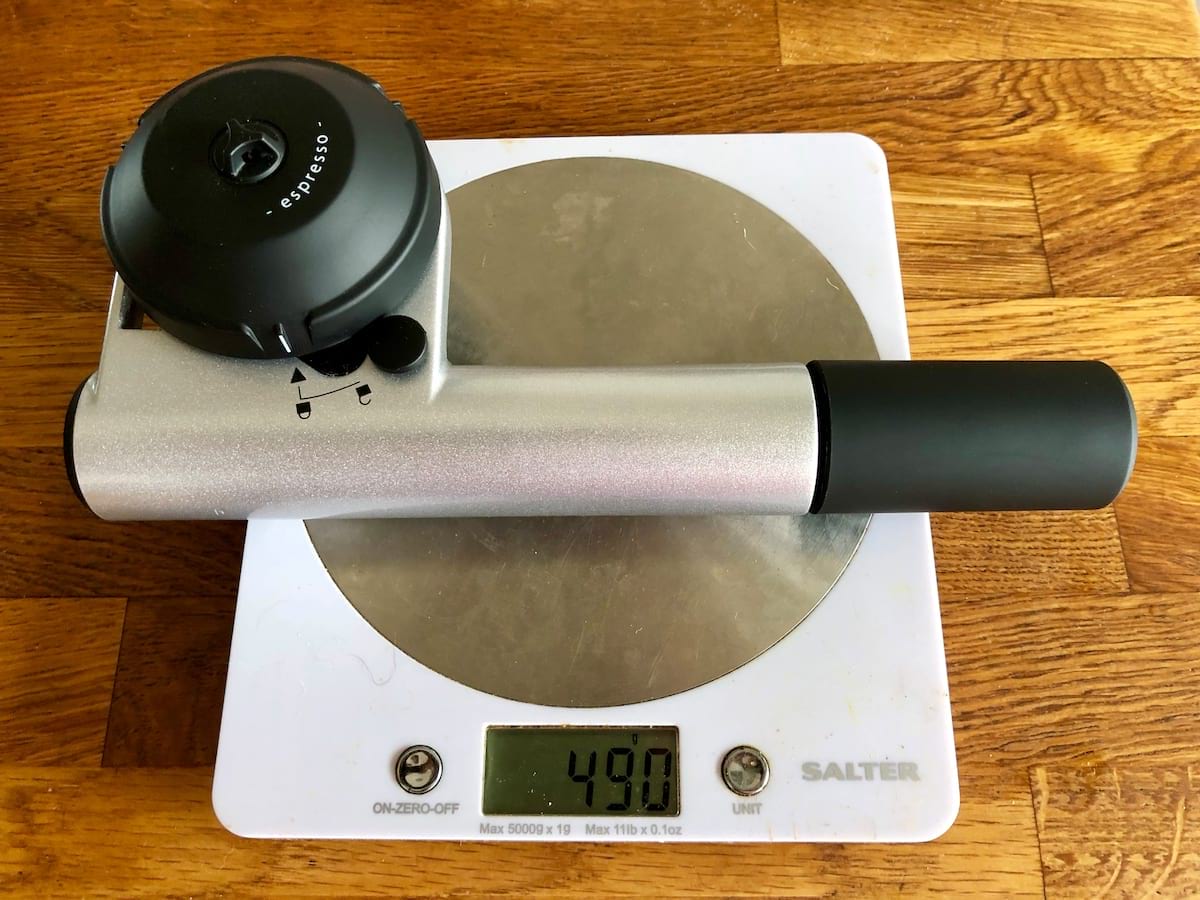
It’s a sturdy bit of kit. It’s mostly made of aluminium and where there’s plastic it’s reassuringly robust with no fragile parts. It weighs in at 490g on my scales, which is testament to it’s robustness, but it does mean that when packing even a lightweight stove and gas canister into your bike packing kit, the cost of good coffee can add a kilo to your load. If it’s car or festival camping you are prescribed this for then it’s not really an issue.
Overall
It’s not a quick process and if you don’t use pods it can be messy. But a good coffee is worth working for and if you put in the effort with good, ground coffee you will get a good brew out of this device. If you’ve got a line of people to make coffee for in a morning then be prepared to develop arms like Popeye.