I made bread (again)

I like the cow BillMC
The boss finds me even more irritating than normal when we're both working from home so I've been banished to the annexe and had to cobble together a desk out of scrap floor and worktop from doing the kitchen. I rather like it and the 2 min doofer for me stereo. Need to crack on with redecorating though! 😵🥺
[url= https://i.postimg.cc/NFqkvzGL/IMG-20201012-200256.jp g" target="_blank">https://i.postimg.cc/NFqkvzGL/IMG-20201012-200256.jp g"/> [/img][/url]
Lankysprinter
Full Member
Someone on here made crayons with their kid out of sticks and old melted crayons. Can’t for the life of me find it. Anyone able to help or have a link for a how to? It’s clearly not super complex but might be some good tips to avoid mess!
Could have been me, back in the early days of the thread.
Put a stick in a vice, drill a 1cm deep hole in the middle of one end. Drill a long hole into the other end, but make sure the holes don't join up in the middle. This is important. Mark the end with the long hole. This is also important.
I used an old pan (a crappy stainless thing that came with our bbq, supposedly for making sauces or something) with a pouring lip. Peel the labels off some crayons, put the crayons into the pan. Apply a heat gun (or a blowtorch underneath). Once the wax is liquid, pour a drop into the 1cm hole until *just* over-full. Allow to cool, then fill the other end. Allow to cool again, then get a big knife and sharpen the end that has the long hole (this is why the mark is important).
Thinking about it, it's probably easier to just drill through the length of the stick and tape over one end, then fill from the other end. Ah well.
I found it easiest if the wax was just melting. It doesn't take much heat so it's easy to overdo it and it starts to separate and goes super runny
Not exactly “made” and certainly not up to the standard of those with woodworking skills on here but I’m quite chuffed with my new desk. Bought a 2m x 90cm walnut worktop and got the company to cut a 2m x 25cm slice for a shelf and profile all front corners with an 80mm radius and a 5 mm chamfer top/ bottom, placed the shelf on rear of worktop/on top of two sample blocks and secured from underneath, bought two 70cm tall steel legs from amazon and fitted it all together with cable tidy trays (i hate clutter/cables) and it turned out pretty decent.
A base to hold a pillow bearing for my hand brakes lever - operates fronts when you push it forwards, rears when you pull it back, separate from the parking park and in addition to the foot brake.
https://imgur.com/a/e4OXzv7
[url=
Vertical headtube and a reverse rake fork. Sliding dropouts for adjustable rake and trail. Steering run on a linkage to take a Brompton sized wheel.
[url= https://www.instagram.com/colin_woof/ ]Follow along here.[/url] Channeling Tony Foale.
Chutney
[url= https://i.ibb.co/S3s0Krt/chutney.jp g" target="_blank">https://i.ibb.co/S3s0Krt/chutney.jp g"/> [/img][/url]
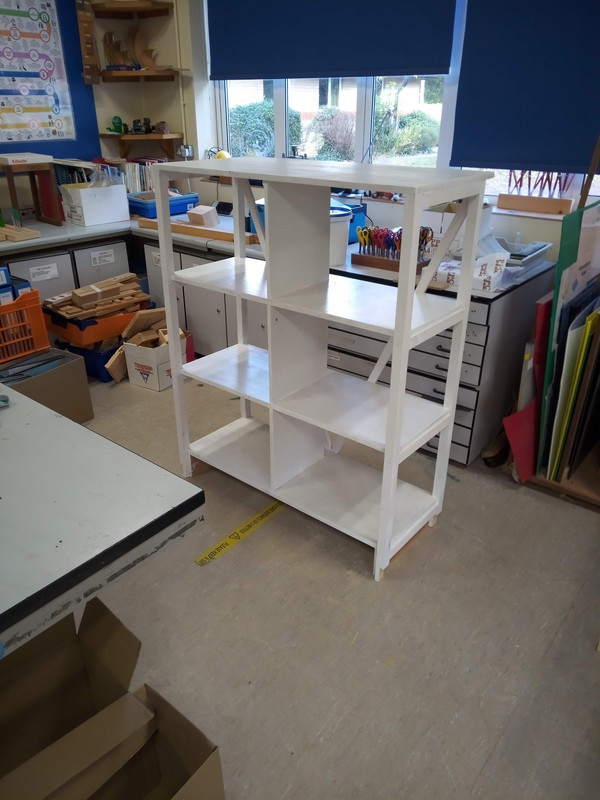
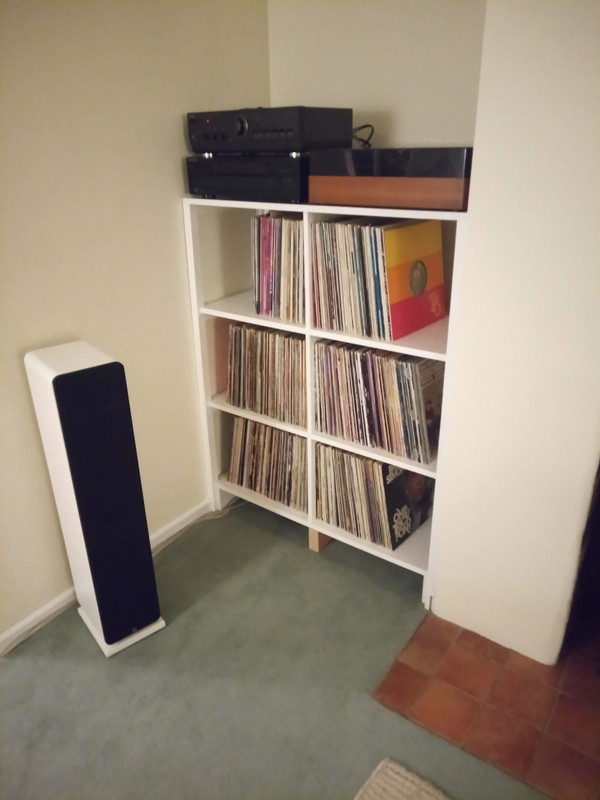
Some shelves for stereo and vinyl.
The opening goes from 990mm at the base to 972mm at the top, so had to do some careful measuring.
Buily in the workshop at work, so very happy that it fitted like a glove!
This is my favourite STW thread.
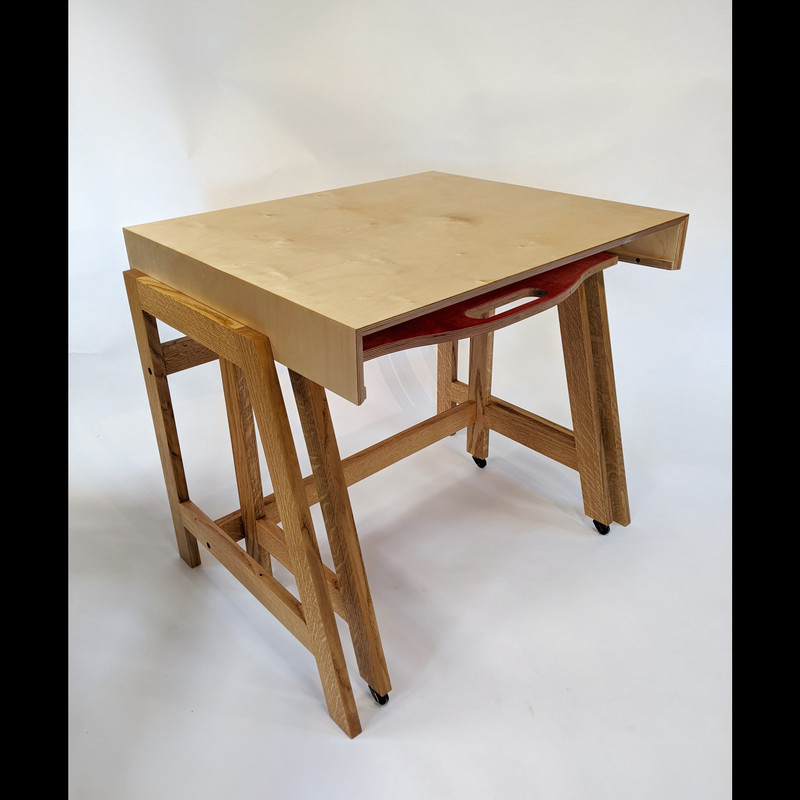
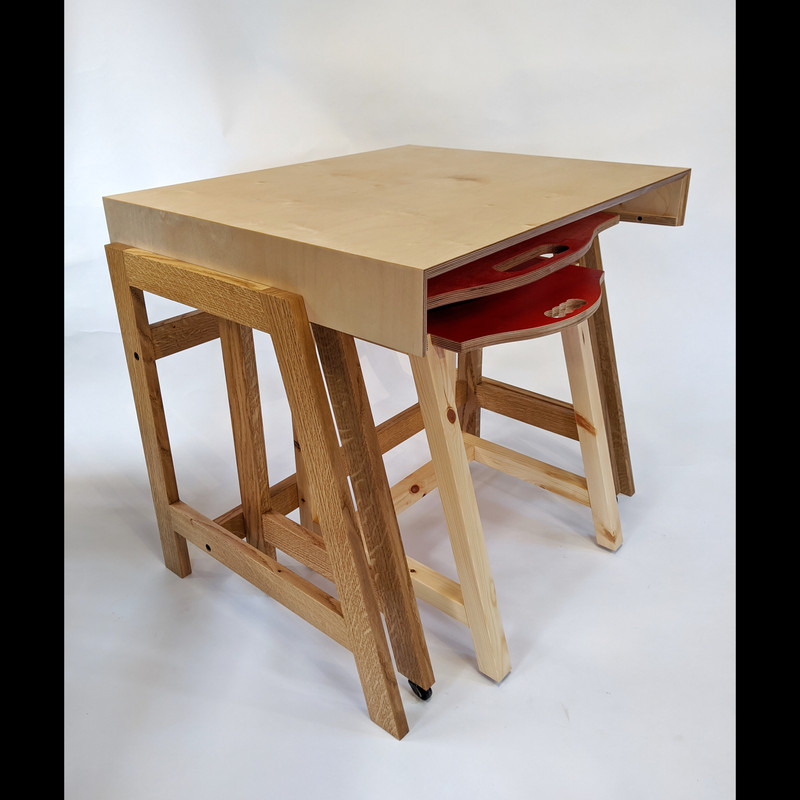
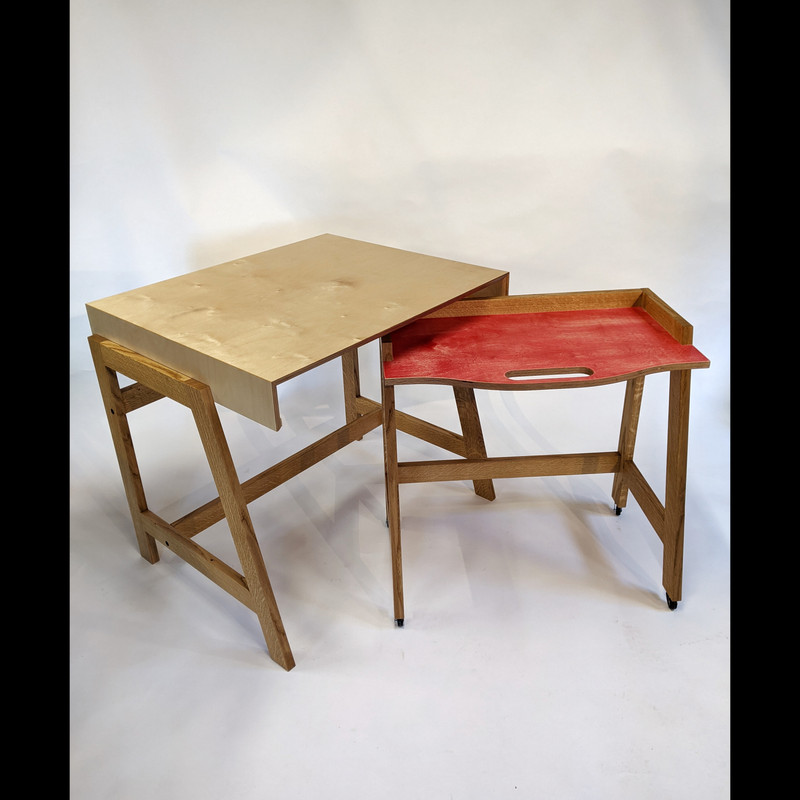
Just finishing up on a set of desks for a home office setup for some friends.
Birch plywood, quarter sawn Oak and red stuff.
The biggest is for the lady of the house, the middle one is for the husband who is a music tech and wanted a pull out mini desk for the mouse and keyboard with the speakers and monitor on the main desk.
Finally, a bonus little mini version of daddy's desk for their six year old (they don't know they're getting this) 😊
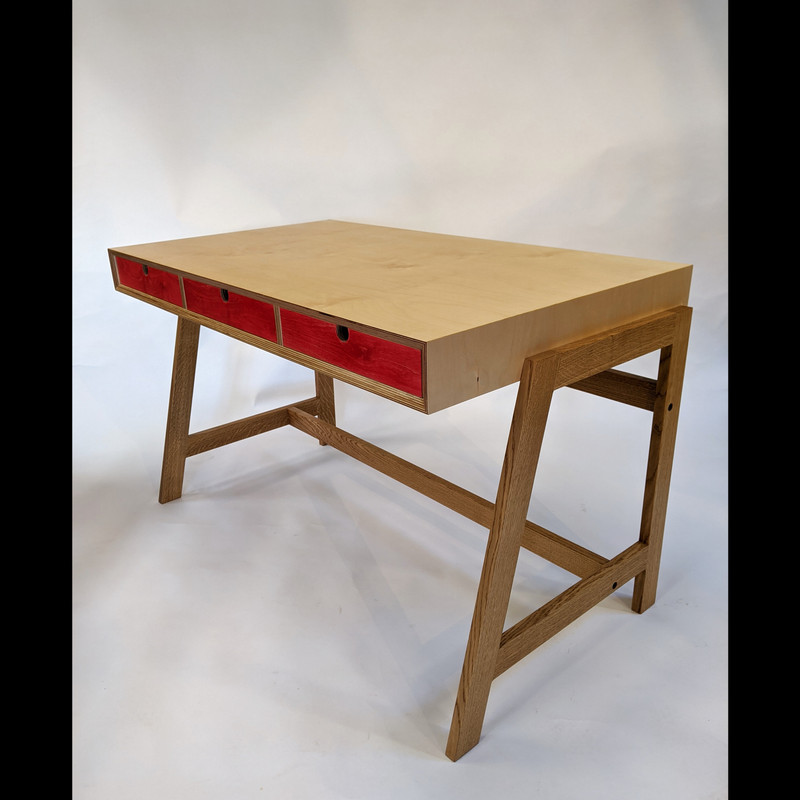
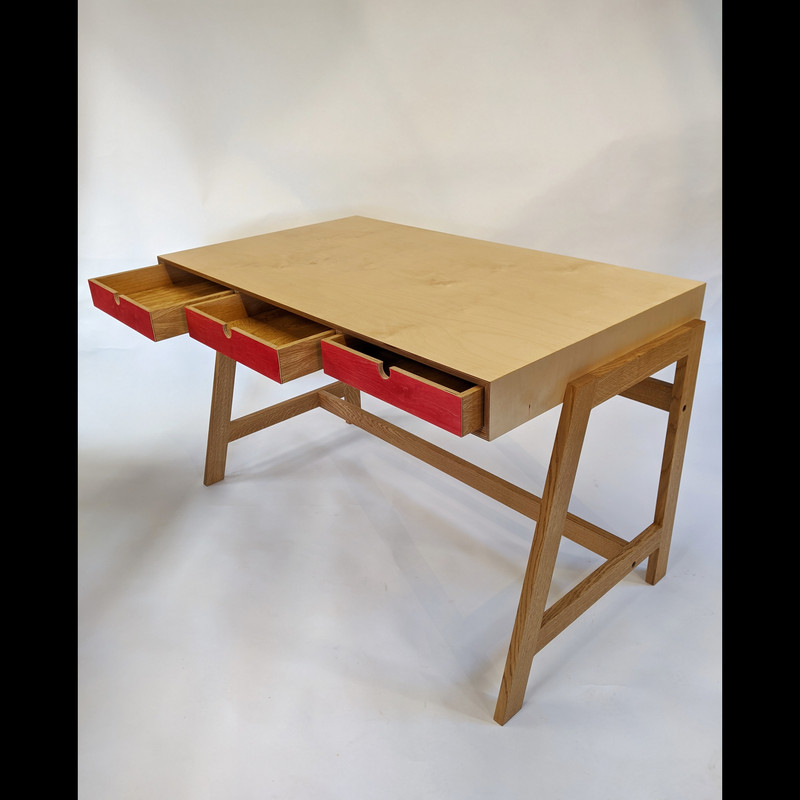
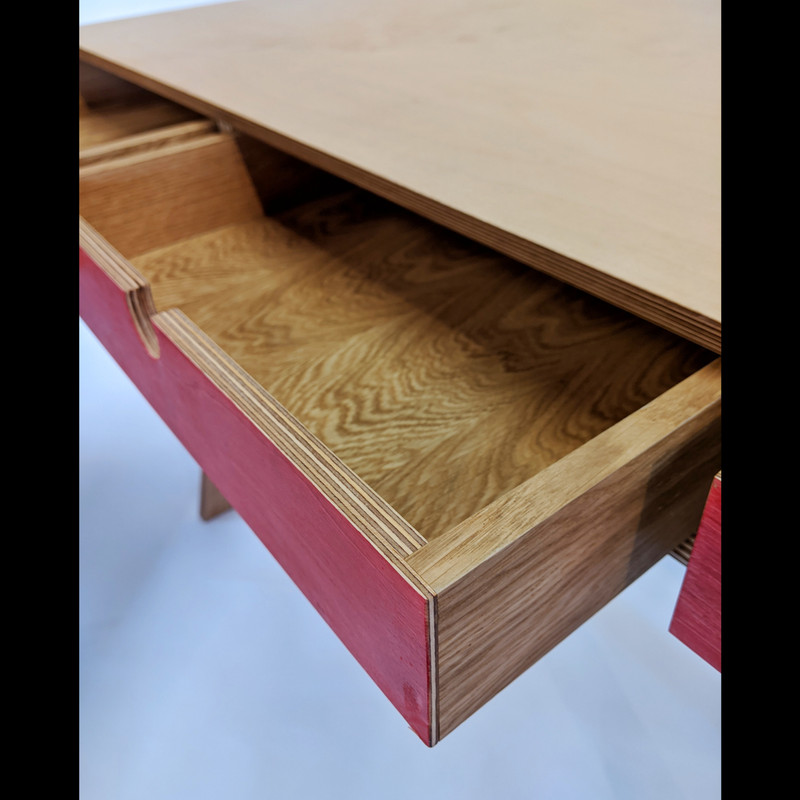
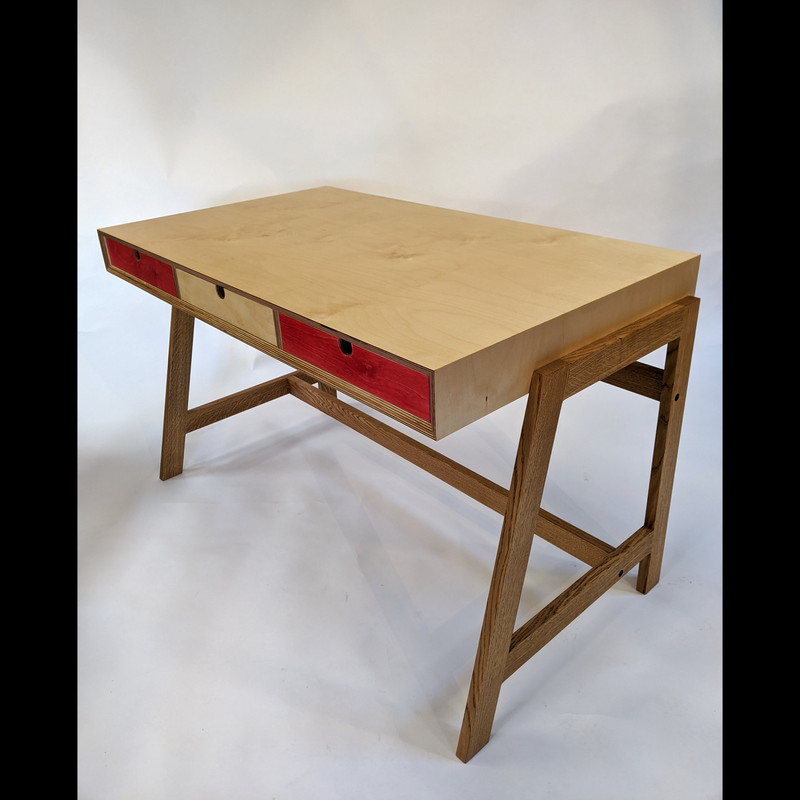
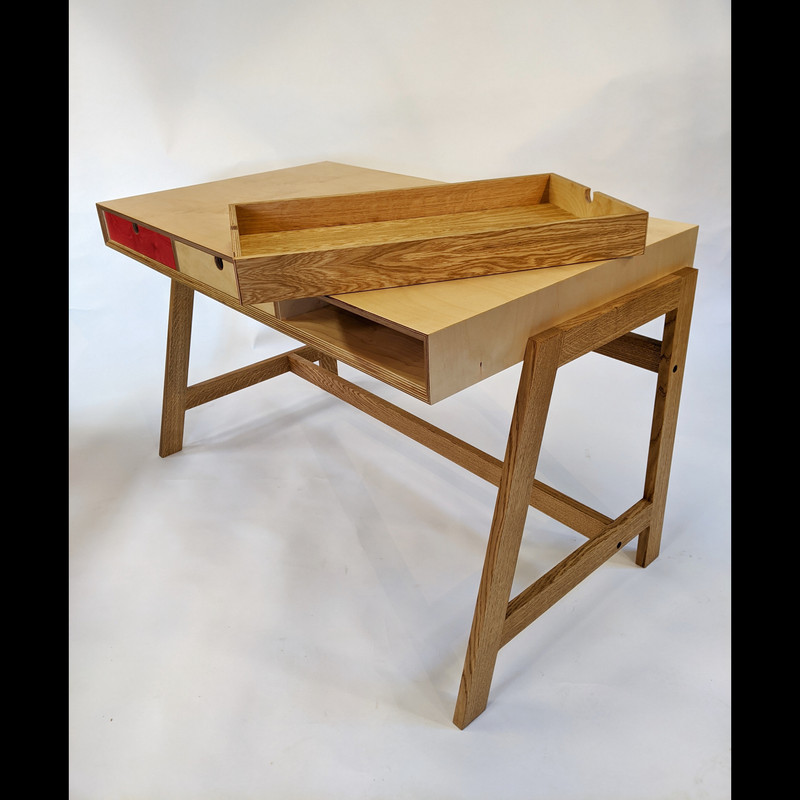
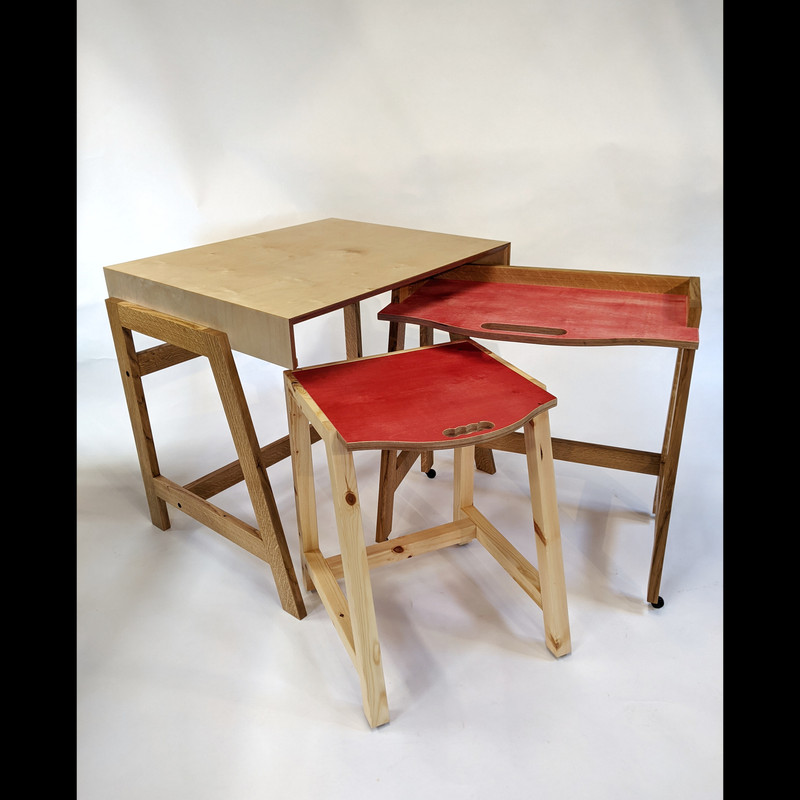
It's really nice to be making a bit of actual furniture after seemingly ages of just mdf boxes (wardrobes) and horrible banisters and stuff. 😊
I love those desks, what is a non-mates rate for the big desk?
what is a non-mates rate for the big desk?
[Kayak prepares for multiple-incoming of STW orders]
Oi Scandinavia, fell some more of those special plywood trees, pronto!
Me and my girlfriend completely stole our friends' idea of stealing Jackson Pollock's idea of throwing paint at a canvas and calling it art. I also wanted to steal Picasso's idea of making a saddle and a handlebar look like a moose head. We did both and hung it above our STW standard-issue woodburner.
The saddle is a Middlemores which has been around since at least 1958 when it was ridden to the Worlds Fair in Brussels, according to the guy who sold me it. Bar from my local bike recycling place. The saddle hangs on the bar which goes through the rails. There's a cut-down quill stem attached to the bars, which goes into a block with a hole in it behind the canvas, secured with a clevis pin. Champagne cork bar end plugs from when there were things to celebrate. Canvas was crappy mass produced print that someone round the corner was chucking out.
Yves Klein meets Carl Andre.

[url= https://live.staticflickr.com/65535/50518128682_b1cfc2427f_b.jp g" target="_blank">
Still a work in progress.
Any more pics of what appears to be just the thing im in need of. A Cargo bike 😀
Wish I could weld 🙁
Not exactly the last thing I made, but probably the last nice thing.
A member on retrobike and we did a swop, he needed a ti ti glide freehub, and i sent him a nos one, so he sent me an entire Bulb rear 6 bolt hub.
Seemed unfair to me so i made him this toolbox. Design taken from one of they woody magazines, with some of my own touches(cross wedges for the through tenons, and a wee spot to put a pencil.Originally of Japanese design. The lid is secured by a compound angle wedge(tricky that)
Only a spot or two of glue, and wedged tenons holding it together. I didnt want any metal, as it always corrodes and make a mess of its own.
Nice table by the way Kayak. Very 1970's I think I've something similar on one of my books. Simple and clean.
The northwind girl friend with "hmmmm not sure " pose
Tracey Emin would have had a pair of her knickers hanging off the bars , maybe some booze and a condom
@redmex I told her to do her best "contemplating art" pose. She's also one of the "artists", it was a joint effort.
The other stuff... give us time 😂
Recent projects now finished


My Nilfisk pressure washer developed a fault and the part required was not avaiable. So I bought Nilfisk Pressure Washer with a damaged housing and some missing bits off ebay and set about mounting the motor/pump in a new housing.
Frame is made from 40x40x3 stainless square tube (material rescued from scrap bin of old workplace). Body is a bit of 14" corrugated plastic drainage pipe. Lid is a 14" non-slip drinks tray from ebay.

.
Having decorated the living room after our wee shite of a 2 year old coloured in the walls with a green sharpie I though I'd do a painting to brighten things up a bit.
This is on three 16" x 20" canvasses. The orange is a lot more vibrant than in the picture.

[img]  [/img]
Topology optimised, 3D printed titanium6/4 headset topcap.
Need to polish them. 40% lighter than a CK one...but that's only a 6g saving.
@squirrelking - cheers - it's just a normal pressure washer with a water inlet from a hose (or other source of H2O) and on outlet to the lance.
The pump is mounted on the tubular frame and the drainage pipe is an easily removable cover. Accessing the motor/pump in the orignal plastic housing is a nightmare!

Love that Daffy
Ah I see, I thought the drainpipe was some sort of buffer tank!
Good work though, that does look a lot more user friendly.
@bungle
Desk looks great. Is it made from spruce ply usually used for building or is it something more special to get that finish?
I love all the stuff on here from bread to the top notch joinery of kayak and dynati to experimental art, ingenious fixes and next level bike kit. Excellent making all! Must finish a couple more projects...
Thanks. Yeah, cheap structural ply 18mm, £37 a sheet. Was going to go with 2 layers till I realised how heavy it is so just added a double-edge for looks and to strengthen. Pot luck with the board quality, the underside has some bad knothole gaps. Edges were better than I expected though with only tiny filling needed. A lot of sanding then Danish oil with wire wool between coats to get the finish.
The missing curved bit hangs underneath as a cable tidy. Chromed legs off the bay do the job but a little lightweight, should have spent more there but desk is wedged into a corner so not a big issue.
Need a plan for the second sheet now....
Grain patterns make it look really good Bungle. Standard materials made to look special is definitely a win.
I'm sure that a 'spare' sheet of ply in the shed is always necessary... matching chairs?
Standard materials made to look special is definitely a win.
Defo. Looks great.
I'm a fan of Osb. That looks mint when sanded and finished.
Kayak - do you have any examples of osb sanded and finished? I need to make a new desk....
This corner wardrobe and wall cupboards in a 9 foot high room I just completed may explain why I had to go into hospital this week for urgent back surgery.

Finished this back in May but not got around to posting it...
[img]  [/img]
Bike O'Clock....
Needed a kitchen clock and decided on a bike clock. Couldn't find any others like this on the internet...
It killed several drill bits and I learnt a lot about pot riveting... (especially the "1" which I wouldn't make as strong next time!)
Kayak – do you have any examples of osb sanded and finished? I need to make a new desk…
Only this little seed drawer/chest I made/recycled for my shed a few years back.
Kayak have you done a waterfall edge with a bit of OSB?! And then to the same for the front plate?
Thats attention to detail!
hardly skilled, but I needed to raise my monitors and after a few weeks on a stack of books I laminated some floorboard offcuts and cut them down to make risers.

