UPDATE: Reviews section refreshed, redesigned, searchable: Go take a look
Kayak, that's lovely!
Being a full time desk jockey, I don't have the manly skills of a lot of you guys so I very rarely have a go at making stuff, but following the relative success of my vertical planter above, I thought I'd have a crack at making a new back gate.
The old one was falling apart and the bastard cat had used the top as a scratching pad. It was also really narrow due to the small opening and a drainpipe in the way which made getting bikes in and out a pain and any standard gate in the shops was too big.
I decided to make the gate posts smaller and make it open out the other way. I also found a pretty cool magnetic latch which is easier than the old latch which used to jam against the wall intermittently.
Anyhoo, this is the result of quite a few hours of effort:


This is what it replaced:

Very nice. You should be properly proud of that 👍
Cheers Timidwheeler, it is quite satisfying knowing I made it myself. My brother is a carpenter and normally 'helps' me do stuff (I mainly watch him!), so the acid test will be when he passes comment, but its straight and it opens and closes so I'm happy 😊.
I tried to do a proper job with what I think are called lap joints so hopefully it won't fall apart after winter...

The genuine Cusco adjuster dial for these shocks is expensive...
[img]  [/img]
...but I like this alternative I made
[img]  [/img]
I finally got round to finishing this off. I needed to make a disc-mount tab welding jig to position a disc brake. It took me an entire month to get around to it.
It's nice to finally have two brakes.
I'm really happy with this one. It's taken a bunch of iterations of cargo-frames but I have the handling absolutely dialled.
as always, more here if interested:
https://www.instagram.com/colin_woof/
[img]  [/img]
@northwind that is brilliant!
Colin, was wondering what you were up to with the machining, good work!
As it's hot this idea may be of use to some of you. An external cover to cut down solar gain from your windows. I used an old sheet.

Getting very close to having some functional additive manufactured (3D printed) titanium cranks. 🙂
I made a frame bag, and was pleasantly surprised at how well it turned out:
Nice bag! 😃👌
I didn't really make this, just changed it a bit. I was bored so I messed about with some paint.
[url= https://i.postimg.cc/W1Kx0FNC/IMG-20200815-203120615.jp g" target="_blank">https://i.postimg.cc/W1Kx0FNC/IMG-20200815-203120615.jp g"/> [/img][/url]
[url= https://i.postimg.cc/vmf290Sx/IMG-20200816-144832358.jp g" target="_blank">https://i.postimg.cc/vmf290Sx/IMG-20200816-144832358.jp g"/> [/img][/url]
so with some bits of worktop left & some tiles leftover from a failed kitchen project........
I decided to make some bedside tables as my wife could never find any she liked
I had to by a plunge router from ebay, which is possible the best powertool I own, even if I was terrible with it, especially on the 1st one
Rustins plastic wood filler saved the day & squared off all the gaps Id left

the islamic arches were cut out badly with a jigsaw


6 years from moving, from tonight I no longer have to charge my phone & put my glass of water on the floor!!
Nice Kimbers! 😊👌
I'm liking the freeform organic texturing you did with the router on the glue surface too 😉 it's so difficult not to dig in.
I'm doing a similar thing at the moment. I find working from the centre in spirals outwards works well, making sure you're cutting against the direction of cutter rotation (machine travelling clockwise), taking small skims at full depth (you can't go back), and being mindful to keep all the pressure on the side of the router that's on the 'shelf' of the work.

Still work to do but last couple of days building and fitting this

Very tidy surfer, looks mint. What board are you using? Melamine ply?
Cheers @kayak23 , I've no idea what I want to do next with the router, I just want to use it !
@kayak23 what will that be in the end? Looks fun. I went to your web page and saw your amazing gallery. Do you have an Instagram that I can follow?
During lockdown I started doing the odd bit of woodwork, then built a deck then got hooked on Leo Sampson's Tally Ho YouTube project. I'm just finishing oiling the deck today, so can post on here even it's done! 👍
@kayak23 what will that be in the end? Looks fun. I went to your web page and saw your amazing gallery. Do you have an Instagram that I can follow?
During lockdown I started doing the odd bit of woodwork, then built a deck then got hooked on Leo Sampson’s Tally Ho YouTube project. I’m just finishing oiling the deck today, so can post on here even it’s done!
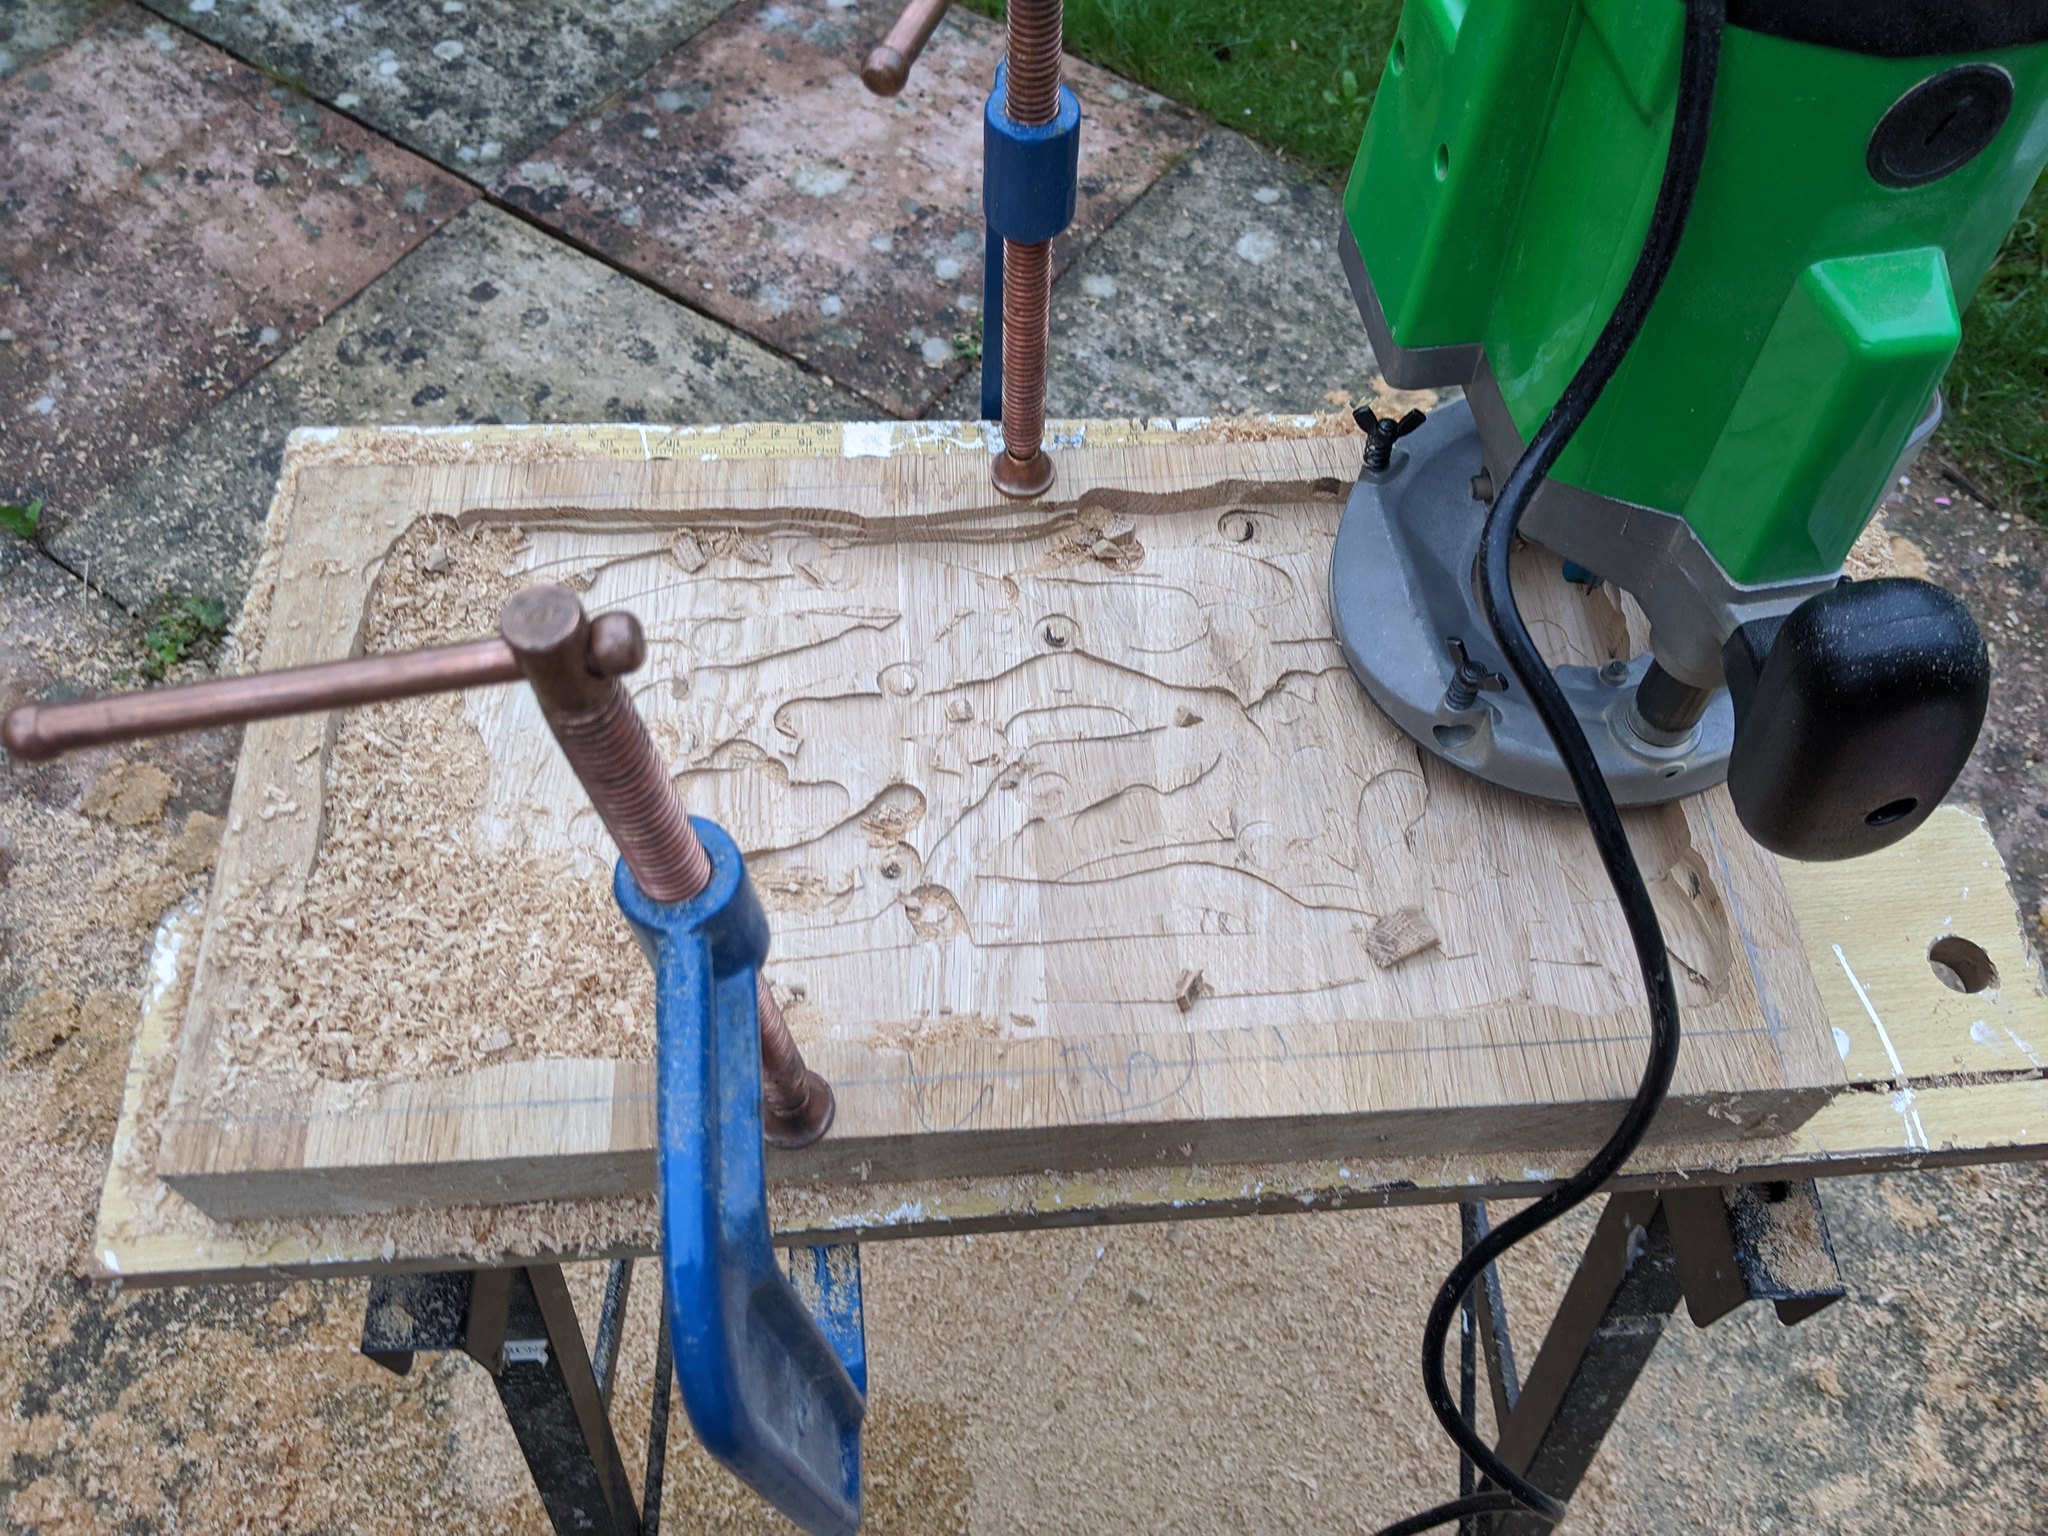
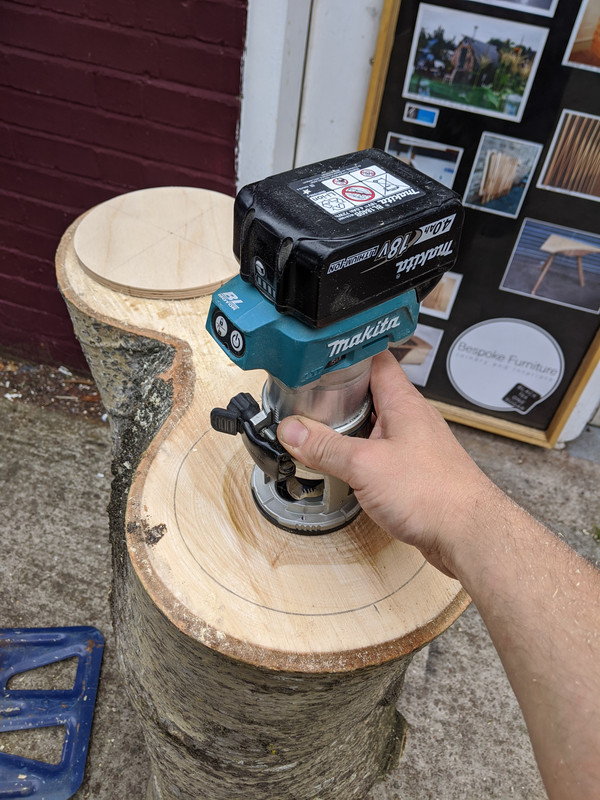
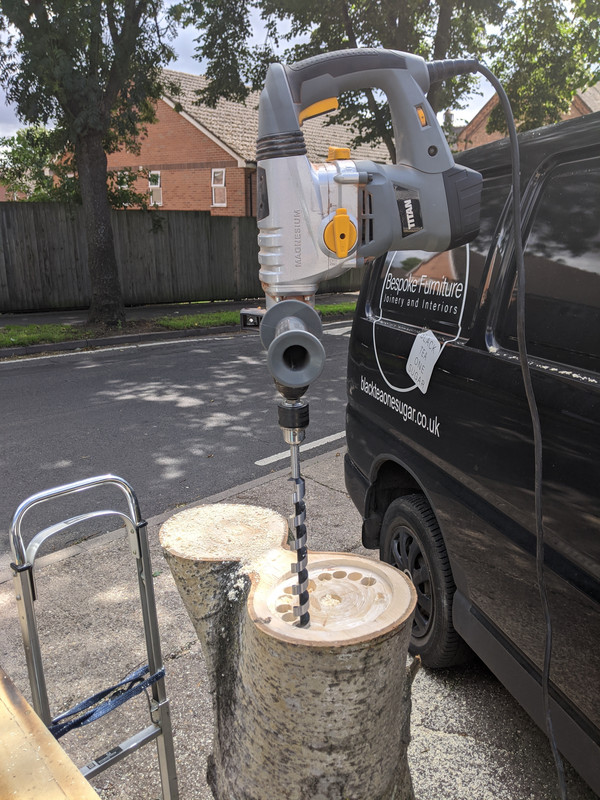
Thanks Adam T. It's for a marketing/exhibition company who are marketing an electric car.
They wanted a tree trunk hollowed out and some electronic bits put in so that on the stand it can look like the car is being charged from a tree.
It's so ...Eco...apart from the tree is dead and all... 😂
Insta is blackteaonesugar
Yeah I love Tally Ho. Unreal the work that goes into it. Properly hard work too. Must be eye wateringly expensive too! 😳
Lockdown capers:
I butchered some tree trunks and fitted them with electronics for electric vehicle charging demo thing...
The last 6 weeks..... Labouring , learning and sometimes ignoring ...... Oh and handing over the bank card every other day.
But we got there.
Dining room is an extra 16sqm and the utility is 7sqm. Fitted a new kitchen at the same time.
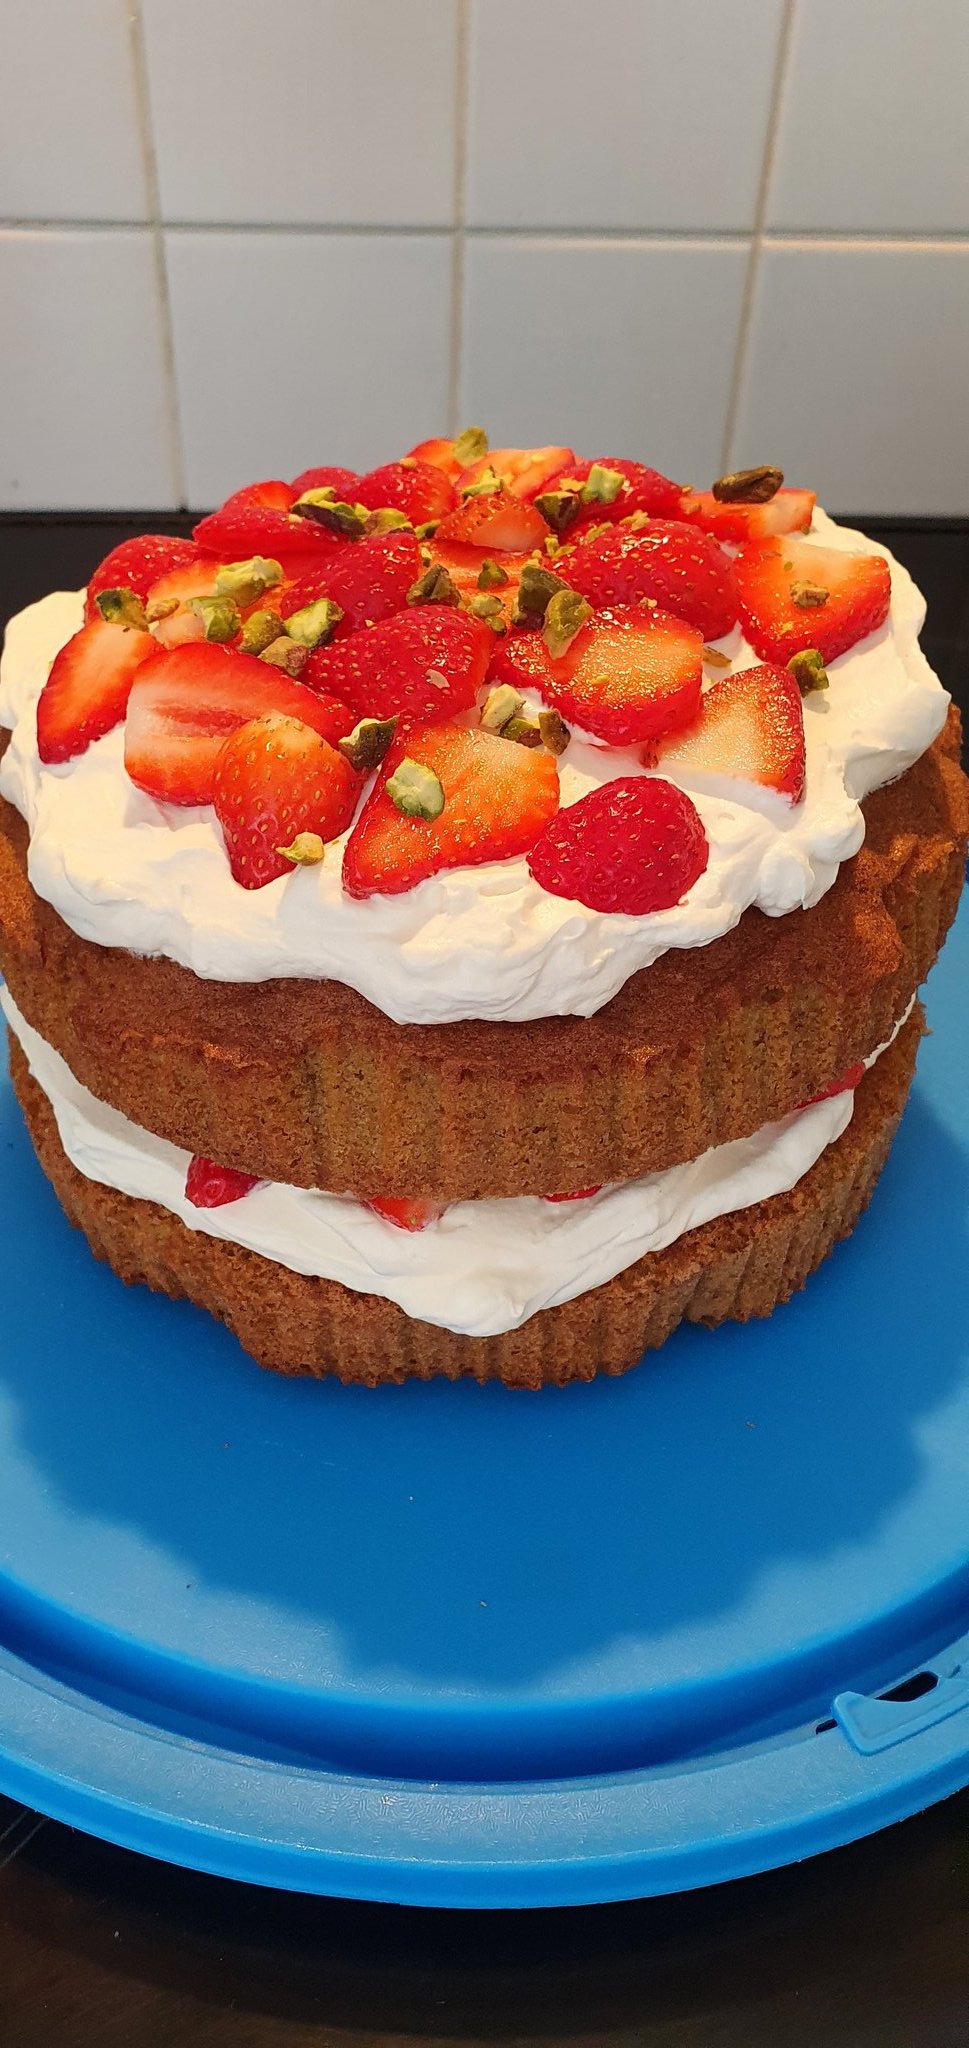
Cake.
Post process machining well under way for my additive manufactured (3d printed) cranks. Machining work by @stevied thanks Steve
I love that! Top work chaps!
Me and the OH spent a sunny afternoon a few weeks ago 'upcycling' an Ercol Welsh dresser unit thing..
Was the really dark stain, so removed the stain from the top surfaces, and painted it.
looks Sooooo much better now!


Me and the lad did similar with a matching coffee table too, a few weeks before (I had both arms then!)!
DrP
Looks very nice - what's the advantage of the 3D printed cranks over currently available machined or forged?
Looks very nice – what’s the advantage of the 3D printed cranks over currently available machined or forged?
You can make them hollow, which gives the best second moment of area for a given amount of material, and you can vary the wall thickness to optimise stiffness/ weight. This means you can have a light crank that is very strong.
"which gives the best second moment of area"
wikipedia.org/wiki/Second_moment_of_area
I had to Google that, still none the wiser...
I had to Google that, still none the wiser…
In really simple terms, assuming you care about weight while needing a minimum stiffness, you want the material as far away from the centre line of the object possible. One example of this in real life is why tubes (rather than solid bars) are used to build bike frames.
In cranks most of the best designs are hollow for the same reason: Shimano with Hollowtech II (an aluminium tube forged into the shape of a crank); Cane Creek with their eeWings that use a shaped tube welded at either end to make a crank; and most carbon fibre cranks are hollow. Additive manufacturing (3D printing) allows not only a hollow structure to be manufactured, but also allows accurate variation of wall thickness within the structure. The wall thickness can then be varied according to the load requirements in that section of the crank.
That does make sense, but I do wish I also could understand the maths behind it. O Level grade C maths doesn't help I'm afraid.
I did start reading the Wiki page though.
I made a bike frame from an older bike-frame. It was rewelded to make the minimum turning radius tighter.
More here> https://www.instagram.com/colin_woof/ <
[img]  [/img]
[img]  [/img]
[img]  [/img]
[img]  [/img]
[img]  [/img]
No pictures sadly as I can’t cope with the technicalities of picture up loading - but I found that some of the more minimalist galvanised joist hangar (frame cramp apparently - https://www.diy.com/departments/expamet-safe-edge-150mm-frame-cramp/35499_BQ.prd ) type things at B&Q are the same thickness as a disc rotor and promptly chopped, de-burred and lightly polished one to make a lightweight pad spreader for my riding pack.
I generally find out I need new pads when I’m riding and a 4 or 5” by 3/4” steel strip makes changing them much easier.
(Not as posh as the folk above me I know - useful though)
For my next piece, I’m turning some old handlebars and a bit of 1.5” oak board into a push-up bar.
32mm hole saw through the board, saw to chop horizontally through diameter of the resultant hole and some bolts to clamp it up again round the bar. Bolts will be recessed.
Might require a shim to take it down to 31.8mm bug I doubt it (we’ll find out).
Sand and chamfer edges.
It's nearly October so Christmas Cake was baked ready for a brandy feed or two for 6 weeks.

It's the Delia recipe with the addition of 1 1/2 tsp of baking powder to ensure that it goes up and stays up!
hey...
The stain I used on the stripped surfaces is osmo oil matte.. I love the stuff. It's not a stain, as it's clear/matte, but jsut really brings out the features of wood.
There's still a bit of the old ercol stain DEEP in the wood, hence why it's really highlighted by the osmo.
It's pricey stuff, but I use it for all my indoor wood projects as it's just sooo lovely!
Prep the wood
paint on a thin coat of osmo and let it dry
use a 'scratch free scouring pad' to 'sand' the surface, and apply another layer.
'scour' it again, and you're done!
DrP
Someone on here made crayons with their kid out of sticks and old melted crayons. Can’t for the life of me find it. Anyone able to help or have a link for a how to? It’s clearly not super complex but might be some good tips to avoid mess!
https://imgbox.com/sh9IPJ2 V" alt="" />
I used metal pot scourers when I did my Osmo coating, nothing too heavy but it gave it enough of a key to take. It's really good stuff, some small black bits near our sink where it gets really wet but otherwise held up really well (engineered oak worktop).
Watching the World’s replay and finished my DIY Tow Whee...£12 sorted.
[url= https://i.ibb.co/p0dRn7J/23-B978-D1-BB5-C-4-C81-9820-3-A88-AF3364-D1.jp g" target="_blank">https://i.ibb.co/p0dRn7J/23-B978-D1-BB5-C-4-C81-9820-3-A88-AF3364-D1.jp g"/> [/img][/url]

