

Got my patissier on again today. Mango, ginger and lime tart on the left, raspberry, ricotta and hazelnut cake on the right.
Using a hand loom I've just woven some woollen thread into a weave that I've turned into a cushion. It's yellow, orange, brown & grey. Very 70's. I have pictures but no idea how to post then here these days. It looks great on our sofa.
I have pictures but no idea how to post them
https://singletrackworld.com/forum/topic/posting-images-on-singletrack-forum-using-postimage/
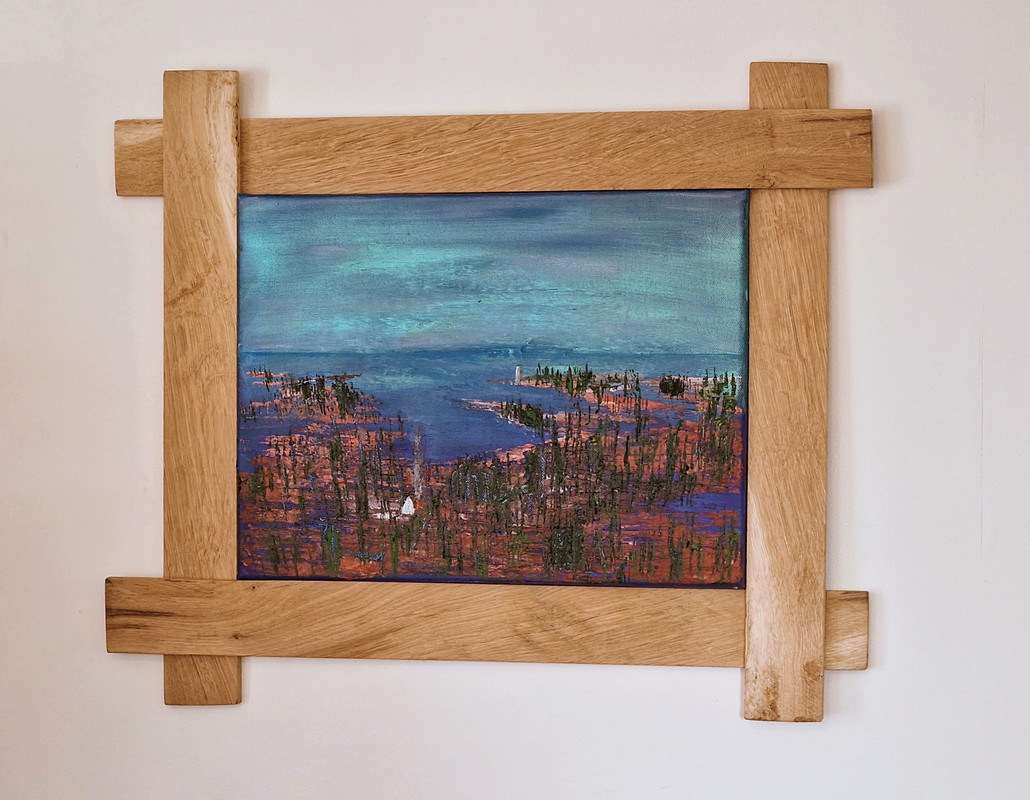
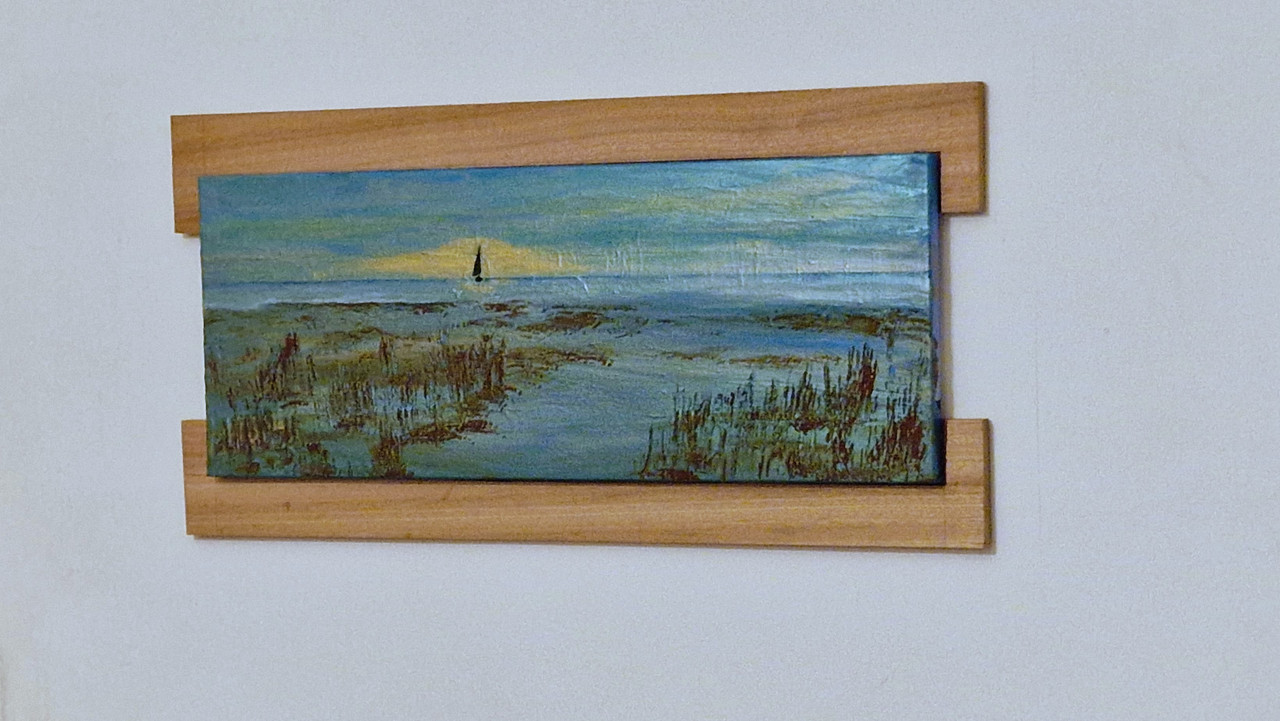
Scrap my last post. I decided to add a yacht sailing into the golden sunset.
"Seeking Gold"
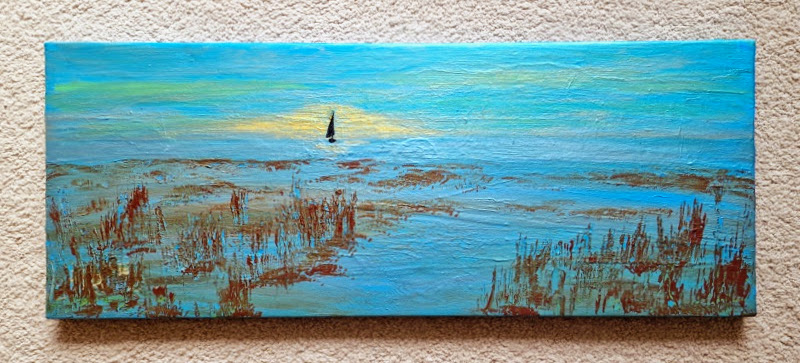
The design I came up with took the profile of the actual river nearby (with a little artistic license)
I'm lichen that
I hate moss now
Anyone else misread that? Super model by the way
I was wondering what the racing driver had done to upset him. Different cultural reference points I guess
A Stirling job?
Some parallettes for extended range of shoulder motion at the bottom of push ups (apparently good for bike riders) and various other bodyweight exercises.

When it came to fitting the bars - 35mm dowel - it was a snug fit into the 35mm holes, I took the rasp to the leading edge lightly. The first end went in smoothly with some persuasion from the wooden mallet, but the other end I was too heavy handed with and split the wood. Doesn't impact their function though. Theres a couple more pictures over on instagram.
My 5 year old granddaughter asked if we had fairies living in our garden...

I explained that we used to but that the grey squirrels had ransacked their house and murdered them all
That made me laugh WCA #cruelgrandpa 🙂
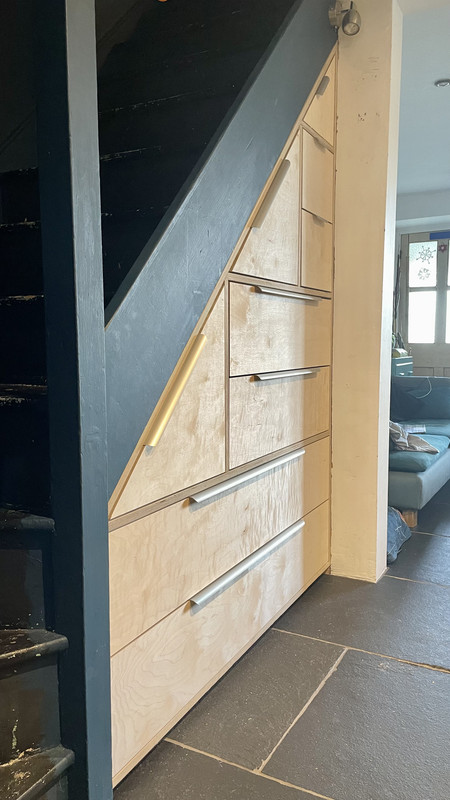
99% finished. Just waiting for the hinges for the top corner. Not sure about the edge pulls, might try and find some nicer ones.
Sign made with on a scrap piece of Ash, Espresso Martini with Coffi Eryri Indonesia Decaf, Derw Coldbrew Coffee Liqueur and Smirnoff Vodka.

Not sure about the edge pulls, might try and find some nicer ones
Neat piece of work. Bit of a pain for the bottom drawer, but would the pulls look better on the bottom edge of each drawer, including the triangular ones?
Nice @jam-bo. Have you got any photos to show how you did the inside please? I'm planning to do something very similar with ours, but bigger drawers for things like the Hoover. Sick of the unstable pile of crap under there at the moment.
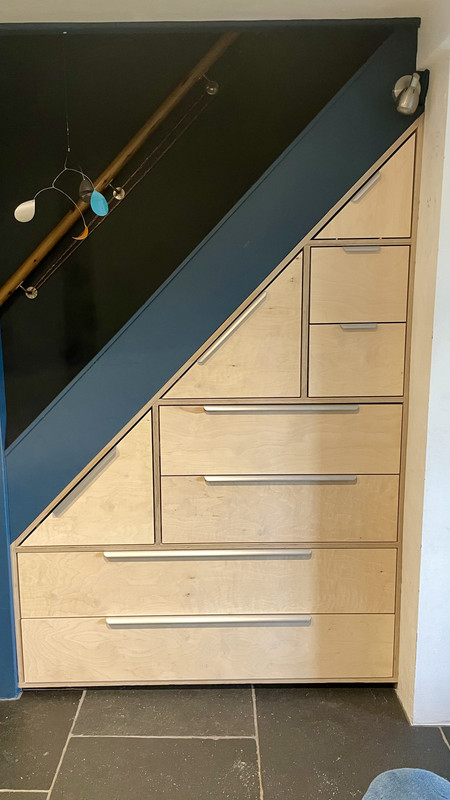
Drawers/doors looks great. Is there something interesting going on with the bannisters as well?
Instead of pulls could you fit a touch to open mechanism? You know the type where a slight push and the drawer/door corner pops out a short way.
[img] 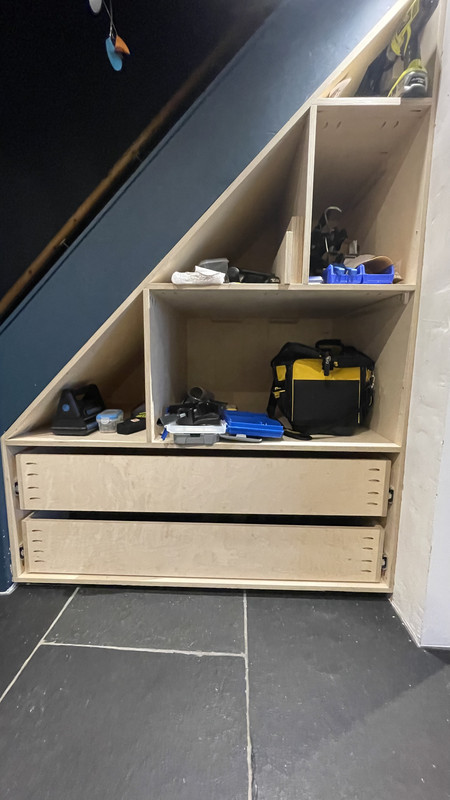 [/img]
[img] 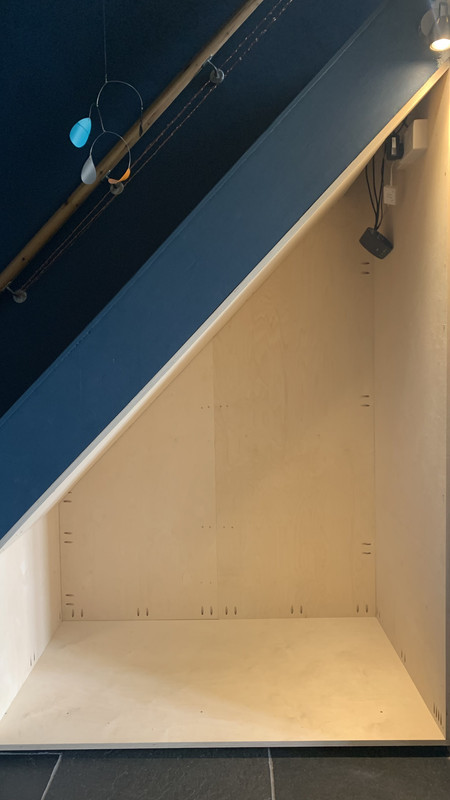 [/img
[/img
[img] 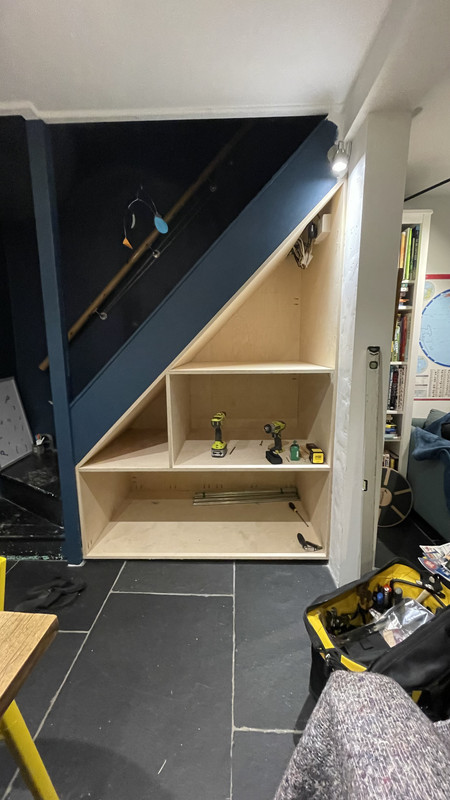 [/img]
[img]  [/img]
[img] 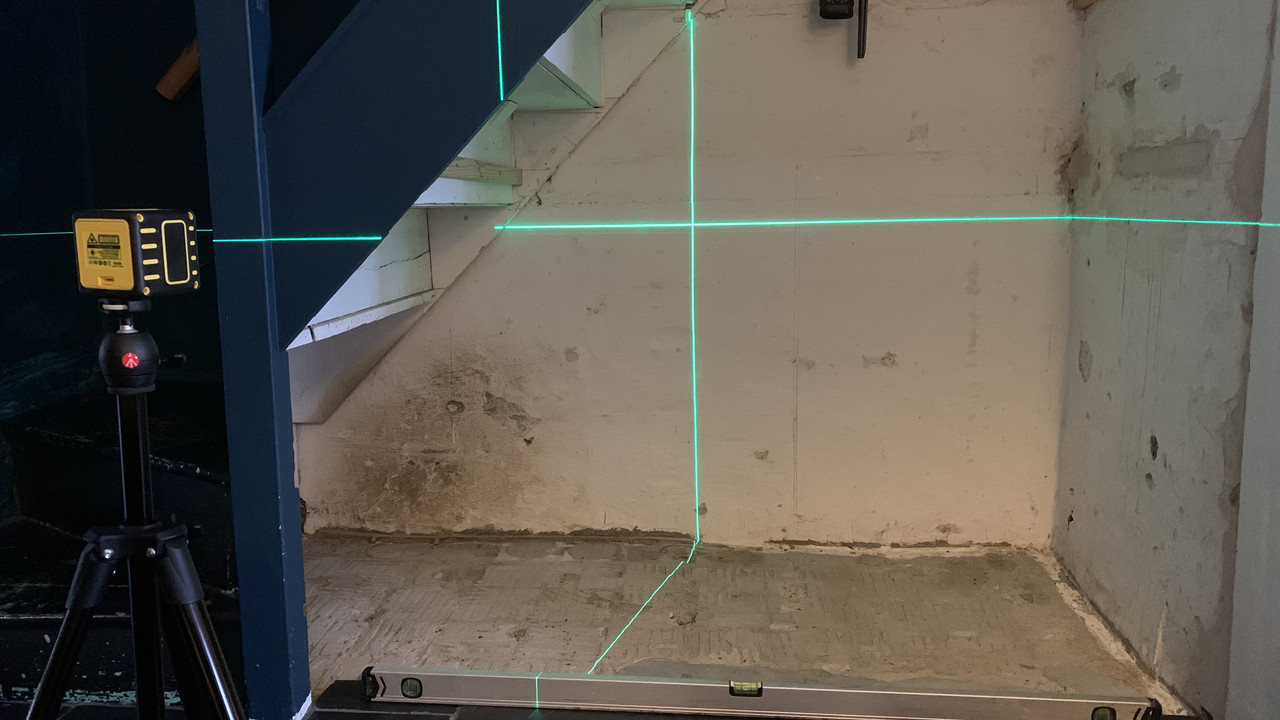 [/img]
Not a square surfAce in sight so built a frame inside to work off. Pocket hole jig was invaluable.
No banisters.
Great work Jam-bo!
I’ll have to get one of those jigs
Nice one thanks. Really neat. Yeah, I was wondering if this and another similar project I have in mind would justify the purchase of a pocket hole jig (and/or a biscuit jointer).
Looks dope jam-bo 👌
Pull handles are fairly cheap and nasty from ikea. I just needed something to mean I actually put the fronts on and finished. It’s only taken me 18 months from start to finish…
That's some good Kreg work. Only used mine for framework but have a few projects in mind. Tempted to buy the big lumber adaptor.
I had considered routing some handles into the top edges, but I think its beyond my skill/toolset.
I was astonished at the price of some handle router bits. I bought a cheapie and have been really pleased with the results. Yes, it needed a bit of trial and error to set it up just right but once done it was faultless. And made several uniform handles for 6 drawers and doors.
I do have a table router though, I'm not sure I'd be so keen with a hand-held.
yeah, I've only got a palm/edge router. not in the mood for investing in anything bigger.
I was sick of lugging my table saw around, so whipped up a mobile stand.

First time making drawers as well. Not perfect, but good enough for this.

Clad in french oak staves used to flavour tank made wine. They'll usually get thrown out afterwards. Need a bit of clean up with the plane to get them smooth.
Bigger ones are less prone to warping & are good for gift boxes like the one I made a few pages back.
Wow Jambo great job!
If it was me I'd remove all the finger pulls and drill some strategically placed biggish holes in the fronts so you can simply pull the flaps open. These don't all have to go dead centre, you could have some fun with placement/ alignment.
Alternatively you could drill some holes and buy some recessed plastic discs with lips in dark grey (blue?) to match the stair stringer.
Because you have made everything so 'flush' on the vertical plane I don't think this arrangement suits any type of sticky out handles/ knobs.
Makes me feel dead lazy going through threads like this...
OK it's not something I've just made. Taken me a year to get to this stage. But as there's some photography geeks on here I thought you might be interested.

AS an olympus pen owner i reckon i know what they are. but obviously more going on!

I’ve just built a MiniMe shed in the garden - home for a static bike, plus will be my bike workshop. Is a Tuin 3m x 2m log cabin but had to build the concrete plinth and then a day of attaching big steel brackets to attach it firmly to the concrete as we’re quite exposed, regularly see 50mph+ winds. Fitted a corrugated steel roof to match the house. Still have the electricals, workbench, cupboards and shelving to install.

Earlier this summer, built this 4m diameter geodesic dome greenhouse. The hub kit came from buildwithhubs.co.uk - online calculator tells you the sizes you need for the struts based on exterior dimensions. Struts are tree-stakes and the cover is polytunnel sheeting. Hardest part was making 10-sided shuttering for the concrete base. Total cost £600 - a third was the concrete base.
Re Jambo's handles, personally I'd lose all the handles and put those push thingy's on the inside.
Jam-Bo - if you want some magnetic push latches I can send you some for the price of postage - I bought a job lot to do all the cupboards upstairs in my house - turned out I only needed half the quantity. You push the door in and it springs out
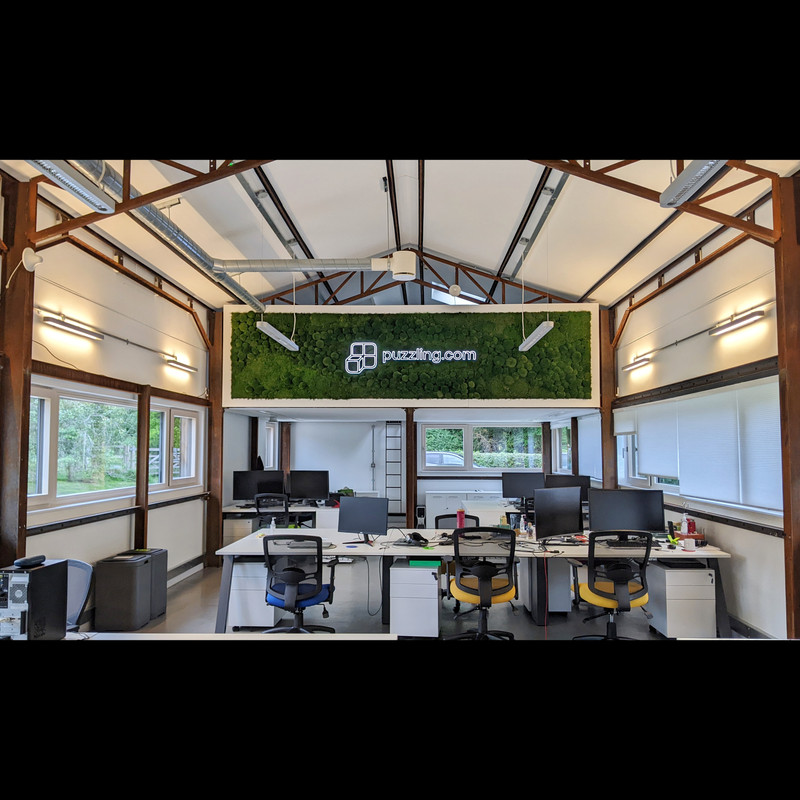
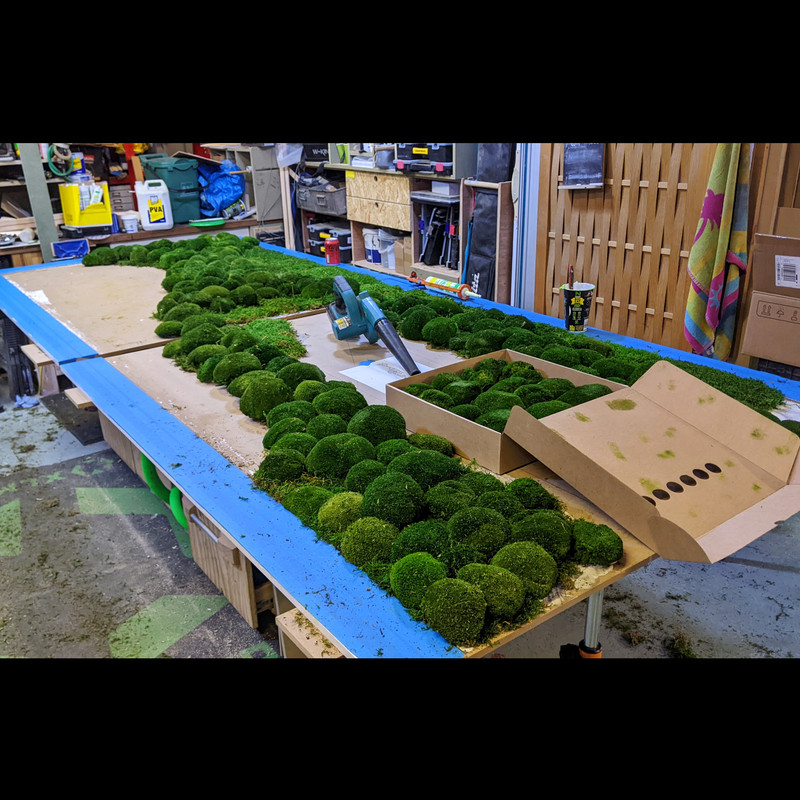
5m wide moss panel with a neon sign(not by me) for a gaming company near me.

@jam-bo nice work. Out of interest, what type of saws do you need for this job?
Finally, a humane use for broccoli
😂
Here's some midway-through photos, but my lad has outgrown his current bike (27.5 wheels) so I got a new frame for him (99 quid CRC jobbie, that got pretty good reviews.. Brand-x frame)..
I tried stripping with synstrip, but was too faffy so paid a sand blaster!
Colours, the boy's own!
Stripped


Primed


Painting


Colour No.2!


Frame gloss


One more coat of gloss to do tonight, then we can buld it up!
Got him a new oval (legend!) chainring too...
DrP
I turned this
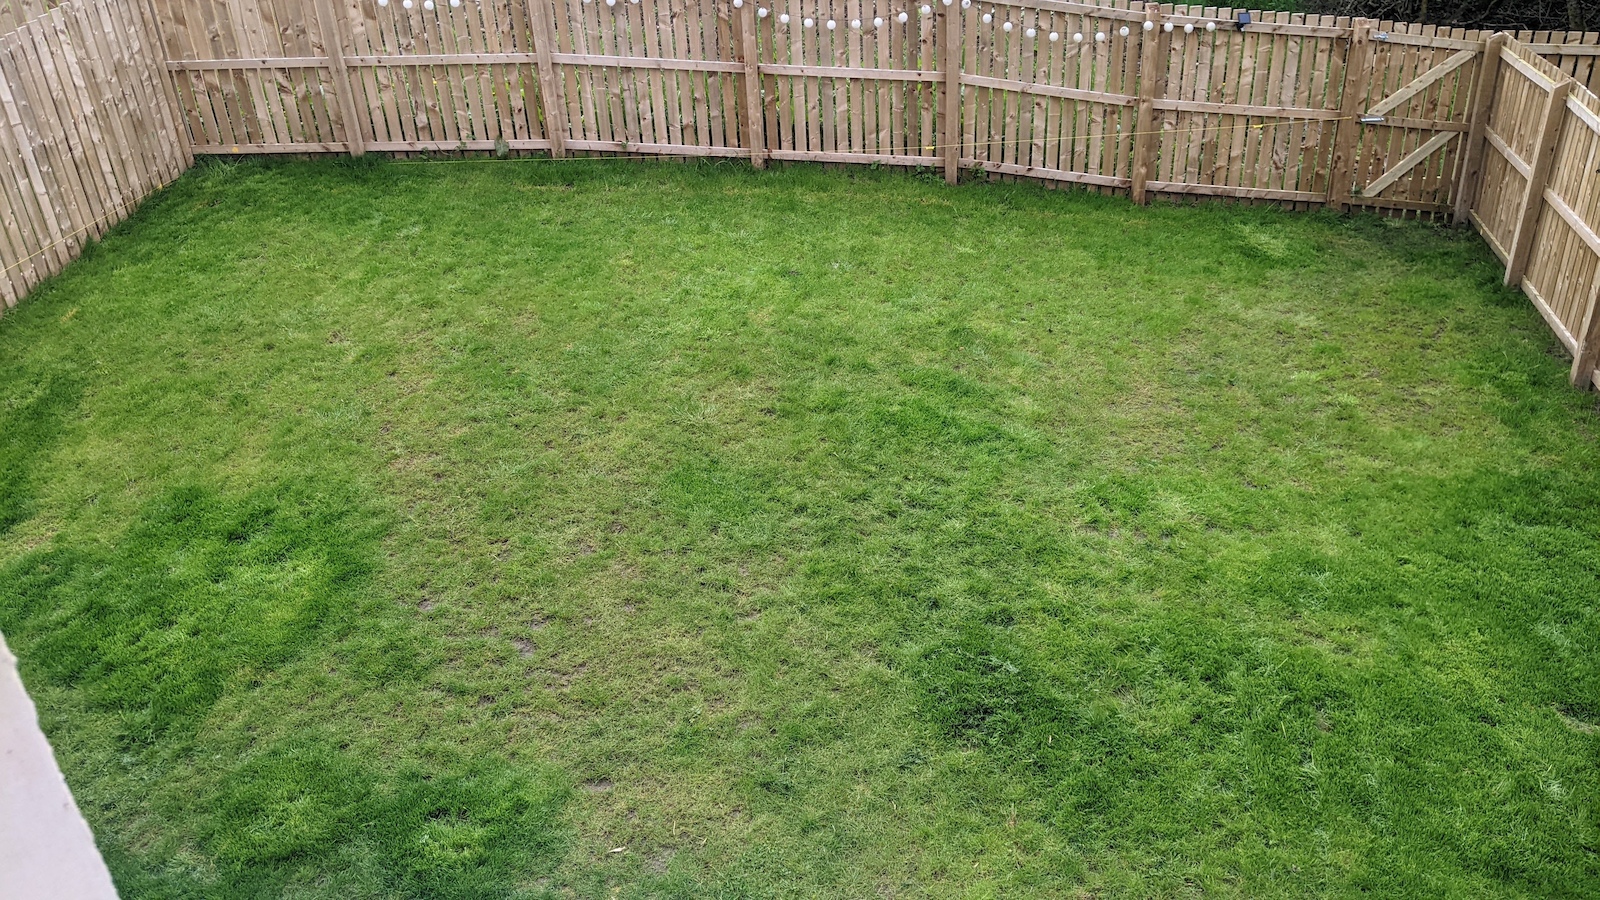
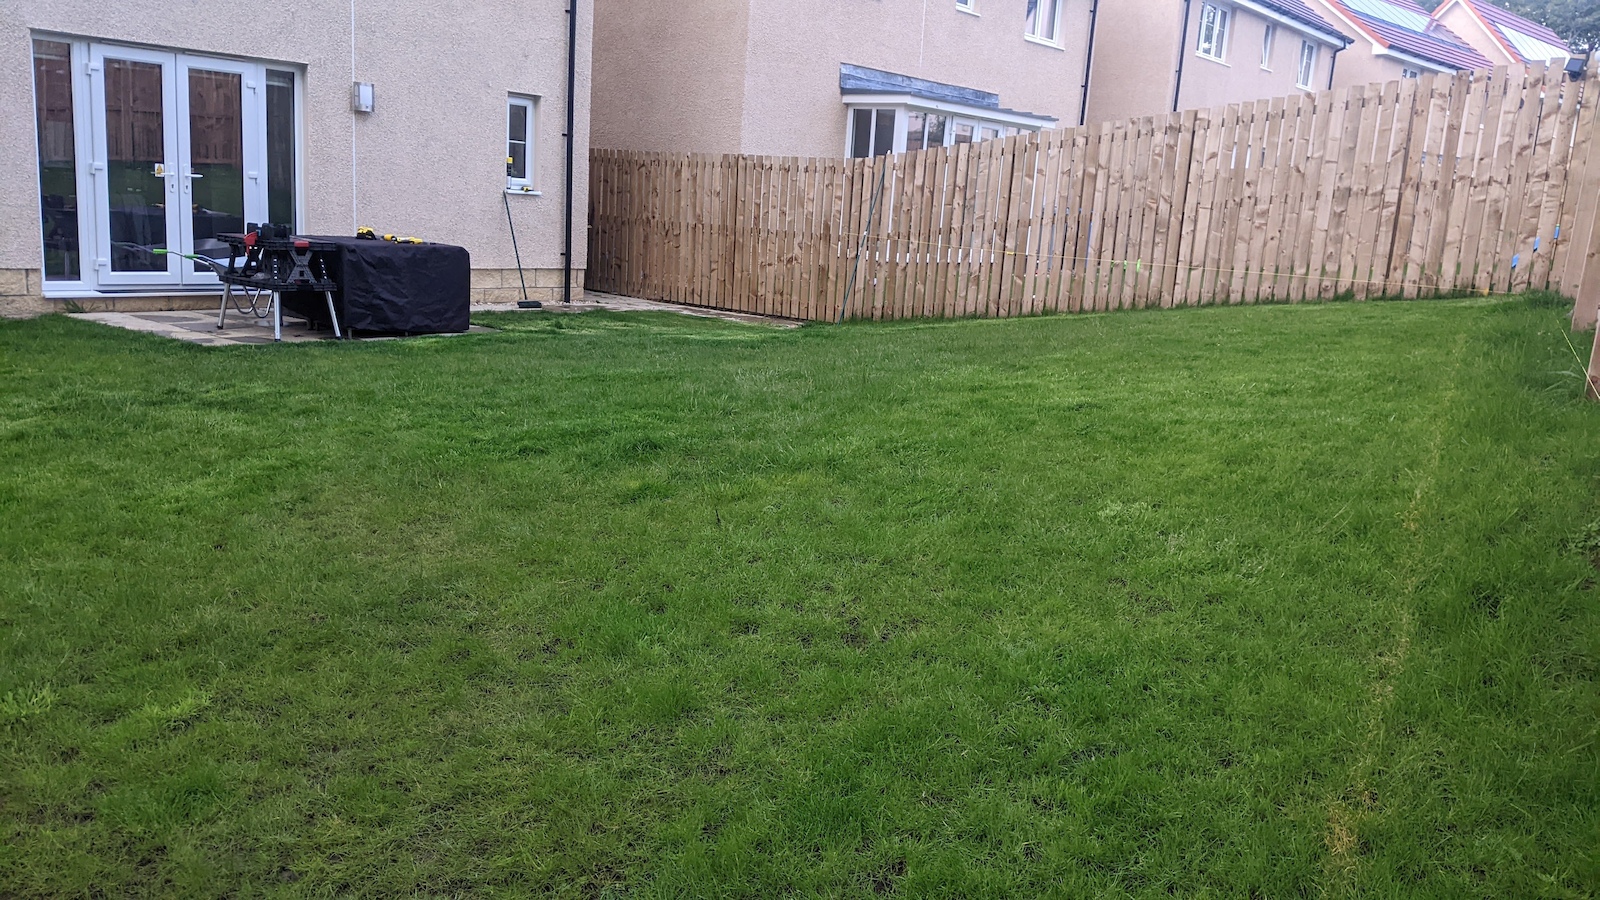
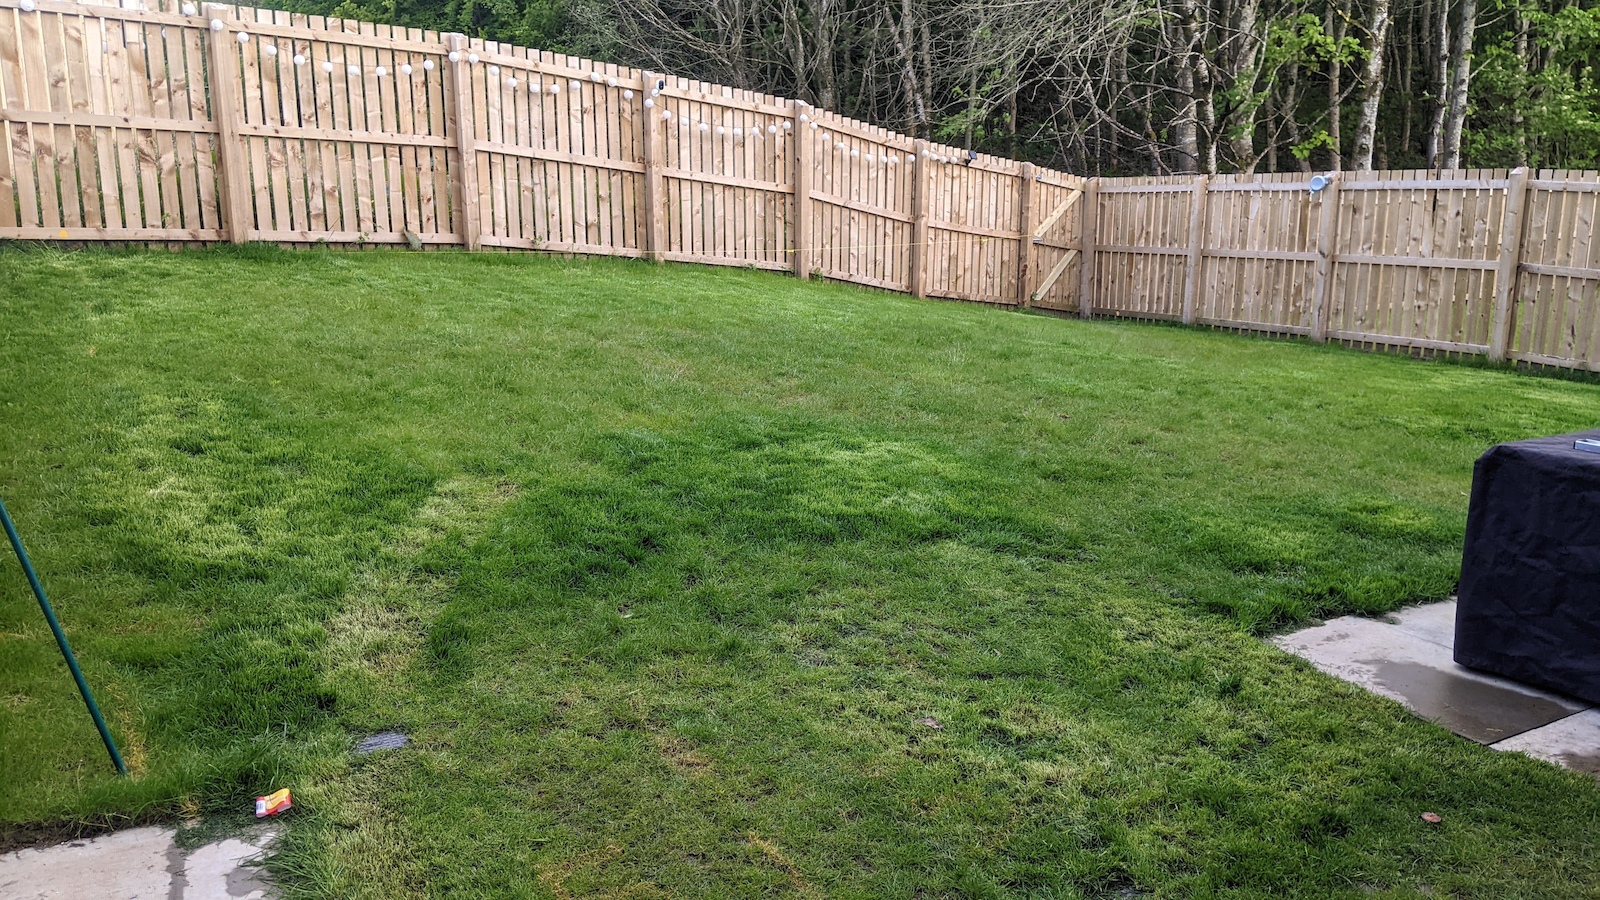
Into this
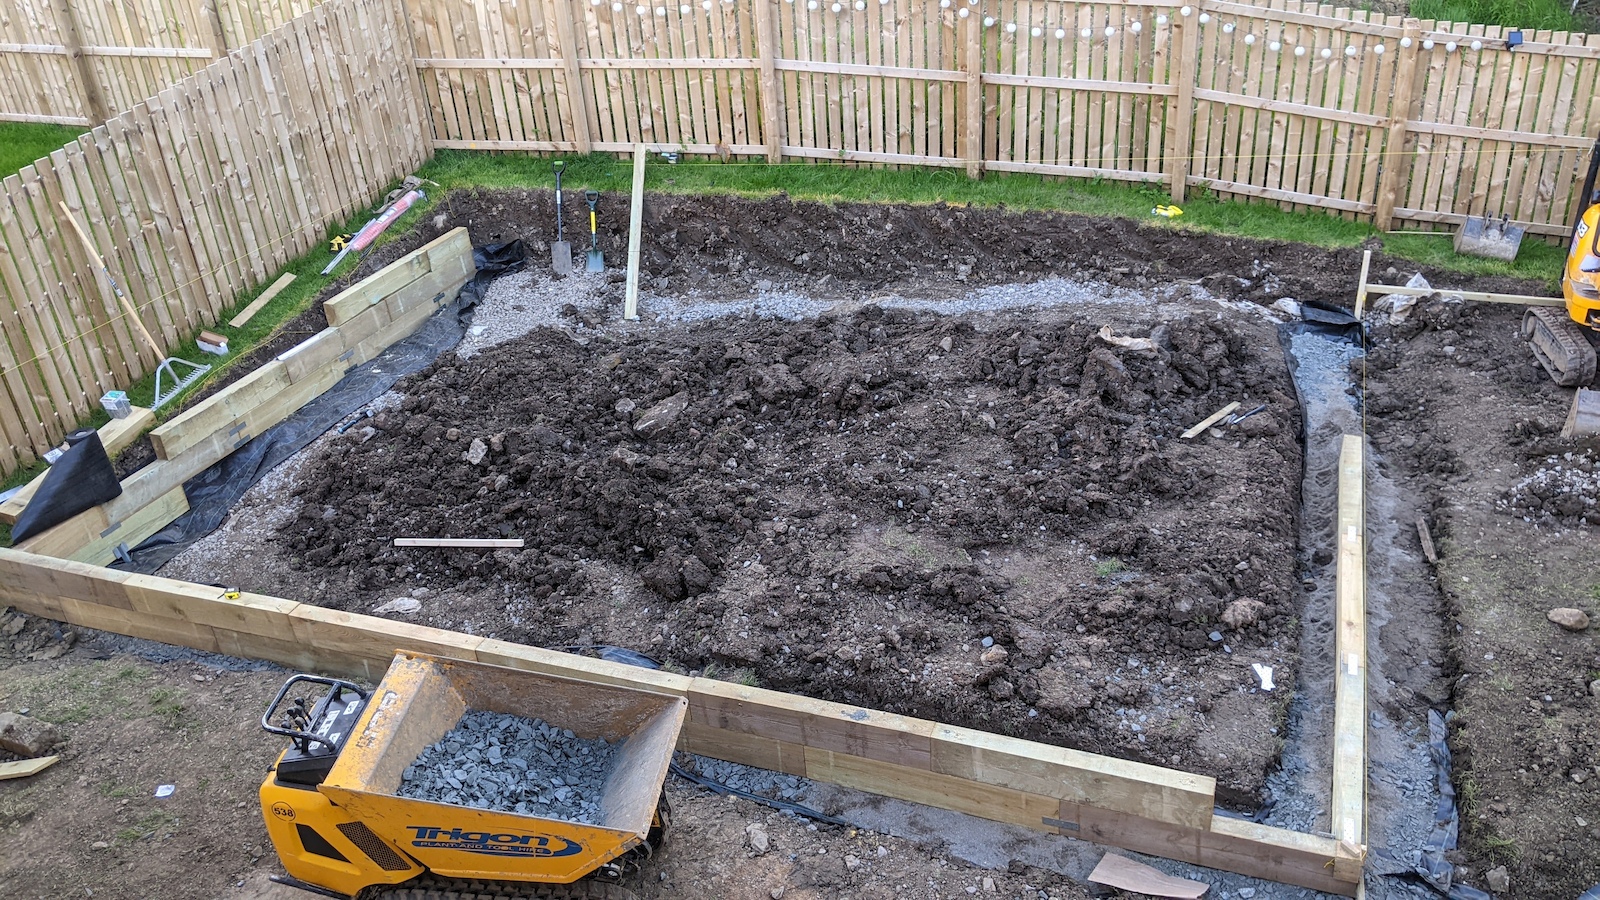
Got to play with a mini digger for a few days
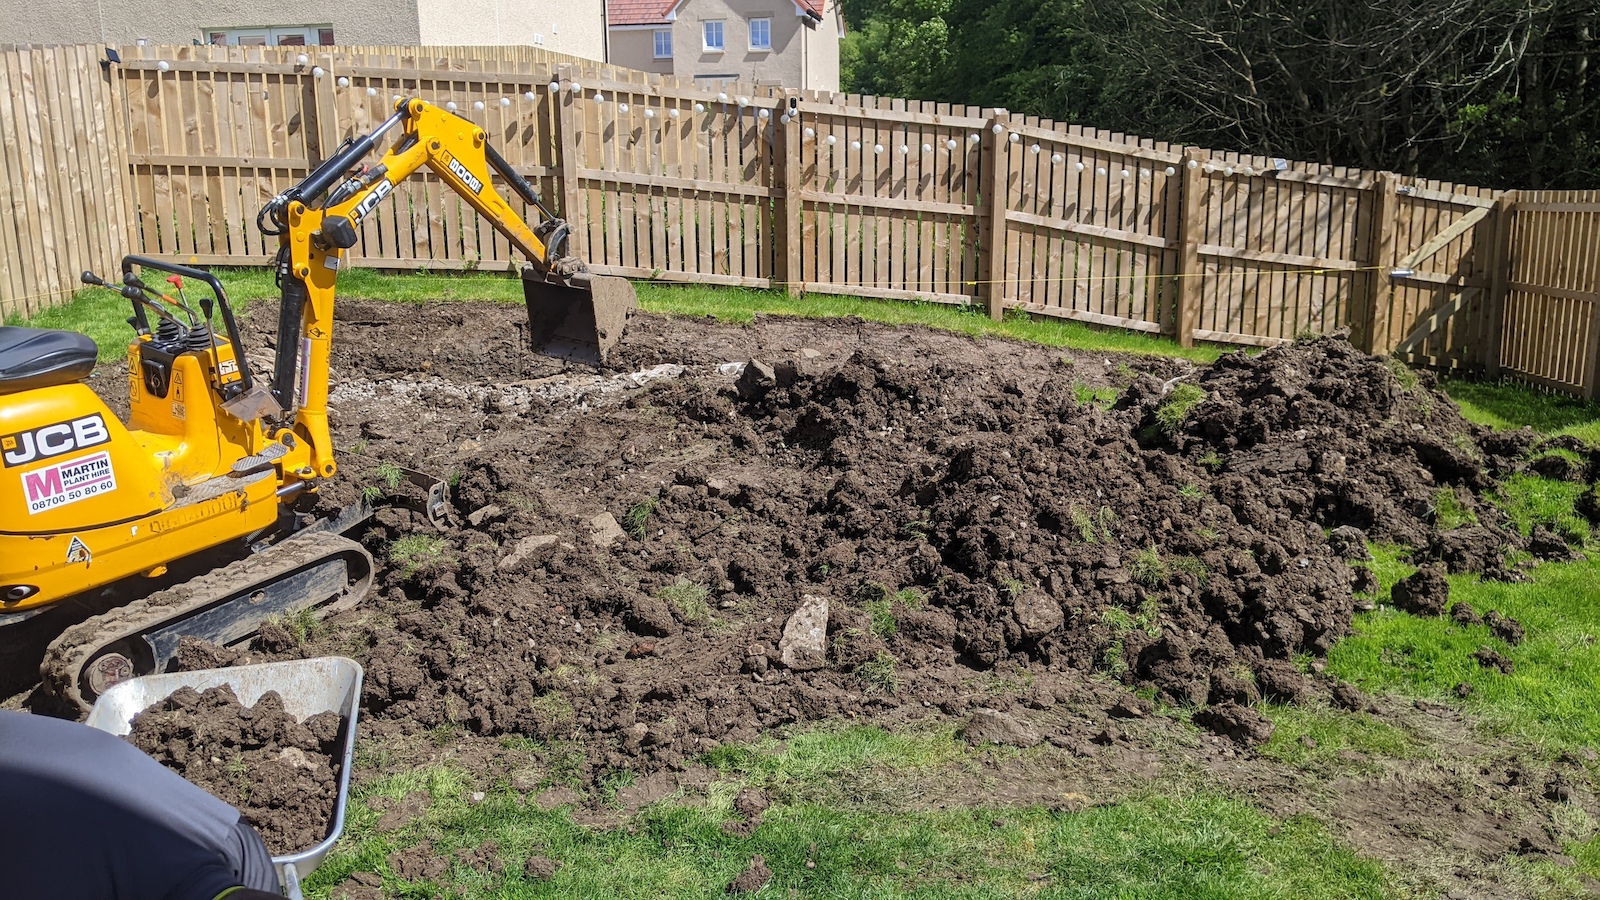

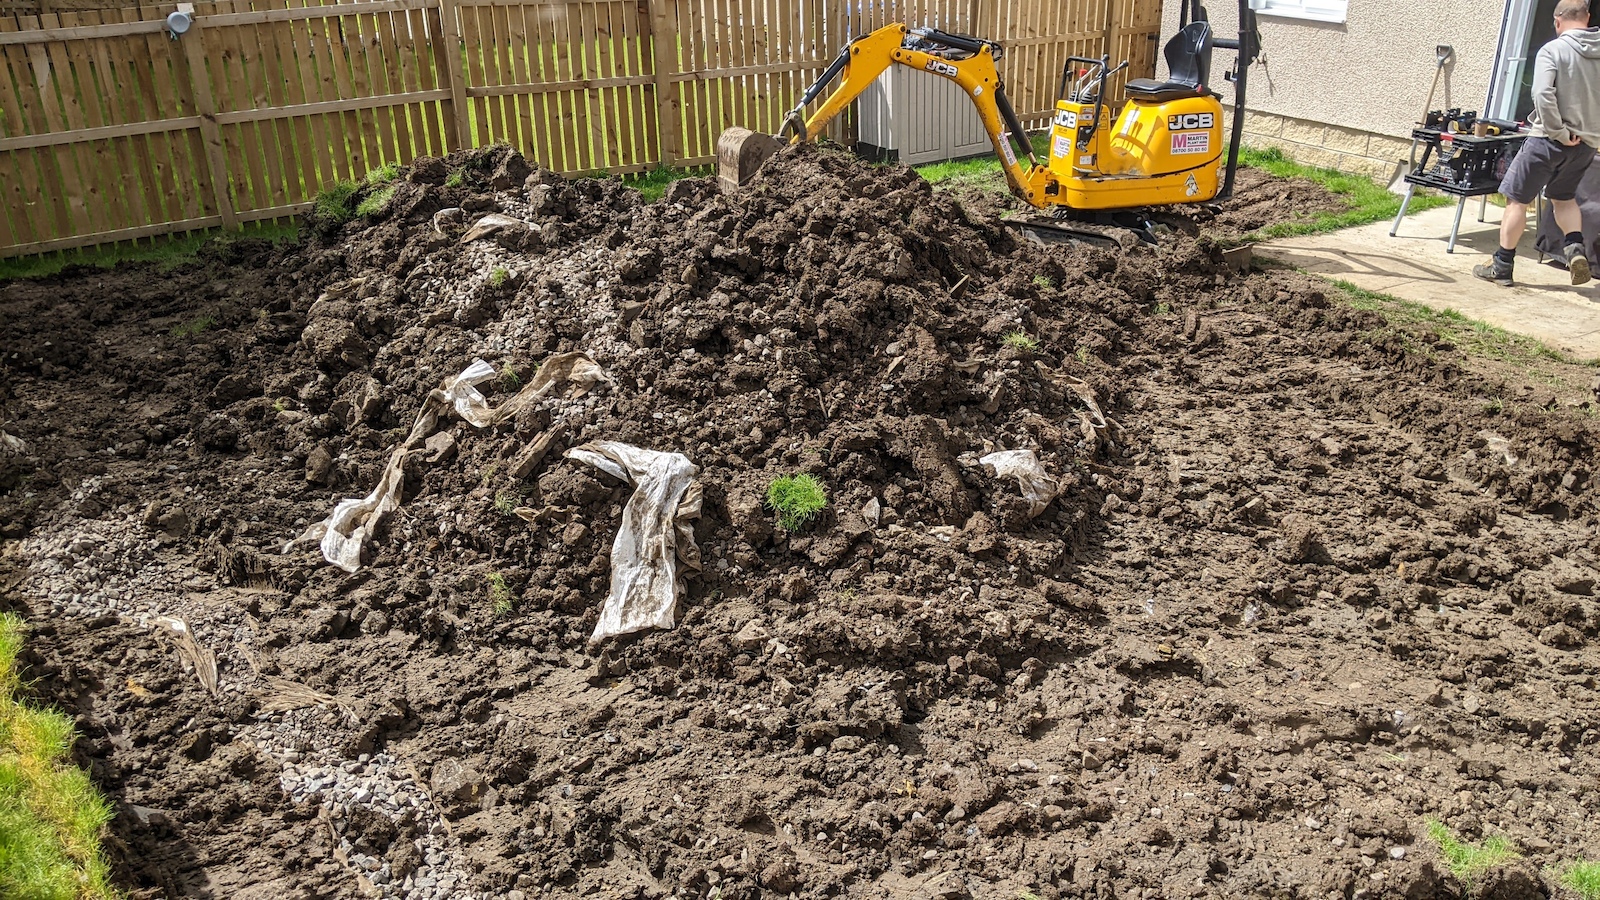
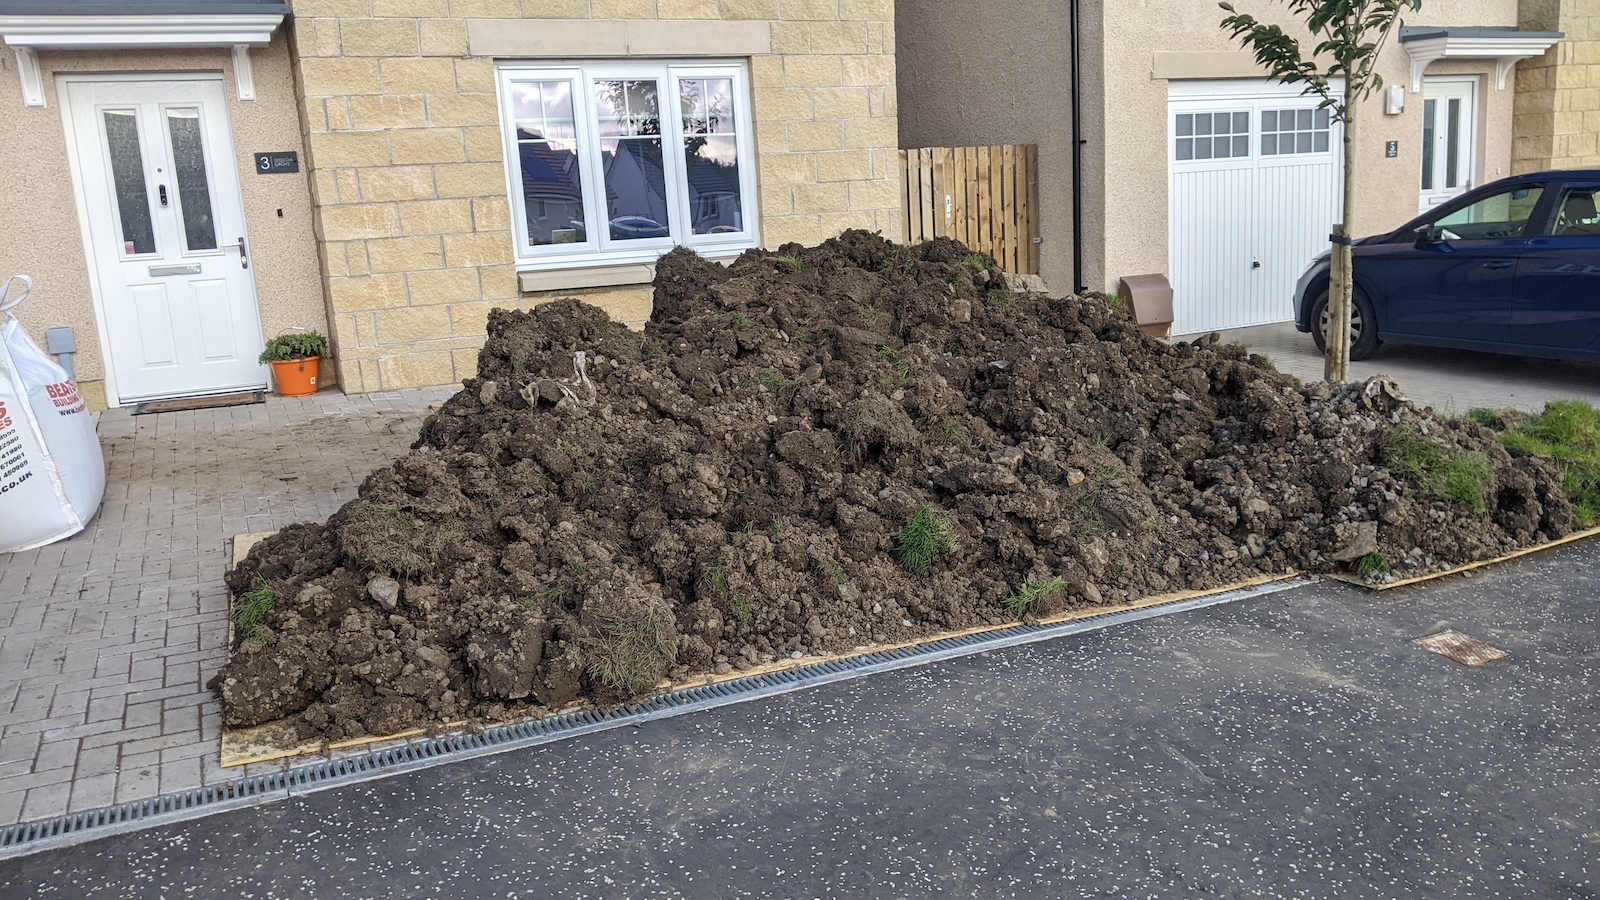
2 lots of this excavated and collected by a grab lorry. Over 40 tons
Because of the massive slope in the garden I had to build up some retaining walls using wooden sleepers and build a slightly elevated "terrace"
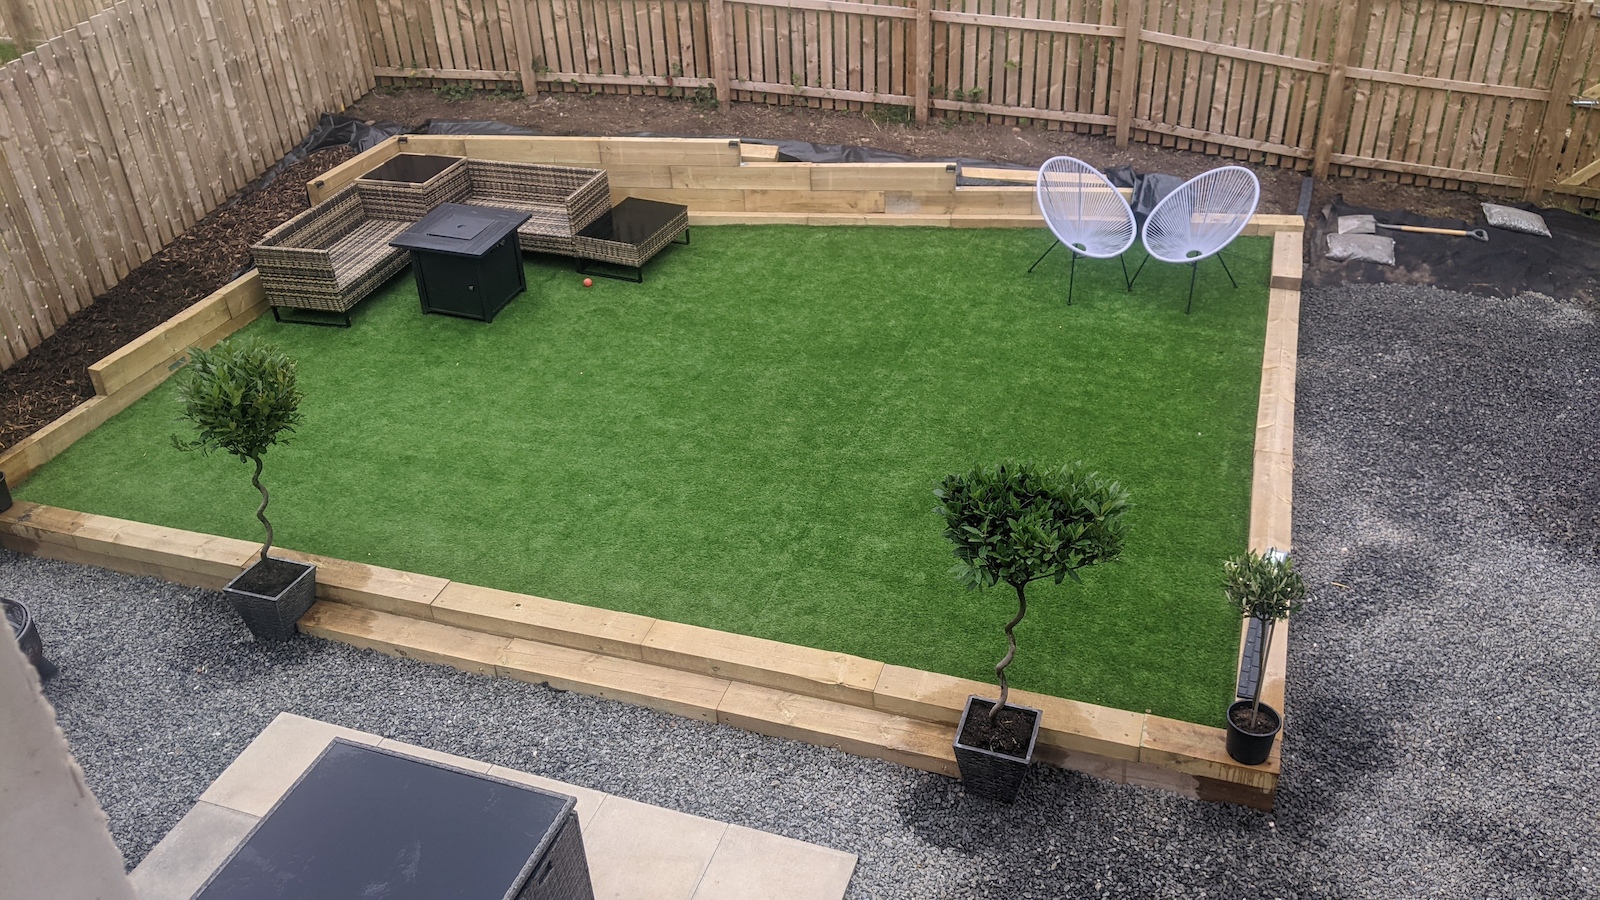
Fake (dog proof) grass down!
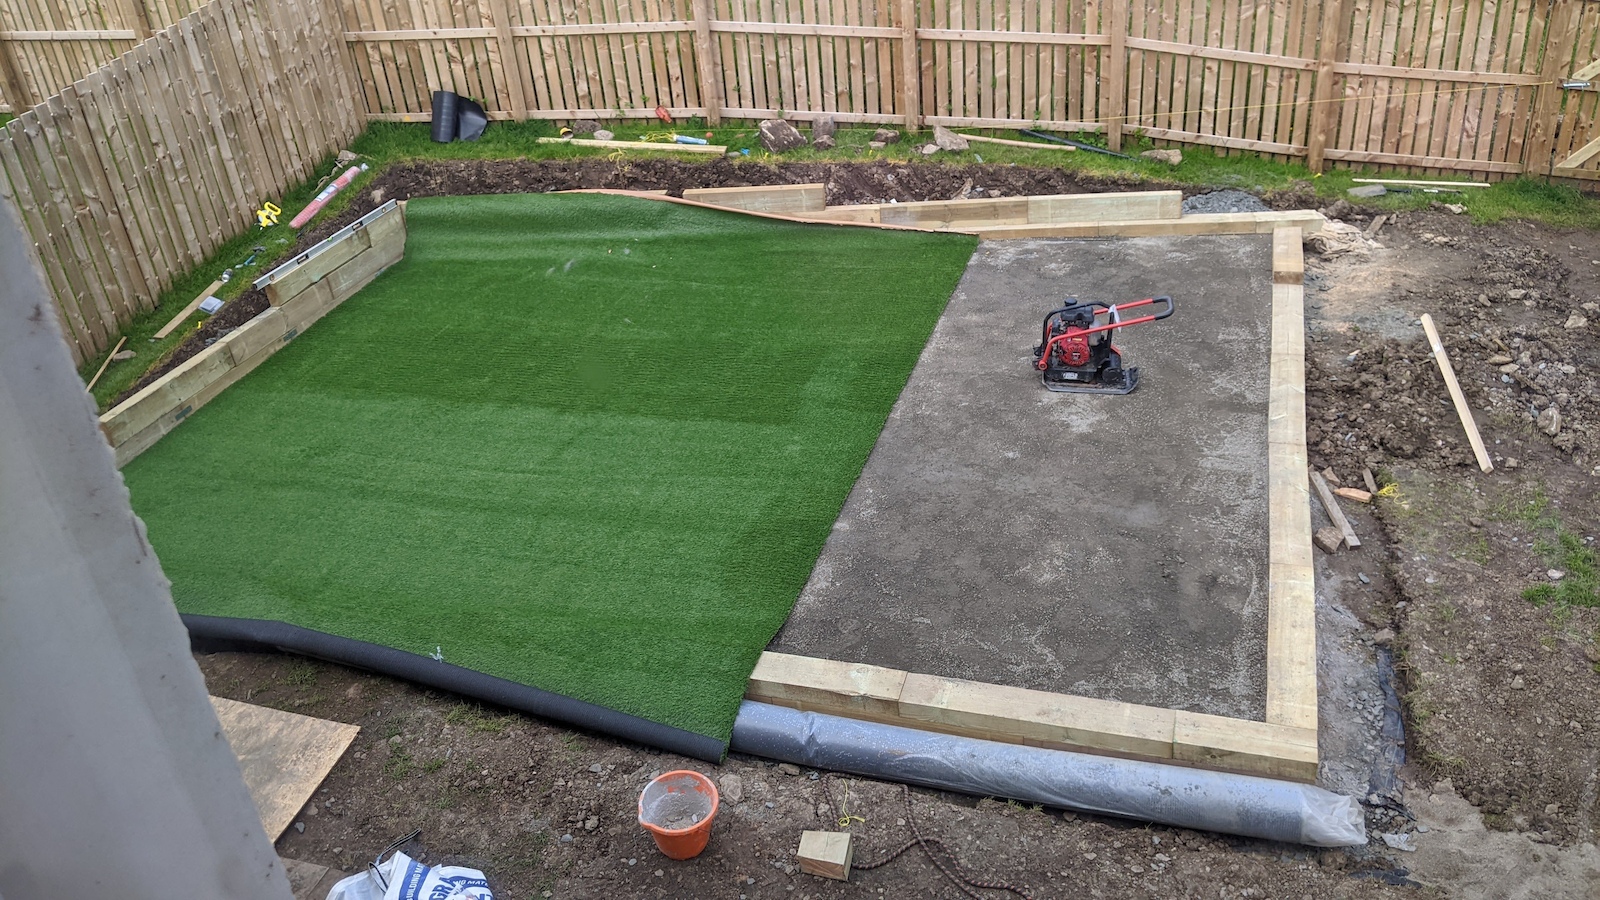
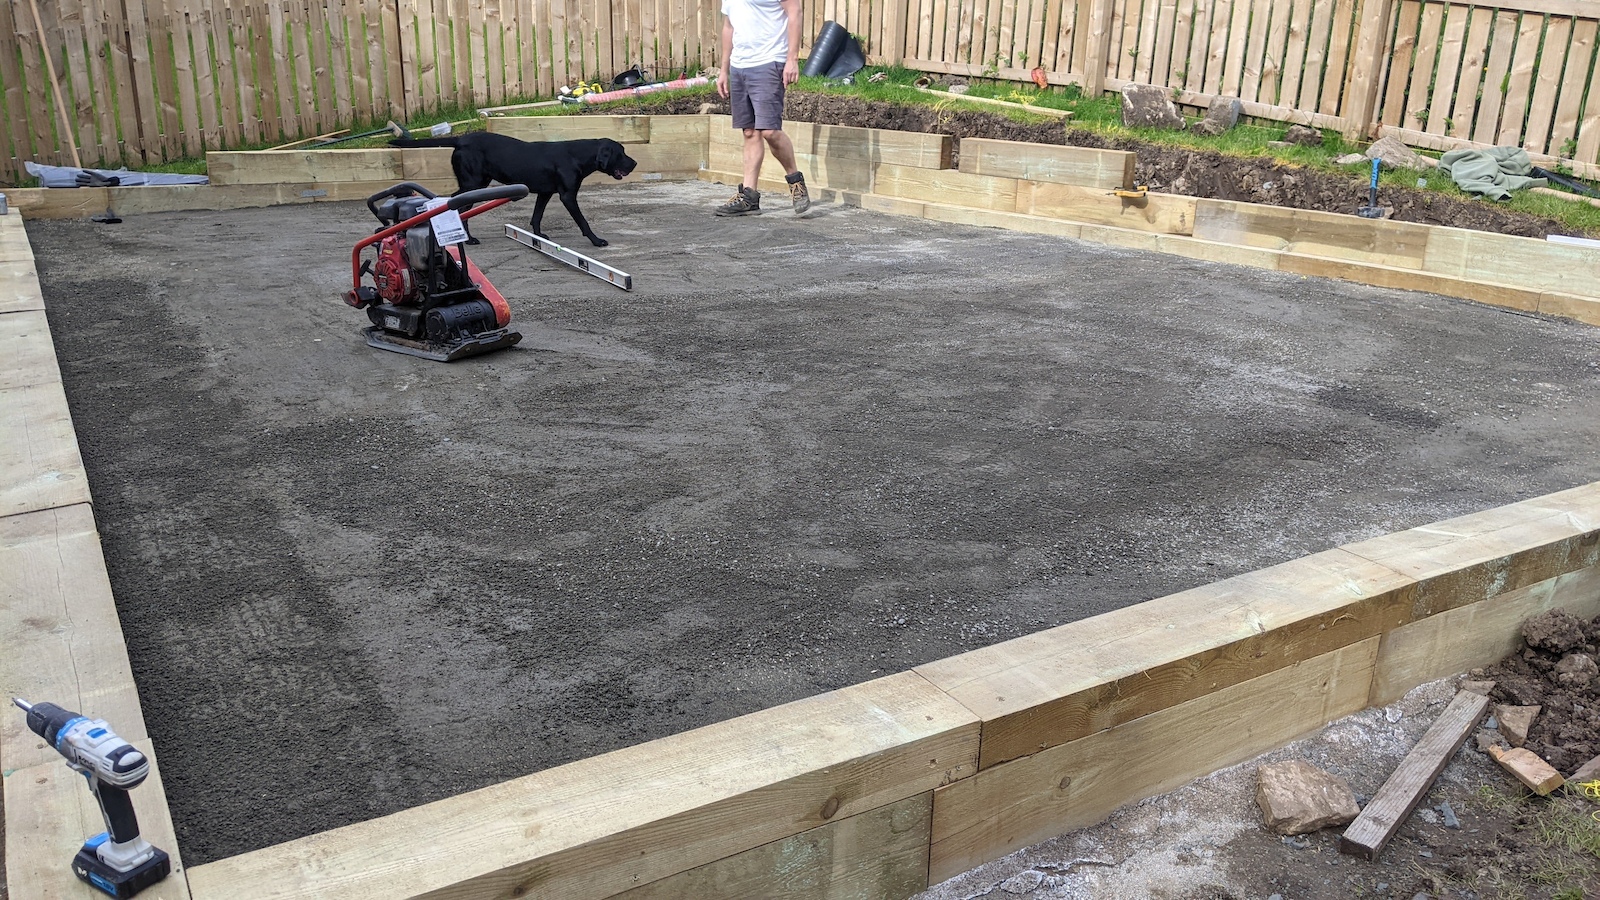
Slabs and chips down in the other areas
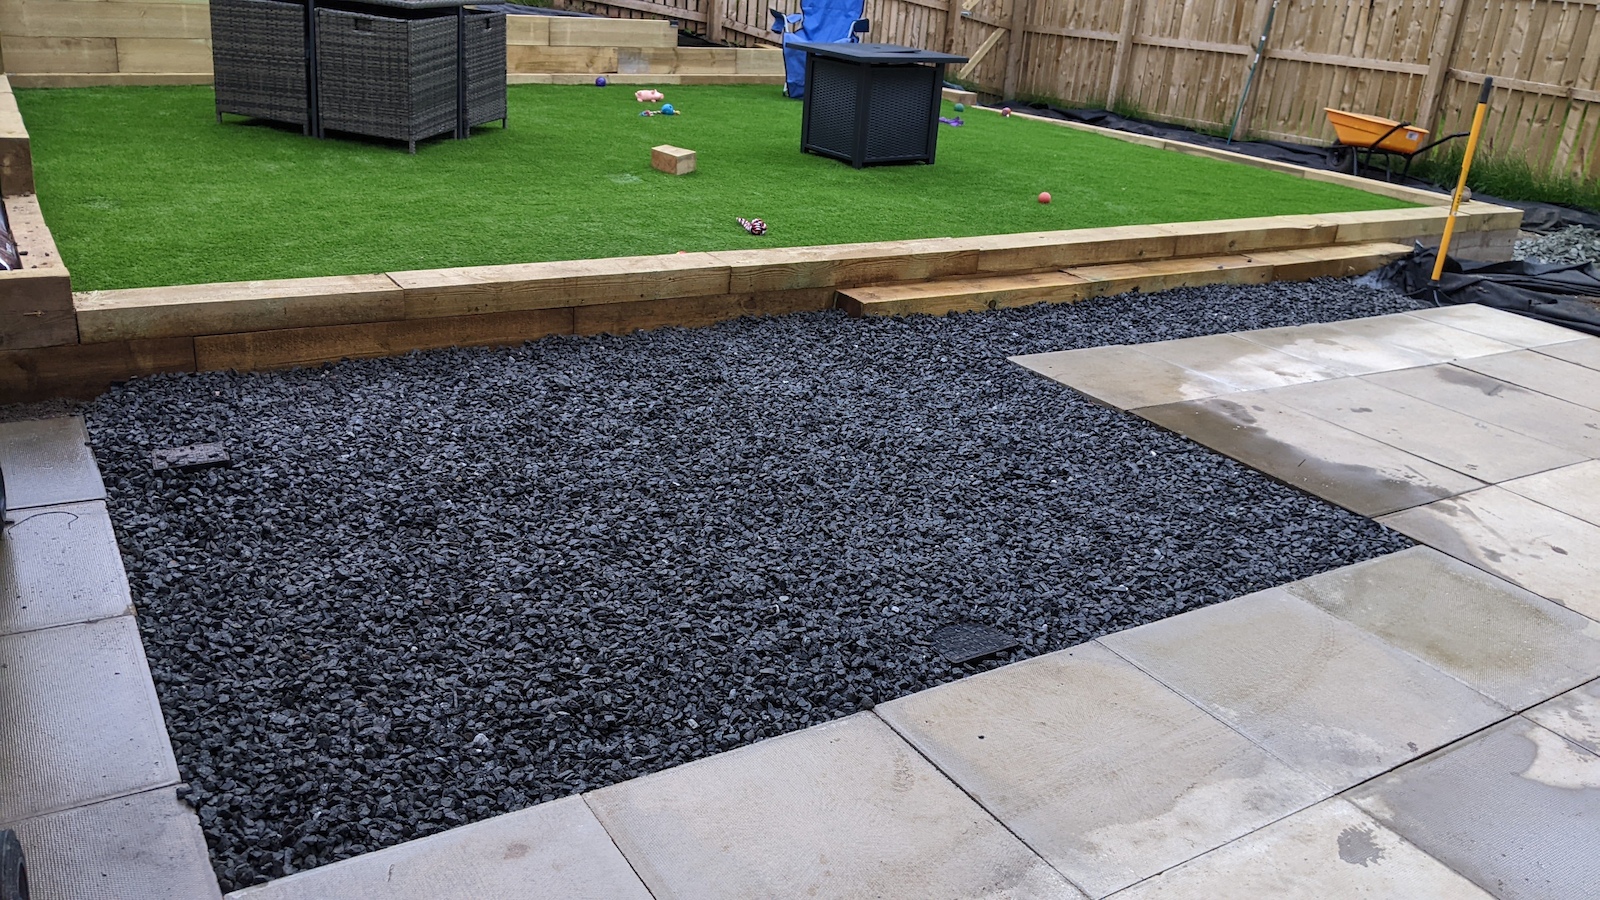
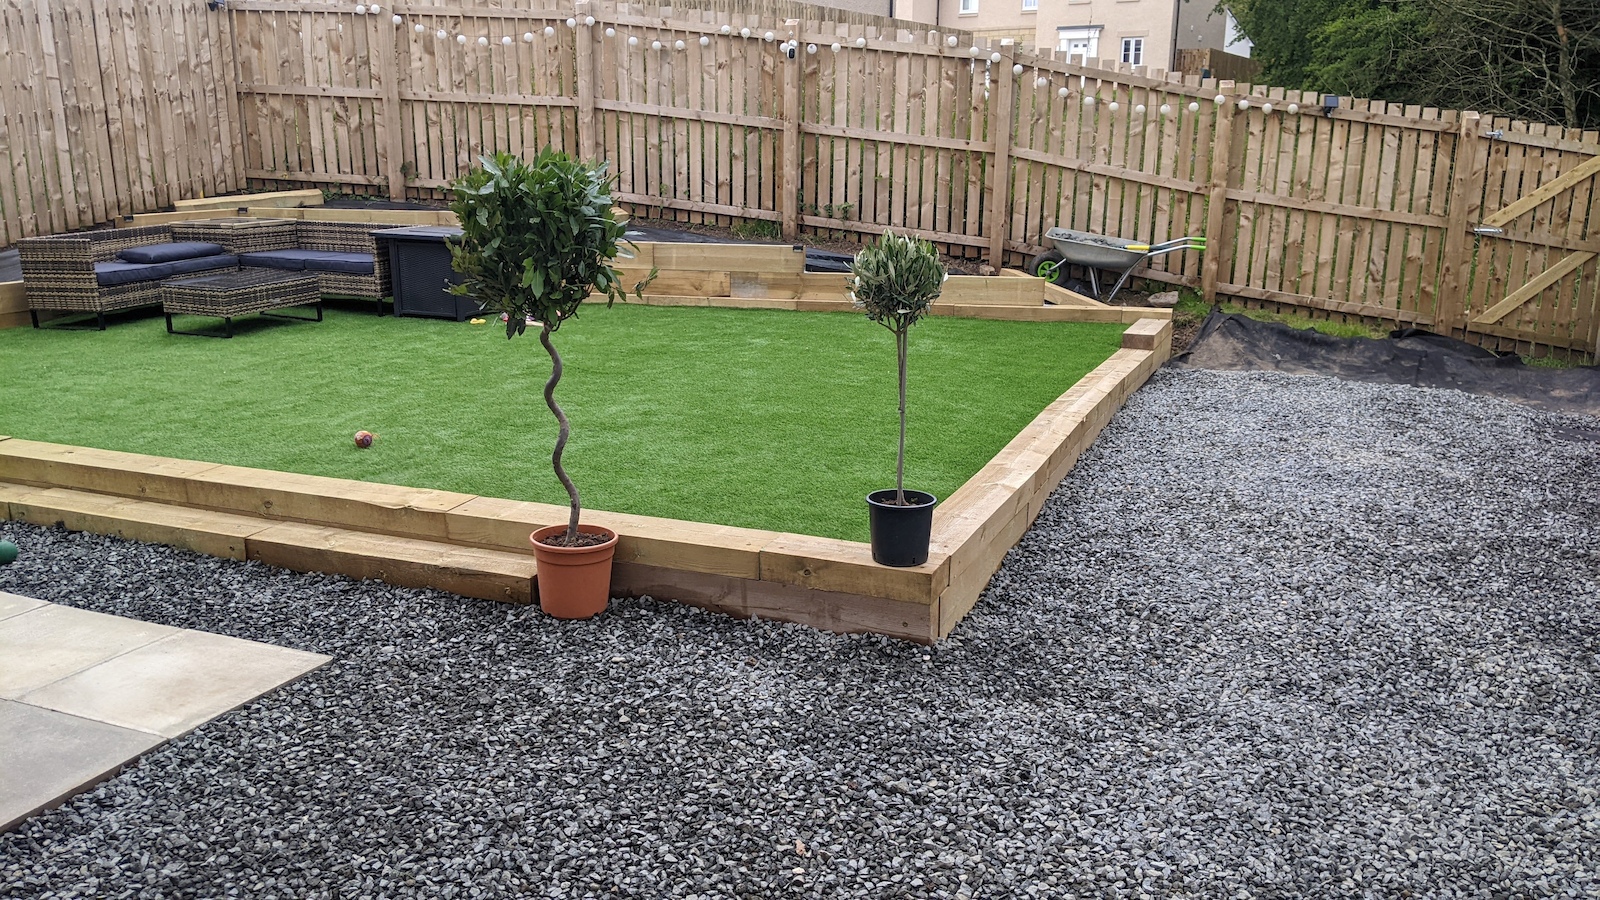
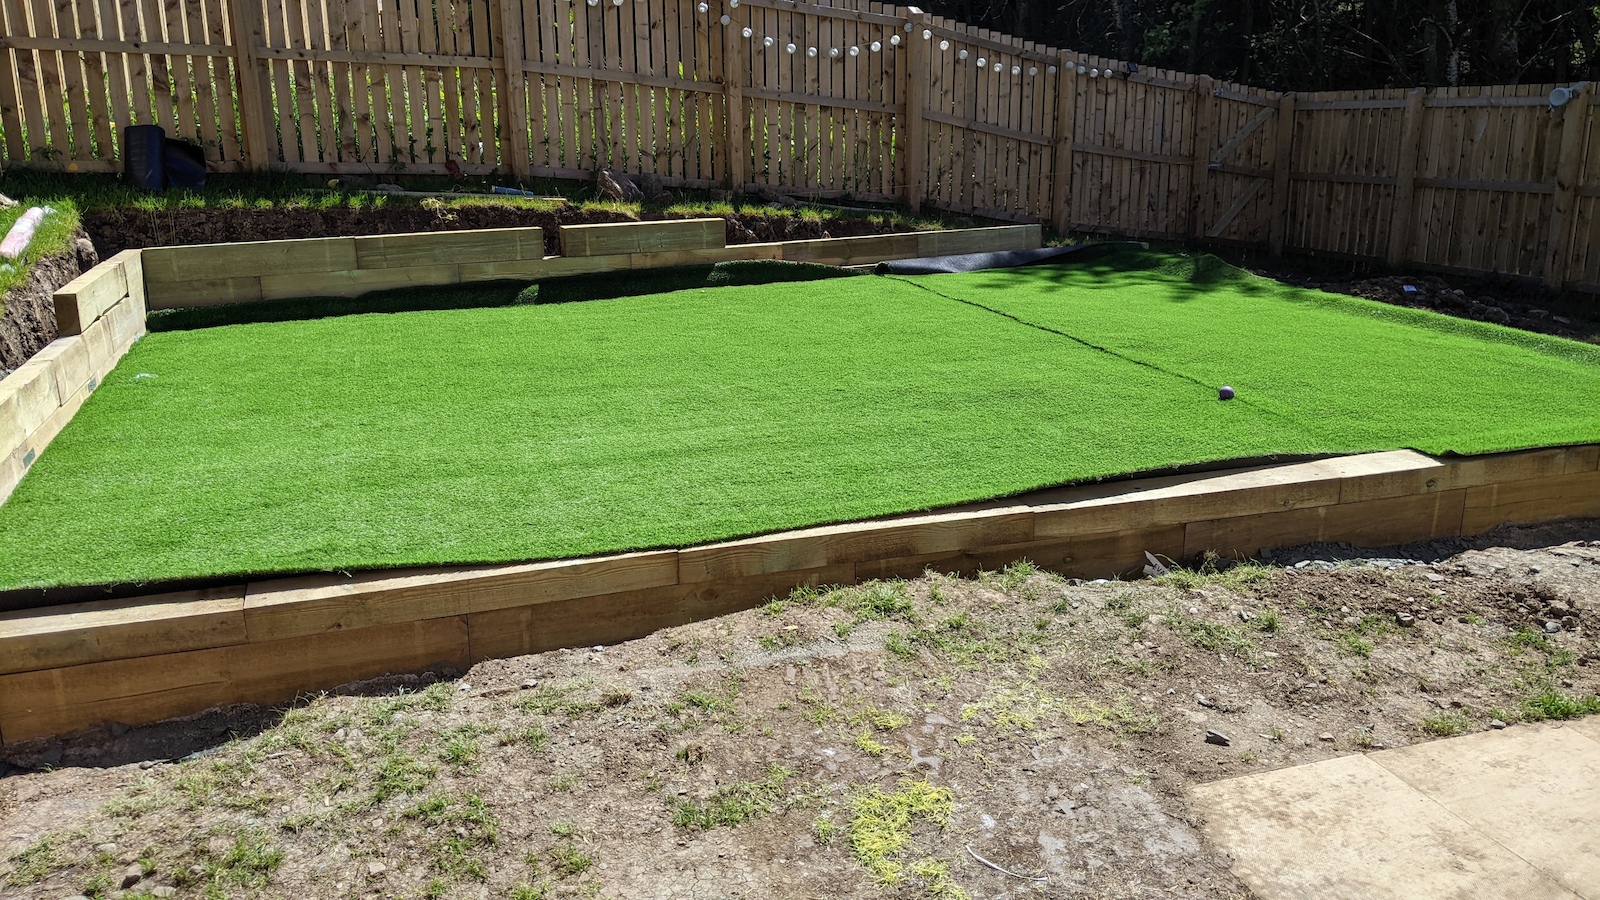
Nearly finished
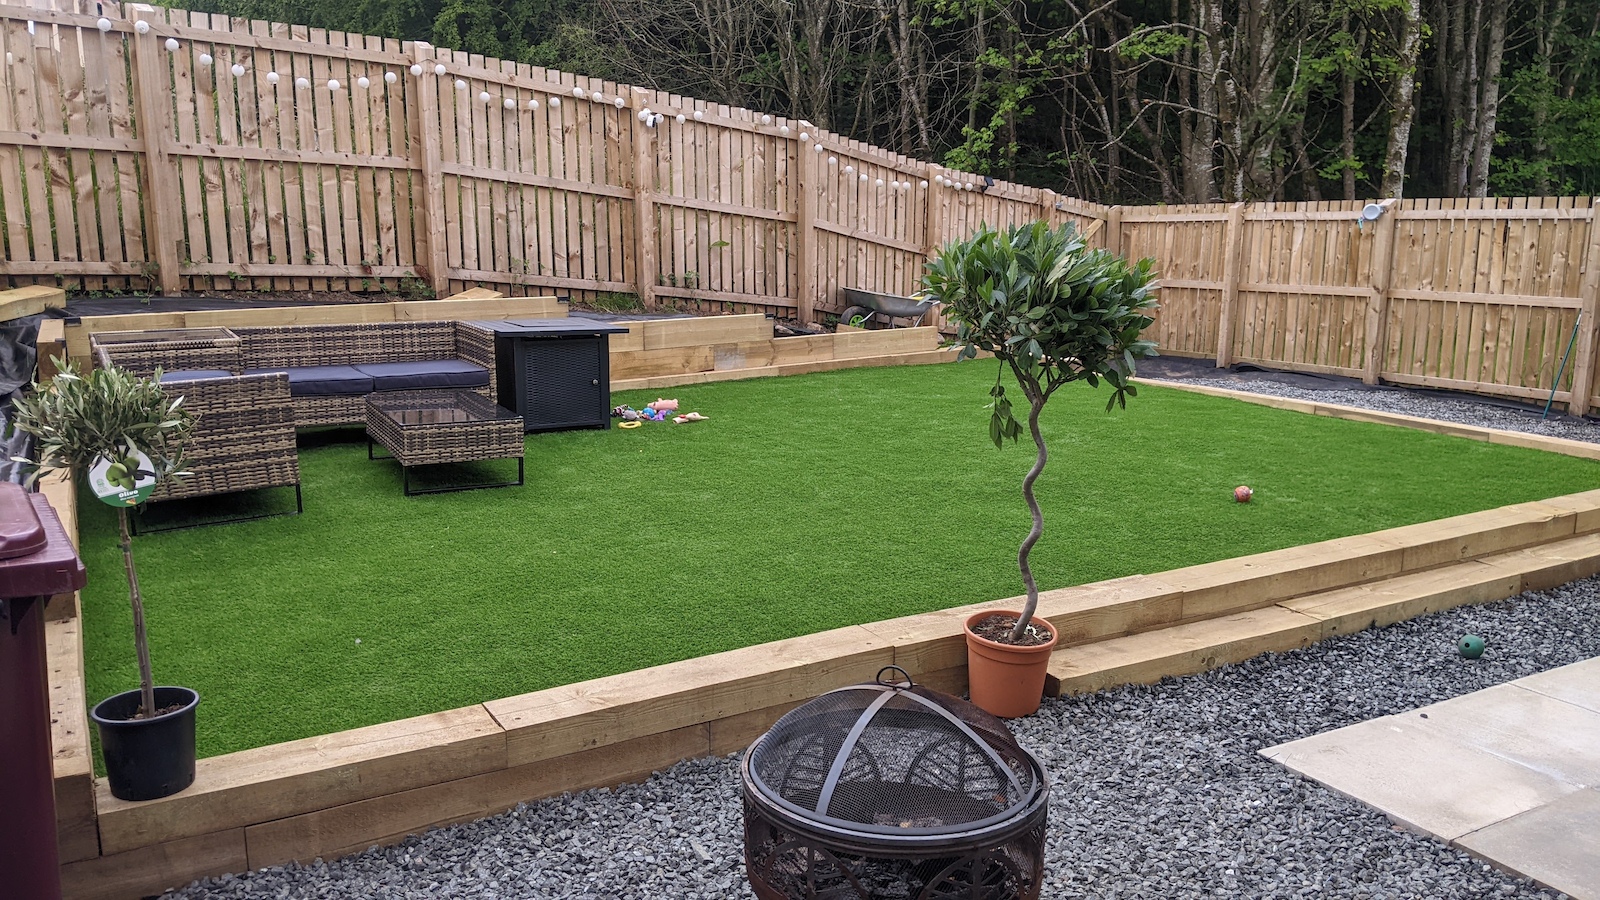
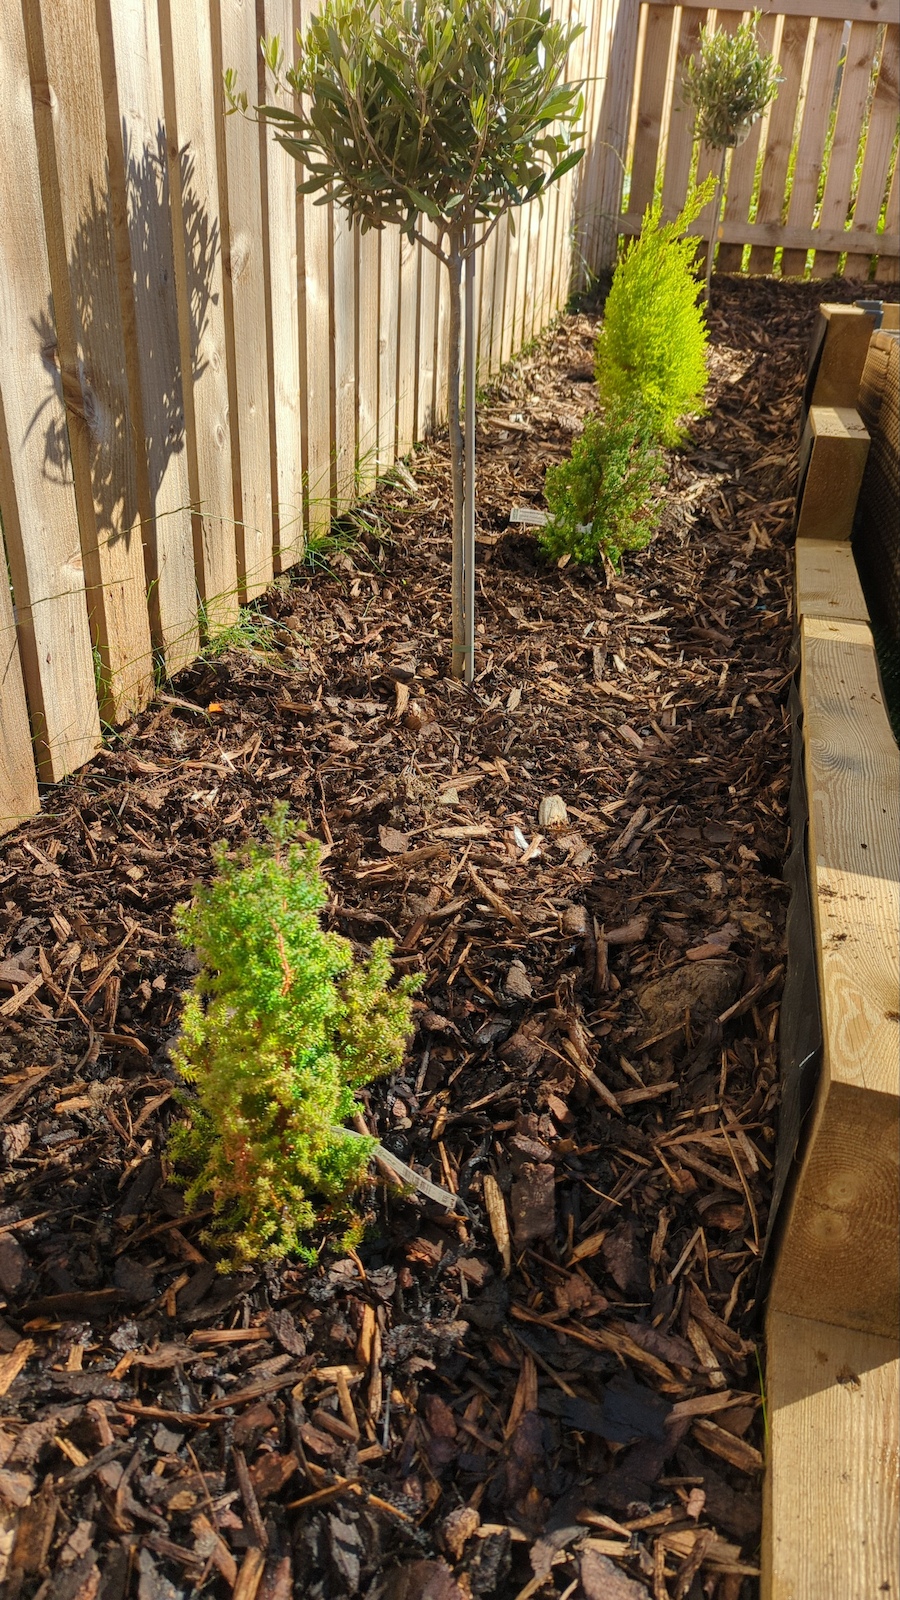
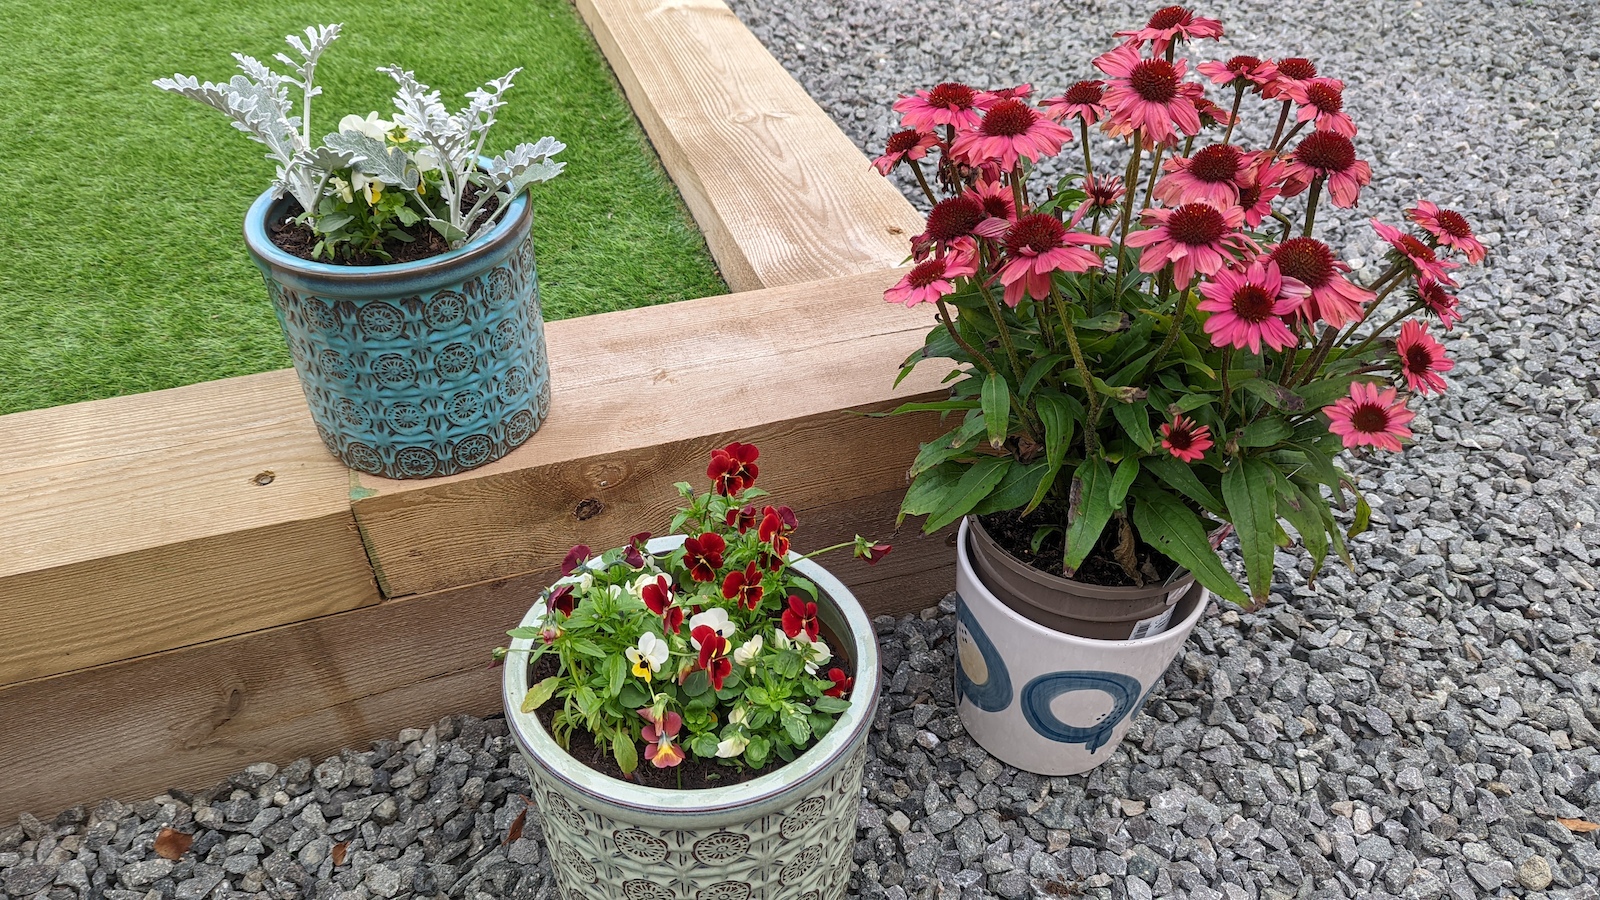
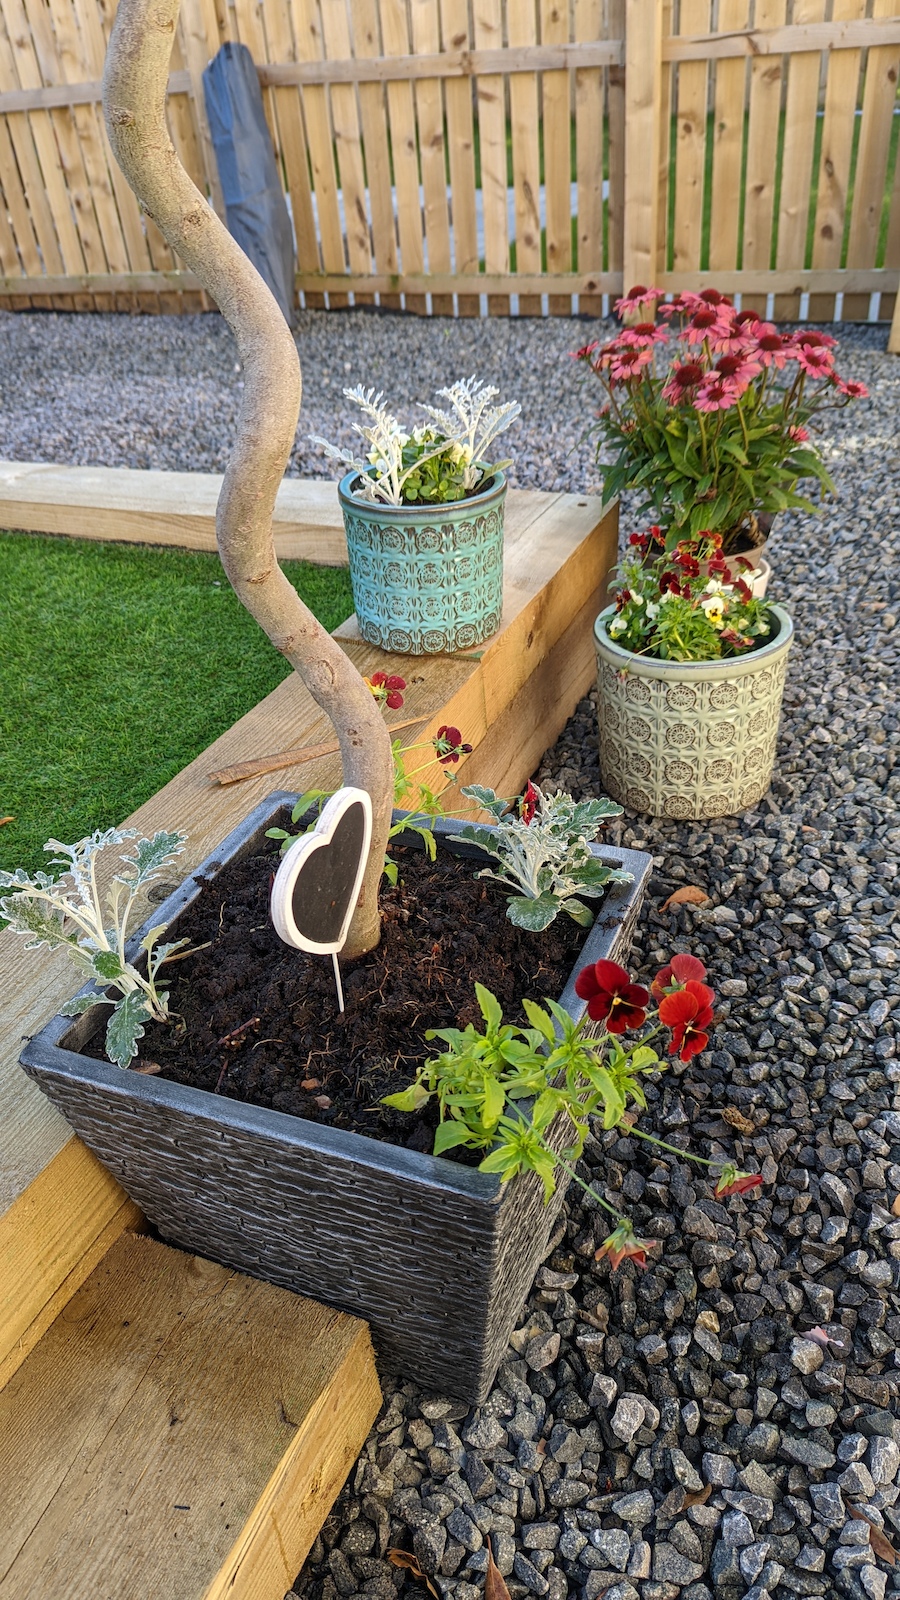
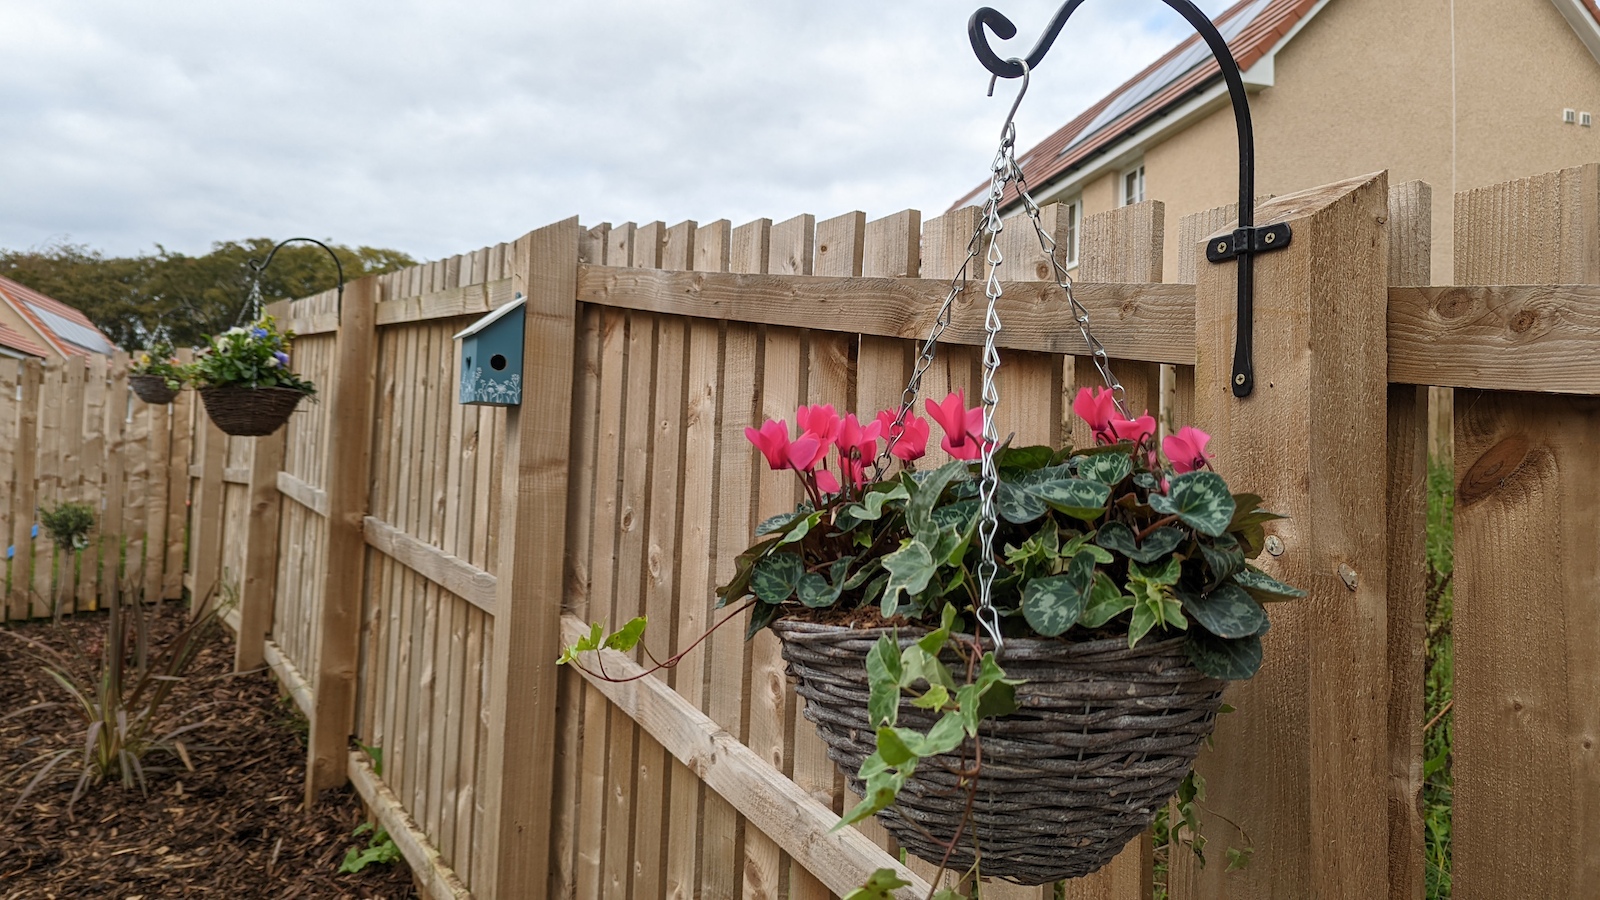
Borders are now full of plants, flowers and trees with more to come in spring
Barring a mate helping me by driving a power barrow for a few days while we dug the garden out, every single thing was done by me alone. 6 weeks of slog at weekends and after work.
Fake grass…..Why?
Fake grass…..Why?
Very wet clay soil and a dog
In an ideal world I'd have had a lawn like the 12th at Augusta. In reality it was more like The Somme in 1916
[url= https://i.postimg.cc/Vk6z0y4L/20220926-125907.jp g" target="_blank">https://i.postimg.cc/Vk6z0y4L/20220926-125907.jp g"/> [/img][/url]
I doned a wall
Coping stones yet be determined
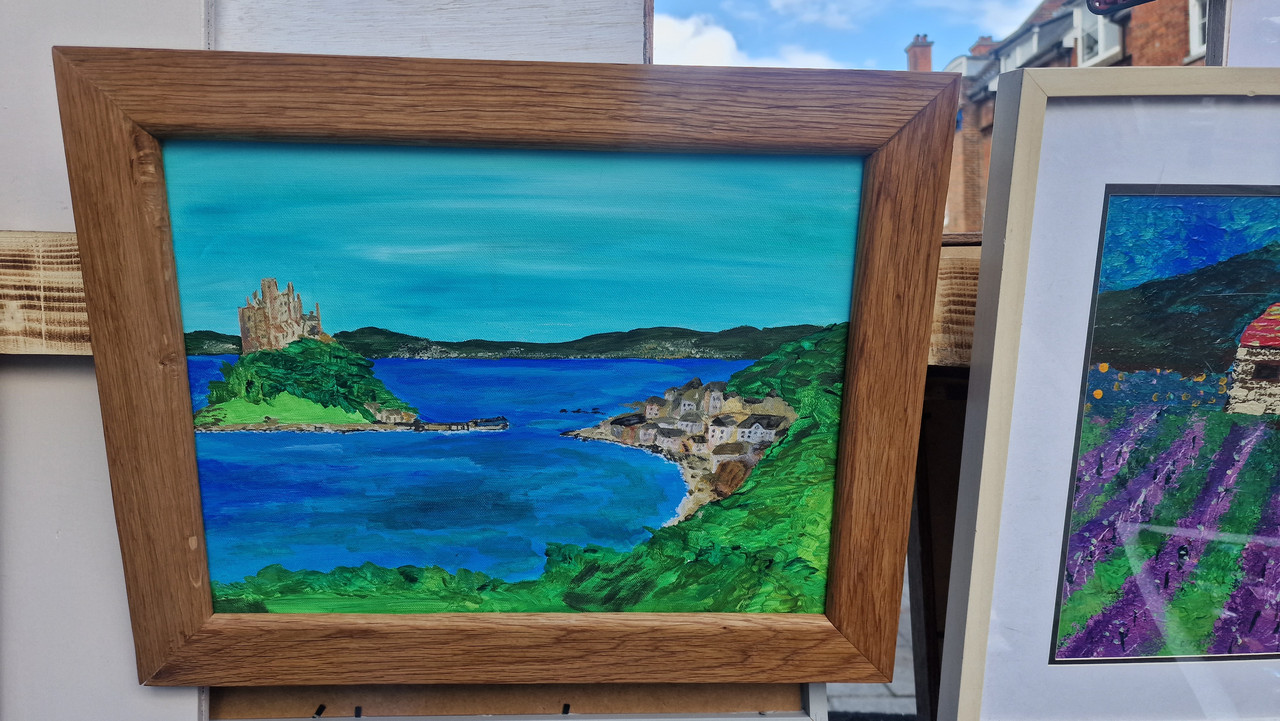
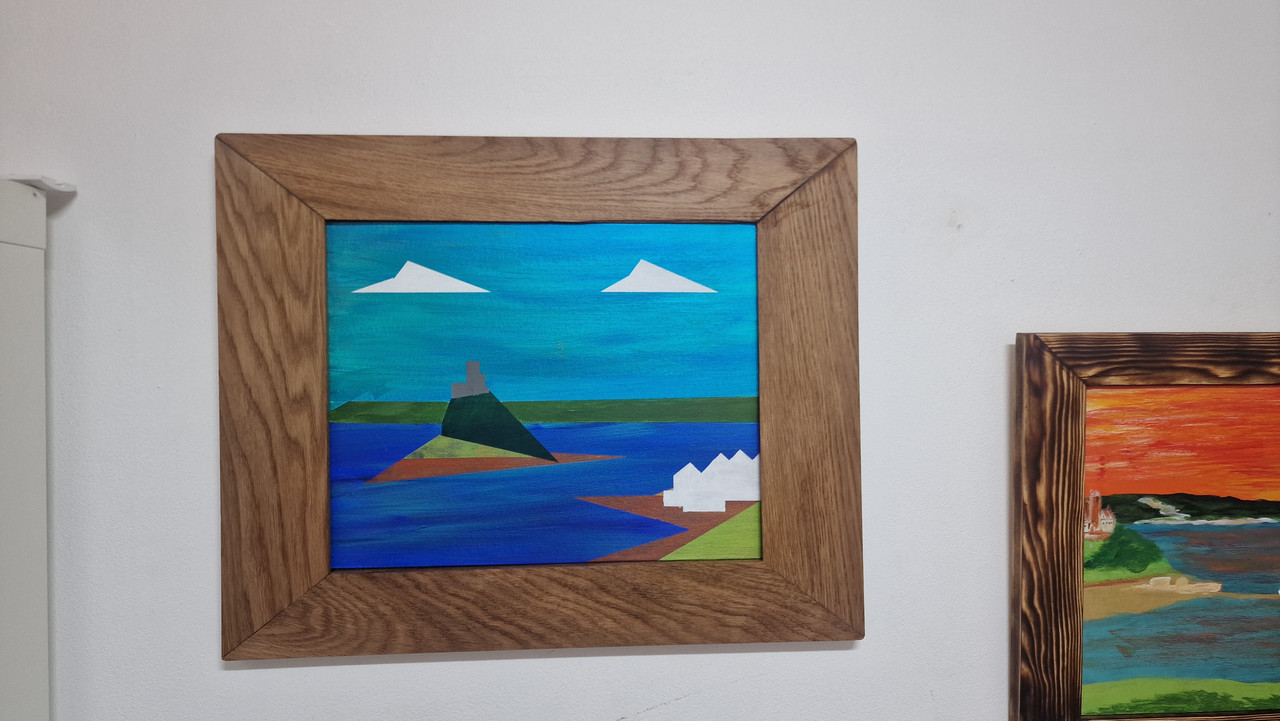
The conventional picture frames are cheap and easy so I thought I would make it difficult and make my own. Here are my first two attempts at 'something different'
I really like that bottom frame. So simple yet effective.
It’s my lad’s 21st birthday party in a few weeks.
I had an afternoon spare today, together with a few pallets and some worktop offcuts that had been in my garage for years.
DJ booth / garden bar!

Love the bar 😊👍
Nice Wall thestabiliser. Can it be seen from space?
Giving our old Coalbrookdale stove a refurb.
Solidwork'd some 10mm laser cut replacement grate bars.
Made a mould for casting refractory side firebricks.
[url= https://i.ibb.co/DWB0r1m/8-D168813-4-E02-44-CB-AD2-F-DF51367569-FE.jp g" target="_blank">https://i.ibb.co/DWB0r1m/8-D168813-4-E02-44-CB-AD2-F-DF51367569-FE.jp g"/> [/img][/url]
[url= https://i.ibb.co/88CP5yz/508886-E5-4-A29-48-E0-9-A08-73766-A9-AA6-F3.jp g" target="_blank">https://i.ibb.co/88CP5yz/508886-E5-4-A29-48-E0-9-A08-73766-A9-AA6-F3.jp g"/> [/img][/url]
[url= https://i.ibb.co/9HtptFN/EC6-AA523-C1-C6-4-D68-BEC5-E710733-DC21-F.jp g" target="_blank">https://i.ibb.co/9HtptFN/EC6-AA523-C1-C6-4-D68-BEC5-E710733-DC21-F.jp g"/> [/img][/url]
Fashioned a handy wheel jig out of a bit of 6x2 and a coach bolt…


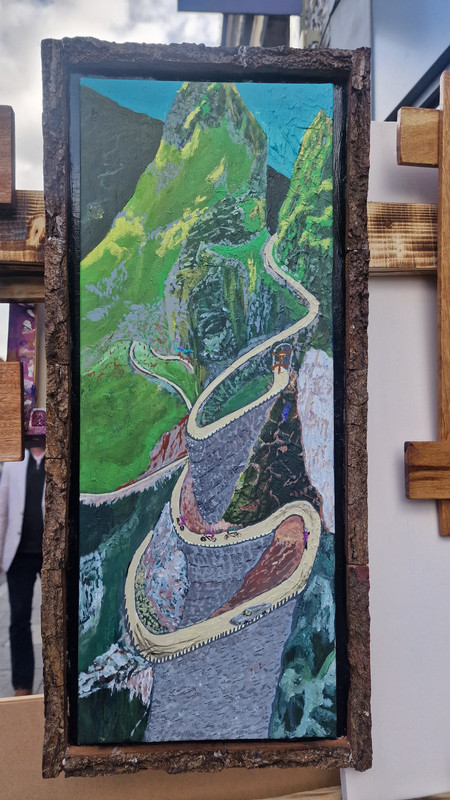
Three more picture frames from me.
They're some lovely grate bars RNP
[i]They’re some lovely grate bars RNP[/i] - Welds need grinding off at the thick end...
...says WCA, master of the pigeon shit weld technique
These two frames let you slide the painting in and out if you want to swap them around.
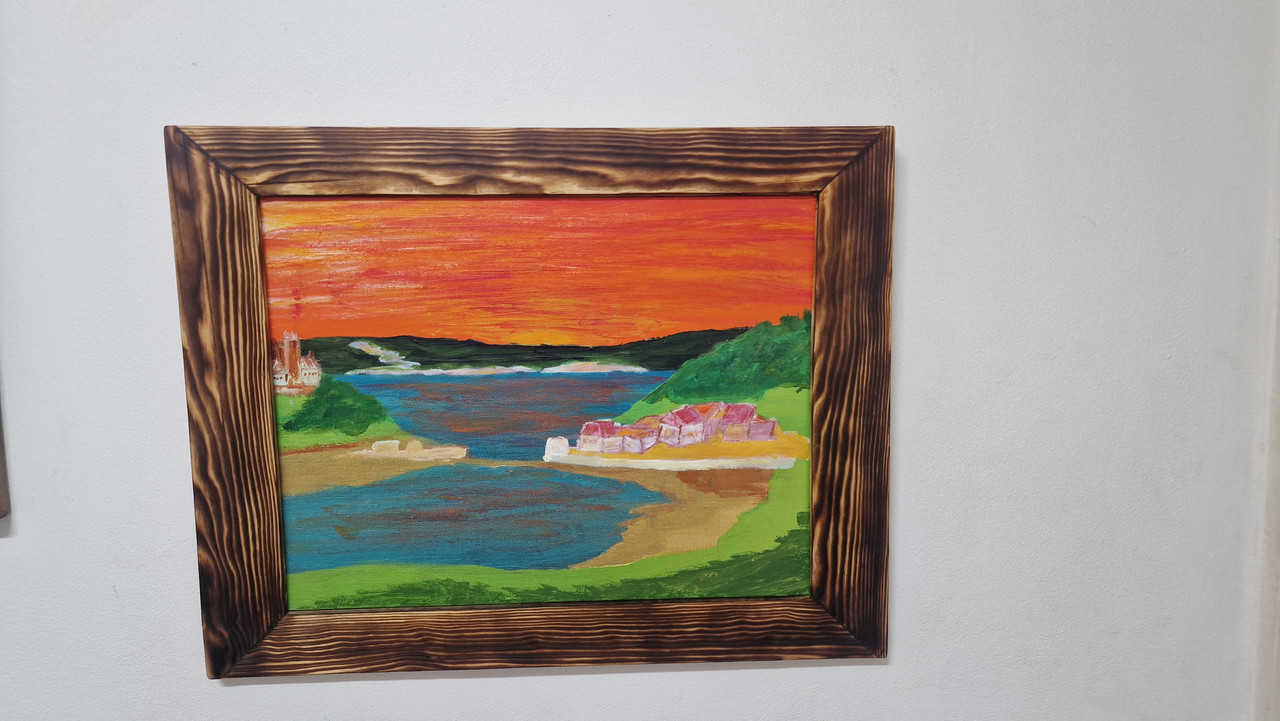
I felt the wider plain frame suited this painting
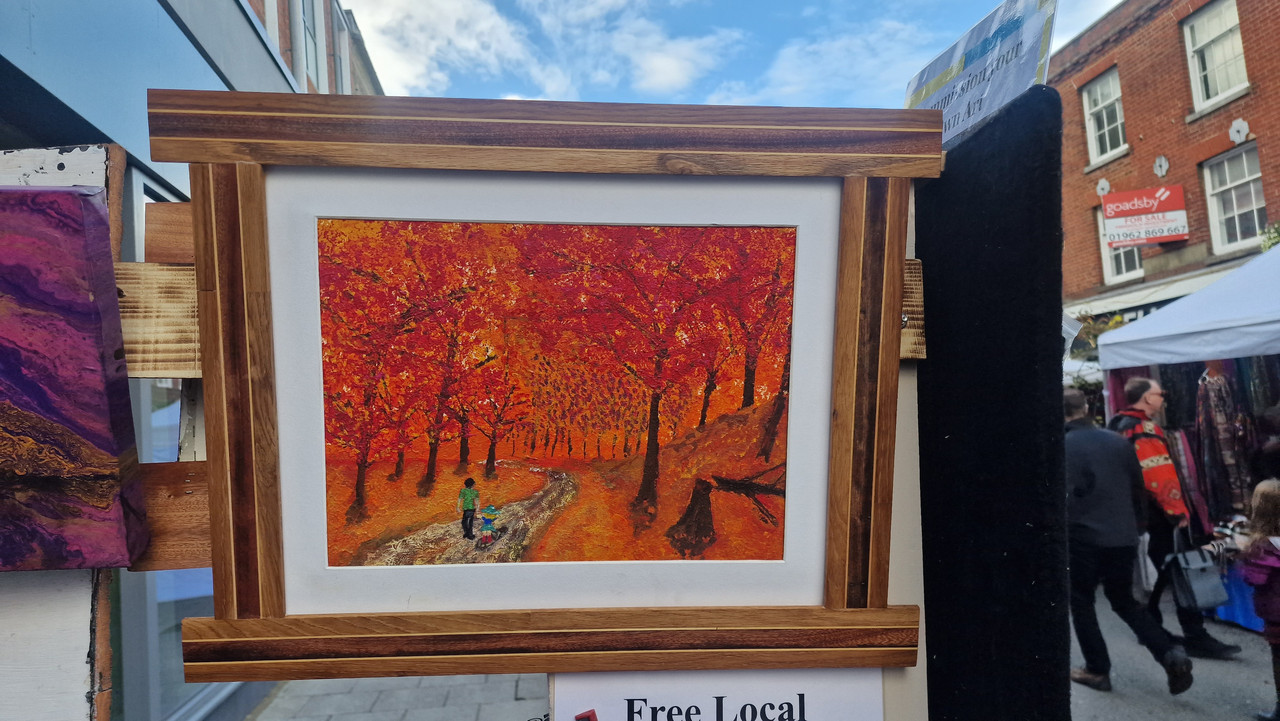
The orange sky did not look great against plain wood to I got my blow torch out
@WCA. You could benefit from a mitre trimmer. They're not all expensive and you can usually find one on ebay or gumtree 2nds. Makes a massive difference, plus its quiet and extremely safe in use.
I agree - they are about £200+ new and couldn't find any local ones going cheap. If you scroll up to the first pair of frames you see I avoided the issue, same for the bark edge one and the one where I laminated a few strips of wood together. I thought I would get bold and try the mitre cut but none of my power tools have an accurate enough gauge for 45 degrees to hold true on all four corners and don't even ask about my hand sawing abilities. I have just planked up another few oak posts so should be able to try some new ideas. I will be avoiding mitres though 🙂
If theres only £200+ versions about, I'd suggest you look at making yourself a shooting board for 45 degree.
Very wet clay soil and a dog
I have that too,still wouldn't have artificial grass. That's gonna be howling come summer. Parents and their neighbours have learned that lesson.
Depending on what kind it is it can also get incredibly, dangerously hot on sunny days.
Auricula theatre for the other half.
Made with an old silk screen printing frame, some recycled painting and decorating trims and some old wiggle tin.

That’s gonna be howling come summer. Parents and their neighbours have learned that lesson
Already solved for that. Rather than using sand under the grass as a base, you use grano dust instead. Sand sticks of dog piss, grano dust doesn't. Was absolutely fine during the summer
Tried to post here several times but it just disappears, so this is a test...
OK, so that worked. How about if I serialise it?...
Regular readers may remember my bike rack system from a while back:

I knew this system would have its limitations - squeezing 5 bikes into 4' of horizontal space is never going to be ideal - but it started to annoy me pretty quickly, and I was scraping pedals/chainstays/spokes every time I took a bike in or out.
Regular readers may remember my bike rack system from a while back:
I knew this system would have its limitations - squeezing 5 bikes into 4' of horizontal space is never going to be ideal - but it started to annoy me pretty quickly, and I was scraping pedals/chainstays/spokes every time I took a bike in or out.
So I decided build something similar but where the hooks could be easily slid across while loaded, to make a bit more room to get one in the middle in or out. I knew unistrut was the way forward having seen a few ideas on here, so ordered 3 1.25m lengths of 21x41mm (about £27 delivered off eBay).
I thought finding bearings the right size to go in the channel would be easy, but having worked out the maximum diameter to fit in the slot, the minimum to contact top and bottom lips for stability, and the maximum thickness to allow for a fastener, I couldn't find anything. I considered some PTFE or nylon blocks as linear bushes, but they were going to work out quite expensive cut to order, and I wasn't sure how well they'd work. Eventually I found these nylon wheels with a 626 bearing on Aliexpress, which looked the perfect size. £13 delivered for 10, so I hit order and waited patiently.
In the meantime I thought about how to mount the rails. The board I'm mounting this to is a divider at the front of my garage which creates a seperate area for the bikes and keeps sawdust, swarf, etc. off them. But it hinges out of the way in case I ever need to get something large into the garage (which is also the access to the back garden). So I didn't want to just screw them on, but I also didn't want to have a joint in the middle where the "wall" hinges, and keeping the unistrut in one piece makes the whole thing more rigid. I also needed to not foul the rollers carrying the hooks.
I decided the solution was some "saddle" type clamps, one at each end, so the strut can slide out without removing them. Had a rootle in my box of scra-, sorry, valuable materials and found some box section that fitted two widths of unistrut neatly, so I sliced it down the middle and welded some plate on each side:


(I could have MIGed it in half the time, but it was a good excuse to practice TIG)
Then I drilled some holes for mounting bolts and sliced it into 6 brackets. A bit wonky, but a perfect fit and plenty strong enough:


The wheels arrived from China and fortunately fit perfectly into the unistrut. After some more rummaging I found some M6 cross dowel bolts that were roughly the right length and would fit in the channel after a bit of grinding to reduce the head. A couple of full nuts fix the tension on the bearing and space it out of the channel:

I ended up using some short lengths of aluminium angle that I had lying around to support the bottom end. Ideally I'd have had more wheels, but didn't want to risk buying another set in case they didn't fit.

The hooks are mounted with roofing bolts - cheap and have a low profile head that doesn't catch the tyre. I made the boards longer than necessary so I could set them at different heights to avoid handlebar clashes.
All mounted up:

I probably could have got away with only two rails since the aluminium angle slides fairly easily without the rail, but I designed it with the previous system in mind, so put it up anyway
Loaded with 5 bikes, with 4 squished into the corner leaving maximum room for the 5th (my partner's commuter):

Got more complicated than I thought, but when was the last time a project didn't? Time will tell how much of an improvement this is (I wanted to make them hinge too to make loading/unloading even easier, but couldn't think of a neat way of doing it... will see how this works for now) but it works as intended in that the bikes slide easily.
Got there in the end.
Good work that. It looks like a great system to minimise used space.
@thenorthwind Nods at the Northumberland flag top cap. Where might I get such a thing?
Very neat that thenorthwind 👏
thenorthwind
Full MemberThanks @colp.
The Giant shop in Prudhoe. I saw one on a friend’s and had to get one too.
Posted 5 hours ago
Reply | Report
Sadly it's a long way to Pruhoe from Aus.
Nice job on the bike storage rails. My in-van bike rack using the same uni-strut sliders is getting on for 4 years old now and is still reliable. 👍
@mahalo – excellent idea, thanks, I’ve copied it
im glad!. so simple, but ive used it loads since making it.
you wouldnt lace a whole wheel with it but for changing tyres and tightening spokes its a dream!
@uphillcursing assumed you were local! Originally though?
Thanks @tthew. First time I've used unistrut for one of my own projects, but can see it appearing again.
@THENORTHWIND Yes local for fourty years, now banished to the Antipodes. Whats the shop in Prudoe called? I might give them a ring.
https://www.giant-newcastle.co.uk/gb
There you go. Despite the Giant branding, it's a fairly standard bike shop, I think they're just franchised.
BTW after I bought it, I realised the top cap design is just a sticker. It seems good quality so no complaints, but wonder if you could get something similar done locally.
Made a memorial surround for my dad in 2010 and before I knew it there were messages left on the memorial asking where I'd bought it from. Ended up making quite a few for people.
Made from cast acrylic and bonded. I sketched it out on autocad first then cut using a festool track saw.
I’ve knocked up a wall rack for my lad’s room in Uni to store his bikes out of the way.
Just 2 screws in the central vertical section holding it to the wall.


That's wicked colp 👏
Cheers fella!
Already solved for that. Rather than using sand under the grass as a base, you use grano dust instead. Sand sticks of dog piss, grano dust doesn’t. Was absolutely fine during the summer
Interesting. Cheers!