Forum menu
You were spot on richmars. Thanks!
Bit of thinking, measuring, marking out, lots of filing and some more sanding and we have a central (enough) wheel. Clearance is still tight, but can't do much about that short of cutting material out of the chain- and seatstays...
[url= https://farm5.staticflickr.com/4340/36857747022_bdc2be4b17_k.jp g" target="_blank">https://farm5.staticflickr.com/4340/36857747022_bdc2be4b17_k.jp g"/> [/img][/url][url= https://flic.kr/p/Y9ZA5W ]2017 09 04 clearance sorted 01[/url] by [url= https://www.flickr.com/photos/robpaul/ ]Rob P[/url], on Flickr
[url= https://farm5.staticflickr.com/4385/36887900531_30b186f732_k.jp g" target="_blank">https://farm5.staticflickr.com/4385/36887900531_30b186f732_k.jp g"/> [/img][/url][url= https://flic.kr/p/YcE8F2 ]2017 09 04 clearance sorted 02[/url] by [url= https://www.flickr.com/photos/robpaul/ ]Rob P[/url], on Flickr
Now for lots of tedious hand sanding and polishing on the lugs...
Result!
A few years ago I made something similar but with carbon tubes. The jig has to be pretty well prefect, as you can't bend the frame like a welded metal frame. My jig was vertical so maybe was easier to check alignment.
Yeah, also the inability (strength-wise) to use REALLY narrow bamboo tubes on the stays doesn't help either. I guess as it's a small frame and the back end seems really short doesn't help either...
Had a similar problem with mine. Shimmed the non-driveside dropout for a while before working up the courage to file out the other side.
Now debating if I can't remove some material to fit bigger a bigger tyre. I think it'll be fine (right up to the point that it isn't).
Small job. Spending the summer learning tig. Just attached a gear hanger to my pompetamine.
Going to braze in a ton more bottle and rack mounts next.
[img] 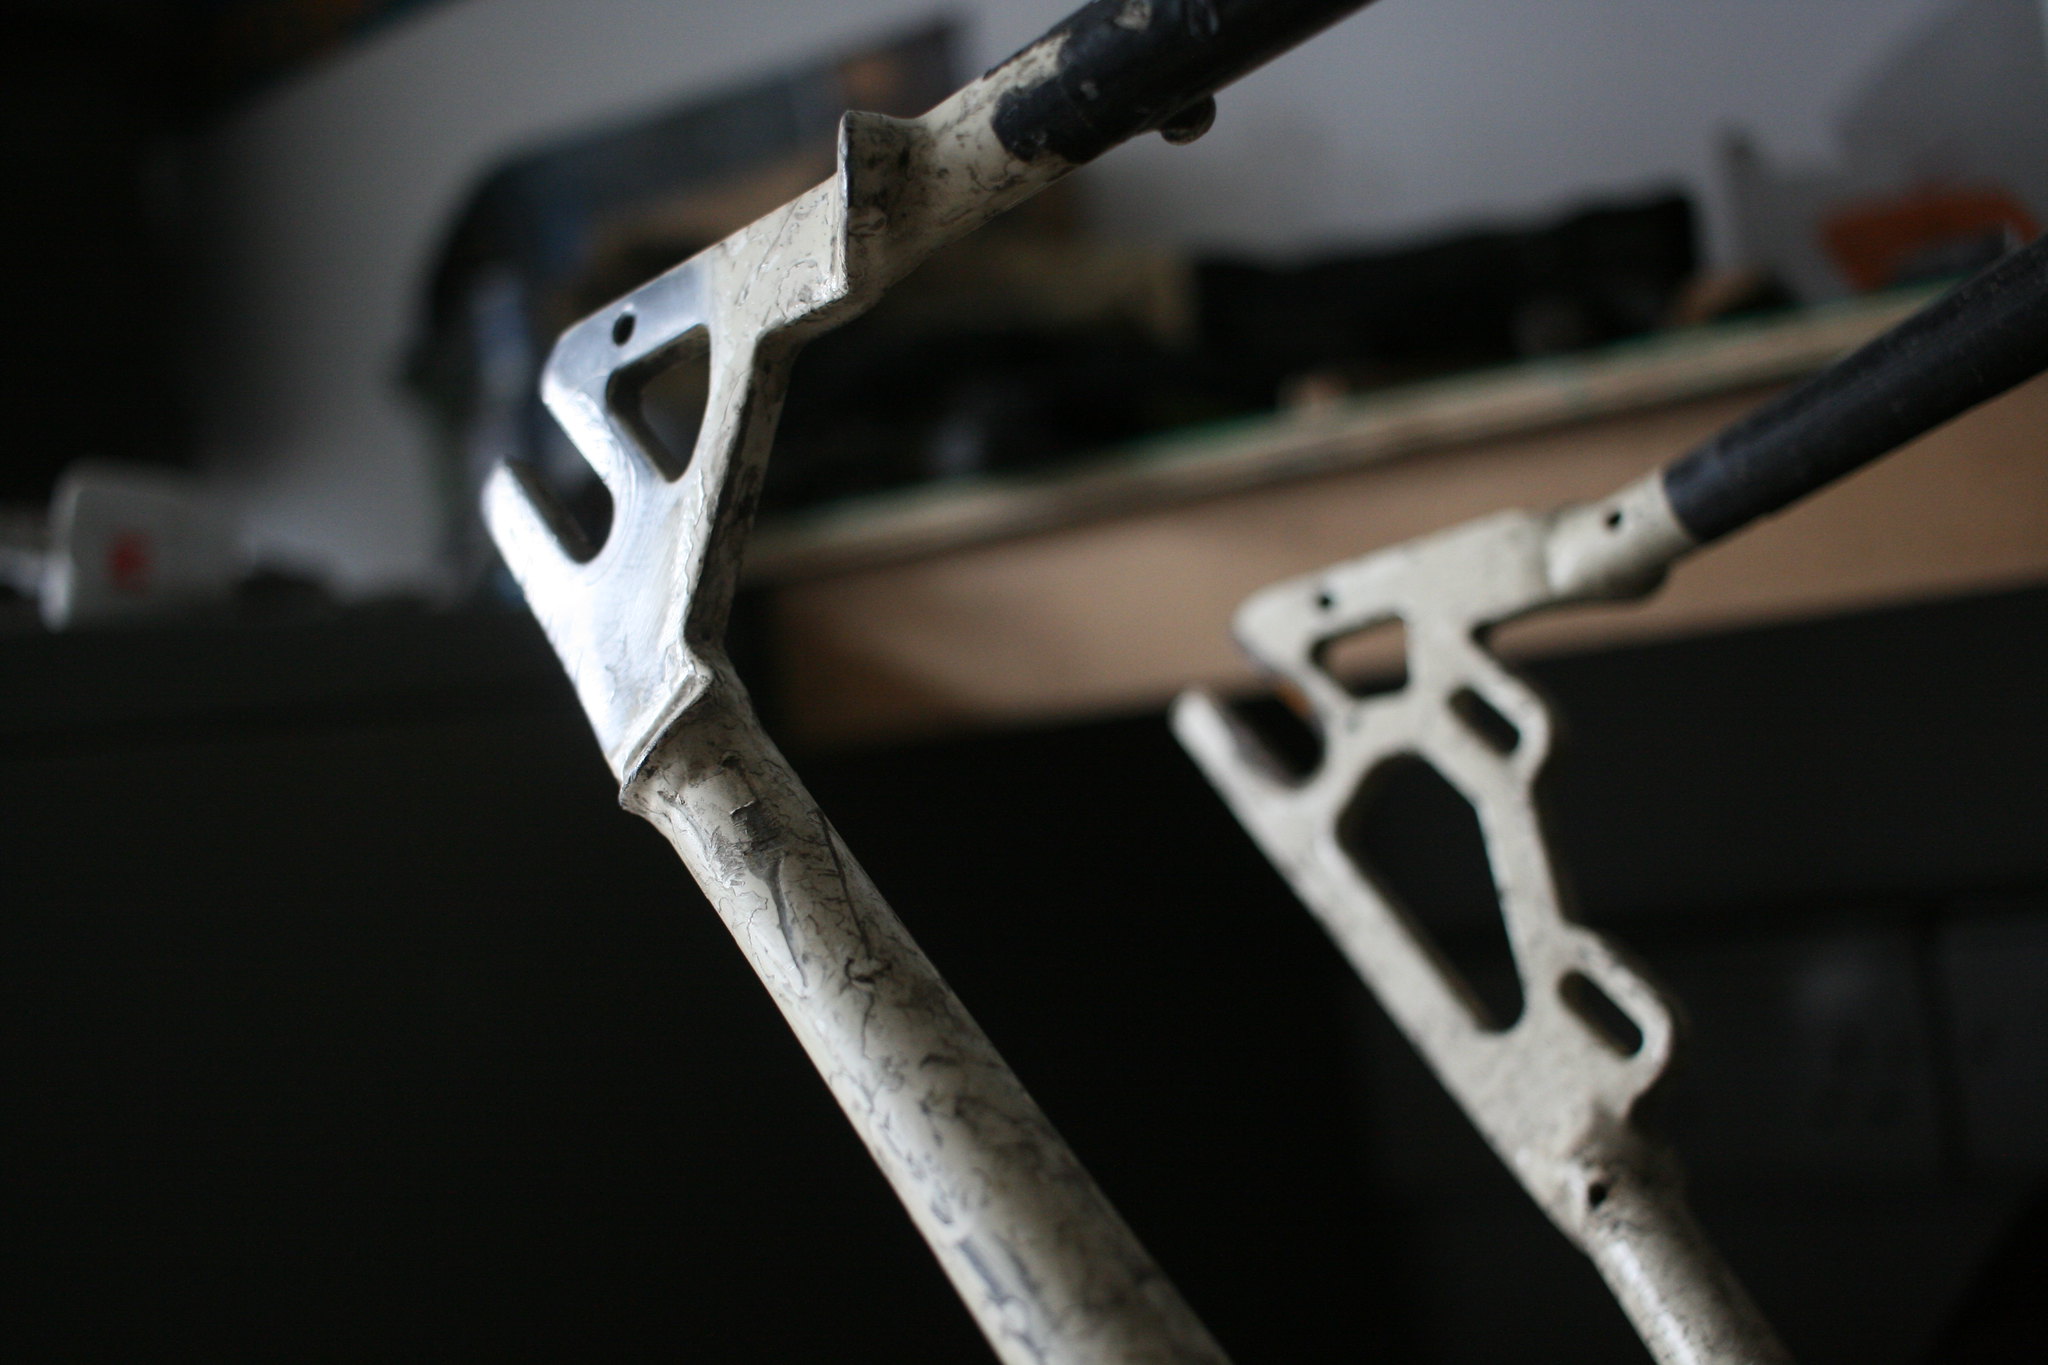 [/img]
[img] 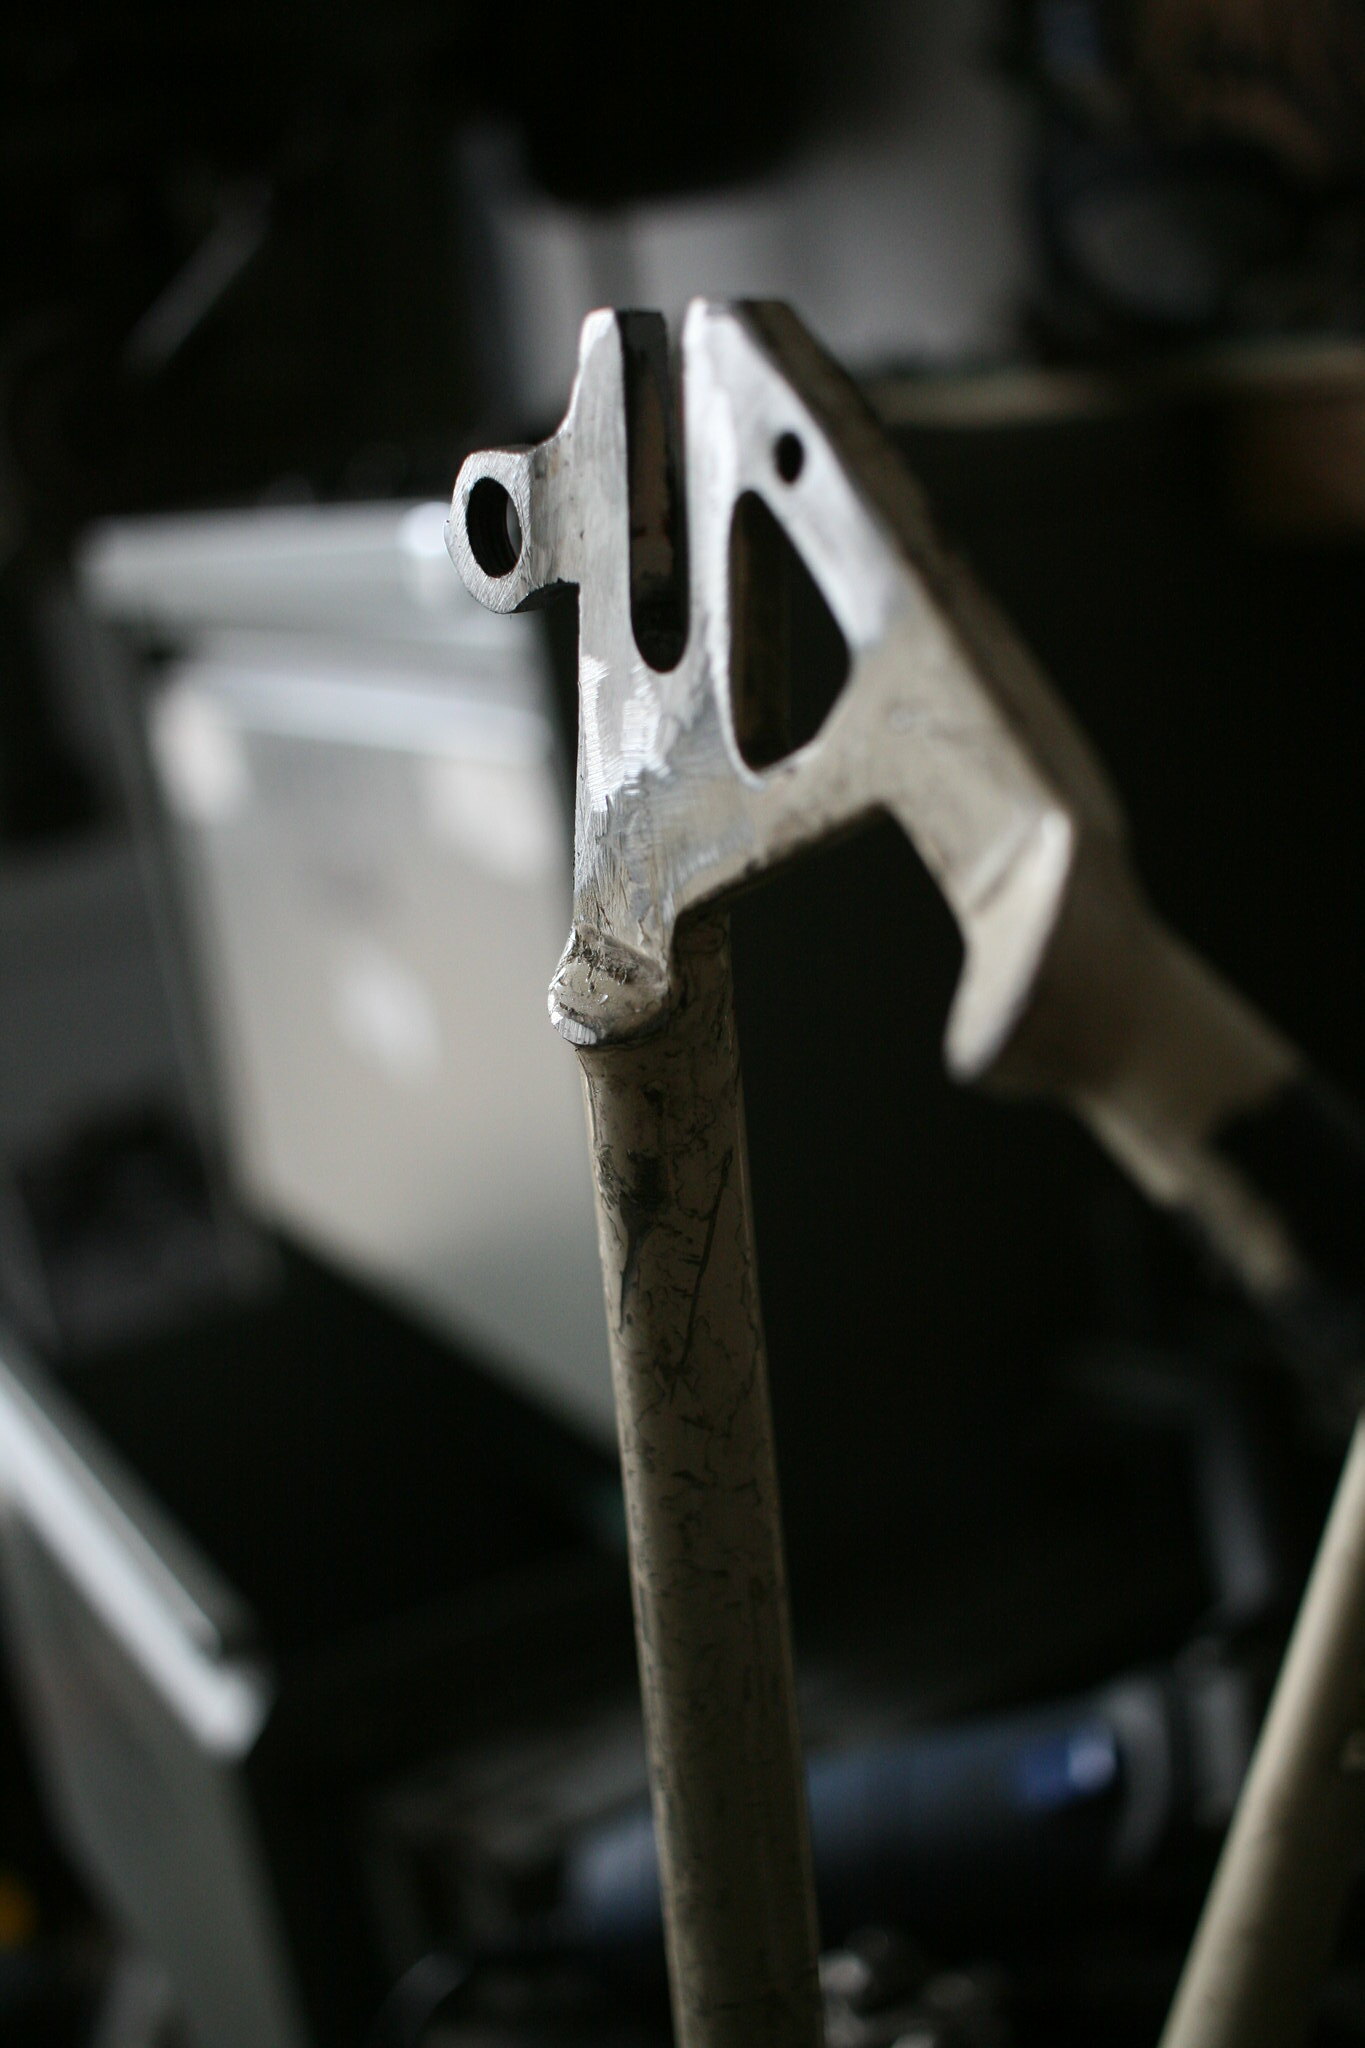 [/img]
[url= https://farm5.staticflickr.com/4369/36307102584_5e503beeb1_o.jp g" target="_blank">https://farm5.staticflickr.com/4369/36307102584_5e503beeb1_o.jp g"/> [/img][/url][url= https://flic.kr/p/XjkoFj ]Shirehampton Public Hall 2017[/url] by [url= https://www.flickr.com/photos/58162507@N07/ ]SGMTB[/url], on Flickr
I want a dark room now 🙂
I made replacement gear knobs for some Alfa Romeos.
Alfa 159:
[img]  [/img]
Alfa GT:
[img] 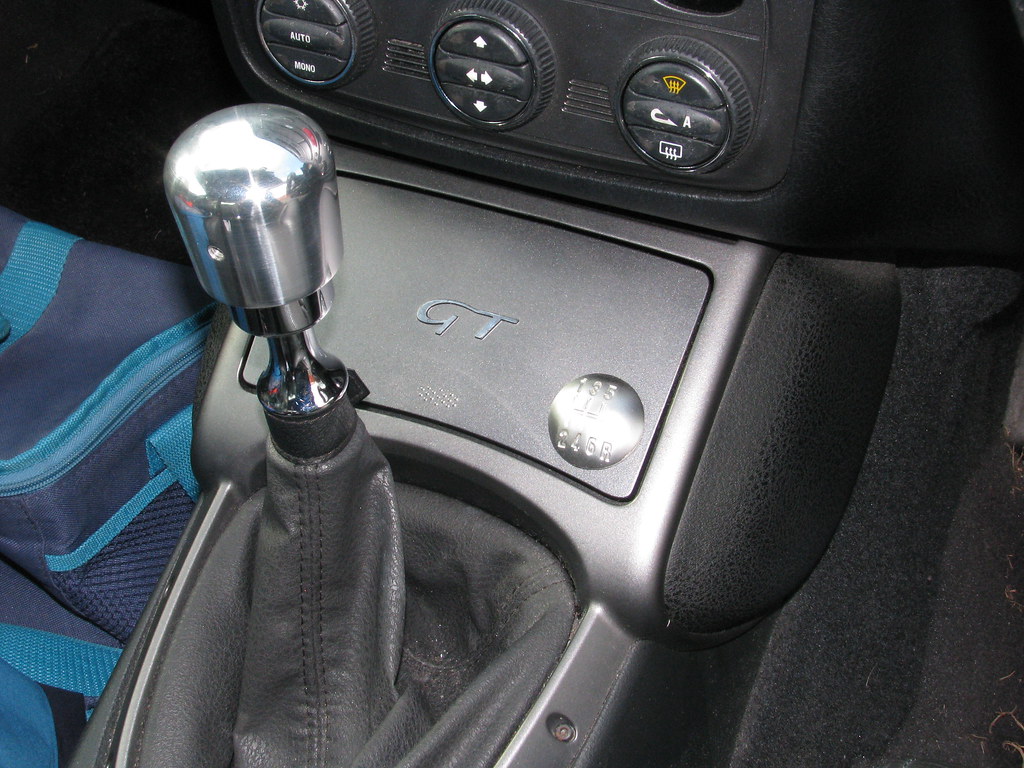 [/img]
crap in comparison, used some knackered bike bits to allow access to my 2nd favorite liquid....
[img]  [/img]
So much good stuff- inspirational! Chapeau to all who've posted.
Yes, it seems a shame when a few things go by without getting mentioned, but it really is great to see them all. Keep posting!ctk - MemberSo much good stuff- inspirational! Chapeau to all who've posted.
Finally got a sheath made for a knife i started quite a while ago.
[url= https://farm5.staticflickr.com/4399/37200009482_e669e03d85_b.jp g" target="_blank">https://farm5.staticflickr.com/4399/37200009482_e669e03d85_b.jp g"/> [/img][/url][url= https://flic.kr/p/YFeLMQ ]Knife+sheath[/url] by [url= https://www.flickr.com/photos/83246699@N00/ ]msh_sco[/url], on Flickr
Today I made (rapidly bodged) a device for getting the number plate board on an empty dinghy trailer to sit at a decent height while still being right at the rear of the trailer (the normal thing is to hang them so dam low that they're useless)
Technologically and aesthetically it was crap (a scrap bit of 150*50 CLS deck frame, an offcut of 100mm square fence post, two bloody great screws and two webbing straps) but as a 5 minute solution to borrowing an empty trailer and bringing it 15miles home along some very busy main roads it was functionally brilliant!
Apple corer.
22mm Copper Pipe
[url= https://farm5.staticflickr.com/4440/37382423446_7491bc8c08_o.jp g" target="_blank">https://farm5.staticflickr.com/4440/37382423446_7491bc8c08_o.jp g"/> [/img][/url][url= https://flic.kr/p/YXmG7b ]P1470951[/url] by [url= https://www.flickr.com/photos/58162507@N07/ ]SGMTB[/url], on Flickr
https://www.flickr.com/photos/58162507@N07/
Bug Hotel
Everything off cuts 🙂
[url= https://farm5.staticflickr.com/4474/36720023754_4f5e0ff391_o.jp g" target="_blank">https://farm5.staticflickr.com/4474/36720023754_4f5e0ff391_o.jp g"/> [/img][/url][url= https://flic.kr/p/XWPHKQ ]Bug Hotel[/url] by [url= https://www.flickr.com/photos/58162507@N07/ ]SGMTB[/url], on Flickr
I like the bug hotel!
can yer guess wot it iz yet?
[img]  [/img]
Work in progress. Should have it finished in a week or so.
can yer guess wot it iz yet?
The crate your lawnmower was delivered in? 🙂
Lego and Surgru DAB Radio and cable tidy for the landrover
Ha! Fantastic use of lego hands!
Finally finished it. I've given up one of my wood sheds (oh, the sacrifices I make!) to Mrs Stoner for a sauna.
Insulated panels with pine cladding. About £700 of materials for the cabin, £75 for the Aspen timber for the benches and £230 for the stove, controller and Finnish Sauna rocks.
Shower outside connects to the garden hose for a freezing douse.
[img]  [/img]
1900mm long so enough for her to lie down (I prefer sitting on top bench anyway). 4.5kW heater with indeceipherable Chinglish controller.
[img]  [/img]
LED ribbon lighting under the bench.
EDIT: Hah! Even found the original thread when I built the wood shed.
http://singletrackworld.com/forum/topic/time-for-another-woodshed-oh-go-on-then
ah - remember it well Stoner 🙂
Looks good!
Is it an electric heater?
Yes. Much cleaner and cheaper than attempting a flued solid fuel heater.
[url] https://postimg.org/image/1p8gj4mpbf/ [/url]
First attempt at making rowies.
The tasting confirms they are as good if not better than shop bought 🙂 next step croissants
Also made some bread , some fruit/nut scones , some pizza dough and a roast chicken dinner 🙂
As always seems to happen these days I got asked to make a leaving gift for a colleague recently (must try to do more rubbish gifts...).
She's well into Veedubs etc and so I took a cue from that and made her a bathroom cabinet, based on the classic split screen bus. Such an iconic shape.
It has mirrors in the front, including tiny and cutesy little Dental mirrors for the wing mirrors, and then has a main mirror in the back when opened.
I did pretty much all the cutting out on our cnc router, grabbing bits of time here and there between 'normal' work.
Made out of Birch ply for the case, and just MDF, Zebrano-veneered mdf, aluminium and OSB for the camper details.
The numberplate (with the family name on it) doubles as a door pull. If built in real life, the numberplate would actually be on the ground as it's lower than the tyres but hey! It's a caricature!... 😀
[url= https://farm5.staticflickr.com/4569/38378021856_ebe6c3cf26_k.jp g" target="_blank">https://farm5.staticflickr.com/4569/38378021856_ebe6c3cf26_k.jp g"/> [/img][/url][url= https://flic.kr/p/21tkoQ1 ]Front on side on[/url] by [url= https://www.flickr.com/photos/79912681@N06/ ]Kayak23[/url], on Flickr
[url= https://farm5.staticflickr.com/4570/38378021526_82e21e69cb_k.jp g" target="_blank">https://farm5.staticflickr.com/4570/38378021526_82e21e69cb_k.jp g"/> [/img][/url][url= https://flic.kr/p/21tkoJj ]Numberplate pull detail[/url] by [url= https://www.flickr.com/photos/79912681@N06/ ]Kayak23[/url], on Flickr
[url= https://farm5.staticflickr.com/4539/26657536999_77db972f85_h.jp g" target="_blank">https://farm5.staticflickr.com/4539/26657536999_77db972f85_h.jp g"/> [/img][/url][url= https://flic.kr/p/GBCR1T ]Camper doors ajar[/url] by [url= https://www.flickr.com/photos/79912681@N06/ ]Kayak23[/url], on Flickr
[url= https://farm5.staticflickr.com/4528/38378023406_af807c1f9b_k.jp g" target="_blank">https://farm5.staticflickr.com/4528/38378023406_af807c1f9b_k.jp g"/> [/img][/url][url= https://flic.kr/p/21tkphJ ]Blackteaonesugar[/url] by [url= https://www.flickr.com/photos/79912681@N06/ ]Kayak23[/url], on Flickr
[url= https://farm5.staticflickr.com/4525/26657537399_fde50ced08_k.jp g" target="_blank">https://farm5.staticflickr.com/4525/26657537399_fde50ced08_k.jp g"/> [/img][/url][url= https://flic.kr/p/GBCR8M ]Camper badge detail[/url] by [url= https://www.flickr.com/photos/79912681@N06/ ]Kayak23[/url], on Flickr
I suppose I shouldn't really be putting it on here, as we've not presented her with it yet....
Oh well, she's not on here as far as I know... 🙂
that needs a like button kayak.
Kayak owns this thread
Great use of OSB kayak! Does it machine cleanly?
I intend to build a CNC router over the christmas break (using 3d printer to print the joints)
It machines ok but obviously has pretty big voids here and there.
Just took it slow and sanded it up all nice.
Very nice Kayak. I'm thinking of using ply on a project so am interested in how you did the case corner junctions, something more than a butt joint?
am interested in how you did the case corner junctions, something more than a butt joint?
Just a simple lap joint done on an inverted router.
When glued up, you can later add wooden pins in a contrasting timber to dress it up a bit and add strength.
[img] 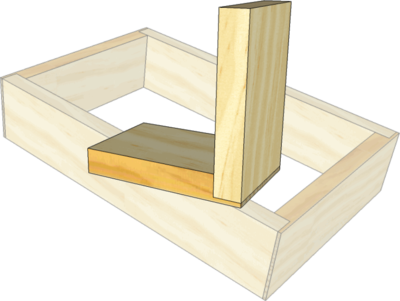 [/img]
Very, very nice! Made my day to see something so thoughtful and good looking.
Finally the swingarm is finished.
[img]  [/img]
I like the bamboo bike on the previous page, am on trial fitting everything myself now.
Nowhere near the standard of the other stuff on here but I made this today as a 'proof of concept' for a cable cover for my dropper post remote cable. It's a Fox Transfer and has an external cam to move the mechanism that has a habit of getting bits of grit stuck behind it. Water doesn't affect it so I need a cover just to keep the grit out. The mechanism:
[img][url= https://farm5.staticflickr.com/4537/37824992674_e9890c21eb_k.jp g" target="_blank">https://farm5.staticflickr.com/4537/37824992674_e9890c21eb_k.jp g"/> [/img][/url][url= https://flic.kr/p/ZCsYw7 ]20171120_124537_Richtone(HDR)[/url] by [url= https://www.flickr.com/photos/91448594@N04/ ]Da_Milky_Bar_Kid[/url], on Flickr[/img]
And the bit underneath, the grit gets stuck in between this and the plastic cam occasionally:
[img][url= https://farm5.staticflickr.com/4573/24668510128_617b984104_k.jp g" target="_blank">https://farm5.staticflickr.com/4573/24668510128_617b984104_k.jp g"/> [/img][/url][url= https://flic.kr/p/DzSyC9 ]20171120_124759[/url] by [url= https://www.flickr.com/photos/91448594@N04/ ]Da_Milky_Bar_Kid[/url], on Flickr[/img]
Getting fed up of having to stop mid-ride and remove the grit! Only takes a minute to whip off the cam, clean it then reassemble. Now I've got a mudhugger on the bike for winter it is keeping clear better but I want a permanent solution.
Found a 50p pipe plug that's the right size so a bit of cutting and filing to shape it round the post and mechanism plus two grooves for the cable tie and I have this:
[img][url= https://farm5.staticflickr.com/4522/37824992614_9019fb78d2_k.jp g" target="_blank">https://farm5.staticflickr.com/4522/37824992614_9019fb78d2_k.jp g"/> [/img][/url][url= https://flic.kr/p/ZCsYv5 ]20171120_125158[/url] by [url= https://www.flickr.com/photos/91448594@N04/ ]Da_Milky_Bar_Kid[/url], on Flickr[/img]
It's pretty snug so grit shouldn't get in easily. The big test will be tomorrow at BPW as the trailers get the thing covered every trip up. If it works well I'll get my mate at a local engineering college to get one of his students to make a tight fitting one on their 3D printer.
Converted a climbing frame and swing into a den...
[img] 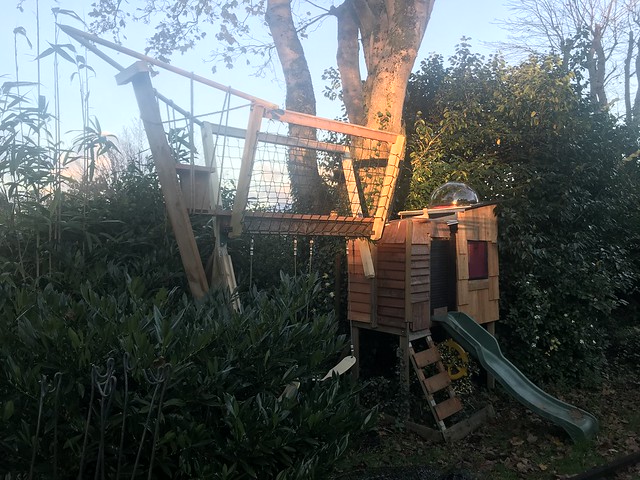 [/img]
And built a giant multi-level coop for my dad’s chickens:
[img] 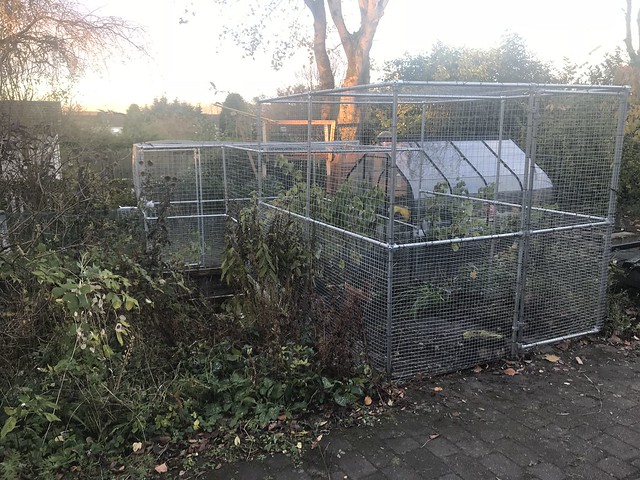 [/img]
That bencooper, is ace.
Cheers 😀 Not photographed, the counterbalanced opening clear roof on the den to give access to the flying bridge, and the gas-spring-opening emergency escape door to the slide...
Well hurry up then! 🙂Not photographed
Looks great!
[img] 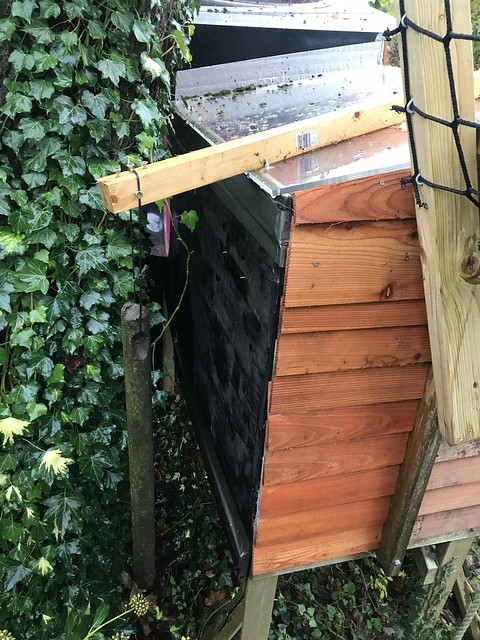 [/img]
Counterbalanced with an old sash weight.
[img] 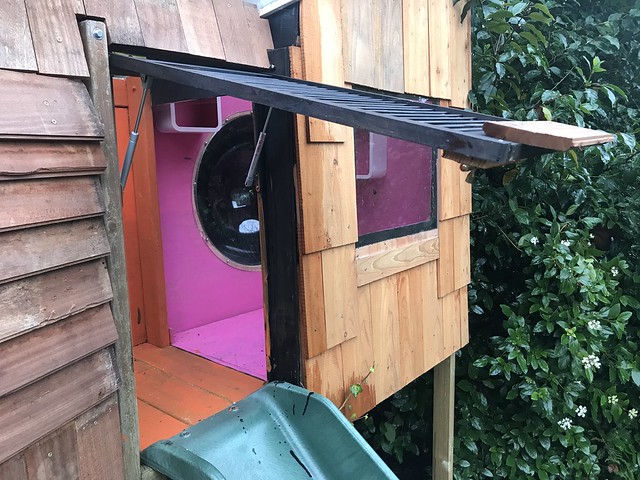 [/img]
Very cool! Awaits reports from A&E from the first attempt to enter the treehouse via the slide...
Paint brush made from an old snooker cue and mini matchpot brushes.
Going to try this with some ink 🙂
[img]  [/img]
[url= https://www.flickr.com/photos/58162507@N07/38563791966/ ]I made a brush from an old snooker cue and matchpot brushes :)[/url] by [url= https://www.flickr.com/photos/58162507@N07/ ][/url]
Plus attachments are removable 3/16th threadon the furrel:)
[b]New Workbench.[/b] To replace the current 'workbench'.
Used:
Lots of timber from a pagoda taken down when we built the extension a year ago, used to form horizontal bracing
Builder left two 150x150mm fence posts which were cut to make the four legs
Old chest of drawers
Bought new: 3 x sleepers (200x100mm) cut to 2m long £30 each
Bought new: 225mm and 175mm timber lock screws to hold it all together £30
Bought off ebay: STW approved, British made Record vice £35
Its not pretty but will last me out, all I have to do is sort and clear the rest of the garage now.
Crappy old 'workbench' and pile of raw materials
[url= https://s26.postimg.org/vzic0qzx5/IMG_20171111_130152.jp g" target="_blank">
New bench and vice! A bit more tidying to do
[url= https://s26.postimg.org/6mz3d3049/IMG_20171126_201713.jp g" target="_blank">
Most of my tools are in big red halfords cabinet
*propabench*
like!
I've made some kitchen utensils for the cook who has everything. Behold The Tattie Jabber - for piercing potatoes prior to baking!
[img]  [/img]
I had some nice plywood left over from converting my van so I made a tool chest for all my biking tools. I'm pretty happy with it, I love the smooth action of the drawer sliders and the magnets on the lid are useful.
[img]  ?psid=1[/img]
[img]  ?psid=1[/img]
nickkent - those images aren't showing. Viewing the urp takes me to a login page, so maybe only you can see them
Thanks AlexSimon, hopefully this works.
[img]  [/img]
[img]  [/img]
ooh nice!
Yes, I've been using those bearing drawer runners for a few projects too. Even cheap chinese ones have been smooth for me.
Excellent job!
[img]  [/img]
[img]  [/img]
3d prints of this classic Bauhaus chess set. As far as I know you can't buy a replica. Quite a clever design removing the religious aspects and replacing with shapes mimicking the movement of the pieces.
Bauhaus Chess Set (Model XVI), author: Josef Hartwig, 1924
[img]  [/img]
Modelled in Maya and then exported via 3dsmax to a STL file.
It took a while to print but happy with the result.
[img]  [/img]
This is what it would have looked like originally in 1924.
Looks great Iain. Are you in the [url= http://singletrackworld.com/forum/topic/cheap-3d-printer-kits-experiences ]3D print thread[/url]?
I'd like to know more about this .
Nice photography too. The lighting on the black set is particularly nice.
Thanks Alex. I will have a look at the 3d print thread.
I will need to look into kits myself as I am changing jobs and will loose my access to a 3d printer.
I'm going to get a job at Kayak's place, just so I can leave one day.
^^^Ha!
Noooo!... Not more! 😀
Some ace recent additions to the thread!
3D printed Soap dish.
Designed in Illustrator and Fusion 360.
About 120mm diameter.
Christmas present
[img]  [/img]
[img]  [/img]
nickkent's tool box ^^ should be in the 'arrgh my eye' thread. I'll post something when I've learnt to post pictures, and also when I've made more than just a mess.
and also when I've made more than just a mess.
Same. At the moment I'm too busy clearing all the half finished jobs from the last 3 or so years (seriously) but once I have a router...
That tool box is nice, I like it. How did you make it?
Been messing about on a laser cutter wotsit at work and have made a few bauble type thingies for friends and family. Google image search, made into vectors in 2D design, cropped, clipped etc...text and shizzle.
After all, nothing says Happy Christmas quite like a candy skull 😀
[url= https://farm5.staticflickr.com/4725/24312232617_9e8a7430ec_k.jp g" target="_blank">https://farm5.staticflickr.com/4725/24312232617_9e8a7430ec_k.jp g"/> [/img][/url][url= https://flic.kr/p/D3oxJr ]Baubles[/url] by [url= https://www.flickr.com/photos/79912681@N06/ ]kayak23[/url], on Flickr
[img] https://flic.kr/p/HJWpTT ][img] https://farm5.staticflickr.com/4687/27396536749_ef30d9c92e_k.jp g" target="_blank">https://flic.kr/p/HJWpTT ][img] https://farm5.staticflickr.com/4687/27396536749_ef30d9c92e_k.jp g"/> [/img][/url][url= https://flic.kr/p/HJWpTT ]rear dropouts #titanium #allmadeinhouse #bicycle # framebuilding #framebuilders[/url] by [url= https://www.flickr.com/photos/151761966@N05/ ]bicycle manufacturing[/url], on Flickr[/img]
CNC Porn as usual mickmcd
I started a separate thread a while back but then photobucket did that thing and it's pretty much pointless now.
Anyhow I've just about finished my daughter's balance bike, just the head tube badge to bond on.
I got a donor bike for the wheels, grips and saddle. Shortened some old P2 forks and built my first frame.
[url= https://s14.postimg.org/ebktmen9d/IMG_20171226_171307_380.jp g" target="_blank">https://s14.postimg.org/ebktmen9d/IMG_20171226_171307_380.jp g"/> [/img][/url]
[url= https://s14.postimg.org/bu92fa0tt/20171226_145610.jp g" target="_blank">https://s14.postimg.org/bu92fa0tt/20171226_145610.jp g"/> [/img][/url]
Little miss breadcrumb is still a little small for it but I confirm it handles nicely around the kitchen!
Wow....! That balance bike looks amazing!
I've just rewired my old XT600. No wiring diagram,it's been a learning experience..
[img]  [/img]
breadcrumb - congrats on your first frame build! Looks absolutely superb. One very lucky young lady.
[b]Breadcrumb[/b]
What is the bar stem combo you’ve used? I’m building one of those tiny demo DMR frames that where on eBay a few months ago, and reach is a problem for little people. They look ideal? If off the shelf.
Thanks Alex, I've wanted to build a frame for years seems fitting that my first frame is my daughter's first bike.
Oldschool- it's not off the shelf unfortunately. It's a set of old bars shortened and scalloped to fit an old DMR seat clamp and welded together. I got lucky with the clamp as it was just kicking about the spares box.
Edit: photo of bars/stem, needs a polish 😳
[url= https://s20.postimg.org/ax0sz4y8d/20171228_203229.jp g" target="_blank">https://s20.postimg.org/ax0sz4y8d/20171228_203229.jp g"/> [/img][/url]
I finished a new dining table.
Made from Yew and tinted epoxy resin. With steel legs.
Link as can’t get the code from Flickr
https://www.flickr.com/photos/154854686@N05/24561108337/in/dateposted-public/
[img] 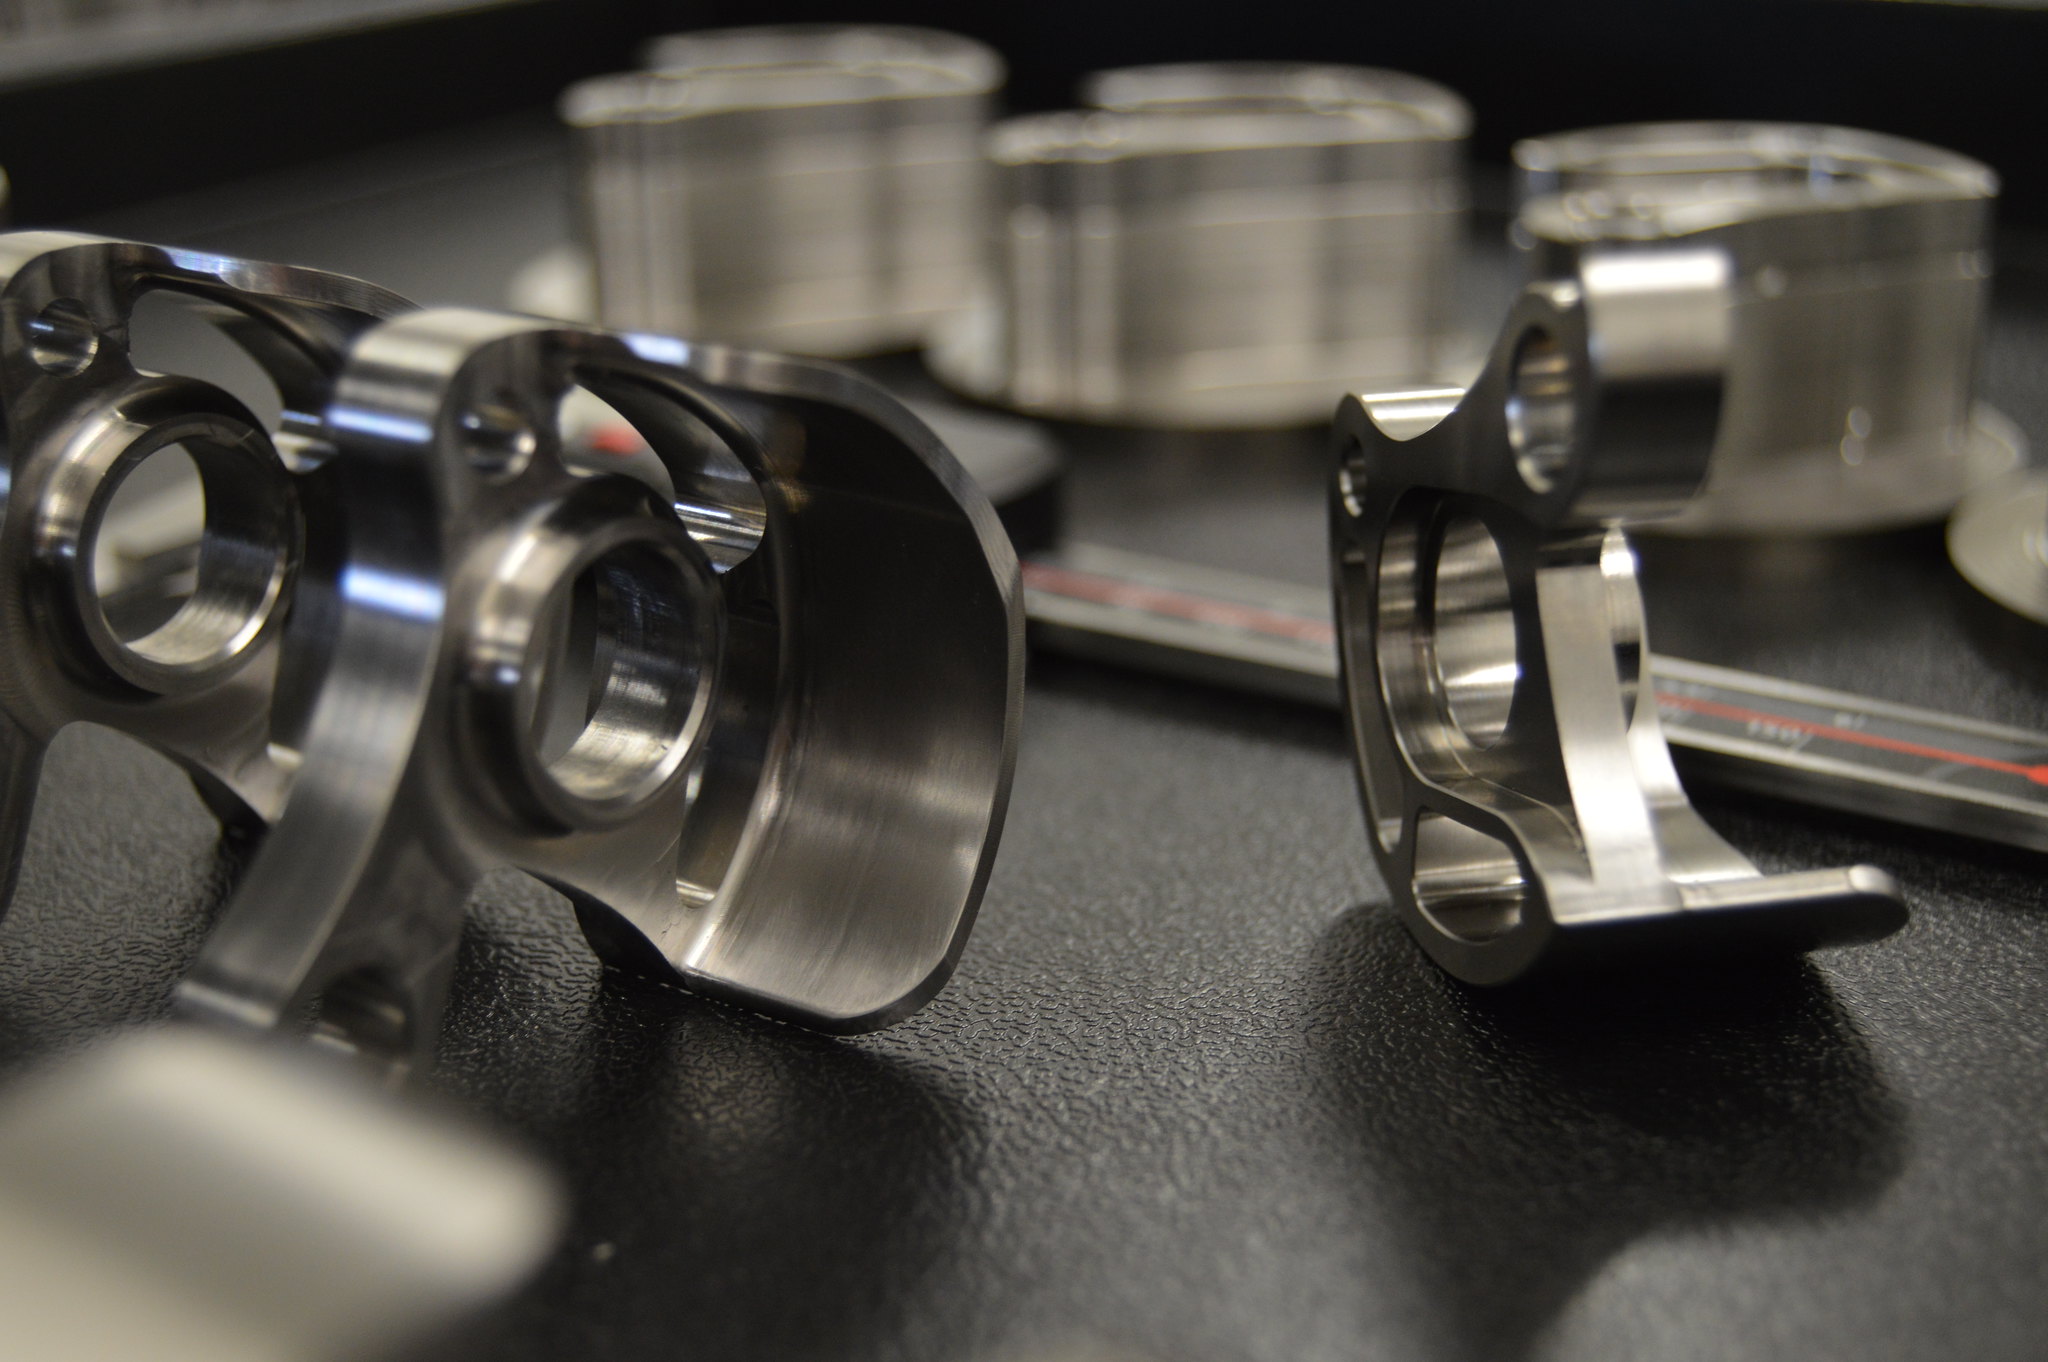 [/img]
finished titanium dropouts going down under
Nice table Oli!
Is the resin flush with the yew? Was it difficult to do?
Here's the pic from your link:
[url= https://farm5.staticflickr.com/4635/24561108337_a9b1a36de5_c.jp g" target="_blank">https://farm5.staticflickr.com/4635/24561108337_a9b1a36de5_c.jp g"/> [/img][/url][url= https://flic.kr/p/Dqo6P8 ]Dining table[/url] by [url= https://www.flickr.com/photos/154854686@N05/ ]oliver young[/url], on Flickr
^^^ Nice table!
Thanks for that Alex!
Yea the resin is flush (except in the long thin closest patch bottom left, but I’ll top that up.)
I originally planned to make it with some beech, but it wasn’t as dry as I was led to believe and warped when stored in the house for a while.
So got the Yew instead.
Would opt for something with less holes next time, I covered the underside of those gaps with tightly layered tape to stop it leaking anywhere. And had to build a large box to contain the piece.
There are a few more pics on my Flickr of it in construction.
Also the resin I used took around 48hours to cure. So now I’ve had go I would happily opt for something a bit quicker setting. Especially when the main centre took two pours to fill and set. So a chunk of waiting time!
I also opted to keep the wood exposed and not just encase the whole thing in resin. As I think it’s nice to have the contrast in material and feel.
Album with a few more pics.
https://www.flickr.com/photos/154854686@N05/albums/72157690865351006
Built 6 weeks back. I've been needing to carry heavy workshop stuff; metal, tooling and the likes but I don't own a car. A fullblown cargo bike is overkill however.
so...
I was admiring this omnium and decided to make my own version.
[img]  [/img]
Built from scrap metal leftover from my adventures in learning TIG.
I present to you, the Cargoturd!
It may be ugly but it works so well that I've ordered a bunch of tubing to build a fancy version.
There's a sleeved and welded steerer extension in there, extended headtube and an enormous rack. Fag paper calcs say it'll yield at a 100kg pointload right on the end so reasonably overbuilt yet is surprisingly light - a lot of the tubing is fairly thin walled.
[img] 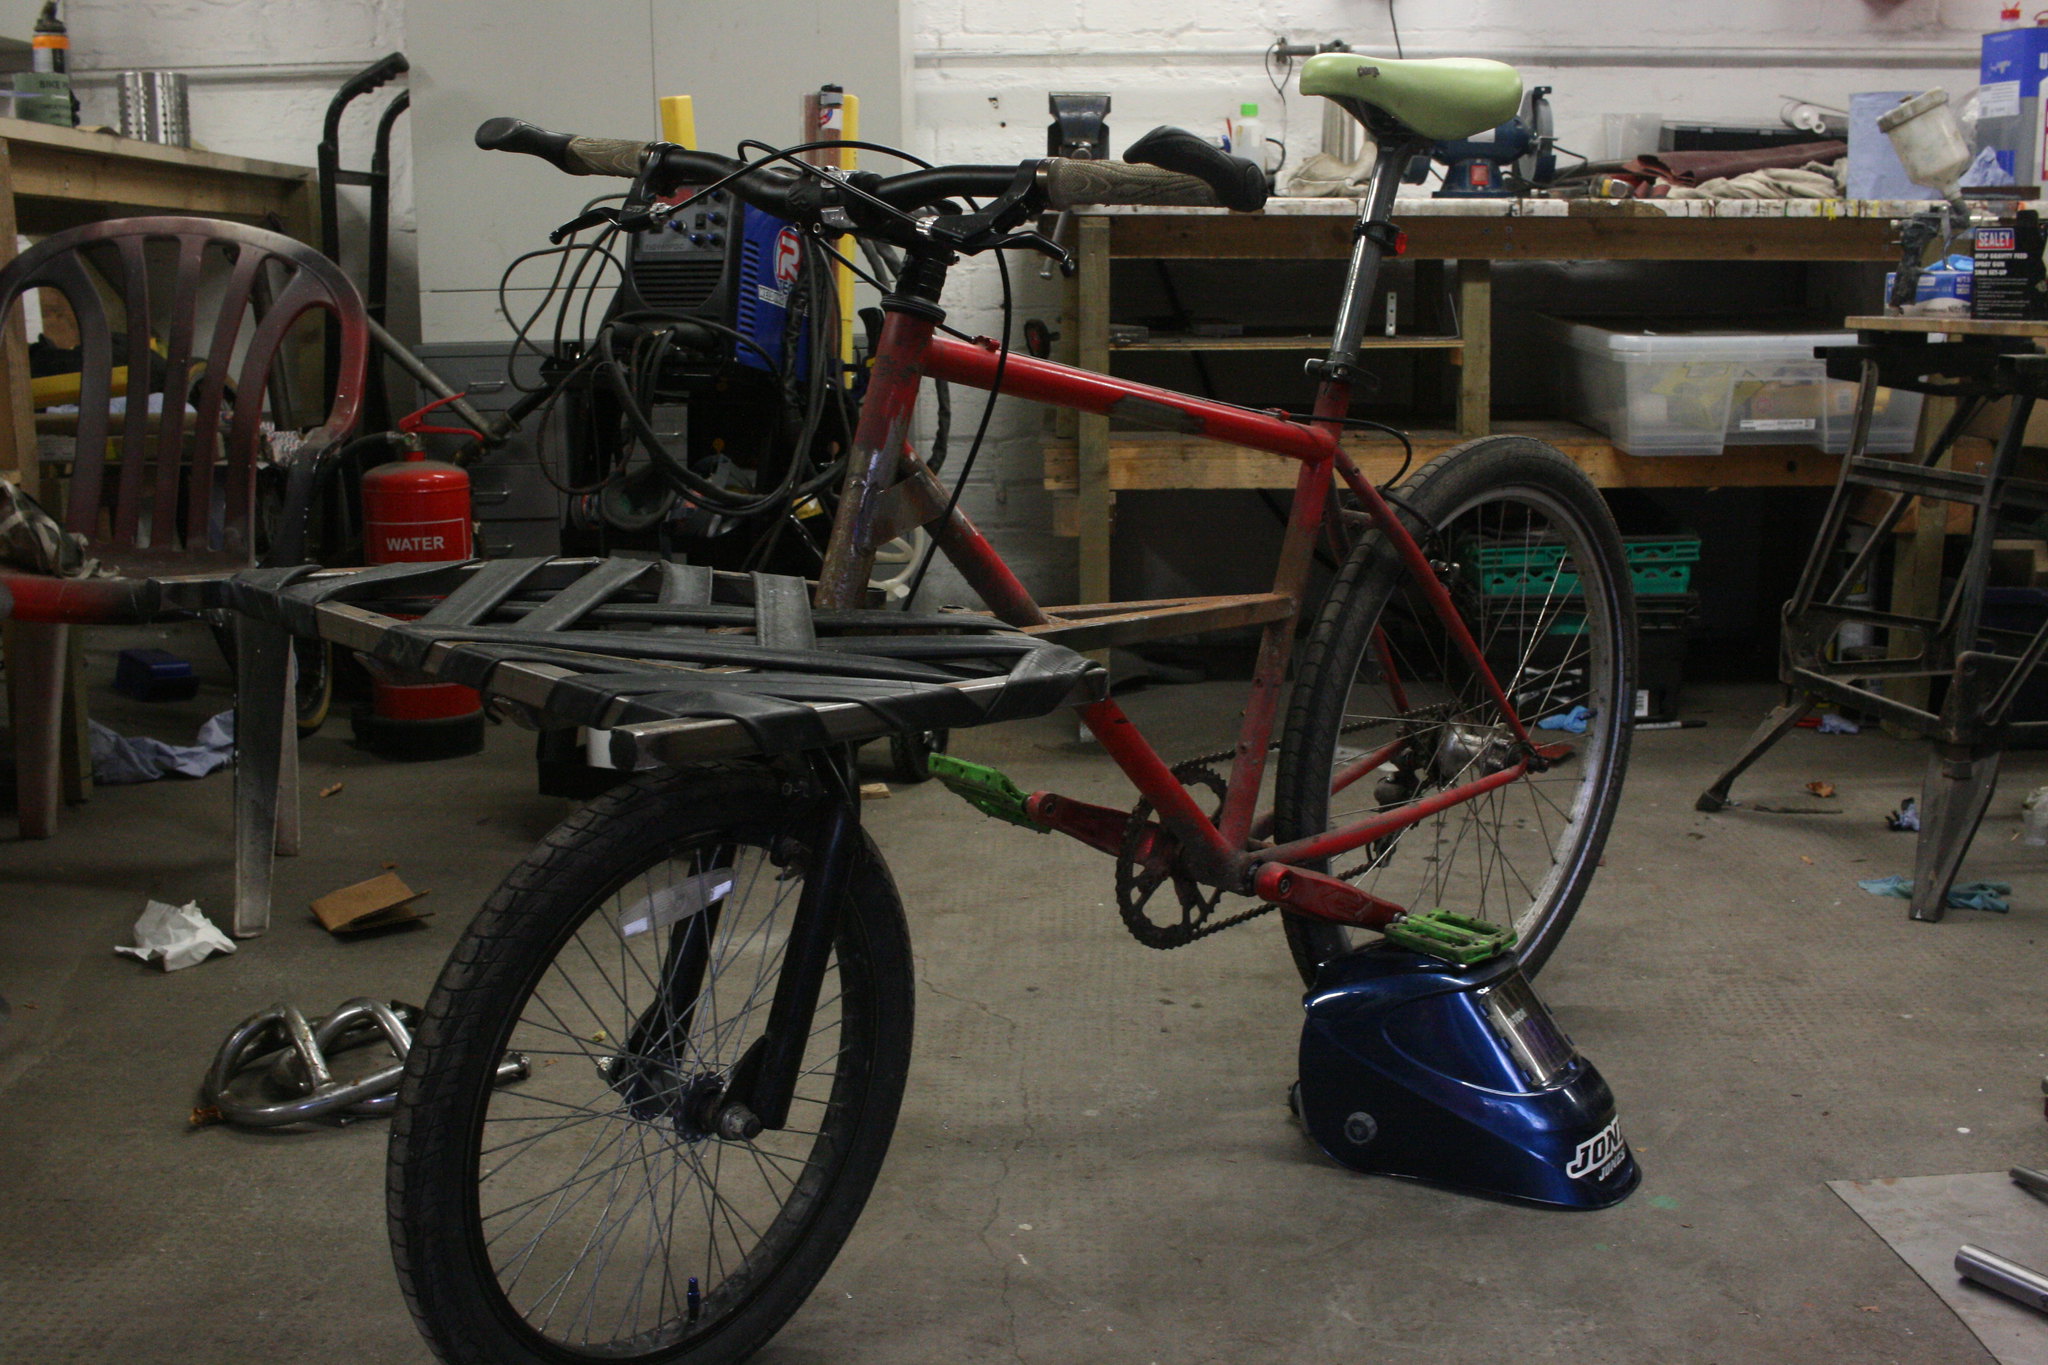 [/img]
[img] 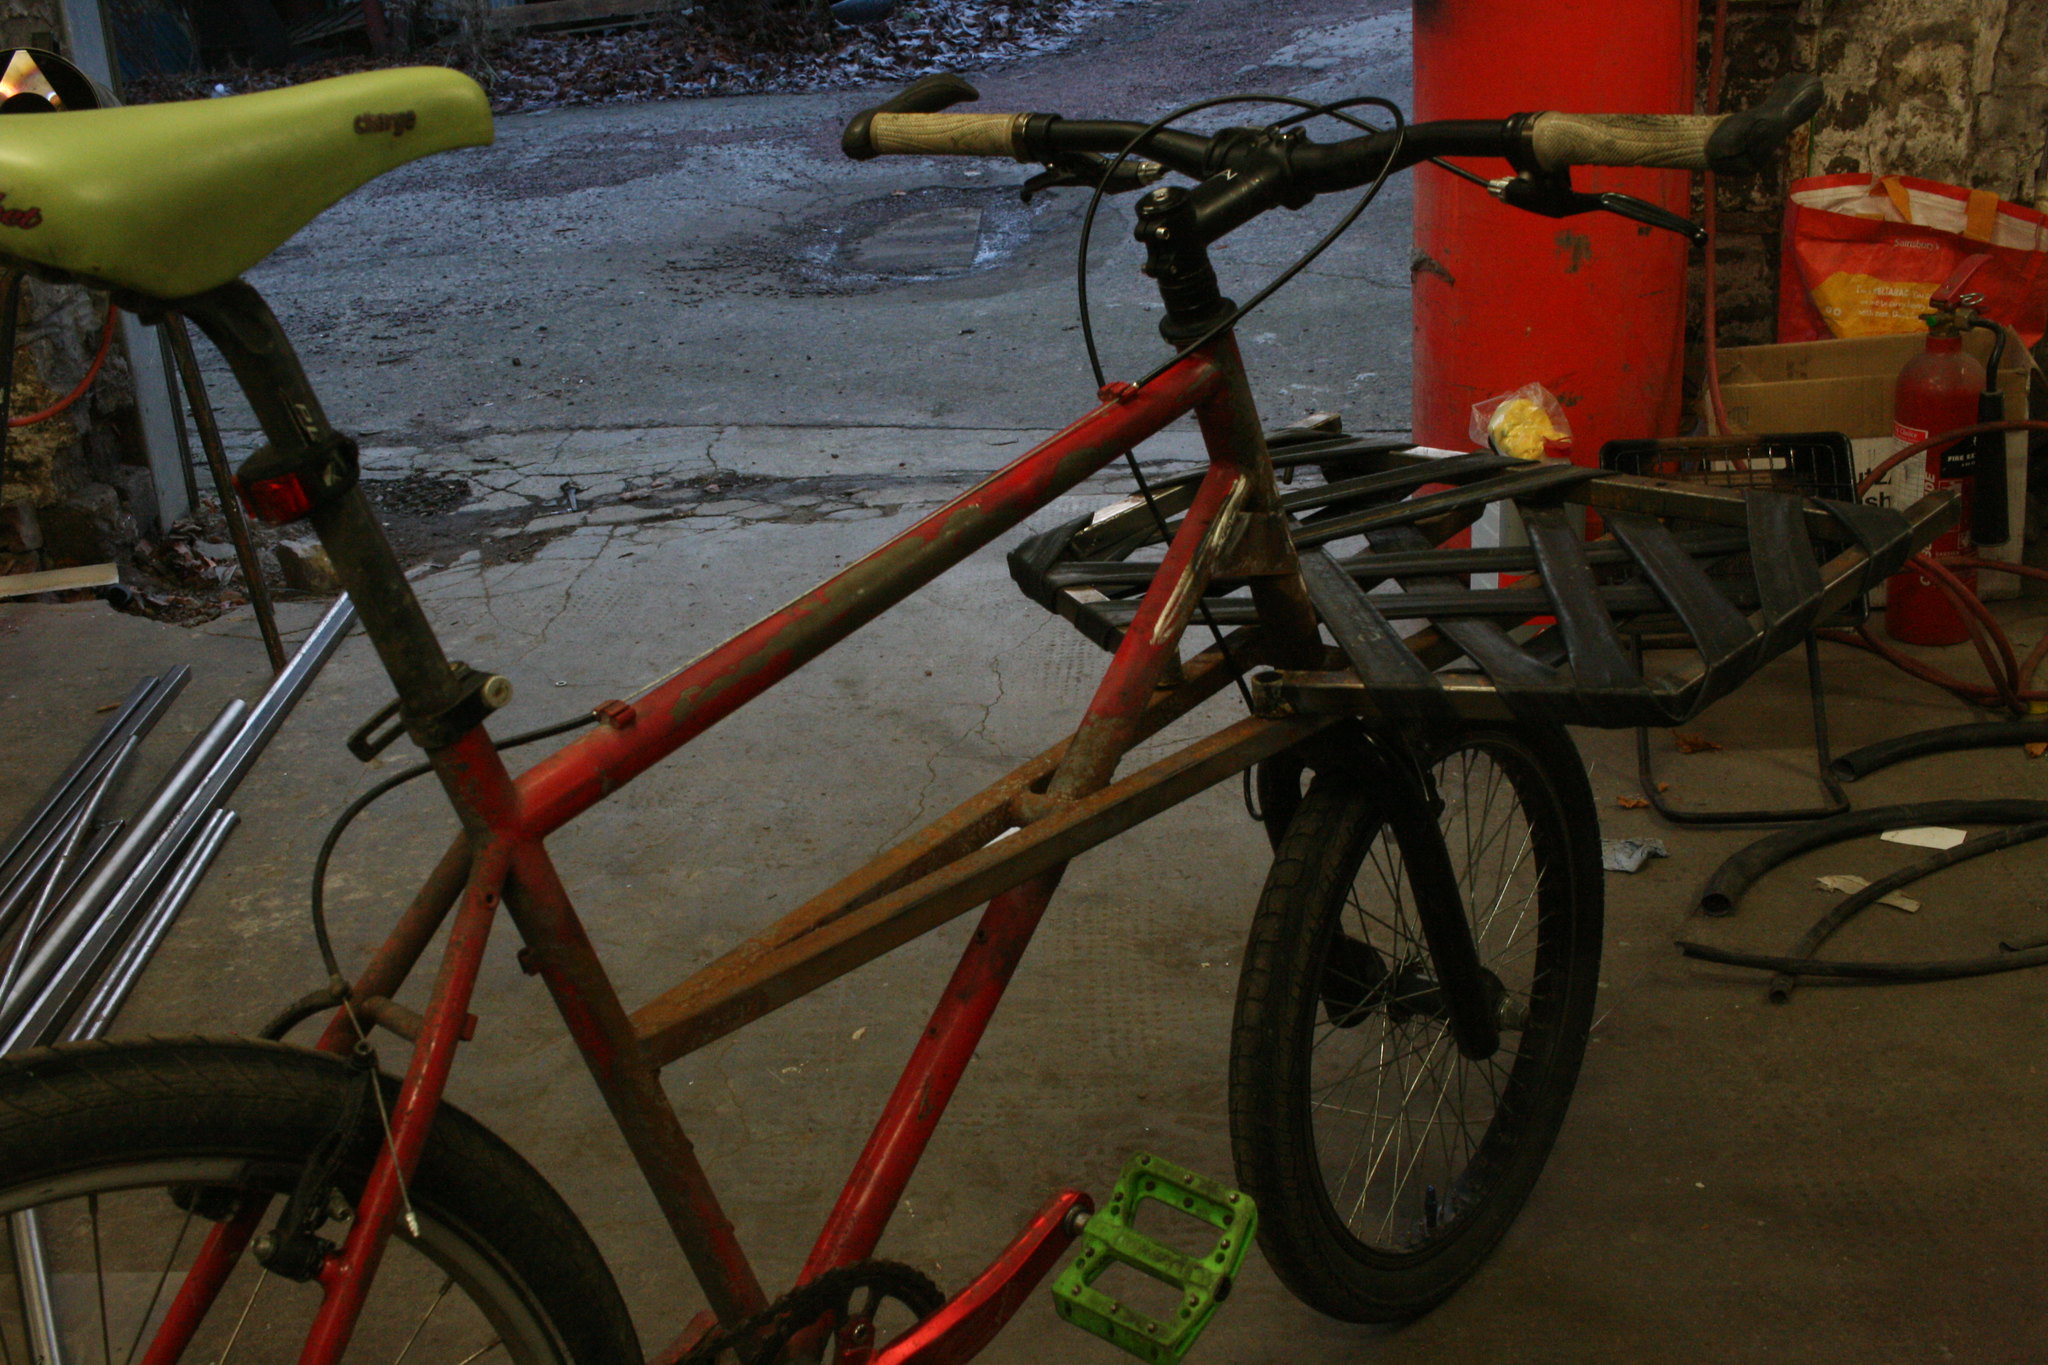 [/img]
[img]  [/img]
Looks amazing. Anyone who can build a bike is an absolute hero in my book.
Will the fancier version be more similar to the omnium (i.e the downtube?)
beast
Trail building tool in my welding evening class.
[url= https://farm5.staticflickr.com/4630/26048757568_6068476c49_o.jp g" target="_blank">https://farm5.staticflickr.com/4630/26048757568_6068476c49_o.jp g"/> [/img][/url][url= https://flic.kr/p/FFQG6N ]Untitled[/url] by [url= https://www.flickr.com/photos/79912681@N06/ ]Kayak23[/url], on Flickr
[url= https://farm5.staticflickr.com/4665/39921684391_44821cfbd8_o.jp g" target="_blank">https://farm5.staticflickr.com/4665/39921684391_44821cfbd8_o.jp g"/> [/img][/url][url= https://flic.kr/p/23PK4Vi ]Untitled[/url] by [url= https://www.flickr.com/photos/79912681@N06/ ]Kayak23[/url], on Flickr
[url= https://farm5.staticflickr.com/4704/25018831557_89bd91bf1e_o.jp g" target="_blank">https://farm5.staticflickr.com/4704/25018831557_89bd91bf1e_o.jp g"/> [/img][/url][url= https://flic.kr/p/E7Q3YM ]Mcleod Trail building tool[/url] by [url= https://www.flickr.com/photos/79912681@N06/ ]Kayak23[/url], on Flickr
Looks good Kayak,
btw how do you find the OSMO oils?
Lots of awesome stuff guys 🙂
Just thought I'd have a go a making a chopper. Not sure how good it will be but turned out quite nice & is bloody sharp.

this is a slight hijack as ive not made it yet but wanted some practical advice from you genii...
my mrs has been bugging me for one of them suspended clothes airers, pulleymaids.
i have decided to make one out of a pair of old skis. i have the skis, the pulleys and the rope
i am just looking for suggestions on how best to bridge the two skis together? i can easily use a piece of timber bolted to the skis at each end but wondering what else i could do...
Why not cut down some ski poles instead for the cross-members - either in pairs and sandwich the skis/rails in between, or with the board bolted down onto a single pole? That said, if you used poles for the rails and lengths of ski for the cross-members, you’ll probably find you can hang more laundry on it...
Why not cut down some ski poles instead for the cross-members - either in pairs and sandwich the skis/rails in between, or with the board bolted down onto a single pole? That said, if you used poles for the rails and lengths of ski for the cross-members (holes drilled to pass the poles through would look/work well and remove the need for bolt/screws), you’ll probably find you can hang more laundry on it...
Love that lettering on the trail tool, Kayak. How did you do that?