Final coat of Danish oil this morning before I post it tomorrow; Mother's Day present - spalted beech 210mm diameter.
[url=  ]
]
[img]  [/img][/url]
Took my front mech off which left an ugly direct mount so I made a blanking plate from a piece of mahogany
[img]  [/img]
Almost too embarrassed to put up any of my paltry efforts after seeing the beauties that others have done, like the lamps and that rather lovely car!
I've been enjoying making butter spreaders out of some beech logs I got hold of, this one I carved entirely with the axe, while sat watching the telly; catching the off-cuts in a large tray on my lap.
[IMG] 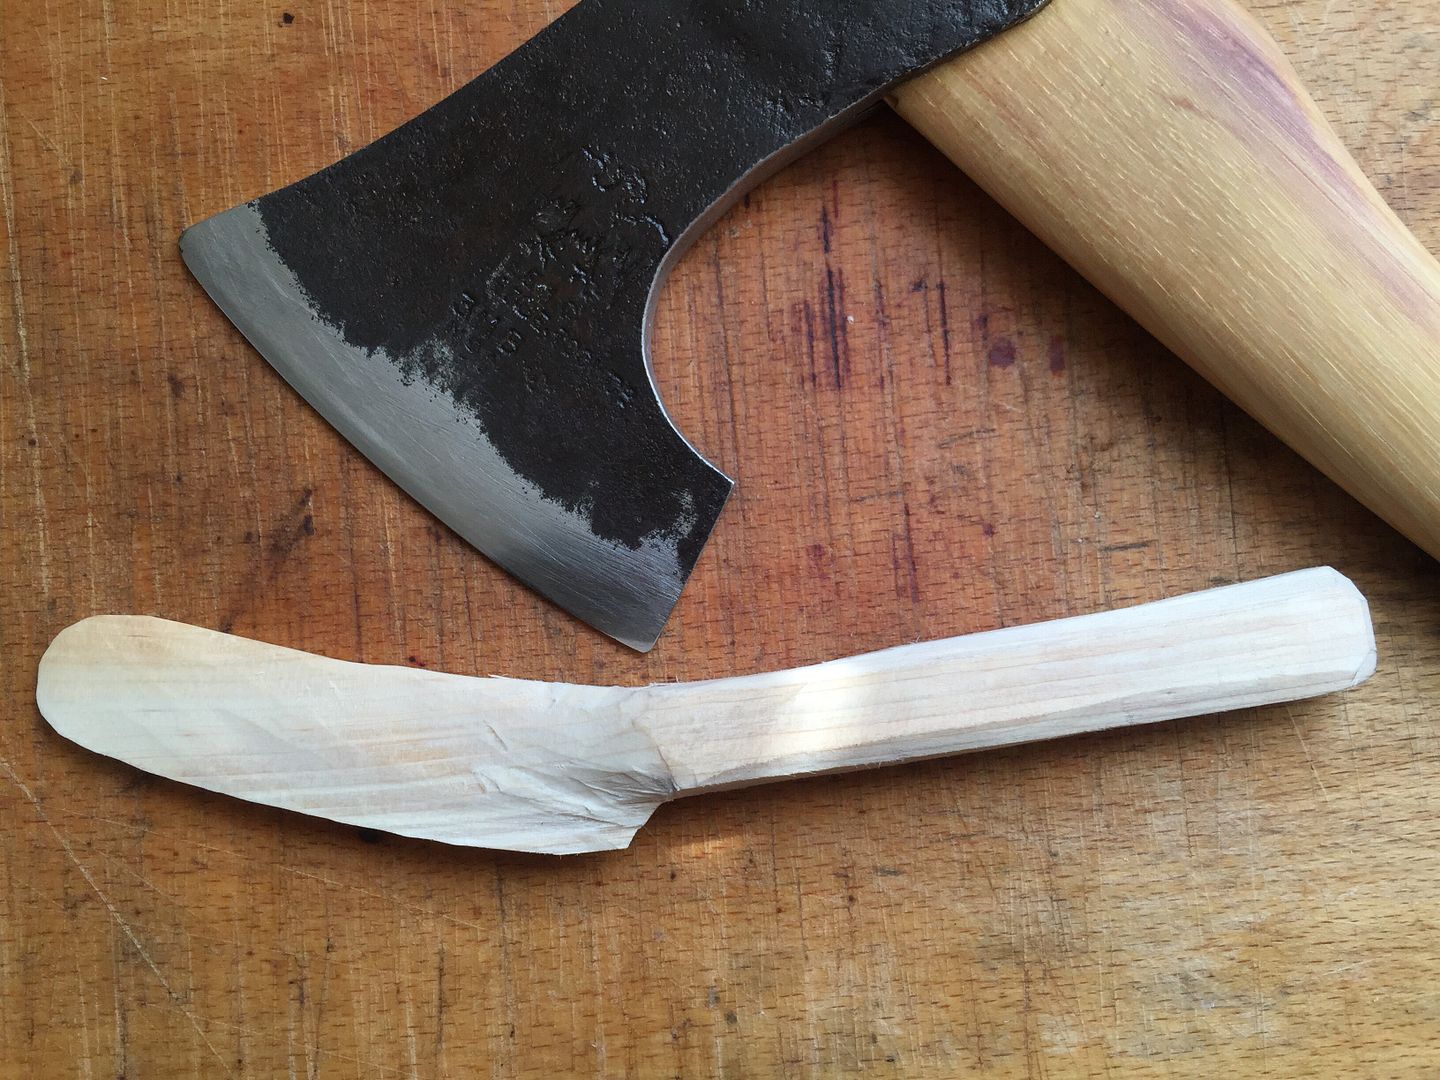 [/IMG]
There was some final smoothing off of the rough bits with a sharp knife, but the axe did most.
Works ok for its intended purpose, too.
Finished a Pinion gearbox touring frame with S and S couplers
[img]  [/img]
More pics on [url= https://www.instagram.com/mattabowns/ ]Instaham[/url]
Here's a bunch of different designs of spreaders I've been playing around with, the three bottom ones seem to work best, the one actually on the bit of bread is my favourite so far, there's a knot in the wood that I thought might wreck it, but it gives it a bit more interest in the grain.
Going to knock out a bunch of them over time as little extra pressies for friends and relatives at Christmas and birthdays.
[IMG] 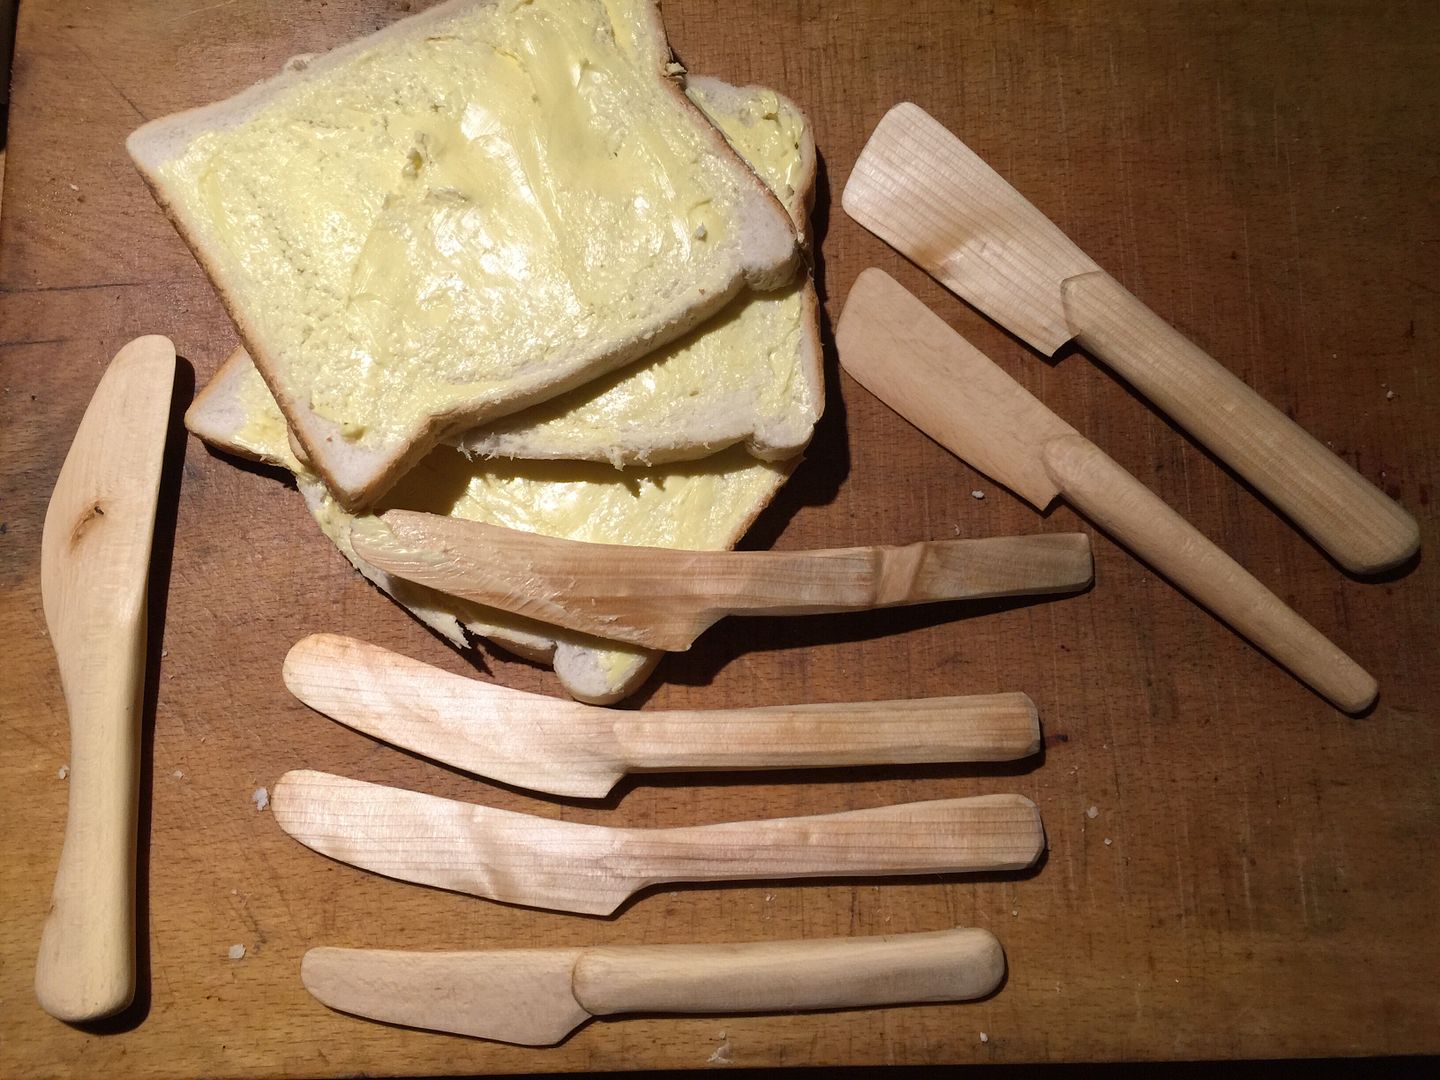 [/IMG]
If my GF saw how well you butter bread CZ I'd be single and she'd be knocking on your door.
Last thing I made was beer...
[img]  [/img]
I got fed up of our TV on a little table and the DVDs scattered everywhere, so more shonky woodwork from me. Attempted a blind sliding dovetail, no screws or glue, needed a big hammer to assemble!
[img][url= https://farm2.staticflickr.com/1668/25137851999_54f6ff3797_o.jp g" target="_blank">https://farm2.staticflickr.com/1668/25137851999_54f6ff3797_o.jp g"/> [/img][/url][url= https://flic.kr/p/Eim4Bn ]2016-03-04_06-42-53[/url] by [url= https://www.flickr.com/photos/martinddd/ ]martinddd[/url], on Flickr[/img]
[img][url= https://farm2.staticflickr.com/1658/24878665713_3cb5eea7dd_o.jp g" target="_blank">https://farm2.staticflickr.com/1658/24878665713_3cb5eea7dd_o.jp g"/> [/img][/url][url= https://flic.kr/p/DUrEyi ]2016-03-04_06-43-07[/url] by [url= https://www.flickr.com/photos/martinddd/ ]martinddd[/url], on Flickr[/img]
[img][url= https://farm2.staticflickr.com/1587/25505383165_c2f8f48fbb_o.jp g" target="_blank">https://farm2.staticflickr.com/1587/25505383165_c2f8f48fbb_o.jp g"/> [/img][/url][url= https://flic.kr/p/ERPKPB ]2016-03-04_06-43-22[/url] by [url= https://www.flickr.com/photos/martinddd/ ]martinddd[/url], on Flickr[/img]
[img][url= https://farm2.staticflickr.com/1609/25365598010_f08643e54c_o.jp g" target="_blank">https://farm2.staticflickr.com/1609/25365598010_f08643e54c_o.jp g"/> [/img][/url][url= https://flic.kr/p/EDtjyJ ]2016-03-10_08-59-15[/url] by [url= https://www.flickr.com/photos/martinddd/ ]martinddd[/url], on Flickr[/img]
Seems to work 😀
how many sockets in that corner and an extension lead 😳 😮 😉
looks a neat solution though.
Beautiful bowl Househusband.
Excuse my ignorance 18BikesMatt, but what and why are S&S couplers? To take the bike to bits?
[img] https://picasaweb.google.com/107939666300528894984/March10201602#6260359140991054018 [/img]
The wooden bit - not actually the last as I've made more since but the only one I have a decent picture of!
Bllx picture wont display - posting from picassa Help pls
how many sockets in that corner and an extension lead
Yea, we inherited 4 double sockets in that corner when we brought the place.
4 way block is run into unit under tv for TV, DVD & aeriel. Remaining wall sockets are for charging lap top, hudl, phones etc - we should have enough!!!
Thank you.looks a neat solution though.
but what and why are S&S couplers? To take the bike to bits?
That's exactly what they do, allow the bike to be split into two parts for travelling.
The wooden bit[img][URL= http://i1036.photobucket.com/albums/a448/sim_p/LP12/DSC_0439%2050_zpsdb8quop1.jp g" target="_blank"> http://i1036.photobucket.com/albums/a448/sim_p/LP12/DSC_0439%2050_zpsdb8quop1.jp g"/> [/IMG][/URL][/img]
Try again!
The wooden bit (Rippled Sycamore) Not the last but only one I have a picture of!
I made this lamp, a few more mods to go on like a touch module to dim the lamp.
[img] 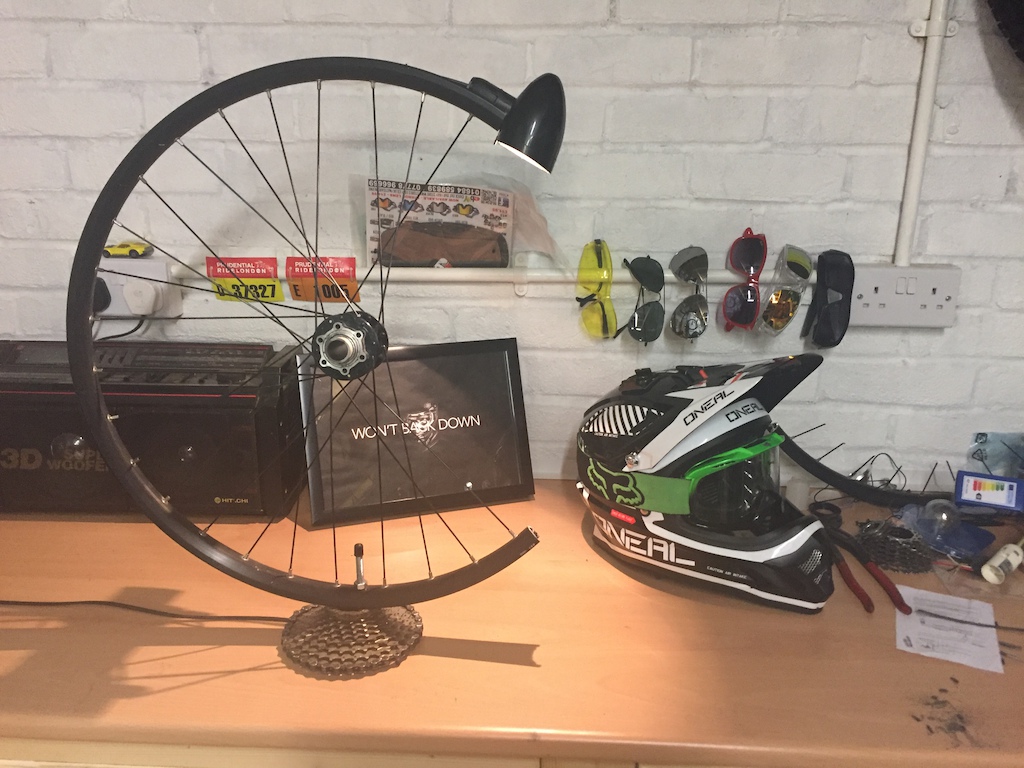 [/img]
Saccades build raises an issue which will apply to most treehouses if you're going to be compliant with Permitted Development regs. Verandas/balconies aren't allowed and the max height of structure is 2.5m if within 2m of boundary (1m in Scotland)
Anyone had the council come knocking?
@dusty trails - that plinth is superb. Makes my 30 yo grooved afromosia look rather worn..!
@dusty trails - that plinth is superb. Makes my 30 yo grooved afromosia look rather worn..!
Thanks @ourmaninthenorth
It replaced a fluted Walnut Plinth also rather old (about 27 years)- had it from new but a bit like triggers broom now!! Took it in to local specialist for an upgrade & service and asked about new plinth....How much!!?? Conversation went ....I could make one of those......really, go on then.
So Shop dismantled & gave me old one to copy (had a top plate to fit) and 2 weeks later new plinth delivered to shop - reaction was WOW! so fitted and looks & sounds great. Ended up making some for shop just before crimbo.
Surfboard from cedar strips with a layer of fibreglass and epoxy on top. Started this years ago, and my Dad has finished it off. Dad is thinking about retiring, and wondering if we could sell boards like this to keep him busy...
[img]  [/img]
[img]  [/img]
[img]  [/img]
Wow! Beautiful board.
I got a hankering to make me a canoe that way...
The board was made with leftovers from my sea kayak project in 2009. I would thoroughly recommend building a canoe, it's great fun.
[img]  [/img]
[img]  [/img]
I don't understand how you/one can make stuff like that kayak and board so nicely. Do you take on mature apprentices? 😉
I was 22 when I made the sea kayak whilst unemployed after uni, living at my parents house. My Dad was a good source of advice, but otherwise I was pretty much self taught. The construction method is not particularly difficult, so even if you cock it up a bit, it looks ok. With enough time* and a spare £1500 for tools** and materials, I expect anyone could make something like this.
* 6 months for me, a few hours a day
* mostly just clamps. Lots and lots of clamps. I used one saw, a couple of chisels and a belt sander.
With enough time* and a spare £1500 for tools** and materials, I expect anyone could make something like this
That, I doubt! Probably the definition of a truly skilled craftsman is thinking what he does is easy and anybody could do it...
I have to say Mowgli that Board and Canoe are lovely!
Well... I don't want to piss on Mowgli's chips or anything, but... I HAVE just knocked this up...
[img] 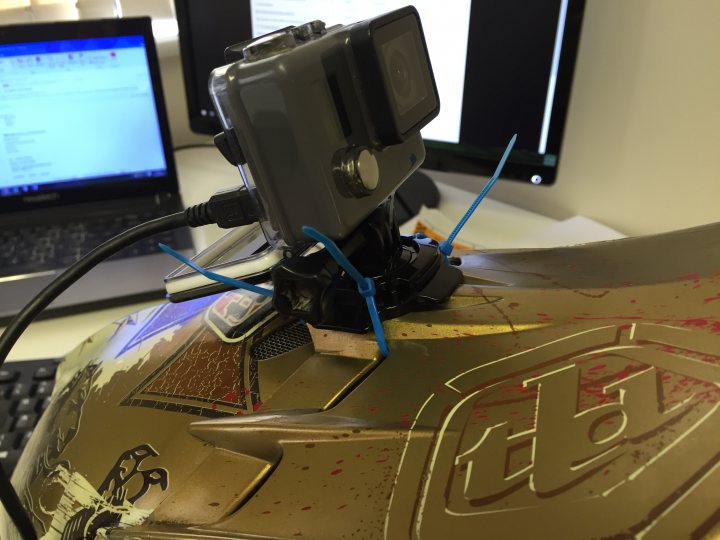 [/img]| http://thumbsnap.com/9mVPHfh8 [/img]
It's almost completely secure (as long as you don't touch or knock it) and I think everyone can agree it looks like something straight out of the TLD factory - a D2.5 if you will, with integrated GoPro mount.
If anyone finds a GP with half a mount hanging from the bottom of it at BPW tomorrow, it'll be mine.
@Kayak23 - As mentioned they are for splitting the frame in two to transport it. There's a video of me doing it [url=
Step aside, Mowgli.
[IMG]  [/IMG]
[IMG]  [/IMG]
[IMG]  [/IMG]
That's right, it's a raised bed made out of 'value' decking and 2x2 from the allotment.
Weep at my magnificence.
Beautiful, Mowgli. How does she sail?
That clips together beautifully 18bikesmatt 🙂
*sulks* 🙂
How's the allotment shed coming along (to live with) Kayak23? That was possibly the finest thing I have ever seen on here.
Thank you very much Mr/Ms bearnecessities.
It's coming along really well actually. It's always evolving, slowly, as I never seem to have too much time for it.
I'm trying to put the effort in to do more things there lately as there is potentially the chance that they may be interested in it for the Shed of the Year comp. 🙂
I've been preoccupied with finishing the shed for my girlfriend too which is by the river nearby. Unfortunately we had some pretty mental flash-flooding last week and the water was a couple of feet high inside despite it being on stilts! 😯
[img]  [/img]
But anyway, I'm getting back to MY shed and have fitted a tiled surround for the stove which makes cups of tea and soup very nicely!
[img]  [/img]
...and I've painted the end wall where I'm slowly building up a fake tree, which I started originally but have not gotten around to doing properly.
[img]  [/img]
Original basis of the tree before I erected the shed.
[img]  [/img]
I've noticed some problems with water ingress at the end of the shed where it must be welling on the back deck then getting sucked in somehow so I've that to sort too...
Always things to do. Thanks for asking 🙂
That shed's beautiful.
Today I've been mostly resewing an army bivvibag. It was one of the enormous danish ones, with all these extra bits of fabric, poppers everywhere and the front was this annoying velcroed flap (I don't require the same quick exit an army guy does).
It's now the same shape as an alpkit albeit with a longer hoodflap for full coverage when necessary. I'm proud of it.
[img] 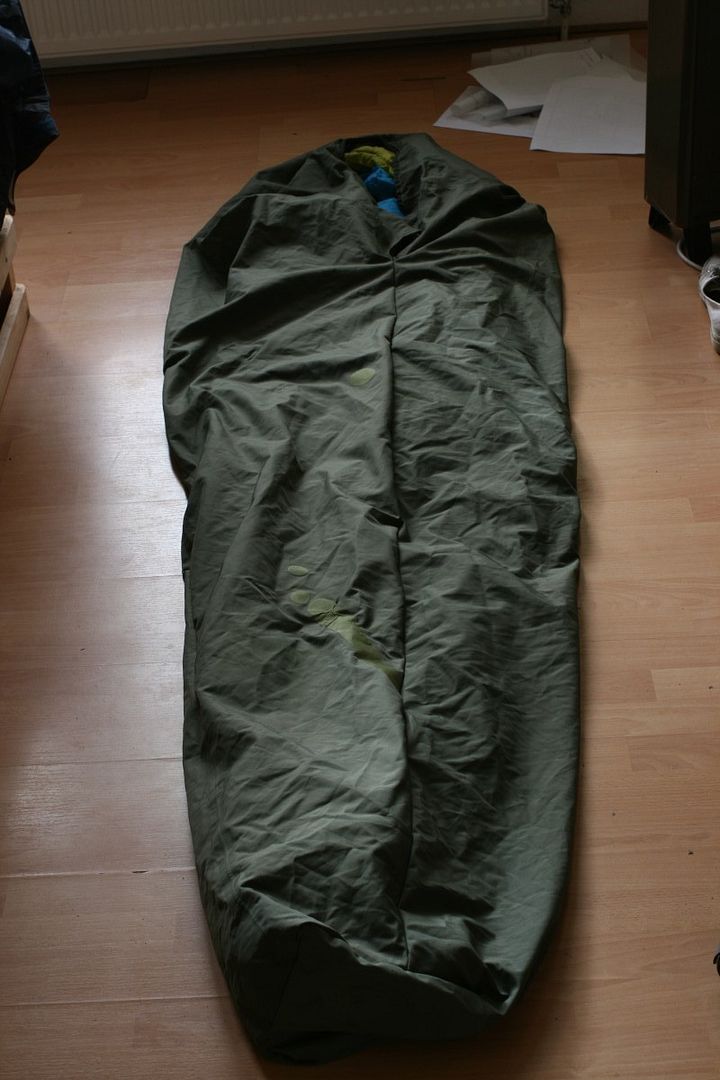 [/img]
Built a rainwater collection pergola for a community garden in our local park:
[url= https://farm2.staticflickr.com/1595/25334786683_16d61a3a27_z.jp g" target="_blank">https://farm2.staticflickr.com/1595/25334786683_16d61a3a27_z.jp g"/> [/img][/url]
[url= https://farm2.staticflickr.com/1451/25334787043_55e2879de9_z.jp g" target="_blank">https://farm2.staticflickr.com/1451/25334787043_55e2879de9_z.jp g"/> [/img][/url]
Everything I build gets a headbadge, them's the rules:
[url= https://farm2.staticflickr.com/1639/25334790233_2fa3f6f860_z.jp g" target="_blank">https://farm2.staticflickr.com/1639/25334790233_2fa3f6f860_z.jp g"/> [/img][/url]
oooo. nice kite 😉
Can't beat a bit of Lindab guttering, either....
Yeah, added another load of u-bolts to the roof today, don't want it to end up in Edinburgh 😉
Is it still there after the wind this weekend ben ?
Wind is horrendous as is the driving rain so ive made food.
[img]  [/img]
Sourdough loaf ,
[img]  [/img]
Tom soup
[img]  [/img]
New york cheese cake.
[img]  [/img]
Last weeks lunch loaf and scones/rock cakes as they emded up 😉
Looks like a solid plan, need to knock up more pizza methinks, last batch was awesome.
Ben, what is that tubework you're using for the frame called? I have a need for some but suspect I could save significant amounts of time if I knew what I was looking for!
Collected the 650b frame (that I think features earlier in the thread before paint) from the painter
[img]  [/img]
[img]  [/img]
Also finished a cross frame that's at the painter along with the S and S/Gearbox touring frame
[img]  [/img]
Is it still there after the wind this weekend ben ?
Aye, I was a bit worried, but it's not budged an inch!
Ben, what is that tubework you're using for the frame called? I have a need for some but suspect I could save significant amounts of time if I knew what I was looking for!
It's scaffold tube - except it's not, it's stuff I bought from Metals4U, but it's the same stuff as scaffold tube. HTi sstuff, also available in other sizes:
https://www.metals4u.co.uk/tube-clamps/size-d-48mm/48.3mm-od-galvanised-tube/p3073
This is what I built today, a big raised bed. Designed to be wheelchair-accessible on this side, it's 30ft long.
[url= https://farm2.staticflickr.com/1635/26048859556_d2187da14a_z.jp g" target="_blank">https://farm2.staticflickr.com/1635/26048859556_d2187da14a_z.jp g"/> [/img][/url]
@bencooper - if you can get hold of a livestock water-trough (the deep ones with the self filling ball-cock mechanism) it makes it [i]massively[/i] quicker/ easier to fill watering cans - one dunk and you're done! Loads less strain than holding a can under a tap.
ben - line the sides of the raised beds with DPM to stop all the moisture from leaving via the planks.
ben - line the sides of the raised beds with DPM to stop all the moisture from leaving via the planks.
Thats good advice, i did it with ours & seems to work well.
[img][url= https://farm6.staticflickr.com/5469/18091957625_0f26534dde_o.jp g" target="_blank">https://farm6.staticflickr.com/5469/18091957625_0f26534dde_o.jp g"/> [/img][/url][url= https://flic.kr/p/tyJ1FT ]IMAG2475[/url] by [url= https://www.flickr.com/photos/martinddd/ ]martinddd[/url], on Flickr[/img]
18bikesMatt - that MTB looks nice, what size? 16"?? and what geometry you gone with???
No additional bracing at the SS/CS @ ST looks clean 🙂
6yrs ago, did the same, and they're still great.
Mrs Stoner was digging them over today.
[img]  [/img]
If you want tubing and connectors, worth looking at Kee Klamp.
ben - line the sides of the raised beds with DPM to stop all the moisture from leaving via the planks.
Interesting, cheers - sides only, leave the base alone? It's just onto soil, though other beds will be onto concrete.
yep, leave the base alone, Allows worms to get in and out and move between bays, and you dont want it fully tanked or it will be a mess after a few hours of scottish rain.
Great, will do, thanks.
@qwerty - It's a replacement for an extra small Cotic Soul that was stolen (ad they no longer make) so the fit geometry is based on that. It's updated though as it's 650b, bolt through, post mount brake, boost, stealth dropper routing and 1x only. The head angle and bb drop were changed to account for the wheels change but the chainstays are the same length as a 26" Soul.
That frame actually represents what will become our 'standard' frame spec as far as tube choice, cable routing, features etc unless someone specifies otherwise. It's also the first frame we've had manganese phosphate coated prior to paint so it's got full rust protection, all future frames will get this.
I only ever add bridges if people need mudguard mounts and it really helps with clearance, not having an option for a front mech helps this further as does boost
Built another four raised beds this afternoon:
[url= https://farm2.staticflickr.com/1666/26070074506_b43ecf0751_z.jp g" target="_blank">https://farm2.staticflickr.com/1666/26070074506_b43ecf0751_z.jp g"/> [/img][/url]
[url= https://farm2.staticflickr.com/1707/25823170120_bbd6bab0a7_z.jp g" target="_blank">https://farm2.staticflickr.com/1707/25823170120_bbd6bab0a7_z.jp g"/> [/img][/url]
Not nearly as flash as some stuff above, but I built this as a night light for my 6mth old boy:
[img]  [/img]
Think it needs some window tints though as the few led's on the strip are pretty harsh even though they're the 'warm ' versions.
Fillet brazed Reynolds 725 cross frame with an integrated seatmast
[img]  [/img]
Keep an eye out at Paris-Roubaix for it
I nearly finished a cabin log quilted block. Yes ultra gay. Yes I don't care! 🙂
Keep an eye out at Paris-Roubaix for it
Ooh, get you 😀
Ooh, get you
Should clarify, the sportive not the actual race
[img]  [/img]
Extremely rough attempt at a garmin stem mount. Will try again next week and hopefully get it a bit smoother/straighter...
My M3 tap snapped off in one of the holes which fixes the plastic insert, so unless I glue the in insert in place, this one's a write off 🙁
Cheers ben and pleader, should allow me to try something out.
I CNC'd a mount to fit a Chinese CREE light so I can put it on my GoPro mount, and keep it off the top of the handlebars
[img]  [/img]
[img]  [/img]
[img]  [/img]
The initial hole was made to fit exactly the Outside Diameter of the light, I then put it in the oven at 180 for half an hour, slipped it on, and it ain't ever going to come off again!
^ Nice 🙂
Recently turned my hand to pyrography. Have so far done some elephants and Star Wars related wood burning.
[img]  ?t=1459630469[/img]
[img]  ?t=1459630474[/img]
Bodged me a wood transporting trailer for a load of logs which are a mile from the nearest road. Some bits of old pallet, some rusty old steel conduit and some salvegee screws. And the wheels off my girlfriends bikes...
[img]  [/img]
delete
Here is a side table I made from rejected oak window sills.
The legs and top are laminated.
The finish is 6-8 coats of neutral Danish Oil followed by 3-4 coats of Miniwax wipe-on polyurethane final finish. The latter is good stuff I got from the US. I have a background in 3d CAD so sometimes use that to develop ideas and sizes. Buttons on the underside to hold the top on and allow for wood movement.
[img]  [/img]
[img]  [/img]
[img]  [/img]
[img]  [/img]
[img]  [/img]
[img]  [/img]
Likes all above!
😀
Currently practising my not very good welding skills and knocking up a stove from an old air compressor.
Hardest thing to weld is the pipe which is very thin and now looks a bit like Swiss cheese! 😀
[img]  [/img]
[img]  [/img]
Hot plate isn't welded yet but is made from an old saw blade.
I thought it was an old chainring now that everyone is running little 1x front rings 😉
you don't say! If the heat doesn't make you keep your distance - the TCT teeth will! 🙂Hot plate isn't welded yet but is made from an old saw blade.
Or to put it another way - it's now dangerous hot or cold!
Like the proportions. Is this for the allotment shed?
Here is another one from a couple of years ago.
Interlocking birch ply, it comes apart with no screws or glue.
The first photo is a scale model mock up.
[img]  [/img]
[img]  [/img]
[img]  [/img]
[img]  [/img]
[img]  [/img]
Like
Brilliant chair!
AlexSimon - Member
Hot plate isn't welded yet but is made from an old saw blade.
you don't say! If the heat doesn't make you keep your distance - the TCT teeth will!
Or to put it another way - it's now dangerous hot or cold!
Like the proportions. Is this for the allotment shed?
The teeth are blunt but I may grind them down further, although I like a bit of danger... 😈
It will find a home at one of the sheds at the allotment I'm sure.
Built myself a Brompton:
[url= https://farm2.staticflickr.com/1453/26208392311_60bb486af8_z.jp g" target="_blank">https://farm2.staticflickr.com/1453/26208392311_60bb486af8_z.jp g"/> [/img][/url]
Well, it's not really for me, it's a demo bike for Velovision magazine and maybe other places.
[url= https://farm2.staticflickr.com/1666/26274644855_787c8060e6_z.jp g" target="_blank">https://farm2.staticflickr.com/1666/26274644855_787c8060e6_z.jp g"/> [/img][/url]
Rohloff and disc brakes - I tried out the TRP HY/RD on the front, pretty good but a big beastie!
[url= https://farm2.staticflickr.com/1555/26248696846_660cbd4037_z.jp g" target="_blank">https://farm2.staticflickr.com/1555/26248696846_660cbd4037_z.jp g"/> [/img][/url]
[url= https://farm2.staticflickr.com/1567/25669823294_a963487536_z.jp g" target="_blank">https://farm2.staticflickr.com/1567/25669823294_a963487536_z.jp g"/> [/img][/url]
@IainAhh - Love that chair, anything without fixings is good in my book
Ben - Know what you mean about those calipers, we tend to suggest sticking with spyres. It's weird but a flatmount caliper would look totally in scale on a Brompton
I'm going to try Spyres when it comes back from Velovision - funny thing is it actually fits better to the front than the usual BB7s. It's chunky but in a different direction!
Yeah, spoke clearance can be an issue with Spyres as they're wide but I imagine on a wheel that small the spoke angle is quite big so shouldn't be a problem. Once you've tried Spyres you'll never go back to BB7s
Nice set of brakes on your Brompton Ben.
I had one that colour. Now traveling round the USA somewhere via ebay.
Did this a few weeks ago.
Originally we did it in the GT colours (Way back in this thread)
New sponsor, new graphics.
[url=  ?dl=0]Link[/url]
I recently turned this
[URL= http://i884.photobucket.com/albums/ac50/tymbian/Mobile%20Uploads/2015-10/20151024_141857_zpsncwllbl3.jp g" target="_blank"> http://i884.photobucket.com/albums/ac50/tymbian/Mobile%20Uploads/2015-10/20151024_141857_zpsncwllbl3.jp g"/> [/IMG][/URL]
Into this
[URL= http://i884.photobucket.com/albums/ac50/tymbian/Mobile%20Uploads/2016-03/20160317_132837_zps79ashwjq.jp g" target="_blank"> http://i884.photobucket.com/albums/ac50/tymbian/Mobile%20Uploads/2016-03/20160317_132837_zps79ashwjq.jp g"/> [/IMG][/URL]
Nice job on your bathroom. Love the tiling, great colour and style. Where has the bog gone?
Around the corner behind the mirror which forms an L-shaped partition with a glass brick wall which you can just see in the pic.
A couple more pics
[URL= http://i884.photobucket.com/albums/ac50/tymbian/Mobile%20Uploads/2016-03/20160317_132927_zpse4xiyncg.jp g" target="_blank"> http://i884.photobucket.com/albums/ac50/tymbian/Mobile%20Uploads/2016-03/20160317_132927_zpse4xiyncg.jp g"/> [/IMG][/URL]
[URL= http://i884.photobucket.com/albums/ac50/tymbian/Mobile%20Uploads/2016-03/20160317_133026_zpsxbeqblmx.jp g" target="_blank"> http://i884.photobucket.com/albums/ac50/tymbian/Mobile%20Uploads/2016-03/20160317_133026_zpsxbeqblmx.jp g"/> [/IMG][/URL]
[URL= http://i884.photobucket.com/albums/ac50/tymbian/Mobile%20Uploads/2016-03/20160317_145106_zpsoe967e23.jp g" target="_blank"> http://i884.photobucket.com/albums/ac50/tymbian/Mobile%20Uploads/2016-03/20160317_145106_zpsoe967e23.jp g"/> [/IMG][/URL]
[URL= http://i884.photobucket.com/albums/ac50/tymbian/Mobile%20Uploads/2016-03/20160317_154046_zpshwx4tt39.jp g" target="_blank"> http://i884.photobucket.com/albums/ac50/tymbian/Mobile%20Uploads/2016-03/20160317_154046_zpshwx4tt39.jp g"/> [/IMG][/URL]
Just made these little stills for some bloke that wants them as keyrings.
[url= https://farm2.staticflickr.com/1648/26210877792_e02a3e4277_c.jp g" target="_blank">https://farm2.staticflickr.com/1648/26210877792_e02a3e4277_c.jp g"/> [/img][/url][url= https://flic.kr/p/FWaAN5 ]Mini Stills[/url] by [url= https://www.flickr.com/photos/swavis/ ]Gavin Belton[/url], on Flickr
[url= https://farm2.staticflickr.com/1479/26030429580_3430501ffe_c.jp g" target="_blank">https://farm2.staticflickr.com/1479/26030429580_3430501ffe_c.jp g"/> [/img][/url][url= https://flic.kr/p/FEdKQ1 ]Mini Stills[/url] by [url= https://www.flickr.com/photos/swavis/ ]Gavin Belton[/url], on Flickr
much gerardi vice jealousy