Just been busting a gut all week on a bit of a DIY project, starting the process of turning 8 metres of my garden into a brick built bike workshop (8m x 4m). After getting planning permission and getting the plans signed off my Building Control, the project started.
Task one was clearing all this:
[url= http://farm9.staticflickr.com/8436/7980548030_5ffa69ff2b.jp g" target="_blank">
[url= http://www.flickr.com/photos/brf/7980548030/ ]A little bit over grown[/url] by [url= http://www.flickr.com/people/brf/ ]brf[/url], on Flickr
[url= http://farm9.staticflickr.com/8311/7980555428_a852b5f18c.jp g" target="_blank">
[url= http://www.flickr.com/photos/brf/7980555428/ ]Post bonfire[/url] by [url= http://www.flickr.com/people/brf/ ]brf[/url], on Flickr
The base is a Float with the slab base and footings poured as one to use the concrete pump only once (as the site is 60m from a public road, although 2m from a Network Rail road which we couldn't use).
To stop the footings collapse, we built the base first (15cm of hardcore).
[url= http://farm9.staticflickr.com/8438/7972573990_f55b3df7e2.jp g" target="_blank">
[url= http://www.flickr.com/photos/brf/7972573990/ ]Hole for the slab's base[/url] by [url= http://www.flickr.com/people/brf/ ]brf[/url], on Flickr
[url= http://farm9.staticflickr.com/8038/7976944543_6400d75a57.jp g" target="_blank">
[url= http://www.flickr.com/photos/brf/7976944543/ ]Tom whacking off...[/url] by [url= http://www.flickr.com/people/brf/ ]brf[/url], on Flickr
Then dug 90cm footings all round the sides.
[url= http://farm9.staticflickr.com/8036/7979925521_5a6fe402c8.jp g" target="_blank">
[url= http://www.flickr.com/photos/brf/7979925521/ ]One side complete (all dug by hand).[/url] by [url= http://www.flickr.com/people/brf/ ]brf[/url], on Flickr
Add a Damp Proof Membrane and about a tonne of steel mesh:
[url= http://farm9.staticflickr.com/8318/7982980901_8e624f670a.jp g" target="_blank">
[url= http://www.flickr.com/photos/brf/7982980901/ ]Ready for concrete[/url] by [url= http://www.flickr.com/people/brf/ ]brf[/url], on Flickr
Then we laid 60m of 4" pipe to pump the concrete from the road to the end of the garden:
[url= http://farm9.staticflickr.com/8032/7986385718_6fd0081089.jp g" target="_blank">
[url= http://www.flickr.com/photos/brf/7986385718/ ]Pumping concrete 60m[/url] by [url= http://www.flickr.com/people/brf/ ]brf[/url], on Flickr
[url= http://farm9.staticflickr.com/8449/7986387872_607905ed1a.jp g" target="_blank">
[url= http://www.flickr.com/photos/brf/7986387872/ ]Pumping concrete 60m[/url] by [url= http://www.flickr.com/people/brf/ ]brf[/url], on Flickr
[url= http://farm9.staticflickr.com/8298/7986386745_2704d04742.jp g" target="_blank">
[url= http://www.flickr.com/photos/brf/7986386745/ ]Pumping concrete 60m[/url] by [url= http://www.flickr.com/people/brf/ ]brf[/url], on Flickr
14.5 cubic metres of concrete were used in all (6m3 per HGVs, so 2 full loads and one part).
[url= http://farm9.staticflickr.com/8303/7986448319_f7c3e4a2de.jp g" target="_blank">
[url= http://www.flickr.com/photos/brf/7986448319/ ]Finally, all the blockages cleared![/url] by [url= http://www.flickr.com/people/brf/ ]brf[/url], on Flickr
To empty the pipes, a foam ball is blown through them, which pushes out 0.5m3 of concrete (for 60m of pipe).
[url= http://farm9.staticflickr.com/8458/7986464978_00db924cb0.jp g" target="_blank">
[url= http://www.flickr.com/photos/brf/7986464978/ ]To clean out the pipes, a foam ball is blown through them, pushing out all the concrete.[/url] by [url= http://www.flickr.com/people/brf/ ]brf[/url], on Flickr
After tamping it down and cleaning up all the overspill, the base is ready.
[url= http://farm9.staticflickr.com/8314/7989664253_9376ec7d5d.jp g" target="_blank">
[url= http://www.flickr.com/photos/brf/7989664253/ ]Slab with about a metre cubed of overspill removed[/url] by [url= http://www.flickr.com/people/brf/ ]brf[/url], on Flickr
In total, four 8 yard skips of earth were filled, 6 tonnes of hardcore and 14.5 cubic metres of concrete were put back in along with 18 sheets of steel mesh and 8m of DPM.
Back at work on Monday, but will take another week off soon to start laying bricks.....
wow
Not doing it by half are you? Got a sketch of the final shed or are you keeping us in suspense?
I always wondered how they cleaned out the concrete pipes - now I now 😀
I love concrete, and tell Tom to get some proper shoes!! 😀
Well at least the base won't give way when you put your bike in....How many storeys is it going to be?
'kin hell. That is a massive quantity of concrete for what is a [s]shed[/s] bungalow at the bottom of the garden.
I know nothing about building bike sheds but couldn't you have put something big and steel in the concrete to lock bikes to?
Looks great - I will be following this!
Building control don't distinguish between a single storey house and a workshop, so you end up with the same spec, so the whole thing is very much over the top for a bike shed.
Unless you make it a couple of square metres smaller and then you can do what you like.
Evolving threads like this are great.
Is it your intention run a commercial sideline from it?
Impressive, BTW.
Here is a very simple sketch in PPT, I knocked up for Planning permission:
[url= http://farm9.staticflickr.com/8176/7992744654_6e592b8481.jp g" target="_blank">
[url= http://www.flickr.com/photos/brf/7992744654/ ]Screen shot 2012-09-16 at 18.55.28[/url] by [url= http://www.flickr.com/people/brf/ ]brf[/url], on Flickr
Basically a dual pitch slate roof, with Victorian brick front, so as to match the house, then breezeblock for the other three sides (as they're hidden by fences).
In all honesty who specced your found/floor design? 2 layers of a393? mesh is ridiculous in that scenario! And after all that you space the mesh on block pavers? and not circular spacers. Was it building controls spec??
A local engineer did the design and building control signed it off (inc approving using pavers to space the mesh). The mesh was beefed up as it's a float so there is a risk the footings pull away from the slab AIUI. Building control did query the float design with the engineer as I changed in from a standard design (footings then slab) to a single pour option to save on pump hire costs.
On a closer look at the pics is it three layers??
4 layers as they wanted overlapping 252 and the local builder's merchant only had 140, two lots of 140 = 280 which meets the spec of 252.
looks very ott, Love it!!
Are you planning on maintaining elephants in there? I've built service reserviors on lesser reinforcement!
This was the spec:
[url= http://farm9.staticflickr.com/8300/7992772035_f1a6e5023c.jp g" target="_blank">
[url= http://www.flickr.com/photos/brf/7992772035/ ]Foundation Specs[/url] by [url= http://www.flickr.com/people/brf/ ]brf[/url], on Flickr
My house is built on less ! i guess your in englandshire are you ?
My house is built on less ! i guess your in englandshire are you ?
Likewise, my house has stood on 9" of rubble for the last 120 years, so this is completely OTT. However, quite fun to build and as it was DIY (with a neighbour and a friend helping with the digging) it didn't cost much.
Interesting design, very rarely see mesh in the top portion of a slab. Locally poor ground conditions? Anyhoo looks like you did a proper job and for a "DIY" effort give us apparent pros a real run for our money. Good work!!
Interesting design, very rarely see mesh in the top portion of a slab. Locally poor ground conditions?
I just followed the plans (know nothing about structural engineering), I just told them what I wanted and the local Engineers did the plans.
Soil is sandy, no clay at all so pretty easy to build on (eg my house has 9" of rubble as a base and has stood still since 1890).
Whole thing did seem a bit insane to me, as digging out the footings was really tough!
Nice!!
I especially like how, once the garden was cleared, you dump a whacking great 'shed' in the space!!
Completely quashes any dreams of decking or a nice water feature!
Man 1 - Woman 0
DrP
You did the right thing, get an engineer in, let him do the design, then do as he asks. All the blame therefore falls back at his door and the pics back it up. As I say, great effort for a DIY project as there's many a "builder" who'd have winged it with a 300 strip footing and a 100mm slab. Good luck with the rest of the build.
Looking forward to seeing this progress. No ground anchor points in the slab??
Looking forward to seeing this progress. No ground anchor points in the slab??
Sort of ran out of time. I only had a week off work and ordered the concrete and pump for the Friday, then had to get everything ready by then. I was going to put a service tunnel in for water etc as well, but we just didn't have a spare moment all week, turned out to be a lot more effort than I had expected. We only made it as a neighbour offered his services at the last minute and helped us dig for 4 days, otherwise Tom and I would never have managed it all!
I'll add ground anchors using expansion bolts. I'll put a steel cage on the inside of the breezeblocks to make it tough to cut through them and the glass doors will have steel shutters, so it should be pretty secure. Plus insurance is easy to get for a brick building, so that will be the final backstop.
Not to forget George the cat:
[url= http://farm9.staticflickr.com/8316/7979920559_fc8de94d56.jp g" target="_blank">
[url= http://www.flickr.com/photos/brf/7979920559/ ]George the digger cat[/url] by [url= http://www.flickr.com/people/brf/ ]brf[/url], on Flickr
Why bother with glass doors?
Did you powerfloat the slab? I do so love powerfloated concrete. Mmmmmmmmshiny...... 🙂
No underfloor heating to keep the bikes warm?
love it. Im in the middle of doing something similar. Refurbing and old agricultural shed. See if I cant rustle up some pics soon...
No doubt there'll be a gratuitous shot of a log burner somewhere in there stoner. 😉
Why bother with glass doors?
Let some light in for when I'm using man tools (lathe, pillar drill, router etc). I've got six Velux in the roof as well.
nice work. should of put a services trench in though for power, water, data, etc.
Superb!
Although happy I have a double garage as I'd never get time to do all that!
Im hoping to fit a log burner at some point but I need to work out how to flue out through the Onduline roofing without it catching fire 🙂
There's also no concrete involved.
But this is what I started with. ("after" pics to come sometime this week)
[img] https://lh6.googleusercontent.com/-Vvu0UXs2Bqg/TgjoO5c-x5I/AAAAAAAAAB4/90f0BFZ9H6Q/s640/p1000369.jp g" target="_blank"> https://lh6.googleusercontent.com/-Vvu0UXs2Bqg/TgjoO5c-x5I/AAAAAAAAAB4/90f0BFZ9H6Q/s640/p1000369.jp g"/> [/img]
Bit of a bonus getting £67 for all the steel sheeting down the metal yard. £145 a tonne at the moment...
There's also no concrete involved.
Shame, that's the fun bit!
Hope that planning permission was got easily, based on the railway etc...
I've just been 'refurbishing' a building as a workshop. The building is +100 years old and is just 'sat' on the earth, so I've built inside it.
[IMG] 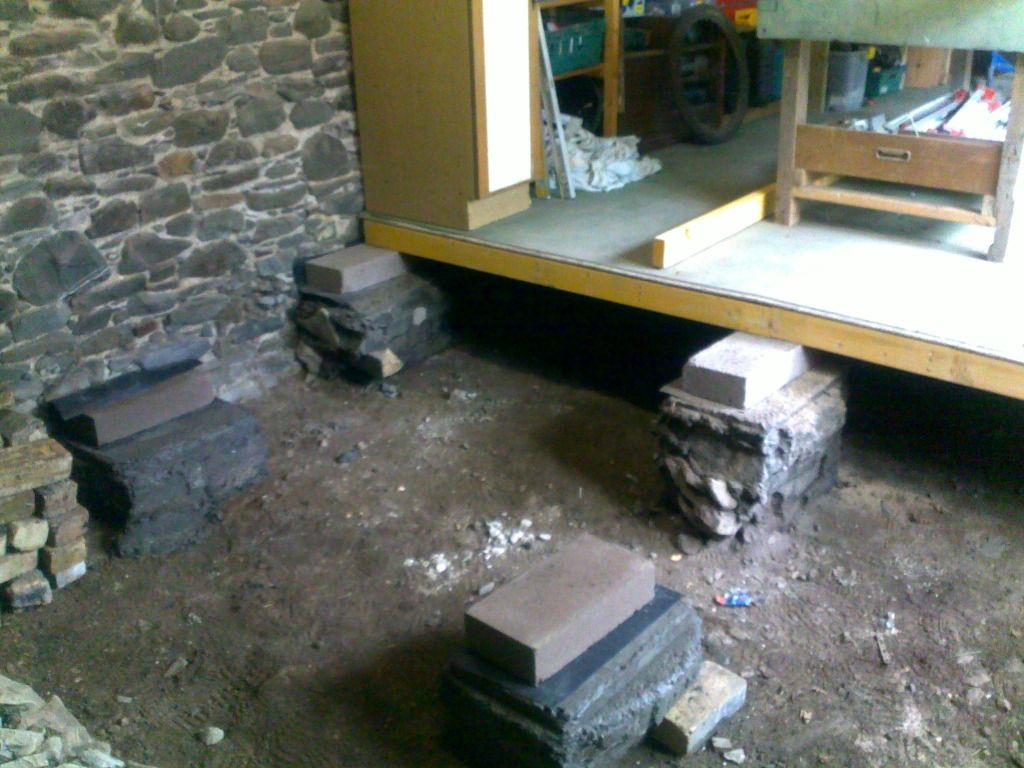 [/IMG]
Planning was straightforward, just very slow (14 months)!
I've got six Velux in the roof as well.
Be careful to secure the roof - friends had the garage broken into by the thieves going in through the (tiled) roof. They were ostensibly after is Ducati, but they've got £10s-of-thousands of bikes as well.
Thieves were disturbed (leaving a neat hole in the roof), but something to think about..!
Both of you need an inspection pit....... Top of the list for when i rebuild my garage 2 story( master bedroom and en suite going above)
[i]Hopefully[/i] I'll get my floating slab laid this week (i started demolition in Jan!), I have cobbled together 8" thick round the edged with around 6" in the middle, A193 mesh doubled up around the edges. I quite fancy some glass blocks in the walls if it ever gets built. Yours looks very well thought out.
trail_rat - my neighbour built himself a double height two bay garage with a car lift on one side and a mezzanine office on the other. Big automatic roller shutter doors.
All for his TVR griff 😉
After all that trouble with the reinforced base you'd better use chemical anchors rather than expansion bolts because either you or the person that spec'ed all that b*ll*cks are on some pretty bad chemicals
Building control don't distinguish between a single storey house and a workshop, so you end up with the same spec, so the whole thing is very much over the top for a bike shed.
you could have built it out of wood and saved on all the planning regs....
[img][url= http://farm4.staticflickr.com/3275/2388118089_5b3756e4f3.jp g" target="_blank">
... and heaps of steel and concrete...
this was built on a base of 150mm concrete on top of a hardcore base. the joists are floating so as to avoid rot. set 300mm threaded rods into the base using chemical fixing at 400x500m intervals and dropped 6" timbers over the top of them.
floating joists.
[img][url= http://farm3.staticflickr.com/2455/3552584768_3798ed8638.jp g" target="_blank">
less than one storey and not a "permanent structure" means no planning consent required. 🙂
Damn. That's one full on project.
This web site may be of some inspiration to you all if you like garage builds? It is better if you make a login it allows you to see more pictures.
www.garagejournal.com
Matt.
Go to the forum
Stoner, I thought I'd share my little beauty of a mancave with you. I spend more time in there than my house, I absolutely love it!
Currently in the process of plumbing in running water.
Specification is cavity walls with reclaimed brick exterior, tiled pitch roof, two Velux windows, double glazed window and door to the front, reinforced rear door to lane access, 10 sockets, 8 sets of spot lights, fully independent intruder alarm, skirting boards (I know, what a nob), wifi, fake Kandinsky art work, exposed beams and insulated roof. Phew. Oh, nearly forgot, multi-fuel burner!
Dimensions are about 6 by 5 metres. Sorry for the poor quality snaps.
[img] 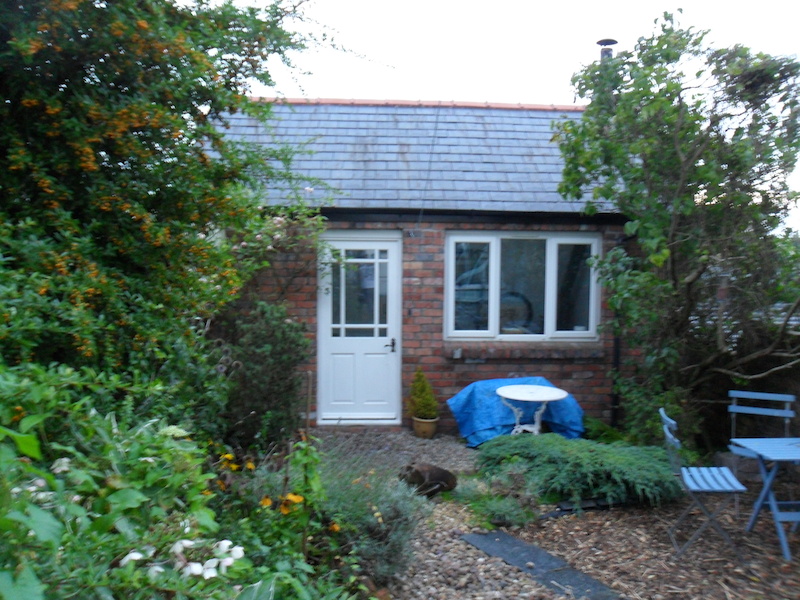 [/img]
[img] 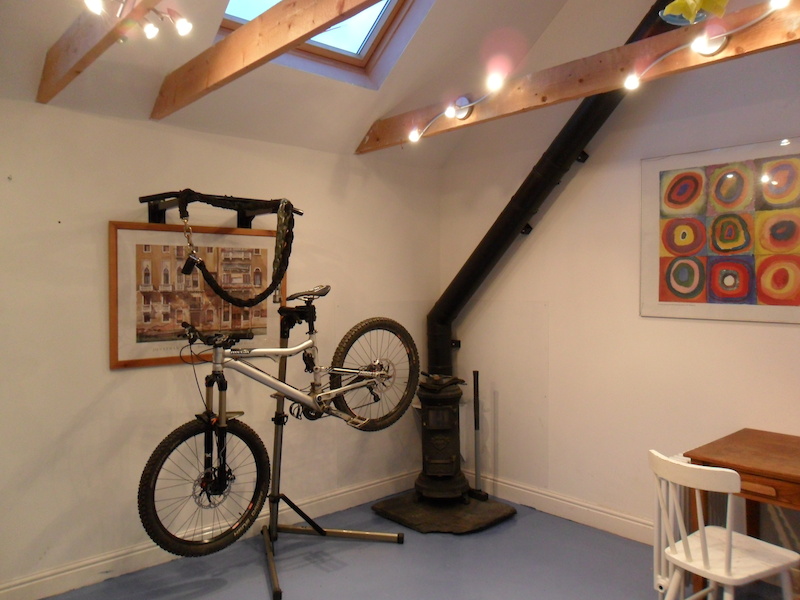 [/img]
[img] 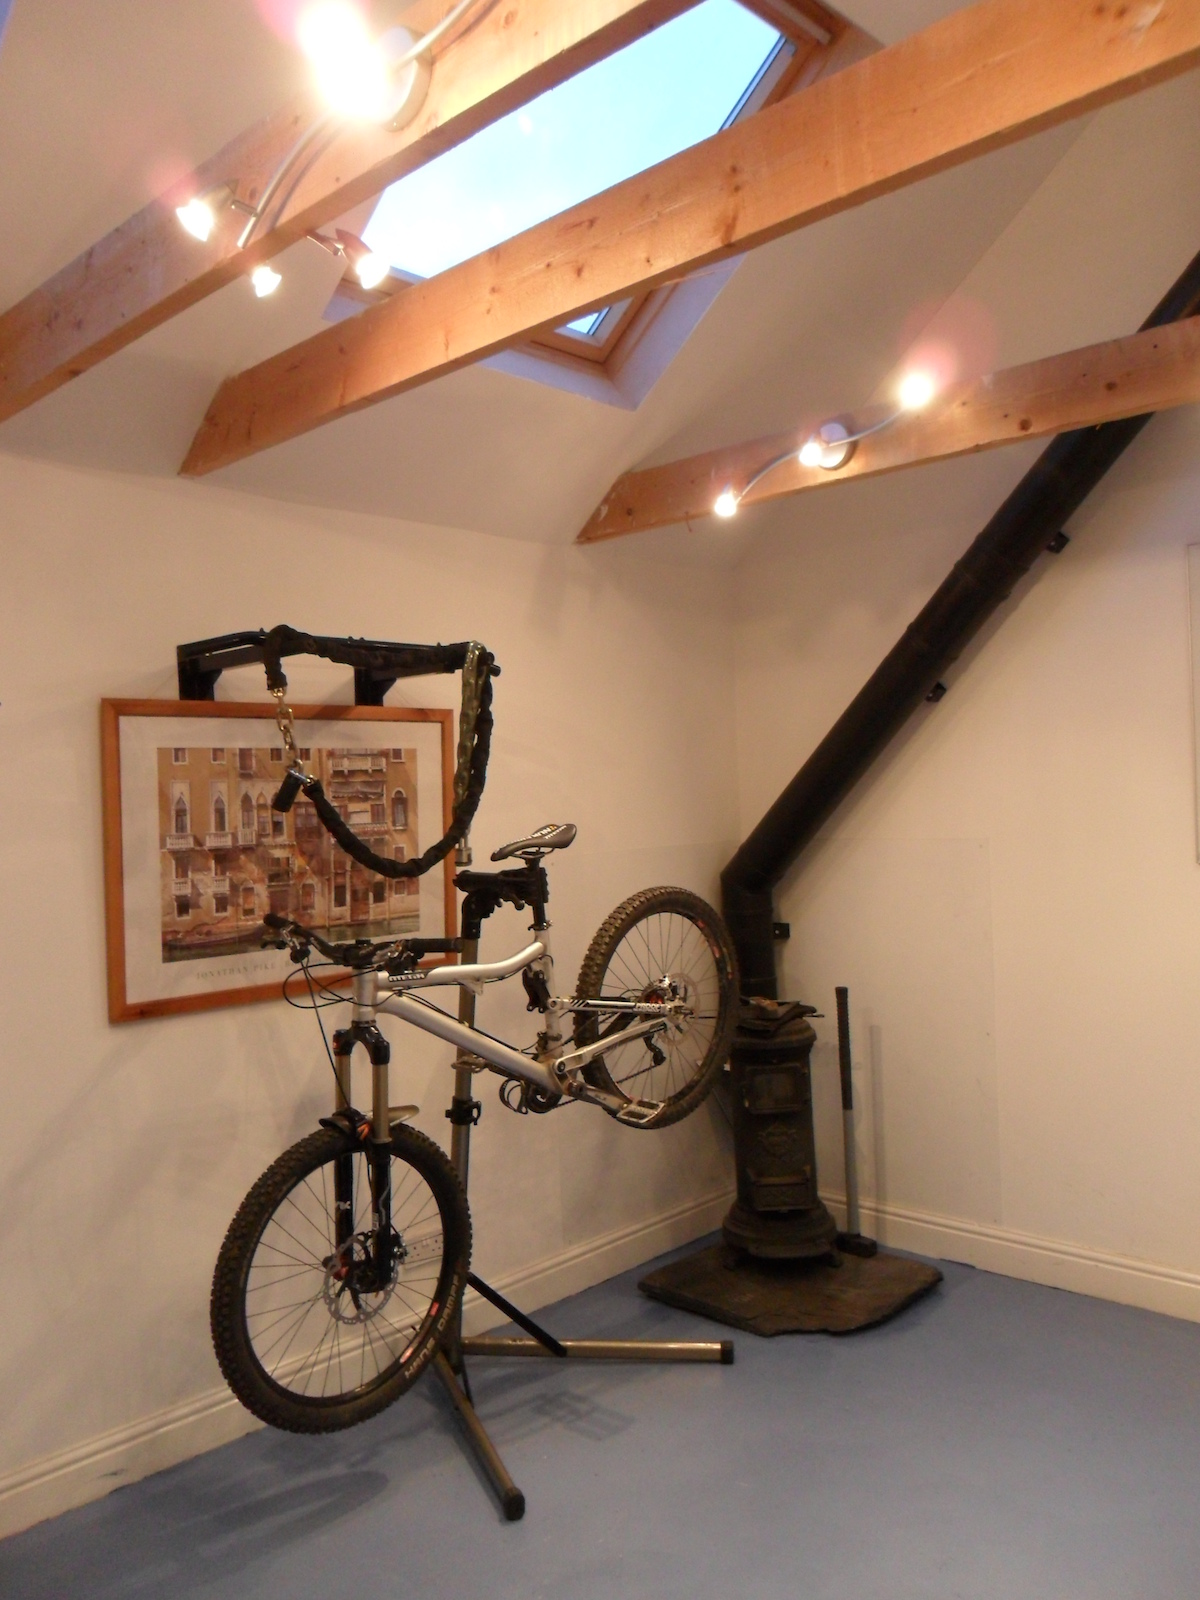 [/img]
While back gave my Dad a hand to dig his shed foundations
[img]  [/img]
Bike.... check. Stove.... check. Sledgehammer.... check. All present and correct, nothing to see here, move along.
AWSUMS!!!
Mintyjim wins. Beautiful...
Mintyjim's is smarter than my house.............where are the tools, the lawnmower and the shelves full of jam jars?
Its a good ol'fashioned STW shed-off! Yeeeaaaahahhhhh!
So from the original shabby agri shed up at the top of this page ^
My mate and I installed the beam and block floor 2yrs ago to give us a basic dry workshop while we were building the house. Those beams are 4.7m long and are right at the limit of what two strong lads can lift.
[img] https://lh5.googleusercontent.com/-nIfQQIdFVmw/TgjoO9B1DYI/AAAAAAAAAB4/lnzn3pmNJM4/s288/p1000511.jp g" target="_blank"> https://lh5.googleusercontent.com/-nIfQQIdFVmw/TgjoO9B1DYI/AAAAAAAAAB4/lnzn3pmNJM4/s288/p1000511.jp g"/> [/img]
Had a perfect week of weather last week to strip the old tin roof and gable cladding off. Got £70 for it down the metal yard (£145 a tonne at the moment for mixed metals)
[img]  [/img]
Added some noggins etc for the new cladding, some purlins for the new lightweight roofing, and some vapourcheck that I had lying around.
[img]  [/img]
New Onduline/Coraline roof and dipped featherboard cladding. Have since added some barge boards and painted them and the purlin and rafter ends. Ive lifted the rafter ties on the front two rafters to allow me to get the camper van in for over-wintering. And also strengthened the joints of all the other rafters - they're probably a few hundred years old and have had to carry a lot of weight over the years - especially when it's snowed.
[img]  [/img]
And got it laid out as I want
[img]  [/img]
[img]  [/img]
My "bike shed" is now just a bike shed with bike tools and bike/camping kit storage now I have some where where I can make a mess and have a bit of space for woodwork.
Im just off out there now to fit a flashing to the roof for a stove before the rain comes back. I missed one on eBay last night locally - someone paid £103 for a seconhand £140 stove! 😯
So Ive ordered a new one which should be here tomorrow.
Now...where to hang the hammock from....
cheers guys!
Hairyscary - On the left hand wall I have floor to beam shelving with tools (bike specific and house), spares, jam jars, takeaway containers, paint. Work bench with record vice and mezzanine storage level full of 'what tyres for x conditions'...not as pretty as the other side but very utilitarian.
What's the roofing material Stoner?
[i]On the left hand wall I have floor to beam shelving with tools (bike specific and house), spares, jam jars, takeaway containers, paint. Work bench with record vice and mezzanine storage level full of 'what tyres for x conditions'...not as pretty as the other side but very utilitarian.[/i]
Sounds like the pretty side to me. Come on - PICS!
AlexSimon - It's a bitumen/fibre profiled sheet. Mine are made by Bituwell, although Onudline and Coroline are better known brands.
I get a decent discount from my builder's merchant where I have an account, so they cost me about £10 + VAT a sheet. The clear ones cost about £18 + VAT each.
Same spec as these
It's a relatively lightweight roofing material, but you do need plenty of purlins for support, not too much overhang either - it will droop otherwise.
Just managed to get the flue flashing in before the rains back
It's a high temp silicone flashing with formable aluminium fringe
[img]  [/img]
It takes up the profile of the sheet, a good splot of silicone to keep the roof watertight and it's quite a nice bit of kit.
http://www.fluesystems.com/shop/V-Seal_ADSR40100.html
The flue from the ski-recommended portable stove is 60mm single skin. It penetrates the roof about 1,800mm above the fire box so will have cooled substantially by the time it gets to the roofing, and the flashing will take upto 240degrees and is big enough to give me plenty of clearance from flue to roof - BUT I wont take it for granted initially and will do some temp readings to check.
[img] https://lh4.googleusercontent.com/-Qu1VBL5hT4g/UGF3cjTEkjI/AAAAAAAADEI/lH3wIfetiyM/s640/IMAG0222.jp g" target="_blank"> https://lh4.googleusercontent.com/-Qu1VBL5hT4g/UGF3cjTEkjI/AAAAAAAADEI/lH3wIfetiyM/s640/IMAG0222.jp g"/> [/img]
Thanks Stoner. At the moment my design doesn't have purlins - just rafters, so I'll have a think.
So many of the roofing options I'm looking at seem seriously flawed in one way or another!
Something to consider with bitumen sheeting is the risk of condensate forming on the underside and dripping in. You can use a membrane on the underside but it would make installation a real ball ache as I had to stand in the un-covered roof area to reach to nail the sheets down - adding a vapourcheck would mean I couldnt do that. Also you're punching a hole every 2" along the purlin in your membrane....
You could try using WBP ply sheeting across your rafters for full support of the sheets - but they still specify 610mm purlin centres under the ply sheet.
PS I used synthetic slate tiles over WBP ply on my bike shed.
[img]  [/img]
Bit of a pain to install as Ive never done roof tiling before and I need the help of a mate, but it was worth it as they look pretty good. It also means I have no condensate risk int he bike shed and have put insulating bats between the rafters to keep camping kit warm and dry.
[img]  [/img]
[img]  [/img]
I like the synthetic tiles... Just off to Google.
tinsy - these are the ones I used as stocked by my merchant's. Jutland by Cembrit
http://www.cembrit.co.uk/Fibre_cement_slates-22529.aspx?ProductID=PROD382&PID=12051
this thread is fantabulous.
im inspired.
I admire you guys, wish I had the time and inclination to build a bigger shed.
in contrast, two of my bikes are kept in a leaky vault under the pavement and are permanently wet and gathering rust.
yesterday I took the bold step of putting a tarpaulin over them to keep the rain off.
<feels ashamed by untidy state of mancave> 😳
Stoner mine is just a shed, I kind of thought those tiles were like a roof felt tile. Probably not what I am after.
[img] 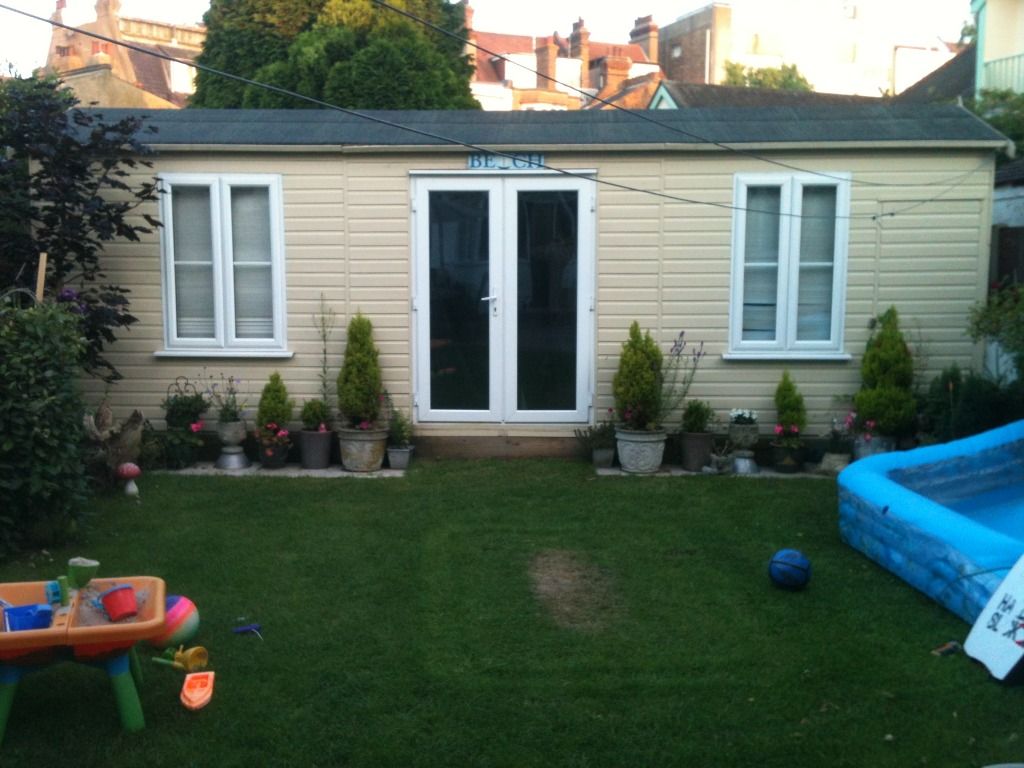 ?t=1343283904[/img]
[b]tinsy[/b] - your roof pitch looks too low for any kind of tile.
Options include:
Felt - get it professionally torch installed for longer life.
EPDM - rubber sheeting that gets glued onto a panelled roof.
Sheet material (like the bituminous stuff mentioned above).
There may be others, but even felt tiles suggest a pitch of 15-20 degrees (depending on wind exposure) for watertight installation (due to wind blowing rain sideways and upwards).
tinsy, you seem to have posted a picture of a wendy-house not a shed 😀
I'm going to spend the evening tidying my garage*.
*hangs head in shame* 😳
*this is not a euphemism.
Brakes, I did try to make it look less shed like, so I guess I succeeded 🙂
I drew the shed up to have made, but I cant remember the pitch, its not as flat as appears in the image, I think its pretty standard pitch.
Google tells me I need shingle strips, to get the tiled effect I am after.
I guess its about time I lost my fingerprints. 🙂
More pics please!
Mintyjim wins. He's second only to the chap in Scotland's unbelievably impressive woodpiles.
Can someone commission a book of these top-notch buildings with pictures of them being built?