Rockhopper, that JP looks lovely.8. Nice preshading and the gloss finish looks just right.
@Rockhopper - some stunning painting there. Interesting idea on the solder - I hadn't thought of that, will see if I've got any thin enough once I've sorted out the spark plugs which WnW have got in the wrong place. I made 12 new ones out of brass tubing late last night, just 12 more needed for the other cylinder bank...
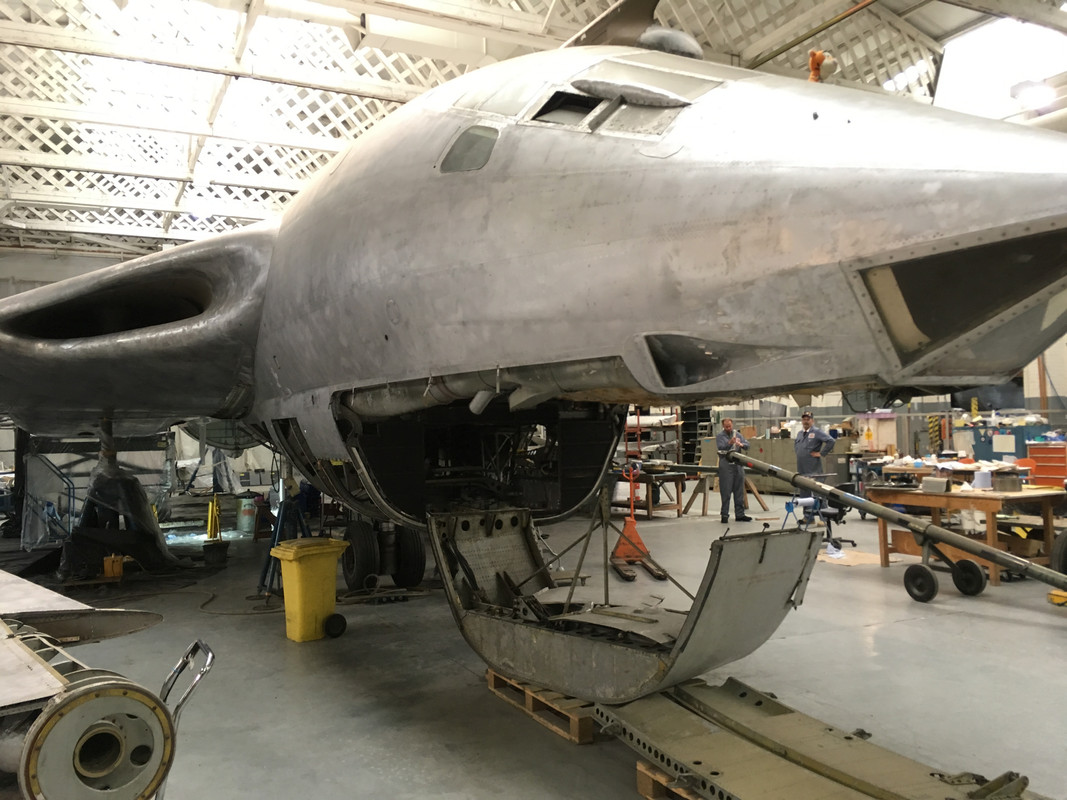
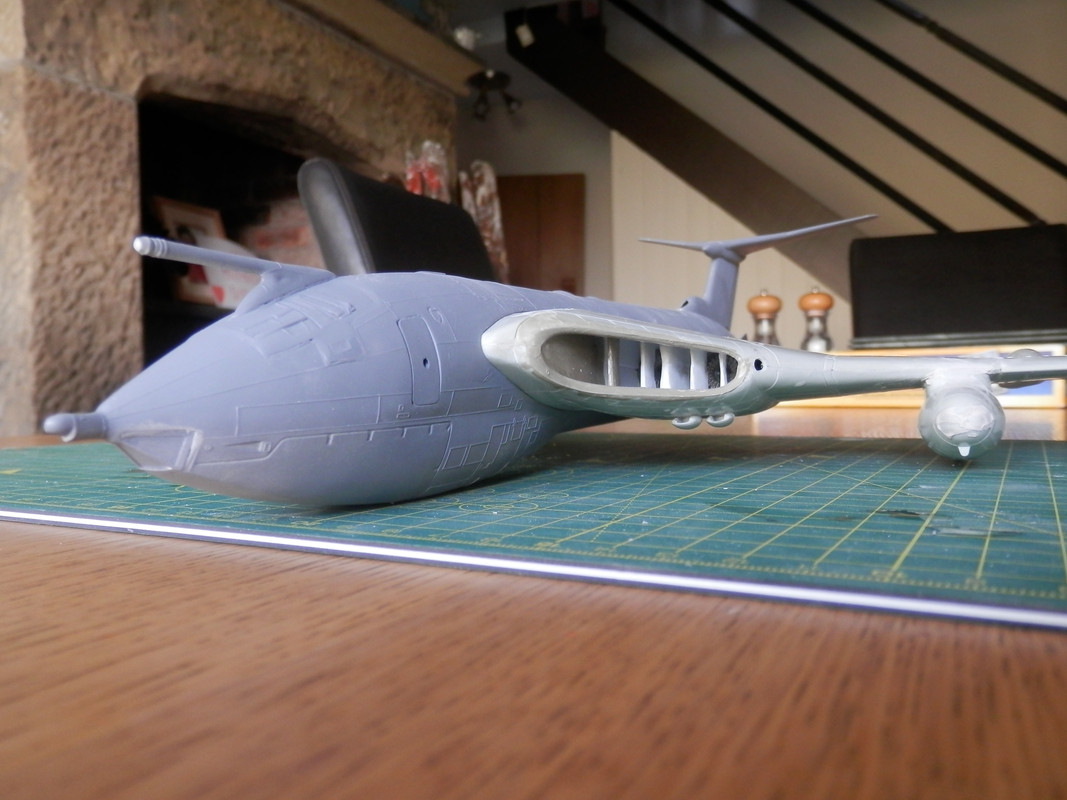
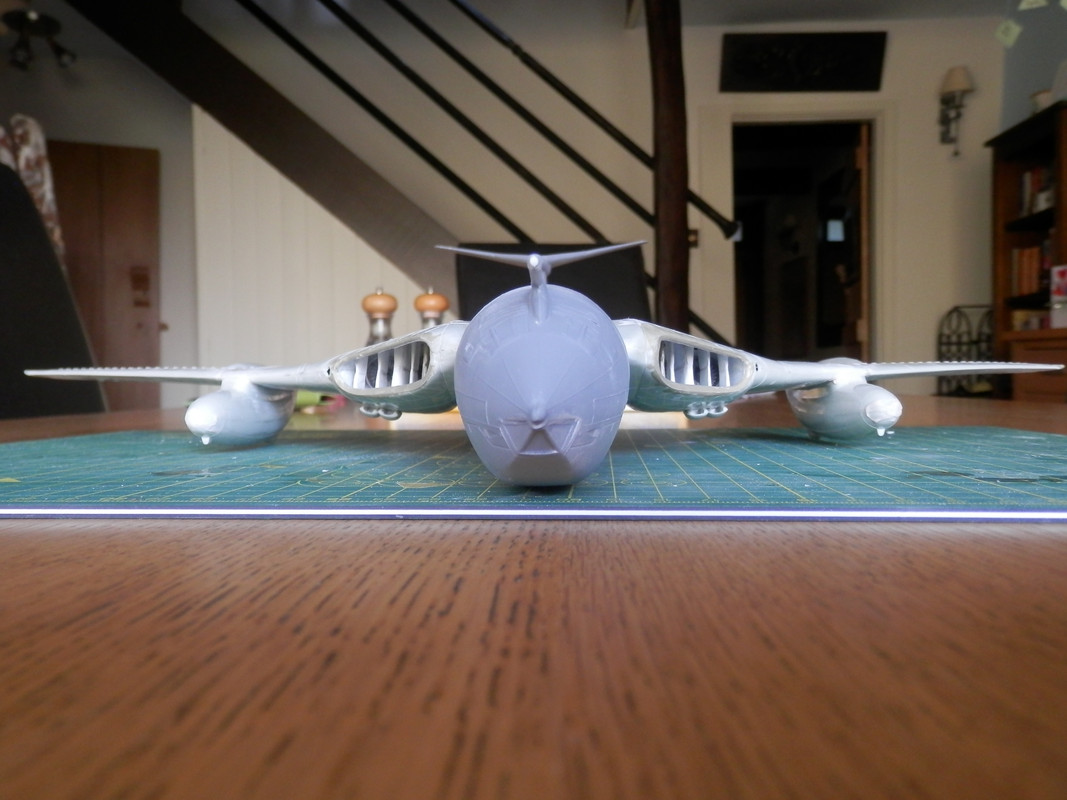
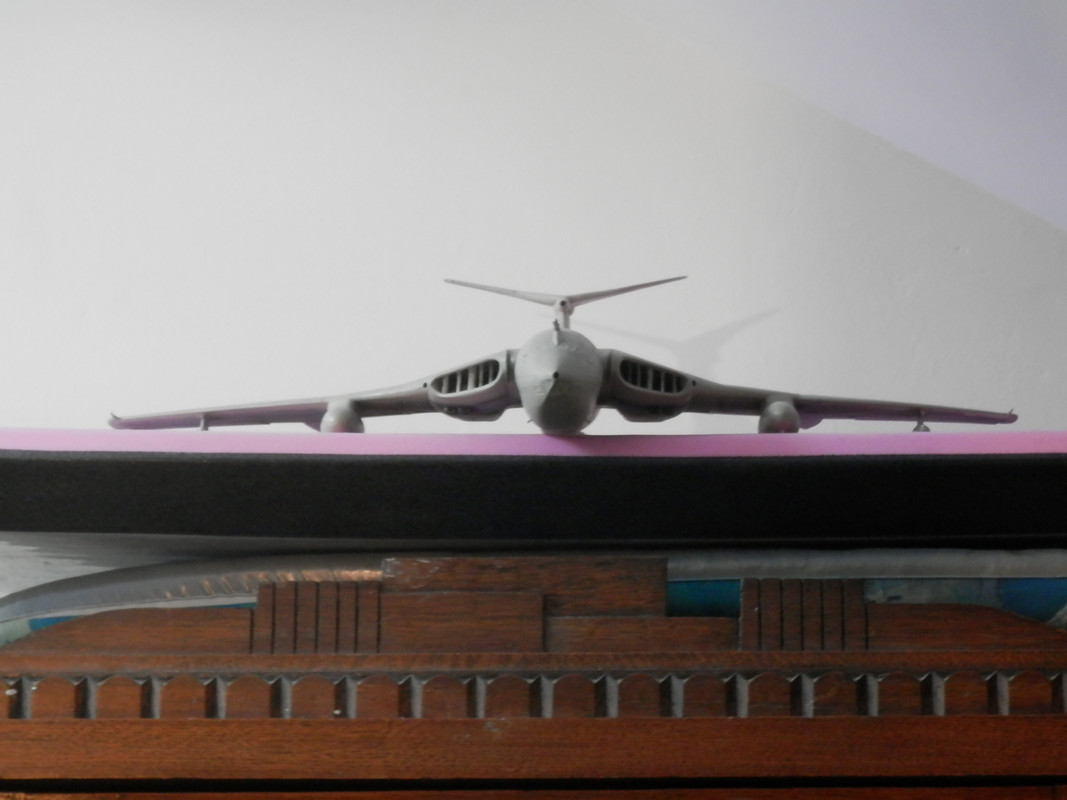
For the Victor builders - here's what one looks like naked (Duxford October last year). In real life those air intakes look like someone bashed them out with a hammer!
That’s the Mk. 1 with the smaller engines.
In real life those air intakes look like someone bashed them out with a hammer!
In real life someone probably did! The V-bombers were all hand built with minor (and sometimes quite major) differences between each airframe.
Thanks for the kind comments guys!
The JP was a nightmare! I wanted to do it in the early training scheme which is light aircraft grey overall with loads of florescent orange decals. Firstly one one company still makes light aircraft grey then secondly the airfix decals are dreadful. They are very thick and brittle. One of them is supposed to fold over the leading edge but even with loads of Markfit strong on its just shattered when i tried to bend it, even the ones on mostly flat panels just wouldn't go down flat then bits came off when you try and move them. The only other scheme using light aircraft grey base was the Mcaws display team from the 1960 so thats what I ended up doing.
Rio is right about the V bomber force, even inspection panels from one aircraft might not fit another due to the hand built nature of the whole thing.
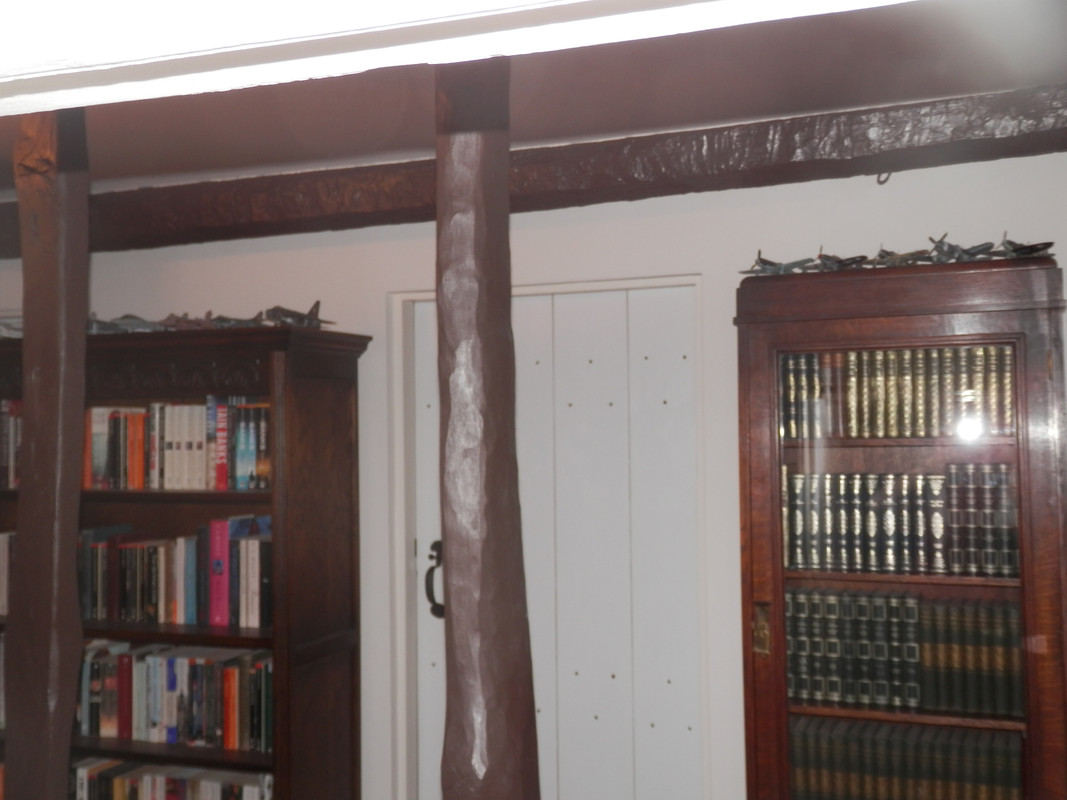
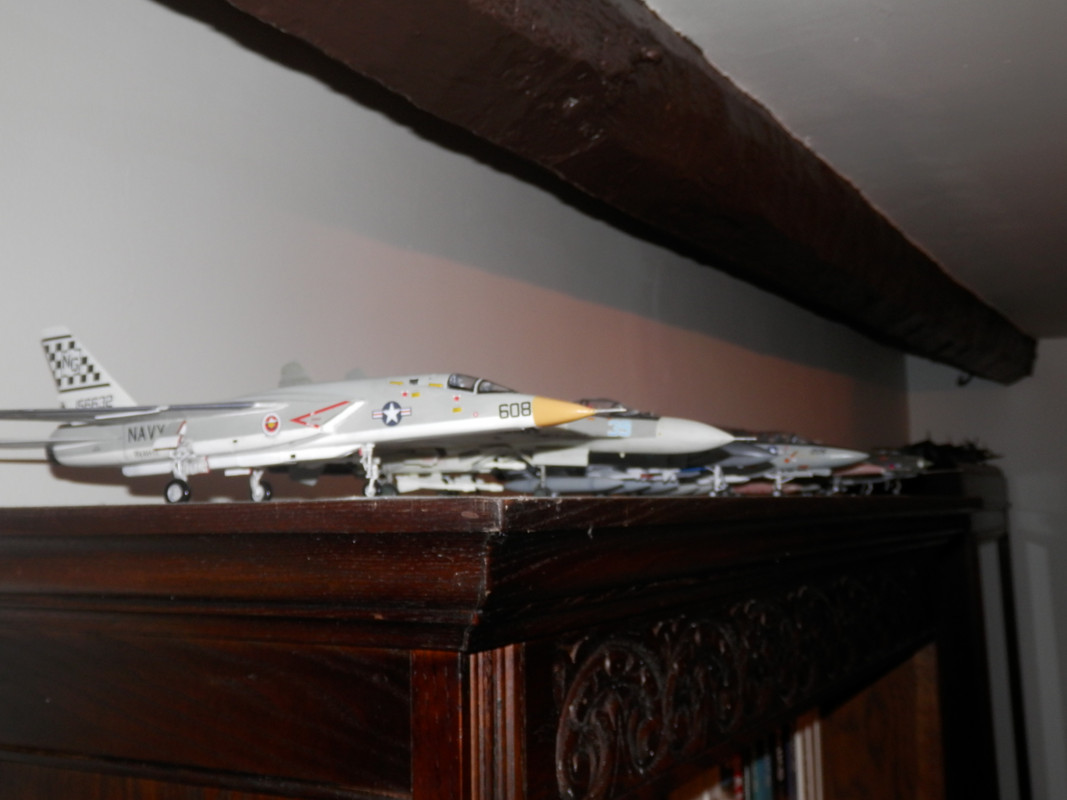
I’m running out of space to display them
Aren't you allowed to hang them from the roof anymore? That was the only place to put them in the 80's
I’m running out of space to display them
Me too. I build them then I put them in a box. No idea what I'm going to do with the Victors.
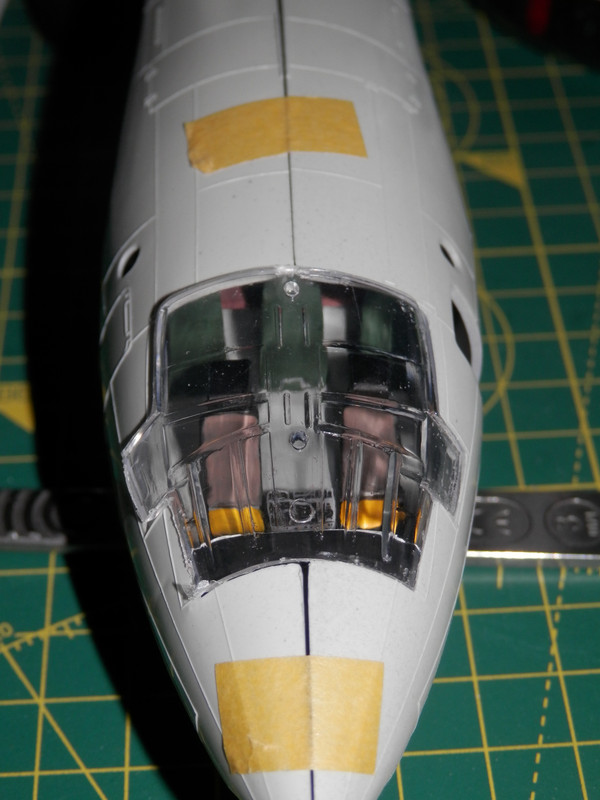
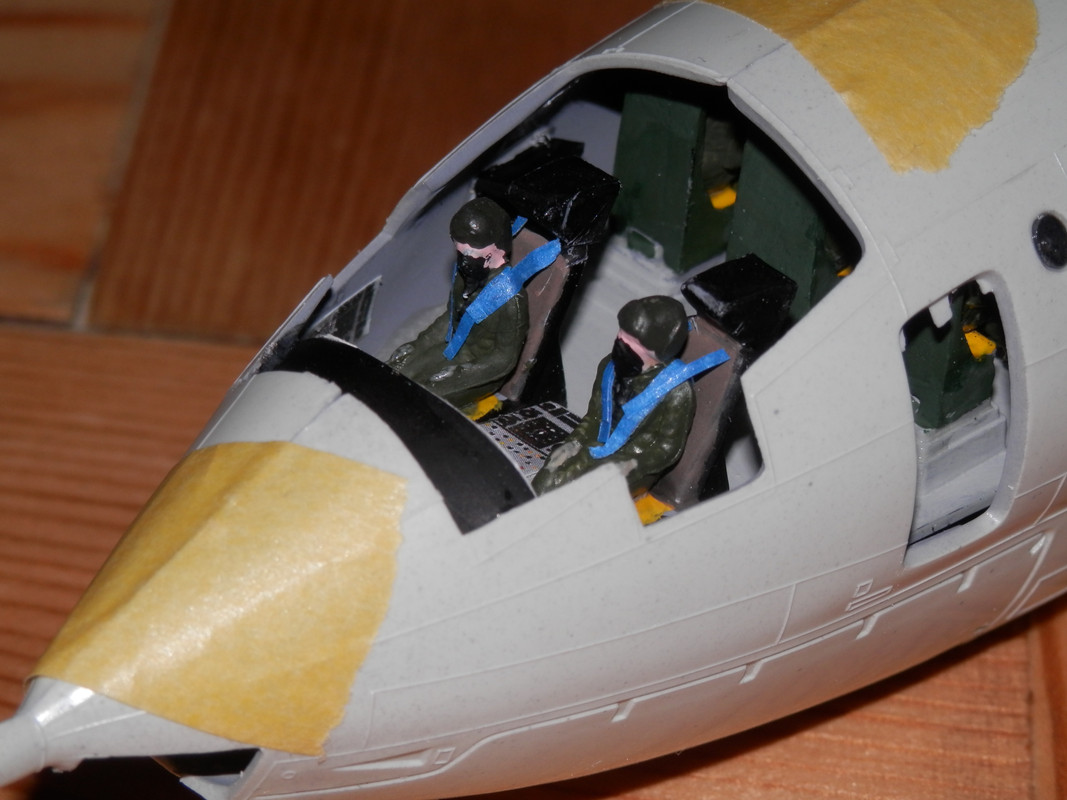
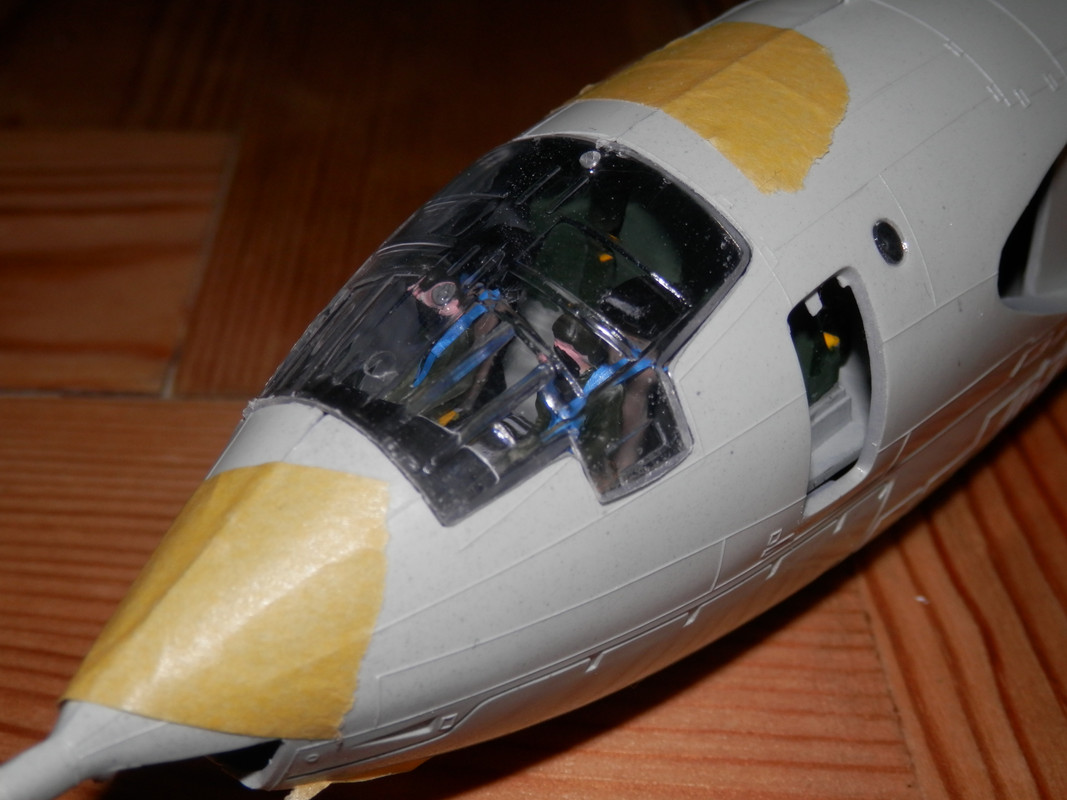
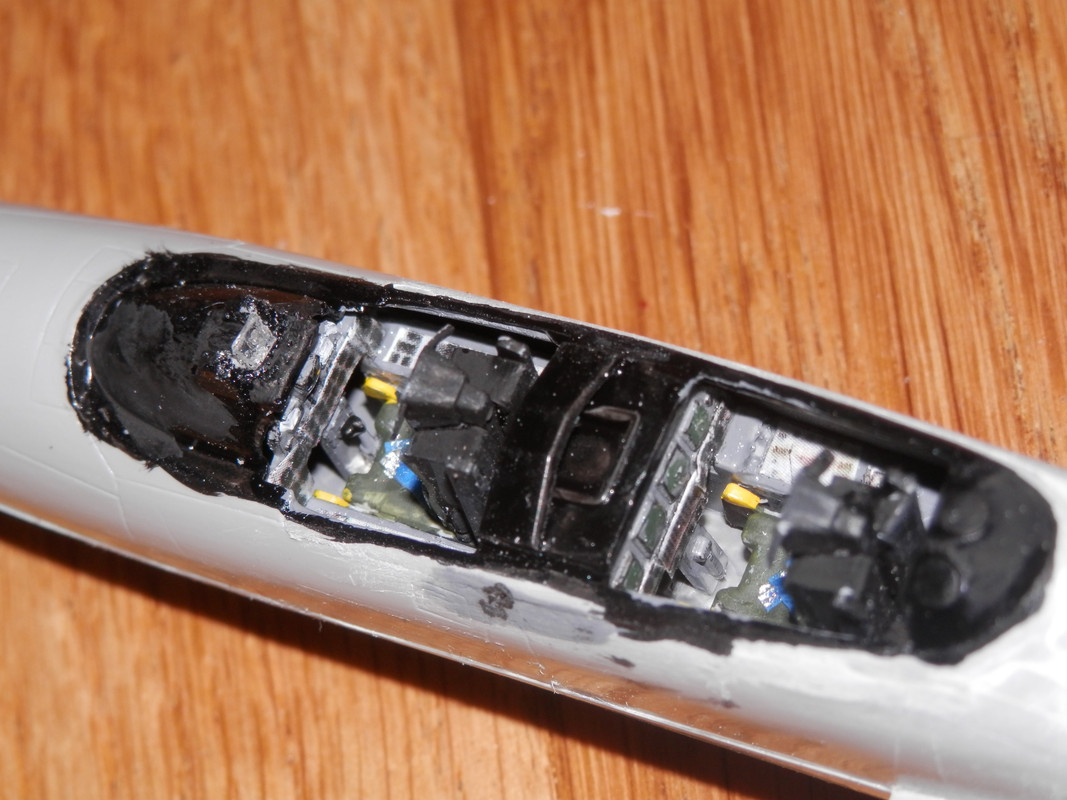
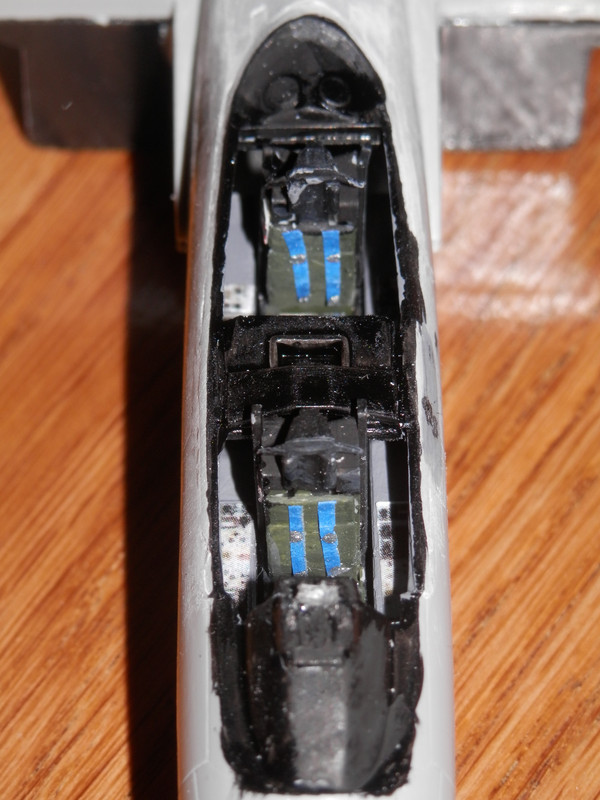
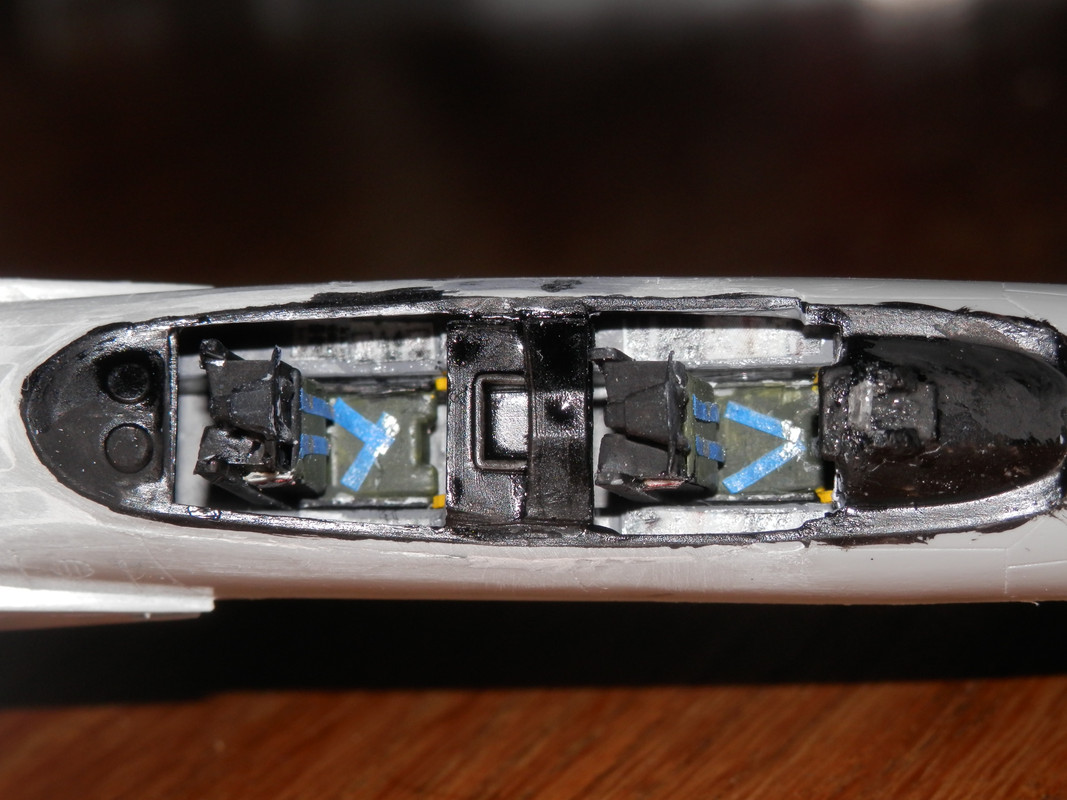
I was so appalled with my previous efforts at enhancing the cockpit that I did it again.
I photocopied the instrument panel from the decal sheet, chopped it up and glued it on with a Pritt Stick.
Much happier.
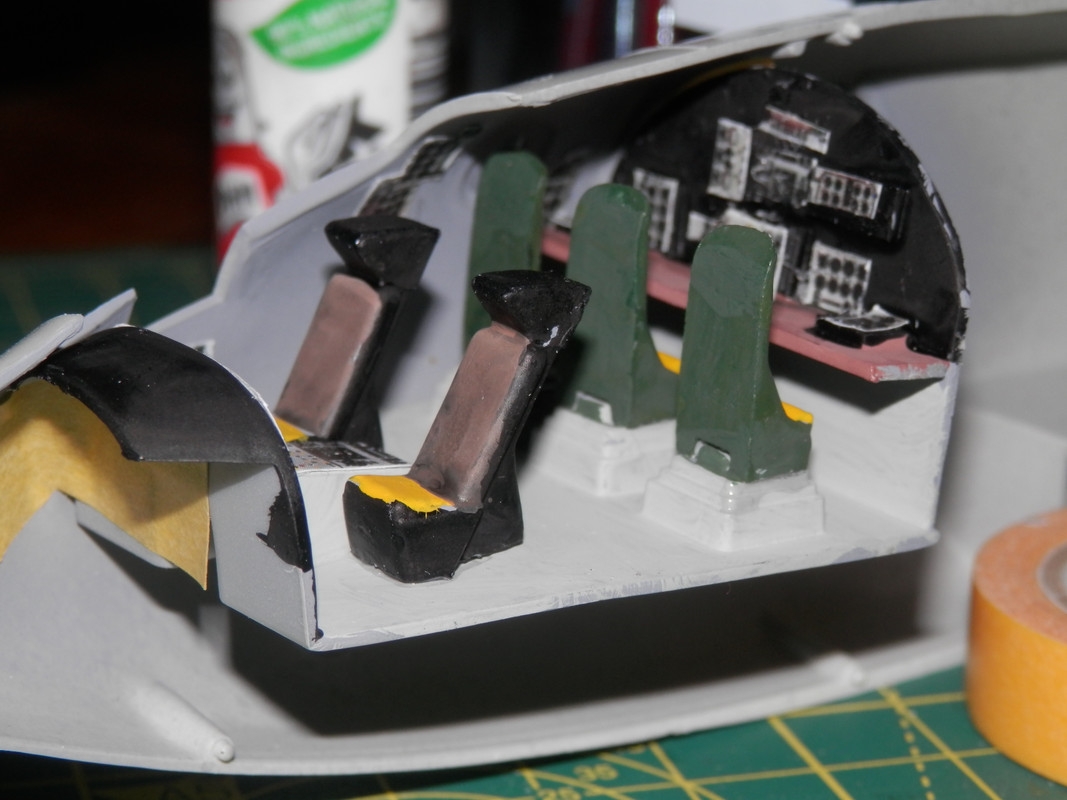
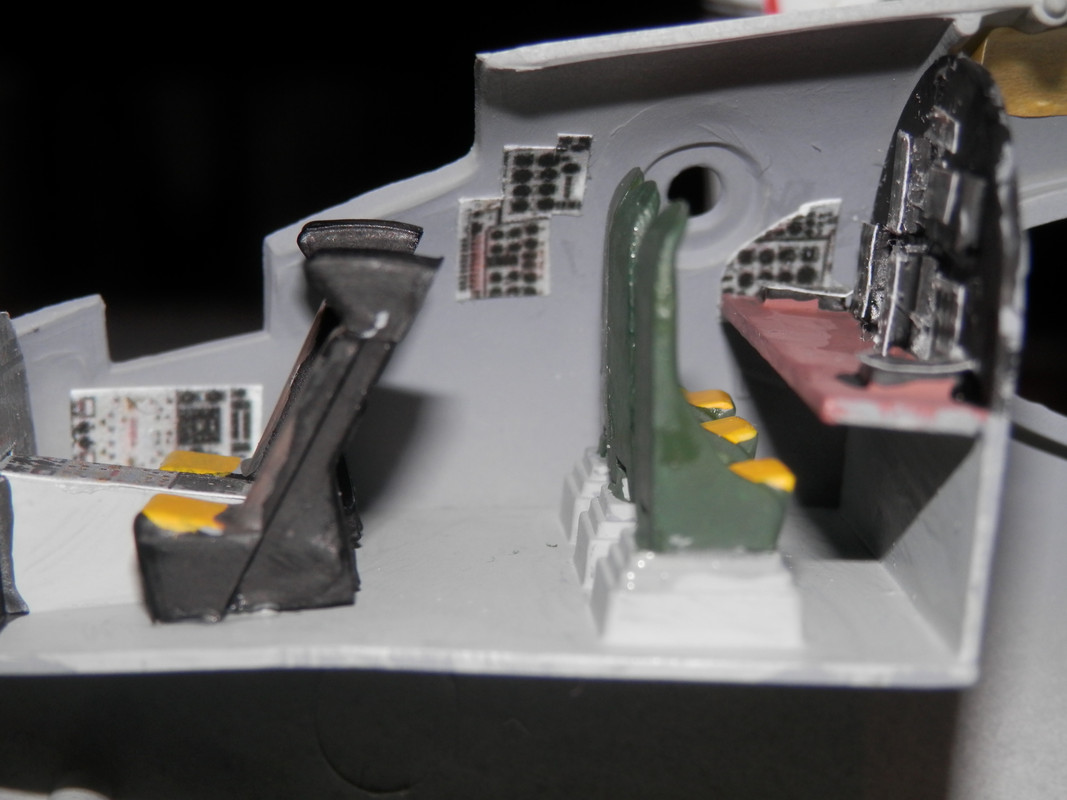
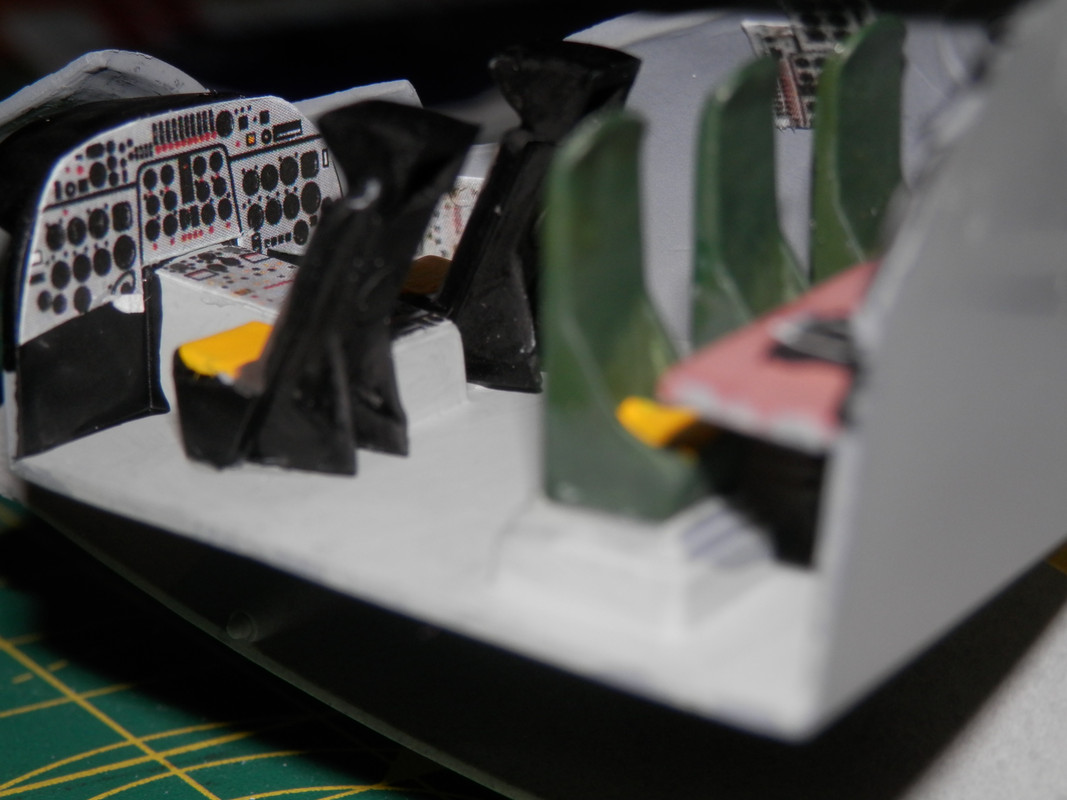

It makes all the difference don't you think?
Nice work on the cockpit, I've never thought of copying the decals before.
Looks like you may be needing a bit of filler on that one!😂
The panel lines are very pronounced on that kit, looking at the Duxford restoration pic above you can hardly see them.
Fuselage fit is fine actually, that is just some quick taping for the photo. The wings on the otherhand are like trip hazards.
The Matchbox decal sheet has no instruments, but the Revell does, so i just photocopied it. Then I ran off 6 more copies to get a load of dials to chop up and stick on. I need to add a "box" on the wall behind the copilot's seat and maybe scuff up the floor a bit. There's also some ducting, so I may stick a few bits of plastic runner on the walls.
I'm going to put the crew in too, but will repostion a couple of heads and sand off their arses so they are not all the same height when sat down.
Inspired by this I've just photocopied my decal sheet. Looks good, was going to suggest adding some seatbelts to make it look busier but if you're putting the crew in that's maybe not necessary.
The crew will be "belted" in. They'll also need some control columns.
Right, here is my latest actual finished kit in about 16 years (maybe more) which has been 'on the go' for about the same length of time, It's even survived 2 house moves.
Monogram 1/48 A1H Skyraider, which is a decent kit but my finishing skills have gone a bit rusty without practice. So I'm not happy with it & it turned into a bit of a practice/re-skill kit, I couldn't be arsed to detail the weapons.
& instead of choosing one of the 60-70 kits I have stashed, I've decided to finish the Hasegawa P3C Orion that's been on the go maybe even longer. So long I lost the undercarriage & had to buy some white metal replacements. (I'll post pics of that in 5 years time when It's done)
Don't laugh.....
https://flic.kr/p/2fbSyfM
https://flic.kr/p/24zn6iv
I read about a pilot who flew the skyraider in Vietnam. He said it was more dangerous climbing in and out then flying missions as they spewed oil over the wings.
Looks good to me Grunty.
I want a Skyraider for my stash as it is an interesting looking aircraft, but I have to show some restraint.
I'm liking aircraft with folding wings, they take up less shelf space 🙂
Nice A1, brute of a plane!
here is my latest actual finished kit in about 16 years
I can beat that, I've got a half finished Jaguar (Fat Slags, op Granby) that's been in a box since the mid 90's. I'll get it done one day.
Damn you... I've just done an eBay search for a Skyraider.
_in_October_1965_(NNAM.1996.253.2381).jpg)
A-1H "Paper Tiger II" carrying the toilet bomb in October 1965
In October 1965, to highlight the dropping of the six millionth pound of ordnance, Commander Clarence J. Stoddard of VA-25, flying an A-1H, dropped a special, one-time-only object in addition to his other munitions – a toilet.[24]
Some wag once used one to drop a khazi.
Am signed off long term sick at the mo so just started work on PT109 and got a vosper mtb next.
I probably need to learn how to weather stuff plus an airbrush would be better than rattle cans
Airbrushes are so affordable now - £60 will get a you a compressor and a airbrush from ebay or amazon, that's what I've been using since Christmas.
Cool, any recommendations?
Damn you… I’ve just done an eBay search for a Skyraider.
Well, I went to the model shop in Ripon yesterday for some glue & lo & behold, they had a Tamiya 1/48 one in for £24.
I couldn't resist but I'll make sure I make a better job of that one!
Episode 2
https://www.bbc.co.uk/iplayer/episode/m00037sz/james-mays-big-trouble-in-model-britain-episode-2
Excellent stuff.
Airbrush wise... I got something like one of these compressor/airbrush sets and it hasn't let me down. https://www.ebay.co.uk/itm/Professional-Airbrush-and-Compressor-With-Tank-Filter-Regulator-Cooling-Fan-Kit/272686620378?hash=item3f7d639eda:g:y-kAAOSwYutaq9l4
I use Tamiya paint and I flush it through with water the thinners after each use.
Mines very similar to the one linked above but it hasn’t got the tank. I didn’t actually realise that it came with an airbrush so I ordered another one! But the supplied one is actually better.
I’ve since upgraded to a Harder and Steenbeck Duo I think it’s called which was about £80. It uses a lot less air than the others but in all honesty it’s no better as an airbrush.
1/72 scale Stuka. I’ve got the 1/48 scale version to build as well which will be interesting.
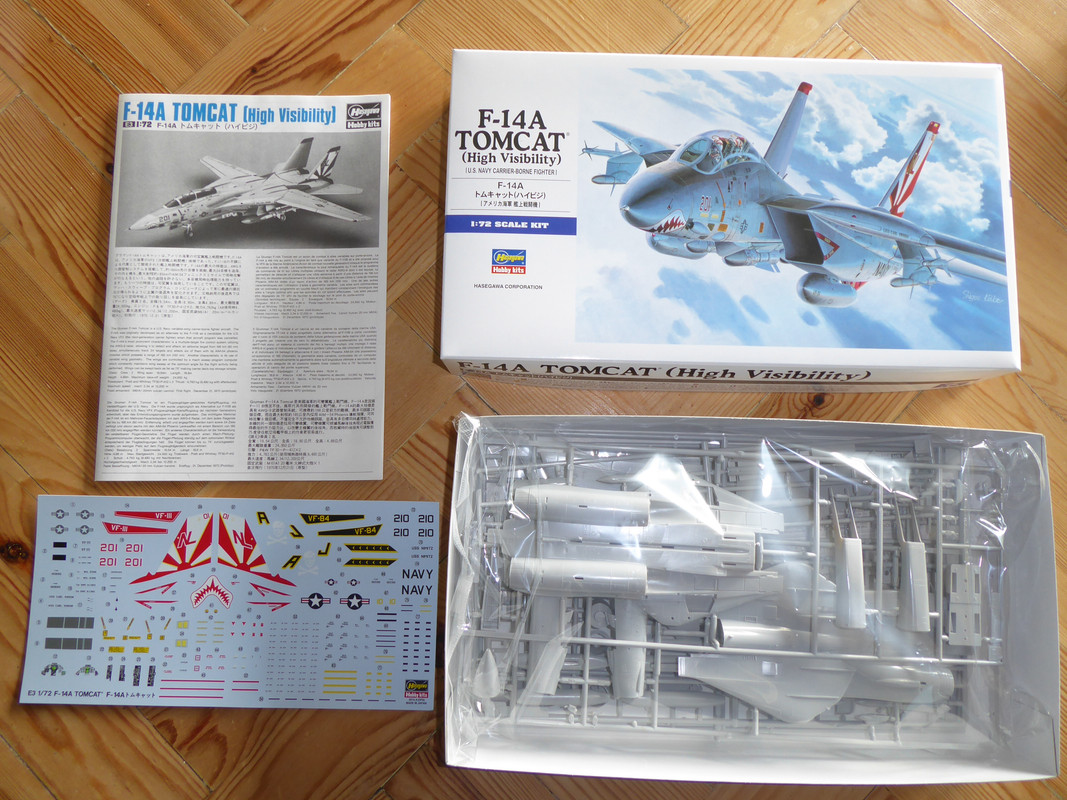
Haven’t built a kit in at least half a centuary. Anyone got advice on who makes a decent Vaught Corsair kit? Otherwise I’ll end up buying that huge Tamaiya Mosquito...
You can get the Italeri 1/72 one for not very much money.
I did it as one of my first kits back.
https://i.postimg.cc/PqGvNgRt/P9275116.jp g" alt="corsair" />
Thanks Harry.
Sadly I tried Google. My bank account may wish I hadn’t.
https://www.cybermodeler.com/hobby/builds/tam/build_tam_60325.shtml
Thanks for recommendations 😁
Really enjoyed James May as well
Tamiya do a nice 1:48 Corsair; I find 1:72 too small & fiddly for my ageing eyes, while 1:32 takes up too much room (aircraft anyway).
Try Http://www.modelhobbies.co.uk
this came up on my youtube feed, enjoy
Does anyone put a flat and bulge into each tyre to show the weight on it?
I do.
I weight the tyres by putting a piece of kitchen foil on the sole plate of an iron and pressing the wheel on it, nice controllable heat so I don't ruin it.
That B17 looks a nice kit, but I think that the panel lines on the fuselage are overdone, it looks quilted! 😂
I tend to agree that a lot of the weathering/detailing you see these days is super exaggerated.
I tend to agree that a lot of the weathering/detailing you see these days is super exaggerated.
Especially panel lines, compare the kit panels on the Airfix Victor above with the pics of the Duxford example.
To flat spot my tyres I stand the finished model on sand paper and gently "brum" it like a kid with a toy car. I don't make any noises though.
In other news... has anyone used Humbrol acrylics with an air brush? I've done the intakes on the Victor with a regular brush and I'm less than impressed. I'm considering finding, or mixing with Tamiya, an alternative before I cock up the whole model.
Especially panel lines, compare the kit panels on the Airfix Victor above with the pics of the Duxford example.
The Victor is the 1980s Matchbox now released by Revell. I would hope that the new Airfix is better. At x3 the price it should be.
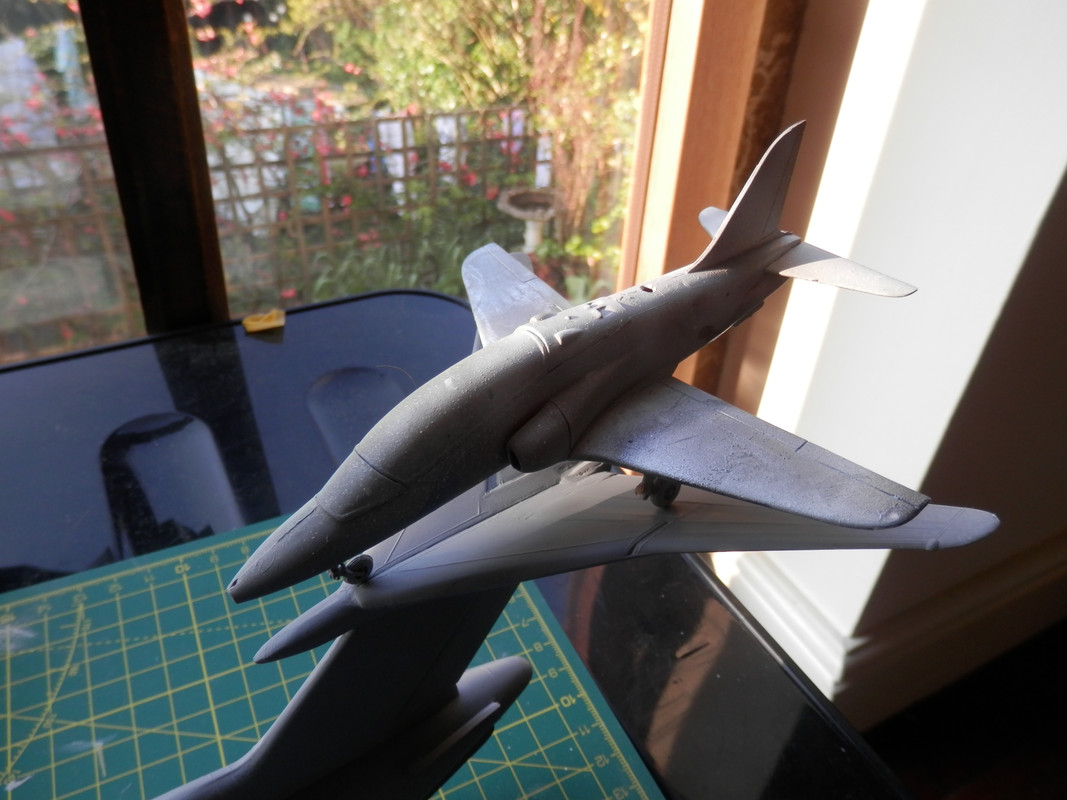
Also, with the Victor I decapitated the crew then stuck their heads back on at different angles so it looks like they are talking to each other. I was surprised by how effective this was.
Airfix have a bit of a reputation for deep panel lines, even on their new tools.
All my recent airfix kits come with pre flat spotted tyres.
I use Tamiya acrylics with a few Vallejo Model air pre-thinned as well They all go down beautifully in my airbrush but don't brush very well. I tried airbrushing a Humbrol acrylic as i needed that specific colour but it didn't work well at all so now when i buy airfix kits with the paints included i just chuck them away (keep the brushes though!).
To flat spot my tyres I stand the finished model on sand paper and gently “brum” it like a kid with a toy car. I don’t make any noises though
Try the iron method, it bulges the sidewalls out a bit to give the impression of weight. Practice on an old wheel first as it's easy to overdo it.
Airfix 1/72 Royal Navy Phantom FG1. A bit disappointing for a new tool kit - I didn't attempt to correct the various errors they made either.
https://www.flickr.com/photos/169210173@N02/46522054975/in/dateposted-public/
https://www.flickr.com/photos/169210173@N02/40471446333/in/dateposted-public/
https://www.flickr.com/photos/169210173@N02/32495545667/in/dateposted-public/
Nice. It "has" to be 007 and Omega.
Did you put all of the stencils on? The decal sheet has really put me off buying one.
I didn't do all of them! Just some on the underside but most of the ones on the top and sides Black writing on a dark grey aircraft doesn't show up too well so i left most of that type off. They are good decals to be fair and the bigger ones went down beautifully after liberal coatings of Tamiya MarkFit Strong.
I'm going to put the FGR2 on my Christmas List.
https://www.airfix.com/uk-en/mcdonnell-douglas-fgr2-phantom-1-72.html
The fit of the intakes and the front canopy on that Phantom look shocking!
Yep. There was no way the front canopy was going on any better, the fuselage is considerably wider than the glass. I could have filled the intakes but they are in such a prominent position i thought I'd leave well alone and just live with it.
Now you see 'em…
Now you don't.
One week and a lot of filler later...
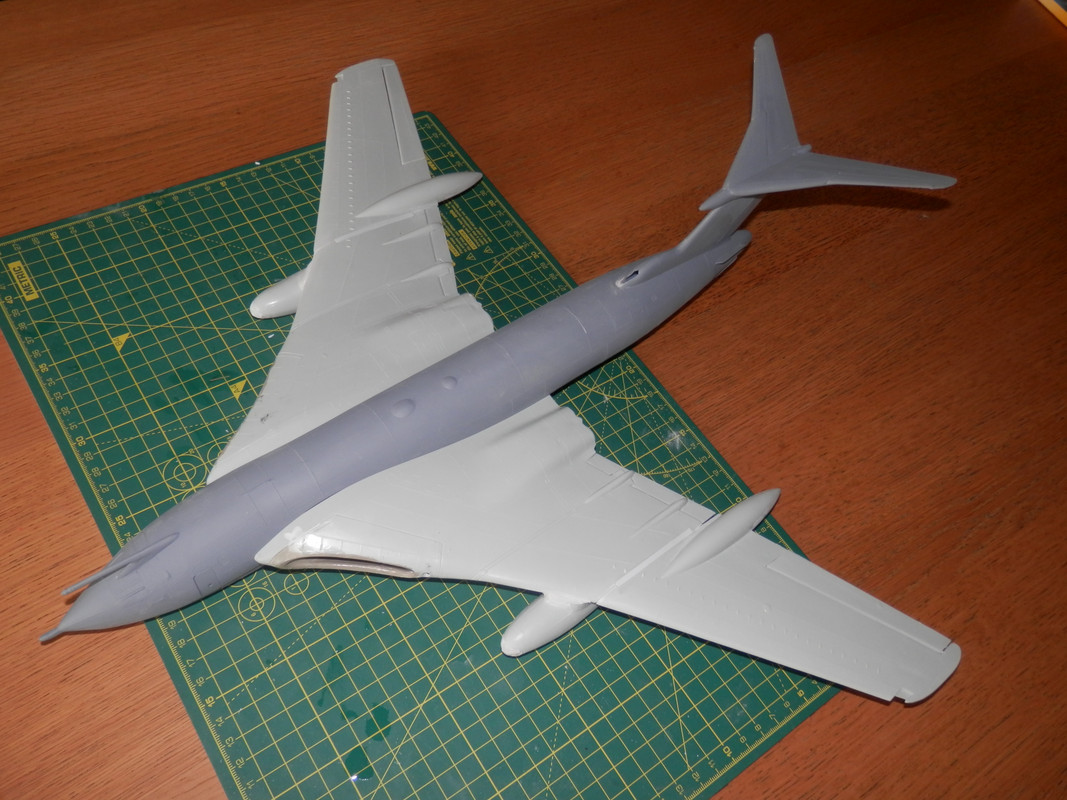
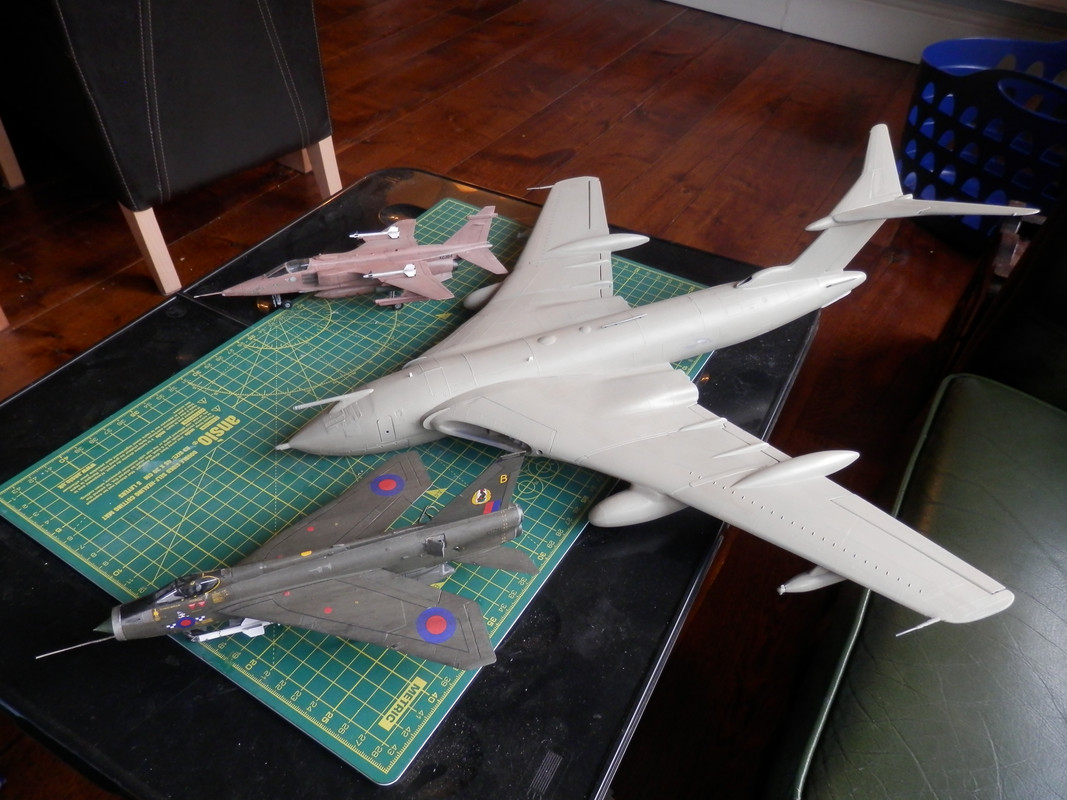
It is starting to look like a Victor, but there is a way to go yet and I've run out of primer.
To give an idea of the size of this thing the tail is bigger than my Hawk "Test Pig".
Any update on the Victor? Where are you going to display it once done, its huge!
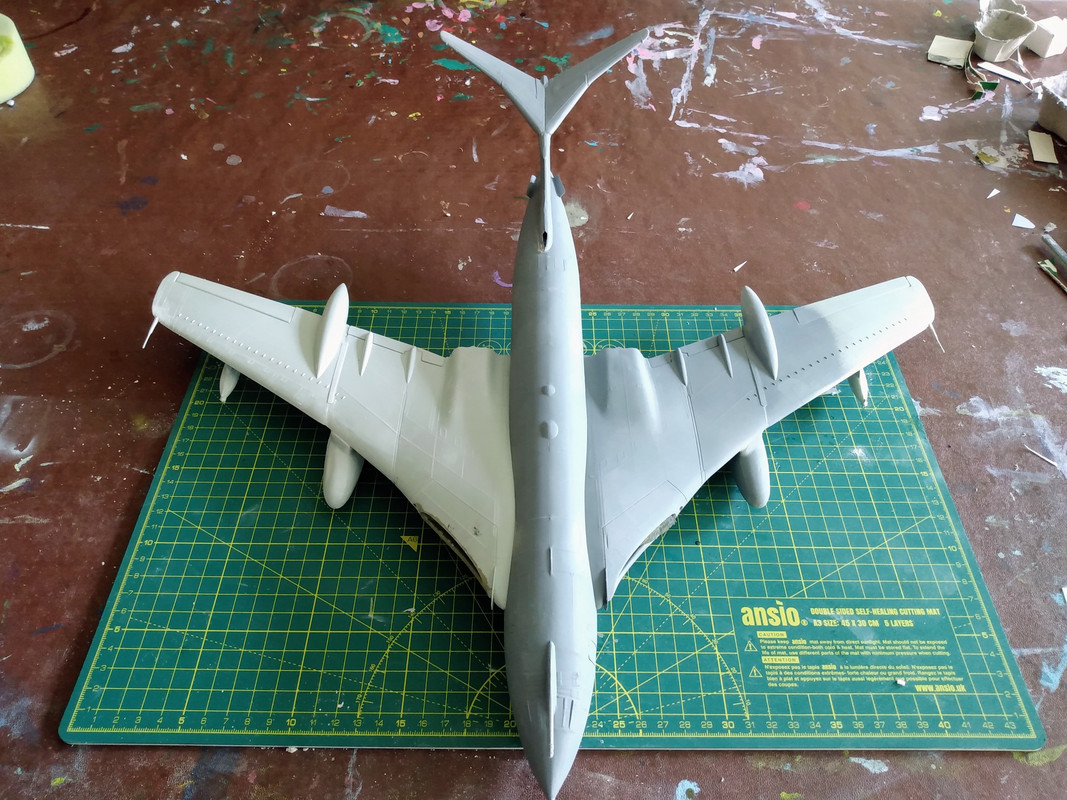
I've done a bit more filling and sanding bit I've run out of primer.
I have no idea where I will put it or it's twin. They are chuffing massive.
Am rather pleased - for my birthday I received a 1/48 Revell FGR 2 which will sit nicely with my two Airfix EE Lightnings and Hasegawa F104. I just need to find the time to build them.
Someone has just done an FGR2 on Britmodeller.
Progress.
In other news, Cold War, Hot Jets is back on the iPlayer.
I’ve just got this RAF 1980s films DVD from amazon for a Cold War jets fix.
How much better is a dedicated re-scribing tool compared to a scalpel blade? Struggling with some panel lines at the moment with the scalpel blade wandering. Can figure out how a scribing tool would prevent this?
My FGR2 is coming along slowly due to work/cycling/drinking/wife commitments, but the kit's engineering is generally very good - aside from the fit around the intakes and the lower fuselage/wing assembly interface that naturally follows a number of compound curves and will be an absolute pain to fill.
The plan is to paint it in XV408 circa 1991 colours - a fetching shade of blue which will be carefully post shaded.
The Phantom's intakes are very complex in shape, which means that masking them is proving to be frustrating - the blue overlaps the inside of the intakes slightly but it's difficult to get a consistent masked edge, plus one needs to be careful with two contrasting colours (dark blue and white on the intakes inside) which could bleed.
The auxiliary air vents on the underside have required some careful sanding to reduce their thickness - because the inside of the vents are a contrasting red against the blue, this will be tricky to get right.
@HTS - am genuinely very impressed by your bravery tackling that Victor (I had that Matchbox kit when I was a child), not to mention the work you've done on the intakes. You absolutely cannot have a Victor tanker without a Lightning nearby, I'm delighted that you've got that covered.
@Nostrils - I bloody hate scribing. It's a PITA and never looks right when I do it! FWIW, I do have a scribing tool which helps, but the best approach is to polish the plastic to a sheen before you rescribe. A rough finish will deflect whatever scribing tool you use resulting in uneven engraved lines.
How much better is a dedicated re-scribing tool compared to a scalpel blade?
If you're using a Swan Morton scalpel you can make a scribing tool. Snap the tip off the blade with a pair of pliers, you only need to take off 1-2mm and it'll leave a tiny sharp square edge. Turn the scalpel upside down and drag the tip backwards along the plastic. I've never tried it but I imagine a photoetch folding tool would be good for snapping the tip?
Just wear some goggles when you're snapping it though, sometimes bits of scalpel blade go flying about!
I've read that you can stick Dymo Tape down and scribe against it to make a straight edge.
Progress on the Victor is slow, but I'm getting there.
I’ve read that you can stick Dymo Tape down and scribe against it to make a straight edge.
I use this, I don't stick it, I just hold it on. You can also use a bit of the frame (sprue?) That photoetch parts come on.
Thanks guys, hadn't considered "masking" either side of the panel line to be scribed. Re the snapped off blade, is a square profile better than a bevelled profile for scribing? I suppose you aren't really cutting the plastic when scribing...
Square is better as it cuts a 'trench' in the plastic, a bevelled blade will score a line but it'll create two minute ridges on either side where the plastic gets pushed over and up.
Finally got permission to put some on display. Not ideal, but better than in boxes under the bed.
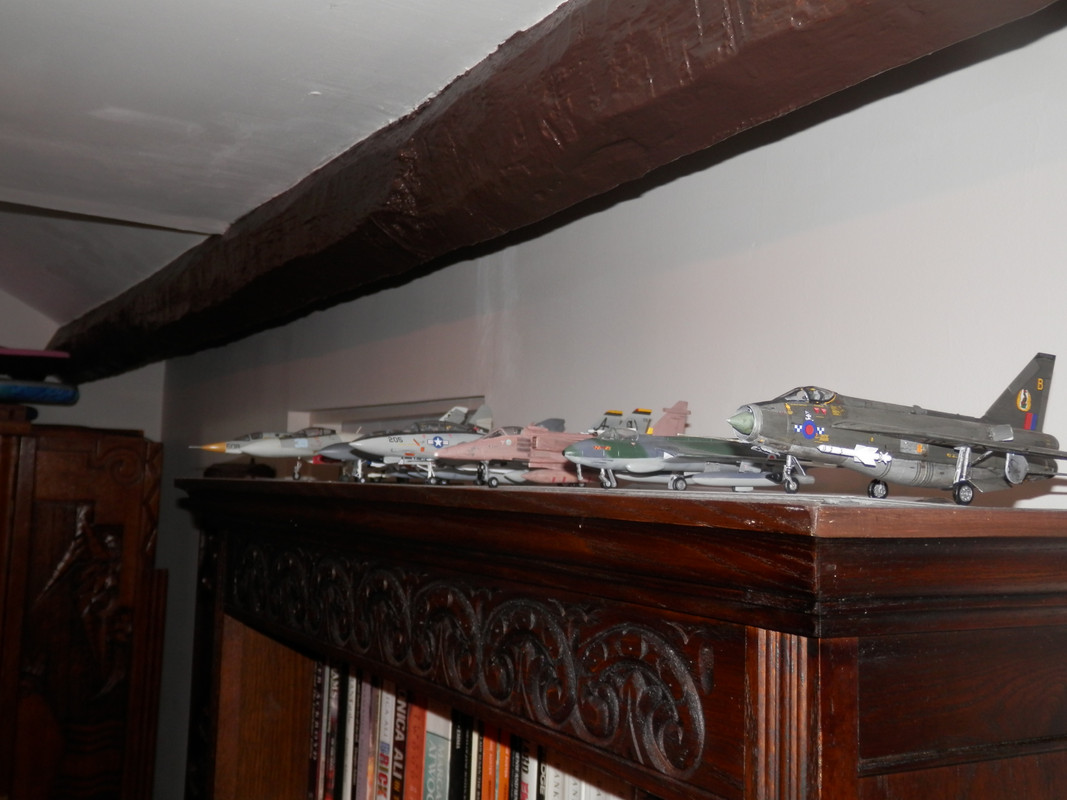

Meanwhile, the work in progress Victor looks on menacingly from its lofty perch.
Nice! Whose kit is that Corsair? Today I managed to snag the Revell 1/72 Corsair from the local stationers for £7. Looks a nice kit.
Any more progress on the Victor?
It is an Italeri. Cost about the same as yours. Got it on line from Jadlam.
Victor is coming on. The hemp is about finished, which is good because it has played havoc with the airbrush. Stuck a load of aerials on it. Done some work on the engine exhausts but they still need more attention. Looking forward to finishing the bugger if I have to be honest.
Don't lose heart, you've got another to build after!
Not just yet. Something out of the box that I can rattle off in a fortnight first.
is a square profile better than a bevelled profile for scribing?
A lot of that will depend upon surface prep. I'm rubbish at rescribing either with a scalpel or with an engraving tool. I've tried the Dymo tape thing, but the stuff I have isn't thick enough to deflect a blade. My technique is clearly wrong. What works best for me is to sand and polish the plastic to a fine sheen and then rescribe. There's fewer flaws in the surface finish to deflect the cutting edge.
Need a break from the Victor as it is all fettling and no actual building, so I've started an Italeri F15E Strike Eagle.
Cockpit had next to no detail so I've jazzed it up a bit with some cut out photo copies of the Victor cockpit decals and added masking tape seat belts.
Will pick up the Victor again when the F15E is at the painting stage and do them in tandem.
The black paint on the cockpit fairings will get another coat, especially where I've got excess PVA from attaching my home-brew HUD.
Fit is a bit "Italeri", but the kit was only a tenner so I'm not too upset.
The Strike Eagle is similar to the Victor K2 in that evolved from a sleek and beautiful aircraft into something covered in lumps and bumps. It looks very "business like".
https://en.wikipedia.org/wiki/McDonnell_Douglas_F-15E_Strike_Eagle
I've just found the Titanic!
It was at the back of a cupboard.
Revell 1:400 scale, as far as I can tell it's untouched and looks like it's got all the parts; comes with 4 unopened pots of paint and a pot of glue.
Free to anyone who can pick it up - Stafford or can meet at Cannock Chase, Birches Valley.
PM me.
Free Stuff! Someone needs to jump in and have it.
The Revell Titanic is one big brute of a kit.
Sadly I don't do ships, don't live in Stafford and have too many kits.
I've got a bit further with the P51! I lost interest in it for a while when I messed up the paint, but after being confined to home with two broken ribs all I could manage to do was watch TV and do some modelling. It's almost done now, just needs weathering and some final assembly. I was pleased with the way the guns and drop tank plumbing turned out.
[url= https://i.postimg.cc/RWZxYDK6/IMG-20190702-131318311.jp g" target="_blank">https://i.postimg.cc/RWZxYDK6/IMG-20190702-131318311.jp g"/> [/img][/url]
[url= https://i.postimg.cc/PCVnnQQ6/IMG-20190702-131333363.jp g" target="_blank">https://i.postimg.cc/PCVnnQQ6/IMG-20190702-131333363.jp g"/> [/img][/url]
[url= https://i.postimg.cc/N54wpc9v/IMG-20190702-131343053.jp g" target="_blank">https://i.postimg.cc/N54wpc9v/IMG-20190702-131343053.jp g"/> [/img][/url]
[url= https://i.postimg.cc/G9vRTYb2/IMG-20190702-131359328.jp g" target="_blank">https://i.postimg.cc/G9vRTYb2/IMG-20190702-131359328.jp g"/> [/img][/url]
What scale is it?
My F15-E Filler Ball Strike Eagle is getting there. Slowly.
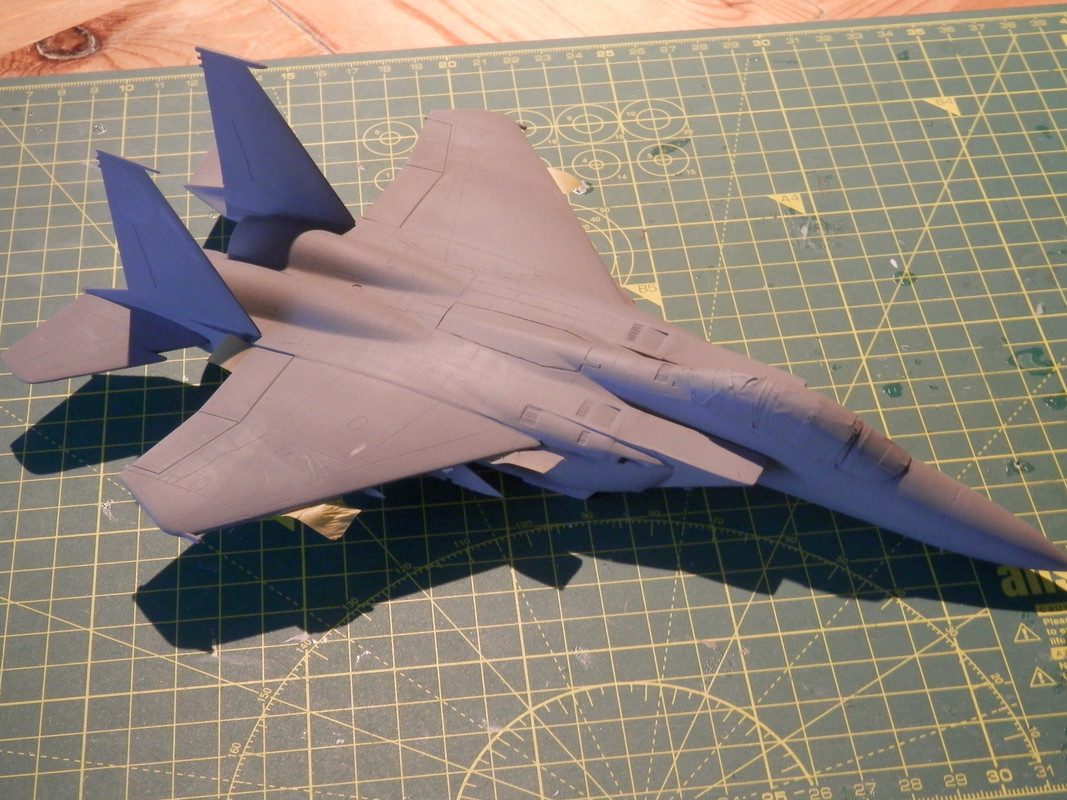
Hasegawa 1/48 scale
Italeri 1/72
Italeri 1/72
I've not made a 1/72 kit for about 20 years (Airfix WWI Albatross), I've got a couple in the kit stash so I might try one soon if my eyes can take it.
I'd love to go to 1:48 but i haven't got the space.
£15ish delivered from Japan.
I suspect that I could be spending a fair bit with these guys as kits start at about a fiver and delivery is about £6.
https://www.plazajapan.com/categories/Plastic-Model/Hasegawa/Aircraft/?sort=priceasc&page=2
So here's a couple from me.Taken a while to get here - had major issues with the Martlet when the primer (Stynlrez) absolutely didn't stick to the plastic and had to be peeled off to start again.
The Mustang is from the Aldi special deal, which came with the wrong decals. First attempt at a full NMF finish, and a play with pastels for the weathering.
(also different phothosting, so lets see what happens...!)


so lets see what happens…!
Nothing so far.