Just installed a new bb. Have never installed a CK before. Got a little confused with the instructions if I'm honest. 😕
73mm shell, so no spacers inside either cup. Then had to put 4 metal black spacers outside the driveside cup for the chainline to be right.
Is it right that I should have these parts left over?
[img] 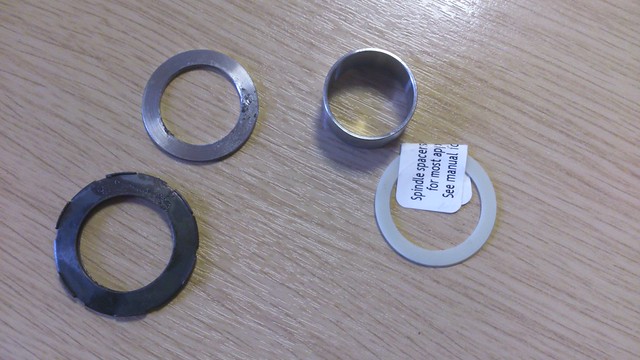 [/img]
The two top ones are too narrow to fit around the spindle, so I guess that is fine. The disc spring though?
What is that thing bottom left in the pic? Don't think my CK BB has one of those (or the top two for that matter)
That's called the disc spring according to the instructions. It's a bit confusing...
The 2 bits at the top are a GXP adaptor kit for fitting Truvativ/Sram
The washer goes on the drive side axle between the bb and the arms on the axle,not sure if its used if fitting to Shimano cranks.
scott_mcavennie2 - Member73mm shell, so no spacers inside either cup
No spacers at all? 73 would usually have one on the drive side, unless CK are different to others.
That's what I expected HG, but it says:
if installing a MTB-style BB and crankset onto a 68mm shell, install one 2.5mm BB cup spacer onto each bearing cup. No spacers are required for all other setup configurations
Just turned the cranks - it doesn't sound or feel quite right, so I'm going to have a play with the spacers when I get home tonight and see.
In fact, I should have checked the site to see which bits I need for which crankset:
http://chrisking.com/bottombracket
Doh!Thanks as well nicolaisam
Travis, just hit it with a hammer. You'll be fine.
All of the above is part of the SRAM conversion kit supplied with the BB. Usually in a separate little bag. You don't need any of it if not running SRAM/TRUATIV. I have just fitted XX1 and needed all the above for it to work plus four 0.5 thin black spacers you should also have received.
OK, thanks - that is really helpful. This means I need to remove the 4 thin black spacers which I think means that I need one of the larger spacers on, otherwise my cranks will rattle around 😕 I think the manual is geared towards SRAM installation, which is confusing. This thread on MTBR suggests I need a spacer on the driveside:
http://forums.mtbr.com/santa-cruz/nomad-chris-king-bottom-bracket-792436.html
Oh well, looks like I get to mess up my lovely CK finish with my shimano BB tool. Can anyone remind me which way to turn? 🙁
One 2.5mm spacer between frame and BB drive side and nothing else.
Just like a Shimano BB and crank on a frame with a 73mm shell.
Cool. Perfect. Thanks.