Right so my obsession with fettling has lead me towards wanting to have a crack at wheel building/setup. I am thinking I want to fiddle about changing hubs maybe. I had thought twice once I saw the cost of wheel truing stands but I have a Park Tool repair stand and I have discovered that I can get a wheel truing attachment for it for £35 - although I might regret saying that as it's from the Amazon Global Store and I may have to pay duty/taxes on top....
Anyway what else do I need, apart from a wheel or two!
Spoke tension meter?
Tools for tightening the spokes?
Any recommendations for the above and also anything else I might need.
Thanks folks
You already have more wheel-building tools than I do and yet I built two sets of wheels in the last two years and have been riding them on two different bikes without any issues.
It's quite confusing to start with but it gets easier and can be quite therapeutic once you have done the first wheel!
aaaah hang on - you will need a Spoke Key :o)
They come in different sizes so measure your nipples before buying!
You need a spoken pro for the nipples. I also have a nipple spanner which can be very handy.
That's all you need* you can try in the frame with a ziptie.
*To start. A truing stand is easier, a tension metre is handy for even tension but I've never built to a tension merely evened them out.
To start...
A frame/forks and a decent spoke key (park or spoken).
Best guides are Roger Musson or Sheldon Brown.
For home building I've only ever used a frame and forks. Built many wheels over the last 30 years.
Used stands, etc. when I worked in bike shops, but imho working simply, and by eye and ear for tension and trueness, teaches you to build a better wheel.
Oh yeah. You need a spoke key for the size of nipples. If it's loose you're in for a world of pain.
Roger Musson's ebook is worth it and also has a design for a wheel stand you can build easily and cheaply from wood. A spoke key is essential (spokey red is my favorite). A nipple driver is useful but not essential. Again Musson's book describes how to make once from a broken/cheap screwdriver.
I have the Lifeline Pro wheel jig, which is much cheaper than the Park equivalent. I used to build with just this and a standard red plastic disc spokey and this was sufficient for a decent wheel build. I bought the cheaper Park TM-1 spoke tension meter a year ago and although it's not necessary I think it makes it a bit easier and quicker.
Spokey* not spoken. Bloody autocorrect.
I used Roger Musson's book and it's very clear but also has quite a bit to keep your inner geek occupied
You really don't need a stand at first - upside-down bike works just fine, and I'm not that convinced by tension meters (and nor is Roger Musson FWIW). Nipple driver is much easier than counting turns of each nipple - though you can probably get there visually too, by looking at how much thread has gone into the nipple
Get a decent nipple key though - that's critical
buy the right length spokes the first time. that really helps...
+1 for Musson's ebook to go through the steps. I found the hardest thing when starting to build wheels is knowing when to stop (either when it's good enough or when you're getting frustrated)
As said above.
Musson's ebook. I think it's 9quid and each time he updates it, you can download the latest version.
A red spokys works wonders.
A nipple driver helps get all the nipples even to start.
I have a park tension meter and it helps but isn't required.
A dishing tool. I got a minoura one which is a bit of a pain to use.
Go for it!
One of these is indispensable - The best spoke wrech that I've ever used. 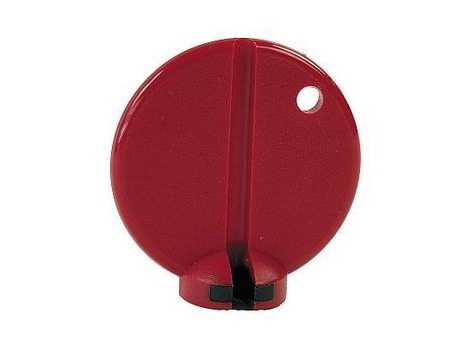
Have just re-rimmed a wheel last night.
As above really, spoke tension meters absolutely not essential, I've been building relatively standard 2x or 3x wheels for years without and don't think I've ever had a spoke failure or even needed to revisit tensions or true (apart from a late night kitchen table set of wheels I built the night before visiting Whistler Bike Park, all 32 spokes came loose simultaneously! 😀 )
Be very methodical with your starting point, I've always just wound the nipples in by hand until the very last spoke thread is obscured. Then you can start adding tension, maybe 1 full turn of a spoke key for the first and second go round (when spokes are obviously still flopping about loose) but then you want to dial it back to maybe a half turn, then a quarter turn, then finishing with 1/8 turns.
After the initial first couple of full turns I always seem to find one or two spokes still very loose, I'm not sure if I've just been clumsy and missed a turn with the spoke key, or maybe a rogue longer spoke has got in or who knows what. I've not had any issues just throwing accuracy to the wind and tightening these to take out the early slack.
After that you get the dish right, the side to side and up and down true right, then you can pretty much just start applying layers of tension, maybe 1/8th turn at a time.
I've recently bought a tension meter (Lifeline - £30, looks like an exact copy of the Park one, seems good) so have used it at this stage, it does pick up inaccuracies but I ignore anything 10% or less (in fact I might even ignore 20% or less, I forget the maths). I think once you get everything tight enough then minor discrepancies don't matter as much, so long as the loosest spoke is still tense enough!
This is where the tension meter is useful, allows you to build right up to the max tension the rim will take.
Watching with interest as have been doing a bit of wheel work recently. Have a cheap stand which works well, and bought a second hand spoke tension meter ages ago but only just used it. Quite therapeutic and compiling lists of stats on spoke tension appeals to my inner accountant. As most have said I suspect you don’t need it, but it did help me identify one or two rogue spokes. Most people seem to say they are useless for carbon rims anyway.
I’ve also learnt that most mass produced wheels seem to be very well made.
Thinking about just trying a rim swap to start me off.
It's all about process and being methodical - you can still build rubbish wheels with the best work stand and build great wheels with no stand.
Lacing is probably the trickiest bit to start and best to have another wheel to copy e.g. trying to get the valve hole aligned with the hub logo and not having the spokes crossed.
Even spoke tension is more critical with low spoke count carbon rims where you have to crank it up a bit.
Start on some 32 hole, rims and hubs building 3 cross with double-butted spokes and you'll have few troubles - you can always undo everything and start again.
Decent spoke tool is a must, I predominantly build with DT Squorx, so have the driver adaptor which has a depth stop, makes the first stage very consistent. Then have the squorx driver and spoke key.
Also have a mix of park spoke keys for normal nipples.
I bought the cheaper Park TM-1 spoke tension meter a year ago and although it’s not necessary I think it makes it a bit easier and quicker.
Agree with that. I built wheels for years without using the tension meter. Finally bought one and it makes building quicker/easier and probably results in a "better" wheel - more even, consistent tension. It also showed I was previously overtensioning spokes beyond the manufacturer's figures, although I didn't have any issues resulting from higher tensions.
I found a more basic but solid wheel jig more useful that a fancier but wobblier one. Park TS8 bolted to a slab of wood as a base.
I have built around 10 pairs of wheels just using frame/forks and zip ties. The part I seem to struggle with is getting the roundness correct and none of my wheels have ever been absolutely spot on for roundness (always a mm or two of up/down when spring the wheel)
I'd built numerous wheels without a tension meter all of which had bee fine. Picked a meter up cheaply and discovered I had a habit of applying quite a lot of tension! Also showed me visually how much the tension differs between sides to the point I may try a asymmetric drilled rim next time.
have a Park Tool repair stand and I have discovered that I can get a wheel truing attachment for it for £35
I wouldn't bother with one of those. Get a cheap standalone jig, or use zipties/pens on a frame.
I may try a asymmetric drilled rim next time.
No reason not to buy one, but the difference they make is pretty tiny, my off centre Pacenti rim still ended up about 130kgf driveside, 80kgf non-driveside!
That's disappointing. I thought one of the 'benefits' was a more equal tension.
That's all very encouraging/useful - thanks everyone.
Is there a standard size spokey for Shimano/UK/european wheels or are they all different? The Shimano documents/exploded view for my current wheel just mentions spoke tension but not nipple size..
Is this a genuine Spokey? Amazon Link
Probably.
I'd get a pro one though, it has two meatl inserts stacked ontop of each other so it engages with the WHOLE sqaure bit of the nipple. Less of an issue with new spokes but quite handy of you have an older wheel with a chewed up nipple.
That’s disappointing. I thought one of the ‘benefits’ was a more equal tension.
It may have been 135kgf DS : 75kgf NDS
That’s disappointing. I thought one of the ‘benefits’ was a more equal tension.
It is 'more' equal but I think unless you have a mega wide DH hub you'll always end up with something asymmetric.
(actually, I haven't built an off centre rim with a disc hub, it might bring it back in).
I have built around 10 pairs of wheels just using frame/forks and zip ties. The part I seem to struggle with is getting the roundness correct and none of my wheels have ever been absolutely spot on for roundness (always a mm or two of up/down when spring the wheel)
Count the number of turns in, or use a spoke driver with a depth gauge.
It may have been 135kgf DS : 75kgf NDS
Thats worse than my normal builds!
Are you sure you have the room the right way round?!
🤭
Thats worse than my normal builds!
I think the point Jamie was making was that the asymmetric rim might have reduced a bigger difference in tension, e.g. from 135/75 to 130/80
I'm pretty sure 130/80 is ballpark for a rim brake 135mm rear wheel, it's certainly what the manufacturers advised and am pretty sure (I didn't take notes) that's what I got using a DT hub. Don't think DT are renowned for wide flange spacing but the wheel has withstood a lot of abuse with nary a wibble so 130/80 is obviously good enough!
Count the number of turns in, or use a spoke driver with a depth gauge.
I do all nipples up so the thread is not showing, using thumbnail on last thread, and then apply same number of turns until tighter but when I say out of round I mean a section of the rim (around 4 or 5 spoke worth) is too low with the rest being same height but I can't loosed off the spokes enough to make it even.
I tend to give up and as long as it is straight side to side and spoke tension feels even I just ride it !
Centering tool been mentioned? I made one out some bits of old shelving. There's how-tos on youtube to give an idea of what's needed.
Best thing I found, after building my first pair of wheels, was then having the knowledge to fix wheels. Came in useful when my son dinged a rim and loosened a bunch of spokes doing jumpy stuff.
Science officer.
What 13thfloormonk said.
I'm sure the difference from a centrally drilled rim to asymmetricly drilled rim would improve the balance of the loads, i was maybe a little clumsy and consise in my delivery.
Jeez - just been looking at all the tools... it's cheaper to buy new wheels! Actually a whole new bike even. 😲
I'm actually surprised at the tension discrepancy, but I suppose it depends on what it's being compared to. Ive only built mtb wheels and relatively 'modern' ones at that.
I would have expected them to be substantively closer for an asymmetric build.
The above is a tension ratio of 100/55 which is quite poor for an asymmetric rim, and worse than most of my conventional builds. I'm hitting 100/68 -100/72 on my boost rear wheels.
Jeez – just been looking at all the tools… it’s cheaper to buy new wheels! Actually a whole new bike even.
Yet many on this thread have built wheels with just a spoke key and some zip ties...
Yet many on this thread have built wheels with just a spoke key and some zip ties…
True.
Jeez – just been looking at all the tools… it’s cheaper to buy new wheels! Actually a whole new bike even. 😲
Yeah, but that's the same as everything though, right?
I mean, a full set of bike workshop tools would cost... a pretty reasonable car amount of money? but you only really need a set of allen keys to get started.
My first recent wheels were built using the Musson design stand using nasty left over wood from a crap integrated cupboard I'd removed. Some scrap metal for the clamps and gauges made out of Lego. The nipple driver was a modified broken screwdriver and I used the spoke key from a multitool. That wheel was still going strong and true when I sold it 4 years later. Total cost was the rim and the spokes (as I had a hub).
You honestly don't want anything to start.
If you get a tension metre you'll get caught up with tension.
Dish is easy you just flip the wheel.
A spoke driver is handy but an old spoke with a nipple tightened hard diwn on it will do the same or just use a screwdriver until it pops off and use a spoke key.
They all go some way to making it easier but whats going to take most effort for your first build is working out how the **** you've laced all the way round the rim but you've still got one to go.
I even have a stand with gauges but find myself eyeballing the gap instead.
Still only building with an old Minoura stand (poss. £40) and a knackered Spokey (pilfered accidentally from a shop I used to work at).
Nipple drivers seem like a luxury or possibly a necessary convenience if you're building lots of wheels, tension meters likewise but also now relatively cheap (was using my £30 Wiggle/Lifeline job again tonight, very impressed).
Haven't used a dishing gauge in years, but since I'm always building for the bike right in front of me, I just stick it in the fork/dropouts to check.
I’m actually surprised at the tension discrepancy, but I suppose it depends on what it’s being compared to. Ive only built mtb wheels and relatively ‘modern’ ones at that.
Yeah, my tensions were based on an 11spd DT Swiss road hub, so about as asymmetrical as you can get! The wider a hub gets and the addition of the disc brake will bring it closer to symmetry. Also don't quote me on the 130/80 thing, that's just from memory.
I have built 2 front wheels to date and echo all the above advice, red spoky, nipple driver and cable ties (to true wheel in fork). Both went well and still running true.
that said I am apprehensive about trying a rear wheel as I am worried about getting dishing/cassette alignment right. No idea if it’s even a thing, just a bit of a mental block/lack of experience for me. Might try a rear one day.
You can make your own truing stands quite cheaply, in the past I've used old frames and forks, I'm currently using one I made for boost rear and have another for boost front, both made out of wood, the rear one has some alloy dropouts I got dirt cheap bolted to it which I can space down to 142, a spokey or park tools spoke key are a good choice, also spoke tension meters are cheap enough on Ebay not to have one, almost anyone can build a true wheel but the spoke tension will most likely be all over the place, one thats tensioned correctly will stay true and not pretzel on the first rock garden.
Getting a wheel true both ways within a papers width and evenly tensioned is so satisfying but will take a few wheels down the line to master.
There's only one "extra" tool that I really wouldn't want to be without, and that's an adjustable nipple driver. Like this:
You can just stick it in a drill, spin the nipples on, and if you've got the depth adjustment right (by luck, basically) you can genuinely end up with a rideable wheel without a single adjustment. It'll probably be pretty bad, and so don't do that (and more likely you'll just get somewhere close, since you probably won't choose a perfect depth) but as a starting point for adjustment it makes an incredible difference. It's a huge time saver but also just basically cuts the build down to the satisyfing bits
Only works with traditional/normal nipples, not oddball squorx and the like which is a good reason not to use any of that bollocks.
I am apprehensive about trying a rear wheel as I am worried about getting dishing/cassette alignment right
I don't think there's much difference in building a front or rear. On a modern wheel build with disc hubs, both are dished on one side more than the other. By my calcs my next build will have 63% left tension rear and 76% right tension front, so not a million miles away from each other.