I got some big 1/24 models for Christmas, apparently pretty hard to do well for a novice.
The Spitfire I got is an old moulding so loads of flash to cut off and sand. The Mosquito is awesome but will take me months to complete. Both Airfix and its cost me a fortune in paint etc ready to start painting as I go along.
Going to do the Spit first as a learner and get some practice on that.
Never trust a man that doesn't have a hobby. Hitler didn't have any hobbies, you know.
I think you'll find he did...
...but only one.
Someone mentioned Warhammer RPG figures, and dry-brushing. For shadow areas, watered-down black ink is commonly used, along with dry-brushing. Black ink is particularly good for highlighting panel joins, hinges, and rivets, dry-brushing for exhaust staining and cordite staining from cannon-fire, and wear-and-tear on paintwork, where bare metal shows through.
Never get nearly all the way to the end of an (admitted) very easy red arrows gnat, with the intention of making it perfectly to give to your son, then let the glue flow onto the clear plastic of the canopy and thus ruin the bloody thing.
Bitter does not cover it!
I keep looking at getting a model to build, but always get put off when you see the list of 15 colours required that are going to cost £40 for a £10 model.
ah but a number of those are commonly used across many kits - for example matt black, anthracite, aluminium/silver, olive drab, sand, very pale grey, matt white, yellow if you do a number of piston engined aircraft, flesh if you do people - but in small amounts so you buy them once and they last forever...
or you could try something that's predominantly one colour, like a Red Arrows Hawk (or Gnat), F117 Nighthawk, Ferrari, modern jet fighter, WWII US Navy fighter, etc...
here's one that uses about 5 colours:
[IMG] 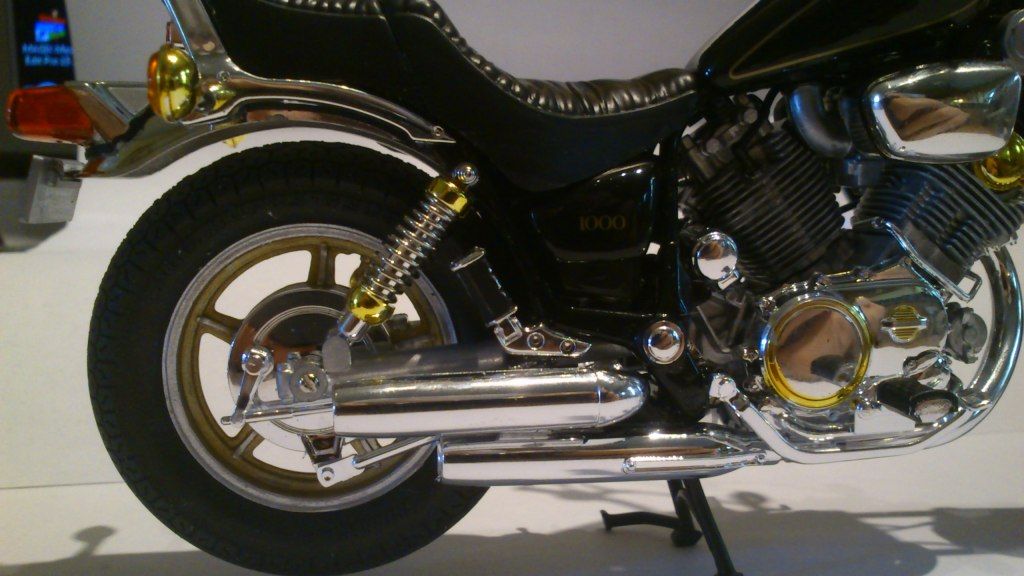 [/IMG]
colours used on this one: gloss black (tank), flat aluminium (engine, brakes, fork lowers), semi-gloss black (frame), clear red (brake light), clear orange (indicators) and clear yellow (gold bits). Once you've bought the clear red, clear orange you'll probably never need to buy them again no matter how many bikes or cars you do
Can I also suggest Britmodeller.com as it's great for learning new stuff, tips, ideas or just inspiration.
If you want to see ridiculous dedication to one build look up the Medivac version of the HUEY in the aviation work in progress, he's been building that thing for years and is on about the 3rd engine scratch build (all previous versions I would have been very very pleased with if it was me building, but he found some fault and did the whole thing again!)
My stuff is run of the mill by comparison.
Badger
dannyh you can probabaly find a vacume formed canopy replacement - try hannants (www.hannants.co.uk)
Vac-form canopies are fiddly but much thinner so the cockpit detail can actually be seen.
Also dip your clear parts in klear/future floor varnish first (lakeland sell the stuff as "Quick Shine Floor Finish") it's basically clear acrylic varnish and gives clear parts a nice shine.... also if you get paint etc. on the part you can strip the part back to bare plastic by soaking it in "Fairy Powerspray" kitchen cleaner (this stuff strips paint of any kit without damaging the plastic - an old toothbrush is helpful).
Badger
this was a nightmare. I'm never ever ever doing anything else with rigging:
[IMG] 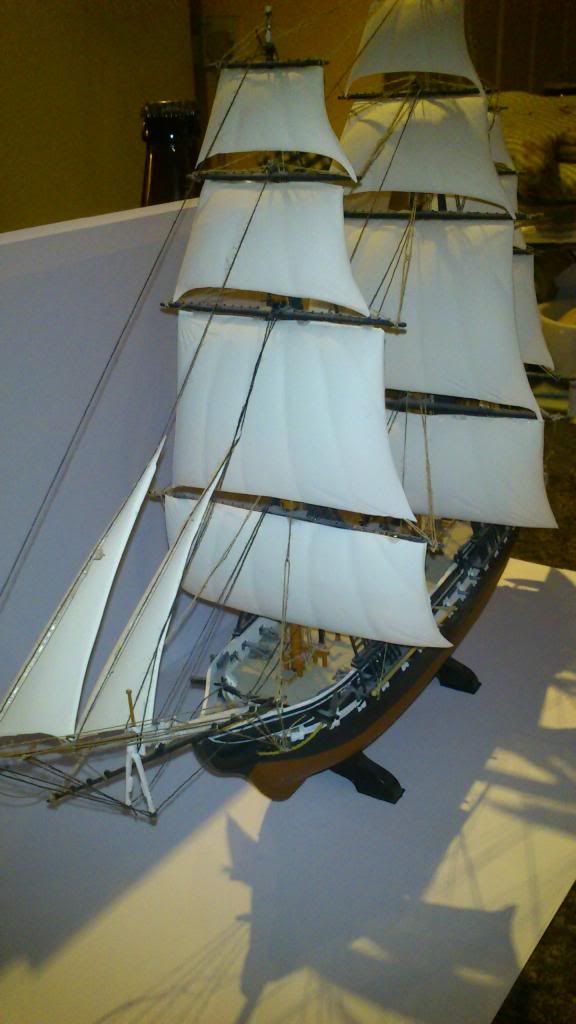 [/IMG]
[IMG] 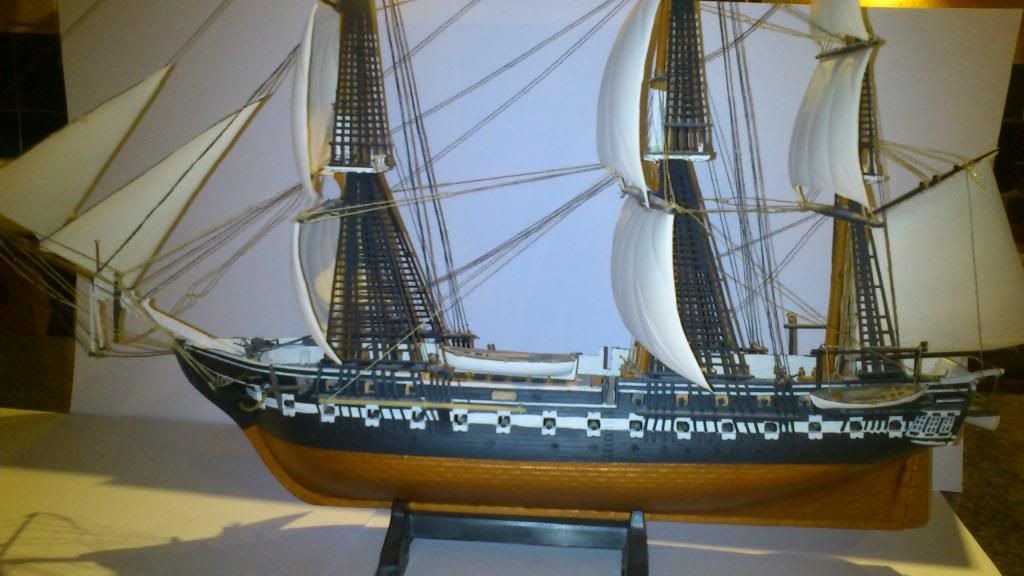 [/IMG]
My two most recently finished:
1/72 Fokker Triplane:
[img]  [/img]
1/72 Me262A:
[img]  [/img]
And this is the one I'm just finishing:
[img]  [/img]
Do you all spray finish your models?
badger
thanks for the tips. Is that a Fokker Eindekker I see in progress?
I do the bulk by airbrush, but some of the finer detail cannot be done any other way than with a proper brush, 0, 00 or possible 000
Just finished the engine for my Spitfire quite pleased as a first attempt in about 30 years! Took me most of the day to paint, well dipping in and out of it, a few hours with letting it dry and faffing about.
[IMG]  [/IMG]
WIP, Wingnutwings 1/32 Pfalz DXII
[IMG] 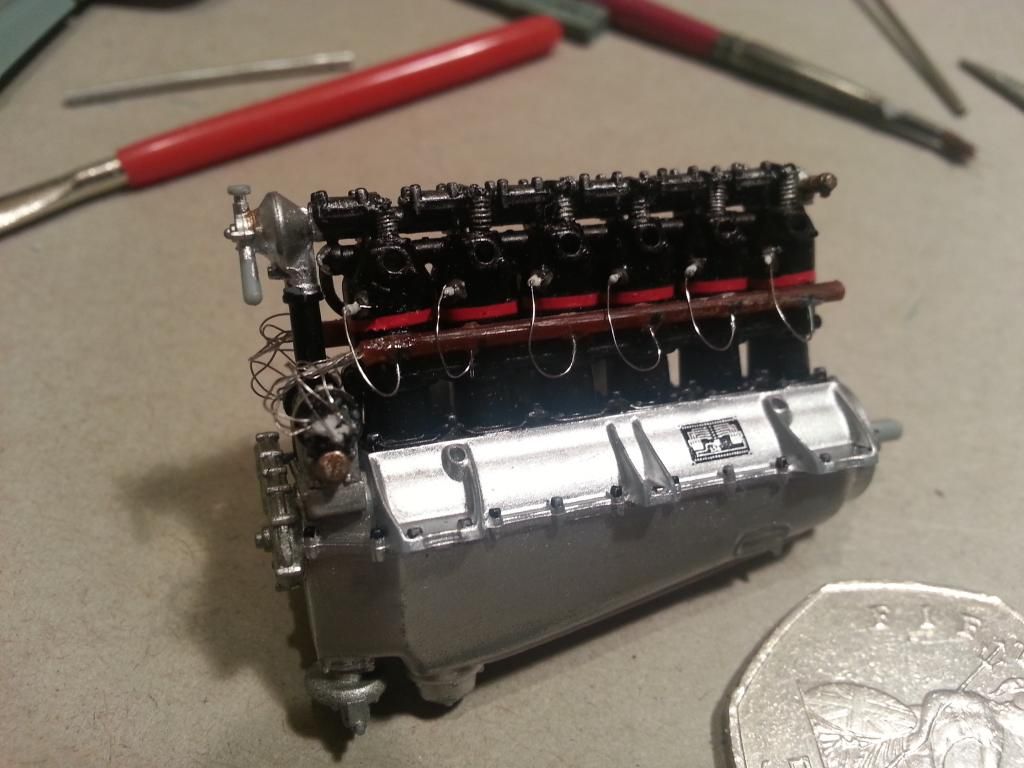 [/IMG]
[IMG] 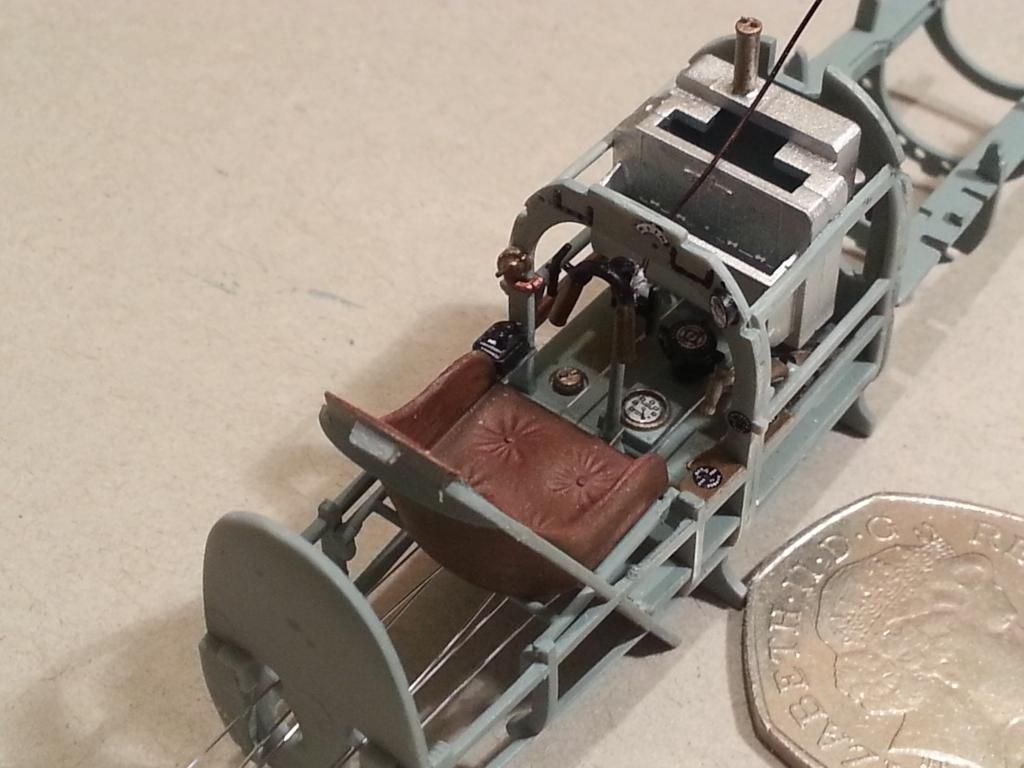 [/IMG]
[IMG] 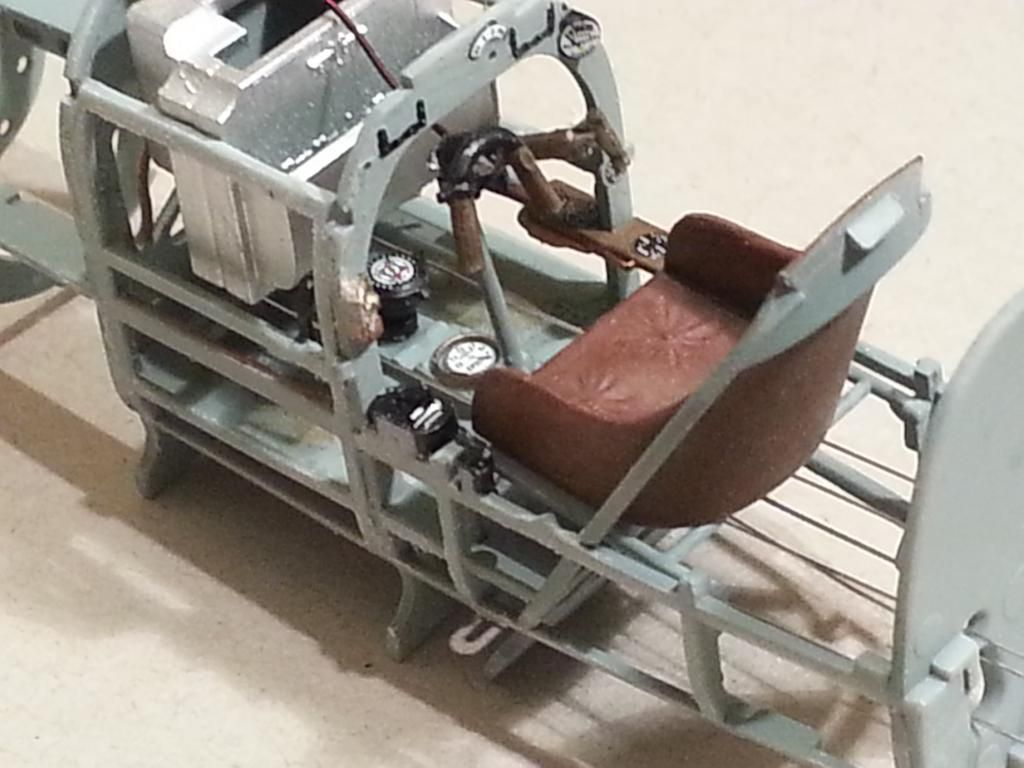 [/IMG]
Love the Fokker! The 'wear' on the prop is very convincing. The 262's a beaut, too. Nice work. 😀
@spursn17 the wingnuts look really good. This spitfire is a nightmare ut its only for practice as I have a Mosquito and the mouldings 100 times better.
The Wingnutwings Pfalz is the best kit I've ever bought, really fine detail, fantastic instruction book, and Cartograph decal sheets (2 of them). I'll post update pics as I build it (slowly!).
If your Spit is the 1/24 one it dates from the early 1970's, it will still make into a nice model though.
I wish I had your Mossie if that's the new big one as it's supposed to be really good, do it justice, and post some pics as you make it.
I used to really admire the early works of francois verlinden, and tried to copy his style in my work, but found his later work in a lot of the tamiya catalogues were too airbrushed and and now only have a few pieces left.
I prefer brushed ti air brushed but I like that typhoon
Anyone remember Hasegawa Egg Planes?
Hasegawa yes; Egg Planes no
I built a 1:32 Hasegawa Me 109E in about 1978 - was a really nice quality kit. I tried to make an 'ink spot' brush for the camouflage by cutting down an ordinary brush and singing the end - as suggested in 'Airfix' magazine. Only their's was a sable brush and mine was synthetic 😳
Still got quite a nice paint result though - just not particularly accurate. The 109 is in my parent's loft somewhere - bit bashed where it fell off the ceiling...
[b]Update on the Pfalz DXII[/b]
Cockpit now finished with seat belts and ready to be glued to fuselage.
[IMG] 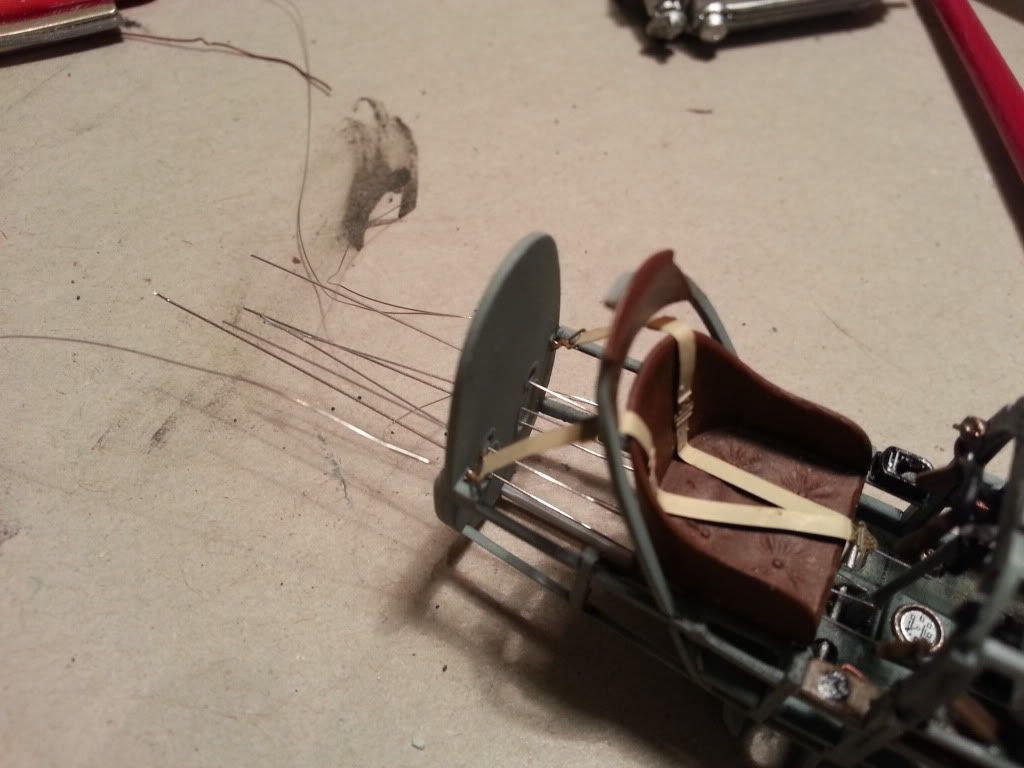 [/IMG]
Cockpit fitted, engine test fitted but not glued, lower wing attached. Cockpit was a right git to get in, really tight!
[IMG]  [/IMG]
I've been wondering how to represent the wood on the propeller with paint, so I made one out of wood instead! I bought a pack of veneer off of Ebay for £3.50, glued seven layers together then carved and sanded it.
[IMG] 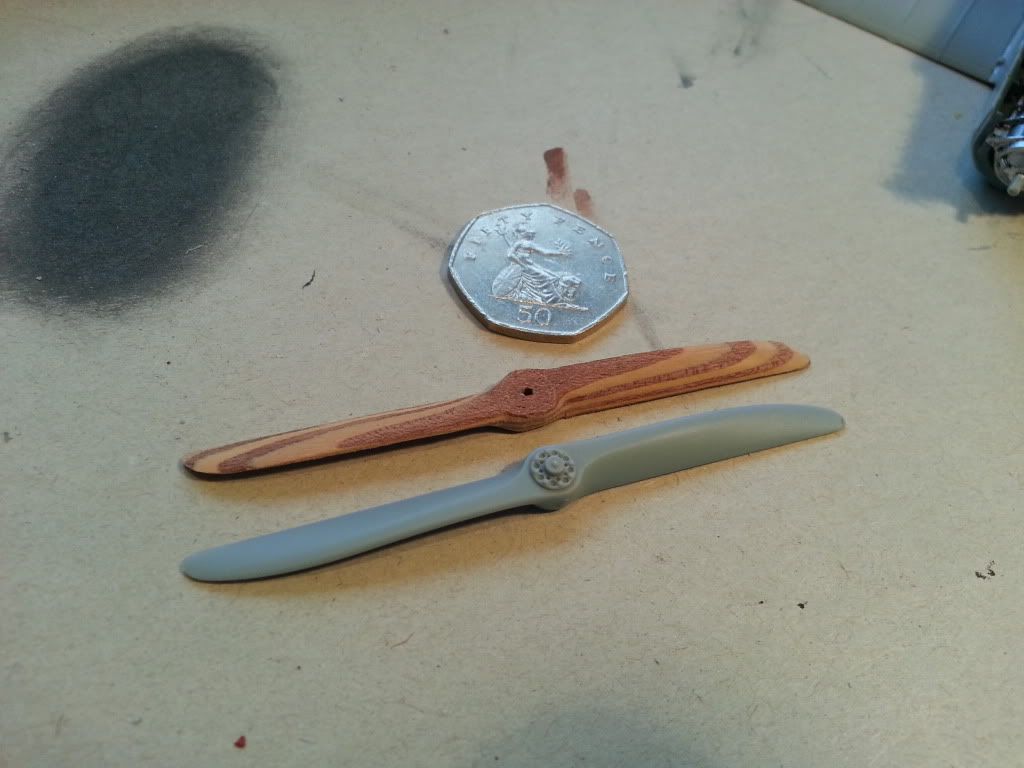 [/IMG]
Pingu, how's the Spit going?
😯
Bloody hell 😯
