Home › Forums › Chat Forum › Coffee table and troubles with joints
- This topic has 42 replies, 13 voices, and was last updated 2 years ago by pk13.
-
Coffee table and troubles with joints
-
 WorldClassAccidentFree MemberPosted 2 years ago
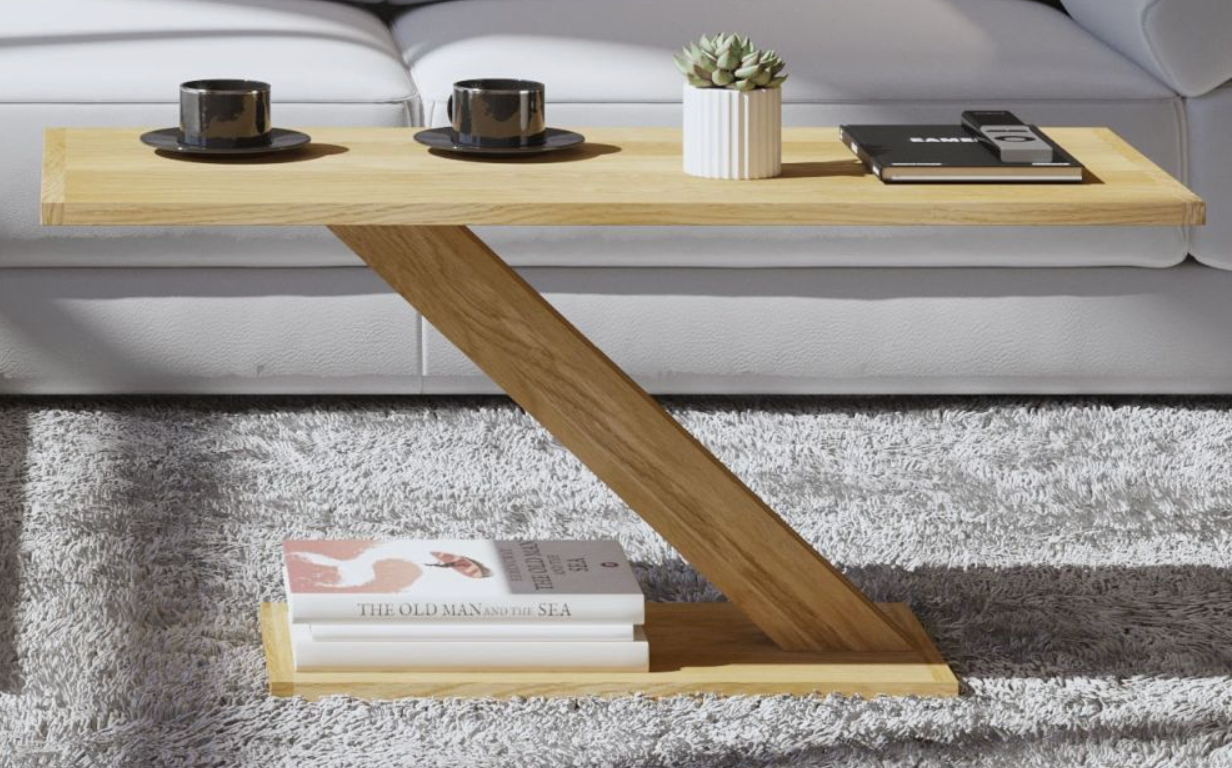
I want to try and make a coffee table similar to this:
From This
There should be enough oak to cut into slices and glue together to form the table top and probably bottom platform, if not, one of the other woods can form the bottom piece. Making the diagonal leg seems straight forward enough.
Who can suggest a joint between the leg and the top / bottom platforms?
The base can be glued and screwed, or whatever fixings, from below but the top deck is clearly visible so can only have hidden fixings or clever joints. Would a few dowels really be strong enough, I doubt it?
Any clever ideas from the experts on here please?
dyna-tiFull MemberPosted 2 years agoSliding dovetail. Cut the table end joint over long, then slide the support leg/arm(whatever) into place and use an infill piece to hide the gap.
Alternatively make it a through tenon, wedged.
kayak23Full MemberPosted 2 years agoThat table looks like it would fall over if a drunk ant walked into it.
Through Tenon with nice contrasting wedges, keyhole joining system like This or just cheat and glue and screw it but sink the screws just deep enough that you can rout a pocket and inlay end-grain to make it look like a through Tenon (the cabinetmaking gods will strike me down! 😂)
If it’s more about the journey than the end result, then I would aim for something on show like a through Tenon, perhaps even a twin through Tenon with contrasting wedges.
 joshvegasFree MemberPosted 2 years ago
I’m with those two^
I have a shit load of padauk I can send you a wee lump if you like for contrasting wedges.
For what its worth thought i think Kayak is right, thats going to fall over, the base isn’t nearly wide enough. I think you can come up with something better.
WorldClassAccidentFree MemberPosted 2 years agoThanks all. I think I will try for the contrasting tenons idea even though the thought of cutting something accurately scares me 🙂
I agree about the unstable look, it is what attracted me to it, and am thinking about how to make it work.
My first thought was a nice thick steel plate inlaid under the base, possibly with a couple of bolts welded on to bolt the leg to – top holes hidden with matching wooden plugs. This would add a lot of weight to the bottom of the table and should make it more stable.
I am hoping that making the leg out of a 4″ square lump of timber will give me a nice large surface area for the joins to add strength and balance, especially when cut at an angle to further increase the contact area.
Basically, I want toi try something fun rather than safe. I am doing this for the joy of the making process as much as the end result. This really is me playing rather than you guys producing something.
JoshVegas – Thanks for the offer of wood. I think I will risk my cheap stuff before raiding your stock but I reserve the right to pester you again in the future. Are you based anywhere near Southampton?
willardFull MemberPosted 2 years agoBasically, I want toi try something fun rather than safe.
Remind me again how you got your username?
Steel plat should help with the balance for a smaller base. I have something similar on my monitor stand and that manages to support three screens pretty well without any bolts, so a 40x30cm sheet of 10mm mild steel inlaid into the base should hold up well enough.
* – I am not a carpenter.
pk13Full MemberPosted 2 years agoThere is a reason the prop guy put books on the bottom of that table!
If someone really wanted that I would use a mechanical fixing then a contrasting timber inlay strip. One drunken night and that table would be back with me broken.
Look at some of the 70s habitat stuff for design ideas thay made some nice coffee tables.
WorldClassAccidentFree MemberPosted 2 years agoI might modify it so that it has the slim, light design of the first but the Z is turned 90 degrees to reduce the forces and leverage. A bit like a light weight version of this
 WorldClassAccidentFree MemberPosted 2 years ago
Hmmm, that one looks like it has been designed to look complex but the basic design isn’t too difficult as you have the three big runners under the main table to fix stuff to. Might try to incorporate that
First task is for me to make some planks. I will add photos to this thread as I go in case anyone is interested.
pocpocFree MemberPosted 2 years agoYou could hollow out the books on the bottom and conceal a big lump of steel inside for stability. Top book remains loose so that it can be changed to suit tastes.
Also, for all we can see there could be a steel bracket or other hidden fixings between the upright and the top of the table in the first image. The angle of the photograph hides it all and in daily use you’d never see them unless you like to lie on the floor often.
TheBrickFree MemberPosted 2 years agoL-plan was always too strong for me but if you need strength worth a go.
WorldClassAccidentFree MemberPosted 2 years agoI have started the process.
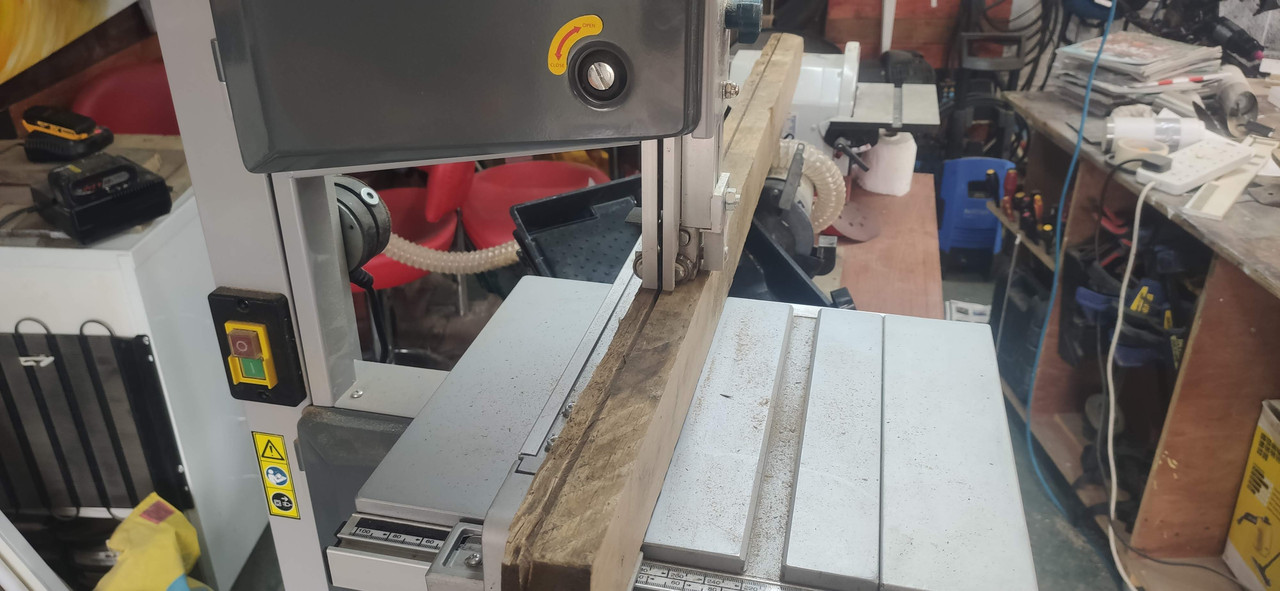
1) Get some wood and hope you can slice it with a chreap crap band saw
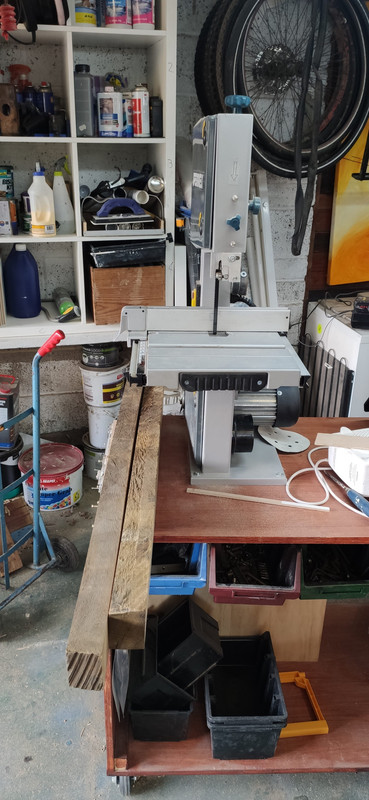
2) Okay, that wasn’t up to the job
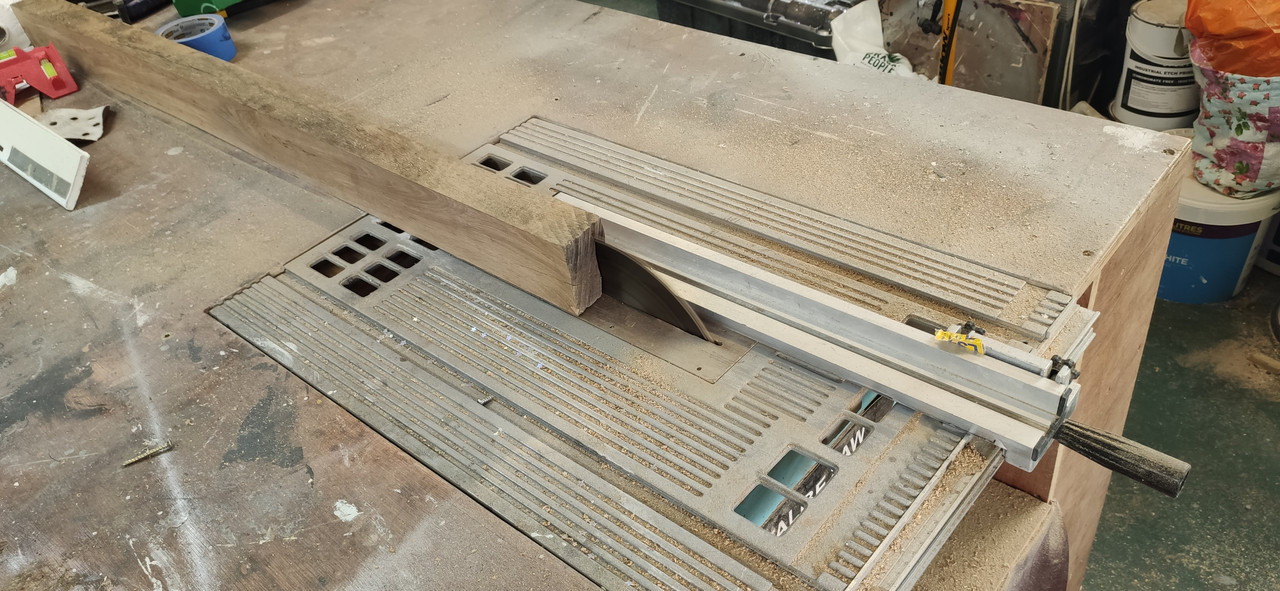
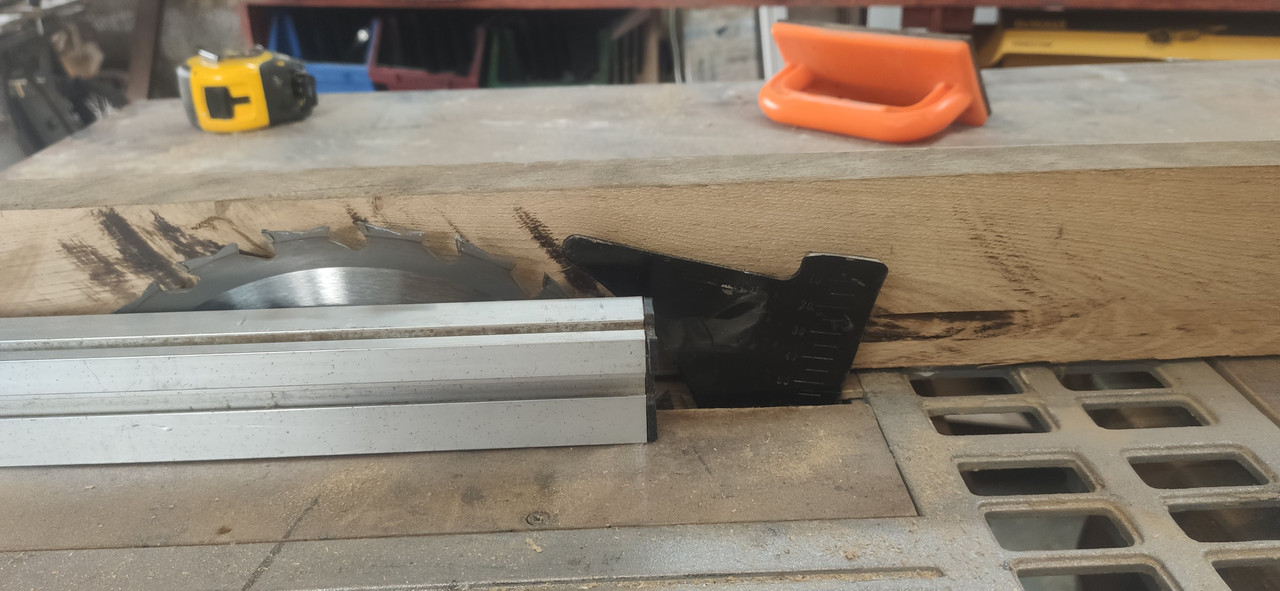
3) The table saw looks almost big enough for this

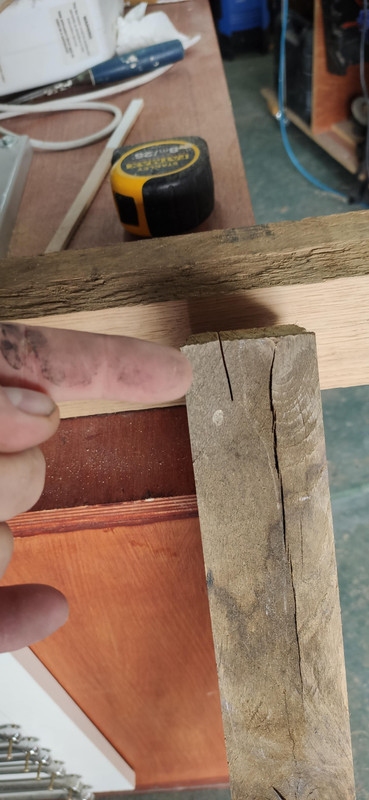
4) It took about 3 blade heith increases to get here because the wood is harder than the useable cheap pine I use.
5) Hmm, Might need to see if I can reduce the burn but once through the thicknesser plane, no-one should notice. Now just got to do the rest.
 dyna-tiFull MemberPosted 2 years ago
Yikes, no riving knife 😯 Plus too many teeth for ripping. Looks more like you’ve a cross cut blade on there.
Last time sharpened/cleaned ?.
creakingdoorFree MemberPosted 2 years agoYikes, no riving knife
This is WCA we’re dealing with here…😉
goldfish24Full MemberPosted 2 years agoTime to hit pause and sort out your tools before you lose a finger.
First preference for this operation would be the bandsaw. What’s going wrong there? Maybe we can help fix that.
If you’re sticking with table saw:
You need a lower teeth count and sharp blade.
You need a riving knife fitted.
You need the fence fitted the right way up – there’s not enough height in its current setup.
Pushing timber through a blade that’s struggling is how accidents happen. With the correct sharp blade it should glide through (ish).
thestabiliserFree MemberPosted 2 years agoServe you right to lose a few digits with your pro putin cryptofascist coffee table!
pk13Full MemberPosted 2 years ago24 teeth saw blade.
Knife needs to go on the saw I’m a hippocrate on that one but you need it.
Fence needs flipping I assume you have been cutting sheet material?
Cut just under half way flip the wood then do the other if it leaves 5/10mm in the middle get a hand saw then bandsaw the rest.Before you cut all the boards for the top check for grain issues
WorldClassAccidentFree MemberPosted 2 years ago1) Forgot to put the riving knife on after the last stuff I was cutting.
2) Fence set up for the last job – it is slightly bent in one direction so needs plipping end on end and side to side sometimes to get a parallel edge
3) I thought I would try with the blade I had before buying a new one. What do you mean by clean and sharpen 🙂
4) Band saw is an Aldi special. The guide rollers will not stay fixed close to the blade and the blade can’t be tensioned much without falling off the main wheels so regardless of how slowly you move the wood forward, the blade bends to one side or the other, seemingly randomly choosing which directionOne of these for the table saw blade?
https://www.screwfix.com/c/tools/circular-saw-blades/cat5990012#category=cat5990012&bladediameter=250_mm&numberofteeth=24&suitablecuttingapplication=woodI might try the table saw to cut a slot each side and then the band saw to cut the middle bit to reduce the rub/burn.
Thanks all – more updates later this afternoon assuming I can still get a signal in A&E
mertFree MemberPosted 2 years agoOoooh, a neighbour has a similar table to that, small base and two opposing diagonal legs on opposite sides of the base.
And as above, the base is basically a block of steel with a piece of wood over it. Weighs a tonne.
Not sure how the legs are attached though.
kayak23Full MemberPosted 2 years agoForgot to put the riving knife on after the last stuff I was cutting.
There shouldn’t be a need to remove it(depending on design) really.
Never a good idea to use a saw without one, whatever type of cut you’re doing.I have mine set to just a fraction under the top of the cut. This means that on the rare times that I do use the saw like a ‘Murrcan, with a crosscut sled, it still can stay where it is. It’s just the crown guard that’s removed.
Still don’t like doing it at all though. Most times there is a better way.
WorldClassAccidentFree MemberPosted 2 years ago[shame face] I was cutting a square hole in the middle of a sheet of ply by dropping the sheet down on top of the saw and then moving it to cut each side of the inner square. Hey, it worked and was a quick solution[/shame face]
pk13Full MemberPosted 2 years agoGet the last one you linked it’s thicker will help with heat build up as well get some trend eco cleaning fluid for your tct blades cannot recommend it enough. https://www.amazon.co.uk/Trend-CLEAN-500-Cleaner-532ml/dp/B003OC35MQ/ref=pd_aw_sbs_sccl_1/257-4906539-2473605?pd_rd_w=Fy0xe&pf_rd_p=2a4904d5-64bb-4199-9215-43a7080cc9a3&pf_rd_r=0Z3GDYN829PHKZWK4XC7&pd_rd_r=417f584a-5db8-4033-8fc7-6be5797ab81e&pd_rd_wg=0YrTt&pd_rd_i=B003OC35MQ&psc=1#
kayak23Full MemberPosted 2 years ago[shame face] I was cutting a square hole in the middle of a sheet of ply
Ah right.
Makes sense.
That’s the sort of cut where track saws are the shiz.Well, we all make our own choices innit.
I’ve done my share of sketchy manoeuvres certainly.I mortised through my left index finger tendon taking shortcuts when I was a yoot for example. 😳
WorldClassAccidentFree MemberPosted 2 years agoI mortised through my left index finger tendon taking shortcuts when I was a yoot for example.
That would be as dumb as realising that a bowed piece of wood on a table saw won’t get sawn through at the top of the bow so pushing it down onto the blade. Old injury, not today
 goldfish24Full MemberPosted 2 years ago
That new 24 tooth blade should be a revelation!
Regarding the bandsaw
the blade can’t be tensioned much without falling off the main wheels
Sounds like the wheels need aligning. There’s videos on YouTube.
WorldClassAccidentFree MemberPosted 2 years agoOkay you “health and safety gone mad” lot, what now?
1) I used a tape meaure rather than guessing the blade size
2) I got the 24 tooth blade as recommended
3) I refitted the riving knife that came with the table
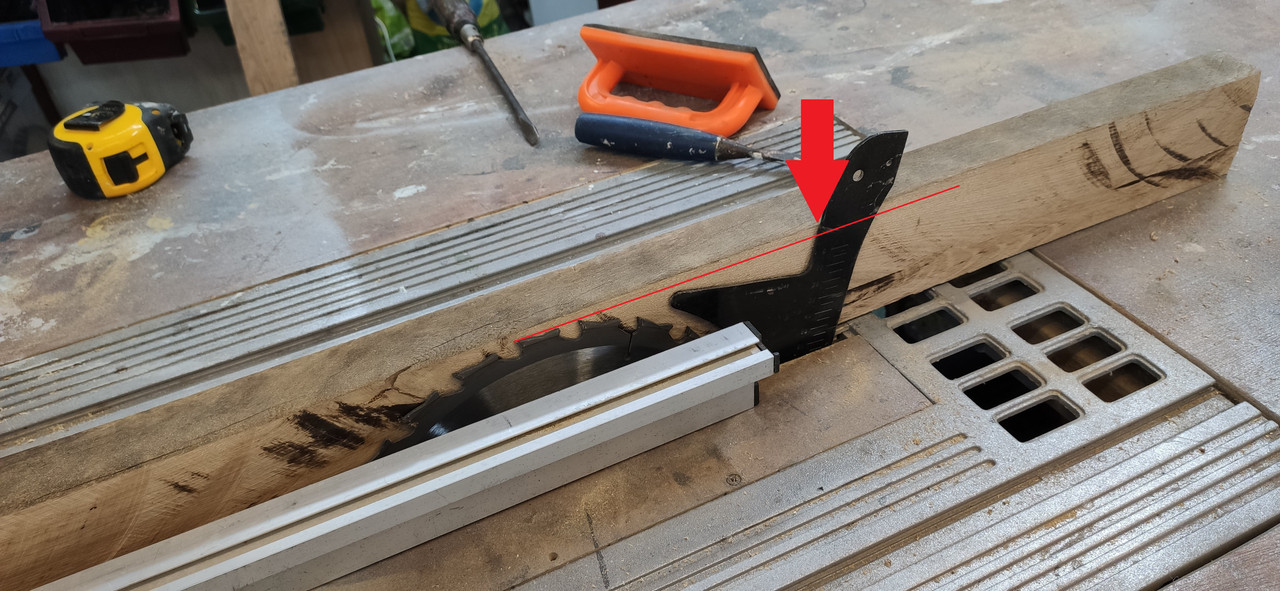
4) I even got a bloody pusher thing that has been kicking around the tool shelves since someone bought me it from a Christmas pressieObviously I can’t actually do anything now because the blade doesn’t cut all the way through the wood so it just hits the riving knife and stops so what do I do?
My first thought is just to grab the angle grinder and cut the top off the riving knnife but I am guessing it was there for some reason so what do you suggest?
Sounds like the wheels need aligning. There’s videos on YouTube – Quite possibly. One to look at for the weekend I think.
BigJohnFull MemberPosted 2 years agoJoints on coffee table – I always use a rolling mat.
I also bought an Axminster blade for my Aldi bandsaw. The widest one that fits and now I get straight non-wandering cuts.
kayak23Full MemberPosted 2 years agoThe sticky up bit on that riving knife will be to fit a crown guard to.
There isn’t much you can do with that type of design really.
If you butcher it, you won’t be able to fit a crown guard which you ought to have on there 99.9% of the time.
Unfortunately it’s that sort of knife design that prompts folks to remove it completely and then have accidents.There are designs (like the one that is fitted to the Hammer table saw in our workshop) that allow the fitting of crown guards AND are still in line with the top of the blade.
You don’t have that.There are two main adjustments on a bandsaw. Tension and tracking.
Tension moves the (usually top) wheel up or down to put tension or slack on the blade.
Tracking tilts the top wheel fore and aft, so that you can get the blade running on both wheels without falling off.
It’s very like a belt sander if you’ve ever used one where the belt goes off the rollers one way, but you make an adjustment to centre it.
Same sort of thing.It’s very likely that the blade you got with the bandsaw will be garbage.
It’s important to set the guides so they are Rizla paper close on both sides, just behind the gullet of the teeth, and the ‘Thrust wheel’ behind the blade.
The thrust wheel (sometimes a solid block or rod of metal, sometimes a bearing) should be Rizla close when running, but the blade will touch it when under load.To be honest, you’re probably asking a bit much of an Aldi bandsaw. It’ll have a maximum blade size that probably won’t be wide enough to cut thick hardwood like that.
If you’ve tried to cut it with a small blade, then wandering of the cut is fairly inevitable I’m afraid.Try a company called Tuffsaws..I just got some blades off them that seem really good.
They’re very helpful if you explain your issues and what you’re trying to cut.
pk13Full MemberPosted 2 years agoOrder a spare knife and butcher that one they are a terrible design and aways makes people take the crown off..
You can take the knife off and place a wedge into the timber cut to stop it binding BUT that’s a two person job and they both have know what they are doing tbh.
Do you have a skill saw?
Mdf straight edge with blocks the same hight as the timber then cut in 20mm passes lowering the blade.Also you could make jig to cover the saw blade then push the timber through the table saw cover the blade in a box to stop you getting pulled into the blade.
dyna-tiFull MemberPosted 2 years agoMy current home saw.
Not relevant I know, but for showing off purposes 😀
 WorldClassAccidentFree MemberPosted 2 years ago
There is no ‘crown guard’ and never has been since I have had the saw so I couldn’t fit it is I could. The knife is just a piece of thin painted steel held on place with a single Allen bolt just behind the blade inside the saw ‘box’.
I assume trimming the knife just below the red line would allow me to use the saw and still get some of the safety benefits. Please let me know if this isn’t the case as it is getting cut in the morning.
The band saw is simple enough and I understand the basic principles on getting the wheel alignment right and then using the tension to pull the blade into place. The trouble is that all of the adjustment bolts etc are so coarse and clunky it is almost impossible to set up correctly. The back roller is held in place with a single 10mm nut but for the top runner it is fixed to the saw chassis and can be rocked backwards and forwards about 1-2cm with easy so offers no real use.
Short video showing the (lack of) rigidity and alignment : https://www.youtube.com/watch?v=o4MAhTcmg_g&ab_channel=ClassicCarClipsIt currently works okay on 6mm ply which I was playing with but the oak was more of a challenge. Once I sell some more paintings or sculptures I will possibly use the money to buy a proper saw. I have promised myself to fund my hobbies from what I sell for a while otherwise I could get silly with too many toys and not enough time to use them.
dyna-tiFull MemberPosted 2 years agoThe riving knife should be a smidgen thinner than the blade kerf.
Make a short cut, measure it then measure the thickness of the knife. Other than that it could just be a case of shimming the knife so it sits directly int he middle of the blade.
WorldClassAccidentFree MemberPosted 2 years agodyna-ti – The knife I have is the right width and place, just too tall when I don’t cut right through the wood. In the photo above the red line shows the top of the cut so the top of the wood is not touched and when that hits the top of the knife I obviously cannot cut anymore. The plan is just to cut the top off the existing knife and hope all is well.
dyna-tiFull MemberPosted 2 years agoRighto.
That would be normal. My knife sits about 8mm below the top of the saw,which is fine for most tenons. Could be a little lower ideally.
It should though sit between 3-8mm clearance at the back between the saw blade and the leading edge of the knife. You dont want too much or the timber has room to close before the knife does its job. But height wise, 8-10mm is good
pk13Full MemberPosted 2 years agoIf you don’t have the crown gaurd just cut it in half. BUT usual warning applys
goldfish24Full MemberPosted 2 years agoSounds like the wheels need aligning. There’s videos on YouTube – Quite possibly. One to look at for the weekend I think.
Yeah I nearly said earlier, it’s one of those jobs where you’ve got plenty of hours spare and plenty of patience 🙂
If you don’t have the crown gaurd just cut it in half.
Yeah I’m thinking this. Fetch the grinder.
But, of course,

Slowly, slowly, WCA, we’re gonna reform you into a health and safety guru!!!
WorldClassAccidentFree MemberPosted 2 years agoSlowly, slowly, WCA, we’re gonna reform you into a health and safety guru!!!
I already wear safety flip flips, what more do you want! 🙂
More photos to follow
WorldClassAccidentFree MemberPosted 2 years agoModify the Riving knife so I can actually use it
Even with most of the cut done and a new blade from Axminster the crap band saw struggles to cut with the saw slowing right down if I move with any speed. I can see that being ignored for anything thinker than ply in the future
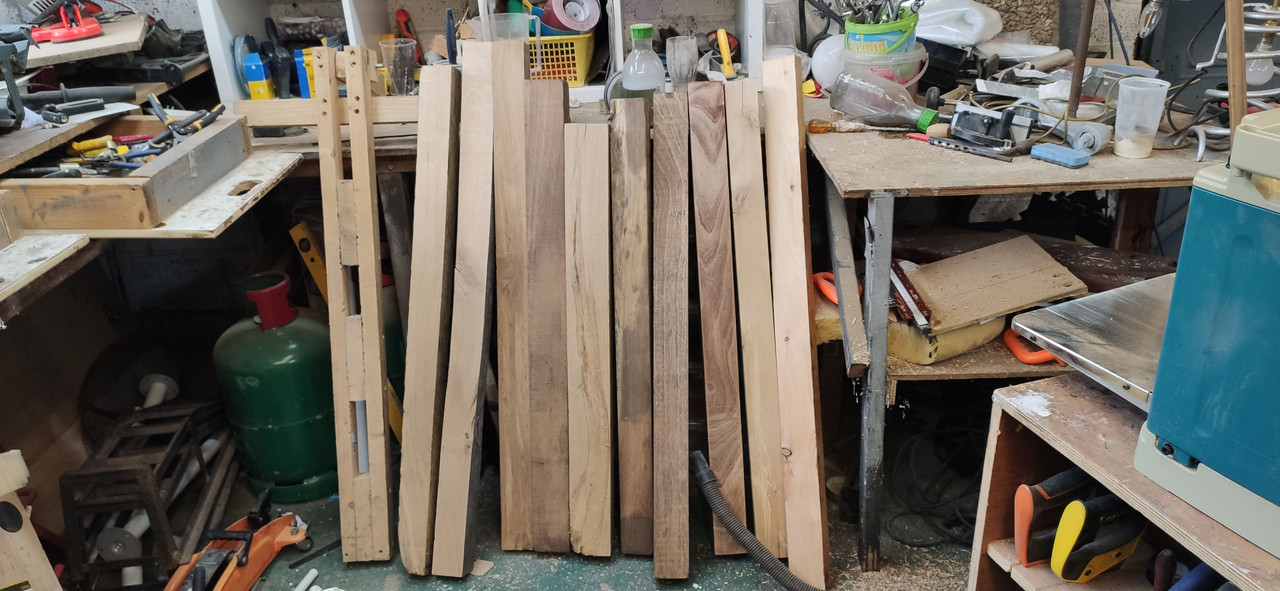
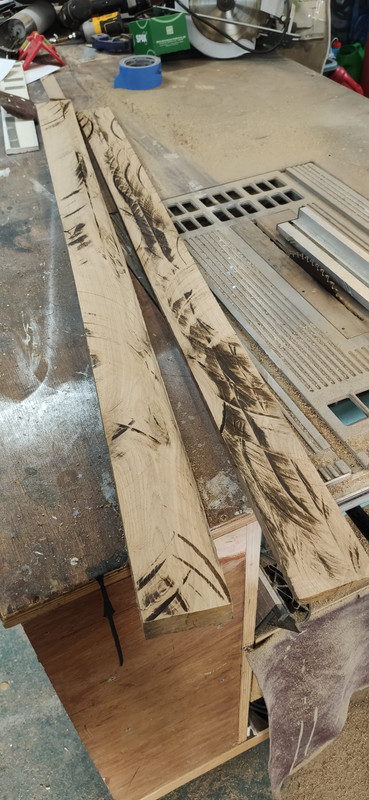
Anyway, here are the rough planks with burn marks and saw circles galore
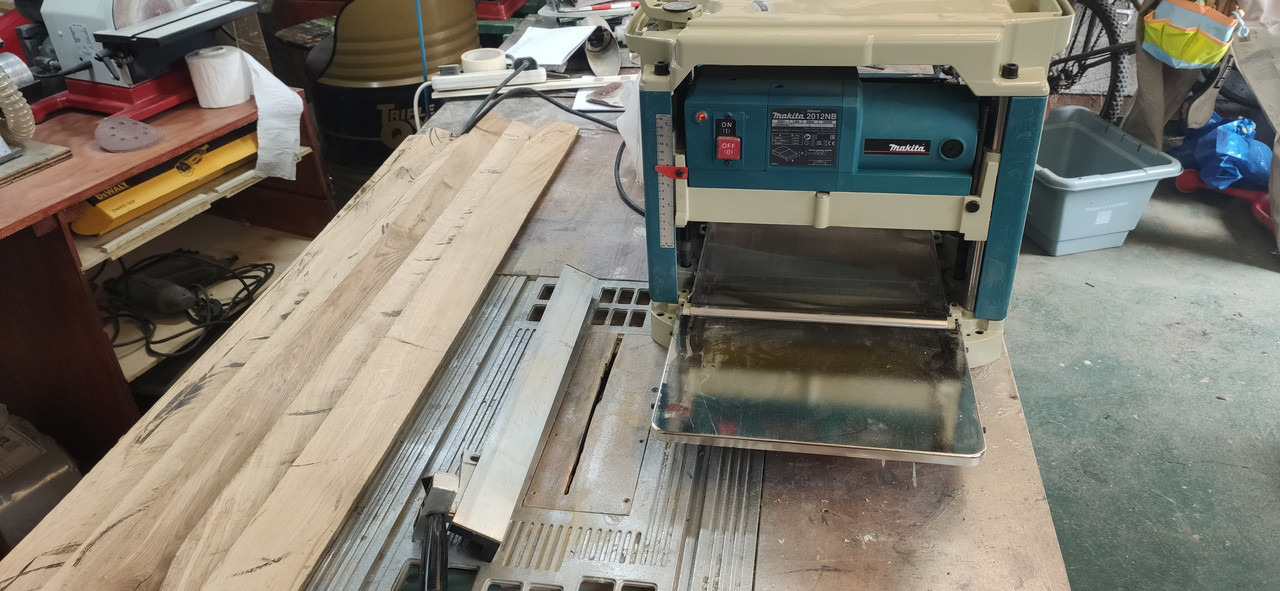
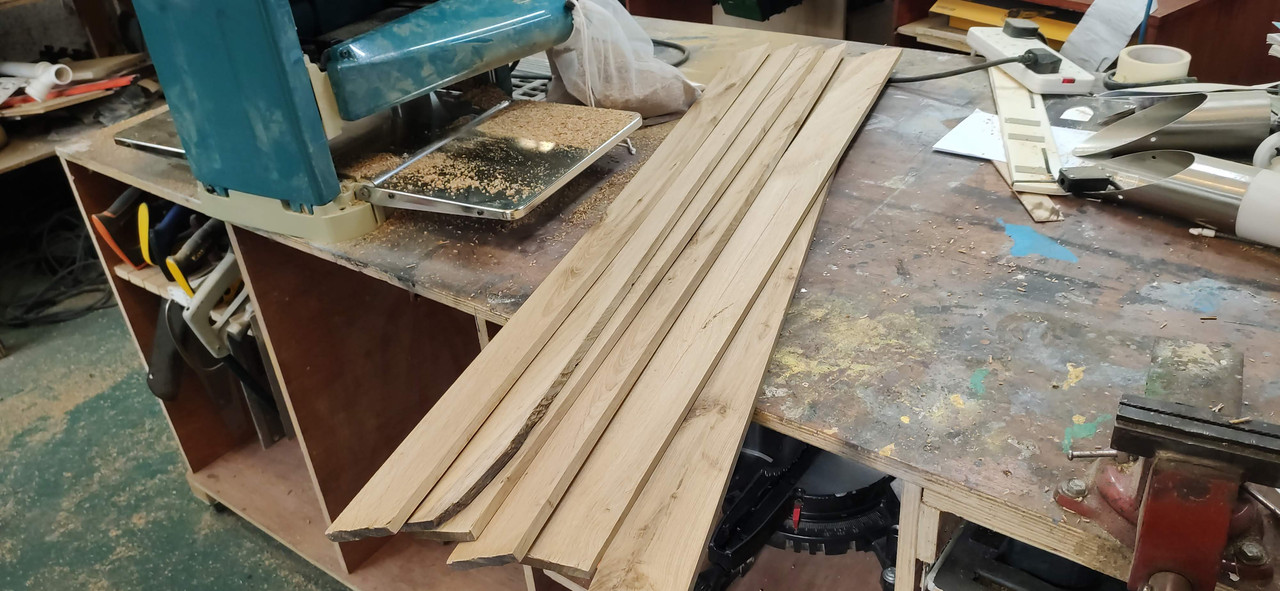
And here they are, much wood shaving later, with clean sides and faces. Still need the final cut but I think I will need to cut a few more planks to make the table size I have just been told we now want. This will also alter the design ideas.
 dyna-tiFull MemberPosted 2 years ago
Whats the tooth count on the bandsaw blade ?. I use 3tpi which is really good for ripping, and the last ripping job i did on it was 160mm maple, which it handled with ease.
I think the motors on my small 10″ bandsaw(record power) will not be dissimilar to yours, so maybe just keep the feed speed down , afterall its not a sawbench so feed speeds wont be fast as that.
The finish you’ve got on the cut looks pretty clean, and certainly better than the horrific burn marks from your sawbench.
Next wee job for you to make yourself is a drum sander. Got a lathe ?. Plenty of easy to construct drum sanders on YT.
The topic ‘Coffee table and troubles with joints’ is closed to new replies.