Forum menu
OK folks,
I know there are a few stove aficionados on here, so I need a bit of (hopefully straightforward) advice.
I had a stove put in my living room about 10 days ago and it's just about ready to decorate around it (plaster just about fully dry). The inside of the fireplace is built up from brick and heat-resistant fibreboard and the clearance is 4" from the back and 7" from the sides of the stove. What paint should I use for the fibreboard? It's gonna get pretty hot in there.
Thanks,
SC
We've got tighter clearances than that and have just used regular paint. I had the same concerns, but it's been fine with the three installations I've done.
The single skinned section of my flu is approx 50 mm from the pink (heat resistant) drywall. We've had bog standard coloured emulsion on there for a year & there's no sign that it's deteriorating or discolouring.
I would think those clearances should be ok, it will depend on how much the stove is used and how light the paint you plan to usee as to how quickly the paint will discolour.
I have much tighter tolerances than you so am looking to tile inside and up the outside edges of my surround with something like I have hopefully linked to below.
Beige Tumbled Marble 5cm by 5cm mosaics
Cheers guys.
I'm planning to paint it white, so discolouration may be an issue with bog-standard emulsion, no?
[img]  [/img]
stuart
plain emulsion there and zero discolouration. Singleskin flue going up there only an inch or so off the wall to the flue ....
Cool.
I'll give it a bash with some kitchen & bathroom paint I found in the shed.
Doesnt kitchen and bathroom paint have waterproofing agents? Plain emulsion sounds a better bet if it's going to get warm.
Out of interest, has anybody here changed from using an open fire to installing a woodburner in its place?
I want to know if there is a significant increase in heat output to the room.
Out of interest, has anybody here changed from using an open fire to installing a woodburner in its place?
I want to know if there is a significant increase in heat output to the room.
I fitted this stove in place of an open fire, it was the best thin I have ever done. The heat output is massive and the reduction in our consumption of wood has been equally massive.
[img]  [/img]
Hi,
Agree with others with plain emulsion, just ensure you use matt and not silk. Everything I have been told says that the matt will sink into the plaster and not sit on the top like the silk!
Cheers McMoonter! If I needed convincing, you're the man to do it.
Can't believe you'd ever run out of wood seeing pics of your log stores on other threads 😉
My stove bloke said to use matt emulsion. That was on lime render. It looks much the same after two winters' use.
OK - matt emulsion it shall be.
Can't find any in the shed though...
trail rat
Just in the middle of having a floating Oak beam fitted above my log stove, did you have a metal heat deflector fitted below the beam?
Been told by a HETAS fitter I need a deflector plate fitted 15mm below my beam with my build?
[img]  [/img]
OP, we used standard emulsion on our previous build fireboards, no issues.
nope and more so its mounted much further away than the previous instalation which was fine for 50 years ...
"Before" shot:
[url= http://farm9.staticflickr.com/8299/7809727422_e413033d21.jp g" target="_blank">
[url= http://www.flickr.com/photos/stuartie_c/7809727422/ ]DSC03273[/url] by [url= http://www.flickr.com/people/stuartie_c/ ]stuartie_c[/url], on Flickr
You'll need more logs than that, Mr C!.
I've just got standard emulsion as well, although its really dark graphite grey, means the cream burner stands out well against the dark background. It's been fine. It'll take you a while to get used to the burner, I remember someone on here saying it takes about 6 months to get to really know what you are doing, and I though 'pish!' - pretty decent advice though!.
I used to light it after dinner, about six, but realised after a while that it was really kicking out full whack when I was getting ready for Bedfordshire. Pretty pointless having the room heated when your in bed?. I now light it as soon as I get in from work, at 3 on early shift, or when I get up off nightshift, and put the last log on about 9, then just let the heat from the cast radiate out and do its job. Even at that, the thing is still warm when I get up for work in the morning!.
Best money you'll ever spend. Apart from your bike, obviously....
Feefoo - easiest/cheapest way to replace an open fire with a stove is one of [url= http://www.aarrowfires.com/our-range-of-stoves/ecoburn-range/ecoburn-inset.html ]these, Aarrow Eco 5[/url]. Stovax also do one called the Milner.
I fit loads of them.
Expect twice the heat of the fire using a third of the fuel.
You'll need more logs than that, Mr C!.
It's OK - I've got a cunning plan to steal them from McMoonter on my way home from work on the dark winter evenings 😉
I've got a cunning plan to steal them from McMoonter on my way home from work on the dark winter evenings
😯
Slight hijack.
Trail_rat, did you use 16 or 12mm steel rod and resin for fixing?
Thinking of doing something similar.
Seem to remember that the beam has to be minimum of 18" from stove.
woohooo.. stove thread.
Summer must be coming to an end.
stuartie c - we used normal paint, however having stacked logs alongside the woodburner against the inside wall, it's made the (pale biscuit colour) paint dirty. I'm forever cleaning the front (outside), but gave up cleaning the inside around the burner. Hope that makes sense.
i used 5 lengths of 14mm threaded bar resined into the oak then bolted to the lintel via steel spreader plates on the inside.
its easy 18inchs from the stove - the underside of the oak gets warm but the top side stays cool.
the original mantle when i moved in was only about 8 inches from the stove.
trail_rat just sent you a jumbled mess of a text did you get it?
i got your earlier one about katies boiler.
i dont have wireless back at the flat so wont get imessages here till i go back to the office tomorrow.
[img] 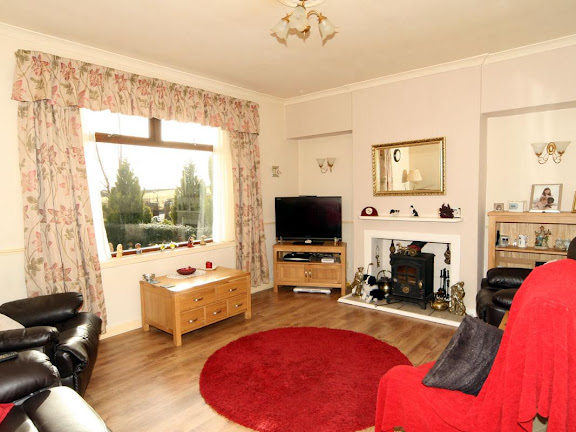 [/img]
how the previous owners had it ..... lots of nasty gloss white mdf woodwork :S