get yourself some eberspacher type fuel line for the heater - the green stuff you have can perish quickly outside. the hose from teh pump to the heater needs to be the same. they are sensitive to fuel delivery.
the fuel pump also should be mounted with the outlet to the heater upwards at 45degrees.
my pump electrics are all exposed under a old VW van driven in teh rain for a year and a bit and are all fine (unlike the crappy fuel hose). i did wrap a bit more electric tape over them but nothing bonkers.
Hmm. I read somewhere else that the fuel pump should point down to the heater which is why I mounted it like that. Any reason you say up? I can switch it over easily enough or even have it horizontal or vertical. Just need to know which is best and why.
I will probably use some old car fuel pipe when I dig the box of bits out for the new car build. That is a braided rubber hose designed for engine bays.
Probably total overkill for this but I have some and after some of the earlier panic over a 12v electrical connector and en exhaust pipe venting below roof height I would hate to upset the H&S gang.
My 2nd and 3rd time wheel building. Been waiting for two years to rebuild according to when I posted this thread. Not yet ready to build a wheel without following Ali Clarksons wheel lacing and tensioning videos yet, they're excellent.
Have replaced the straightpull hubs with 2nd hand Hope Pro 2 Evo hubs, and spokes are ACI Alpina DB with brass nipples (avoiding aluminium since they corroded and broke).


Just wow - that table!!! Good effort!
Chapeau
Lovely that table
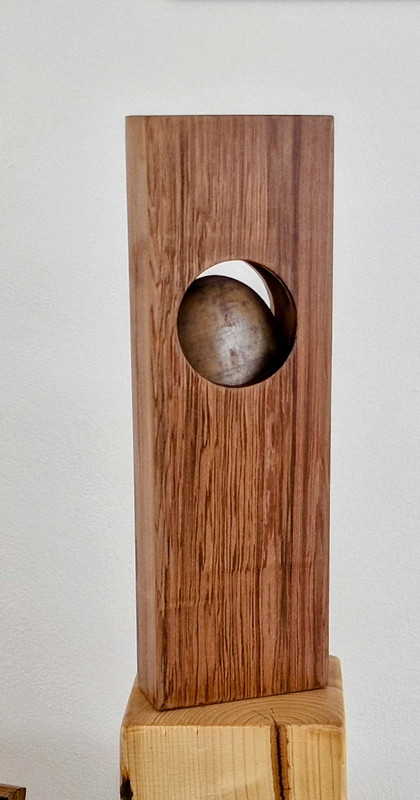
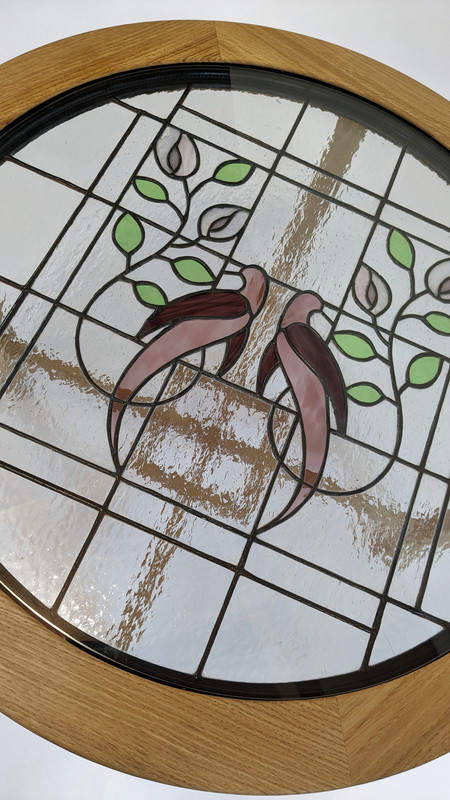
Can anyone else see a surprised looking face in the middle on that?
It is meant to be 'A cold, hard stone' but I might have to post if on the "Agh, my eye" thread now 🙂
@kayak23 That table is amazing. I've only used oak twice and found it so sensitive to conditions. How on earth do you ensure it doesn't split and crack into pieces after being installed?
used oak twice and found it so sensitive to conditions. How on earth do you ensure it doesn’t split and crack into pieces after being installed?
It's a natural material so there's always a chance things can go wrong. However, all you can do is to give it the best shot by selecting decent material, well-seasoned, in a stable environment and built following the principles of working with wood since forever. It'll still do whatever it wants though. 🙂
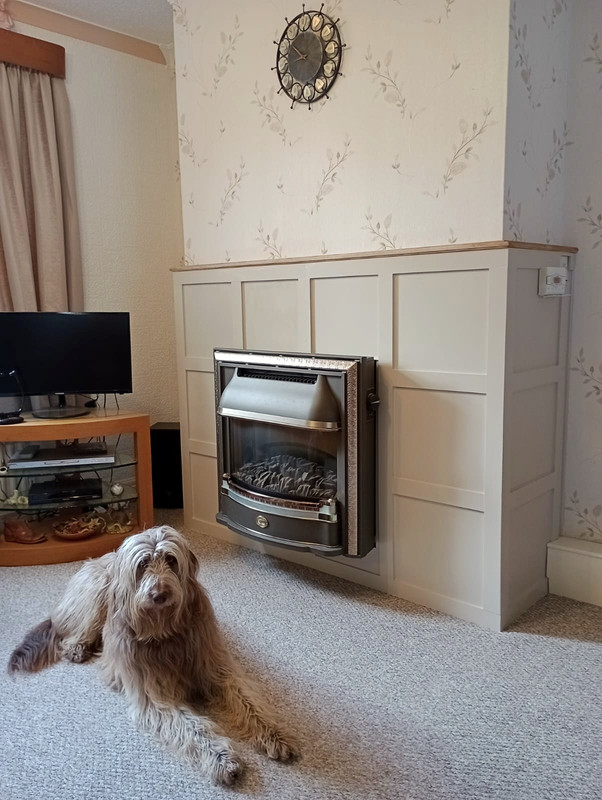
Did a little wall panelling job for the MIL up in Manchester.
Really hard to get anything done when someone insists you have a biscuit, or a tea, or a sandwich every five minutes 😂
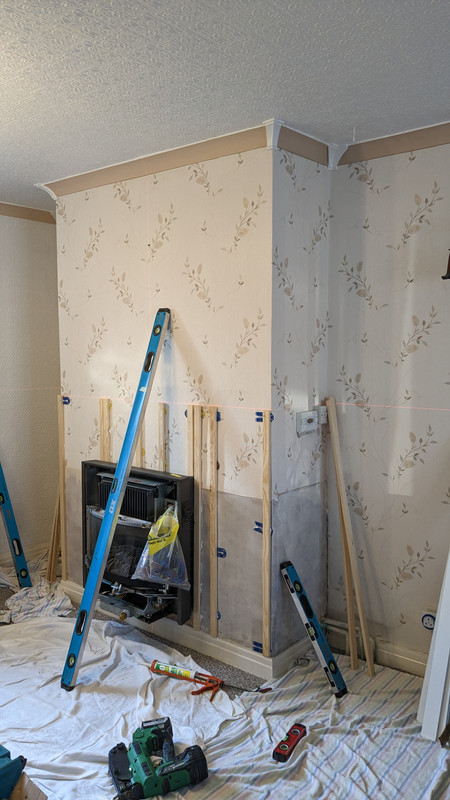
Harold was a great help.
I didn't pre-make the oak trim on top wide enough at the workshop so had to go to B&Q in Ashton.
I almost cried when I had to pay £35 for a couple of poxy strips of oak moulding! 😭
I've got shed loads of it in my workshop.
[i]I almost cried when I had to pay £35 for a couple of poxy strips of oak moulding! [/i]
I remember when I was building the garden cabin I needed window surround for 8 1m square windows. I thought I would just buy some D profile wood, cut in half lengthways and put one bit in the inside of the glass and the other on the outside. It turned out to be cheaper to buy square cut wood and a router then put the profile on myself. They seem to double the price for any shaping or profiling.
Re-used wood and a group of fish - Old School?
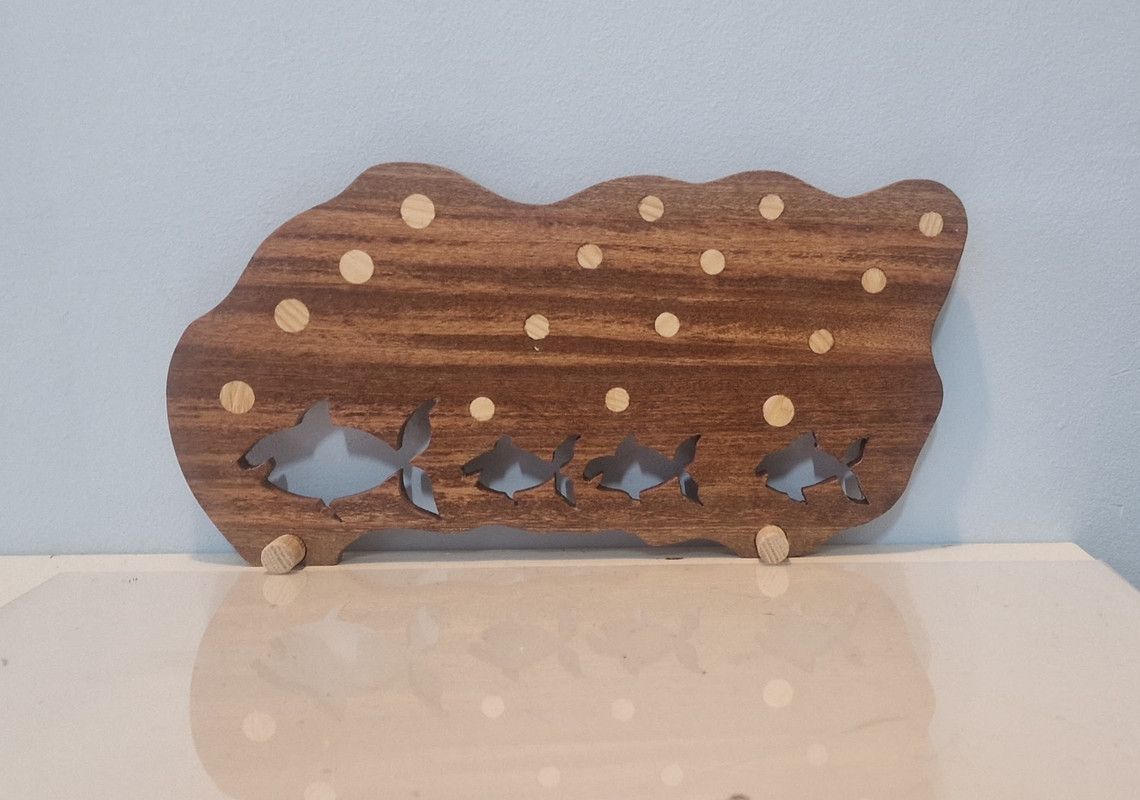
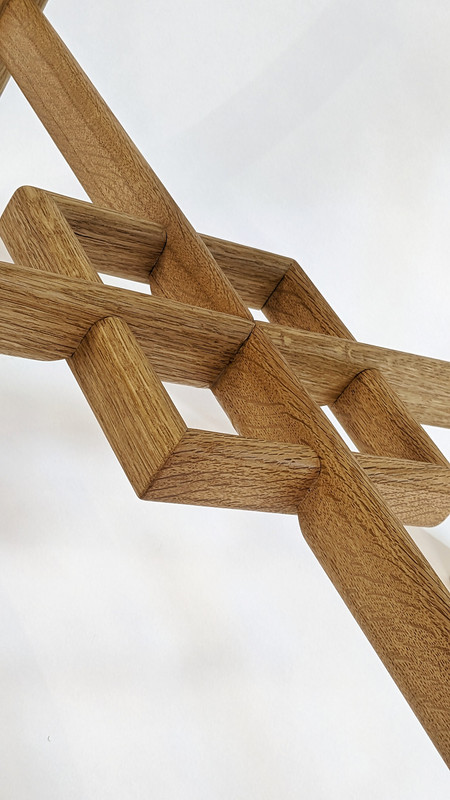
Actually trying to make dowels and holes that fitted neatly.
Very nice WCA. I'd ask what it is/for but in truth nice things that are handmade dont really need a use other than to look at.
WorldClassAccident
Actually trying to make dowels and holes that fitted neatly
Unfortunately and no surprise there are more precise plug/dowel cutters and drill bit sets, but that tend to be pretty damn expensive, like 80 quid a throw expensive.
Make a nice thing for the bog. Or do you have another use.
I normally just sell this stuff as part of NicksArtStuff or at art markets. I am building up a few pieces ready for Hampshire Open Studios in August when I let the adoring public into my house and gallery to admire, and hopefully buy, my art. This gives me something at a lower price point.
In the mean time, like the stone in the block of wood a few posts up, it just looks pretty on the shelf.
Truly Art for Arts sake
Can i ask the paint colour of the wall panelling? Looks superb
But no Stabila level?, tut tut 🙂
My son's chain guide broke so I knocked up a prototype in tinkercad and printed it out to test. Turned out pretty good so I just fitted it to the bike, works a treat.
[url= https://i.postimg.cc/7b5kycQV/IMG-20221017-185423.jp g" target="_blank">https://i.postimg.cc/7b5kycQV/IMG-20221017-185423.jp g"/> [/img][/url]
[url= https://i.postimg.cc/BjgyFcVb/IMG-20221017-192905.jp g" target="_blank">https://i.postimg.cc/BjgyFcVb/IMG-20221017-192905.jp g"/> [/img][/url]
My son’s chain guide broke so I knocked up a prototype in tinkercad
👌👏
Can i ask the paint colour of the wall panelling? Looks superb
But no Stabila level?, tut tut 🙂
It's Farrow and Ball, Elephants wanger or something.
Nobody pays me enough for Stabila levels! 😭
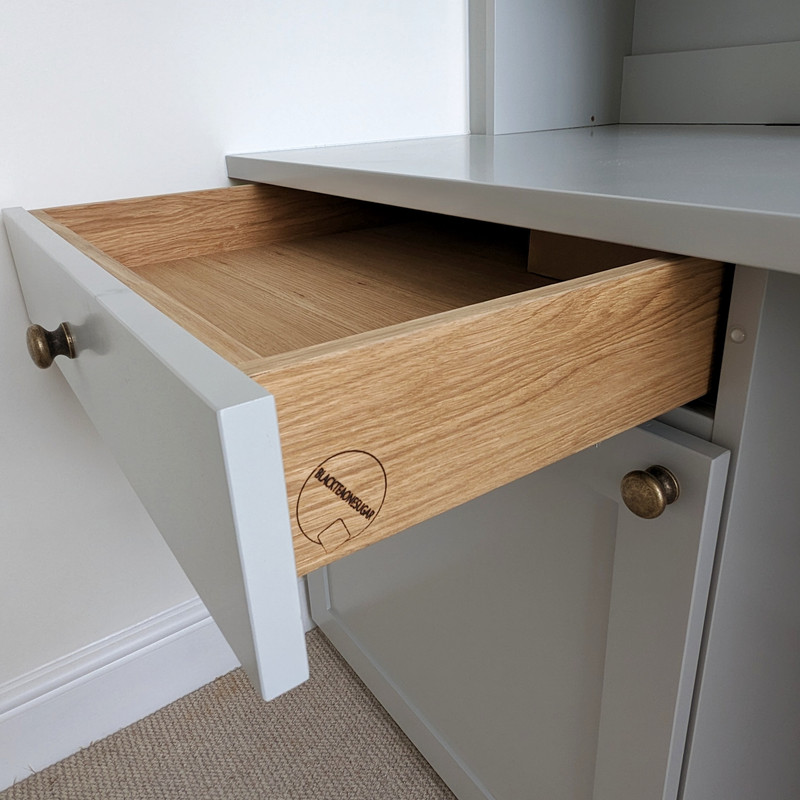
Built in desk with pull out computer tower thingy.
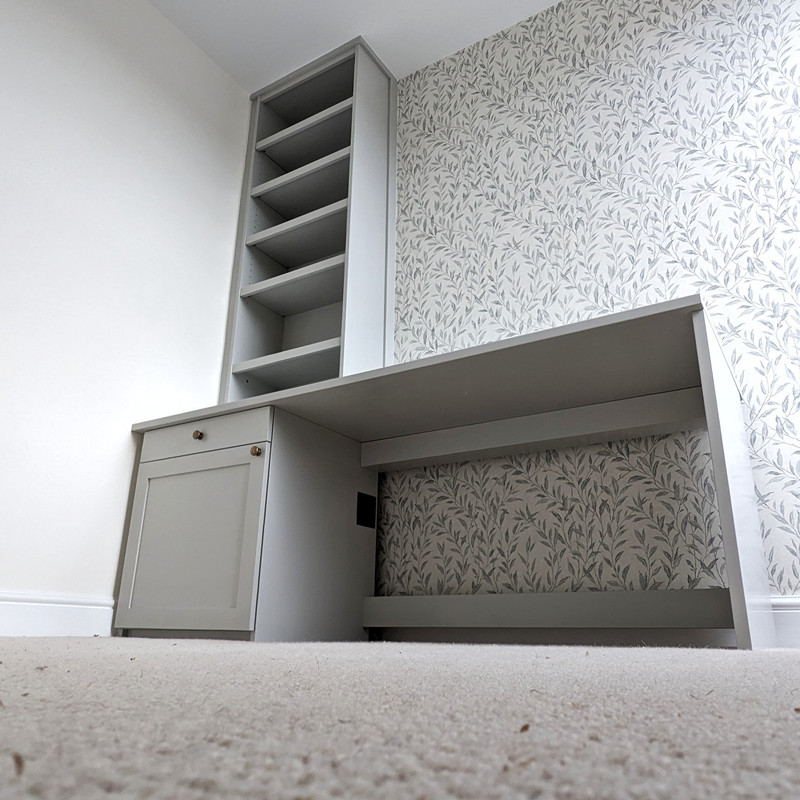

My wife sent the first photo back from her pilates class, apparently this contraption is super useful and also hard to acquire.
[url= https://i.postimg.cc/sGmSmxdY/IMG-20230324-WA0003.jp g" target="_blank">https://i.postimg.cc/sGmSmxdY/IMG-20230324-WA0003.jp g"/> [/img][/url]
A bit of googling told me they go for $200+ with shipping on top...
A couple of springs, two M10 stainless bolts and washers (about $10), plus an off-cut of 18mm ply from my scraps pile, and I made this:
[url= https://i.postimg.cc/ft0B8xBx/IMG-20230408-112723.jp g" target="_blank">https://i.postimg.cc/ft0B8xBx/IMG-20230408-112723.jp g"/> [/img][/url]
For bonus points the curved foot pedal bit is made from an off-cut of a seat tube from when I trimmed one down to fit one of the kids' bikes 😄
Busy couple of months...
[url= https://i.postimg.cc/WpJ9XJXc/PXL-20230404-163738551.jp g" target="_blank">https://i.postimg.cc/WpJ9XJXc/PXL-20230404-163738551.jp g"/> [/img][/url]
[url= https://i.postimg.cc/HxrSGJm5/PXL-20230404-163753355.jp g" target="_blank">https://i.postimg.cc/HxrSGJm5/PXL-20230404-163753355.jp g"/> [/img][/url]
[url= https://i.postimg.cc/1X6JtLf3/PXL-20230404-163828042.jp g" target="_blank">https://i.postimg.cc/1X6JtLf3/PXL-20230404-163828042.jp g"/> [/img][/url]
[url= https://i.postimg.cc/KYq9sP6x/PXL-20230404-163850945.jp g" target="_blank">https://i.postimg.cc/KYq9sP6x/PXL-20230404-163850945.jp g"/> [/img][/url]
@stanstorey stick that up on The Gate Appreciation Society on FB for a bit of free advertising 😉
Crikey, that's some gate! 👏
Blimey - I need a bi-fold gate for my driveway. I wonder how hard it would be to knock up something like that?
Thank you people!
I've just asked to join the gate appreciation society on FB 😄
Busy couple of months
That is amazing craftsmanship, that’s one helluva gate.
Built in desk with pull out computer tower thingy.
another fantastic job.
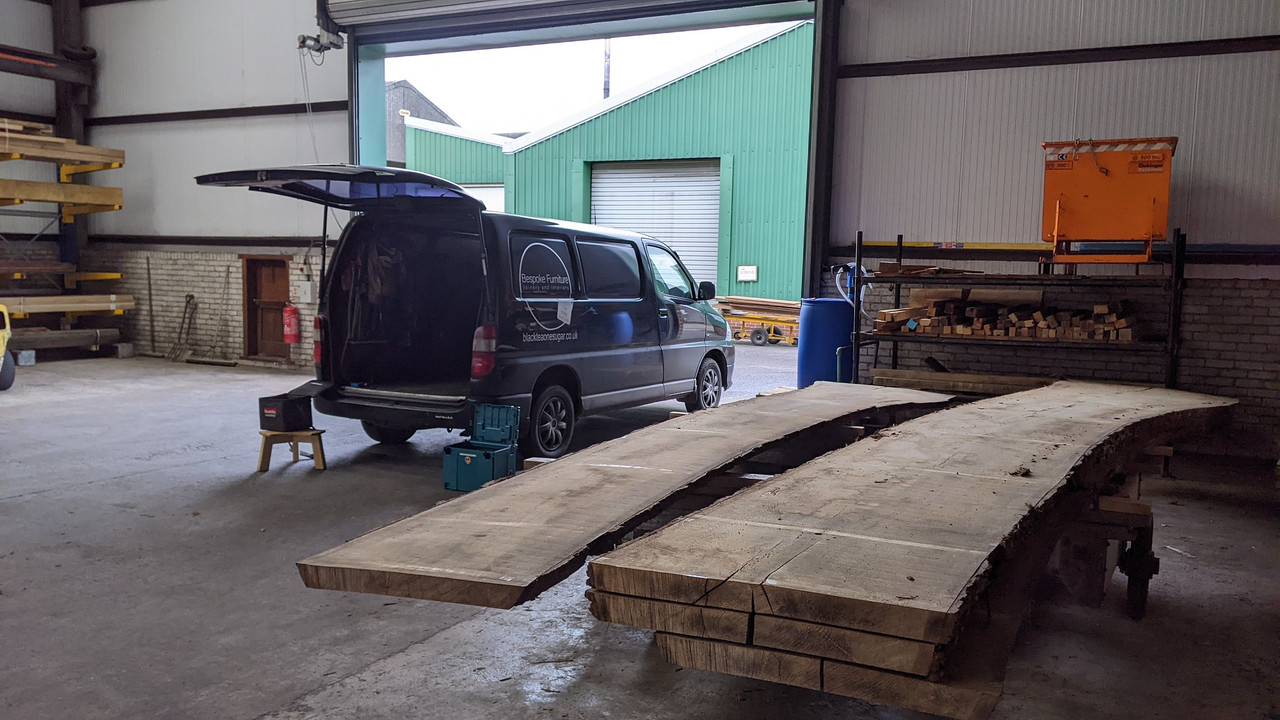
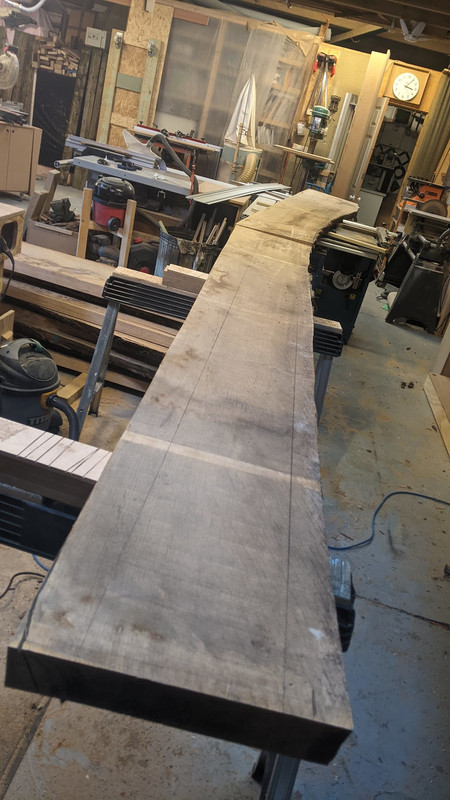
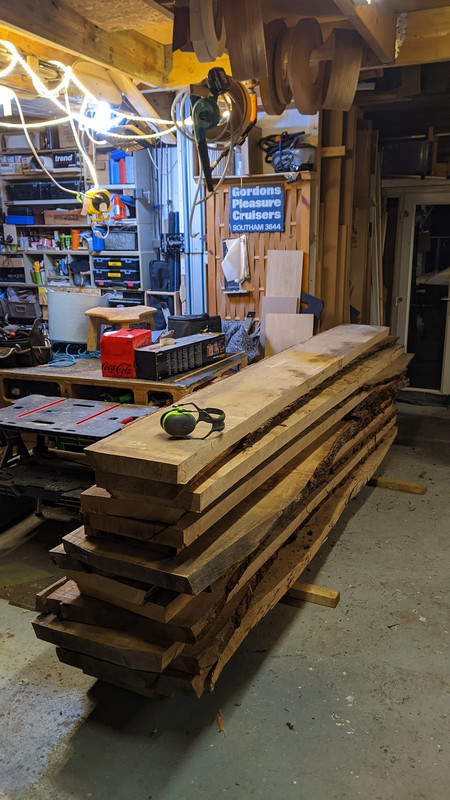
Big conference table in prime Oak and steel.
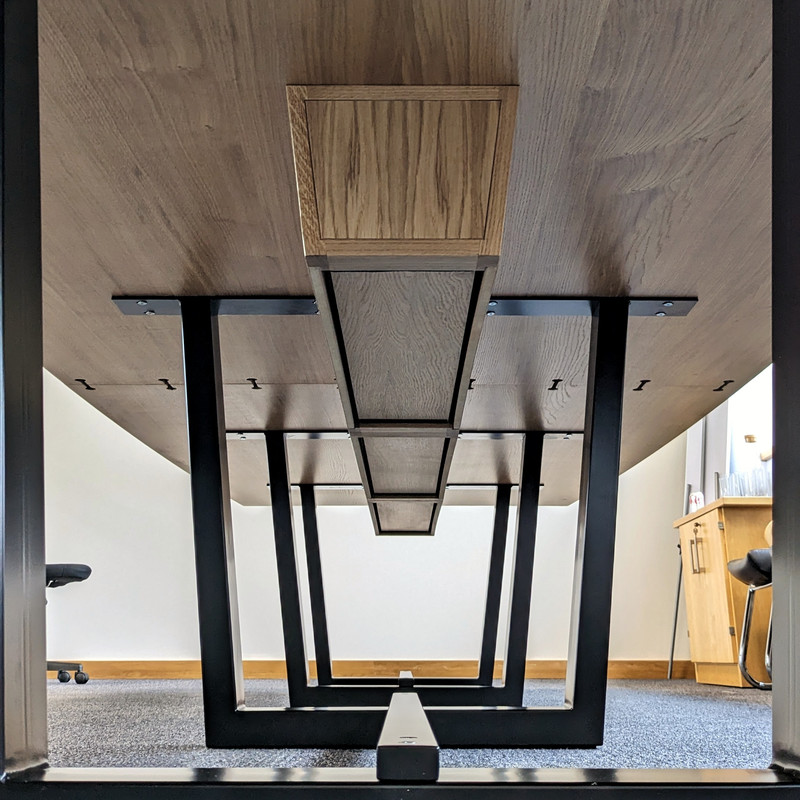
I work on my own so the scale of this was pretty challenging (4800x1600x40mm) and I’m stoked with how it turned out 🙂Made in 4 sections.
That is bloody lovely, so much attention to detail, do like the inlays on the top, or whatever they actually are :). Even the under table “tray” is superb.
You chaps are really bloody talented.
I've been considering today on buying a drum sander. its how much would i use it 😕
A couple of things I finally remembered to take photos of...
An insect hotel that was actually my partner's Christmas present, but only recently put the finishing touches to and got up on the fence. Made mainly from old fence boards that fell victim to Storm Arwen.

A quick beer holder I made as a birthday present for a mate, to make a change from just giving him a carrier bag of beer 😀 Made from bits of our old shed, nailed and glued together. Carved a praying hands emoji with a Dremel... it's an in joke. It might not be pretty, but they say beauty is in the eye of the beer holder... IGMC 😀

Love the hotel and beer holder! 😊👌
Nothing better than a gift made for someone specifically.
It’s a natural material so there’s always a chance things can go wrong. However, all you can do is to give it the best shot by selecting decent material, well-seasoned, in a stable environment and built following the principles of working with wood since forever. It’ll still do whatever it wants though. 🙂
Yes, I very quickly learnt I couldn't shove a half finished project in the shed and expect it to be the same shape weeks later.
I had some oak boards under the sofa "acclimatising" for a while. These were then made into a cabinet for the same room. I had to move it to the shed for a while and the joints moved apart or became misaligned. Then after a week or so back in the house, almost like magic, it was back to how it was before
Thanks kayak - agreed. Wish I had the time to make stuff for myself too! However, having said that, today I made a quick little stand for the rear of my bike out of scrap ply for when I need to store or transport it with both wheels off, but not upside down, which, believe it or not, is sometimes. I had one for my old bike that was shaped to the chainstays, which is quite bike specific... No idea why it hadn't occured to me to use the thru-axle.


Goes neatly with the board I made for the fork to stop the bottom getting scraped up when the front wheel's out (much more common) out of ply, a couple of tee nuts and 15mm Talon clips.
Inspired by spring and a bit of sunshine over the weekend
@thenorthwind Great idea, you could add a chain holder as well by bolting an old ring or part of cassette to the RHS.
wife saw a tiered planter at the local garden centre for £90 ....I had some left over wood from a bench that I made last year.... so I put the spare wood to good use....

Ooh, you're going to be in trouble for letting that chain drag on the rug! Best get that tensioner added quickly.
Looks liek Elephant's breath (farrow and ball)
We got the "same" but in Dulux.. Bleached Lichen...
DrP
Not up to the amazing standards of some of the sublime woodwork in this thread.. but i finally got around to making some work benches for the workshop this weekend.. 🙂


Neat joints them 👍
Agree. Very nice jointage and perfect workshop benches 👌
But why isn't your garage overflowing with all sorts of crap? Eerily tidy.
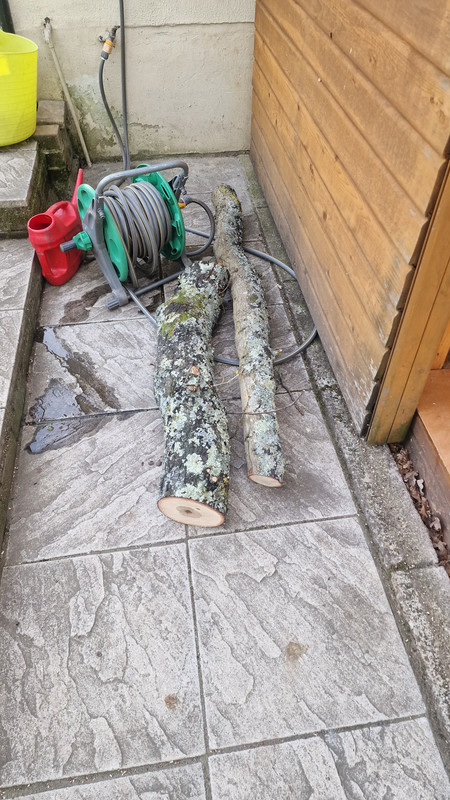
I am excited after the tree surgeons left a load of oak trimmings. This isn't quite finished but...
If you squint a bit, can you see the giraffe too?
But why isn’t your garage overflowing with all sorts of crap? Eerily tidy.
this is very much the just tidied up 37 Tonnes of sawdust and moved them into place calm before the storm.. 😀
all the crap is behind me waiting to be piled on to the benches once theyve had a coat of varnish to protect the top a bit more..
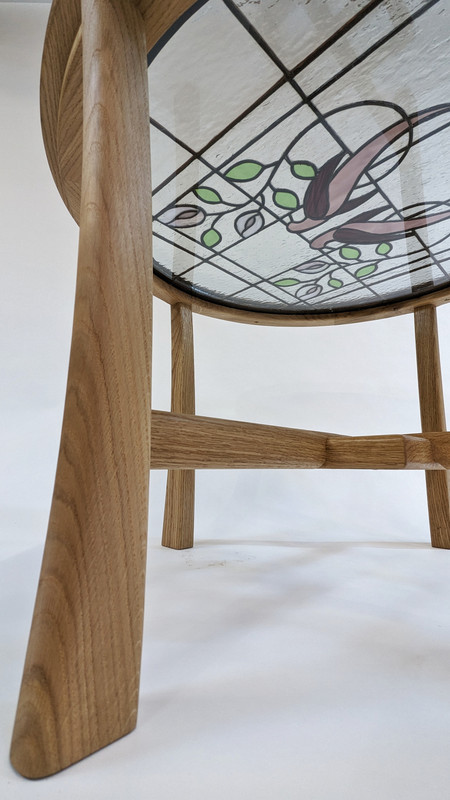
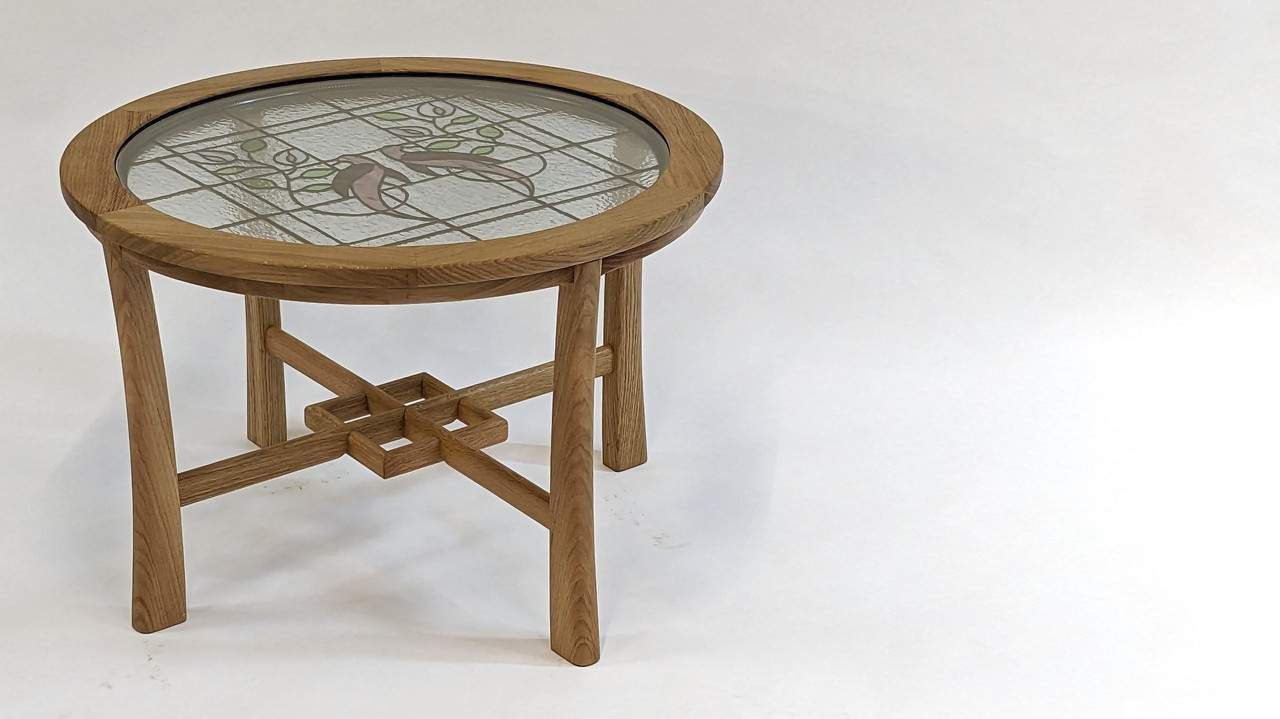
Nice stretcher work.
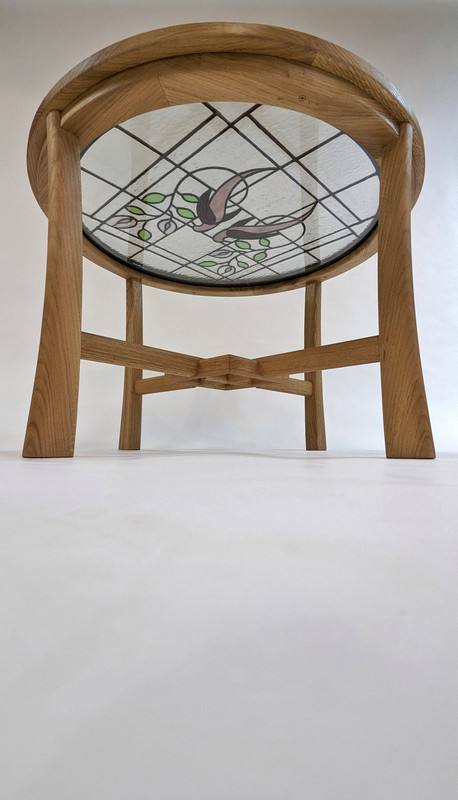
In fact the legs look really nice too, and proportions and in fact overall the design looks really good.
Are the legs screwed onto the rail, with the top section screwed to that ?
Yes that's right. I thought they might some day need to get the glass out so the top ring is screwed from underneath and captures the glass.

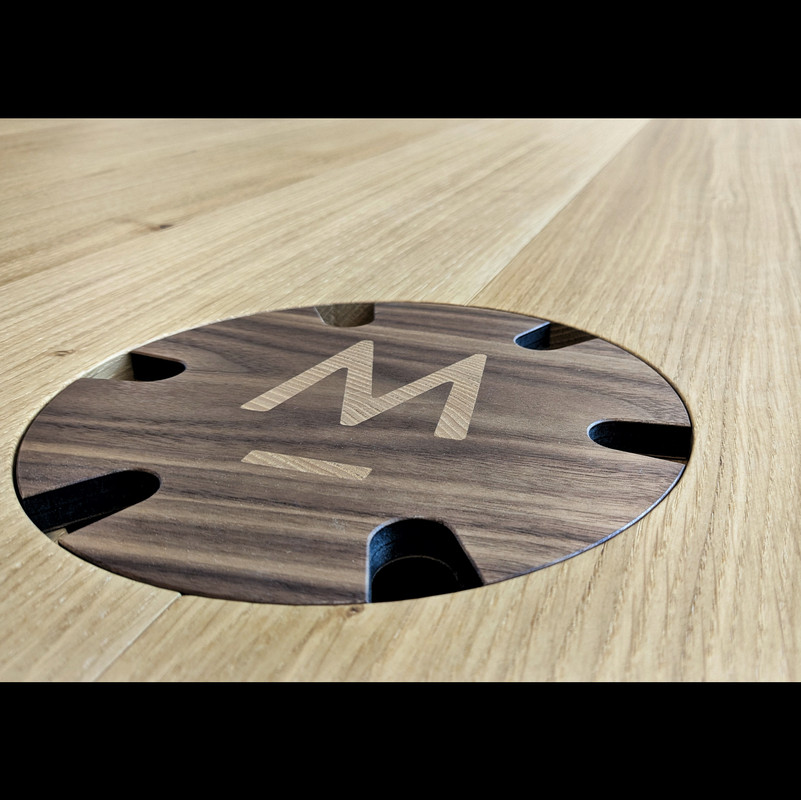
I made some wood be on fire.
I then made it have lettering in it. Then I made bits of it yellow and finally I sealed it all.
For a local African chocolate emporium.
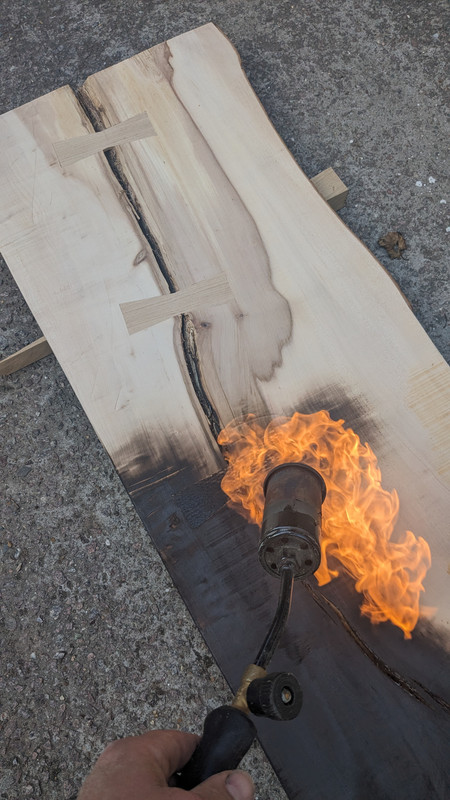
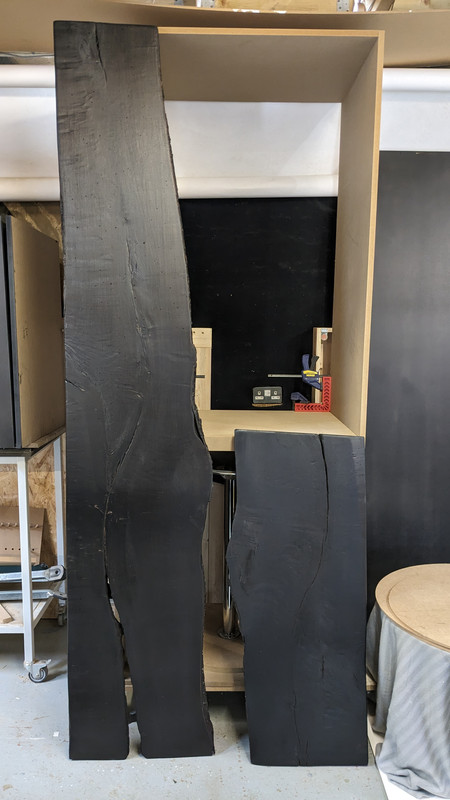
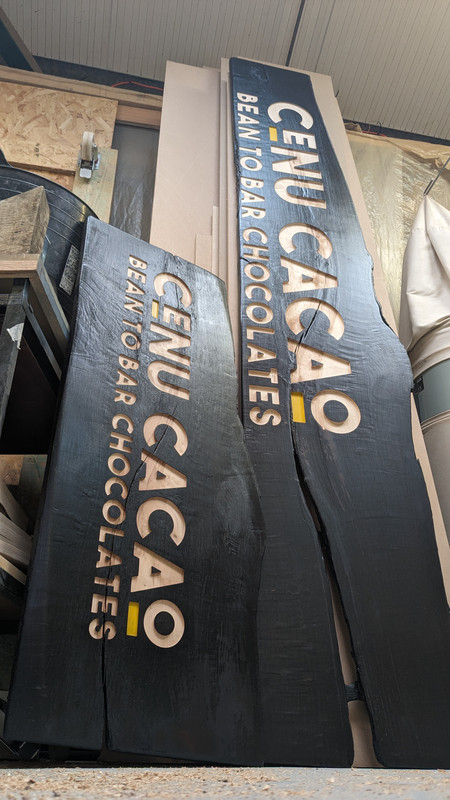
The guy who did the CNC cutting of the logo didn't centre the text, up/down-wise on the bigger board which is so annoying and the very first thing I noticed.
I'm hoping nobody else will notice (better stop pointing it out)
If anyone lives in Solihull, it'll be there 😊
The guy who did the CNC cutting of the logo didn’t centre the text, up/down-wise on the bigger board which is so annoying and the very first thing I noticed.
Hmmmm yeah... Bit of a tricky one because of the board shape, but the whole text would have only been shifted upwards fractionally... Looks like the smaller text was placed (small S roughly middle aligned between edge & crack), and then the larger text (referencing the C) aligned between top edge of that and top edge of board. Was going to say maybe small text placed there to avoid placement over crack... but then looked at smaller board.
Looks like YOU cut the board wrong on that one. I know you didn't but if I got those two, it would be the first thing I would suspect
To be honest kayak I think they look like stamps as in Hessian bag stamps and that the slightly off sensible position is kinda not a big deal.
I think they look great either way.
Looks like YOU cut the board wrong on that one. I know you didn’t but if I got those two, it would be the first thing I would suspect
Thanks Wca. I didn't cut the boards at all, just machined and burnt them.
I can see your frustration with the placement of the writing. Remembering back to my CNC days, it's an awkward shape and a bit too low, but limited due to the taper of the board. I'd have emailed you two screen shots to choose from; one with the text parallel to the bottom and the first letter centred, and the other angled radially to roughly be centred across the entire board.
It doesn't look like you've cut the board incorrectly 🙂
What did you charge kayak. Ie how far are you now...
[i]Thanks Wca. I didn’t cut the boards at all, just machined and burnt them.[/i]
Yeah, frustrating when someone else's work makes it look like you have done something wrong, even when you didn't do anything
Remembering back to my CNC days, it’s an awkward shape and a bit too low, but limited due to the taper of the board. I’d have emailed you two screen shots to choose from; one with the text parallel to the bottom and the first letter centred, and the other angled radially to roughly be centred across the entire board.
I marked it all out for him with a centre line running the length and the width extents too.
I used to run a CNC myself at a college and so I know the process for setting up and testing a cut.
On a one-off like this I would always run a test cut, perhaps even on a piece of material placed on top to check the path.
You can even zero the machine above the work and run the program with the cutter out of the work, to see where it goes.
Not sure he went through anything like that, so there you go.
Not heard anything back yet so fingers crossed they're happy anyway.
It looks well placed in this photo but it's mainly shadow.


I think the CNC guy got it just right - the logo/wording fits the wood where it should. Central would have looked odd due to the wood itself, and symmetry isn't always the best option.
Beauty is in the eye of the beholder.
Yes, agree with above logos look fine where they are.
I think the CNC guy got it just right – the logo/wording fits the wood where it should. Central would have looked odd due to the wood itself, and symmetry isn’t always the best option.
It's not the centrality in the length. I wanted it to the left, to be before the big split.
It's the position top to bottom.
It's very low on the bottom edge with a gap at the top.
Anyway, by the by.
😊👍
Today I'm in charge of dinner. Swedish meatball sauce was acquired from the self-assembly, Swedish fascist furniture emporium. I have made the meatballs to go with it and a cold rice pudding and caramelised apple sauce dessert.


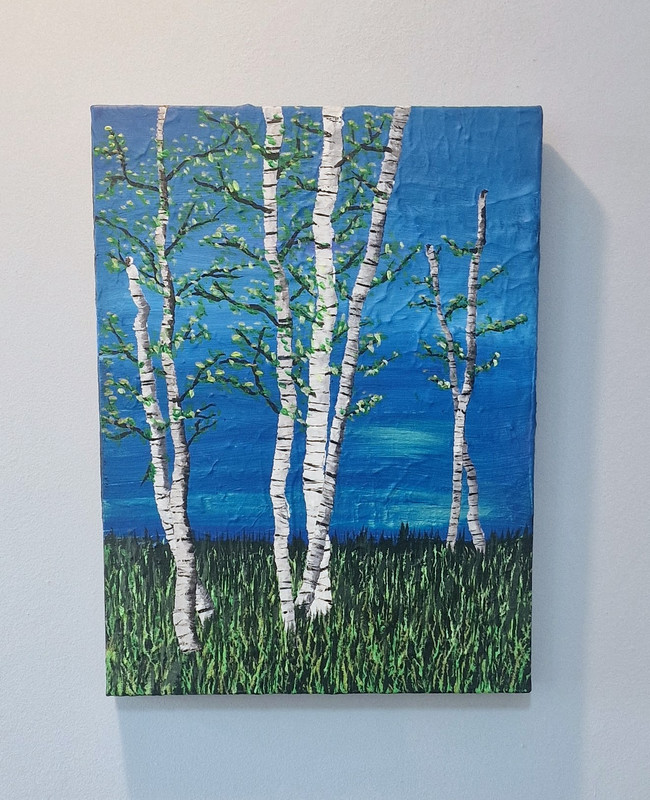
Made or painted? Anyway, just hung this on the wall while I decide if I like it or want to sell it.
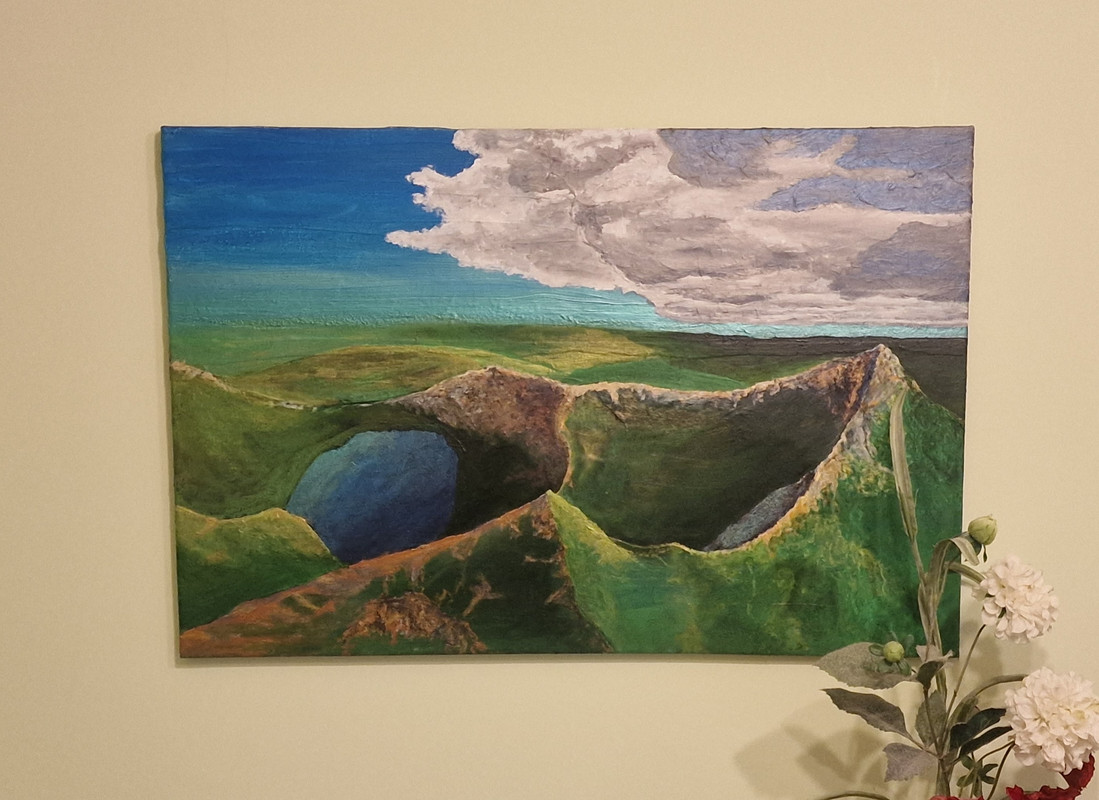
The gig with making WCA is make to sell and if you cant, then it gets to decorate the house.
[i]The gig with making WCA is make to sell and if you cant, then it gets to decorate the house.[/i]
The gig with MrsWCA is that paintings get hung around the house for a week and then I suggest I will sell them and I have to guess from her reaction if it is a yes or no. I got told off recently for trying to sell one that she said was fine to sell. The logic was that she was happy for me to sell that one but I hadn't done a replacement the right size, colour and style that she liked enough to put in its place so she wanted it back on the wall.
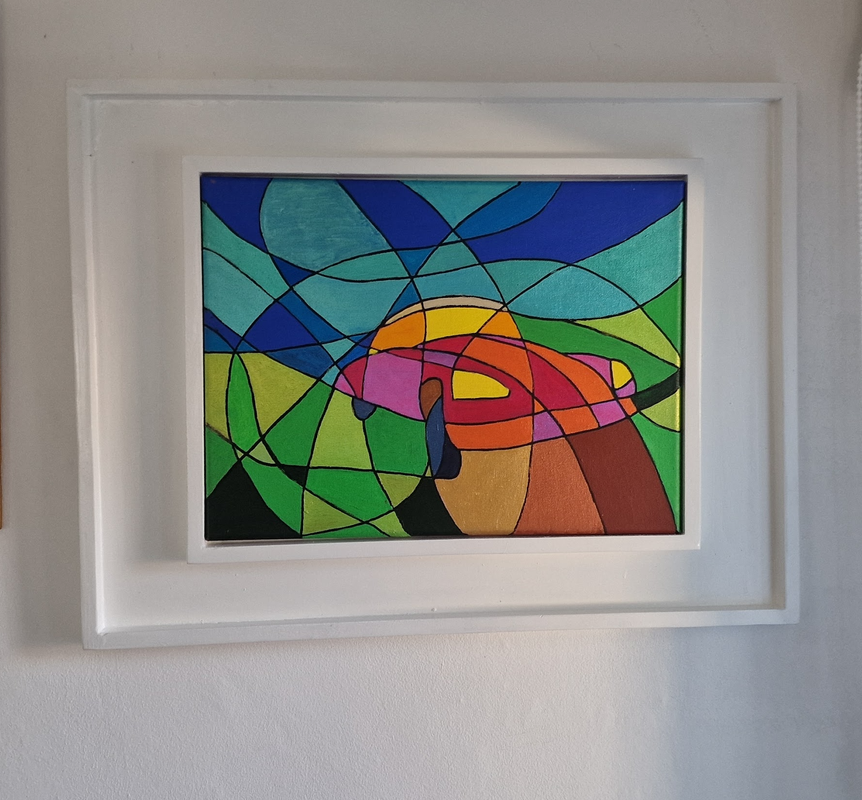
normally, anything is for sale except my wife and my soul. I did this painting asa quick bit of fun to put up in my garage and it sold within an hour the first time I took it to market which was a nice surprise but means I need another car themed picture for the garage now.
A step for the porch of the annexe
[url= https://i.postimg.cc/25N6Hx6T/IMG-20230624-WA0008.jp g" target="_blank">https://i.postimg.cc/25N6Hx6T/IMG-20230624-WA0008.jp g"/> [/img][/url]
Concrete plinth, stone faced , slate slabs, grout TBD. Not a bad weekends work if i do say so myself
Only a little thing but made this insert for my double square nipple wrench. After using a similar DT swiss part on squorx nipples I want one non DT nipples. There is a till absolve but it's £50. This fits in the nice £15 DT tool.


Hmm the last bit of that post went missing. Used the above to make these. Straight Pull 240 EXP, DT comp spokes, XM481 and Sapim orange nipples 🤪. Could have got under 1800g with comp race spokes but they are hard to get in the UK in SP form without spending ££££.

It's been so long since I've posted here that I've hilariously forgotten how to do pictures. 🙂
Nice frame. 👍
It’s been so long since I’ve posted here that I’ve hilariously forgotten how to do pictures. 🙂
Instagram used to just work (embed), but it doesn't anymore. Your work is well worth clicking through for though, welcome back!

Ohh yum, lemon drizzle cake, my favorite 😀 It looks coked evenly to perfection 😀
Here we go! I remembered how to do it.
[url= https://live.staticflickr.com/65535/53063921764_e97ca0b43e_b.jp g" target="_blank">
[url= https://live.staticflickr.com/65535/53063920974_4fdee3368d_k.jp g" target="_blank">
[url= https://live.staticflickr.com/65535/53063922954_86b83b3c55_h.jp g" target="_blank">
Got excited to see a post from retrodirect! Not disappointed 🙂
Were / are you still involved with Brompton?