[img]  [/img]
Extremely rough attempt at a garmin stem mount. Will try again next week and hopefully get it a bit smoother/straighter...
My M3 tap snapped off in one of the holes which fixes the plastic insert, so unless I glue the in insert in place, this one's a write off 🙁
Cheers ben and pleader, should allow me to try something out.
I CNC'd a mount to fit a Chinese CREE light so I can put it on my GoPro mount, and keep it off the top of the handlebars
[img]  [/img]
[img]  [/img]
[img]  [/img]
The initial hole was made to fit exactly the Outside Diameter of the light, I then put it in the oven at 180 for half an hour, slipped it on, and it ain't ever going to come off again!
^ Nice 🙂
Recently turned my hand to pyrography. Have so far done some elephants and Star Wars related wood burning.
[img]  ?t=1459630469[/img]
[img]  ?t=1459630474[/img]
Bodged me a wood transporting trailer for a load of logs which are a mile from the nearest road. Some bits of old pallet, some rusty old steel conduit and some salvegee screws. And the wheels off my girlfriends bikes...
[img]  [/img]
delete
Here is a side table I made from rejected oak window sills.
The legs and top are laminated.
The finish is 6-8 coats of neutral Danish Oil followed by 3-4 coats of Miniwax wipe-on polyurethane final finish. The latter is good stuff I got from the US. I have a background in 3d CAD so sometimes use that to develop ideas and sizes. Buttons on the underside to hold the top on and allow for wood movement.
[img]  [/img]
[img]  [/img]
[img]  [/img]
[img]  [/img]
[img]  [/img]
[img]  [/img]
Likes all above!
😀
Currently practising my not very good welding skills and knocking up a stove from an old air compressor.
Hardest thing to weld is the pipe which is very thin and now looks a bit like Swiss cheese! 😀
[img]  [/img]
[img]  [/img]
Hot plate isn't welded yet but is made from an old saw blade.
I thought it was an old chainring now that everyone is running little 1x front rings 😉
you don't say! If the heat doesn't make you keep your distance - the TCT teeth will! 🙂Hot plate isn't welded yet but is made from an old saw blade.
Or to put it another way - it's now dangerous hot or cold!
Like the proportions. Is this for the allotment shed?
Here is another one from a couple of years ago.
Interlocking birch ply, it comes apart with no screws or glue.
The first photo is a scale model mock up.
[img]  [/img]
[img]  [/img]
[img]  [/img]
[img]  [/img]
[img]  [/img]
Like
Brilliant chair!
AlexSimon - Member
Hot plate isn't welded yet but is made from an old saw blade.
you don't say! If the heat doesn't make you keep your distance - the TCT teeth will!
Or to put it another way - it's now dangerous hot or cold!
Like the proportions. Is this for the allotment shed?
The teeth are blunt but I may grind them down further, although I like a bit of danger... 😈
It will find a home at one of the sheds at the allotment I'm sure.
Built myself a Brompton:
[url= https://farm2.staticflickr.com/1453/26208392311_60bb486af8_z.jp g" target="_blank">https://farm2.staticflickr.com/1453/26208392311_60bb486af8_z.jp g"/> [/img][/url]
Well, it's not really for me, it's a demo bike for Velovision magazine and maybe other places.
[url= https://farm2.staticflickr.com/1666/26274644855_787c8060e6_z.jp g" target="_blank">https://farm2.staticflickr.com/1666/26274644855_787c8060e6_z.jp g"/> [/img][/url]
Rohloff and disc brakes - I tried out the TRP HY/RD on the front, pretty good but a big beastie!
[url= https://farm2.staticflickr.com/1555/26248696846_660cbd4037_z.jp g" target="_blank">https://farm2.staticflickr.com/1555/26248696846_660cbd4037_z.jp g"/> [/img][/url]
[url= https://farm2.staticflickr.com/1567/25669823294_a963487536_z.jp g" target="_blank">https://farm2.staticflickr.com/1567/25669823294_a963487536_z.jp g"/> [/img][/url]
@IainAhh - Love that chair, anything without fixings is good in my book
Ben - Know what you mean about those calipers, we tend to suggest sticking with spyres. It's weird but a flatmount caliper would look totally in scale on a Brompton
I'm going to try Spyres when it comes back from Velovision - funny thing is it actually fits better to the front than the usual BB7s. It's chunky but in a different direction!
Yeah, spoke clearance can be an issue with Spyres as they're wide but I imagine on a wheel that small the spoke angle is quite big so shouldn't be a problem. Once you've tried Spyres you'll never go back to BB7s
Nice set of brakes on your Brompton Ben.
I had one that colour. Now traveling round the USA somewhere via ebay.
Did this a few weeks ago.
Originally we did it in the GT colours (Way back in this thread)
New sponsor, new graphics.
[url=  ?dl=0]Link[/url]
I recently turned this
[URL= http://i884.photobucket.com/albums/ac50/tymbian/Mobile%20Uploads/2015-10/20151024_141857_zpsncwllbl3.jp g" target="_blank"> http://i884.photobucket.com/albums/ac50/tymbian/Mobile%20Uploads/2015-10/20151024_141857_zpsncwllbl3.jp g"/> [/IMG][/URL]
Into this
[URL= http://i884.photobucket.com/albums/ac50/tymbian/Mobile%20Uploads/2016-03/20160317_132837_zps79ashwjq.jp g" target="_blank"> http://i884.photobucket.com/albums/ac50/tymbian/Mobile%20Uploads/2016-03/20160317_132837_zps79ashwjq.jp g"/> [/IMG][/URL]
Nice job on your bathroom. Love the tiling, great colour and style. Where has the bog gone?
Around the corner behind the mirror which forms an L-shaped partition with a glass brick wall which you can just see in the pic.
A couple more pics
[URL= http://i884.photobucket.com/albums/ac50/tymbian/Mobile%20Uploads/2016-03/20160317_132927_zpse4xiyncg.jp g" target="_blank"> http://i884.photobucket.com/albums/ac50/tymbian/Mobile%20Uploads/2016-03/20160317_132927_zpse4xiyncg.jp g"/> [/IMG][/URL]
[URL= http://i884.photobucket.com/albums/ac50/tymbian/Mobile%20Uploads/2016-03/20160317_133026_zpsxbeqblmx.jp g" target="_blank"> http://i884.photobucket.com/albums/ac50/tymbian/Mobile%20Uploads/2016-03/20160317_133026_zpsxbeqblmx.jp g"/> [/IMG][/URL]
[URL= http://i884.photobucket.com/albums/ac50/tymbian/Mobile%20Uploads/2016-03/20160317_145106_zpsoe967e23.jp g" target="_blank"> http://i884.photobucket.com/albums/ac50/tymbian/Mobile%20Uploads/2016-03/20160317_145106_zpsoe967e23.jp g"/> [/IMG][/URL]
[URL= http://i884.photobucket.com/albums/ac50/tymbian/Mobile%20Uploads/2016-03/20160317_154046_zpshwx4tt39.jp g" target="_blank"> http://i884.photobucket.com/albums/ac50/tymbian/Mobile%20Uploads/2016-03/20160317_154046_zpshwx4tt39.jp g"/> [/IMG][/URL]
Just made these little stills for some bloke that wants them as keyrings.
[url= https://farm2.staticflickr.com/1648/26210877792_e02a3e4277_c.jp g" target="_blank">https://farm2.staticflickr.com/1648/26210877792_e02a3e4277_c.jp g"/> [/img][/url][url= https://flic.kr/p/FWaAN5 ]Mini Stills[/url] by [url= https://www.flickr.com/photos/swavis/ ]Gavin Belton[/url], on Flickr
[url= https://farm2.staticflickr.com/1479/26030429580_3430501ffe_c.jp g" target="_blank">https://farm2.staticflickr.com/1479/26030429580_3430501ffe_c.jp g"/> [/img][/url][url= https://flic.kr/p/FEdKQ1 ]Mini Stills[/url] by [url= https://www.flickr.com/photos/swavis/ ]Gavin Belton[/url], on Flickr
much gerardi vice jealousy
They're brilliant!
I would like a couple of Lang's on quick points though as the gerardi is a bit limited for the longer wider stuff.
I think my boss will have other ideas though 😉
Made myself a little chest of drawers for my shed using OSB sheets and a nice old metal filing drawer that I ground the paint off.
Shapely Iroko legs...
[img] 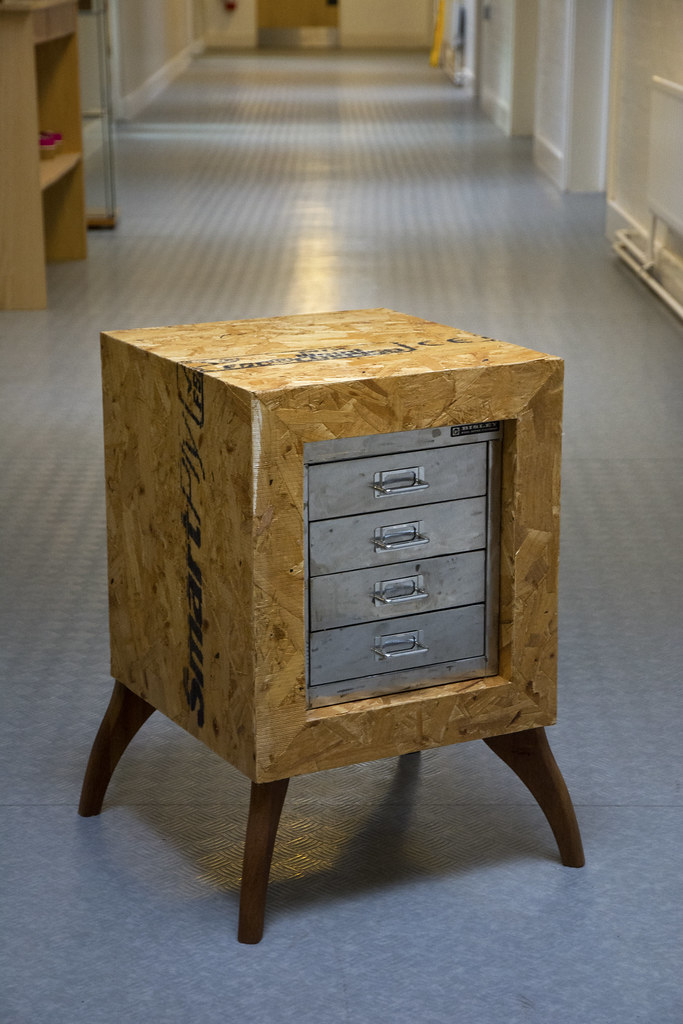 [/img]
[img] 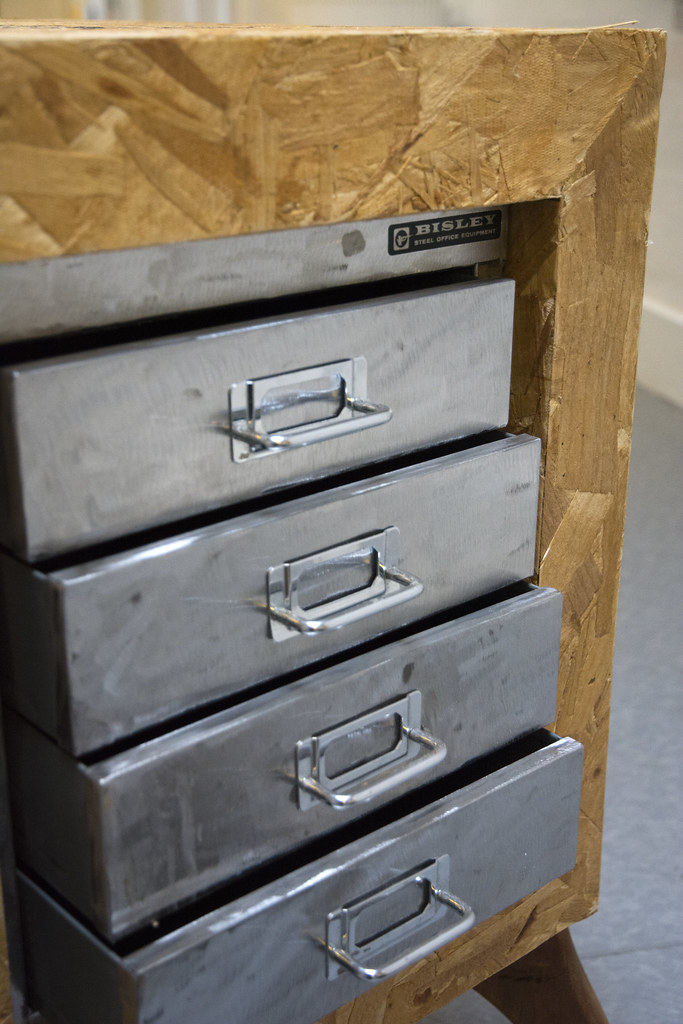 [/img]
Those are quite crisp edges for OSB
Nice work!
The YMT 5th axis vices are pretty good, for the price.
Kayak,
I think those drawers are blimmin gorgeous. Makes we wanna try some OSB furniture...
YMT stuff does indeed look good, had never heard of them before. Cheers stevied
[IMG] 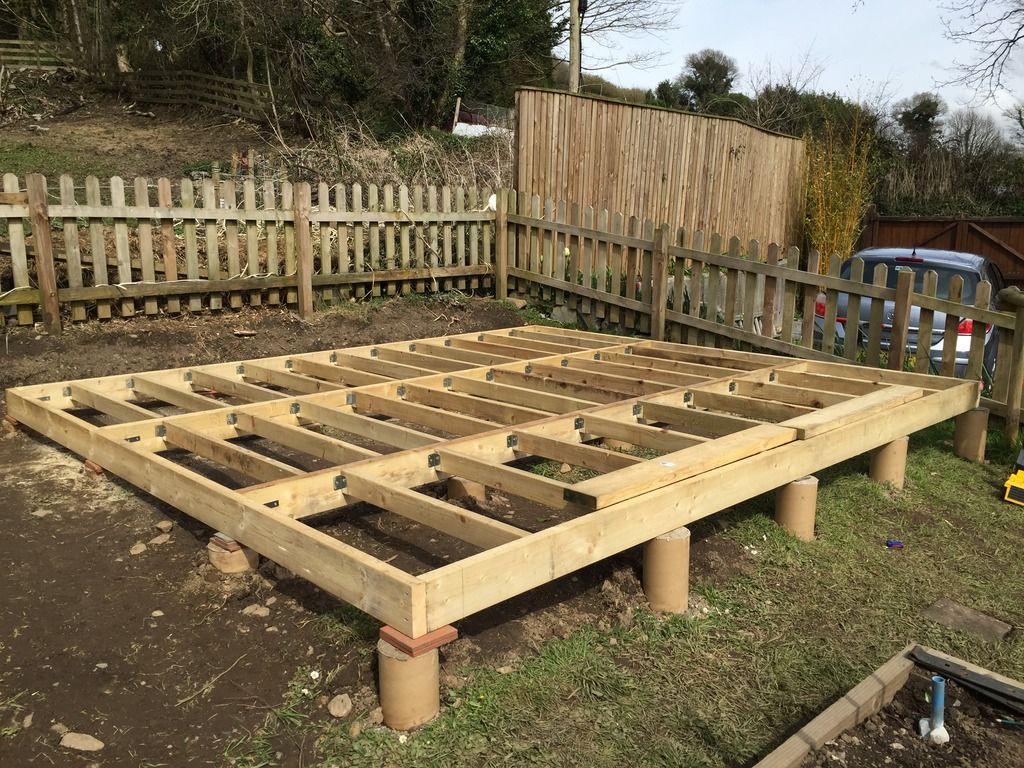 [/IMG]
A base for a studio.
Made myself a synthetic camping quilt. Its a bit less power tool action than a lot of stuff on this thread but quite happy with the way its turning out.
I am using pertex quantum outer with a cimashield inner, should get me near 4 degrees. I have put d rings up the side so i can, with cord, cinch up, create a foot box or tie to a mat.
Need to add a drawstring to the foot end yet.
[img]  ?dl=1[/img]
[img]  ?dl=1[/img]
[img]  ?dl=1[/img]
Any further info ajf?
What does it do? How do you use it? How small does it pack and why bother with this over a sleeping bag?
YMT stuff does indeed look good, had never heard of them before
I'm using a couple of the 5th axis vices and the normal vices. Best I could find for the price. Easy to make soft jaws for too which is a limiting factor with most of the other options
@BlobOnAStick not weighing until all finished properly but the materials were meant to weight about 550grams, reckon may weigh in end about 700grams. Packs pretty small.
Got a rab top bag sleeping bag already which has top down only nothing on bottom. Buy into idea of not needing much from the bottom of your sleeping bag so quilt nice and adaptable. Also going to use it in a layering system with sleeping bag for winter if I dare brave a winter bikepacking ride.
Cool! Thanks for that - I'm very interested in how it turns out. Never heard of one of these before and it sounds really versatile!
Finished my little stove. Added a vent to the bottom using scaffold tube and a vegetable steamer to the top of the flue for a bit of pzazz! 😀
Welding work is.....not the prettiest but it's my first try so not so bad.
[img] 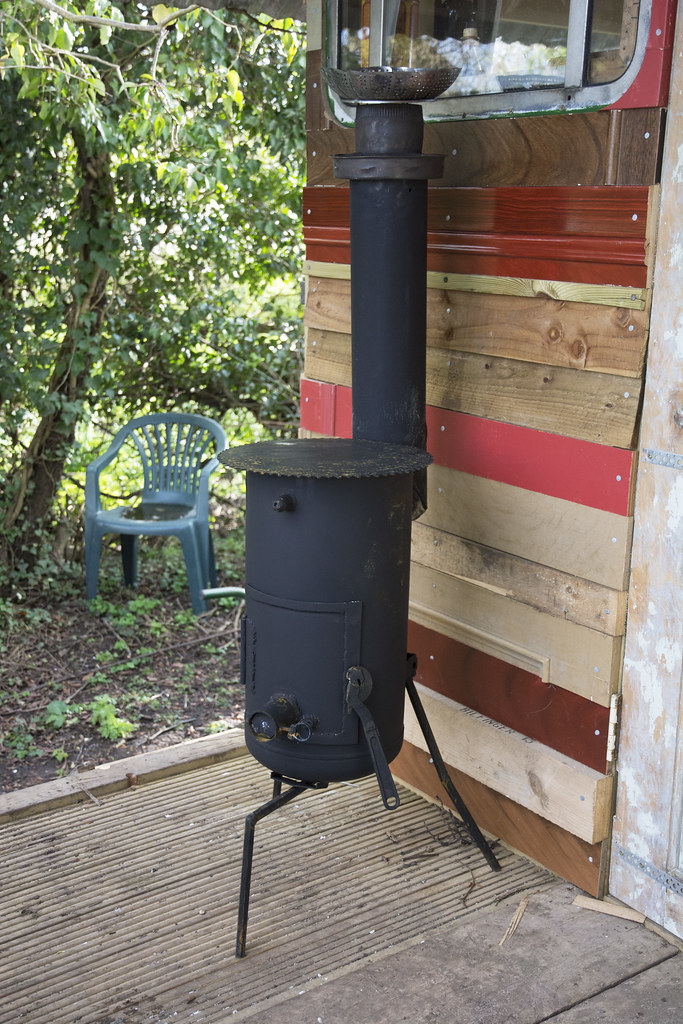 [/img]
[img] 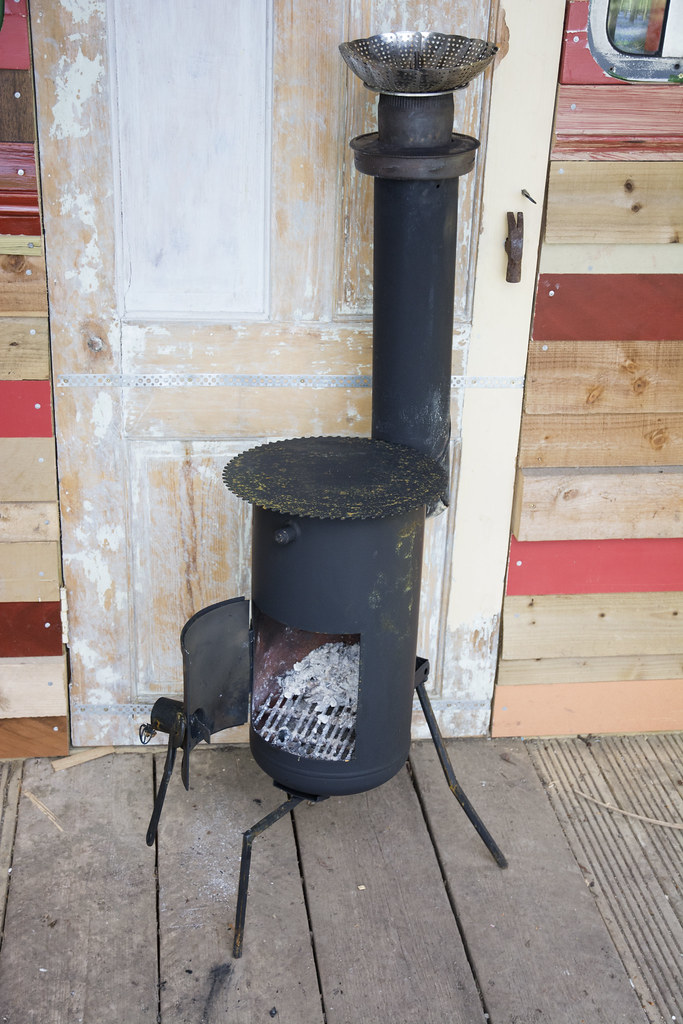 [/img]
It works really well. The vent is effective. Not made a cuppa on it yet mind but I think it'll be good.
[img][url= https://farm2.staticflickr.com/1613/25909585603_88a0bf7f31_c.jp g" target="_blank">https://farm2.staticflickr.com/1613/25909585603_88a0bf7f31_c.jp g"/> [/img][/url][url= https://flic.kr/p/Ftxp8a ]IMG_20160418_2313458[/url] by [url= https://www.flickr.com/photos/134931250@N03/ ]Bicycle Manufacturing[/url], on Flickr[/img] a jig for a special project
its the worlds first one man pirate ship
oh
[img][url= https://farm2.staticflickr.com/1631/26389186042_f4b1fc0f8d_z.jp g" target="_blank">https://farm2.staticflickr.com/1631/26389186042_f4b1fc0f8d_z.jp g"/> [/img][/url][url= https://flic.kr/p/GcVtCf ]IMG_20160406_200325[/url] by [url= https://www.flickr.com/photos/134931250@N03/ ]Bicycle Manufacturing[/url], on Flickr[/img]
and went back to messing about with carbon fibre for a bit again
Woah!,you have an optical table,like a proper optical table,and,and it's even tidy. 🙂
Another useful little tool to add to the collection:
[img]  [/img]
Been somewhat busy lately in the evenings knocking up all sorts of stuff. I think because we have construction going on at work I've been inspired to use all the cool stuff they chuck out! 🙂
An old extraction fan unit was taken off the roof next to our workshop to make way for a new system.
I salvaged the big cylinder that had a motor driving a big fan on it and decided to use it for a table base.
[img]  [/img]
For the top I decided to try a sort of eccentric starburst thing using pallets and scrappy wood, all coming out from a central point which I used a wire brush for a drill for.
The sections all sit on a framework made from an old cable reel and some chunky 2x4. I fitted an old peephole from a front door so that you can look through the top into the cylinder and watch the fan turn should you so desire.
[img] 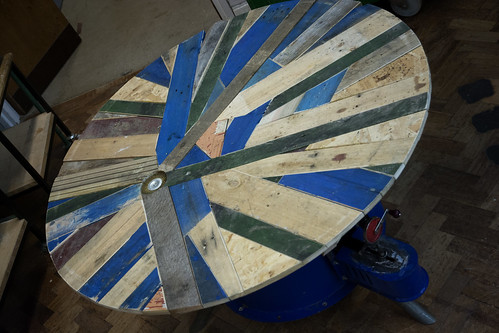 [/img]
[img]  [/img]
To make the fan inside the cylinder still turn, I took off the 'kin heavy motor that drove the twin drive belts and did some Heath Robinson shit with an old hand drill.
Works well.
[img] 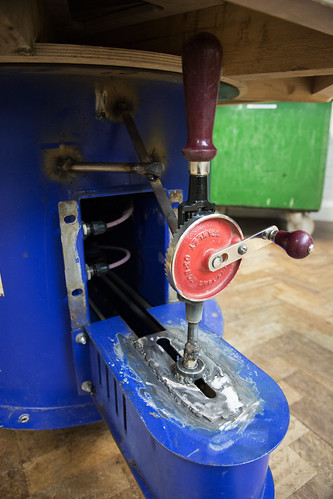 [/img]
🙂
Nice work again Kayak - as I've said before, it takes a special eye to make random reclaimed stuff work visually.
Very jealous that you have all the tools to hand.
My next projects are:
Bathroom vanity/sink unit
Built-in bed with storage
Bathroom cabinet
I think I've already decided that 2 new tools are required to even start 🙂
More shonky skillz, I liberated these from a demolition site:
[img][url= https://farm2.staticflickr.com/1711/26348855930_89a14ea912_o.jp g" target="_blank">https://farm2.staticflickr.com/1711/26348855930_89a14ea912_o.jp g"/> [/img][/url][url= https://flic.kr/p/G9mLTu ]2016-04-24_08-47-19[/url] by [url= https://www.flickr.com/photos/martinddd/ ]martinddd[/url], on Flickr[/img]
bish
[img][url= https://farm2.staticflickr.com/1465/26556725531_481cc4b9f2_o.jp g" target="_blank">https://farm2.staticflickr.com/1465/26556725531_481cc4b9f2_o.jp g"/> [/img][/url][url= https://flic.kr/p/GsJah8 ]2016-04-24_08-47-52[/url] by [url= https://www.flickr.com/photos/martinddd/ ]martinddd[/url], on Flickr[/img]
bosh
[img][url= https://farm2.staticflickr.com/1660/26016598784_246347fd08_o.jp g" target="_blank">https://farm2.staticflickr.com/1660/26016598784_246347fd08_o.jp g"/> [/img][/url][url= https://flic.kr/p/FCZSq1 ]2016-04-24_08-48-14[/url] by [url= https://www.flickr.com/photos/martinddd/ ]martinddd[/url], on Flickr[/img]
Leftovers going to school bonfire.
now i just need a wood burner!
A little brown fish. You really want pics?
