Thanks mate! It's painted black now and looks a lot better. WRrong paint though - rubs off as soon as it's touched. All a learning experience!
Might be worth trying a metallic paint as an undercoat, then giving it a black topcoat; if the black wears, it'll show the metallic, giving a patinated effect. It's finding a paint that really sticks, so acrylic, polyurethane, cellulose, something like that.
Very much a learning thing, though, I'm carving a bunch of butter spreaders at the mo', trying different shapes to see what works best, not a quick thing to do, each one takes a couple of hours to get the basic shape, with more time taken to get a decent finish. I'll never make money from them, but they'll make nice little pressies for friends and family.
I need some walnut oil to soak them in as well.
Wrote another book:
[img]  ?1452539830[/img]
[url= http://www.blurb.co.uk/bookstore/invited/6136513/7dfc127eac98cbad5698828a84e968dc2418d95a ]Linky[/url]
For myself, really 😉
You ever fancied getting into Hunterston A?
With writers credentials like that I'm sure you would have no bother...
Nice book though, some of the old boys here might be interested. Linked to it in the SSC [url= http://www.skyscrapercity.com/showthread.php?p=129930423&posted=1#post129930423 ]Inverclyde thread[/url], folk on there lap up books.
I'd love to, but don't fancy getting shot 😀
Really appreciate all the things on this thread.
Thanks for sharing everyone!
Dog finished, much grief - especially when I knocked it off the windowsill and 3 legs and it's head broke off 😆 GF was happy with it as a present 🙂
[img]  [/img]
Nice one Dezb,looks good.
Bloody hell. I thought it was a lot bigger than that. 🙂
Nice work though.
Thanks 🙂
Finished the wet room last week....large format tiles (900x50) on the floor, brick bond. For the fall to the drain, I didn't want the angles to be obvious, as it makes the grout lines look too busy, so I used a dry cut and beveled the rear edge, to create the illusion that they were still complete tiles....it doesn't even look like there is a fall now :0)
[URL= http://i929.photobucket.com/albums/ad131/stedlocks/tiling%20pics/14C35DFD-DA85-4799-BB53-17E0FA14E9F3_zpsu4z9rvkc.jp g" target="_blank"> http://i929.photobucket.com/albums/ad131/stedlocks/tiling%20pics/14C35DFD-DA85-4799-BB53-17E0FA14E9F3_zpsu4z9rvkc.jp g"/> [/IMG][/URL]
Bloody hell. I thought it was a lot bigger than that.
Yes, I thought it was life size 😉
Looks really good though.
Thanks Ben... although, not sure how it looks any bigger iin my previous pics! It was balanced on a little vid camera and there's a Singletrack mag in one shot! 😆
More Ply based weight lifting stuff...
[url= https://farm2.staticflickr.com/1532/24150800070_e47e9cf3ed.jp g" target="_blank">https://farm2.staticflickr.com/1532/24150800070_e47e9cf3ed.jp g"/> [/img][/url][url= https://flic.kr/p/CN8asE ]Jerk Blocks[/url] by [url= https://www.flickr.com/photos/brf/ ]Ben Freeman[/url], on Flickr
[url= https://farm2.staticflickr.com/1517/24150799770_5454852b36.jp g" target="_blank">https://farm2.staticflickr.com/1517/24150799770_5454852b36.jp g"/> [/img][/url][url= https://flic.kr/p/CN8anu ]Jerk Blocks[/url] by [url= https://www.flickr.com/photos/brf/ ]Ben Freeman[/url], on Flickr
That tiling is impressive.
Jerk blocks? Blocks to jerk off from?? Whatever happened to a healthy clean before jerking???
Are those holes at the right height for jerking? 😯
Jerk blocks? Blocks to jerk off from?? Whatever happened to a healthy clean before jerking???
No - you don't understand - the Jerk is inside, the air holes are so he can breath, the weights are on top are to stop him escaping. The second box is there as a warning to others.
the air holes are so he can breath
They're actually so the wood can breath, the timber sub-frame is a bit damp as the builder's merchant stores it all outside.....
Back onto an Engineering theme... home made Precision Level
[img] 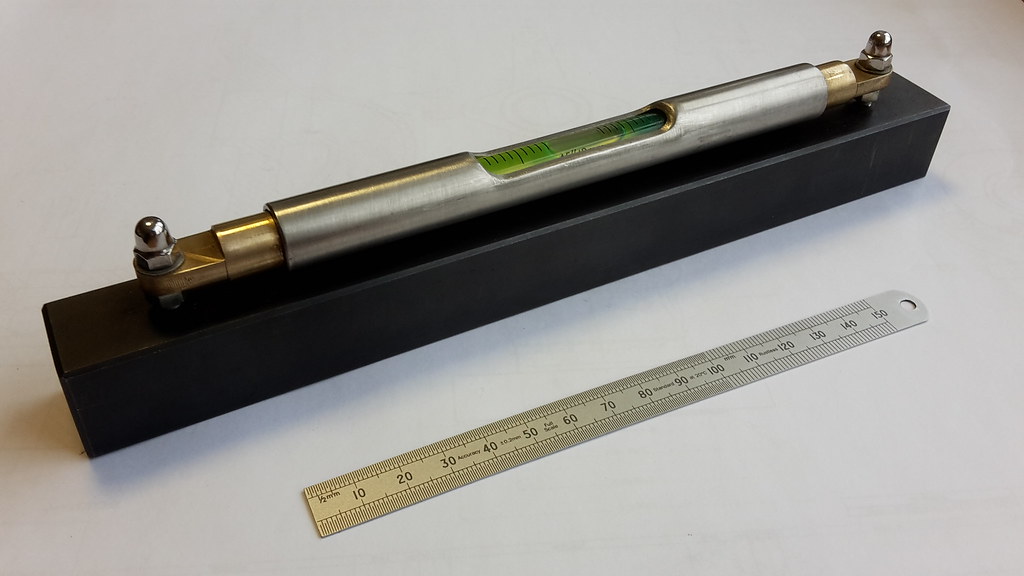 [/img]
Mmm. That is right on so many levels. I'd quite like a posh level like that... 🙂
We needed to do a tracking shot for a promo vid, so out came the Lego
It worked pretty good
Ooh, nice work stavromuller. Dual lines seem to do a nice job of correcting the initial acceleration wobble.
I made an RC camera dolly once, and it worked, but would need a lot of revisions and tuning to get unpleasant vibrations out of the single line design:
http://www.instructables.com/id/RC-Cable-Dolly-for-Small-Format-Cameras-and-Phones/
If I ever get the time, I'll make a V2 with a rock crawler motor or a small gearbox.
Knocked up a log store out of some pallets, bits of fence, a large piece of wriggly tin, oh and some large boulders to hold the roof on in the high wind:
[url= https://farm2.staticflickr.com/1715/24035651804_83ed2f19ad_h.jp g" target="_blank">https://farm2.staticflickr.com/1715/24035651804_83ed2f19ad_h.jp g"/> [/img][/url]
A bit rough and ready but it cost nothing and hopefully it should do the job.
This is more in the category of making stuff to make stuff, but I made a tube notching setup that's very quick to adjust and use:
[url= https://farm2.staticflickr.com/1582/24156004499_c9b06b643b_z.jp g" target="_blank">https://farm2.staticflickr.com/1582/24156004499_c9b06b643b_z.jp g"/> [/img][/url]
Can handle tubes up to 50mm, angles up to 45 degrees, and can slot tubes too by just changing the arbor.
A basic bearing press, partly just because I wanted to learn how to use a Bridgeport, partly because I'd already been turning delrin bits to hold bearings on the bits of wood and threaded rod I was using before. I'd make it more neatly a second time…
[img]  [/img]
[img]  [/img]
The acme threaded rod and nuts came from a 3D printer parts supplier, but have just enough play in them I'll probably buy a tap and redo it with my own parts.
Pics broken...
Weird, showing up here in browsers that haven't loaded them before. Some ISPs seem to have massive caching issues with imgur though. Links:
http://imgur.com/n2xg0De
http://imgur.com/CzycNis
Nach
Very nice.
I might make something similar,now that I am going in to a world of pressfit BB
The doggie looks really good, Dez, I'd be chuffed with that.
Just modded a very tatty little hatchet I found lurking out in the shed, rusty, very blunt, worm eaten and rotten handle, so I thought I'd have a go at cutting it into a different shape for carving;
Original with new hickory handle:
[IMG] 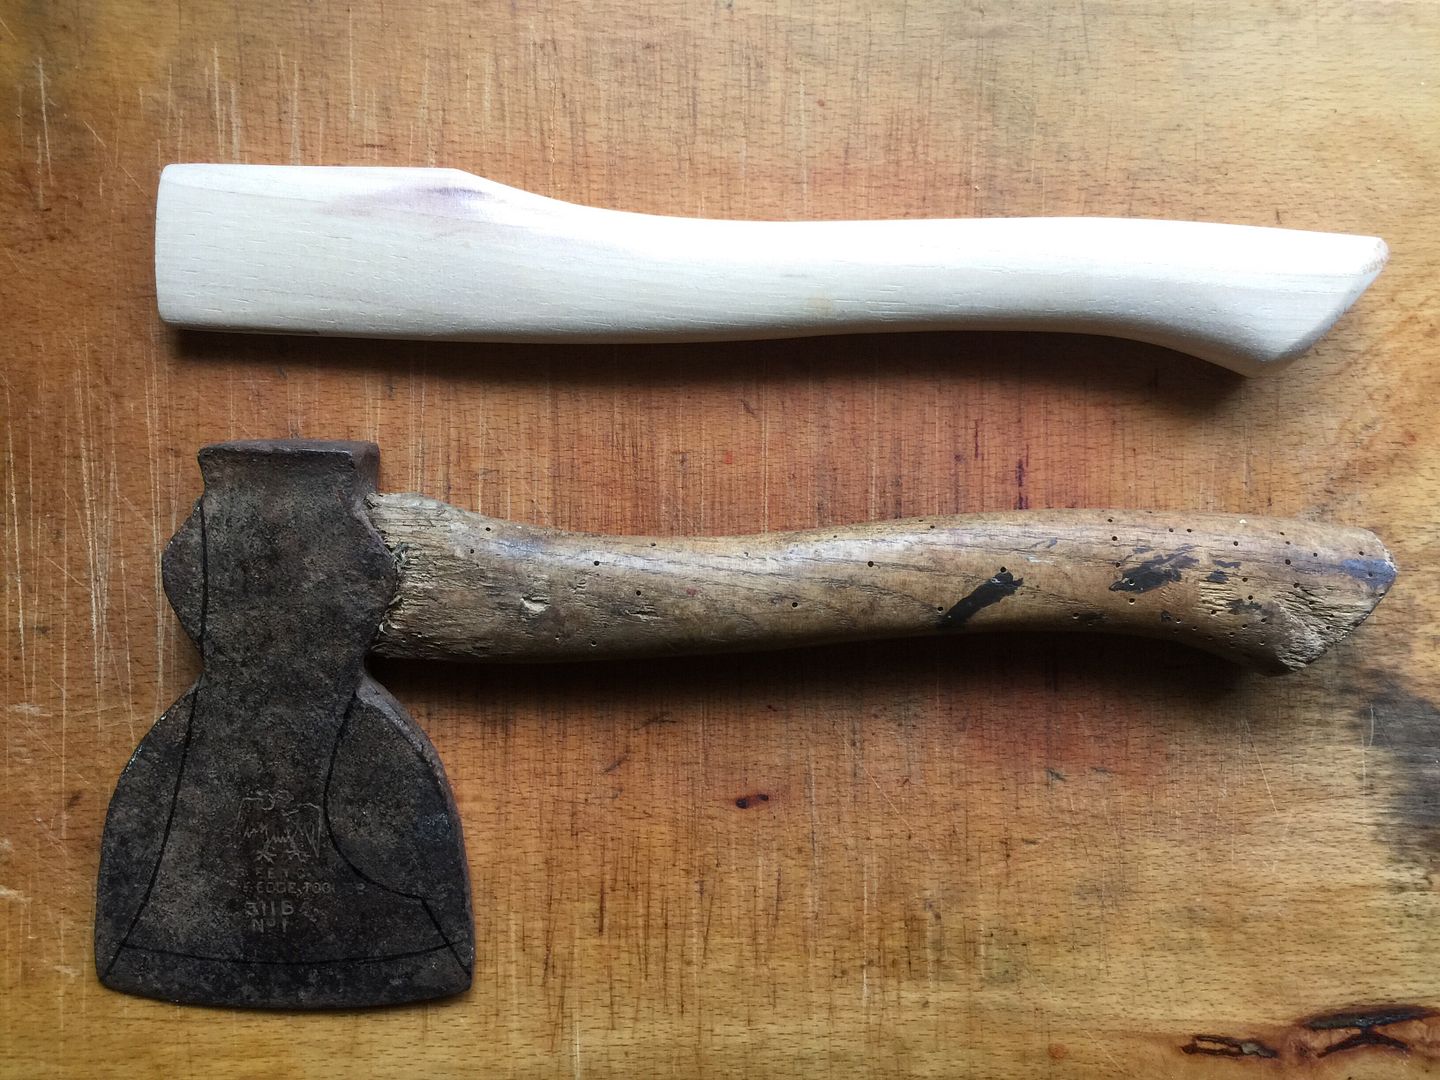 [/IMG]
Finished version:
[IMG] 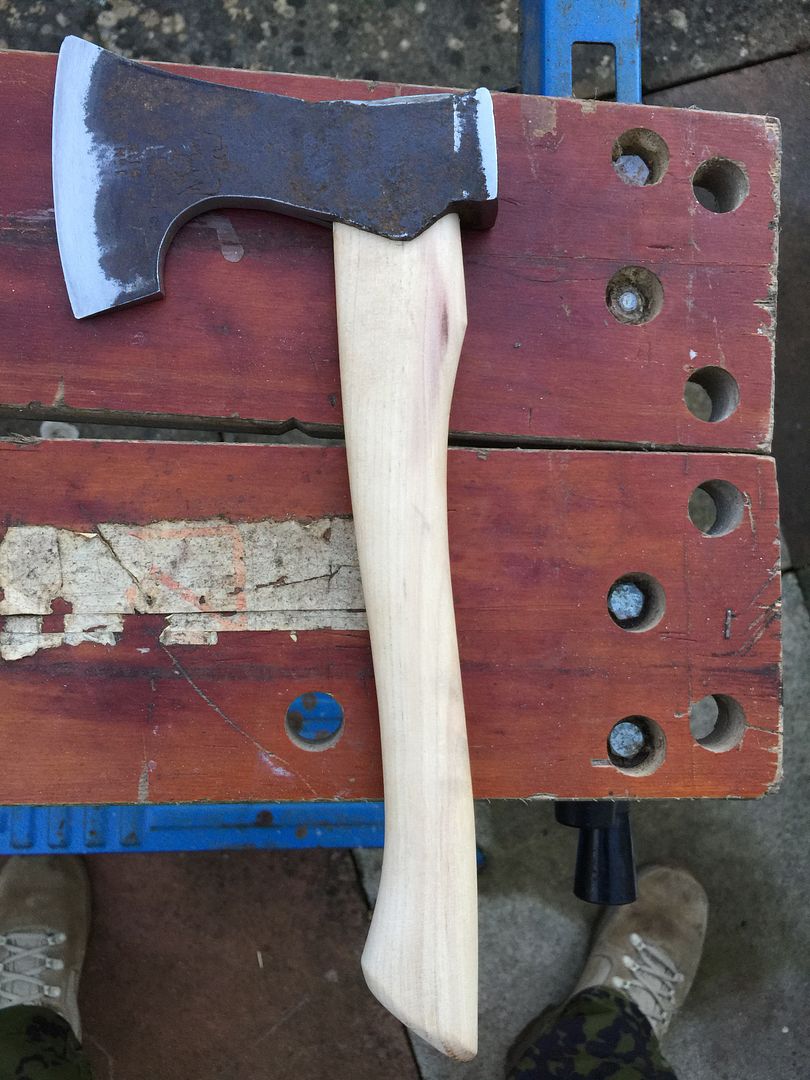 [/IMG]
All work done with a clearance sale angle grinder from Homebase, cost £8.30, with a 3mm cutting disc and a 6mm grinding disc, and a couple of sets of cheap 2nd-cut files.
Edge re-bevelled with a file, then finished off wit coarse and extra fine diamond 'stones' and leather strops.
It's [i]very[/i] sharp now!
Concrete desk lamp
[img]  [/img]
Helped an elderly neighbour clean out his shed t'day and found an old but very sturdy 18" rake head so i took it home and cut it down so that the head would fit in the bottom of my rucksack, i ground a slight edge on the left hand tines so i can use it for bush wacking/briar removal. For a handle i rummaged about in the garage and found some very thick alloy tubing so i carefully tapered the end to a very snug/tight fit in the rake head then drilled it to accept a bolt and stuck an old mtb grip on the handle.
Quite chuffed with my wombling n' bodging, it works perfectly for raking the debris off my trails and the bush wacking ability is very decent as the angle of the tines are relatively flat when swinging it so you get a good cut close to the ground. Obviously it won't stand up to heavy abuse but for a quick groom of the trails it's seems to do the job just fine.
The top of the handle does protrude from my rucksack by 20" so i'll have to remember not to cycle under low branches otherwise i'll be on my arse.
[img]  [/img]
Cor, that lamp is marvellous.
Love the bushwacker, that's a great bit of repurposing! And the lamp is just lovely, a great piece of industrial design; it wouldn't look out of place in a high-end shop. 😀
That lamp is really, [i]really [/i]nice flanagaj!
flanagaj - Member
Concrete desk lamp
Love the lamp flanagaj. Really nice. Lush finish on the concrete.
I've just finished making some lamps this week too.
I sell some stuff now and again in a shop in Warwick which sells all manner of stuff from craftspeople.
I like to 'borrow' nice shades that I see in places like Ikea, and then basically pimp them with legs/stands, lovely flex and clear plugs etc.
They seem to sell ok but as ever, folks don't really quite appreciate the work that goes into them when they're umming and ahhhing at prices... 😐
I made six of these Sycamore smaller lamps this week(in my holiday time) and one of the bigger ones in Larch and plywood.
[img] 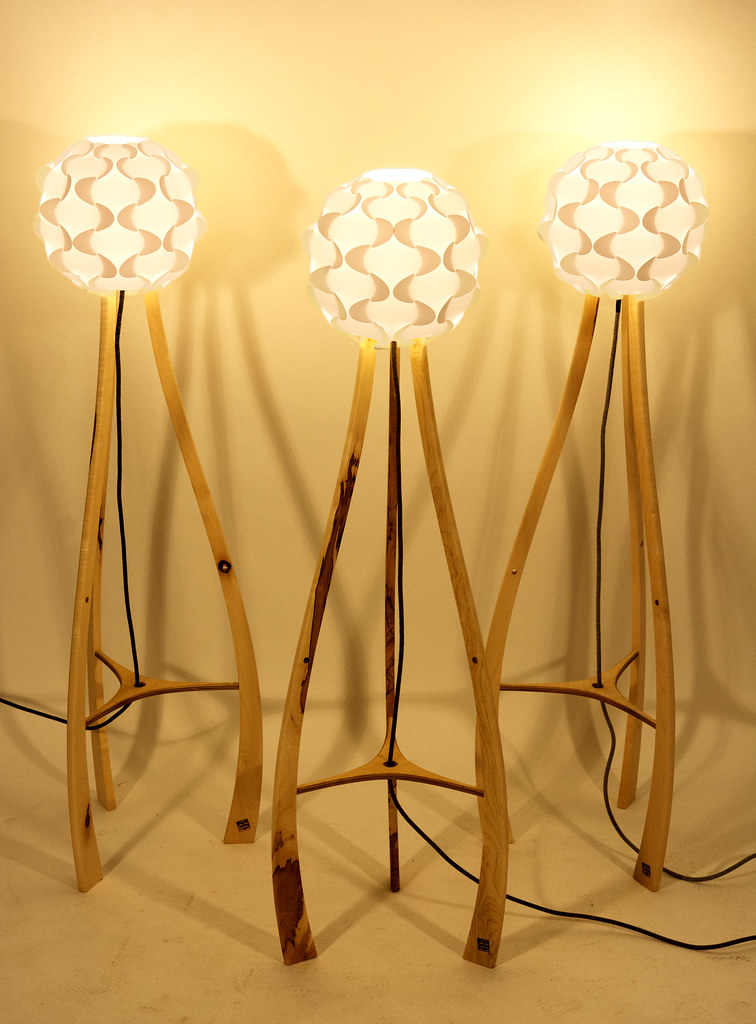 [/img]
[img] 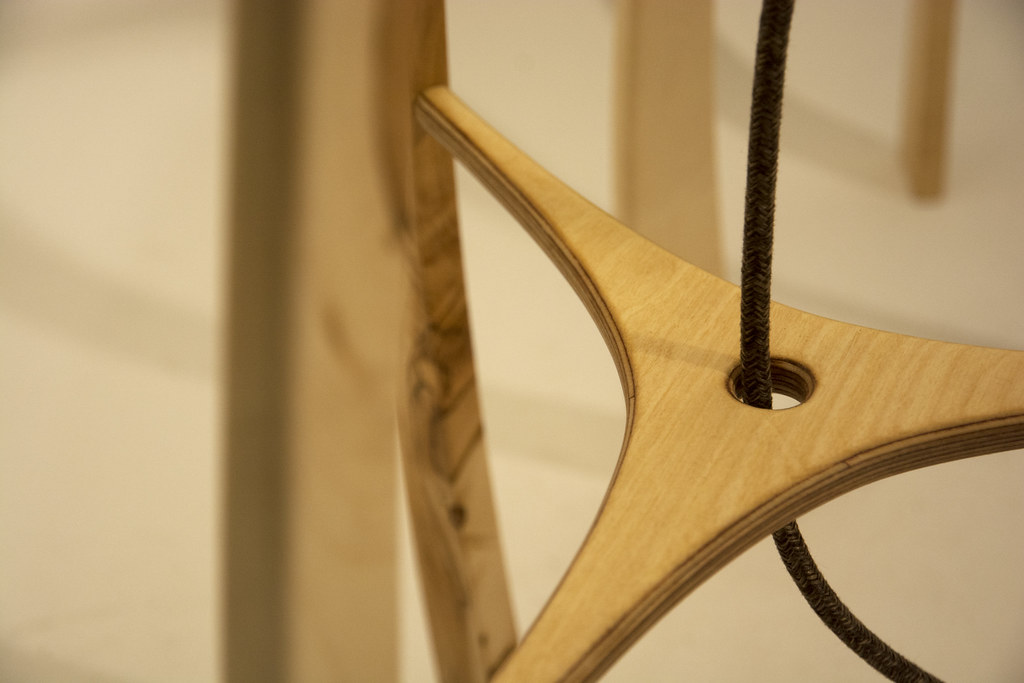 [/img]
[img] 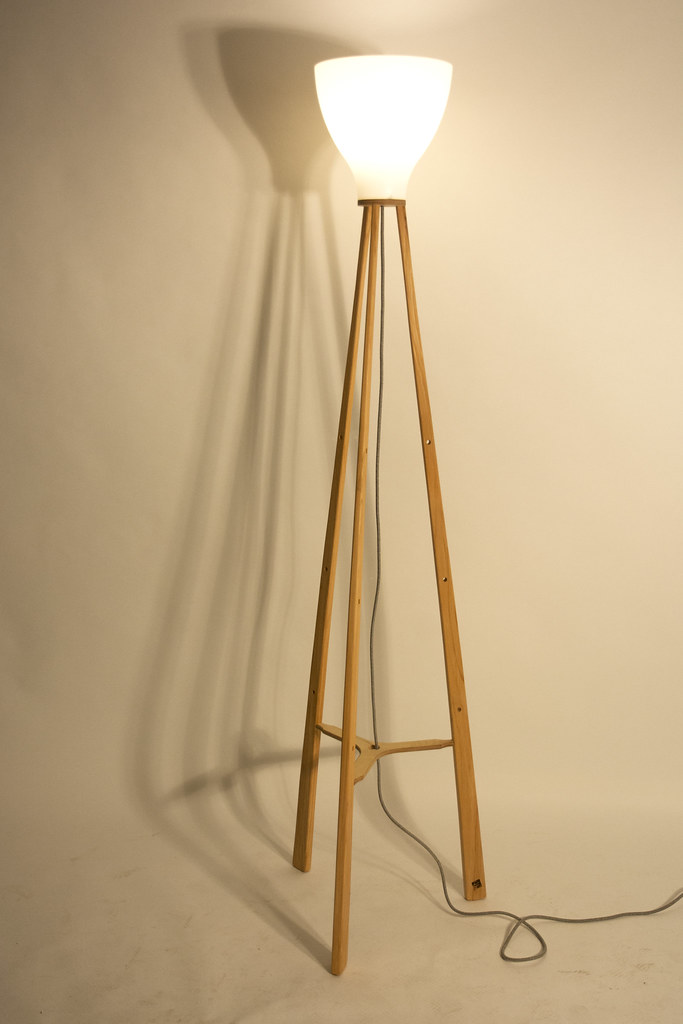 [/img]
[img] 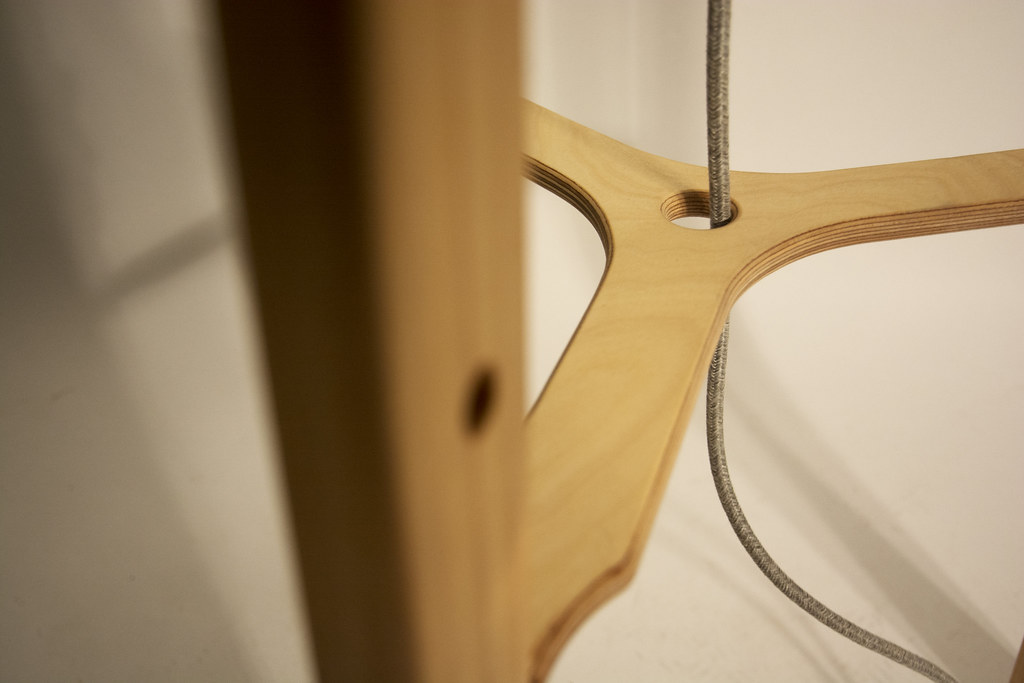 [/img]
Very nice and elegant but why the wonky square inlay/hole/black mark on the bottom of the legs?
Nice work Kayak!
The lamps are very nice, good work.
WorldClassAccident - Member
Very nice and elegant but why the wonky square inlay/hole/black mark on the bottom of the legs?
It's my logo, branded onto the leg with a brand I had made which I heat with a gas torch.
[img] 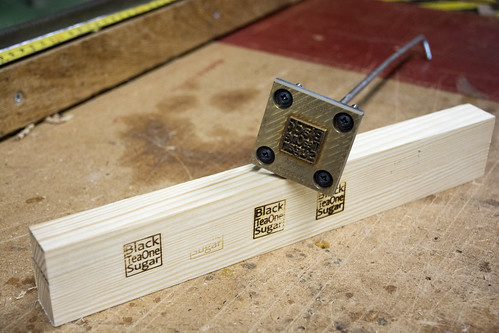 [/img]
Toooo Cool!
When I get off this stupid iPad I will post up mu slightly less professional efforts.
There is a gallery that has opened up locally I might try and supply some stuff for. Any hints or tips regarding payments commissions etc. Email me if you prefer.
Much as I don't like posting after Kayak's wooden wonders here's a table I made.
[url= https://farm2.staticflickr.com/1677/24482221294_69926da495_n.jp g" target="_blank">https://farm2.staticflickr.com/1677/24482221294_69926da495_n.jp g"/> [/img][/url]
Nice Hobster. What wood is it? Have you put a finish on it yet? It looks fairly pale.
Really nice lamps Kayak. I agree with your sentiment regarding people not appreciating just how much work goes into making them. Shame.
Those lamps are great (both the concrete one and the he wooden. Kayak/flanagaj do you guys sell your stuff online anywhere?
