My Discovery II used to look like this....
[img]  [/img]
Currently looks like this...
Its a labour of love, really
Looks pretty that.
Doing a good job of it, take your time.. 😀
I'd love to have the time and more importantly, the space, to restore a SIIa.
I definitely go for a galvanised chassis/bulkhead. In fact I'd galvanise anything that couldn't run away.
[url= https://farm5.staticflickr.com/4501/38084527402_e3b792d13e_b.jp g" target="_blank">https://farm5.staticflickr.com/4501/38084527402_e3b792d13e_b.jp g"/> [/img][/url][url= https://flic.kr/p/212pa9N ]Untitled[/url] by [url= https://www.flickr.com/photos/66452821@N00/ ]ritcheyp20[/url], on Flickr
We hired these a few weeks back. Interesting, but not sure I’d want to own one
all good things come to those that wait Tiger! 🙂
looking nice. slowly slowly catchy monkey.
Looks pretty that.Doing a good job of it, take your time..
Heres an idea of whats gone into it so far....
[b]THIS IS JUST THE SEAT BOX!!!!!!![/b]
Cut out rusted steel parts
[img] 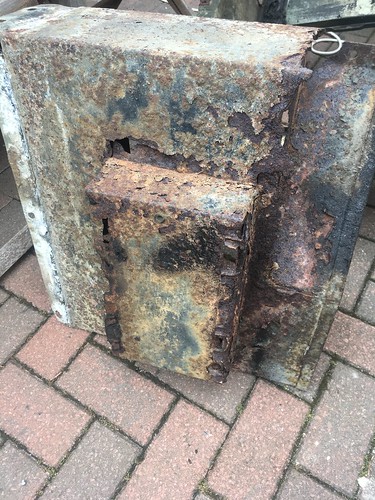 [/img]
Construct, rivet and seal shiney new alloy replacement
[img] 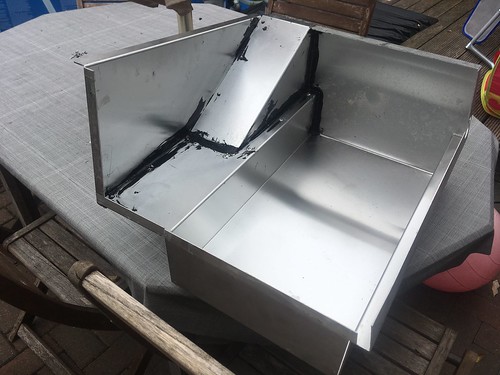 [/img]
Fit new pattern side
[img] 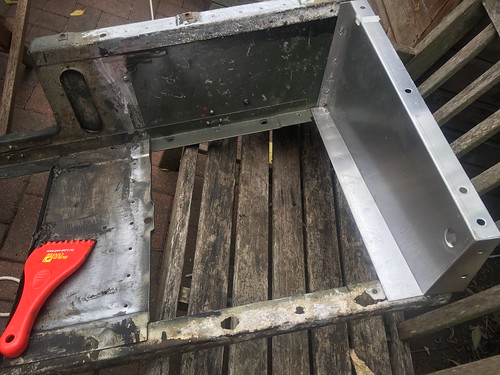 [/img]
Countersink rivets to look like original spot welds, fill and dremel 'fake' spot welds back in
[img] 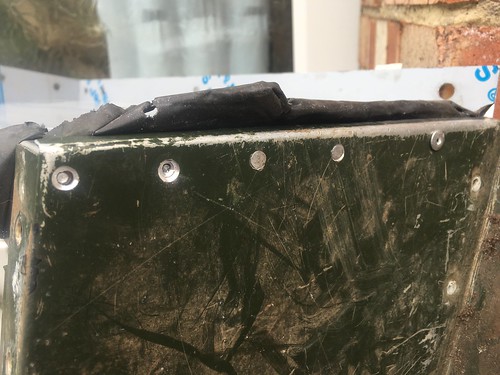 [/img]
[img] 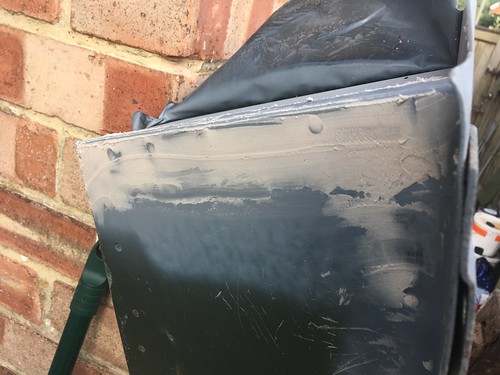 [/img]
[img] 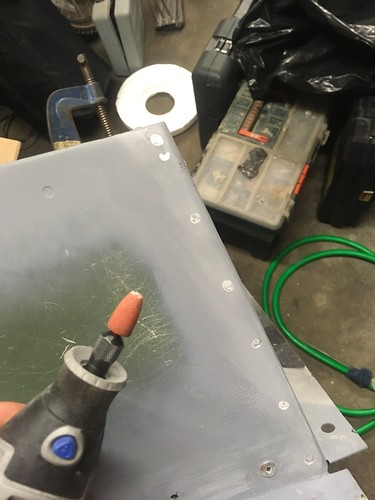 [/img]
New Seat angle
[img] 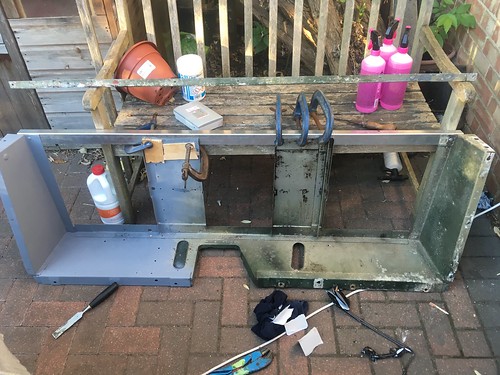 [/img]
Fit new box with original Aircraft Dome Rivets (had to learn new skill) & Etch prime
[img] 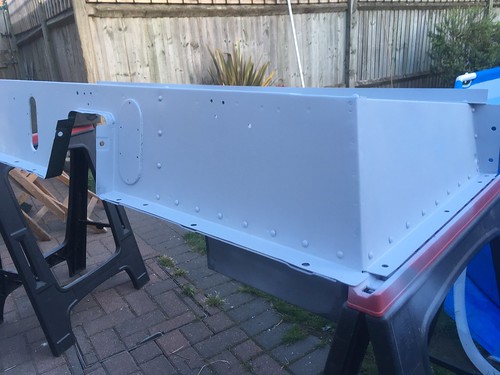 [/img]
Unsderseal
[img] 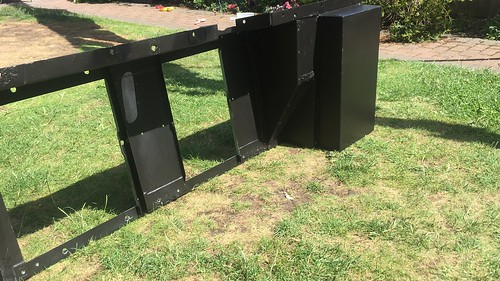 [/img]
The rear tub was a whole load more work 😯
We ended up with one of these as our photographic units wagon at the MOD.
[img]  [/img]
When the on site firemen had it they'd occasionally get it on 2 wheels as the water tank had no baffles. It was quite something to drive, the gear stick was miles long and sheared of on one occasion while driving. On another occasion the whole windscreen fell in on us and it was eventually condemned when the manifold went and starting leaking carbon monoxide into the cab, that wasn't too pleasant an experience. You could get close to 50 in it if you used the whole mile and half road between HQ and the gate.
i cant remember - did some of us not mention that "over winter" would spiral back at the start ?
:D:D:D
still consider mine quick and it took 14 months - total strip down and rebuild including welding to chassis , complete rebuild of the bulkhead , front axle rebuild with new spring/shock mounts and hockystick mounts- all internals of both axles replaced , new engine, full rewire and a paint job.
reminds me - the last photo i posted was as i dropped it off for previous mot..... it requires another.
due to the fact ive been in the uk about 90 days this year and most of those have been away in the camper i think its done a 3 digit figure since the last mot 🙁
I reckon that Welsh Farmers last pc is the Strata Florida bomb hole as well.
Suspect my 110 CSW has to go. Bought a camper van and 4 vehicles for 2 people is too much. The 110 is least used and the most expensive to run. What will I get my fire wood in? A bloody Jimny isn't going to carry much.
I once owned an SII SWB with a 2.5ltr diesel Perkins engine in it, the steering box was fitted in correctly too so 2 turns left and about 16 turns right 😆 TBH it was in great condition back then, used to tow a horse box around and when that was on the Landy was level, take the box off and the nose dipped because of the weight of the engine
😆
Those photos of the repair work are excellent, that’s quite involved and a proper job.. amazing. Keep up the good work and it will last you out.
take the box off and the nose dipped because of the weight of the engine
that would be the rear end rising rather than the front end dipping. they are rated to carry a **** load so the rear springs are rather robust and when empty will sit arse up.
nextdoor have just discovered land rovers and have a 90 and a long wheel base 110 both have had a little tickle in the engine department. I recommend the sip Tig/plasma cutter for general maintenance along with a good understanding of miss matched wiring.
The long wheel base one is being converted into a highland fly fishing camper get anywhere type thing. And having a good look around them they look just as easy to work on as VW buses
Suspect my 110 CSW has to go. Bought a camper van and 4 vehicles for 2 people is too much. The 110 is least used and the most expensive to run. [b]What will I get my fire wood in? A bloody Jimny isn't going to carry much[/b].
Oh I dunno.....
[list]
Love a renovation/build/conversion thread. Thanks for sharing!
Sweet, more landyage.
Tiger6791 - Yup, that's what always happens. There's no such thing as a quick rebuild (well, there is, but the results wouldn't be very good).
In other news, my IIa SW I mentioned earlier in the thread is now finished, huzzah!
[img] 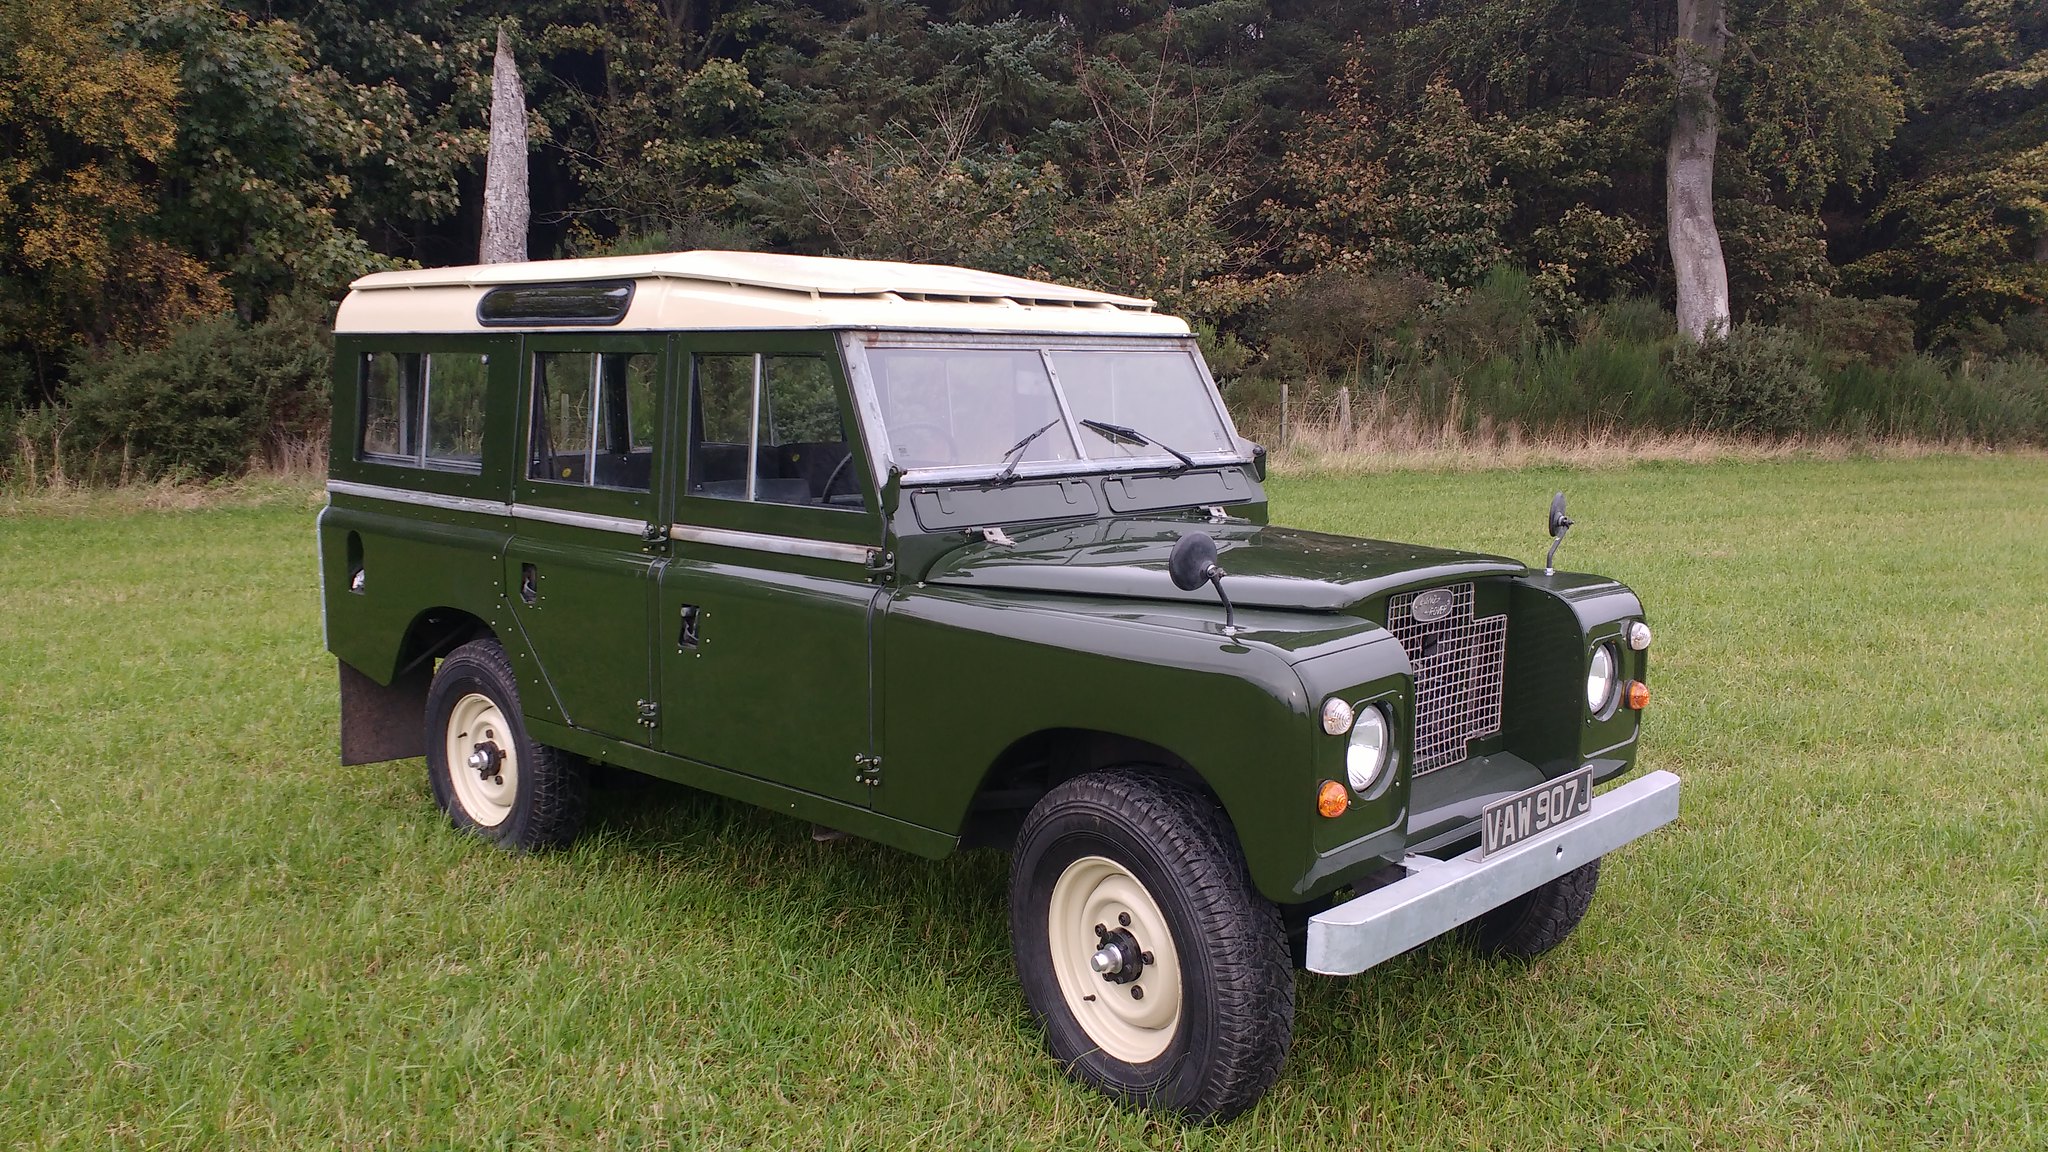 [/img]
[img] 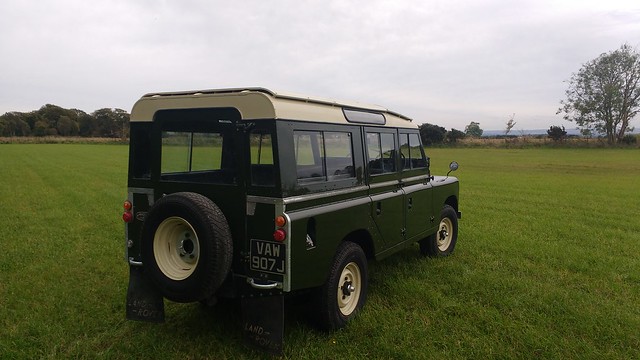 [/img]
Shameless plug, it's also for sale...
Puma here. Love it. Picked up some new tyres a month or so back, so much better. Few bits i'd like to do, wire in the spots etc, and still need to properly seal it underneath.
[img]  [/img]
Here we are in the Lake District this summer.
[img]  [/img]
[img]  [/img]
109 looks nice 😀
[b]Right onto the tub[/b]
Once I'd cleared 50 years of crud off it was actually in great shape, I suspect Land Rover in 1966 was pretty good at quality. Nearly 2 decades into production and before British Leyland.
So in short it needed 1 new cross members and some galvanic corrosion neatening up.
50 years of crud
[img]  [/img]
4 hours later (and a lot of wire brushing)
[img] 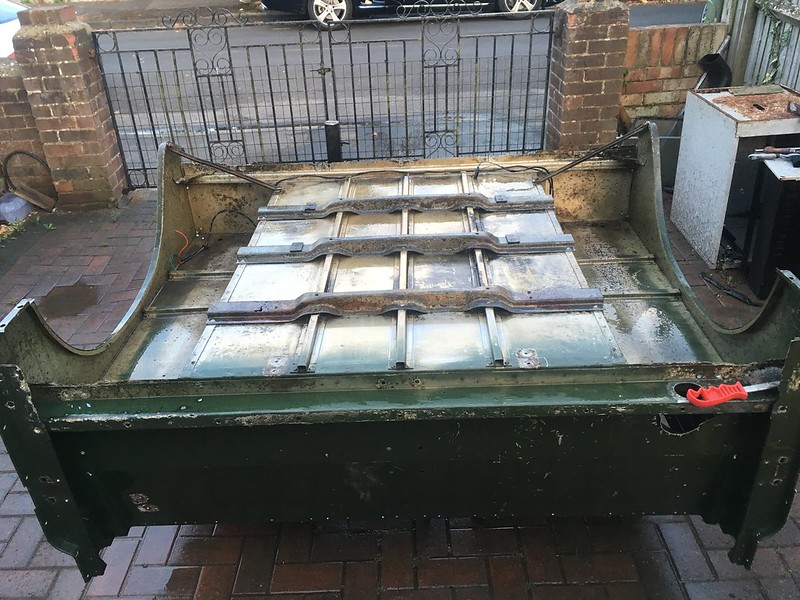 [/img]
1 bad (steel) bit
[img] 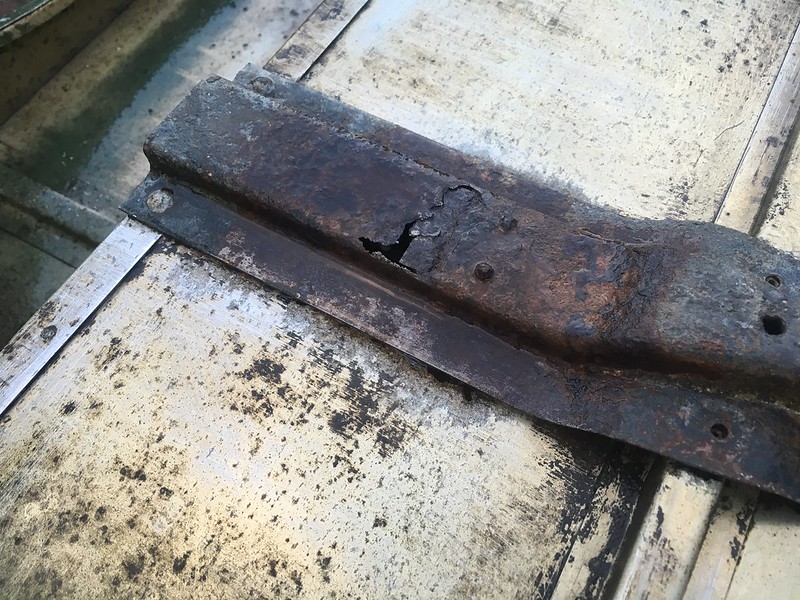 [/img][/url]
and lots of this
[img]  [/img]
So the galvanic edges of the rear qtrs I was just original going to trim a straight edge taking 5mm off the bottom the panel but instead I decided to build it back up again using a bit of fibreglass.
[img] 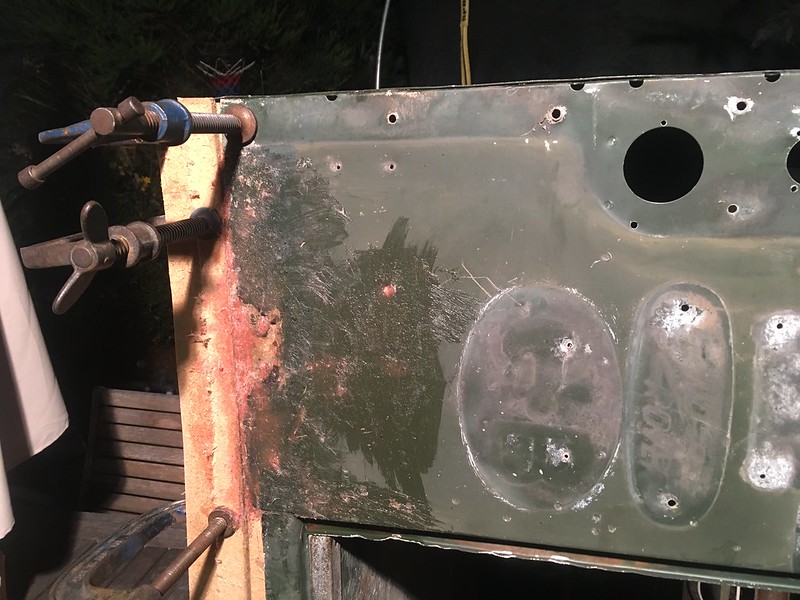 [/img]
..and from inside
[img] 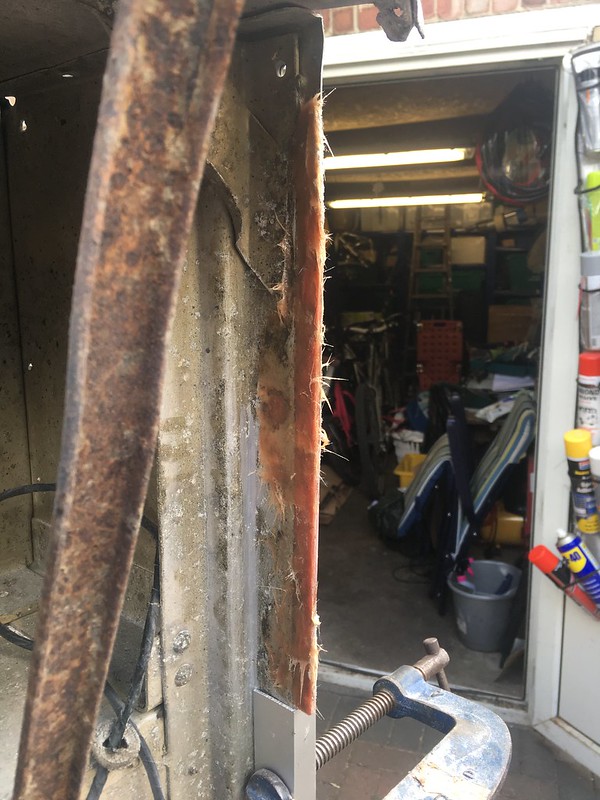 [/img]
jig off
[img] 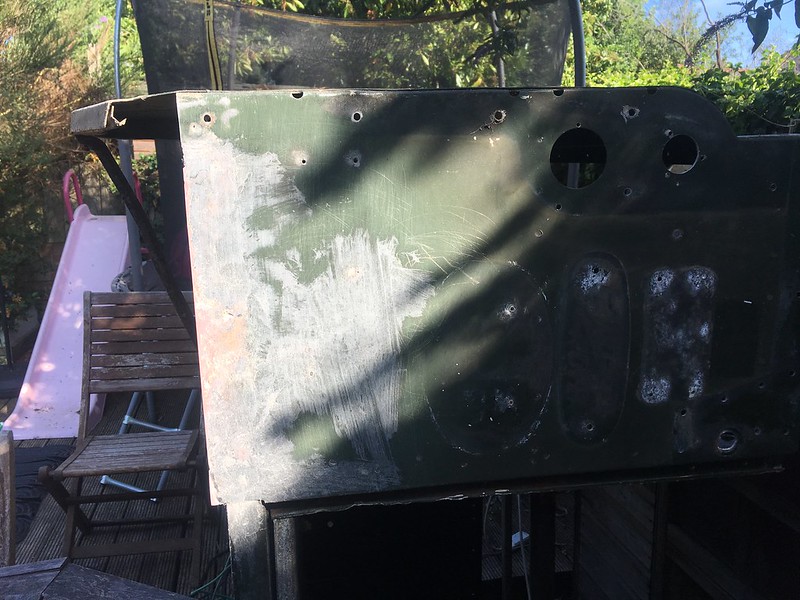 [/img]
bit of etch primer to show where i'll need a bit of knifing filler
[img] 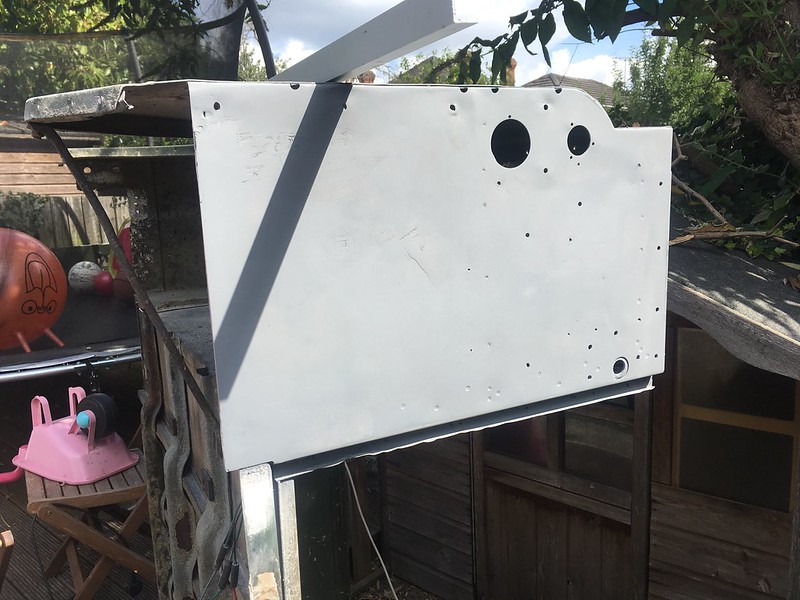 [/img]
One of the rear wings had a nasty crease in it and it wouldn't knock without with springing all in and out.
Anyway had an idea to clamp a bit of 40mm oak worktop to it and 'anneal it' with a blowtorch, the internet said 350c so armed with infrared thermometer and blowtorch and hammer I heated it and gently persuaded the rear wing to be straight(ish)
Very weird watching the ally bend and bow into it's own shapes under heat.
Clamped up
[img] 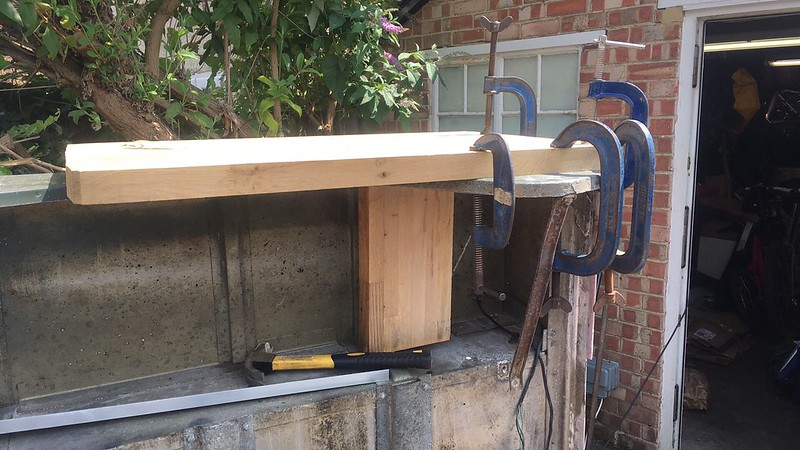 [/img]
After heat (and few whacks)
[img] 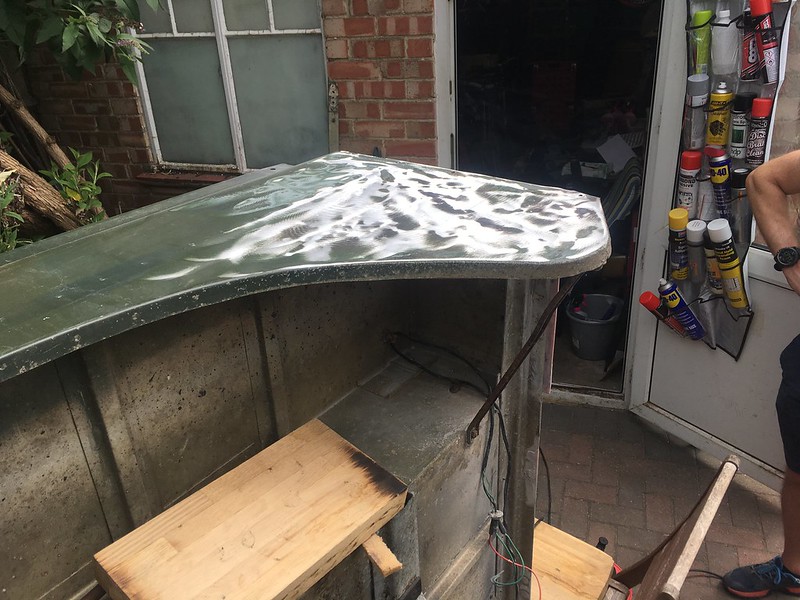 [/img]
Needs a bit of filler but really pleased 😀 😀 😀 😀
[img]  [/img]
So rear looking a bit tidier
Okay so now the rear is tidy!
From crusty grizzly edges to nice and smooth :thumbsup:
[img] 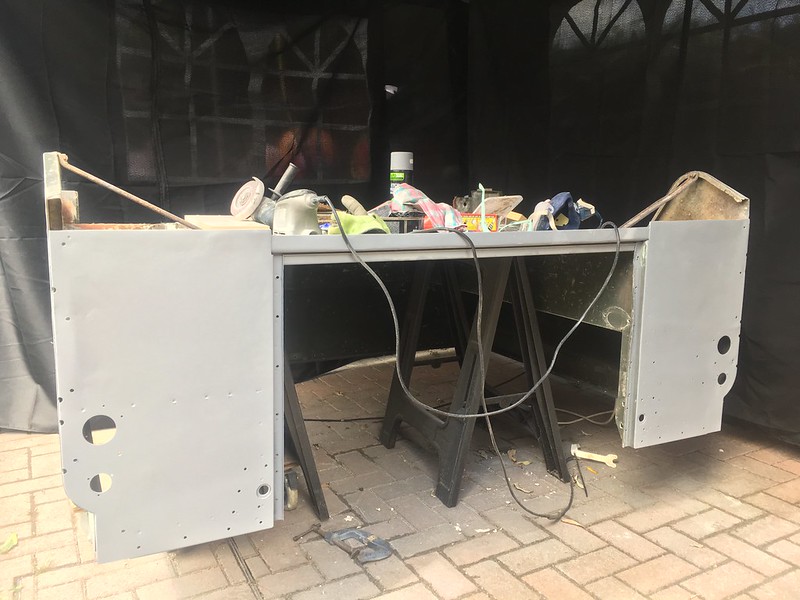 [/img]
Next job is to replace the bad crossmember then paint!
The nearest tub cross member had had it so a new one was needed
[img] 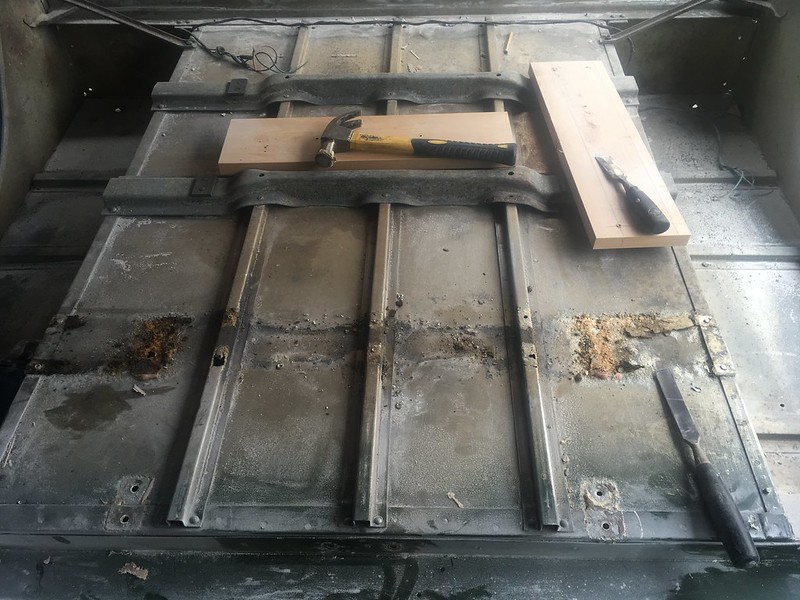 [/img]
Patched the holes with my favourite stuff .... (flibreglass, used mating this time) as it was only 2 small holes in the tub floor.
Where the support beams had gone I slid 15mm Aluminium channel into the existing beams, this will reinforce the existing but also gave me something to rivet the new crossmember to.
Anything steel was also primed
[img] 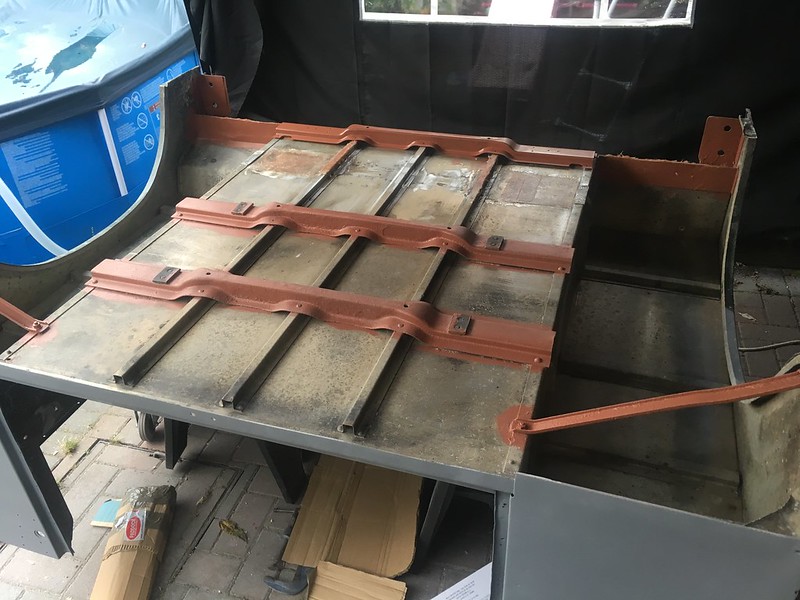 [/img]
New crossmember fixed into place and the whole underside of the tub was etched
[img] 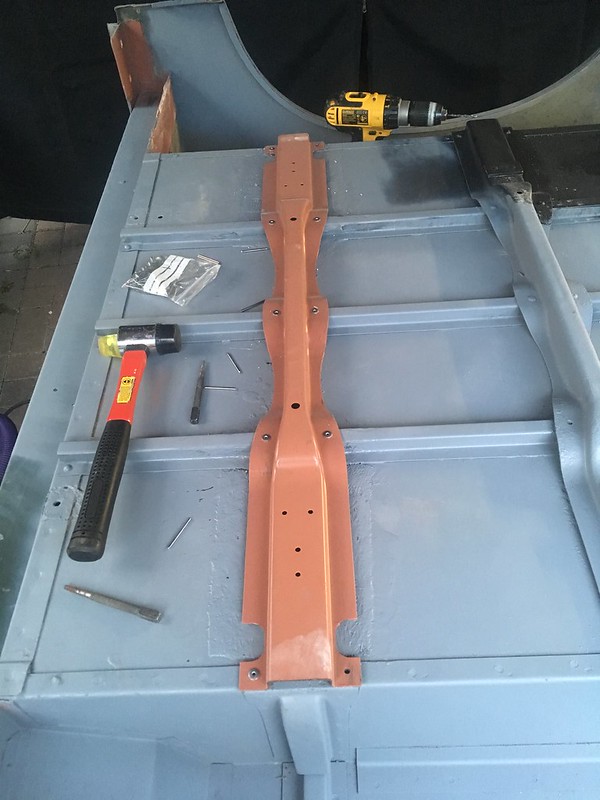 [/img]
Then given a coat of Buzzwelds's CIO mainly because I had half a tin (horrible stuff!!) but neatens it all up and and extra layer in the battle against galvanic corrosion.
[img] 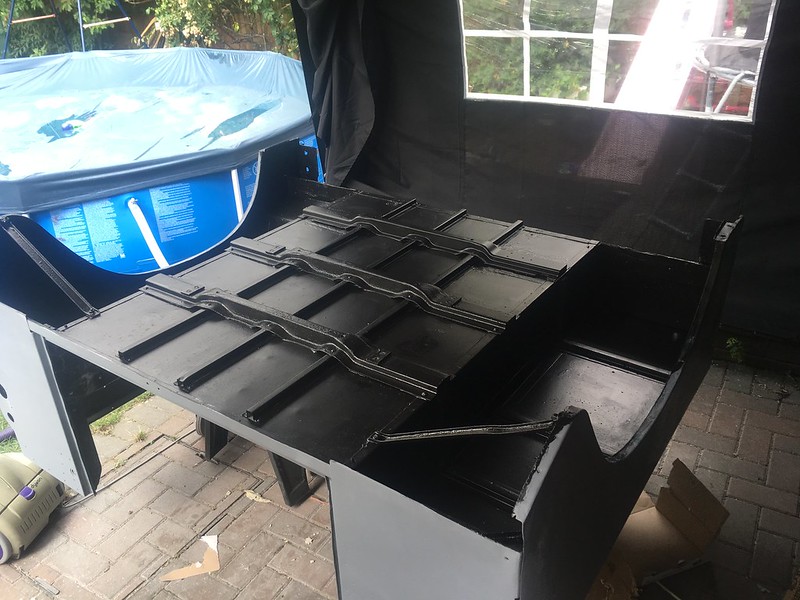 [/img]
Anyway pretty pleased, but it over never to be seen again. (apart from by an MOT man) :thumbsup:
[b]Then Paint![/b]
Sand & flat
[img] 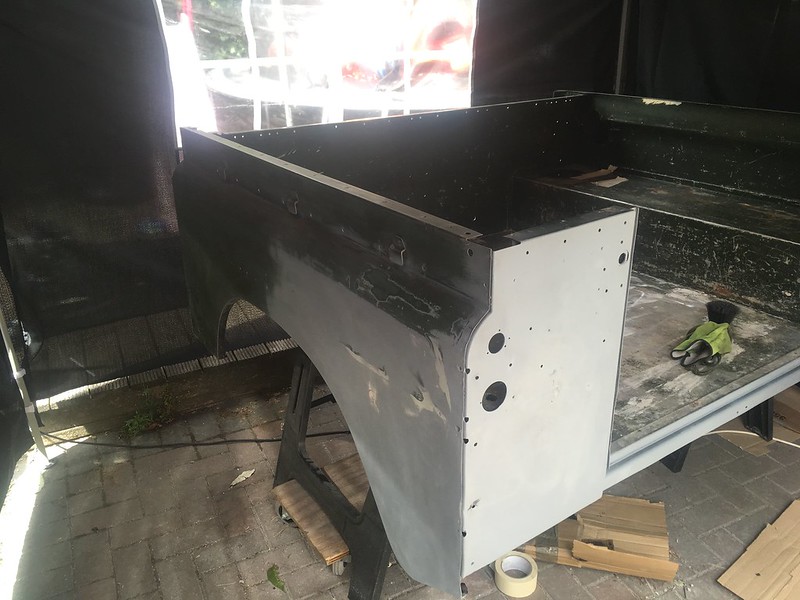 [/img]
High build primer over some the etch
[img] 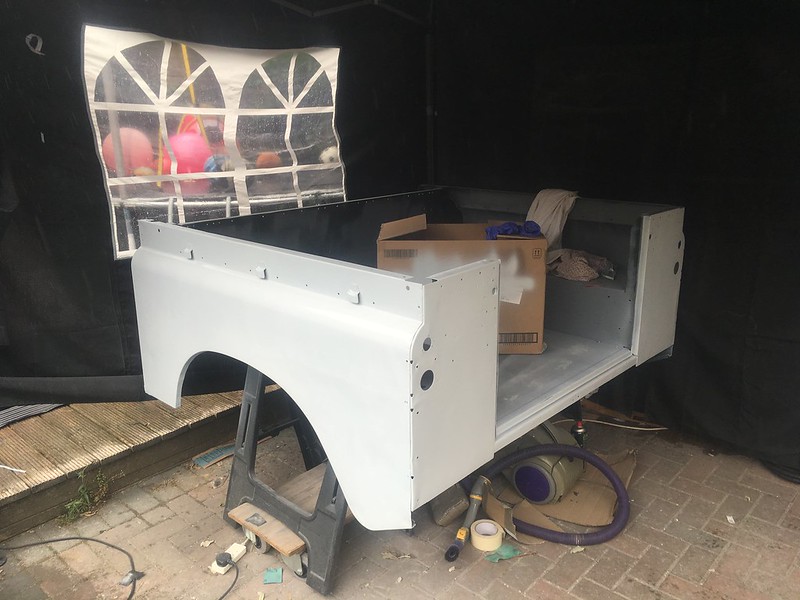 [/img]
Then some Seafoam "Pale" Green :thumbsup:
[img] 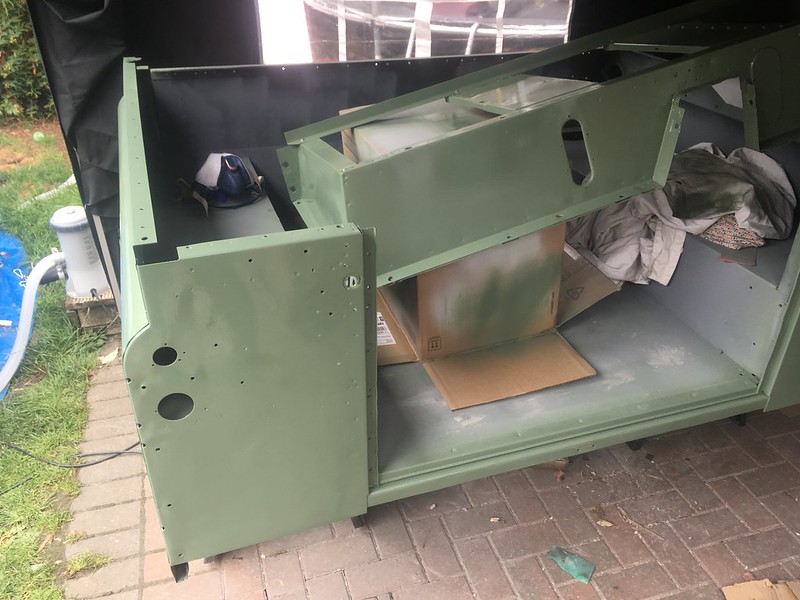 [/img]
[img] 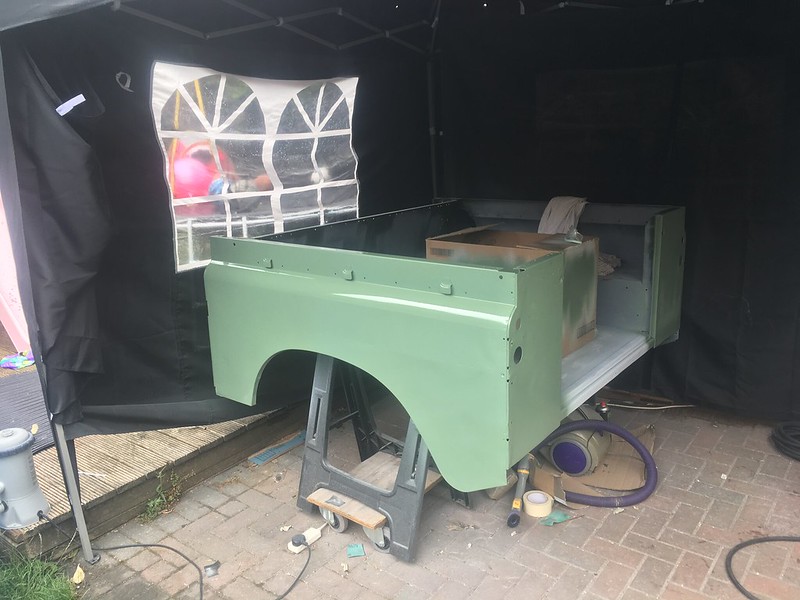 [/img]
Came close to buying one years ago having never driven one, then started working where I do and driven them a fair bit I say a good work vehicle but no way would I want to own one privately.
"Oh I dunno.....
A"
A trailer is cheating and no good for thieving from the side of the road. Can fill a 110 until the steering goes light.
Shameless plug, it's also for sale...
Great work, there, Kenneththecurtain! Where are you and how much?
Nice job. Having owned an ex-MOD 90 I'm pretty sure that mileage won't be real; I had a pal who was driving for the RAF and he pulled the service record; it was 27 pages of detailed coded records of all the repairs, rebuilds, re-purposes, every single thing that had been done to it including two major accident rebuilds and three new speedos, meaning the mileage was actually something like 175,000 when the speedo only showed 56,000.
Cracking car though, we miss it terribly.
I've got a very early Discovery which I haven't been able to bring myself to sell but can't afford to repair and run either.
Looking at the very thorough job Tiger's doing reinforces my feelings that a patch here and there probably won't cut it.
I would have thought after several decades of making cars in Britain any company would have got rust proofing nailed, nope.
Great job op keep it up.
Seat box rebuild and battery tray replacement along with footwells are winter jobs on my 110 td5 van
I thought the td5 would be a good upgrade from the old 2a I used to have. But not so sure
Oh I dunno.....<pedant> That's an SJ, not a Jimny. </pedant>
It's also pulling a trailer full of twigs, it only looks like logs because it's being towed by a 4x4 for ants. (I actually love SJ's, my dad ran them for years when I was wee). They aren't really comparable to land rovers though, they're properly tiny.
Great work, there, Kenneththecurtain! Where are you and how much?[url= https://www.gumtree.com/p/land-rover/1971-land-rover-series-iia-109-station-wagon/1269392856 ]It's not spamming if someone asks, right?[/url]
With all the work you’re doing I’m surprised you’ve got time to take photos 😆
Much as I love the detail & effort the op has put in I think I’d have kept the original paint myself. Did the same with my S111 ‘lightweight’; sorted the important bits but left it looking shabby. Tells the history of the vehicle.
I’d have kept the original paint myself.
Trust me, there is a part of me that wishes this also....
I’ll bet! It will still be beautiful when it’s finished, makes me want another.
When I retire I'm thinking seriously that on my last business trip to Johannesburg I might look around for a second-hand 110 and ship it home. Vehicles used up there on the Highvelt have never seen salt and have been in hot, bone-dry conditions most of their lives. They have the steering on the correct side and will generally have been maintained well, by an enthusiast. Finally the Rand is weak and freight rates are cheap (so I'm told) thanks to the net flow of manufactured goods to SA and the numbers of empty containers coming back.
Has anybody done this?
I'd watch out and double sure it wasn't stolen from here in first place.
Numbers check when registering in UK could lead to confiscation.
See re Italian range rovers done recently.
When I retire I'm thinking seriously that on my last business trip to Johannesburg I might look around for a second-hand 110 and ship it home.Has anybody done this?
Not personally, but very good friend of mine runs a small Landrover repair shop in Stourbridge and brings over about half a dozen Landrovers/Rangerovers from SA every year.
He is very picky about what he buys, and everything he brings back is in astounding condition.
[url= http://www.simba4x4.com/ ]http://www.simba4x4.com/[/url]
Globalti you should try and find one of the South African one's built there from UK supplied kits with the BMW engine, I think it was the 3.2L they stuck in it.
SA spec was the 2.8 m52 engine
Looks like a nice job you're doing there. Keep up the good work!
This is my 80 on the Wayfarer this summer.
[url= https://farm5.staticflickr.com/4540/38177787662_f0171b9c49_b.jp g" target="_blank">https://farm5.staticflickr.com/4540/38177787662_f0171b9c49_b.jp g"/> [/img][/url][url= https://flic.kr/p/21aD9bj ]IMG_5692[/url] by [url= https://www.flickr.com/photos/11688538@N03/ ]daniel.tomlinson[/url], on Flickr
Good job on the annealing, quick workshop route using Oxyacetylene was to coat the panel in a sooty flame then heat up the panel with a 'normal' flame and at the point you've burnt off all the soot it's annealed.
