I'm loving this tread, it's up there with rate my brickie and the McMoonter builds 😀
I like it too. Thank you Mike. You're a very nice man.
I'm now looking on webuyanycar to sell my bmw so I can buy a van. I blame you. You're awesome x
Oh dear, what have you started. The missus is gonna kill me. (Starts scouring Ebay for suitable van)
My Missus has moved enough to consider renting a motor home for a week. What I'm worried about is that she won't like it and say NO i've been good enough to try it and it's still NO.
🙂
Next up, some electrickery. Got a couple of 100W solar panels from ebay:
[img] 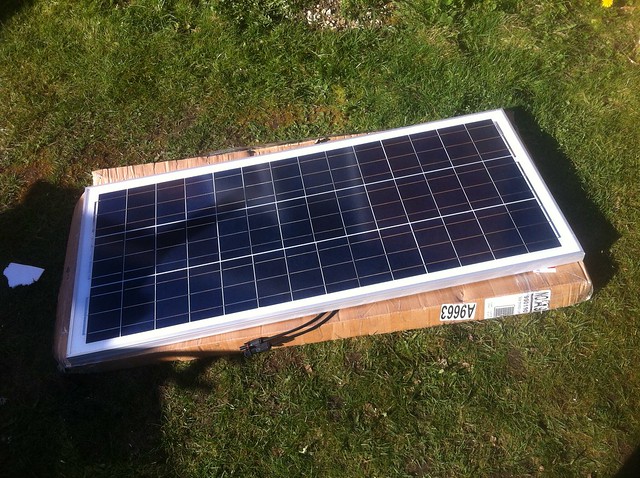 [/img]
Thought I'd best checked that they worked -- looks promising:
[img]  [/img]
I didn't want to be hoofing panels on and off the roof while sorting the brackets out, so I made a mockup out of a bit of scrap ply:
[img] 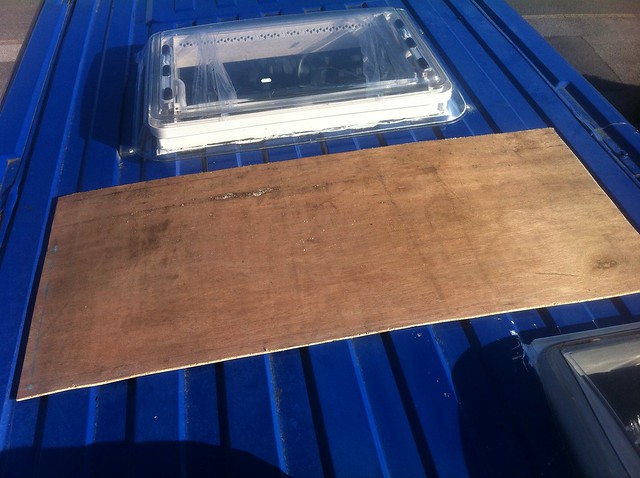 [/img]
Used that to position and mark up the plastic corner brackets. I ummed and ahhed about how best to fix them on -- I reckon just Sikaflex would have done the job just fine, but I bottled it (having read about someone's that came off) and used some rivnuts as well:
[img] 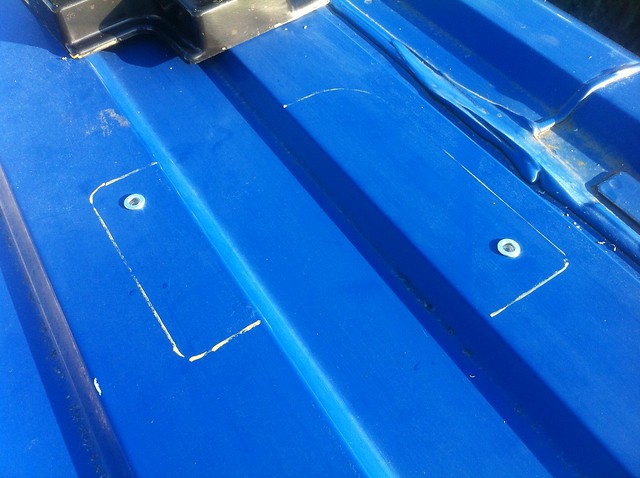 [/img]
Bracket in place:
[img] 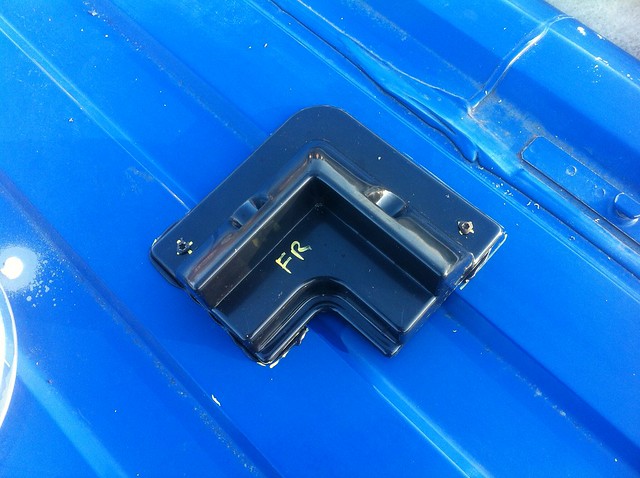 [/img]
That's "FR" for "Front Right", not "Freeride", of course. Repeat for the other corners and the panel drops in as so:
[img] 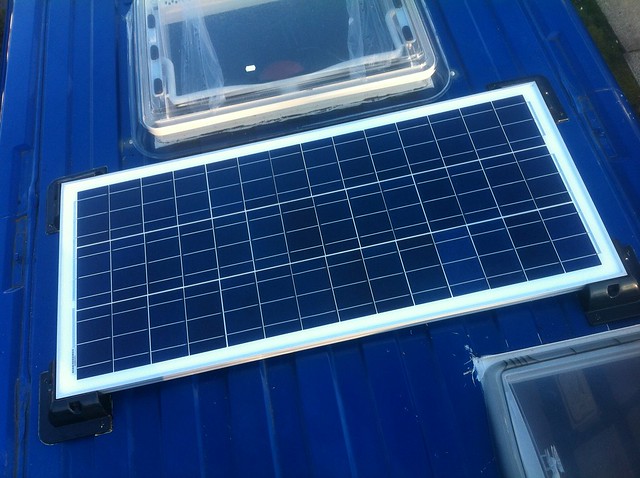 [/img]
Drilled the aluminium frame and brackets, put stainless self-tappers through to hold the panel to the brackets, job bejobbened:
[img] 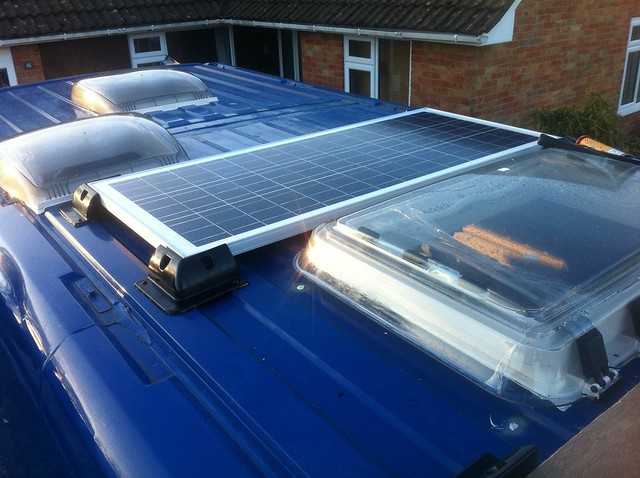 [/img]
Then did it all again for the other panel, which goes right at the front. It's pretty snug against the big rooflight to avoid the front brackets ending up on the sloped part of the roof, but the rooflight will still open fully. Just:
[img]  [/img]
The cables come in via a waterproof box stuck to the roof:
[img] 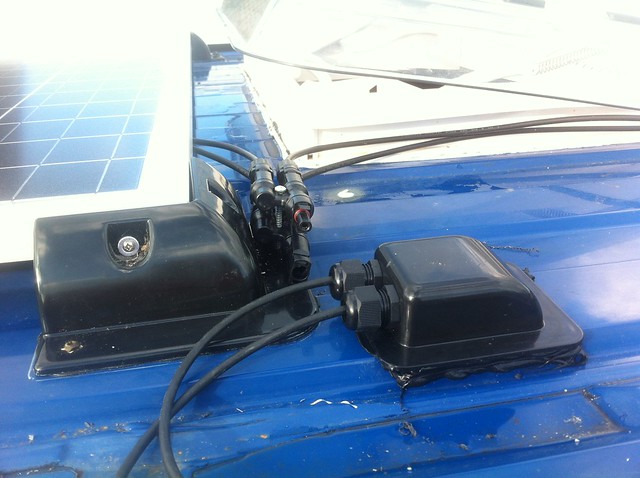 [/img]
Panels connected together with Y-connectors -- they have handy mounting holes, so I attached them to one of the brackets with a long screw and a quick-and-dirty spacer made from a bit of alu tube:
[img]  [/img]
Tidied the cables up with a bit of self-adhesive trunking:
[img] 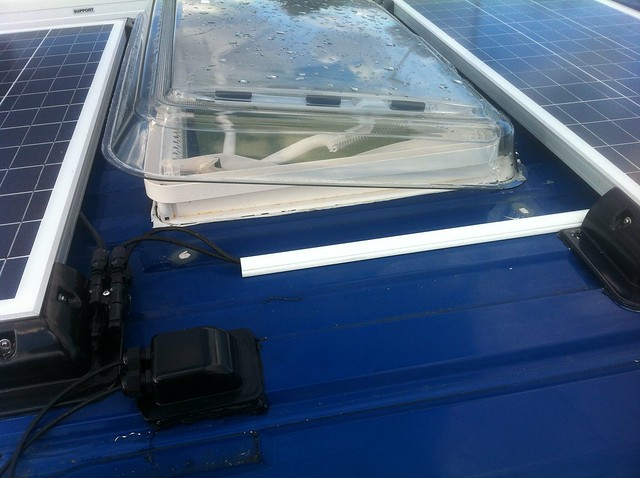 [/img]
Just stops them flapping about, not sure how powerful the adhesive is but it's done a few hundred miles and hasn't come off yet.
The increasingly-crowded roof now looks like this:
[img] 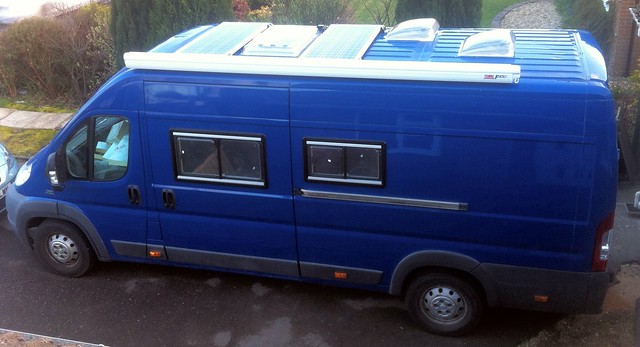 [/img]
Note also the Fiamma roll-out awning which was a reasonable ebay bargain -- someone else converting a van had bought two of them with a view to putting one down each side, then thought better of it. So it was effectively brand new, never fitted, still in the box, just a bit dusty and £140 less than a new one.
The charge from the panels will eventually find its way into two of these:
[img] 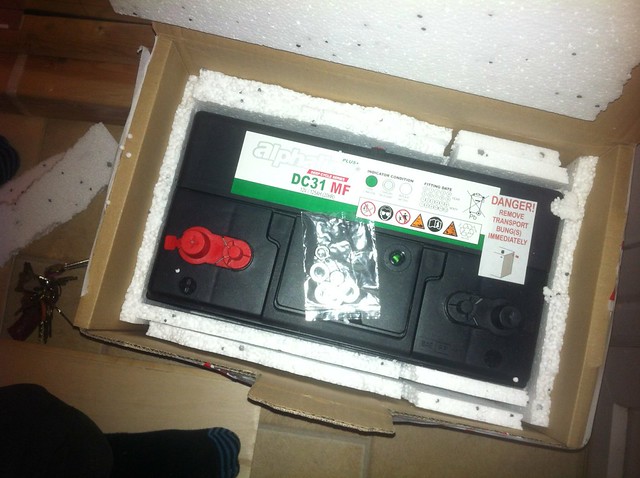 [/img]
which I felt a bit sorry for the delivery man about, they're about 25kg each.
In other news, more ebay purchases included a teeny reversing camera that fitted neatly above the high-level brake light:
[img] 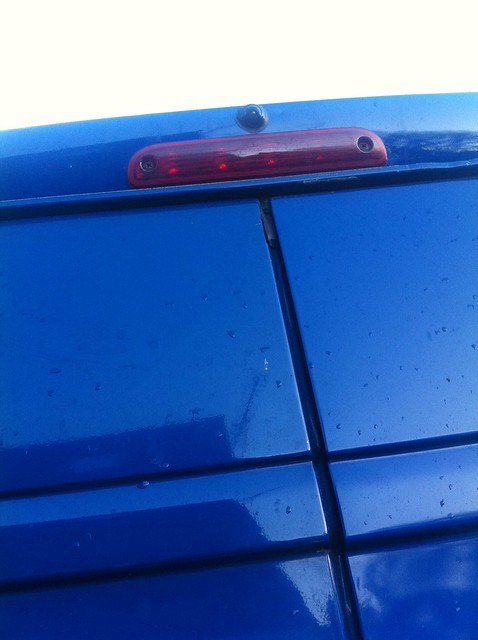 [/img]
and a 5in screen that goes where the mirror would be:
[img] 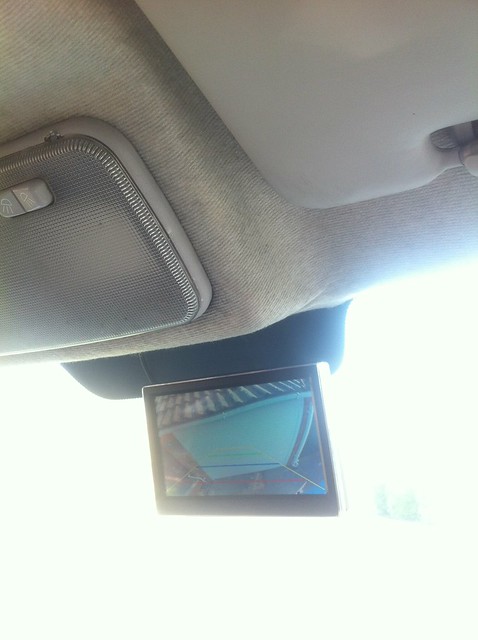 [/img]
Needs adjusting to be actually straight. It's a very wide angle (claimed 170degrees), that blue bit at bottom right is the top corner of the van roof. Somewhat inevitably it distorts a fair bit at the edges, my guttering isn't quite that wonky 😉 Decided that we might as well have it on all the time when driving, so screen and camera are both hooked into a handy spare ignition live I found in an empty slot in the fusebox:
[img] 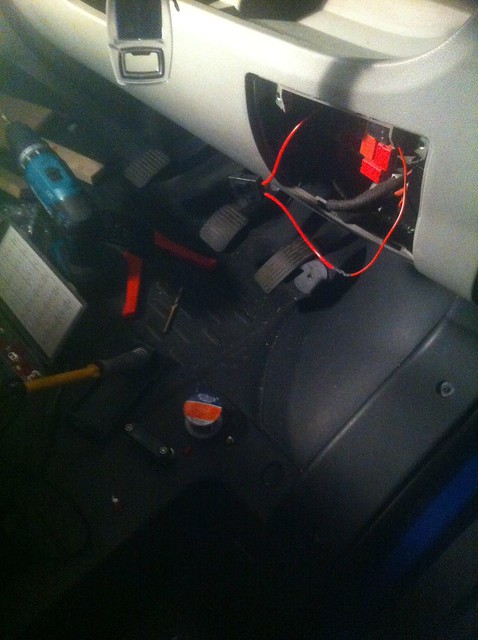 [/img]
The neat way of doing this would be to pull the fusebox out, connect a new wire to the back of it and put a fuse in the vacant slot. But taking the fusebox out looked a bit non-trivial, so I cheated -- stuck a spade connector into the fuse side and added an in-line fuse holder.
Also I got a sticker:
[img]  [/img]
Which I bought, for added irony 😉
NO!!!! just read the whole thread and thats it, its like breaking bad, I need more... Cmon I need to see how it ends....
I think there is another sticker possibility - Envied by Singletrack!
looks fantastic, very inspirational
Just wow. In the words of Ron Burgundy;
I love this thread.
That is all, carry on.
Fantastic. Looking forward to the innards
This is fantastic!
My brother converted an old AA van to a Camper using Amdro kit, which I thought was relatively impressive, but he has clearly an amateur.
I took the lazy way out and bought a preconverted Toyota HiAce.
This thread is great! I haven't felt this excited since Breaking Bad 🙂
Either I'm going mad or the reversing camera has been in two instalments. Top thread, keep'em coming 🙂
Mike_D - I am in awe!!!
Just added this thread to my favourites; I now feel crestfallen and empty inside having arrived at the end of this episode.
Awesome build. Bring back memories of doing mine... good and bad! 🙂
OP - What sealant did you use on your roof lights? I made the mistake of using sikaflex here and it failed after a few months and started leaking. You need to use something that doesn't dry out, as it will crack.
They're bedded on two layers of mastic tape. It took a couple of goes to get all the roof corrugations satisfactorily filled, and the odd shape of the Midi Heki at the front around the hinges caused some issues. All good now, though. /crosses fingers
Stop teasing us! It's obviously finished, get the rest of the pix up!
It's _so_ not finished 🙂 It's got to the point where it's a Motorcaravan in the eyes of DVLA and the insurance company, and we've had eight nights away in it so far, but there's plenty to do yet 🙂 Perhaps unsurprisingly, getting to "useable" status has slowed progress a bit...
They're bedded on two layers of mastic tape. It took a couple of goes to get all the roof corrugations satisfactorily filled, and the odd shape of the Midi Heki at the front around the hinges caused some issues. All good now, though. /crosses fingers
Fingers crossed! It was a heki-midi I used, with mastic to fill in corrugations and sikaflex as the sealant.
I had lots of problems and ended up having to re-do it all using a non-setting mastic from a tube, rather than the tape stuff.
Also, I know exactly what you mean by slowing up. I got mine ready to use almost 2 years ago and have only just started to do more bits and pieces 🙂
I had no idea just how much time and effort was going to be involved in it.
I had my van for 7 years and it wasn't finished when I sold. Had lots of great holidays in it though 🙂
Enjoying the updates.
I brought the corrugations up to level with thick strips of uPVC from a building plastics place, stuck in with Sika (not exposed to UV just there so should be OK). Tape on top.
MOAR.
Insert own "got wood" joke here:
[img]  [/img]
Various sizes of planed all round timber for framing, 6mm birch ply for bulkhead sides, 4mm birch ply for wall lining and furniture skins, 3mm ply for ceilings.
Some of this was for battening the roof to support the ceilings:
[img] 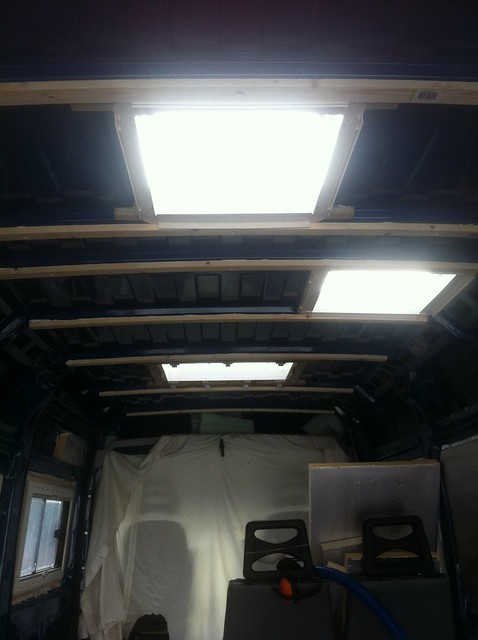 [/img]
There'll be more Celotex in between the battens -- went for 40mm in the end because there was _just_ enough height for it (I'm 6ft) and we want it as well-insulated as we can reasonably manage. Most of the battens are Sika/rivnutted to the steel ribs in the roof, but in a couple of places we need intermediate ones so we can use the full width of a sheet of ply. And also to help support various bits of wall/full height cupboard that'll be going in later:
[img] 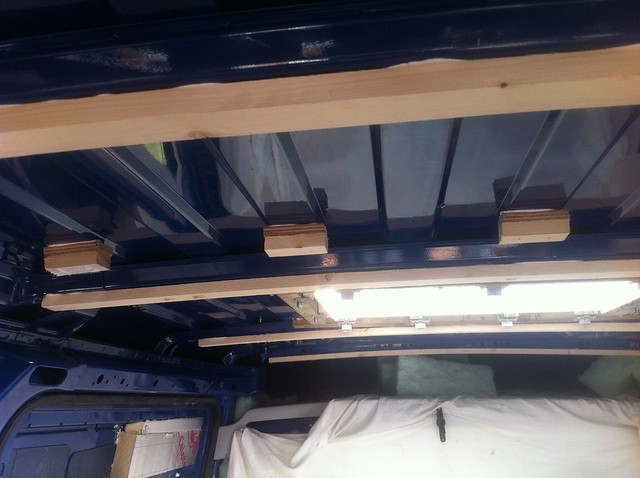 [/img]
The intermediates need packing so they end up at the right height. Many points for Sikaflex here -- I can hang off one of those little blocks (until my grip gives out).
Meanwhile, more insulation was happening:
[img]  [/img]
After much pondering we're not doing anything with the steel ribs -- people who've insulated inside report that it doesn't make much difference, given that most of the heat is conducted through the metal rather than radiating through the air gap.
The windows work best with a wall thickness of about 25mm, so that's what we did. But there's 50mm of insulation in the walls, so I had to make reveals for the windows to bring them out to where the walls will be:
[img] 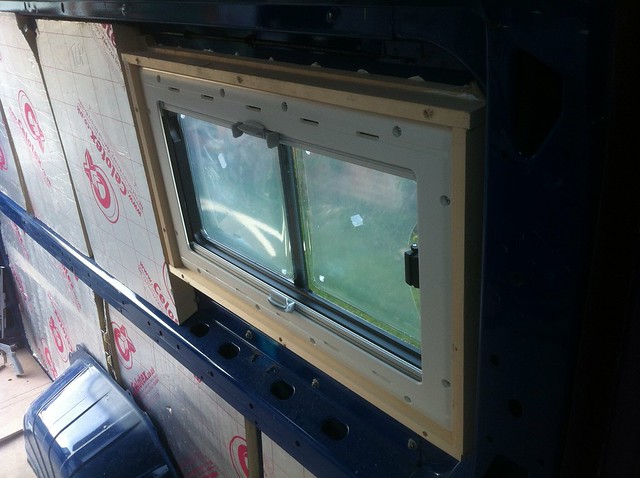 [/img]
Then some more wood, making a start on the framing for the rear bulkhead that separates the accommodation from the bike space:
[img] 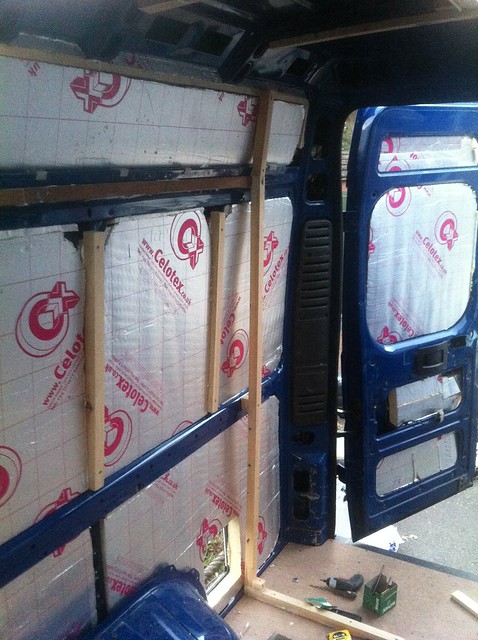 [/img]
The space looks very shallow, because, well, it is 😉 But it's deep enough for two bikes side by side, crossways, front wheel out, with big flat pedals on, so that'll do.
Obviously when tackling a project like this, it's essential to maintain a tidy, well-ordered working environment:
[img]  [/img]
Hm. Possibly not that essential after all.
Got a bit of interior lining in, bit of a fiddle to get the hole for the window in the right place -- to play safe I made it a few mm too small, it'll get planed/sanded back to end up flush with the reveal frame. Eventually.
[img] 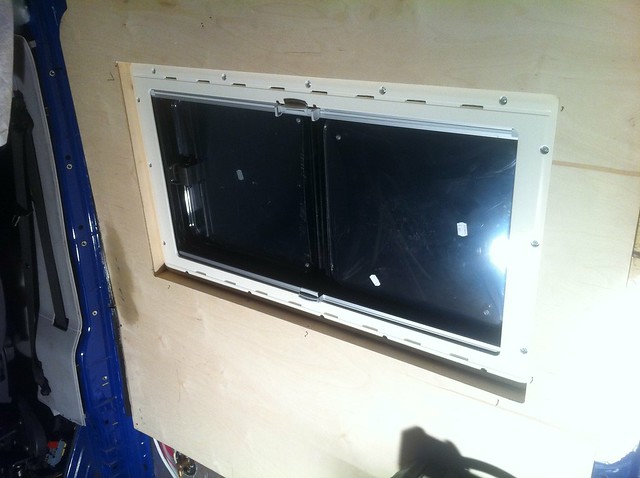 [/img]
Insulated the roof:
[img] 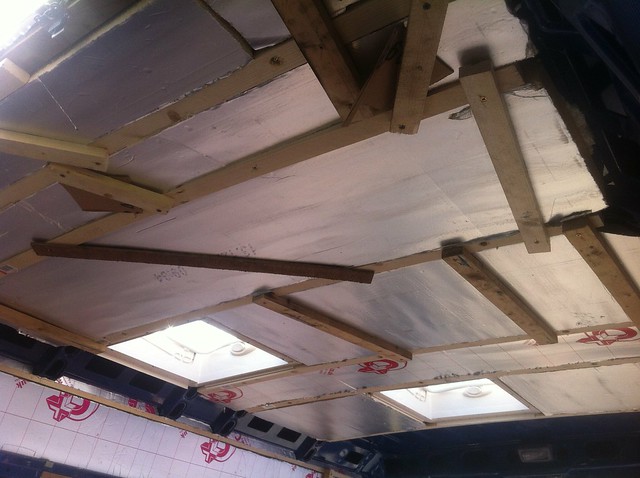 [/img]
All those random bits of wood are temporarily screwed to the ceiling battens to support the insulation while the goop goes off.
In the interests of saving time and effort, the rear bunks are made using Ikea bed bases. They're too long and too wide, but that's easily remedied:
[img] 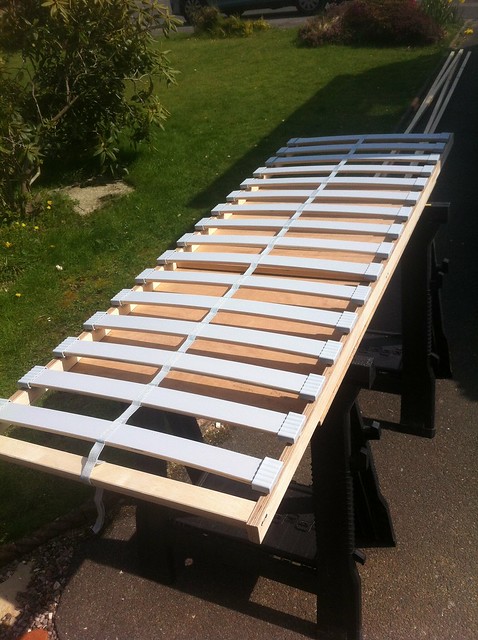 [/img]
Lower one mocked up in position:
[img] 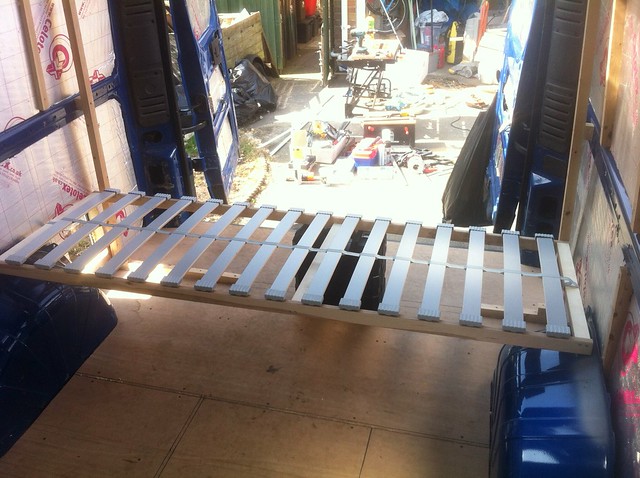 [/img]
Bulk of the bulkhead framing done:
[img] 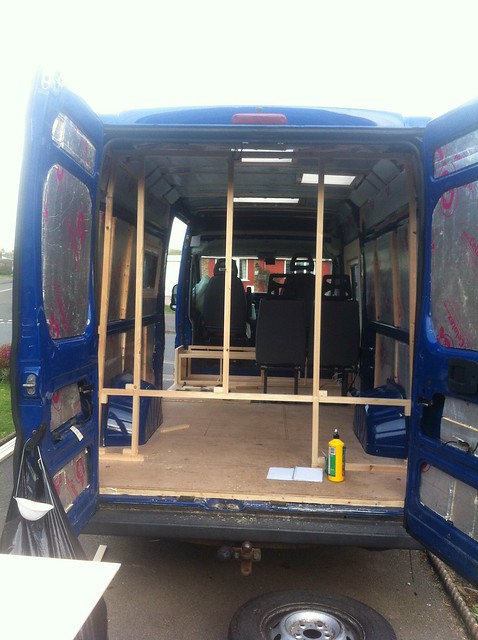 [/img]
The gap at the bottom is for access to the space under the lower bunk -- there's room for a couple of inflatable canoes there (not a random example, those are things we'd like to carry 😉 )
Lined on the accommodation side:
[img] 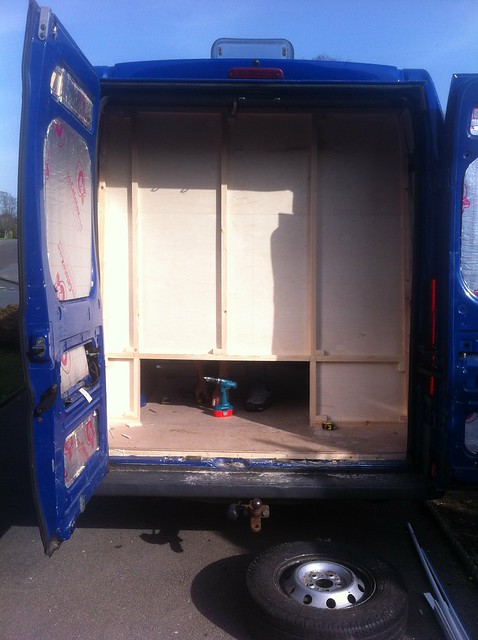 [/img]
Looks like this from the other side:
[img]  [/img]
A bunch more framing to hold the lower bunk up:
[img] 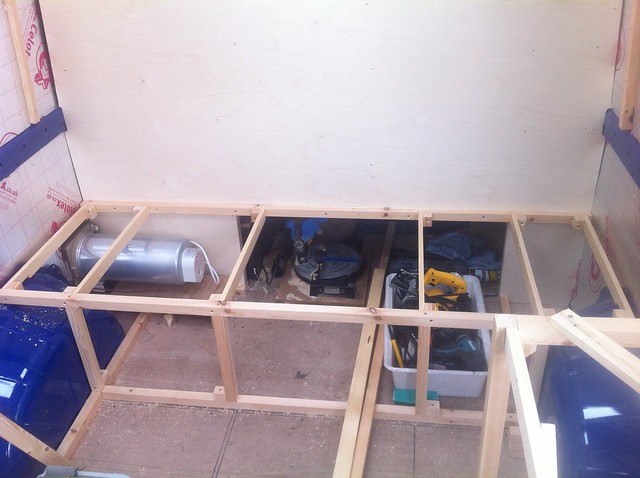 [/img]
With the base in place:
[img]  [/img]
And to round off this exciting instalment, another lined window:
[img] 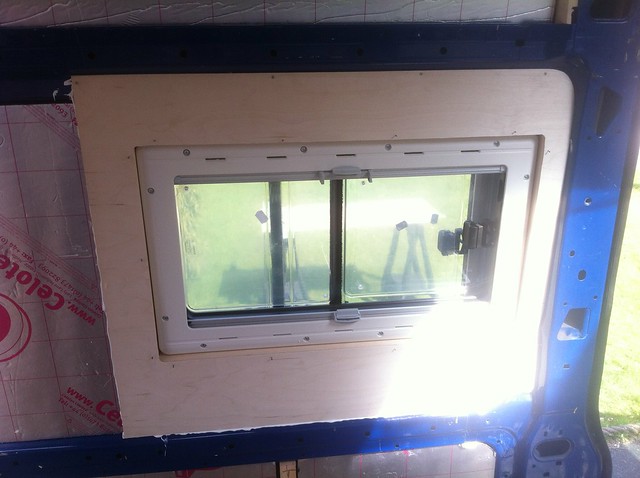 [/img]
This one's over the kitchen, so the lining doesn't need to go any further down. There'll be a full-height cupboard to the left, so the lining doesn't need to go any further that way, and an overhead locker, er, overhead.
Super-observant readers may have spotted a sneak preview of the next stage in one of the pictures above 😉
Chapeau sir 8)
Water heater?
Bench seat?
Wow! Top job sir. Can't wait to see it completed!
Loving your work sir! Its like an stw "how-to" guide..
when you say you work at at desk.. is it producing Haynes manuals?
its monday, sunny, my legs hurt from HOTS and i demand an update to this thread...
And then...
Is there anything to update following the long weekend?
Daft Question but I take it you'll be insulating the rear bulkhead? Also, put a seatbelt and drop down seat in there for naughty kids?
We must be due an update soon? 🙂
Long-awaited update time! The sneak preview was indeed the seat/bed/bench/box thing, which started life on the dining room floor after an evening of attacking a set of Ikea bed slats with a saw and randomly aiming screws at them:
[img]  [/img]
The clever bit is that it's in two overlapping halves that slide apart like this:
[img] 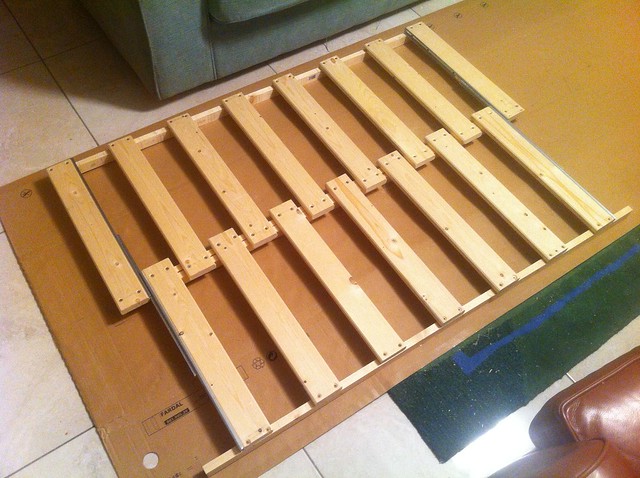 [/img]
There's a shallow ball-bearing drawer runner at each end to keep it all in line. You're probably thinking that that looks a bit small for a double bed and you'd be right -- there's a second bit that goes alongside:
[img] 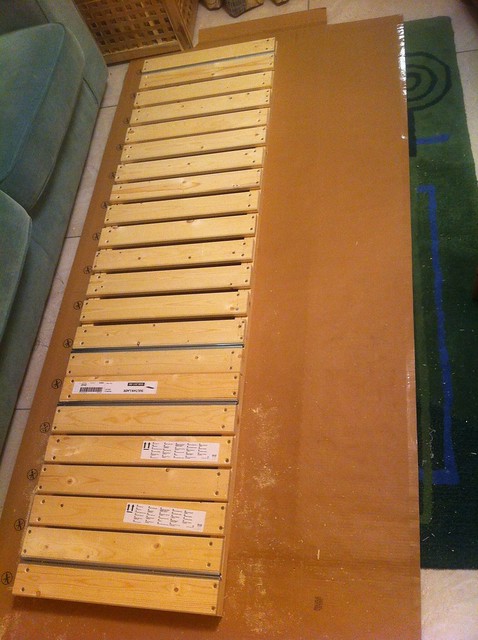 [/img]
The reason for two sections will become clear in the fullness of time 😉 Pull out the small bit:
[img] 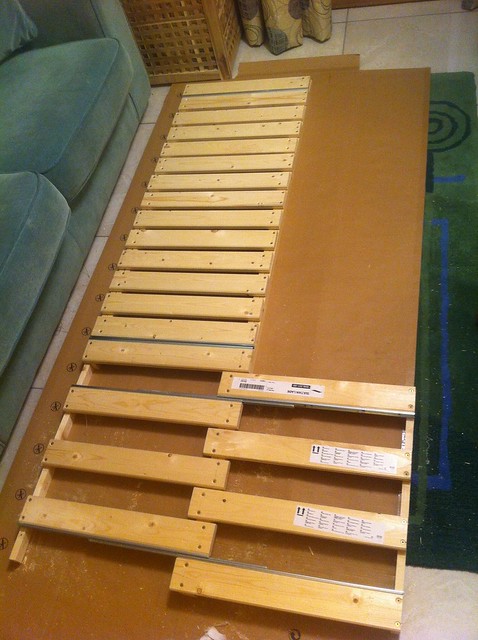 [/img]
Then the big bit:
[img] 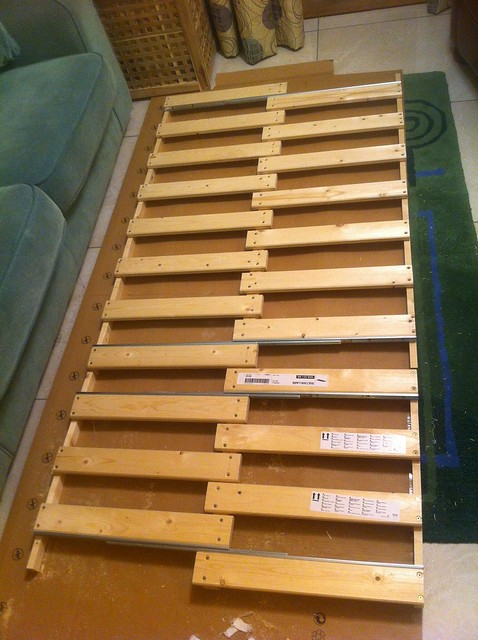 [/img]
The remaining width will be made up by a hinged flap that sits on the top when it's a seat, of which more later. The whole thing goes in this position in the van:
[img] 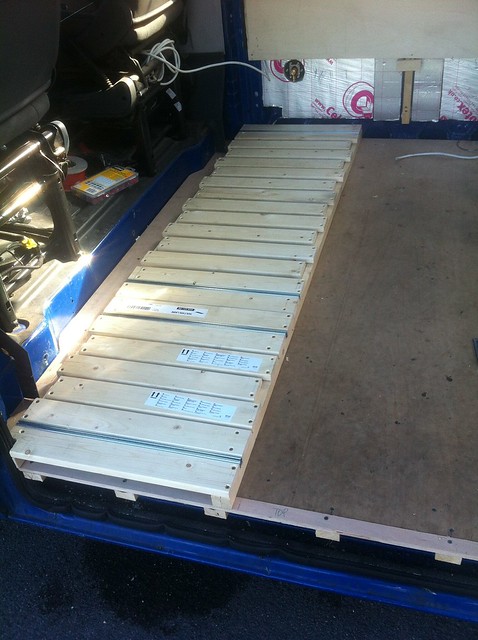 [/img]
It's just over six feet long, we'll be sleeping across the van -- it's not that generous in length (I'm a gnat's pube under 6ft) but an acceptable trade-off for saving a couple of feet along the van so we can fit everything else in. Obviously it doesn't go on the floor, so I started on a frame to hold it up:
[img] 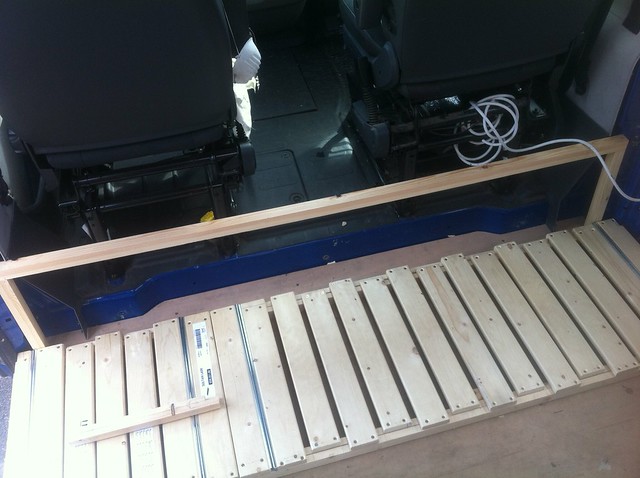 [/img]
It all got a bit free-form from here -- I had the rough idea in my head but the execution involved a fair bit of making it up as I went along, as well as cutting out odd corners and bits of plastic trim to win back all-important mm here and there. With a bit of frame in I mocked up one end with some scrap timber to check the height:
[img] 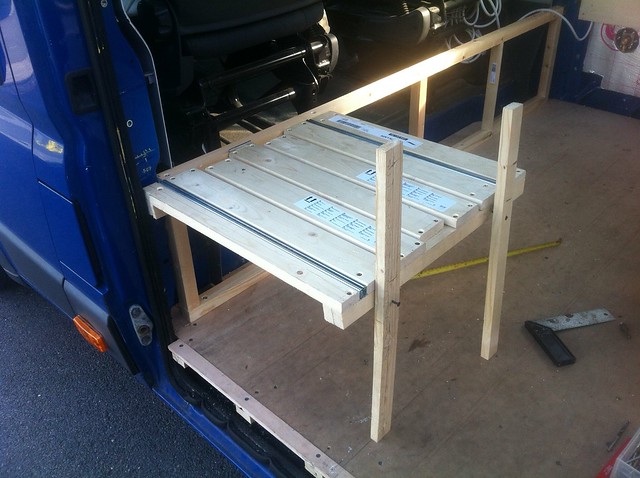 [/img]
Made another frame for the front of the fixed section -- it's all 32x32 planed timber, possibly slight overkill but I don't want it collapsing:
[img]  [/img]
Then an end panel -- this isn't holding anything up, it's just closing the end of the box and making it a bit stiffer. It's 44x18 timber with 4mm birch ply glued to it:
[img] 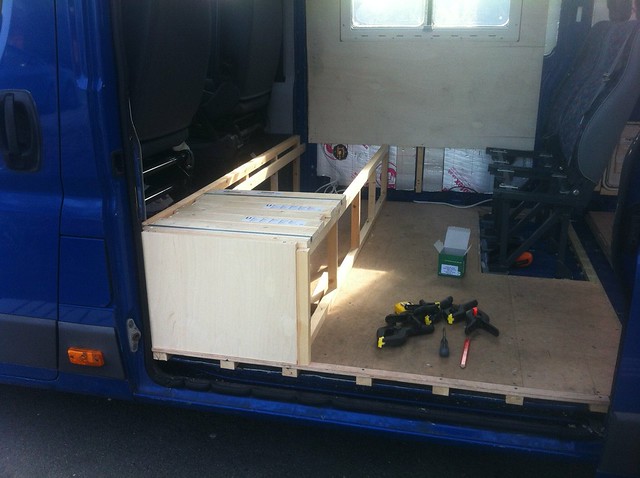 [/img]
Rounded off a bit of the 32 square with a router to make a nice corner:
[img] 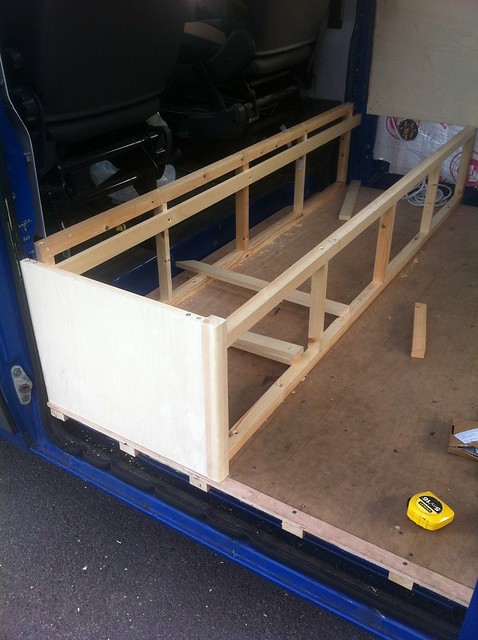 [/img]
Quick mock-up with a couple of the cushions:
[img] 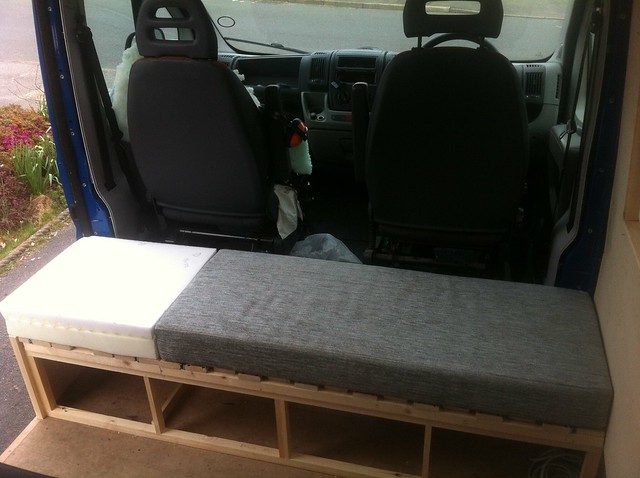 [/img]
Cushions are foam mattresses from Ikea cut into bits and covered. Fortunately my mother in law stepped in for that bit, my sewing's not so hot.
The front of the slide-out bit is held up by another panel like the end one, here it is closed:
[img] 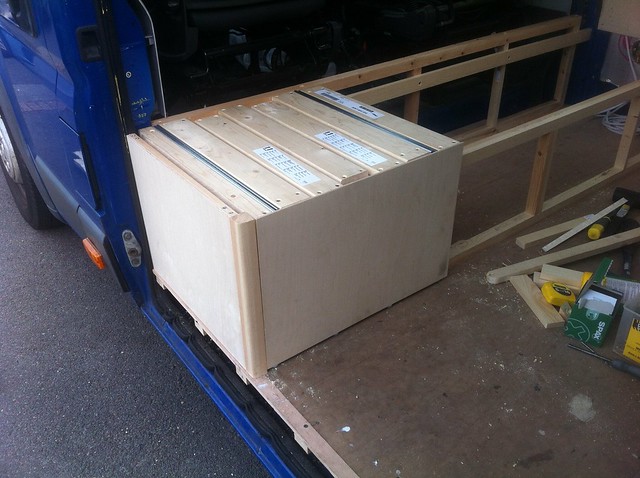 [/img]
And open:
[img] 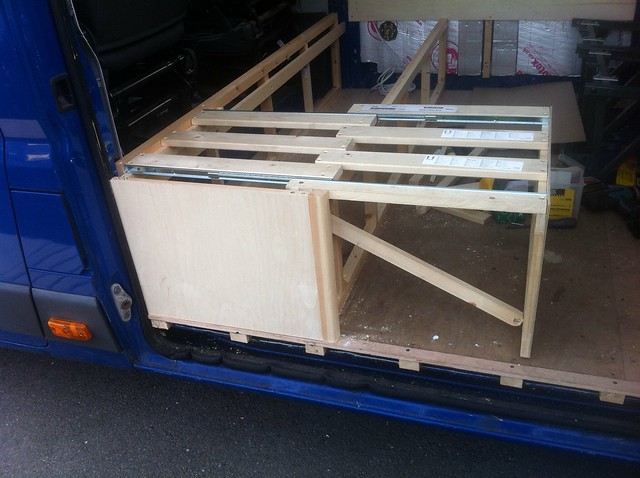 [/img]
Had to add the diagonal strut to stiffen it all up, the front panel was a bit floppy without. It also hinges up for access beneath:
[img] 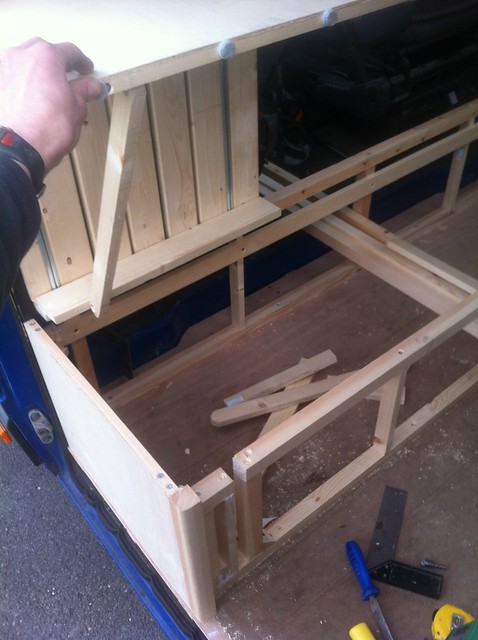 [/img]
You can see where I had to hack around the front of the fixed frame to allow clearance for the strut, I made an extra internal bit later on to stiffen the base up again.
While I was scratching my head at the bed, my Dad pitched in to help by working on the kitchen unit. Again, it's a timber frame with a thin plywood skin to keep the weight down. Fledgling frame:
[img] 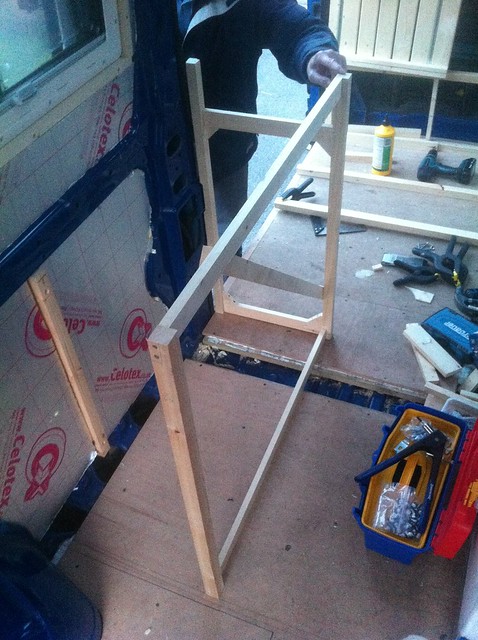 [/img]
And in position with one side on:
[img] 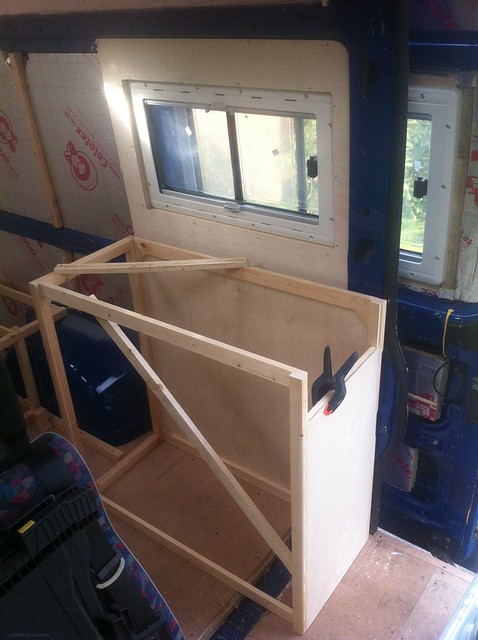 [/img]
More soon...
slowpuncheur: Yep, there's 25mm Celotex inside the bulkhead and another skin on the boot side. Watch this space 😉
my sewing's not so hot
Mike_D is revealed to be human after all, I don't know whether I'm relieved or disappointed.
My lack of talent knows no bounds. By a happy coincidence, this project appears to align well with my less startling incompetencies 😉
Some great ideas there - I wouldn't have thought of the drawer runners.
Keep it coming!
Took a break from woodwork to do some gas plumbing. Yes, I'm doing my own gas plumbing - minimal number of joints, drop-out vents all over the shop, copious quantities of leak-detecting goop and a hard-wired gas alarm, it'll be fine. Took off another bit of plastic trim from the outside, glad I did, all this stuff fell out:
[img]  [/img]
Made another hole much like all the other holes and ended up with this:
[img] 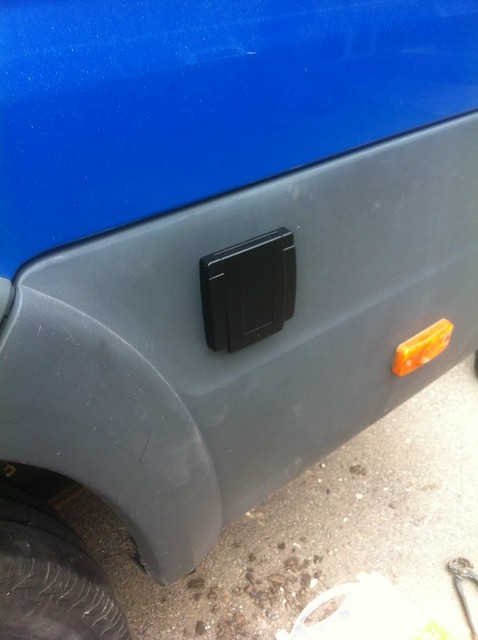 [/img]
which is an external gas point so we can plug a barbecue in. It's one of those distinctly non-essential extras that's kind of there because it'd be a right ballache to put in afterwards...
At the other end of the system, a regulator goes on the end of the LPG tank:
[img] 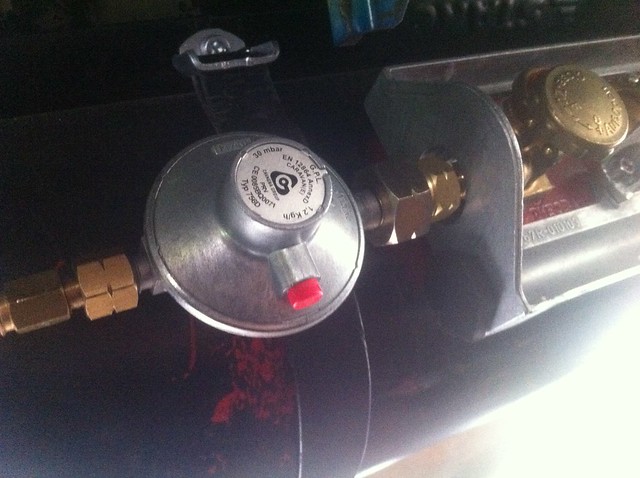 [/img]
and some plastic-covered copper pipe connects to that to bring gas into the van. Much clippage underneath:
[img] 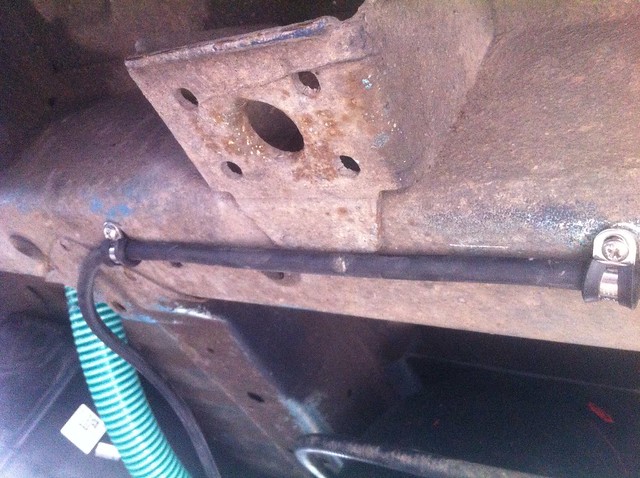 [/img]
The pipe comes up through the floor and into the end of this mighty manifold of magnificence:
[img] 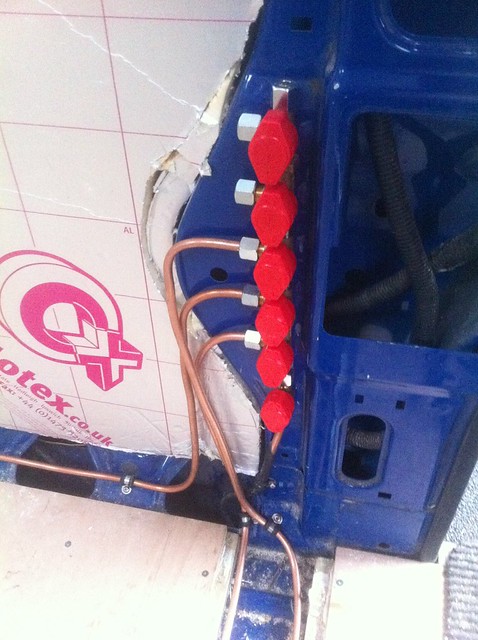 [/img]
Bottom tap is an extra inline one that shuts off everything at once, then the manifold has a connection each for air heater, water heater, BBQ point, stove and the oven that we'll probably not actually bother buying or fitting in the end 🙂
Also made a start on the wiring, there's an awful lot of this kind of thing going on:
[img] 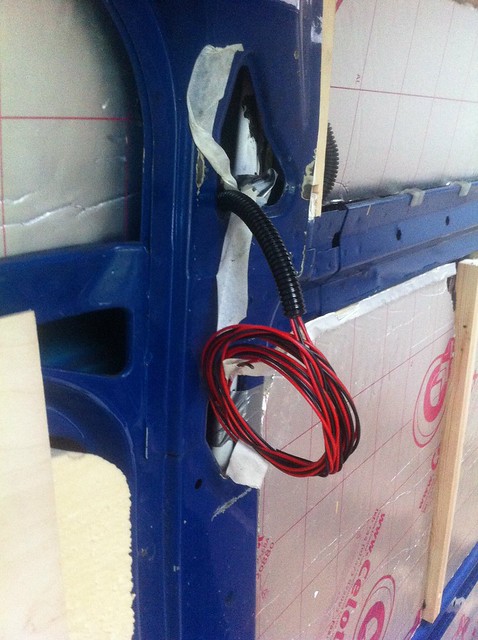 [/img]
More on wiring at a later date, it's great fun. Honest.
Reached a point where things needed to be definitely upright. We're using the floor as a datum (because the drive's not quite level) so everything needs to be perpendicular to the floor. Made an enormous set square to help:
[img] 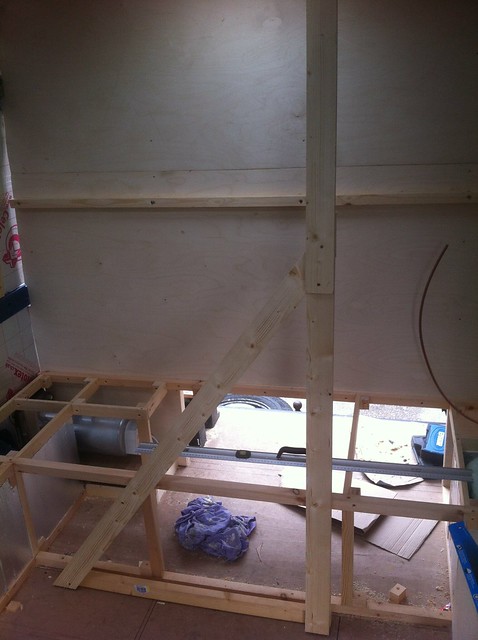 [/img]
This is all around the time we had a bit of a massive push/panic -- the 120 day insurance deadline was hoving into view, and we had a holiday booked at the same time, so we needed something that (a) ticked all the insurance boxes and (b) was usable for five nights camping. It also coincided with some grotty weather, so it was a good job we managed to score a (relatively) cheap roll-out awning:
[img] 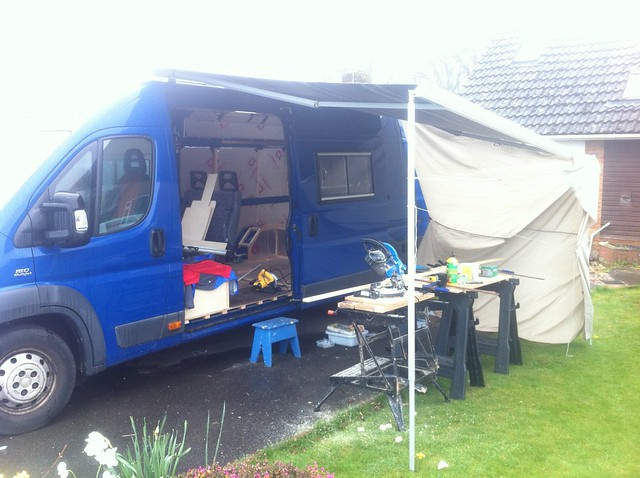 [/img]
It was listed on ebay as "used" but it had never been fitted and was still in the box. Bargain! It sits on brackets that attach to the roofrack fittings, so no drilling, which made a pleasant change.
Sorted out all the connections to the water heater -- plumbing is mostly standard domestic 15mm push-fit polypipe stuff (because easy, and had a big roll left over) with adapters to connect caravan-style hoses just before the appliances, which all need rubber hose (of varying sizes, just to add to the fun).
[img] 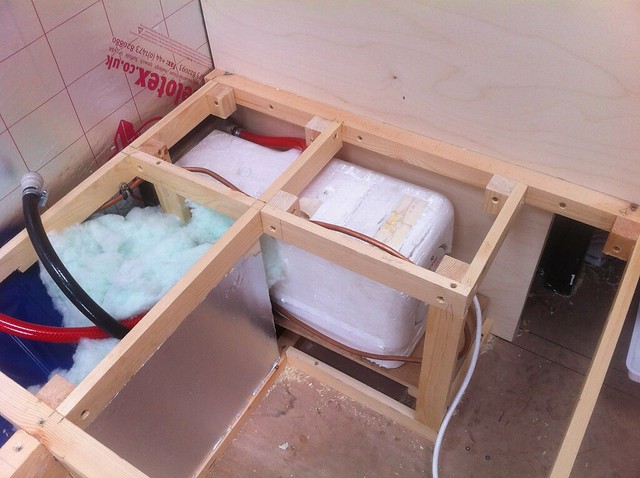 [/img]
Back to furniture. To fit everything in, the kitchen needs to slightly overlap the sliding door and also the bed, which means it needs to have a funky cantilevered overhanging bit. Because we clearly have an aversion to making things easy, we decided that it needed a nice curve on it. Unleash the G-clamps:
[img] 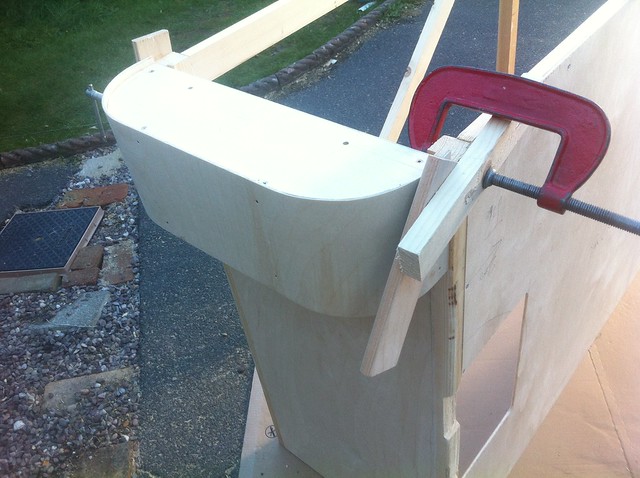 [/img]
Top and bottom are 6mm ply, the curved face is 3mm ply with the grain going the appropriate way, pinned and glued into the 6 - we'll fill the pin heads later. That's probably about the tightest radius that normal 3mm ply will do. Put a back panel on it, cut some big holes in some 28mm Ikea wood-block worktop and in it goes:
[img] 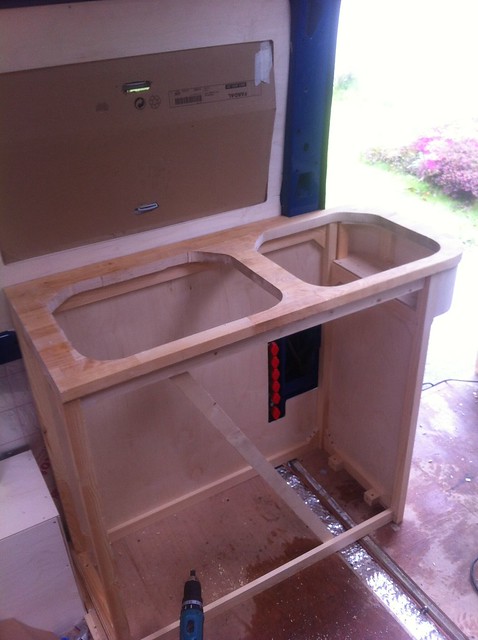 [/img]
Holes are to accommodate the stove and sink:
[img] 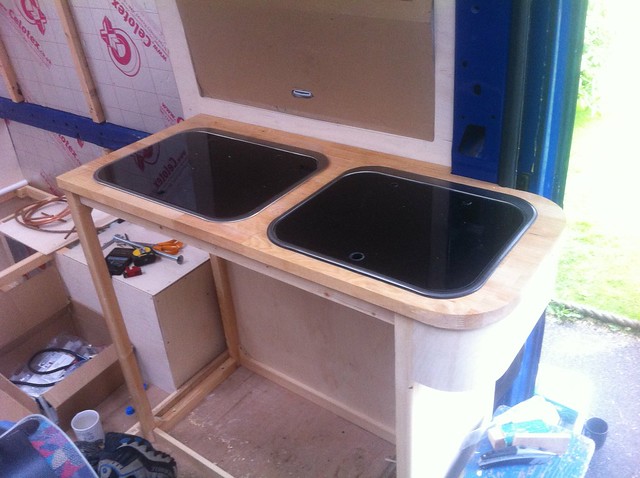 [/img]
and a bunch of pipes and a water pump hide underneath:
[img] 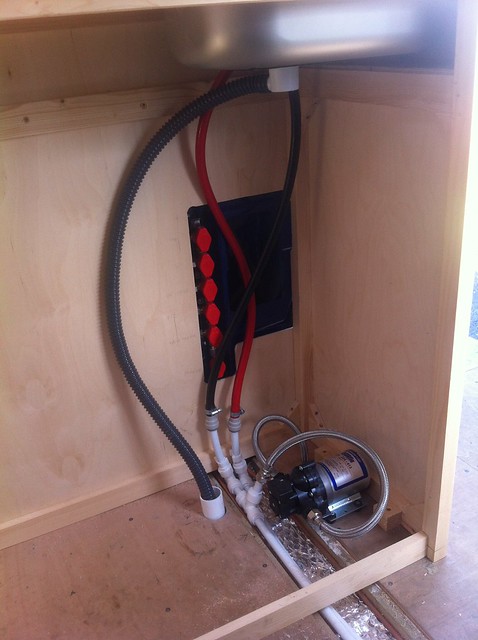 [/img]
Next to that bit of kitchen there's a tall unit to accommodate the fridge and more cupboards. We're severely constrained on width here -- the bunks can't be any narrower, the kitchen can't be any narrower or any further forward and the fridge has to fit, so the super-light framed construction had to give way to two sheets of 12mm ply:
[img] 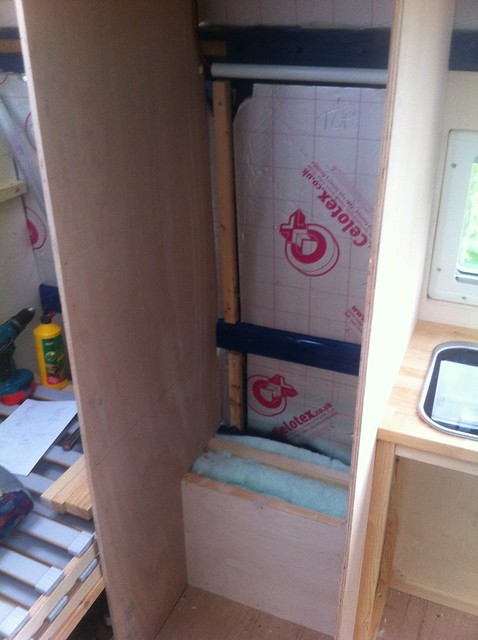 [/img]
Having struggled with the space constraints of a teeny-tiny fridge in our previous van, we wanted to go large on this one:
[img] 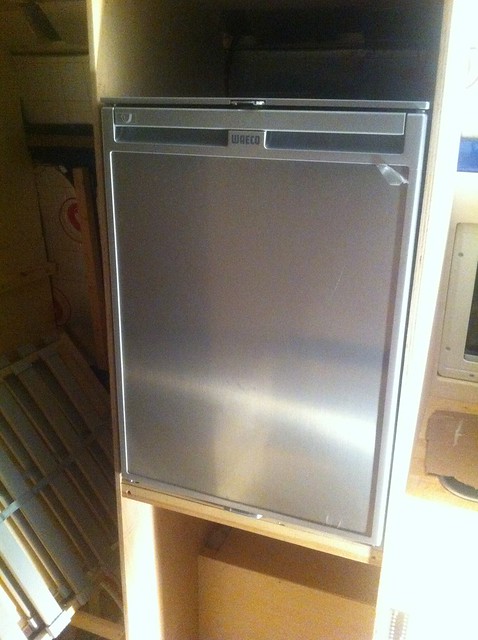 [/img]
It's a Waeco CR110 compressor fridge, mounted high up so you don't have to grovel in the aisle. It'll take a week's food for four of us no problem. It's also the single most expensive thing in the van :/
Conscious of the fact that we would actually need something to sleep on, the bed needed finishing. Front panels for the sliding sections:
[img]  [/img]
Looks like this when pushed in:
[img] 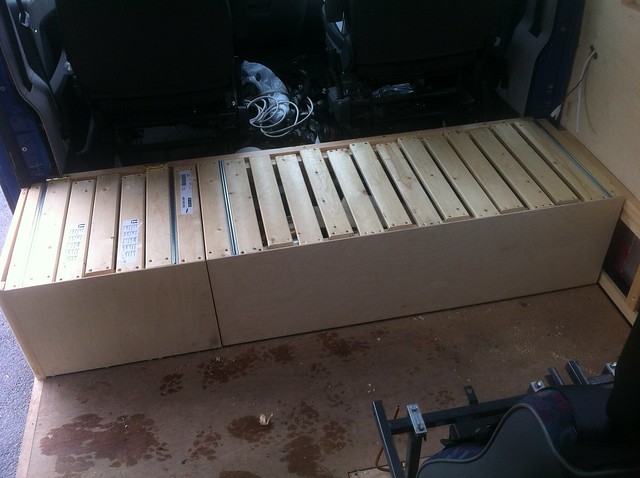 [/img]
Pulls out thusly -- the front panels act as legs to hold it up:
[img] 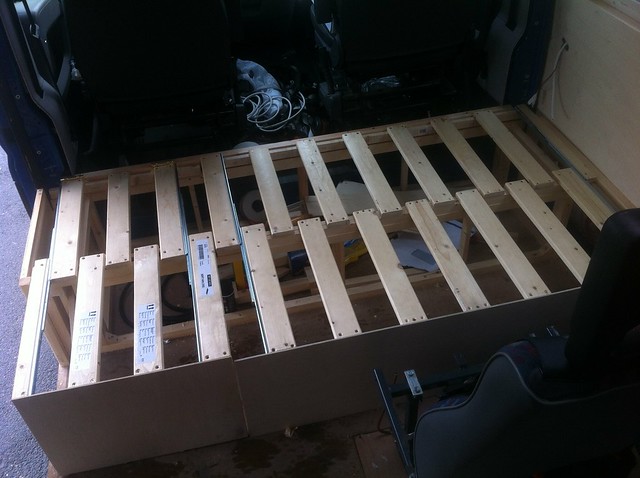 [/img]
Or you can just pull out the short bit:
[img] 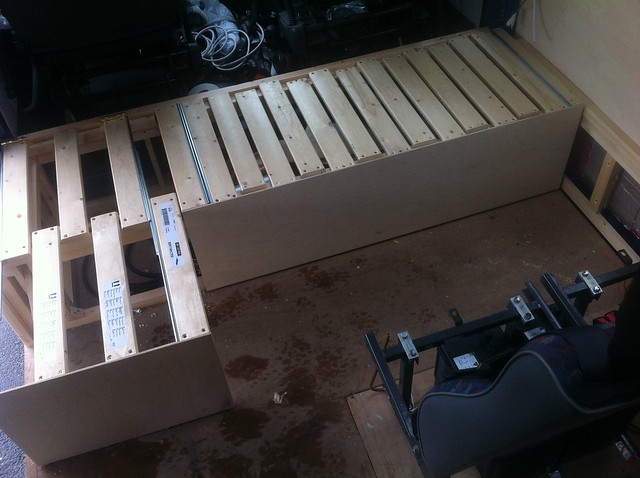 [/img]
Still needs more width, though, which is made up with two sheets of ply on counterflap hinges. These are a PITA to fit, because they've got a double knuckle and need recessing and clearancing and all sorts. Chisel and router action:
[img] 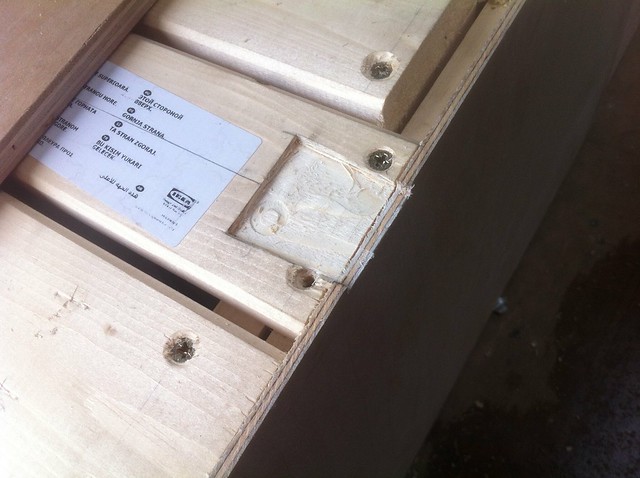 [/img]
More:
[img] 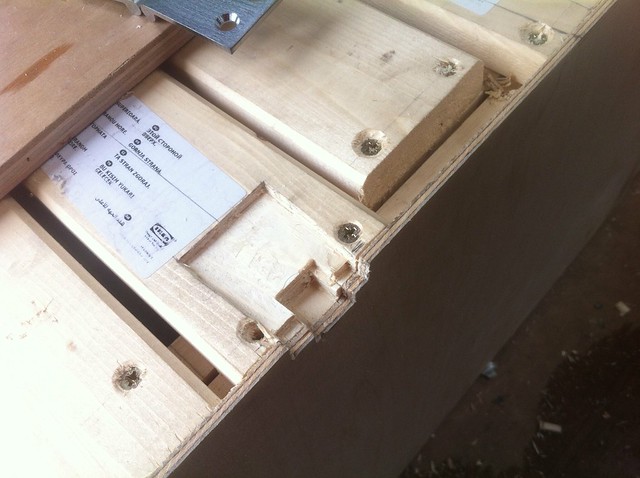 [/img]
Hinge sits in like so:
[img] 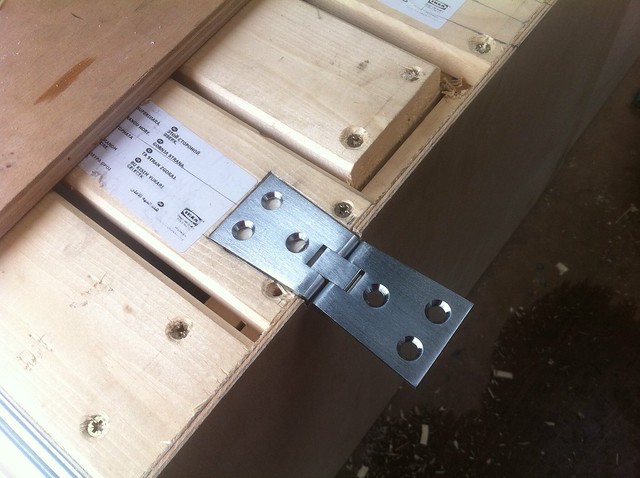 [/img]
Then repeat a bunch of times until you end up with this:
[img] 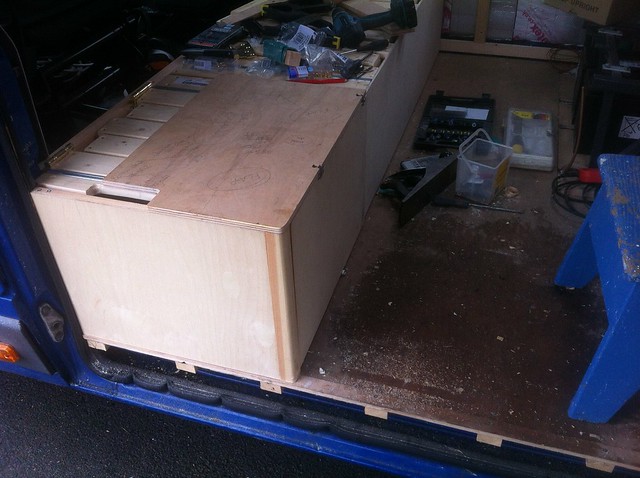 [/img]
Slide out:
[img] 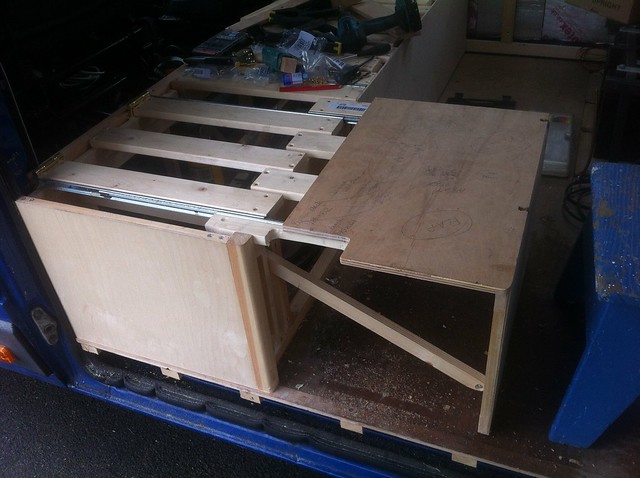 [/img]
Unhinge:
[img] 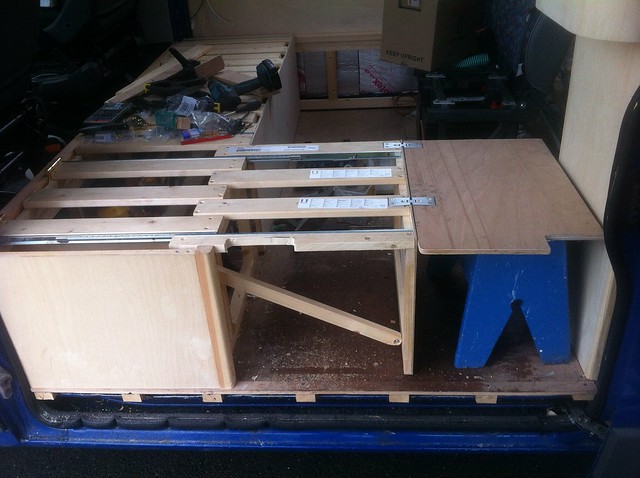 [/img]
Eventually there'll be a support on the end of the kitchen unit, fortunately that stool is just the right height... In this configuration you get an L-shaped seat around where the table will be, and it also lets two adults sit with their feet up. The large section has a flap too, which overlaps the travel seats -- happily the seat cushions are secured by a single handwheel bolt under the front edge, so they're easy to take out. That means that the bench seat and the travel seats are the same height.
Made a quick table from the rest of the worktop -- it's ludicrously heavy, I plan to rout out the back of it quite a lot to get the weight down:
[img] 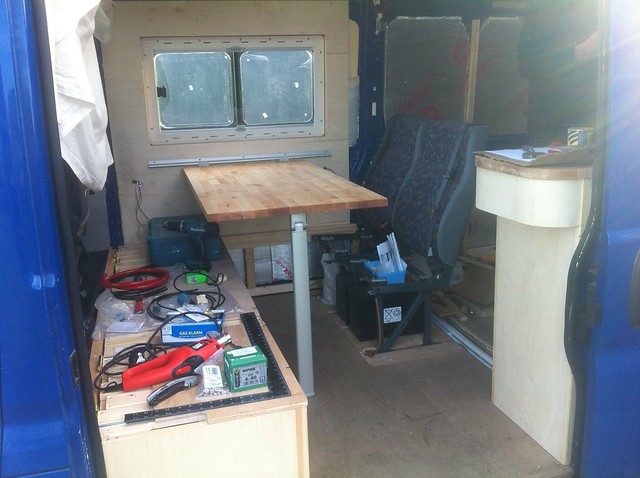 [/img]
With all the cushions in it's like this:
[img] 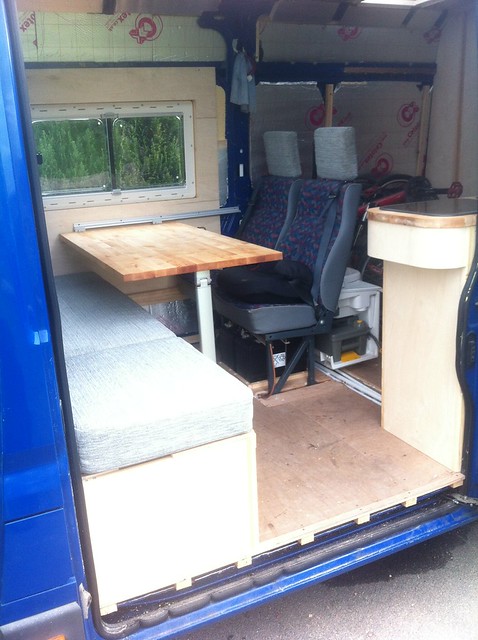 [/img]
In bed mode it's like this:
[img] 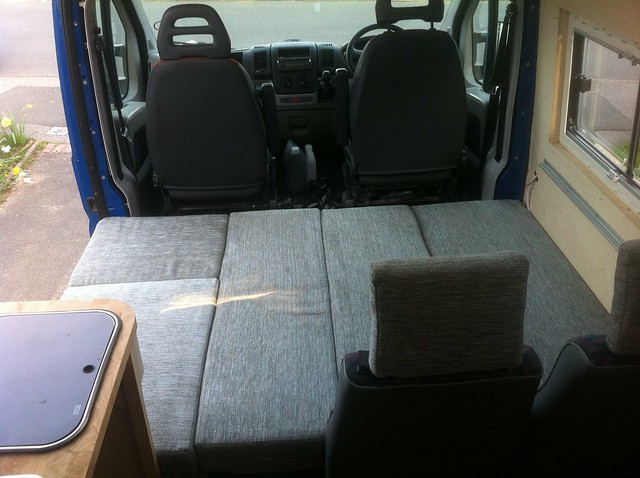 [/img]
The bed's only just long enough, really (it's 187cm long) but that's as much width as we've got inside the van. It's a useful 130cm wide, which isn't far off the width of a normal double and a lot roomier than our previous van. We spent a fair bit of time working out the cushion sizes so that the gaps don't coincide with shoulders or hips. The two narrow cushions in the middle stow under the bench, the wide one on the right goes on top as the seat cushion, the square one top left stays where it is and the other one stows behind the travel seats.
Put a wall up at the back to hold the upper bunk up:
[img] 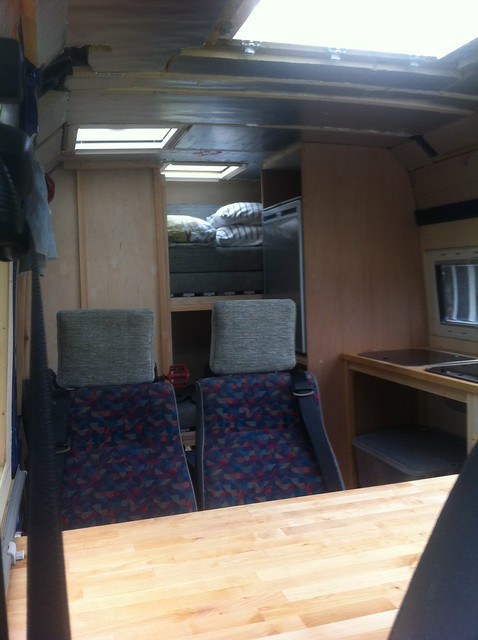 [/img]
And that was as much as we had time to do. Took a bunch of photos to satisfy the insurance company that it had a bed/stove/water/gas etc, lobbed some stuff in the back:
[img] 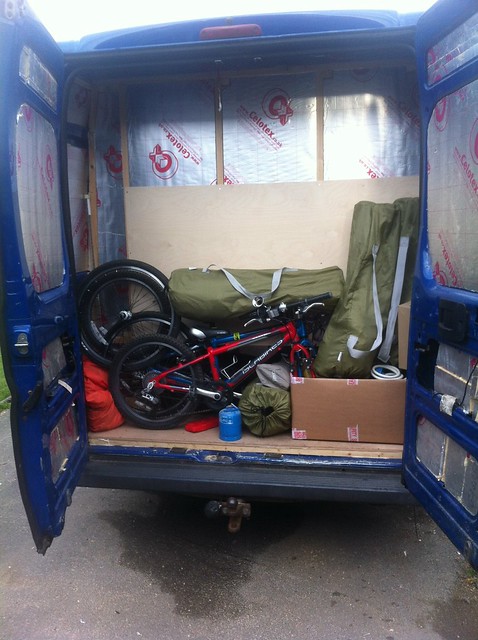 [/img]
and cleared off to Dartmoor for a few days:
[img] 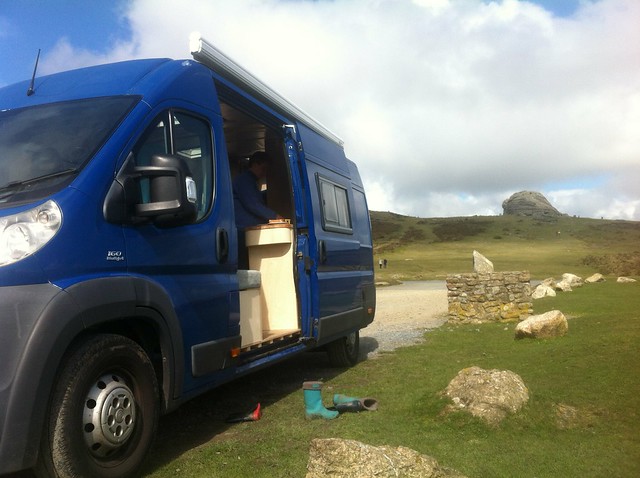 [/img]
To be honest, it was very basic at this point -- gas plumbing wasn't finished, so we had to use a camp stove and gas bottle outside -- but we had running water, a bodged-in light and the fridge worked. It was good 🙂
Love coming back to this thread, bloody great to see how you are progressing. Shed loads of storage room in that back bit too. Very nice job sir!
Nice. 😀
Very nice!
Seeing all the steps makes it really clear that getting the right base van in the first place is not to be underestimated!
Mm. I wouldn't want to have to take it all out to put into another van 🙂 Although actually (so far) most of it could be removed intact if it came to it.
Thanks for the update Mike, I like how you made the double bed, clever idea!
