Space issues in my new flat mean I need to build a shed (yay) for 3 cheapish bikes and a whole lot of crap. Space issues and London outside means it has to be very small yet sturdy enough to resist all but the best equipped thieves. Access problems and snobbery mean it can't by an off the shelf number.
Internal dimensions are 1600 x 600 to the frame, which should be just big enough if the front wheels are off.
In true STW style it's probably hilariously over engineered. It's the first time I've designed/built a shed so all comments and advice are very welcome.
Here goes.
Base. 100 x 100mm legs and frame, 50 x 50mm trimmers, legs sunk into holes filled with postcrete and levelled. Ground anchor concreted in beneath the floor. Weed suppressant mat and gravel.
[IMG] 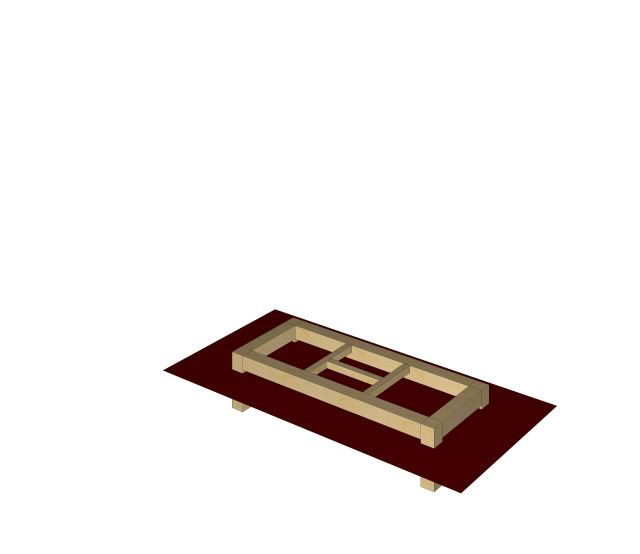 [/IMG]
Frame. 50 x 50mm frame built up as complete panels. Rear panel fixed first with cladding already on. Side panels added without cladding to allow for tolerances.
[IMG] 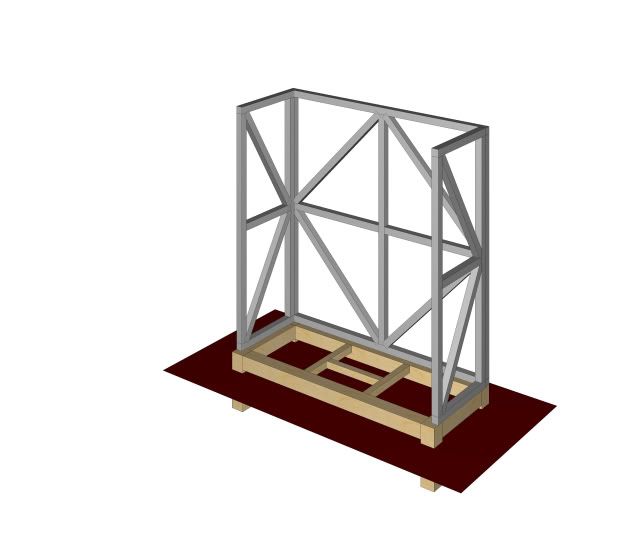 [/IMG]
Front. 50 x 50mm frame with 75 x 75mm door surround. Built in 3 parts and assembled unclad in place. Floor is 18mm marine ply with a 150 x 150mm access hole for the almax chain.
[IMG] 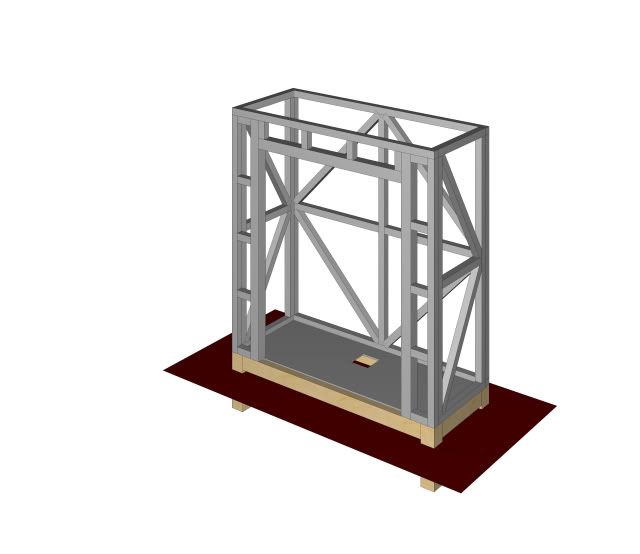 [/IMG]
Roof. Joists are 150mm high at the back sloping down to 50mm at the front (7.5 degree fall forwards), 25mm wide. 50 x 50mm frame around the side and back, 20mm boards front and back. 18mm marine ply top clad in felt and 20mm end panels (shown later).
[IMG] 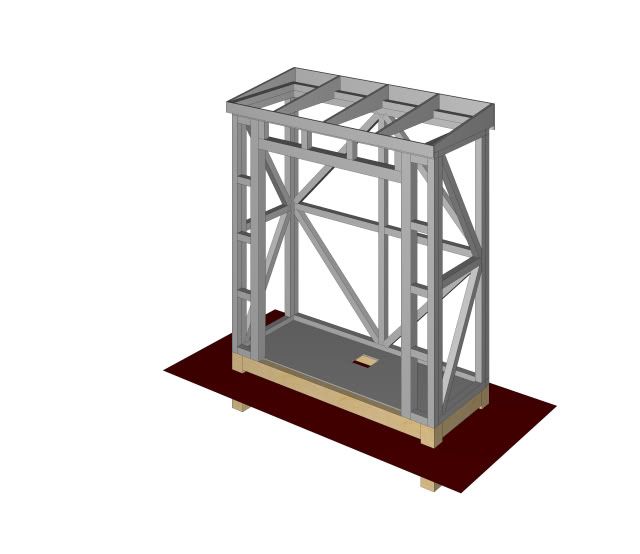 [/IMG]
Cladding. TGV cladding of some description. Could I use ply to the rear as it's against a fence? Door opening is 1200mm and doors will be barn door style in matching cladding and with a plethora of locks.
[IMG]  [/IMG]
Finishing, fixings, trim, material types and cost are still very much up in the air. Comments welcome.
I will obviously update once the build begins.
How deep will the moat be?
Technically I think you'll find that's a butch wardrobe.
I'd have said, over built wardrobe.....
Have you priced "marine ply" yet? If not get ready! True marine ply is not required. Your diagonals are not needed and unless you're good with a saw/bevel etc you're not going to get nice tight joints. Personally if security is an issue I'd line it all with a 12mm ply then clad.
You don't want to cut timbers down for your roof like that, it will be a complete ballache and getting them all equal will be very tricky down the grain. Just make the rear elevation higher than the front.
Allow for either a gutter or roof overhang or you're gonna get water running back inside the gap around the doors.
HTH
Pictures look nice btw 😉
5thElefant - MemberTechnically I think you'll find that's a butch wardrobe.
footflaps - MemberI'd have said, over built wardrobe.....
😆 😆 😆
That's a wardrobe!
You just need 4 posts for the corners, some sheets of marine ply and it will be completely rigid. Take 15 secs to cut it in half with one of these though:
[img]  [/img]
If Footflaps made wardrobes...
Go on humour me- how long did it take you to draw those....,
Probably could have built a perfectly adaquate shed in the time.
Last shed i was involved in was drawn on a post it.....
Could do with a drip across the front to divert rain water off to the side.
Last shed i was involved in was drawn on a post it...
Too much planning.
Only one way to build anything,
Make it up as you go along.
Double
Needed to help dan order the wood first - drawings are easier 🙂
Really nice drawings ( you don't need the diagonals the walls will sort out the bracing)
here are my detailed drawings for my next shed.
[img] 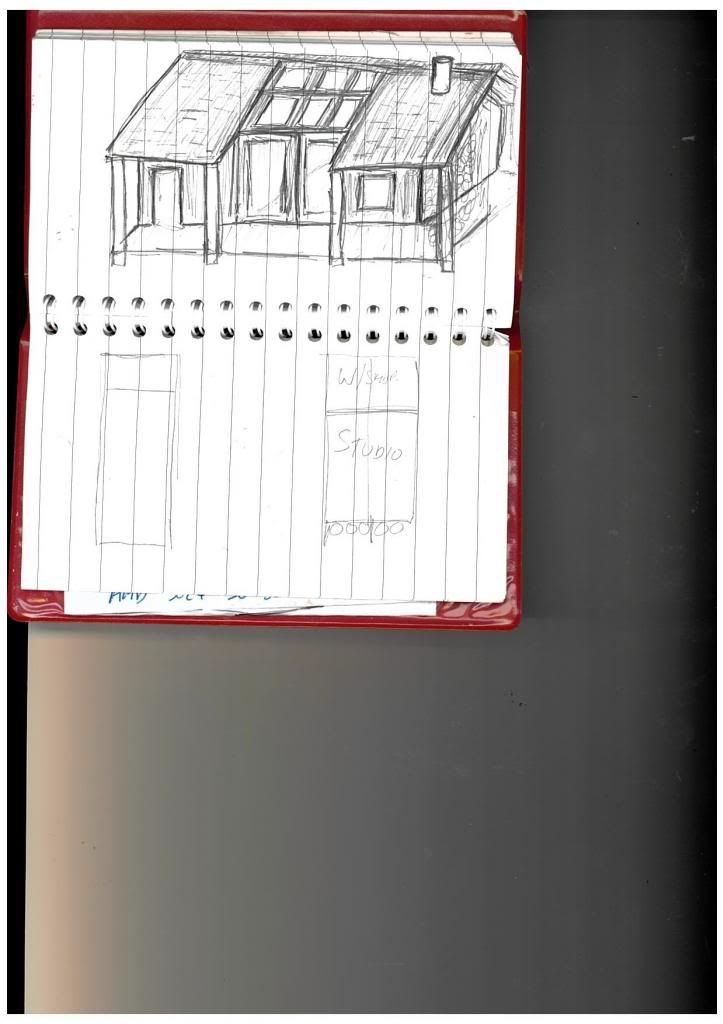 [/img]
I built this with less detailed drawings than yours 😉
[img] 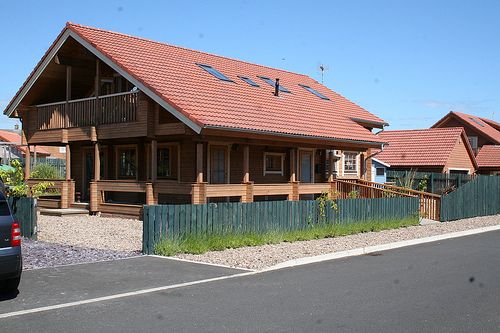 [/img]
But It would have been a lot easier with them
Technically I think you'll find that's a butch wardrobe.
STW at its tea spitting best. I thank you.
Congratulations, you have designed a tool shed.
[img] http://tesco.scene7.com/is/image/tesco/206-3501_PI_TPS1351319?wid=170&hei=170&$Offers$ [/img]
available from Tesco or Argos
Line it with galvanised steel mesh.
Thanks everyone.
butch wardrobe.
I do have a degree in furniture design, and a very small garden.
numerous comments from wrightyson
Internal ply cladding is not a bad plan, I looked at raising the rear but angling the tops of the side panels confused me. I'll look again in more detail tomorrow. The front an rear of the roof are 15mm off the cladding, air gap and drip line combined.
Go on humour me- how long did it take you to draw those
Couple of hours at work this afternoon, including a bit of research into timber sizes and while redesigning the seating bowl of a stadium.
Line it with galvanised steel mesh.
Pffft! The man wants security.
OP, line it with wolverines.
Couple of hours at work this afternoon, including a bit of research into timber sizes and while redesigning the seating bowl of a stadium.
Maybe avoid shed distractions in the future and then you may get the seating bowl design right the first time 😉
are you building that around your 3 bikes? looks like a tight fit? just get stuck in.
secure it up with metal plates and some coach bolts
I do have a degree in furniture design,
Go on show us some of that !
Maybe avoid shed distractions in the future and then you may get the seating bowl design right the first time
Cheapskate contractors = value engineering. It was right first time, now it's a bit worse. 🙁
are you building that around your 3 bikes?
It's going to be tight inside but the will fit. Looking at the door opening again it might be impossible to get the bikes in though. 😳
Build it round the size of sheets of ply.. makes it easy for sizes and measurements once you throw away the fancy pants plans
Go on show us some of that !
Unfortunately that was 15 years ago, it's been buildings ever since.
It's designed around maximum 1.8m lengths
Nice drawings. It's not very secure as it has no door though.
600mm depth? I'm struggling to see how you'll get more than one bike deep in that, and it doesn't look tall enough for stacking two, let alone the three you mention. Asgard metal sheds are apparently a tight fit for three,and they're 3' deep & 6' wide without the loss of space of 2" & 3" beams/spars.
It's over engineered a tad (though from an anti theft POV no bad thing) an i fear not big enough, You will need more depth - which I assume is unavailabe?
The depth is somewhat tight, but with front wheels out, pedals off, bars turned and a bit of topping and tailing and it should be fine.
huws - Member
I do have a degree in furniture design,Go on show us some of that !
Unfortunately that was 15 years ago, it's been buildings ever since.
Where did you study? I was at Bucks 15 years ago...
Does it have to be a straight rectangle : ie could the bottom be wider than the top ? that's the beauty of building yourself you can use all the available space and design it around what need to go in in it.
Edit: just saying as I am trying to fit an office into a garage that needs to take sports car, so some the desk in the office will be hollow to make room for the boot of the car on the other side of the wall.
Where did you study? I was at Bucks 15 years ago
Snap! Graduated from the furniture and related product design course in '98 🙂
Does it have to be a straight rectangle
Yep. There's only really one place for it. I had considered a roughly triangular one squeezed into an odd corner but the existing flowerbed has since been developed so that's out now.
I can barely be bothered taking wheels off after a ride... you'll be staking the bikes up indoors 🙂
Just make the shed bigger or make a shed for each bike
Can't the door go at the end of the shed? That would save you having to force the bikes round 90 degrees...
My latest shed/garden re-design has started life like this.
I'll do something more detailed/open plan to calculate timber required and play around with the design from there. Will probably use 3x2 for the frame (and use less timber than your design ^^) 😉
[url= https://farm3.staticflickr.com/2933/14156704558_43b7c47a3f_b.jp g" target="_blank">https://farm3.staticflickr.com/2933/14156704558_43b7c47a3f_b.jp g"/> [/img][/url][url= https://flic.kr/p/nyYP45 ]Untitled[/url] by [url= https://www.flickr.com/people// ]davetheblade[/url], on Flickr
This is my bike shed:
[url= https://farm9.staticflickr.com/8258/8648611981_df2c34845a_z.jp g" target="_blank">https://farm9.staticflickr.com/8258/8648611981_df2c34845a_z.jp g"/> [/img][/url][url= https://flic.kr/p/ebfp2F ]Jeff and Liz on the new bike park...[/url] by [url= https://www.flickr.com/people// ]brf[/url], on Flickr
Built with no plans. It has a load bearing roof and lives in the workshop:
It has shelves and more storage on top of it:
[url= https://farm6.staticflickr.com/5512/9110343210_ea9c0f43d8_z.jp g" target="_blank">https://farm6.staticflickr.com/5512/9110343210_ea9c0f43d8_z.jp g"/> [/img][/url][url= https://flic.kr/p/eT3TCW ]Storage Rack[/url] by [url= https://www.flickr.com/people// ]brf[/url], on Flickr
Line with fibre glass insulation and chicken-wire stapled to the inside of the ply. That will defeat reciprocating saws et c.
APF
[i]Built with no plans. It has a load bearing roof and lives in the workshop:[/i]
You did Google Morrison Shelter before you started though 🙂
I have a new shed today.
Budget and space dictates it is only just big enough, and steel. 🙁
I've simplified WARDROBEZILLA slightly. Clear internal depth is now 650mm and the door opening is approx 1450mm.
Feel free to take the piss.
Base now sits on semi buried concrete blocks with one central post concreted in for stability.
[IMG] 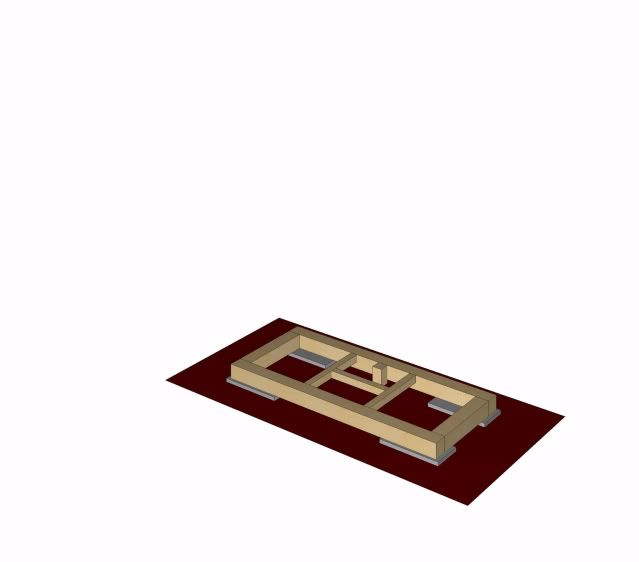 [/IMG]
50 x 50mm frame with 75 x 75mm door post and lintel. 50 x 50mm roof joists at 400mm centres.
[IMG] 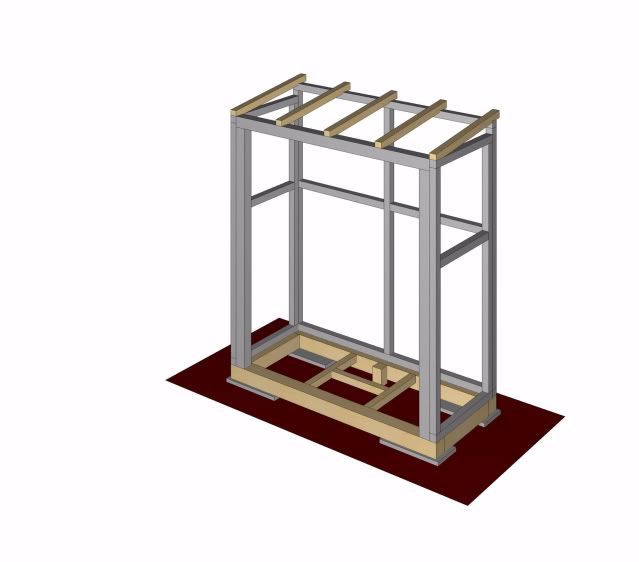 [/IMG]
9mm WBP ply cladding. 18mm floor and shelf.
[IMG] 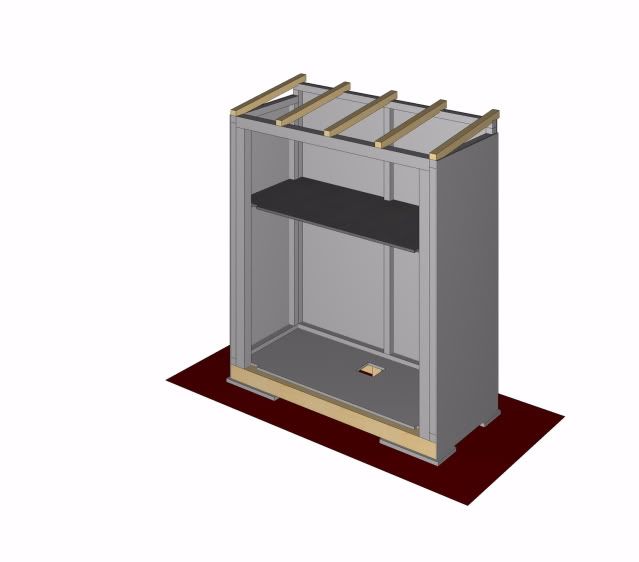 [/IMG]
TGV cladding. doors 25 x 100mm frame, 9mm ply then clad. Roof 18mm ply with felt covering, drip lines front and rear, air gaps all round.
[IMG] 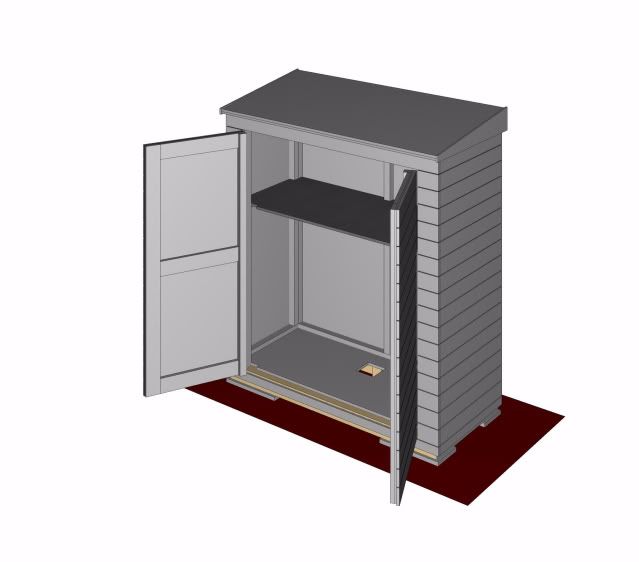 [/IMG]
Thanks all.
Maybe build a scale model out of matchsticks.. those artsy wardrobe computerised images are a bit confusing
