Just taken delivery of my 2019 Spark 900SL frameset and plan to start building it up this weekend with AXS eTap and a few lightweight bits and pieces. The frame comes with dozens of plastic parts and bits and pieces from which I will have to work out what I need and what is 'extra'.
Has anyone built up a 2019 Spark from scratch before ? Any hints, tips or gotcha's to look out for ? I have built plenty of road and CX bikes but this is my first FS build.
Thanks
Run your cables first before the BB.
Expect the rear shock to come out to make sure your cable housing is tight.
When I rebuilt my Spark 900SL last Autumn and replaced all cables, I made a note of the outer lengths for future ref. - do you want them?
+ personally I found no issue with having the BB fitted, but it will make life easier if you're running a dropper.
Do you not just have one cable, the rear brake?
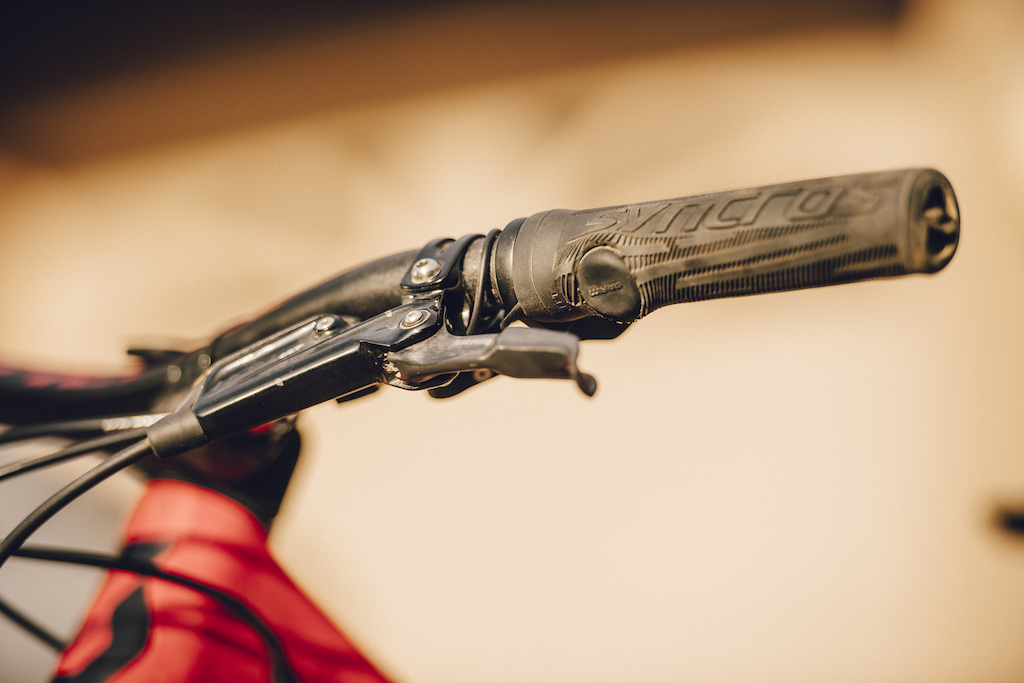
The wee plastic bits are presumably just to seal off all the holes you don't need thanks to etap.
Build pics please!
If you plan to run a dropper, put a couple of hours aside for counselling 🙂
On my full bike, I had to take the shock bolts out and clean the excess loctite off them to stop it creaking.
LOL forget dropper routing and buy a Magura Vyron 😉
That was my plan after I ended up removing it to put on another bike Weeksy!
I used to have one a while ago too.
Would you not go for the AXS reverb to go with the rest of your groupset?
If the money was there I certainly would 🙂
AXS everything would be ace on a Spark!
I had to remove the rear shock to get the lockout cable housing right, also taking the b/b out is about the only way to get the reverb and rear brake hose through nicely.
I have Di2 on mine so had to get creative with some of the 'spare' parts they send out, they cover a multitude of options.
You can route the rear hose and dropper outer without removing the BB, granted the dropper cable is a bit of a faff.
Are you using an AXS reverb too OP? obvs that will solve any hose issues.
don't think sram have made wireless brakes yet 😉
Thanks for all the notes and yes I will take build pics as I go. As you say I only have the one 'cable' to run for the rear brake. I am going to put an AXS dropper on it but I need to get the seat post sizing right first as they come in a myriad of different lengths - so this will be the last thing I buy.
I have also found a bit of an idiots guide video on the Scott site which I will follow the steps on.
https://www.scott-sports.com/gb/en/page/how-to-build-a-bike
you have a second cable to run for the rear shock..
I've not had a single frameset in 13 years that comes with it pre-inner cabled to the lockout lever.
Aside from bladder remnants inside the downtube messing with your hose routing up the down tube, This is your potential frustration point. Its entirely possible to push the outer cable off the metal 90 when you try to push the inner cable through.
When yopu have your outer length set, I would suggest removing the shock to run your inner cable. Get it all tightened down before reinstalling the shock and finally installing the lever clamp back on the bars.
Your box of parts will also have a second remote without the dropper lever attached so you can run your wireless post
Rear shock cable to Twinlock lever is already installed from the factory so I plan on leaving it as it is unless I find a problem with it and yes there appears to be a second TL lever for the RHS in the pack as well.
I should have the (Hope) brakes and the AXS groupset by the weekend so will make a start on the build over the bank holiday. I've posted the contents of the 'extra's pack online as I may be asking for help to ID certain parts.
https://photos.app.goo.gl/eTStyaz7oyres9YFA
2nd lever is for LHS above bar...stops it interfering with your dropper lever if you run a '1x' style paddle
good news on the shock already being set up with its cable.
of noteable impostance i sthe semi circular plastic piece bellow the 2 di2 battery rubbers (below the 2 head tube cable port blanks) this is for teh TL lever if you choose not to run the syncros grips.
Other impostant are the 2 oval grommets in with the head tube rubber cable post inserts (above right of the 2x prongy front mech screw hole covers which IIRC the SL frame doesn't have anyway?)..these are the brake hose grommets and must be installed as you run your hose through the seat stay
*chain stay*
No pics yet? Some slacking going on here 🙂
Took delivery of my new frame today, no parts to build it yet though.
OK - firstly photo's have moved - they are now here: https://photos.app.goo.gl/8qSQ9rfNrwgf1DPP8
I already have two issues:
1. I now have all the parts and have started the build. First dilemma comes as a result of combining twinloc lockout remote and AXS. Unfortunately they don't live happily together on the bars. I've done loads of research today and it appears that even Nino and Katy's mechanics have struggled with this one as you can see in this picture - https://tinyurl.com/yyrr3ovx.
So it looks like my choices are:
a. Mount the RH twinloc high as they have done for Nino and Katy Comptons bike - which I think looks ugly
b. Send the Reverb AXS dropper back and fit a standard cabled dropper with a three function remote lockout from Scott.
Anybody got any other ideas ?
2. I have just about sorted what all the various plastic parts options are for. However I can't find anything where, in my case, the rear brake hose exits the down tube. There is a screw thread there as if something should screw on this location but I can't see a rubber grommet or piece of plastic to fit the hole. https://tinyurl.com/y6ffz3bd Any help ?
Regards
Little baggy above the SFN.
Thanks BearBack - spot on I was looking for something a bit bigger. It also confused me that there were two parts in there but now I see one is for Di2/hydraulic and the other is mechanical/hydraulic.
I have also decided to keep with the AXS Reverb top mount the Twinloc and just spent the last hour trying to get the cable and noodle into the rear shock, ended up stripping it all down and it went backtogether fine. Will do a bit more tomorrow and post some pics.
I was going to swap my remote to do the same at that with a proper dropper lever. I ended up getting a 2x type lever, but it was a bit rubbish and hard to press.
In the end I've just removed the dropper and will likely get a wireless one down the line and figure it out then 🙂
Good looking frame too. It'll be a quick bike!
you need to use both...as an opposing pair. you DONT want to be clamping directly to the carbon!
rear shock cable.. refer to first post 😉
OP - nice choice! And remarkably tidy kitchen/garage.
Question from Bearback's post:
of noteable impostance i sthe semi circular plastic piece bellow the 2 di2 battery rubbers (below the 2 head tube cable port blanks) this is for teh TL lever if you choose not to run the syncros grips.
Is that piece buyable separately? Would like to change my Scale's grips.
Get a "blip" button srom sram, for the dropper post
Ref the bike check of Kate Scott Spark on pink bike. (in case you didn't see it)
https://www.pinkbike.com/news/bike-check-kate-courtneys-scott-contessa-spark-rc.html
That's if you can get one quickly.
isn't that firmly in the 'pro race hack' camp at the moment, rather than an easily available customer option now though?
Hi MTB Rob - yeas I looked at the blip option - aside from the £300 for the blip box plus the cost of the blip itself the bigger issue was mounting the blip box. As you can see Katy has it mounted on her bars for this photo shoot, which looks worse than my lockout levers IMO - 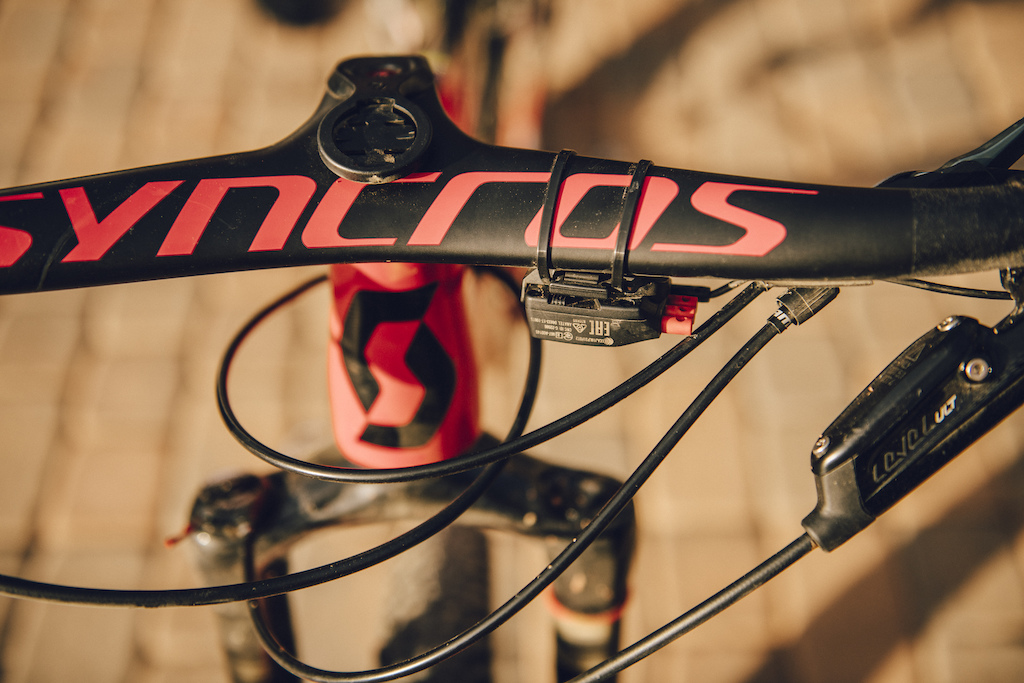
If you fancy moving on the di2 cable exit chip for the chain stay (to the right of the Star nut). let me know, I've been trying to get one for mine with minimal success so far.
Mkm, that's some £££ they charging!
Yes doesn't look great on the bar, but looks a lot better than twin lock above/AXS below.
But they did say they are waiting for some longer cables so they can put the box in the frame.
It's the normal way of New tech/groupset/parts that come to market, it's the v new customers that tend to be the test subjects on how everything fits/looks and what is needed. and little add on's are not in stock, hard to get and cost ££.
TomH, yes pro race hack, ref my comment right at the end. but looks like Mkm is on the case and looking into it.
OK - I got a few hours on the build today and can't go much further as I missed a few deliveries on Friday and don't yet have the dropper post or any tyres. I am also waiting for the wheels to arrive in stock - so can't fit the rotors, cassette or chain until after the bank holiday. I also need to visit my LBS on Tuesday to properly seat the crown race as my road spec tool doesn't fit - so haven't cut down the steerer yet. I also have to trim down the front lockout cable and generally tidy things up.
I have uploaded a few more photo's to the album mid build in case anyone wants close up shots for their build in the future.
I managed to ID most of the small parts that came with the frame apart from the ones in the image. Hopefully I don't need them as I have no clue where they go. Bearback ? https://tinyurl.com/yxdf9qzx
Top, di2 battery holder to zip tie to internal cables or something. I think
Middle, left is captive nut for rear axle. Right is main pivot nut for use as 2x or no chain device.
Bottom, bar end plugs to protect grips.
Can't you integrate Axs dropper Into right hand shifter?
Then you drop reverb remote shift lever and mount Scott lockout lever under bars?
Max
You can, but you need to use the left hand controller as a shifter for gears (either up or down), there’s only two buttons on the RHS
Cheers Bearback - is the captive nut something I should be using as everything seems OK without it ?
What he said 🙂
You already have one captive nut there with the hanger that's already installed.
Scott framesers come with 2 hangers. 1 SRAM (short), 1 shimano (long).
A hanger set consists of 4 pieces
Hanger
Axle nut
Stubby Allen headed bolt to prevent rotation in frame
Small bolt to lock hanger to axle nut.
https://www.bike24.com/p2222071.html
Sorry for the lack of progress reports but I have been away at a training camp in Italy for the last week or so. Today I was due to get back on with/finish the build but unfortunately have just realised I don't have any UST rim tape for the wheel so cannot fit the tyres until I buy some. I am also having a problem with the XG1299 cassette (see other post) so have ground to a halt again.
Here is the progress so far

That's shaping up nicely. You must have the patience of a saint! I'd have had it built and broken something by now 🙂
Giving me a few ideas for mine though...
That is going to look amazing. I'd gorilla tape the wheels and get out on it ASAP.
Ref the twinloc and dropper lever. Might be a stupid idea but is it possible to turn the AXS remote around and mount behind the twinloc to operate with your finger?
On the Blip, costs aside at Cape Epic I spoke with Nino's mechanic and they had the blip button in the grip, and ran the cable (all nicely heat-shrinked to the brake cable) inside the frame where they stashed the blip box. Looked very clean.
Or could you use a rockshoc twistloc? Not sure if the throw on the leaver is the same?
OK finally got it finished today after a bit of an issue with the cassette which required a SRAM warranty return.
All up its still a smidgeon under the 10kg mark which isn't too bad for an XL frame with a heavier than usual dropper.
Currently got all the stem spacers in as I haven't been for a proper fit yet. Not the easiest build I've done but learned a lot along the way.
Nice! Under 10kg is really light!
I always wonder what mine weighs (XL like yours). Mine is the lower spec carbon frame though with a more mid-range build (GX Eagle, Fox 32 SC Grip etc).
Now I've decided to keep mine, I've been slowly upgrading. I'd love to have a different paint job, but it's a bit more than I can spend at the moment.