To owners of Roger's book - does the DIY truing stand detailed in the book require metal-shaping beyond what's achievable with a file and a hacksaw or is it pretty straightforward? Seem to remember hearing before that the "dropouts" are a bit tricky without access to some beefier tools.
Probably buy the book anyway, but just wondering before I drop the cash.
Built my first wheel the other day following the instructions in Zinn & the Art of Mountain Bike Maintenance (birthday present - pretty good book though, pleasantly surprised - I'd rate it higher than the Park Tools one). Had it trued, tensioned, was pretty happy with it. Then turned the page to find the wee add on bit about "by the way, if you're building a [i]rear, disc[/i] wheel you need to do things a [i]teensy[/i] bit different." Not happy. Still, unlacing it and rebuilding it again does at least mean I now have twice as much experience...
what did they say needs to be done differently for a rear disc wheel?
You could make the drop outs for the Roger Musson stand using a good hardwood either.
I got my dad to make them at work for me - is there no small engineering workshops nearby that you could call in?
I did my dropouts with a 10mm drill bit for the shap and then cutting out and taking the sharp edges off the sides to make a 'u' with a dremel. It took aaaaaaaaages! Almost as long as it took to rougly cut out the rest of it. I suppose you could use nice hard wood for the dropouts but might be worth making up a few replaceable ones as I am not sure how long a wooden one would stand up to repeated fitting and removal of axles.
But this design is pretty flexible in that you can fit all sizes of hub in it and do offset 'dishing' ie for downhill bikes with offset rear swingarms.
I have never used a metal one but one of the things the Musson book says is that a wooden one mans its easier to hear the spokes when you 'tune' them. (hard to explain but I ping early in the build to start off with roughly even tension, and then quite a lot later on as sometimes a bit of 'wonk' will be because the adjacent spokes are too slack rather than the one you think it is being too tight).
I have to say that I've never got on with my Roger Musson stand, I've always found it easier to go round to my LBS with a bag of doughnuts and borrow theirs for an hour...
I found some 30mm * 4mm steel strip that I hacksawed dropouts into and then fixed to the mdf upright for mine, works brilliantly, wasn't very difficult to do and didn't take too long to make either...
what did they say needs to be done differently for a rear disc wheel?
For a rear disc wheel, you run the spokes from the opposite "side" of the hub flange compared to a non-disc wheel (on the disc mount side).
This means that the spokes on the outside of the flange (which apparently do more of the work) are the ones which are stretched by the braking forces and therefore resist said forces better.
Like I said, it was my first wheel, so I'm just repeating what the book said! It's my one slight criticism of the book - even though it's been updated well and covers a lot of very modern components, there are a few places where it could do with being re-written so that the modern stuff is the "normal" way and the more archaic stuff is the optional extras.
e.g. the default wheelbuilding instructions effectively only apply to front, non-disc wheels. Given that probably 80% or more of modern mountain bikes now have disc brakes and that 50% of all wheels are, of course, rear wheels, then these instructions only apply to 10% of all wheels.
Still my fault for being a muppet and not reading right to the end of the chapter though.
built the stand and used 6mm ply for the drop outs they wont last forever though at least a couple of years.A great cheap stand
 GRAVITY-SLAVES.CO.UK
 is that a spoke-free maglev rim?
Cheers Stevomcd, thought it might be that. Roger's take on it is that it's a small theoretical difference and it doesn't really matter. I must admit, I've got some wheel I built with type A lacing* and some with the Shimano recommended type C but I've not noticed any difference.
* as defined in Roger's book.
my wood work is pants so i bought one of these and the alignment tool tho i do use rogers book lol 😉
Cheers Stevomcd, thought it might be that. Roger's take on it is that it's a small theoretical difference and it doesn't really matter.
Yeah, I guessed that might be the case. Was going to post on here and ask the question before I bothered re-doing it, but I've re-built the wheel for a bike I'm selling (anyone want an 05 Stumpy FSR? :wink:) and my conscience wouldn't let me leave it "not right". ALL the disc wheels I looked at for comparison had it the "right" way so it seemed a bit dishonest to leave it.
mi©k - that's a thing of beauty!
I bought the book and built the Musson stand from mdf. I initially cut the dropouts from some bar I bought in B&Q using the drill and hacksaw method and they worked but were a bit rough around the edges so I cheated and got a neighbour who has a light engineering firm to cut me another set. I actually found cutting the acrylic to make the guages more of a pain until I got the knack. I reckon the book was 10ukp well spent, now on fourth pair of wheels.
That Hozan stuff is very very nice indeed! Wonder if that does spokeless wheels too? 😉
You should see my dishing tool, makes my wheel jig look hi tech.
Plank. 2 blocks of wood screwed on each end. Big wood screw in middle.
Sit the blocks on the rim. Adjust screw until it's on axle.
Flip, check.
Job's a good 'un.
i used a pair of on road forks - even does rears - attached to one side only:
then at bottom a bar with sone cable ties for radial and lateral movement.
Pics:
[img]

[img]

[img] 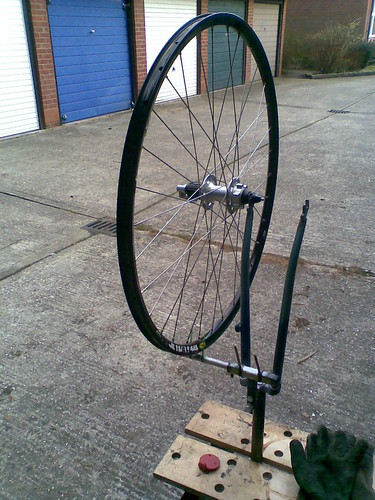 [/img]
