My mate has picked up a vintage Raleigh wayfarer and needs some advice for removing the cranks. So fello bike nerds any ideas...?
[img] 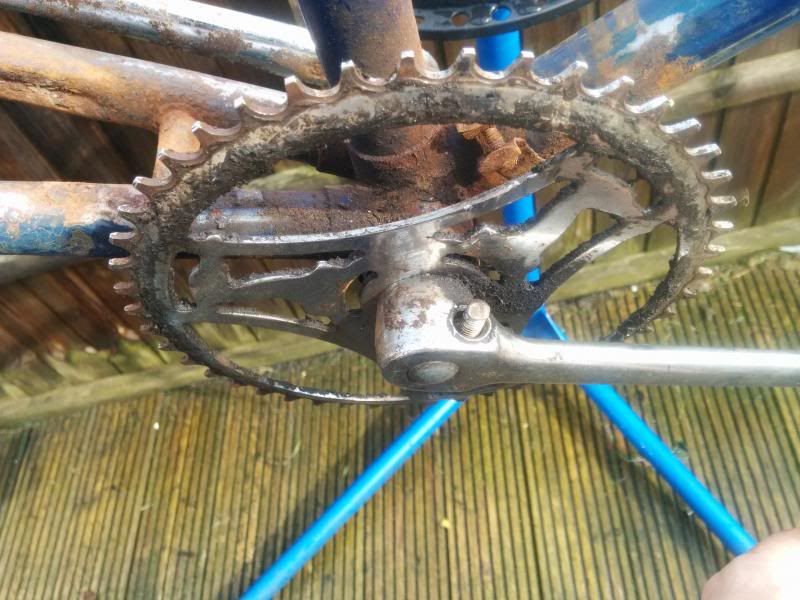 [/img]
[img] 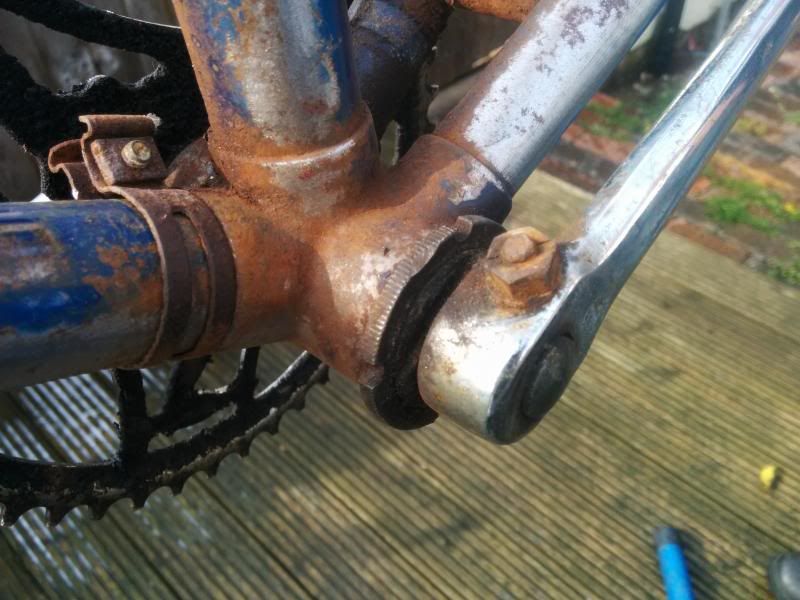 [/img]
Cottered crank. Loosen the nut but don't remove, then malky the nut with a big hammer to free the tapered cotter pin.
Once you get that out, it's easy.
Often have to add either heat and or plus gas
Or rest the crank arm over a tube before beating out the cotter pin
To stop the energy being lost from the beating
+1 for a week of plus gas treatment followed by heat and hammer. I bent quite a few of those in my youth by being too eager and generous with the hammer.
IIRC the axle tends to cut into the pins a bit, which makes them a bugger to remove even before you start to think about bits seizing together
BenC's method always worked for me but I've never left one for 30 years, which that looks like so I can see that plusgas/heating might help too
You can also use a ball joint splitter if you want to be posh 😉
I have a few cotter pin crank bikes.
If you simply hammer out the cotter pin you're not doing your bearings or your frame any good.
There are special tools for the job, but for home mechanics, it is necessary to improvise.
Use a tube to transmit the impact through the crank to the floor. I use a cut down straight handlebar.
Leave the nut at the top of the thread which helps protect the thread from the hammer.
Rest a heavy hammer (lump hammer or spalding hammer) on the nut and strike this firmly with another hammer. As straight a blow as is possible and you might avoid bending the threaded part of the pin. It also helps to prevent damage to the crank by a near miss because the lump hammer is a bigger target.
One good whack is usually all that is needed.
Do it the other way and you can be hammering away for ages and end up turning the threaded part of the cotter pin into a rivet head.
When replacing a cotter pin, the threaded part should project upwards when the pedal is forwards.
If you're planning on knocking hammers together please wear eye protection.
Also as it's an old Raleigh don't bin any parts. Raleigh used their own threading on bottom brackets and headsets. The cups were made of kryptonite and are very hard to get hold of, but you can get new axles and ball bearings.
