Not sure if this has been done but got this from Hellfrauds yesterday and fitted it to my MJ-872
Nice cheap mount works well.
Good find
great idea - just bought three.... (buy two get the third free)
They need a wee bit of tweeking but it works great, was out tonight and its solid.
I know it says max size 30mm but do you reckon it could stretch to OS bars?
Any pics of it installed? How much tweeking did it need?
Will have a look tonight, might just be a tad small for os bars, will try it on my other bike.
As for tweeking it was just trim off a bit of plastic with a hacksaw added a dent for the rubber grommet (obvious when you see the old mount) with a drill and stick a longer 4mm bolt with washer in, took 10mins at most.
cheers Steve
Would be interested in a pic as the bolt seems to be in a different position between my Smudge light and those £26 cree jobs
the Electron mounts seem to be in stock again:
http://www.chainreactioncycles.com/Models.aspx?ModelID=6091
Were mentioned as a good solution with minimal tweaking some threads/months/years ago.
What work's best from your experience?
Cheers!
the Hope clamps work, with a longer M4 bolt.
Wrong electron mount Hock, I bought one of those you've linked to to try it out as an alternative, and couldn't see a way of using it & returned it. IIRC correct the mount for the "EHP 100/ 110/ 200/ 111/ 101/ 201/ 211" could be converted, but that for the "Electron Extreme Micro" & is of no use. As above, if you don't fancy the OP's one, try the Hope clamp.
That electron mount didn't work for me either.
EDIT - on my 836.
EDIT again - my 836 came with a mount like the halfords one linked to - the bracket flexes as you're riding making the light patch constantly move around. I solved it all with a Lumicycle mount, which I had to file a bit thinner to fit the slot in the bottom of the light unit) screwed into the mounting hole in the bottom of the light. Works brilliantly.
Whats wrong with its own mounting system?
it attracts zombies in the night
@sputnik: standard magic shine solution with o-rings tends to wander around the bar when the going get's a little rougher, e.g. light beam pointing at your front tyre after a bump. Not good if there's a second bump coming. Or a zombie...
Can be bettered with putting some gaffer tape around the bar to increase diameter and provide a grippier surface but a rock-steady solution is what you want really.
So,
- the Halfords thingy worked
- the lumicycle worked -> is there a link to the correct one?
- the Hope works -> dito
- and which Electron exactly works?
Thanks for the help!
Hock
All I did with the standard one was put a single wrap of cloth tape round the bars where it mounts- makes it as solid as any mount out there (and actually faster to tape the bar + mount the light than most alternatives)
ok so the mounts i ordered worked and a little bit of work (about 5mins) with the dremmel later and i now have one mounted up. Heres [s]some[/s] quite a few pics......
[img]  [/img]
original packaged up Halfords bracket
[img] 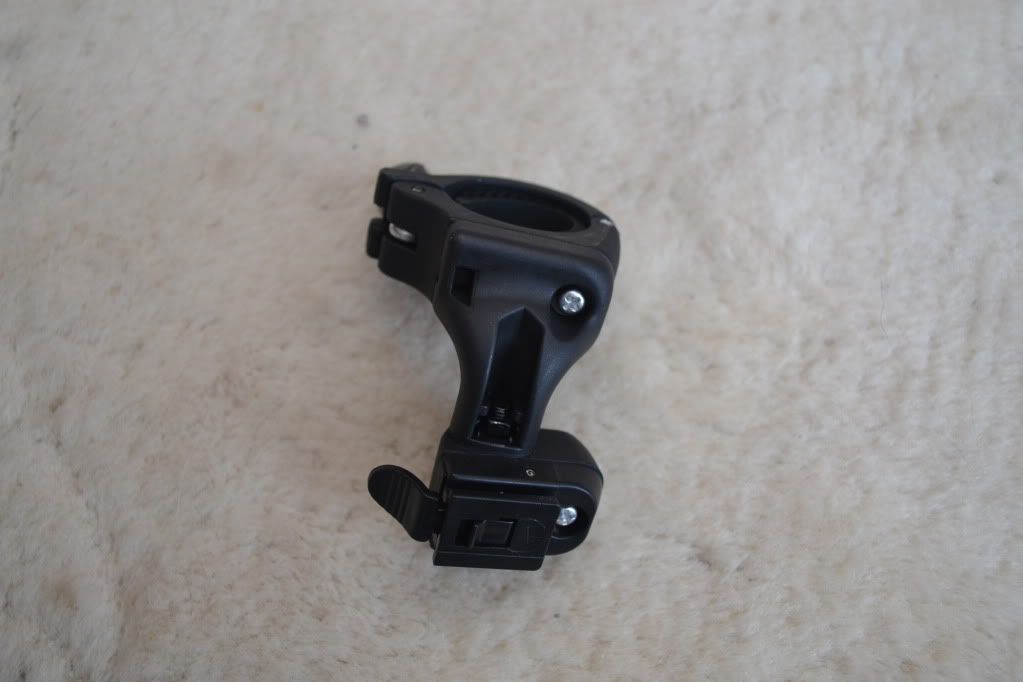 [/img]
out of the packaging
[img]  [/img]
top removed and grove added for the cable
[img]  [/img]
light mounted (had to use a new bolt as the original was to short)
[img]  [/img]
mounted to the bike.
[img]  [/img]
[img]  [/img]
[img]  [/img]
[img] 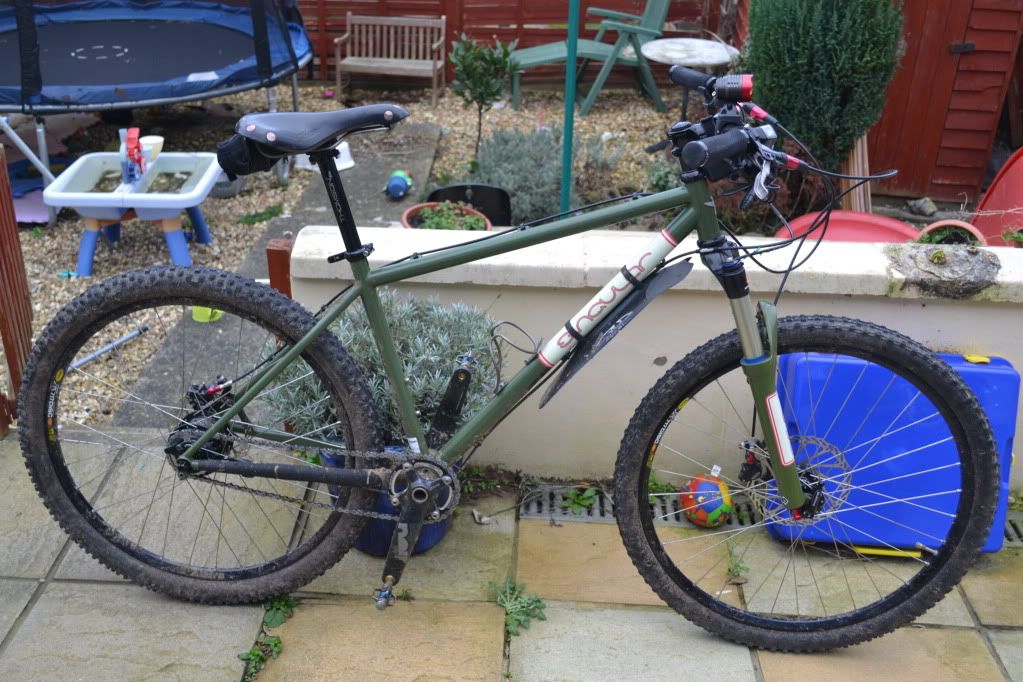 [/img]
[img] 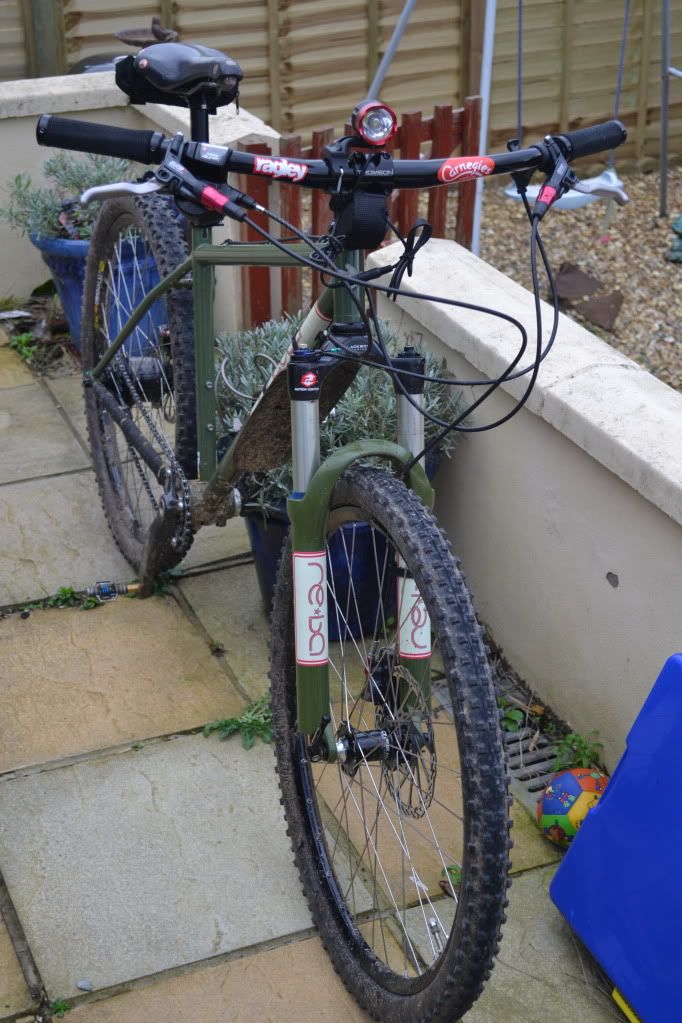 [/img]
only problem is my dremmel transformer gave out half way through the second one (well it is over 10yrs old and has been stored in a damp shed), so will finish the others after a new one arrives.
So are those OS bars? Might have to get one if they are...
Superb - thanks for this
yep 31.6 oversize bars - the bracket comes with the 'standard' little strip of rubber to take it down to the smaller 25.4 bars.
Bare in mind you'll also need a longer (m4?) bolt as the little one that the lights come with is not long enough.
Great saved me trying to figure out how to post pics.
+1All I did with the standard one was put a single wrap of cloth tape round the bars where it mounts- makes it as solid as any mount out there
I like to remove my lights and leave no trace.
Can also supplement it with a couple of the Royal Mail's finest red elastic bands that the posties leave lying around everywhere. Total cost = £0.
stevewhyte - i'm assumeing you did something similar to get it to work?
A bit of tweeking with the cordless drill and i managed to get the 2nd sorted - so now i have twin beams.
[img]  [/img]
[img]  [/img]
at Northwind:
tried your "cloth tape" method before fiddling with adapted mounts and it works perfectly!
Rather than gaffer tape I now used left-overs from a racket grip band and the 872 stayed in position throughout the ride.
Thanks! Saved me some handicraft work I'm not any good in anyway...
My batteries have stopped working.Any of you guys seen any offers on these.Sorry and thanks in advance.The apes.
Have you been playing with apertures or something monkeyboy or do you have really small garden furniture? Nice looking bike BTW.
well i am only 3ft tall... (the bike is a bit big for me)
monkeyboyjc - Member
stevewhyte - i'm assumeing you did something similar to get it to work?
Yes spot on, seems like a great mount for the money to me.
All i need to do now is get out on my bike in the evening!!
monkeyboyjc - have you changed lenses? Where did you get them from and what are the advantages?
Ta
I'll dig out the details later for you cyclistm. the stripy one is a wide angle lens, bought from ebay for about £4, it spreads the light more left to right and almost gets rid of the hot spot. The other, with the round centre, is a spot reflector (it replaces the standard chromevone and the glass lens). I bought it direct from a guy in the US, there's a thread on here about him somewhere (he also does a wide angle and a kit of three iirc) I think that one cost about £8.
I use a width of inner tube around the bar under the O'ring. You could take the bar off to slide it on and make it 'permanent'. Also cut a loop of inner tube and looped it over the stem to act as a cable guide. This was all part of pufferising the bike which involved a lot of old inner tube in various sizes and shapes.
the halfords mount modification is excellent - took the opportunity on this rainy morning to get it fitted. works perfectly, will give it a spin tomorrow. nice one. 🙂
A couple of wraps of self amalgamating tape works a treat never slips ,1 minute fix and been good for months .
fantastic find, well done that man!
who would have thought.....
Best one is i have bought 2 more and converted my Garmin edge 200 too use them so its in front of my stem but low. Works perfectly very pleased.
i need help with this please.
on the halfords mount, the screw goes in from the top
on the dx light, the screw goes in from the bottom,
how do you screw the light to the mount?
Hopefully this helps: 872 upside down.
[img] 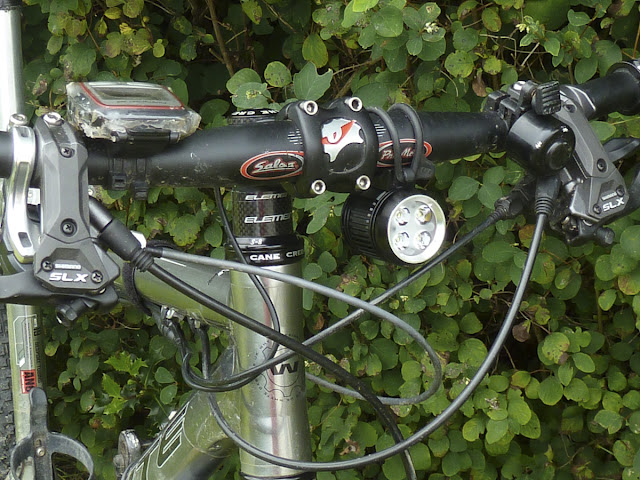 [/img]
Or have I missed something obvious (again!)?
You just turn the screw round and put it in the other direction.
simples 🙂
cheers