jameso - I will admit I was lucky with the weather and did 99% out the front of the garage as you do need space to work with carbon, I worked on the folding table with green + orange paint. The disassembled jig to the right can also be seen 😀 - if the weather had have been bad I would have cleared the garage out as you need 360 degree access when building. In terms of small parts - I have made my own bash out of a flat sheet of carbon (works great), I did try a bottle cage but that wasn't as successful - but will try again with a new bottle 😀 (it stuck last time)
FunkyDunc - no foam left in it - I moulded the main tubes around pvc pipe, and the small parts I melted the foam out with acetone - as I did internal cable routing I needed clear routed though the frame 😀
fair play to the OP, great to see this kind of stuff 🙂
its as much as I can do to bolt a bike together from its component parts
Mightily impressed.
Good for you!
The lathe didn't work very well, but did produce a massive amount of dust. It does show how crude you can be but still get something that works.
how about doing some destruction testing with the other tubes that didn't make the frame...
but I never know where my interest will be in 10 years time!
well I went from postdoc research into superplastic aluminium alloys intended for the Eurofighter/Typhoon to being a copper.... 🙄 😀
rs - all tubes went well so that sorta stuff that...
crashtestmonkey - haha - nah definitely want to do something engineering based, I love doing things like this so why not make a career out of it!
I thought you mentioned you used some other techniques that didn't work so well, would be good to see them being hit with a hammer 🙂 or make a few spares and hit them with a hammer!
Fantastic stuff.
I keep thinking about trying something largish as a project.
A canoe is currently winning in my head.
A canoe is currently winning in my head.
Easy. Big block of foam, curved to a canoe shape. Lots of carbon (might be a bit expensive), lots of tape. Dig out the foam when cured.
Bloody brilliant & not sure whats best the actual build or '..two weeks intesive testing in the alp..'
Cap well & truly doff'd
wow, hat off to you
A canoe is currently winning in my head.
I was actually thinking about doing a full suss sometime in the next few years... let the designing begin!
richmars - MemberA canoe is currently winning in my head.
Easy. Big block of foam, curved to a canoe shape. Lots of carbon (might be a bit expensive), lots of tape. Dig out the foam when cured.
Carbon fibre isn't usually used on its own for canoes.
Kevlar is the better bet.
Although to be honest I'm leaning towards a cedar strip construction with glass fibre outside.
you mentioned bamboo - I thought this was interesting a few weeks ago;
[url= http://www.theguardian.com/technology/2013/sep/21/bamboo-mountain-bike-review ]null[/url]
ps. well done on your creation!
yeah - when I looked around oxford brookes uni a few years ago, they were doing the development and testing for these next door to the room I was in so I went and had a look around -They let me have a quick spin on it - and to be honest I was a bit disappointed, but probably didn't ride it enough to see the benefits and might have been an early prototype. By then I had already started making the bamboo bike trailer for my a-level, so it was a bit late for extra credit/research.
Fair play mate - sounds like a great Uni project
The best projects i could come up at Uni was designing an electric chair, determining, through statistical analysis, the number of women Bond had nailed and programming a computer to beep 'Baa-Baa Blacksheep'
Bolton Institute at its very finest 🙂
Oliver - yhm with a proposition 😉
thought I would update this with the latest turn of events...
so I went to cannock chase today with a few mates from uni, all going well till I have a bit of a nasty pedal strike (dented a m520 pedal kind of hard) so think nothing of it till about 20 mins later where it felt like I had bent a chainring but then realised the BB shell had parted company with the rest of the frame...
[img] 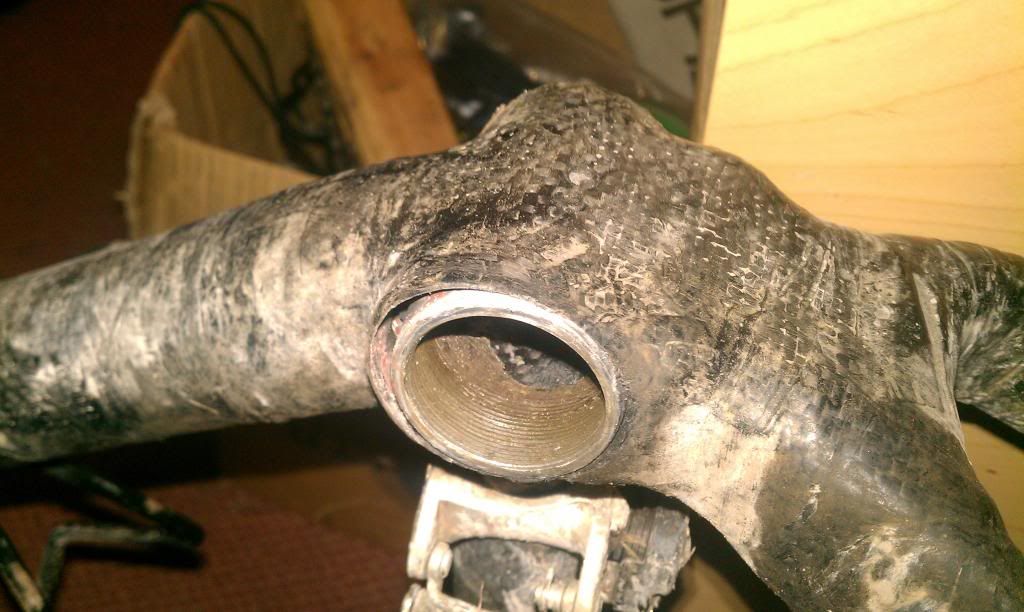 [/img]
[img] 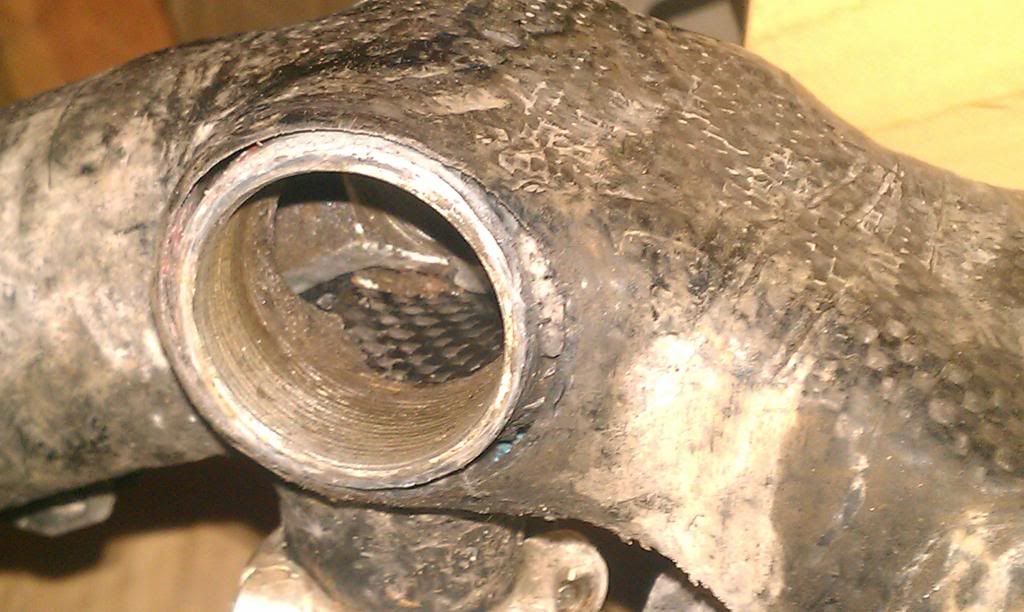 [/img]
It's repairable at least, just need to go home from uni to access the correct equipment to do it - now this I promise to do a full photo documentation (hopefully)
That's the bit I was always concerned about on mine. I used a layer of glass fibre between the shell and the carbon, as, in theory, you can get galvanic corrosion between the carbon and steel.
Also, it's not easy to get a good surface area contact between the shell and the rest of the frame
yeah - used the glass fibre method - but I think the hit I had would have cracked most carbon frames 🙁
If I was doing another one, I'd make a carbon tube, with an internal diameter a bit bigger than the shell, build the tube into the frame, then glue the shell inside the tube.
yeah - Hadn't thought about doing it that way, but I guess that would give you the best chance of getting a decent bond
a decent bond will only occur if you can get the fibreglass to stick to the aluminium anyway ,a bond is only as strong as its weakest element the fibreglass is not the weak element the interface between the aluminium and whatever epoxy or adhesive is used is(some adhesives are not epoxy based)
Google FPL etch (still a bit old) and extrapolate from there or even CAA etch or the phosphoric (sometimes called boeing) process
glassfibre ...old hat chaps
compositepro - I have just looked at the failure in a bit more detail and it appears that it is infact the fibreglass-metal joint that has failed, I guess I needed to so a bit better surface prep that a bit of sandpaper before hand! - I have also realised that the way I have designed it the BB shell was only in contact with the carbon around the bottom 50% of it - so an upward impact would just push it up - both these issues should hopefully be fixed in frame version 1.1 🙂
I have looked into both those method, but they seem a little out of reach for a shed-job - so I guess I'll have to increase the surface area
Aluminium is filthy in terms of materials to glue the ano and etch is more for future reference
Any form of surface conversion is always a help but cleanliness is pretty much key
Latest update...
so last weekend I took the frame home from uni to fix it so heres how it went...
shell cut out
[img]  [/img]
shell fiberglassed and carboned in place
[img] 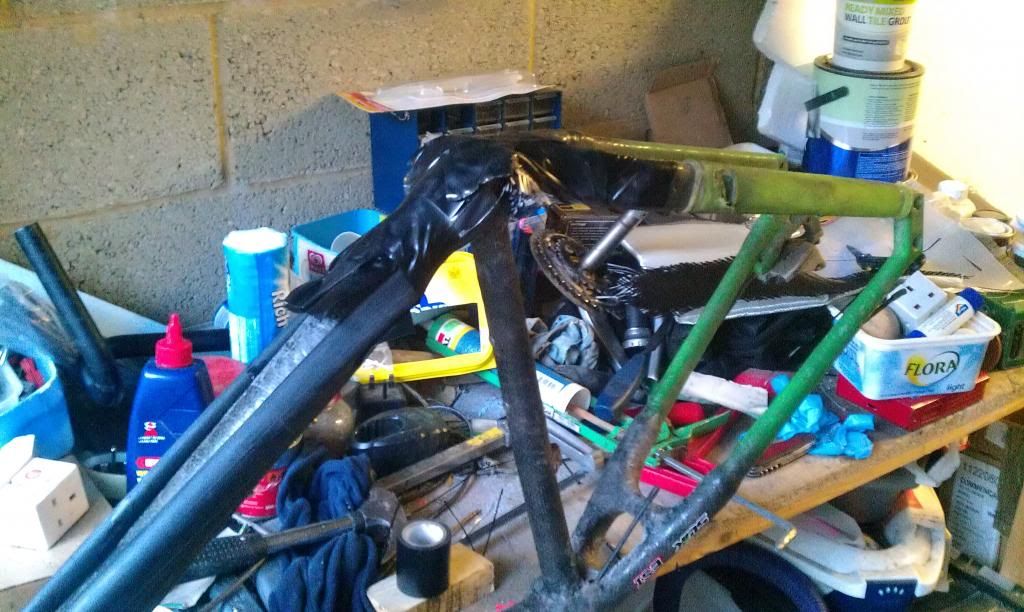 [/img]
first layer done
[img] 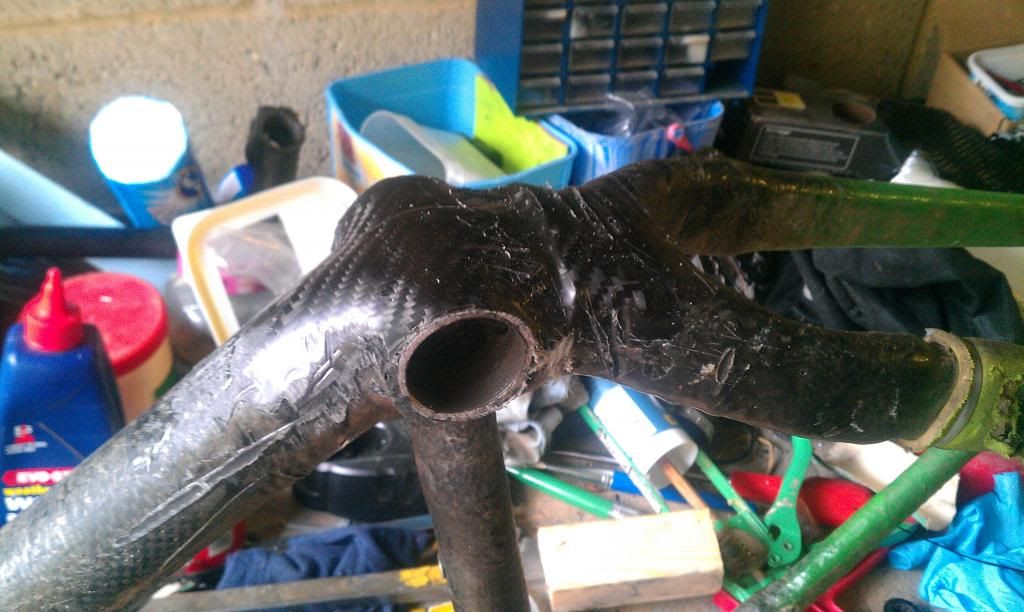 [/img]
sanded down a bit
[img] 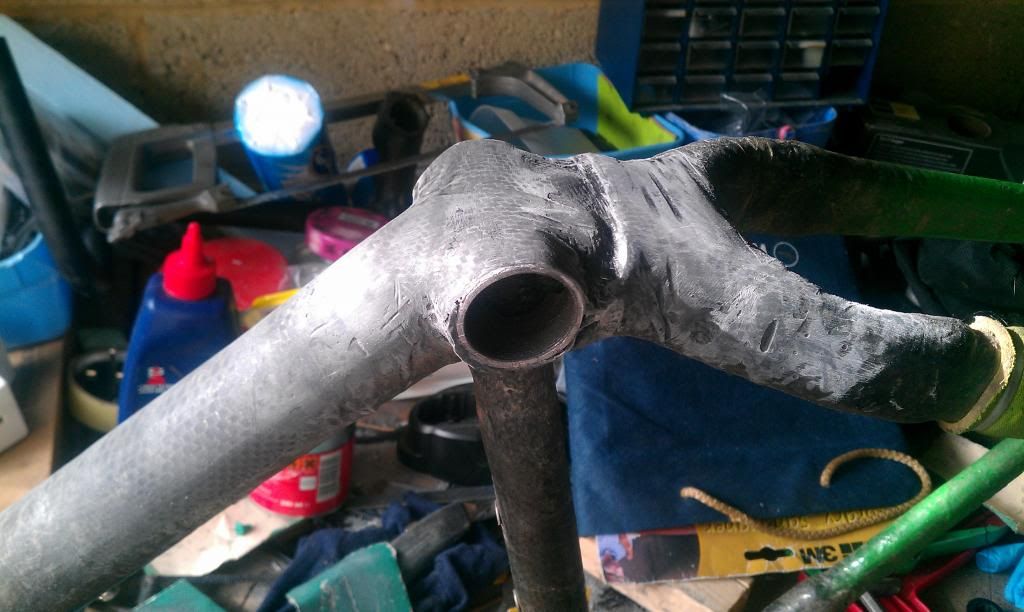 [/img]
some carbon added
[img] 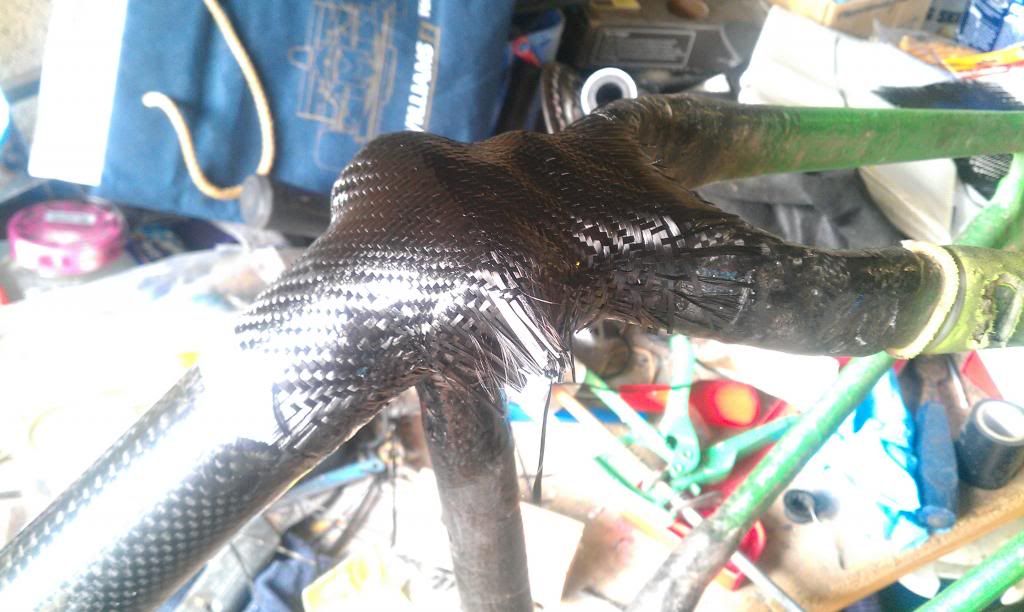 [/img]
[img] 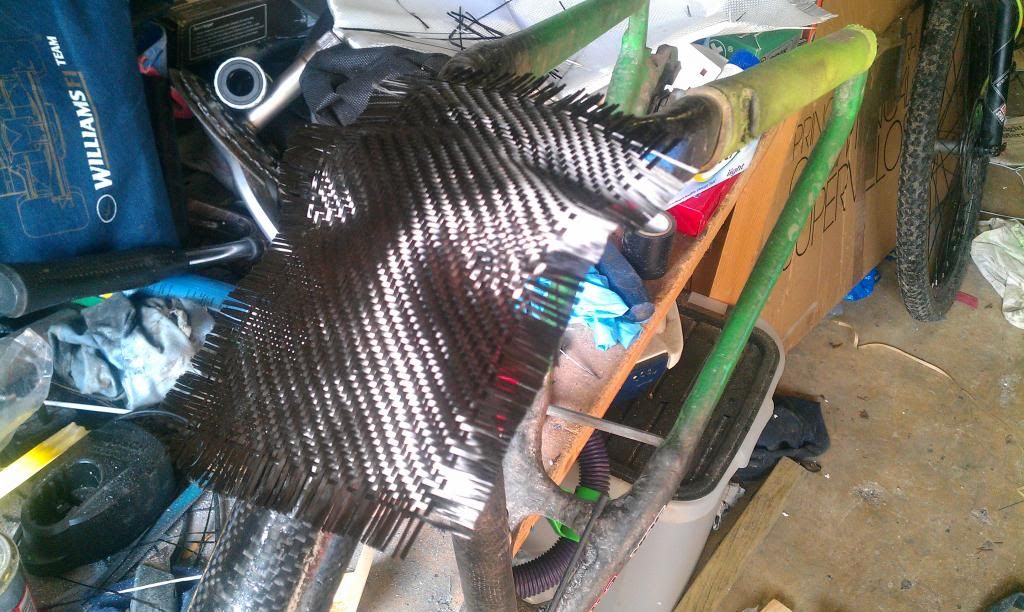 [/img]
electrical taped...
[img] 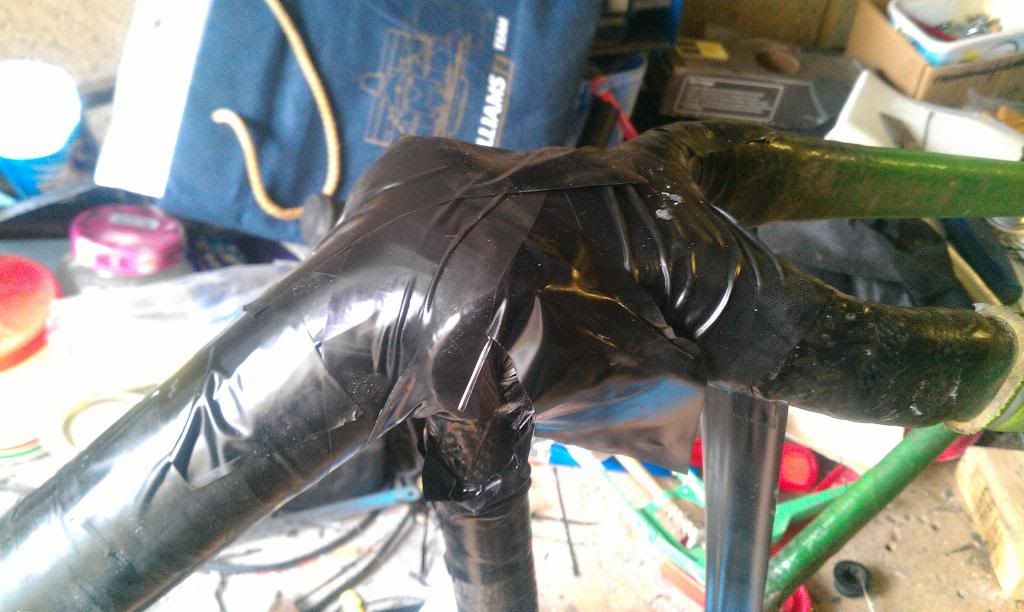 [/img]
done!!!!!
[img] 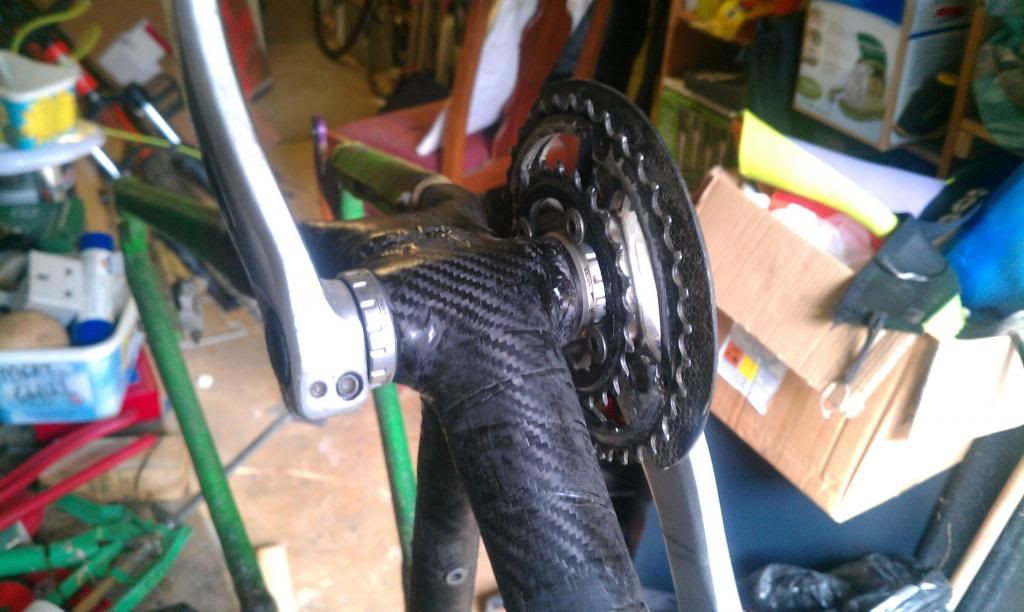 [/img]
sure it's been answered but can't see it, what is the cost of the materials? got a link to some good stuff?
to be honest - not sure I have said, so here I go...
Carbon fibre - free 😀 - a composites company donated for a school project I did a few years back (15m^2)
resin - £20 - [url= http://www.easycomposites.co.uk/products/epoxy-resin/EL2-epoxy-laminating-resin.aspx ]clicky[/url]
pvc pipe for moulding main tubes - £10 [url= http://www.ebay.co.uk/itm/Solvent-weld-waste-pipe-32-40-50mm-white-black-grey-/120758396565 ]clicky[/url]
other laminating kit ~ £50 - [url= http://www.easycomposites.co.uk/Default.aspx ]clicky[/url] (gloves,pots,stirrers,brushes,foam for mold, release wax for pipe)
old frame for parts (bb shell, headtube, dropouts) - £?
probably forgotten something major - but will update if I remember
awesome - manic plot hatching going on as I have just got the garage sorted - well the beer fridge is in
I use this stuff [url= http://www.westsystem.com/ss/ ]West System[/url] 105/205, you can get graduated dispensers that screw in like soap bottles and give you the right ratio amount, saves loads of measuring hassle.
The soap dispensers aren't great, I gave up on them. Just buy a cheap set of digital scales, much easier.
any prices on the carbon fibre?
I have been googling but i'm currently stumbling a bit in the dark
The soap dispensers aren't great, I gave up on them. Just buy a cheap set of digital scales, much easier.
Fairy snuff, last few years I found them excellent, except where you let the resin get too cold and wax up
Have you never tried [url= http://www.ebay.co.uk/itm/Mini-Handy-Clear-Pallet-Stretch-Shrink-Wrap-Film-x-1-/120764235614 ]Pallet/Shrink Wrap instead of the tape?[/url]
I used tape to start of with, but once I tried the Pallet Wrap, I found it so much easier to use and wrap stuff.
Mike, [url= http://www.carbonmods.co.uk/Departments/carbon-fiber-kits.aspx ]here you go.[/url]
I got the £40 kit to get me started years ago. Its got enough to play around with for a while.
[url= http://www.carbonmods.co.uk/Departments/Carbon-fiber-cloth.aspx ]If you need more cloth.[/url]
yeah - tried the pallet wrap - but found it stuck to the carbon and didn't give a great finish - I also found that the cheaper/crappier the electrical tape the best (99p shop stuff is great as really stretchy)
As for measuring - cheap eBay drug scales for about £4 do the trick!
as for price of the carbon - can't really help as mine was left over from a school project (a company donated way too much 😀 )
mikewsmith - you're in tassie aren't you? try these chaps in Hobart [url= http://fibreglassshop.com.au/? ]fibreglassshop.com.au[/url] - i used to get CF sheets from them for repairing kayaks
