So i'm not paying £30-40 for a new top cap, especially when the bush is replaceable.
First step is to remove the knackered bush (after removing the seal etc) - this is a bit tricky due to being a blind fitting.
The internal flange that the bush presses against doesn't appear to be structural, so I decided to drill 2No. 3mm holes in it to allow it to be drifted out. There is probably a better way, but I couldn't be bothered to think of one.
[img] 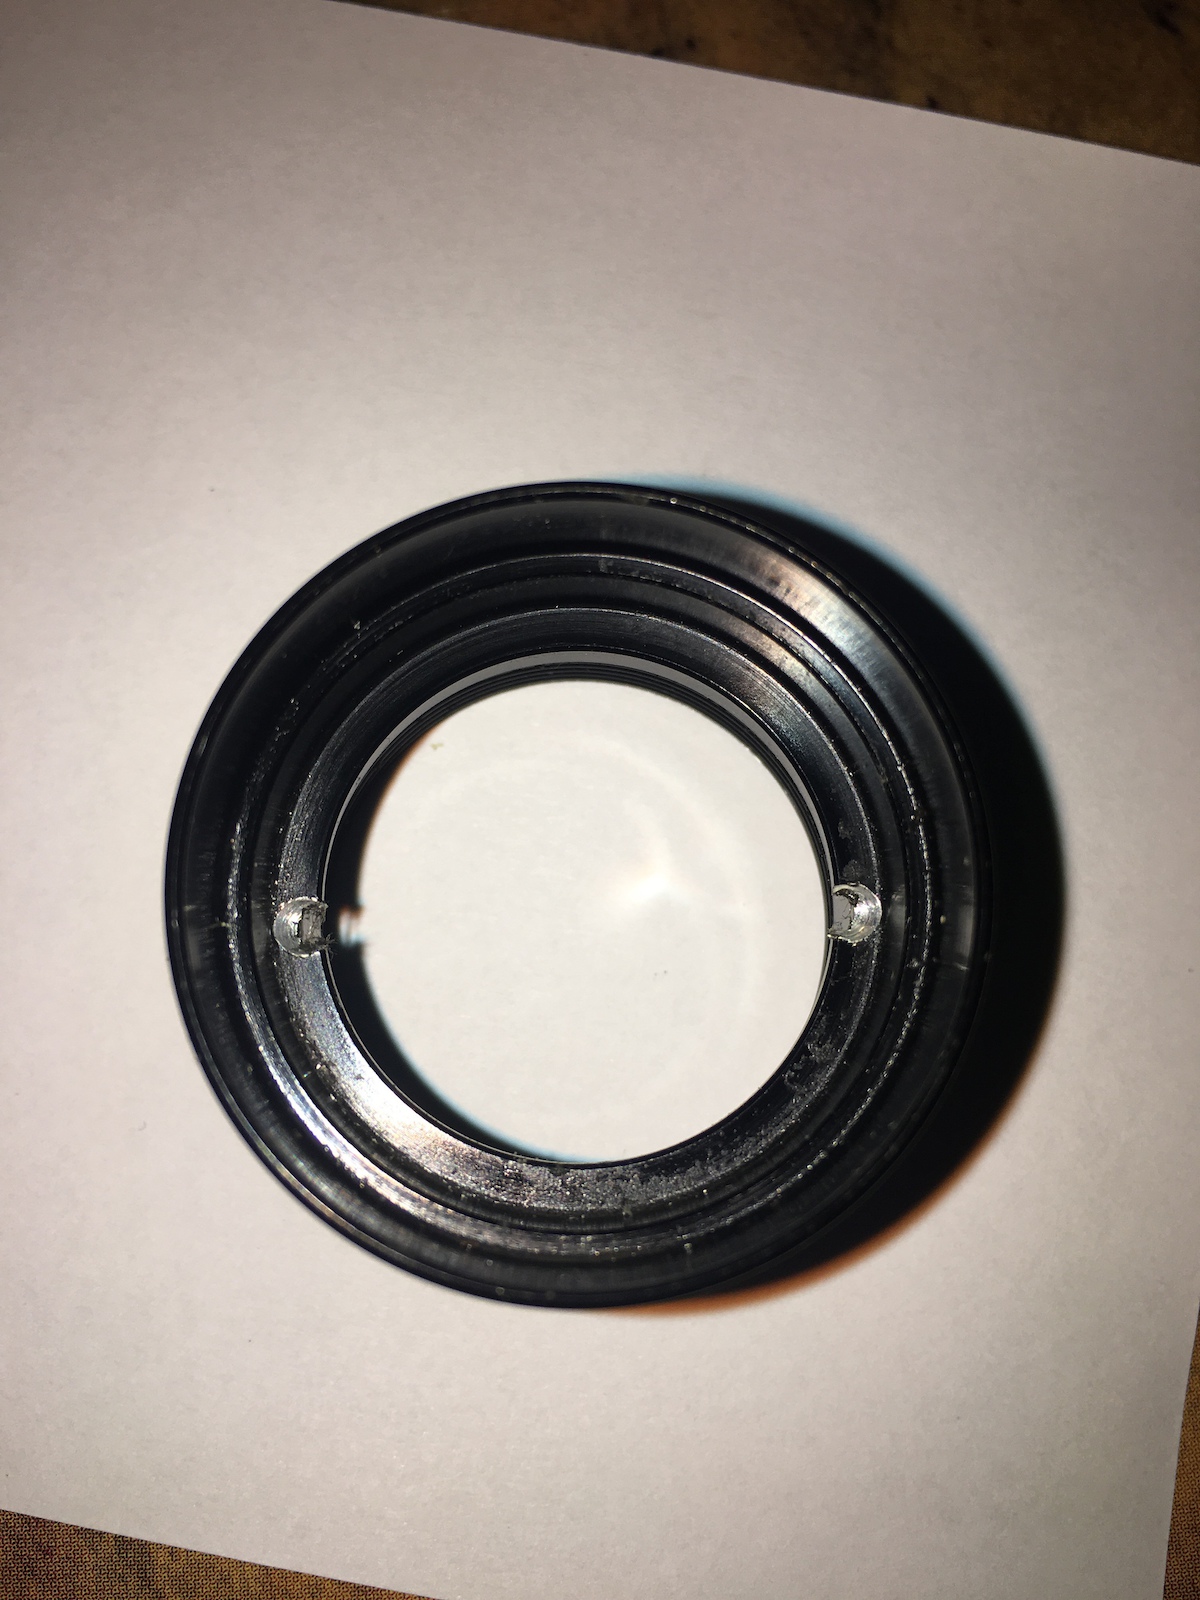 [/img]
[img] 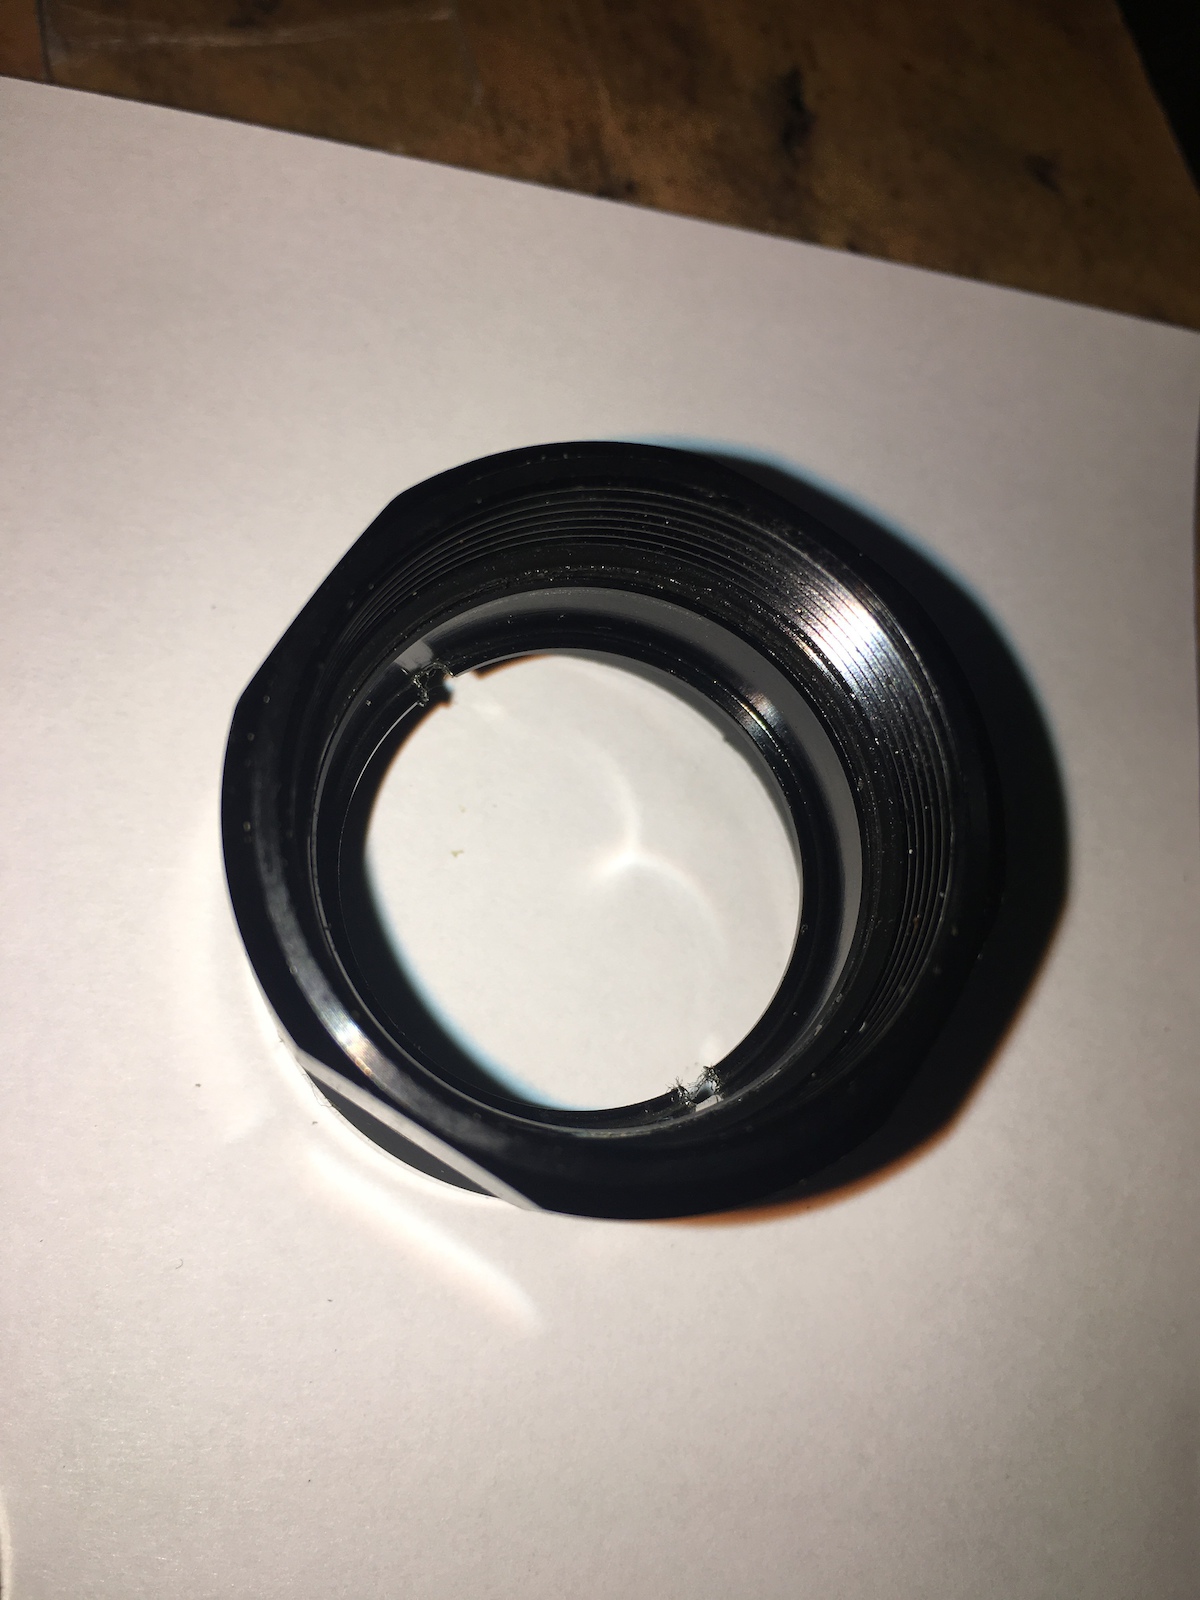 [/img]
So with the knackered bush out, the new polymer bush can be installed (more on the actual bushes later) - new bush on the right.
[img] 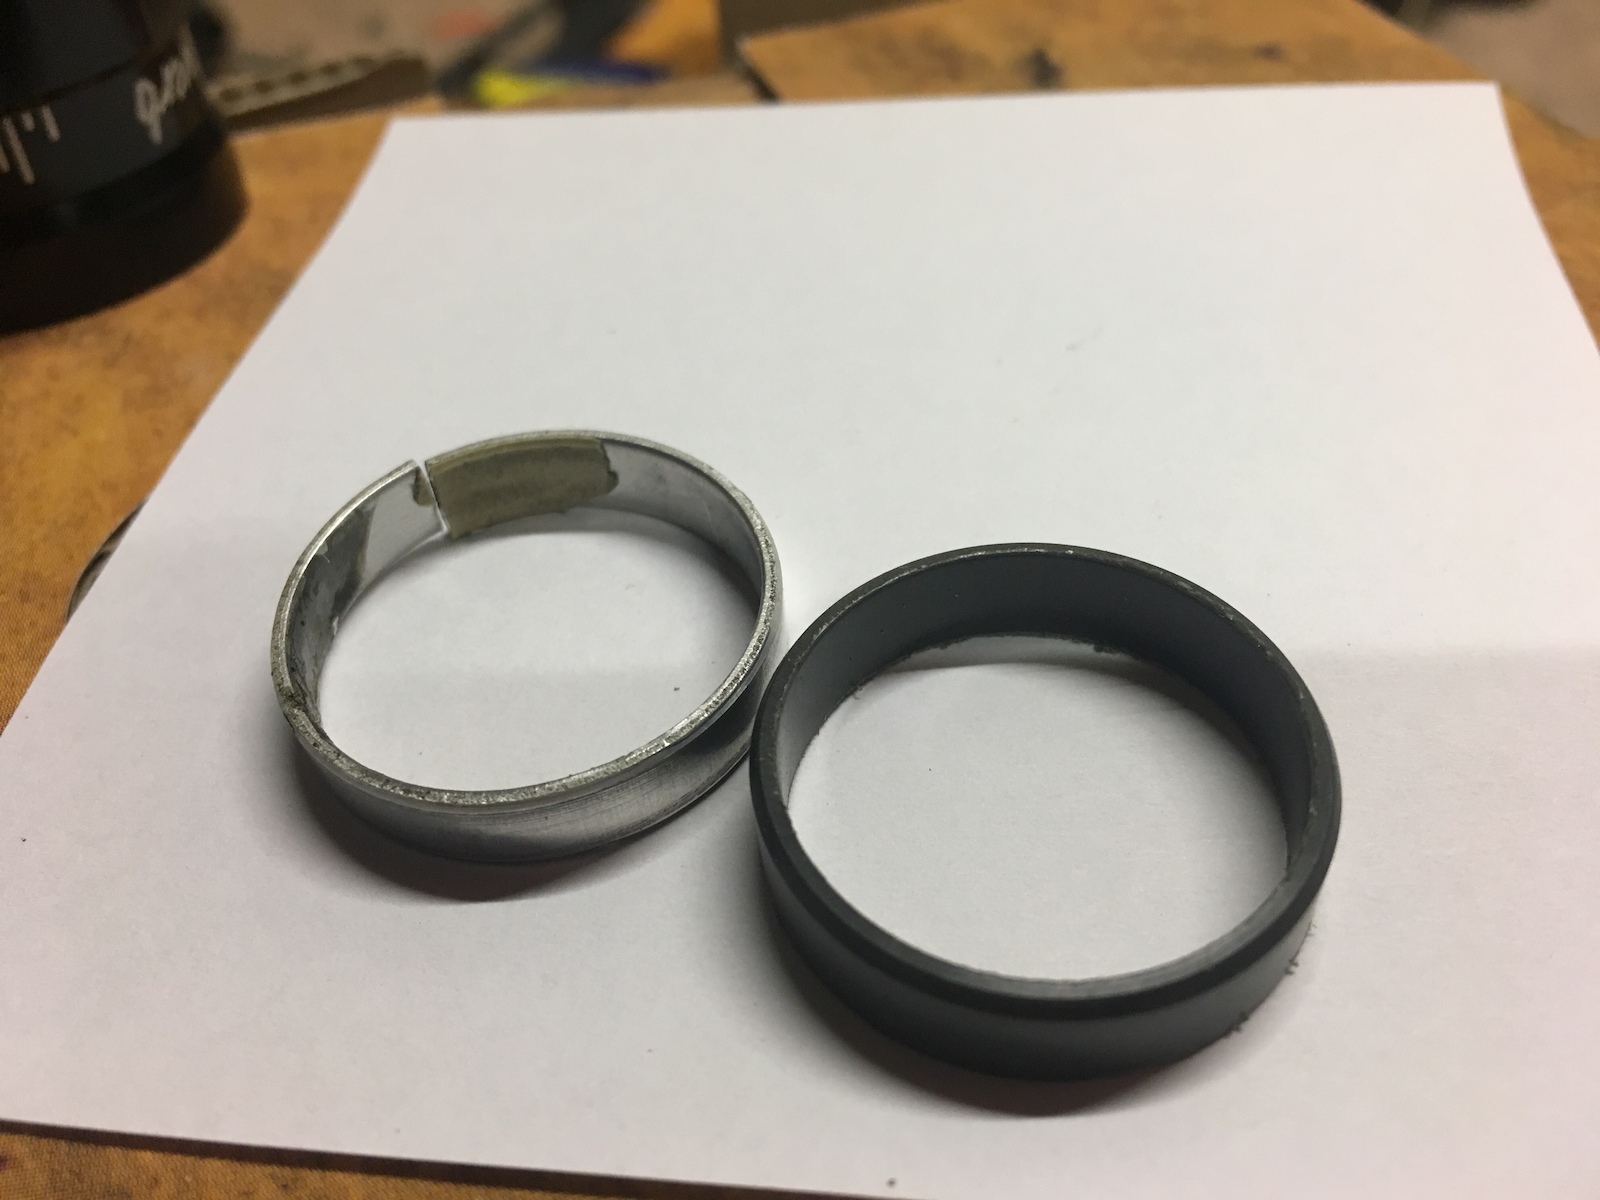 [/img]
With a relief cut in the polymer bush (not sure if that's the correct term), it pushes in fairly easily with a bit of grease, and using the sleeve as a screw/press. It doesn't appear that a very tight interference fit is critical in this application as the bush is held in place when the top cap is tightened down.
[img] 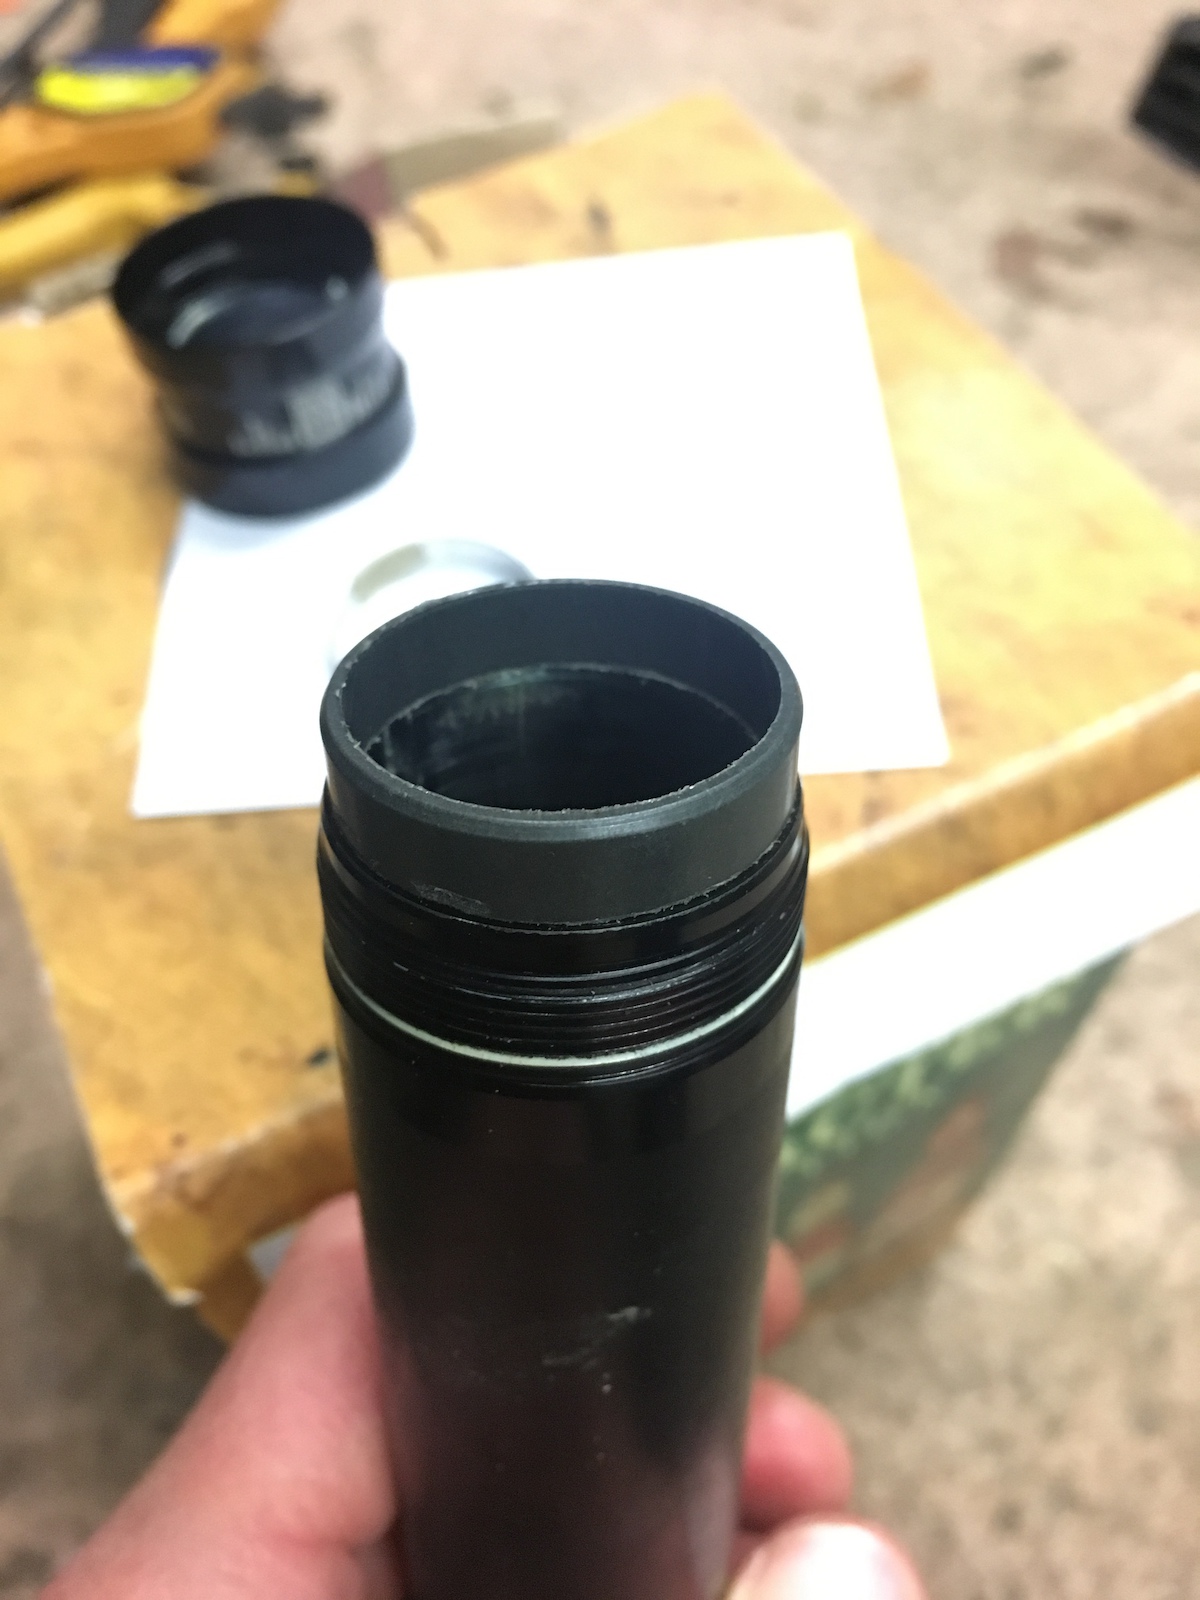 [/img]
[img] 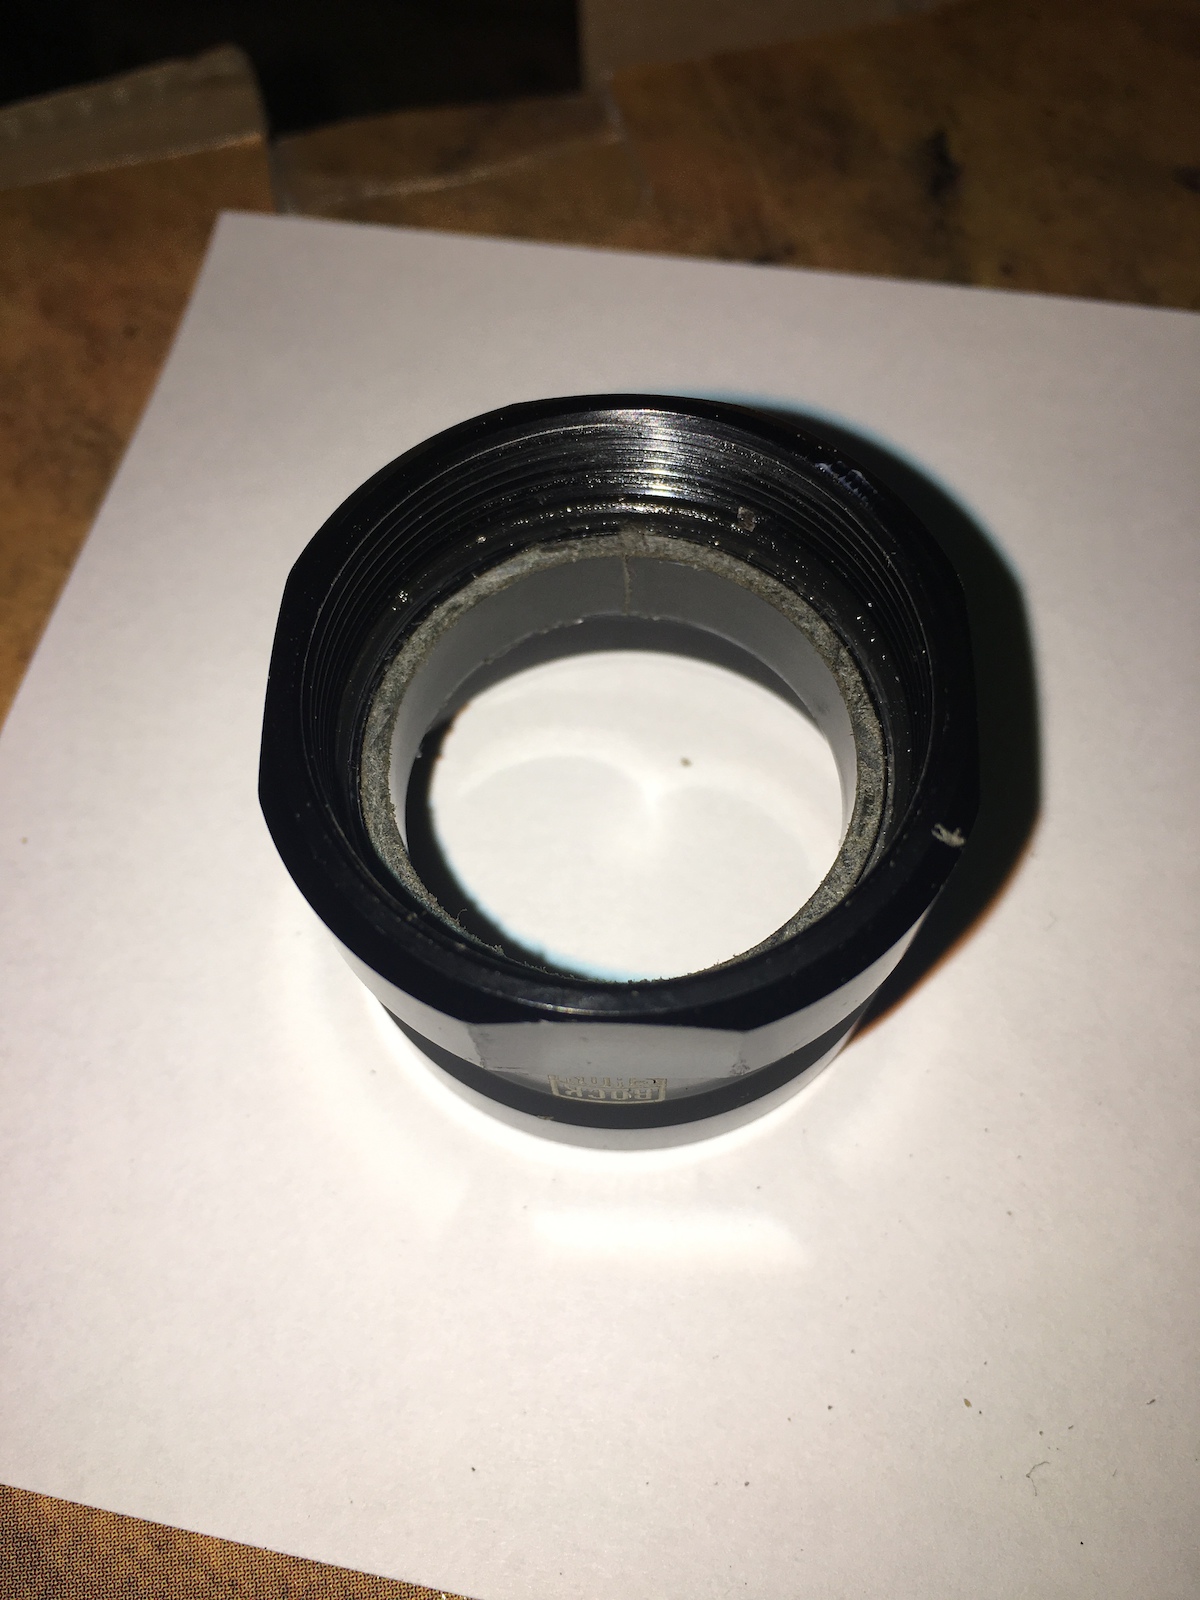 [/img]
[img] 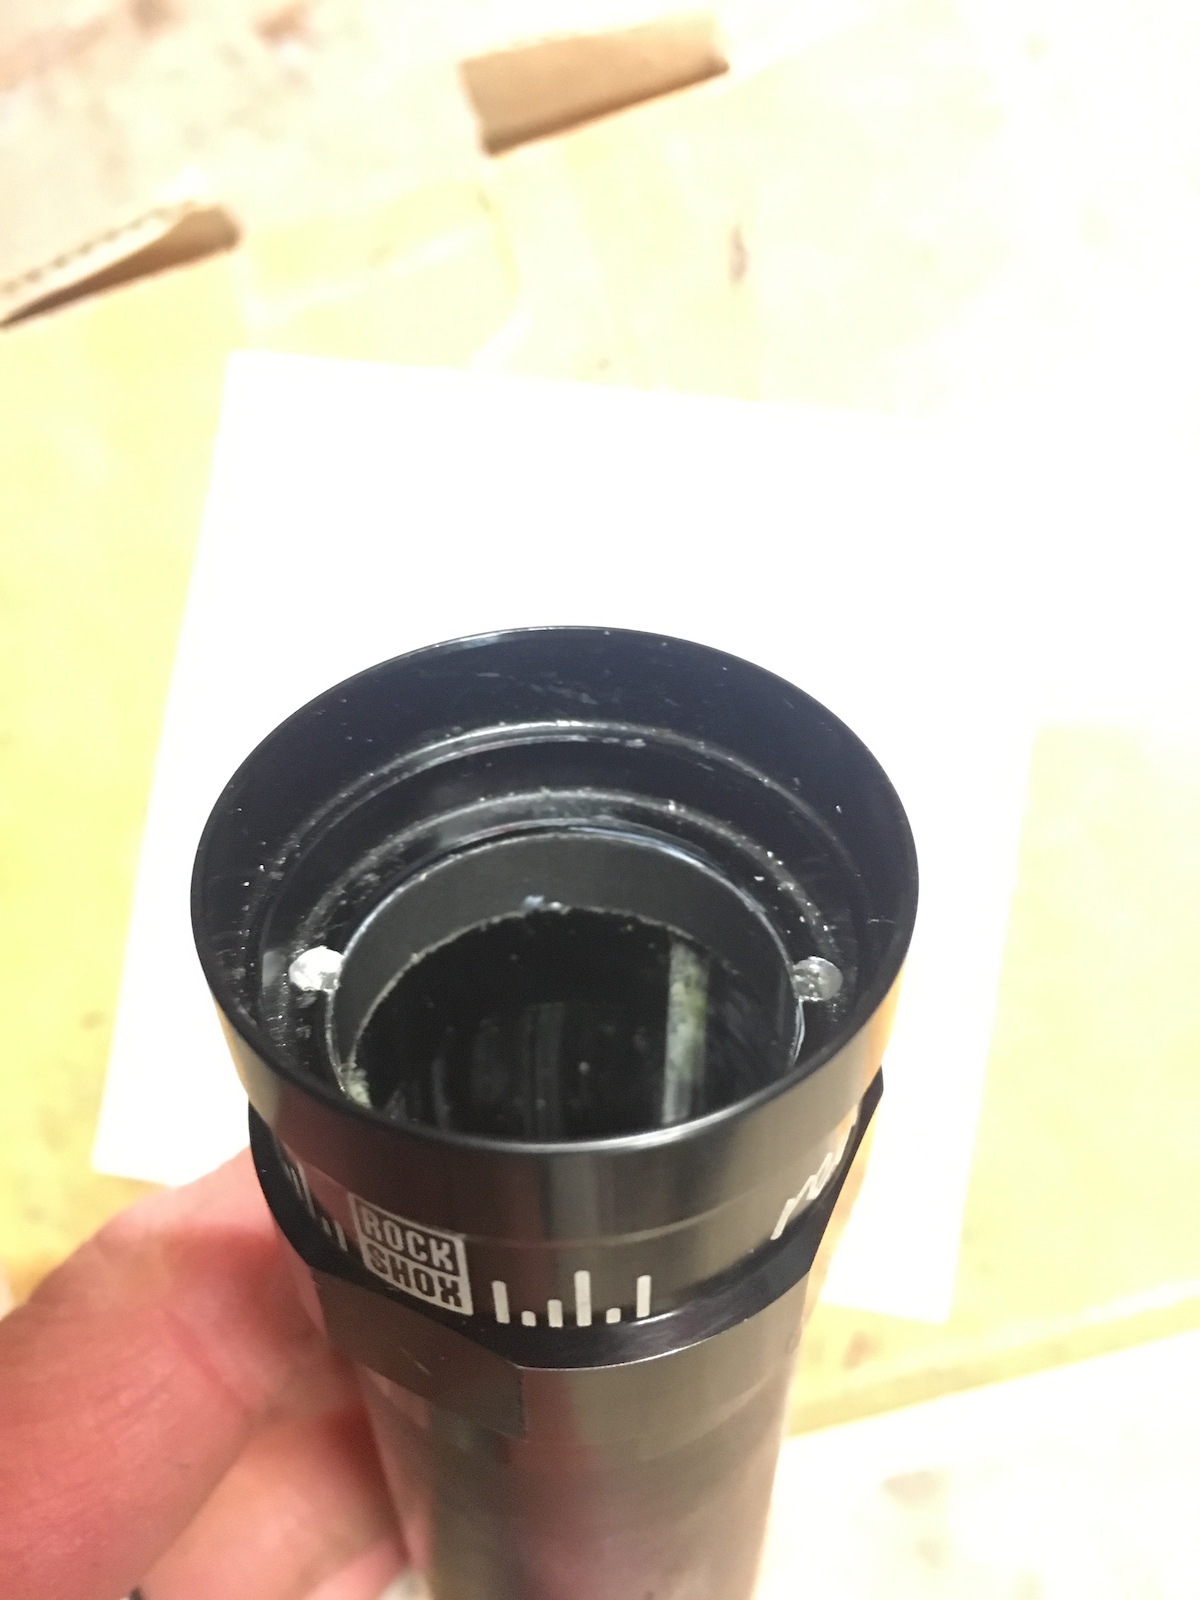 [/img]
As above for the lower bush.
[img] 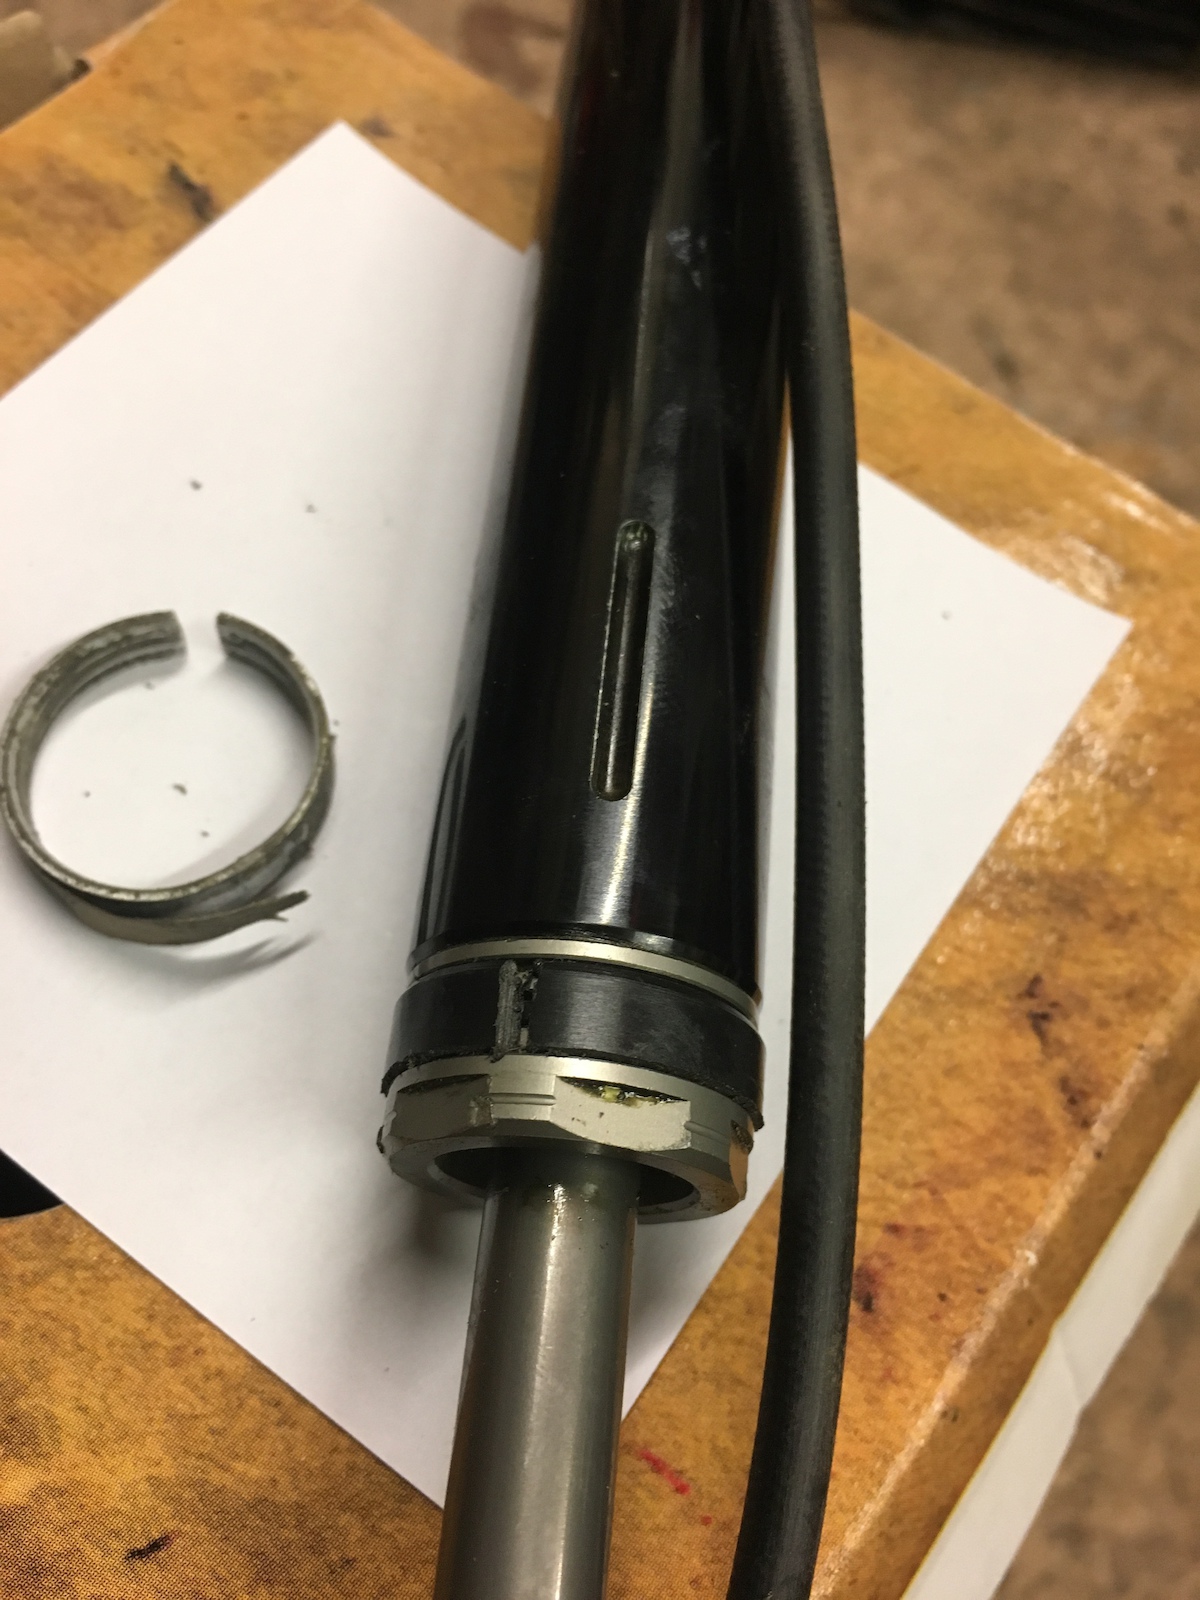 [/img]
Bush info:
Top Bush: 28mm OD, 25 ID, 6mm width. IGUS
Bottom Bush: 25mm OD, 22 ID, 6mm width. IGUS
IGUS have about a million materials available all with different lead times, prices, sizes and uses. Not sure it makes much difference in this particular application.
The 6mm width is the killer on these, I had to buy longer pieces and cut them down to size with a bandsaw.
This also means I have some spare stock bush which I can cut down if anyone else needs one.
Mikey - this is spot on. Well useful, cheers.
If you are chopping up some bush lengths, I’d def have one as my reverb has started to become a little sloppy!
Thanks Neil. Trying to cover my costs, IGUS’s savage postage costs and my hourly rate.. £10 for both bushes? Are you still in Exeter? Hope all is well, cheers Mike
I looked into bushes from Igus I while back but didn't bother due to the correct height not being available, I got a local Hydraulics place to supply an upper bush in PTFE, I've currently got it fitted to my own post and its been fine for a good few month now, i'd of liked it to be a slightly tighter fit in the top collar than what it is.
Look forward to reading more
Cheers
Interesting, my 3 year old reverb has started to wobble.
Cam anyone point me in the direction of instructions to take a Reverb in bits?
Tick. I'd even be willing to use the original bushings and change them every three months if I could find an affordable supply.
Great info, thanks!
Good work OP.
Cam anyone point me in the direction of instructions to take a Reverb in bits?
These will get you in far enough to get to the bushings (note that you get the lower bushing in the basic service kit for ~£10.)
Stealth:
Non stealth
For the top cap, if you use a small enough screwdriver and a big enough hammer, the bushing will tap out easily.
I've not tried removing the too cap bushing as I've nothing to out back in there but I assume a blind bearing puller would do it.
Nice one OP,the PTFE original style are a constant ball ache on a post that needs regular lubing.I've got a relatively new topcap where the ptfe is already being pulled/slumping off .
I reckon IGUS could make a nice cheap replacement set where you don't even need to drift out the bared metal bit of the topcap bush,a 'clip' style bearing could just simply snap over the top and be held in bottom and top by its own flanges that would also act as thicker bushing material to aid the thinner PTFE thick bit over the old bush and then by the bolting down action of the collar itself .
Great work OP!
mikeyd - yer still in Exeter (ish, having some building work done at the mo) and £10 is good for me! I'll email you at some point and sort.
"For the top cap, if you use a small enough screwdriver and a big enough hammer, the bushing will tap out easily. "
Yeah, due to it being a split bush, I reckon getting a thin screwdriver under one of the ends and levering it out would also work.
I didn't have any success with tapping my top cap bushing out,but have just run a hacksaw though it's seam and it fell out .I've just ordered some G Sleeve bearings from somewhere else so thanks for dimensions OP.
[url= https://www.bearingboys.co.uk/G-Sleeve-Bearings/WMG222530-Sleeve-Bearing-27971-p ]Lower Bushing[/url]
[url= https://www.bearingboys.co.uk/G-Sleeve-Bearings/WMG252830-Sleeve-Bearing-27982-p ]Topcap Bushing[/url]
They look good,
I've just ordered this to cut some more up:
http://www.chainreactioncycles.com/x-tools-saw-guide/rp-prod10222
That could work,I think I will just use the hacksaw again.I've got some pipe cutters but with such short pieces to cut it will be hard to use.I'm sure I'll figure something out.
What's the action/feel of the post like with the nylon bushes Mikeyd ?
Indistinguishable from stock bushings in terms of smoothness, a lot less fore/aft play, but that’s comparing it to the worn condition.
£26 for 8 topcap bushings and 10 lower bushings -
bargaintastic,should keep my reverbs running well for a while 😆 . Cheers again for measurements OP
[img] 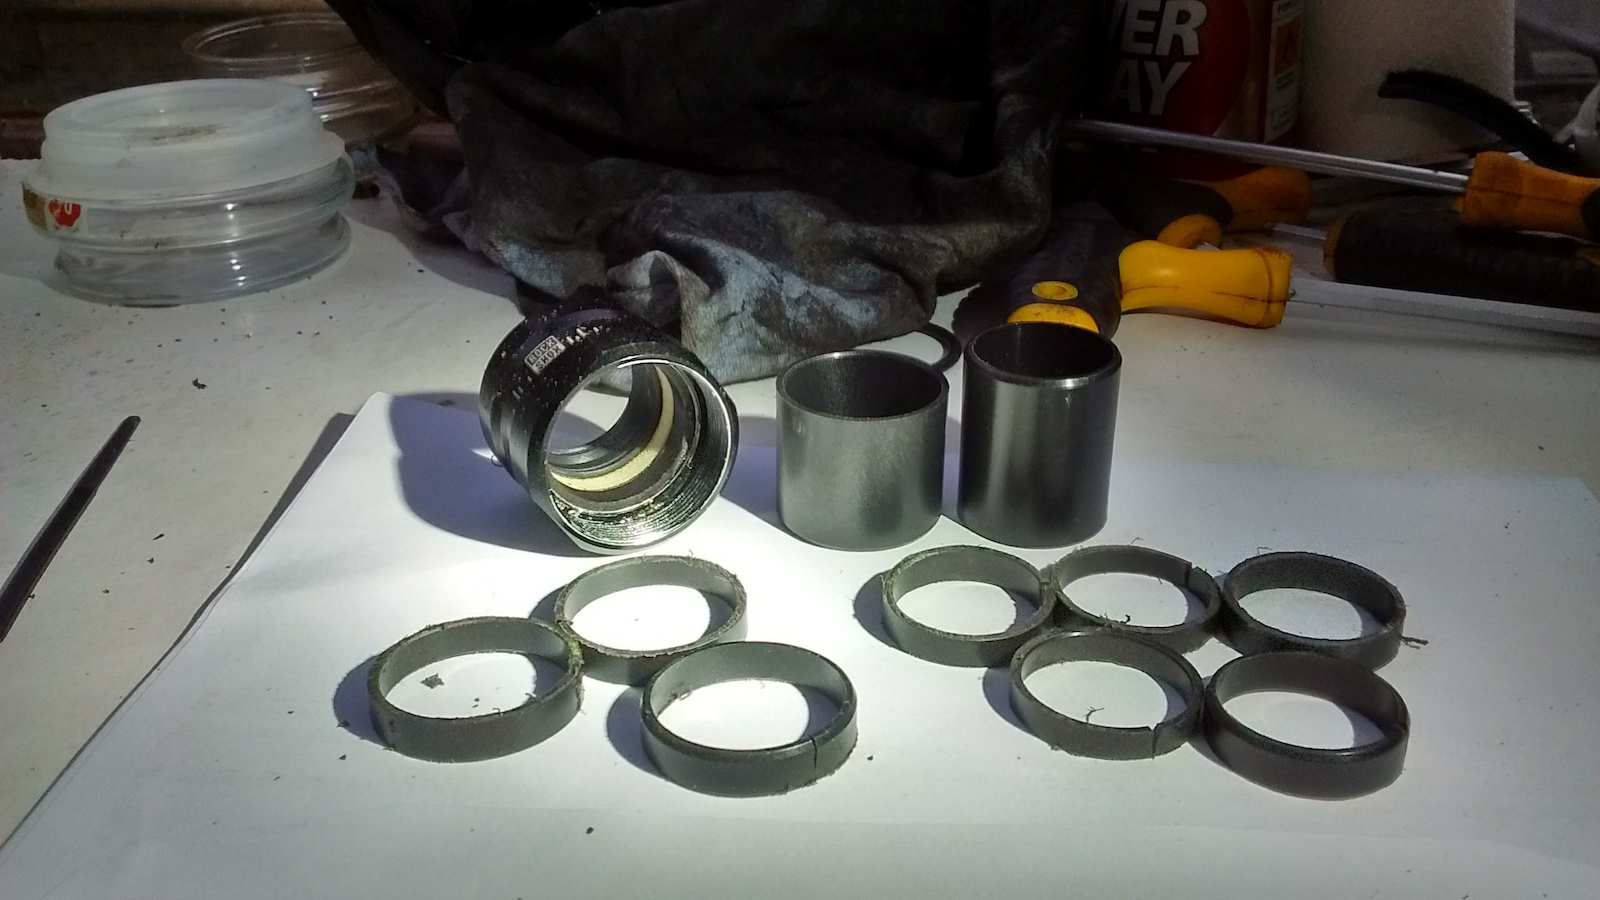 [/img]
[b][u]gravesendgrunt[/u][/b]
How did you get on with the bearings from BearingBoys? What was the fit like in the top cap? Post move freely enough?
Cheers
All good,post moves as it should.Pops up nicely,there is some initial stiction when compressing it though that has lessened with use.This could well be from me overlubing it-they are mean't to run well dry according to their makers .It fits top cap fine.
Cheers, did you slot the upper bush like the OP or did you leave it solid?
What did you lube it with? I use Buzzy's Slick Honey on Reverbs with the standard bushes, also used it with the PTFE upper bush and that ran ok, don't like the idea of it running dry, your going to need some lube for the brass keys.
Cheers
Yes I did slot upper bush and then pressed it in with bench vice -not needed but help keep it square.
The old one I got out by just hacksawing through it's seem gently and it popped out.
I usually use lots of marine grease in slider/key area-found it was more resilient to the wet stuff but maybe this affected the nylon bushing a wee bit....who knows or it may just of needed 'running' in.
The makers-Bowman said if you were to lube them,mineral oil with no additives would be the way to go.I'm sure slick honey will be fine-I used RSP slick kick around the topcap.
Cheers, I'll give them a go
A big thank you to mikeyd for this idea and gravesendgrunt for finding a supplier.
It's revived my ancient reverb. The old bush lost it's ptfe coating and gouged the stantion so a new ptfe bush would be trashed on the first drop. The new plastic bush has been going a few weeks now no problems except for initial stiction which I've put down to the gouging from the old bush but it drops and returns well out on the trail.
I managed to tap the old bush out with a screw driver. I cut the plastic by running the point of a stanley knife around it until it cut through but it did make a small lip which needed sanding. I also cut a 1mm slot to get it to fit.
I rate this the same as helicoils as a repair that is better than the original so thanks again for the idea and info.
mikeyd - Member
So i'm not paying £30-40 for a new top cap, especially when the bush is replaceable.
Depends how much you value your time. An hour's job or more? (for me, probably a day 😀 ), easily worth £30 to make it a fraction of that, plus you're getting a shiny new top cap inc new wiper seal.
Still, I'll file this under Reverb servicing as I may feel tight enough to DIY it to this extent when I finally get round to sorting out my wonky Reverbs 😀
Is it not £30-40 just for the top cap with the new seal, then another £30-40 for the actual labour for the service?
Great work guys. Tagged for future ref
It's not about the cost Deadkenny,although only paying £3 instead of around £40/£50 is a big bonus.It's about eradicating one of the inherent weakness in the reverb for me and many others-ie the fragile original bushings which can be prone to catastrophic failure leaving only metal to grind against metal as the coating just gets pulled off.I've had the same thing happen in the past as Conkers-topcap bushing fails and gouges post surface (SRAM refused to warranty (Via YT bikes) this on mine as they said it had to be from an external physical influence and they'd never had one fail in this way......very hard to believe as I knew what had happened ....anyway long story).
I don't think the dust seal on these is a big wear prob-they just seem to keep working and stay flexi,I don't think they have as hard a life as with forks.
teethgrinder - Member
Is it not £30-40 just for the top cap with the new seal, then another £30-40 for the actual labour for the service?
I'd still DIY it, but 5 mins to replace the cap isn't £30 of my time. That said I'd still need to do the rest of the service and I do balk at paying the £80 often quoted for a Reverb service (plus extra depending what's knackered) given the price you can pick up a new one.
Reality is I'll spend a day doing it, probably find I'm missing some bit or tool and take a week 😀
gravesendgrunt - Member
gouges post surface (SRAM refused to warranty (Via YT bikes) this on mine as they said it had to be from an external physical influence and they'd never had one fail in this way......very hard to believe as I knew what had happened ....anyway long story)
Ah the usual "never had one fail in this way before" 😀
One of mine is gouged, a friend's is also. Seen others like it online. Usually with sideways play as the bushing has gone. Though arguably it's because it hasn't been serviced in time, play in it and crud got in the bushing which scratches it up.
That particular one I've got is very old now and way beyond warranty anyway. I'm interested in learning how to fix it up. Was just going to get a top cap though, plus all the other bits & tools.
Thanks for the info on here peeps, 2 of each ordered from Bearingboys and just hoping the 5 day free delivery will arrive before the current bushings die 🙂
Mine have been well used and are still performing really well,top one had oval'ed a little from wear fore and aft pressure when I last lube serviced it so I just rotated it . Much more robust than the 'proper' ones .
