- This topic has 20 replies, 11 voices, and was last updated 9 years ago by molgrips.
-
Help – Digital Camera Help
-
sadmadalanFull MemberPosted 9 years ago
We got a Lumix G6 before Crimble and we have been taking some phot’s with it. i do realise that the main issue I have is in framing the shots, but I can practise that. But I don’t have a clue of how to drive it apart from stuffing it into auto mode.
I’ve done a Google* for useful guides as to focal length, aperture settings, white balance, …. and frankly I am swamped with the amount of info. All I really want is a good basic explanation of what they all mean and the impact of changing them. I do realise that this may not make my photo’s any better but at least I will understand some of the stuff that the various menus/options present to me.
So does anyone have any recommendations for good sites or ideally a good book (remember those things) that would be a good introduction? Or will I forever be stuck in the land of Google* trying to track down something that is not gobbledygook!
* other internet search engines exist
jaymoidFull MemberPosted 9 years agoOld but good:
http://www.photonhead.com/Have a play with this too:
http://www.photonhead.com/simcam/shutteraperture.phpI think one of the keys to photography is knowing the relationship that aperture, shutter speed and ISO have on the picture. If you understand those three things you can easily understand the rest.
If you have a play with each of those variables with the other two at a sensible constant you will see and hopefully understand what impact they have on your pics.
e.g. Pic at f2.0 and then f22, whats the difference? Try different subjects, close, far, moving, still. How does the resulting picture look? I’d expect the F2.0 to have the most depth of field, and be better for capturing moving objects, f22 on the other hand has a shallower depth of field and would probably be too dark without changing the ISO or shutter speed. Now try the same with ISO and Shutter speed. Then think about the picture you want to take and the settings your camera would need to set to to capture the shot the way you want to:
e.g. Fast moving subject = think: fast shutter speed (reduce blur), higher ISO (allows faster shutter speed), low f numer/big aperature (allow more light in the camera to expose the pic correctly).
DezBFree MemberPosted 9 years agoHow about this Kindle book
or any digital photography book will have a guide to setting apartures/shutter speed/exposures etc
eg
 stumpy01Full MemberPosted 9 years ago
Best bet for a book is to go to Waterstones and look at a load of them. Find one that suits you.
focal length is just zoom. but it can affect depth of field and aperture.
Depth of field is basically the area of the picture that is in focus (front to back, looking into the picture). This is mostly affected by aperture. A small depth of field means that for example, a persons face is in focus but the people only a few feet behind are out of focus. A large depth of field means that the bike 20feet in front of you is in focus, as is the tree 50 feet away.
Aperture is the size of the hole that light gets through to reach the sensor. A small number means a large aperture (wide hole) letting more light through, and a large number means a small aperture (small hole) letting less light through.
To get a ‘correct’ exposure, aperture and shutter speed are balanced. So, a large aperture (big hole, lots of light) means you have to use a short shutter speed (so lots of light, but for a short time). Or you can use a small aperture (small hole, little amount of light) and to balance this you will need to use a longer shutter speed (little light, but for a longer time.
I was told to think of a ‘correct’ exposure being like a bucket of water. To fill it, you can either use a small hose for a long time (small aperture, long exposure) or you can use a large hose for a short time (big aperture, short exposure).
Generally a camera will try to achieve what it considers to be a balanced exposure. But this isn’t always what you want. For example, if you take pictures of friends on a snowy mountain, the snow might appear grey because all the white in the scene is fooling the camera and making it under-expose (darken the shot to achieve a ‘balanced’ result). If the camera has a ‘snow/beach’ mode, all this does is sets a certain amount of over-exposure so the snow stays white.
There is often an exposure compensation button on cameras. This allows you to over-ride the default exposure that the camera would take to make it appear lighter or darker.
White balance is just aiming to get the right colour in the image. Auto will attempt to read the scene and adjust accordingly. Play around with it and set it to different things and see what happens. You’ll notice the general colour of the scene can be changed dramatically, giving a ‘cold’ or a ‘warm’ look.
ISO is how sensitive the camera is to the light coming in. In bright sunlight, there is plenty of light so a low ISO can be used. In a concert venue or a church where there is less light, a high ISO would be better as the sensor is more sensitive to the (small amount of) light hitting it. If you use a low ISO when there is little light, then the shutter speed will decrease (the shutter will be open for longer) and you will not be able to hold the camera steady enough, resulting in a blurry shot from where your hands have wobbled. A tripod would help in this situation.
The issue with high ISO is the pictures get more grainy and less detailed – there is more ‘noise’ in the image.Best thing to do is find something to photograph, like a bowl of fruit, open box of eggs, a person, an ornament and take varying pics of it.
P is basically auto, but lets you change things.
A is aperture priority, so you can change the aperture and the camera will try to pick a suitable shutter speed.
S is the opposite of A; you pick the shutter speed and the camera will try to pick a suitable aperture
M is manual – you are on your own.I would set the ISO to a fixed value rather than auto; perhaps 400. If the ISO is changing while you are trying to get your head around shutter and aperture, it will confuse you further.
stumpy01Full MemberPosted 9 years agojaymoid – Member
e.g. Pic at f2.0 and then f22, whats the difference? Try different subjects, close, far, moving, still. How does the resulting picture look? I’d expect the F2.0 to have the most depth of field, and be better for capturing moving objects, f22 on the other hand has a shallower depth of field and would probably be too dark without changing the ISO or shutter speed.
Wrong way round, regarding depth of field.
f2.0 will have the shallowest depth of field (only a small amount of front to back in focus), but lets the most light in. So as you say, is good for capturing moving objects (lots of light, fast shutter speed).
f22 will have the largest depth of field (in focus from front to back) but lets the least amount of light so requires a longer shutter speed (or higher ISO – more sensitive sensor).
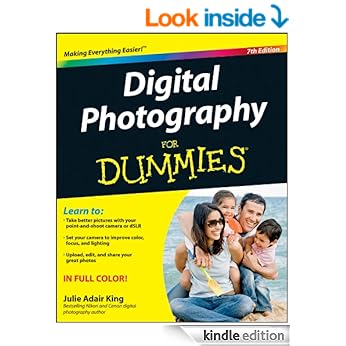
CougarFull MemberPosted 9 years agoIn all seriousness, that For Dummies book is very, very good if you’re coming to it cold. I’d recommend starting there also.
The ‘bible’ is a book called “Understanding Exposure” which is superb, but I’d suggest that’s your second book after …for Dummies.
molgripsFree MemberPosted 9 years agoI’ll explain it as quickly as I can:
It’s all about capturing light coming into the camera. You need light to make the image. More light = brighter image.
Light comes through lens onto sensor
Sensor is made of little tiny buckets
The more light accumulates in each bucket during the picture taking, the brighter the resulting imageThe lens has a resizable hole in it called the aperture, this hole can be big or small. Big = more light, buckets get fuller, picture gets brighter.
The camera has a shutter that opens to show the sensor to the light from outside (via the lens). This can be open for a short or long time or anything in between. Long exposure = more light, buckets get fuller.
The computer in the camera can also digitally multiply the amount of light in the buckets.
With a big aperture, the side effect is shallower depth of field, meaning that things in the foreground will be sharp and the background blurry. Small aperture means deeper depth of field, ie things closer and slightly further away will both be in focus.
With a longer exposure, the side effect is that moving objects will blur. With a longer still exposure, the whole picture will blur even if the objects are stationary because the camera will shake a bit in your hands. Shorter exposure means you can capture movin objects without blur
If you amplify the light in the buckets, any random variations in the level in each bucket (inevitable cos it’s electronics) will also be amplified, so you get a more grainy picture and black things like shadows don’t look really black any more.
Bosh. £150 please, invoice in post.
Re the camera – P works most of the time. A lets you choose aperture and it figures the rest out, S lets you choose shutter instead. M lets you choose both.
Purists will fanny on about how you need to avoid P or Auto like the plague because it make you an inferior human being, but this is largely bollocks. Choosing and composing your picutre is 95% of the challenge, and this is the hardest part, so people focus on the remaining 5% because it’s quantifiable and science based hence what they can understand 🙂
Leave it in P, and only change if you need a specific effect.
iamanobodyFree MemberPosted 9 years agoIf i have a budget of £200 what would be the best/most versatile camera to buy?
sandsFree MemberPosted 9 years agoIn addition to what has already been posted:
If you search on flickr for ‘Lumix G6’ some photographers choose to show the EXIF data of their images.
E.g. Real NYC Pizza
Aperture F5.6
Focal length 14mm
Shutter speed 1/160 second
ISO 1600Taking some time to study these can be useful to gain an understanding of the sort of settings to use for a particular type of image.
As you asked about ‘White Balance’, you will have pre-sets for (typically):
Auto
Daylight
Cloudy
Flash
Tungsten (Traditional light-bulbs)
Fluorescent (Fluorescent tubes)
CustomWhite Balance is more accurately described in terms of degrees on the Kelvin (K) scale. So you may have settings for, or see references to:
6000K (On camera flash)
5500K (Average noon daylight)
2500K (Domestic tungsten bulbs)…i do realise that the main issue I have is in framing the shots…
Assuming you are shooting in jpg/jpeg format, these can be edited very successfully (e.g. cropped / tilted / re-sized etc) in the free photo-editing software from ‘Irfanview’.
However, editing in jpeg, the image will reduce in quality each time it is saved.
If you try Irfanview, select:
File – Save as
In the small jpeg/gif save options box – set the slider to about 90CougarFull MemberPosted 9 years agoIf i have a budget of £200 what would be the best/most versatile camera to buy?
My Lunix GF2; body, two lenses and various other odds and sods.
CraigWFree MemberPosted 9 years agoThe Lumix G forum is helpful. Not very busy, but some useful guides, check the knowledge index section. https://www.lumixgexperience.panasonic.co.uk/forum/
For a basic book, this is pretty good: DK Beginner’s Photography Guide. http://www.amazon.co.uk/The-Beginners-Photography-Guide-Dk/dp/1409322793
iamanobodyFree MemberPosted 9 years agocougar – i may get back to you about this. Got some money coming in 8 weeks
SidneyFree MemberPosted 9 years agoI did a days course – introduction to dslr -after a year of owning a camera that was far more capable than I and was constantly let down by my photography skills.
The aim of the course was to enable you to shoot in full manual mode and it delivered. I felt liberated! My recommendation would be to consider a similar course.
For composition I highly recommend the classroom at morguefiles.
Really clear and easy to follow lessons. Homework there if you enjoy that sort of thing.
cranberryFree MemberPosted 9 years agoThere’s plenty of good advice above, I’d add..
Shoot in RAW format ( as opposed to JPG ).
For this, you should also get a copy of Adobe Lightroom. In basic terms, if you shoot in JPG the camera captures the image from its sensor, manipulates it according to how it is set up, compresses it and out it pops as a JPG. If you shoot in RAW then the camera captures the image from its sensor and you get to create a JPG via Lightroom, but, you get to pick the best settings for that particular image. If you make a comparison with film, then the RAW image is akin to a negative and you have your own digital darkroom that you can use to get the best out of the shot.
There will be a bit of learning to do, but there will be shots that you’d otherwise discard because the exposure is incorrect that you can save with Lightroom. It will also reinforce what you are learning in terms of the relationship between ISO, aperature and shutter speed settings. You can play around all day with an image in Lightroom and not change the original RAW file at all, so you can fiddle with a picture to your heart’s content and always go back to the start if you make a mistake.
Edit:
to add a couple of points ..
1. If framing images is something you want to improve – take loads of phots and look at the photos of others and think about what makes them good/bad.
2. To help with framing – your camera probably has a feature to superimpose a grid over the display at the back. Set it to do this and read up on the rule of 3rds.
molgripsFree MemberPosted 9 years agoShoot in RAW format
Personally I would not recommend that to a beginner. It’s the next level of complexity – something to look at when you’re comfortable with the basics.
It is NOT necessary to take good pictures, but it might help your good pictures look a bit better. It’s the equivalent of processing your own film instead of sending it off to Truprint.
Don’t overcomplicate the technical side of it. It’s 95% inspiration, creativity and composition, 4% exposure settings and 1% everything else imo.
stumpy01Full MemberPosted 9 years ago+1 on not shooting RAW to start with. Leave it on jpeg.
It’s just another hurdle that isn’t really required to learn the basics.cranberryFree MemberPosted 9 years agoPersonally I would not recommend that to a beginner. It’s the next level of complexity – something to look at when you’re comfortable with the basics.
I do agree with you that it is more complex, but at the same time you don’t want to have the OP go off and take loads of pictures and then find out about RAW/Lightroom months down the line.
Perhaps I should have suggested to set the camera to RAW and JPG at the same time, for ease of use/creating images that need no further processing now and the ability to go back at a later date when he is more experienced to manipulate the RAW files if he wants to.
molgripsFree MemberPosted 9 years agobut at the same time you don’t want to have the OP go off and take loads of pictures and then find out about RAW/Lightroom months down the line.
Not too big of an issue. Better than making him think he NEEDS to fart about with RAW to take good pictures and be put off. He’s probably already given up on this thread 🙂
The topic ‘Help – Digital Camera Help’ is closed to new replies.