Brilliant.
win
Flip me! Bookmarked...
I like how you made the double bed, clever idea!
I'm pretty proud of the bed, I have to admit. A fair bit of head-scratching went into it 😉
I really need to get my finger out and get started on my van. It will be nothing like yours though. Awesome job!
So at the end of the last thrilling instalment we were actually using the van for camping. And jolly splendid it was too, even in its very unfinished state. Turned out that the insurance company wanted at least a hint of cupboard door to sign it off as converted, so here goes:
[img] 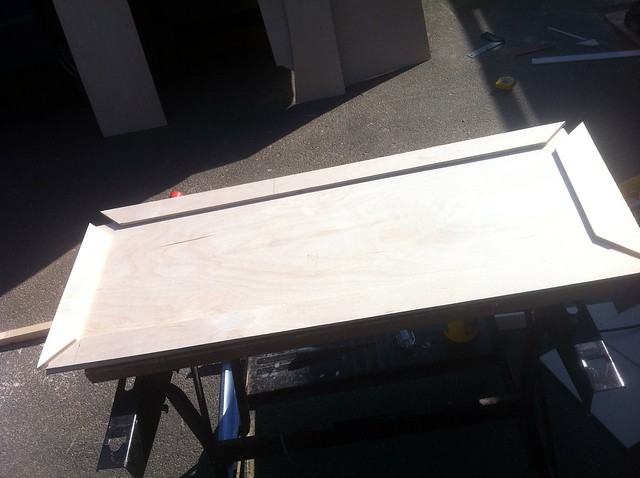 [/img]
Again, we're trying to keep the weight down, so the cupboard doors are hollow. They need to be a particular thickness to line up flush with the corner of the kitchen unit, so this one's made of two skins of 4mm ply with strips of 6mm around the edges. Glue and clamp:
[img] 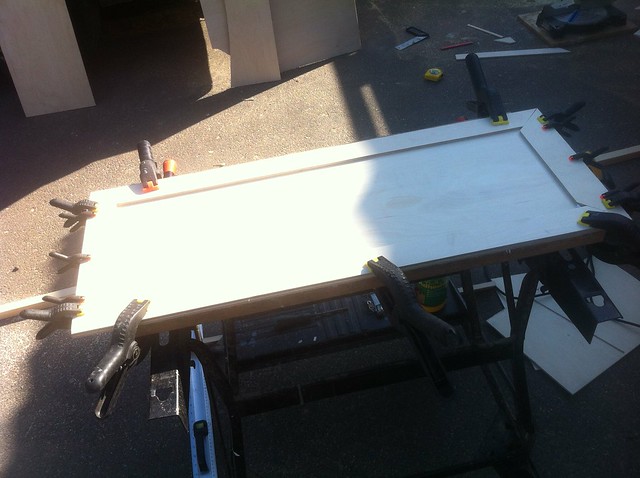 [/img]
Glue an inner skin on and offer up in the hole:
[img] 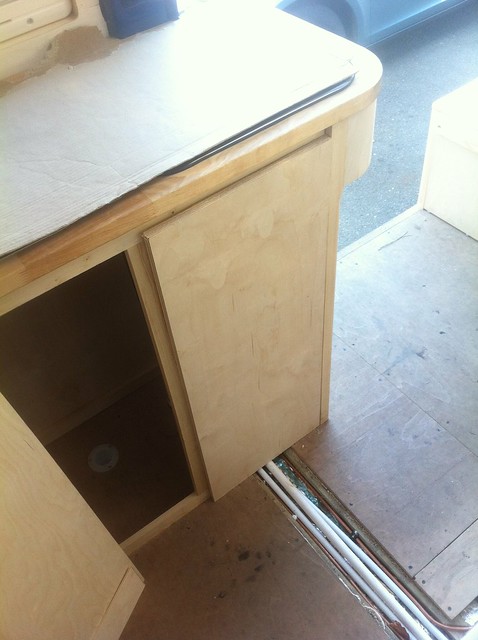 [/img]
Hinges and a latch and stuff need adding, of course... Similar deal with the draw fronts, except these don't have a back. Cut out a frame from 12mm ply:
[img] 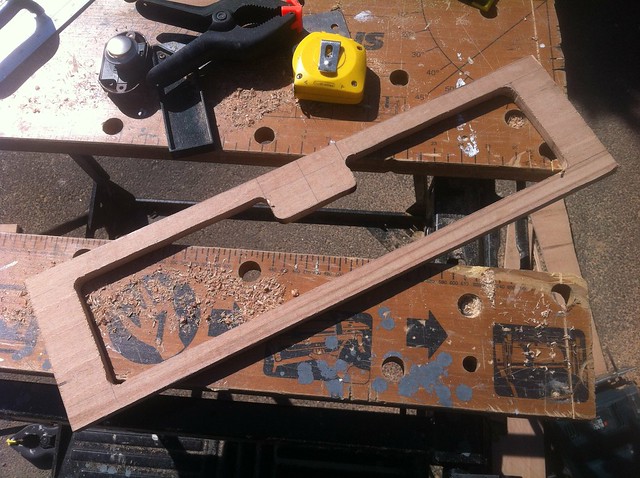 [/img]
And a few more:
[img] 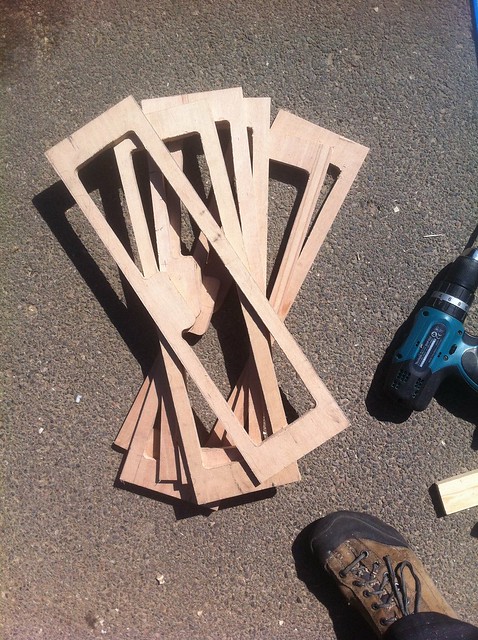 [/img]
Glue on 4mm ply skins:
[img] 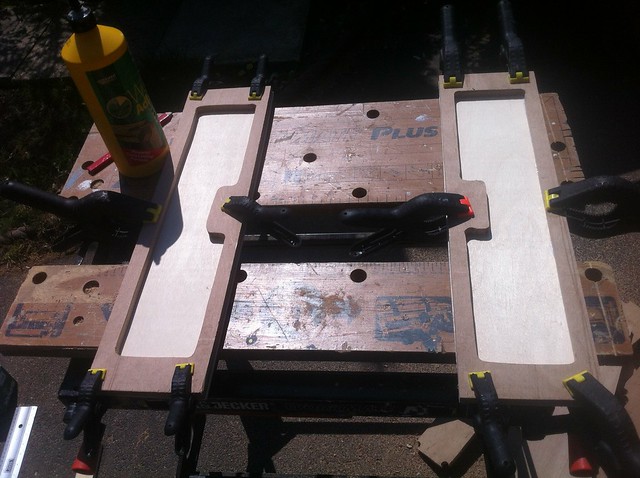 [/img]
And the result is something that looks suitably chunky but doesn't weigh much:
[img] 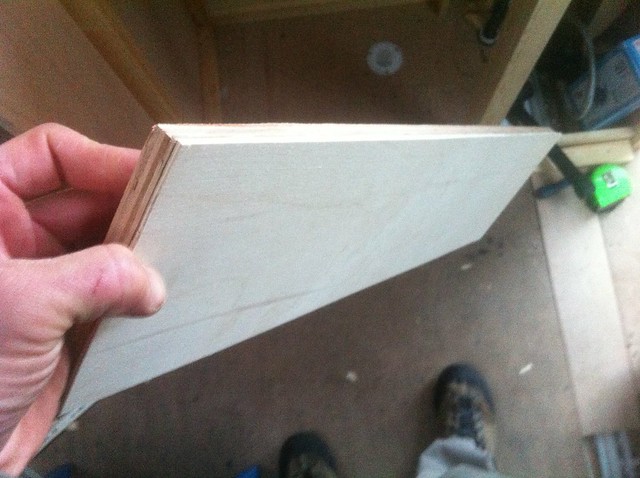 [/img]
I left the thin ply slightly proud around the edges, I'll plane it down later. Drawer fronts need drawers, and this is where we cheated ever so slightly:
[img] 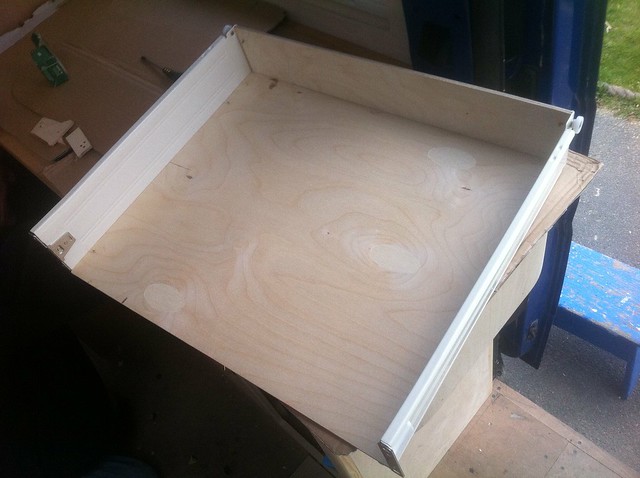 [/img]
That's a drawer kit from Screwfix -- you get the sides, runners, and brackets to hold the front and add front, bottom and back to suit. They're steel, but pretty thin steel. My back-of-envelope sums suggested that the weight penalty over making them entirely out of ply is about 5-6kg for every drawer in the van (and there'll be nine of them) which seems a fair compromise because it'd take me FOR EVER to make plywood drawers from scratch and also I'd go mad.
Some drawers in, one latch in place, next to the cupboard:
[img] 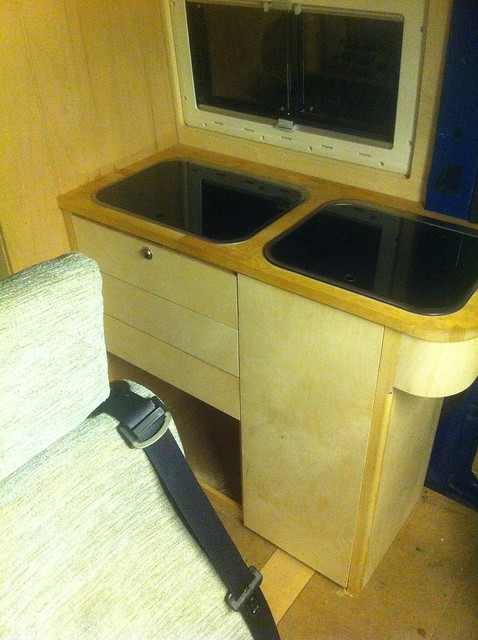 [/img]
They need a bit of adjustment and alignment, but you get the idea.
Quick shot of the temporary wiring I did before Dartmoor, just to get the fridge, water pump and a light up and running:
[img] 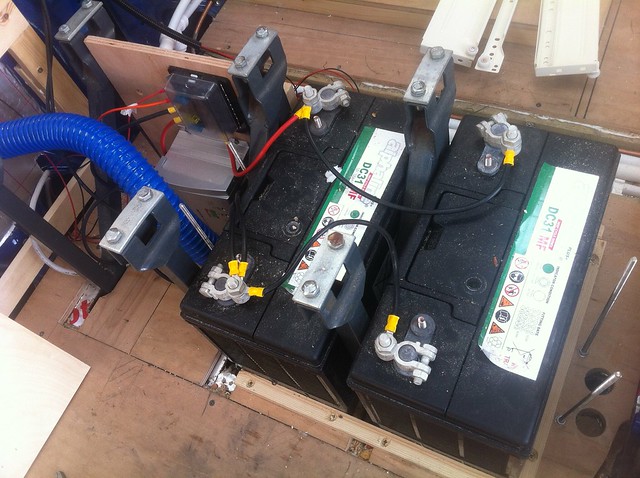 [/img]
This is all under the rear seats. At this stage the only thing charging the batteries were the solar panels on the roof -- the charger is the grey box vaguely top left under the fuse box. It's an MPPT charge controller, which does clever voltage juggling to get the most out of the panels. The batteries are held in by a timber lip around the floor and (not pictured) a pair of thick plywood plates across the top attached to those bits of threaded rod (which go right through the floor with big washers and nylocs underneath). Pretty much all the wires you see came out later on when the split charge setup went in, of which more later...
Next up, the heater. We chose a Propex gas heater for a couple of reasons. First, they're cheaper than diesel-fuelled Eberspachers. Second, I didn't particularly want to start tapping into the van's fuel supply. Third, we've got loads of gas on board anyway. And fourth, we had one in the previous van that had been there for twenty years and never missed a beat. First up, more holes:
[img] 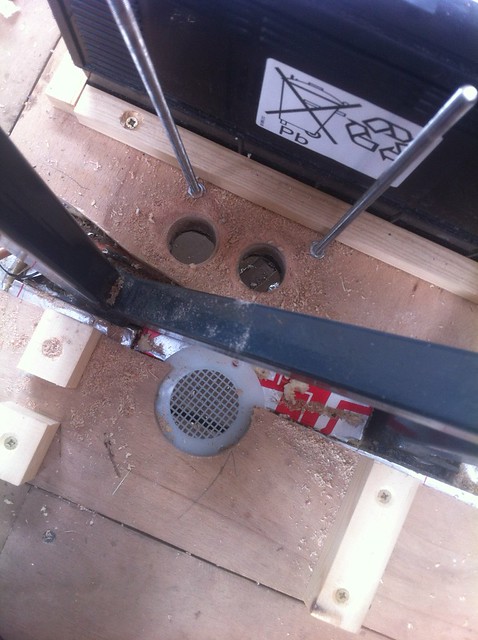 [/img]
The mesh one is a gas drop-out vent -- butane/propane is heavier than air, so if there's a leak it behaves like water and you need somewhere for it to get out of the van. There is (or will be) one of these underneath anywhere there's a gas connection. The other two holes are for the air inlet and combustion exhaust -- the Propex is room sealed, drawing in air for combustion from outside the van and exhausting similarly. The ideal way to mount it is flat to the floor with the inlet/exhaust spigots straight through the holes, but we don't have space for that so we've got the second-best up-on-edge position:
[img] 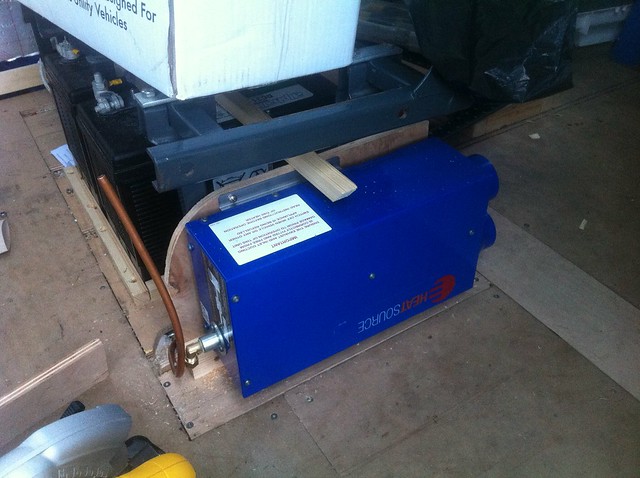 [/img]
Connected up the inlet and exhaust pipes, fed them out underneath, connected gas pipe, hooked up some power. With all the gas connections now made, this seemed as good a time as any to bite the bullet and fill the LPG tank. Checked all the connections again, made sure the gas alarm was working and headed to the petrol station. The tank cost £19 to fill which is very economical compared to the Campingaz refills we're used to using. Anyway, all the gas appeared to go into the tank and nothing exploded. Back home and presto:
[img] 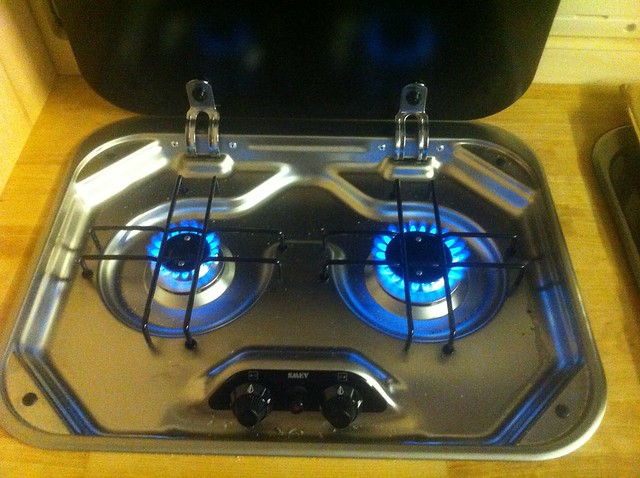 [/img]
Oh yeah. Now we're cooking. And so on. You can't tell from the picture, but this is hot water:
[img] 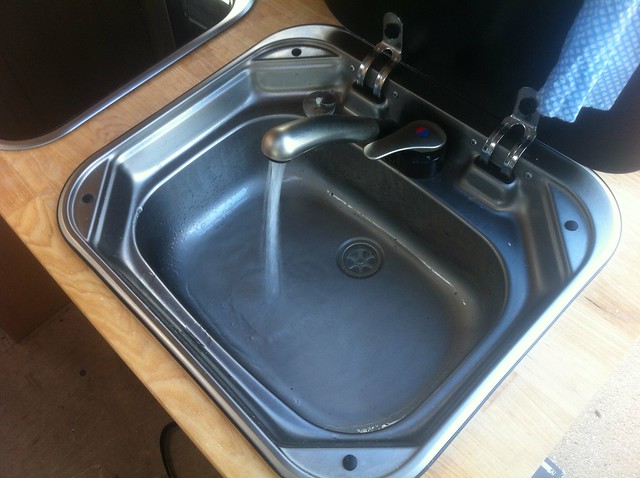 [/img]
And the Propex? Er, nothing. Just a flashing light on the controller, which when decoded was saying "combustion fault", ie the burner wasn't lighting. Checked everything, tried again. Nowt. The main fan (the one that recirculates the air inside the van) would run, but no heat. Internet research suggested that sometimes the second fan (which draws in combustion air for the burner) can stick if it's not run for a while, like for example while sitting on a shelf in a warehouse. Seemed like a plausible scenario, so:
[img] 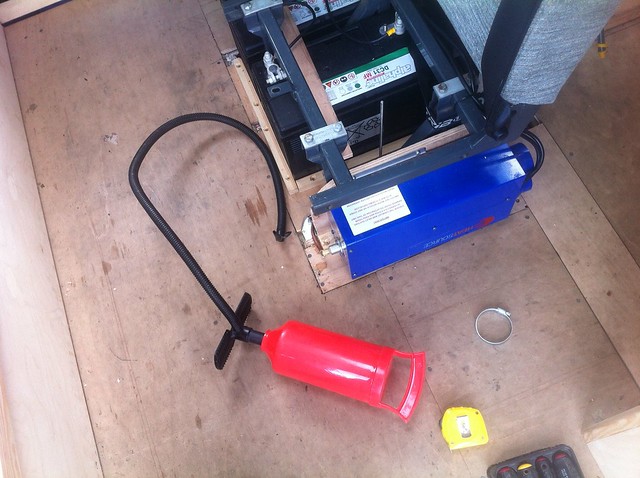 [/img]
Dug out the pump for our inflatable canoes, pulled the inlet pipe off, stuck the pump hose in and gave it a few healthy blasts. And would you believe it, it actually worked. Yay the internet!
Impressive work!
Fancy renting it out? 😉
Sitting in a very damp and soulless press room in Brasil, and just catching up with this thread puts a smile on my face. What will we do when it ends? Someone else will have to take up the mantle.
/looks at to-do list
Don't think you need worry about it ending any time soon 😉
When you're done, can you make me one please? Ta.
As long as you're not in a hurry, and you supply an empty van with a big bag of money in the back 🙂
I love this thread, and envy your man skillz
Well done, it looks awesome!!
If only I had the time and skill to do something like this.
Loving this thread.
Great ideas, effort and skills on show.
Out of curiosity.
What finish are you putting on the ply doors?
If only I had the time and skill to do something like this.
Skills can be acquired, it's not like I knew how to do a lot of this stuff before I started 🙂 Time is definitely an issue, though. Everything takes at least twice as long as you'd think...
What finish are you putting on the ply doors?
We're going to paint all the interior ply some variant of white, probably normal kitchen/bathroom paint with a roller, with plenty of sanding to get it nice and smooth.
Right, where was I? This has been covered really, but here are the rear seats (as re-covered by mother-in-law) showing batteries and stuff underneath. That'll be all getting boxed in, eventually.
[img] 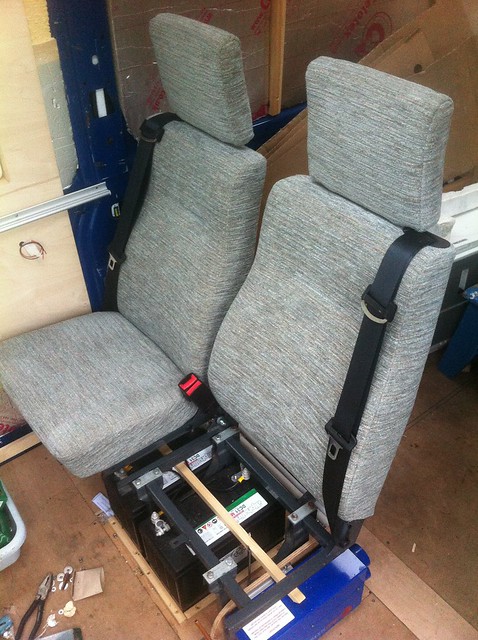 [/img]
With a weekend away coming up, I bodged up a shelf in the boot space with left-over stuff. Battens across front and back:
[img] 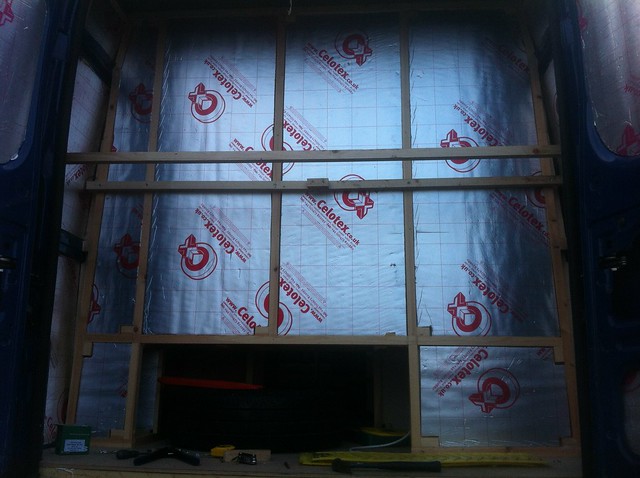 [/img]
Plywood on top:
[img] 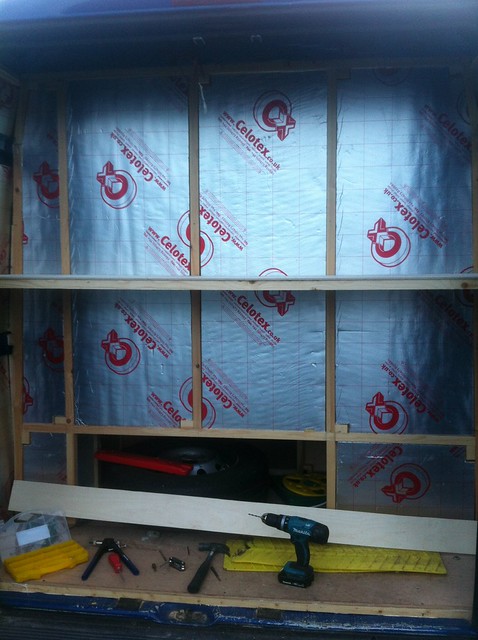 [/img]
It was a bit flexy like that, but another piece of ply on edge across the front stiffened it up beautifully for very little extra weight. Here with a child's bike for testing purposes:
[img] 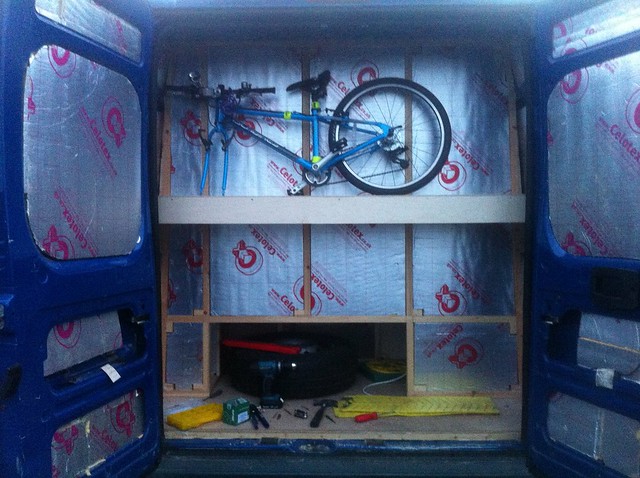 [/img]
And packed to go away with four bikes on board:
[img] 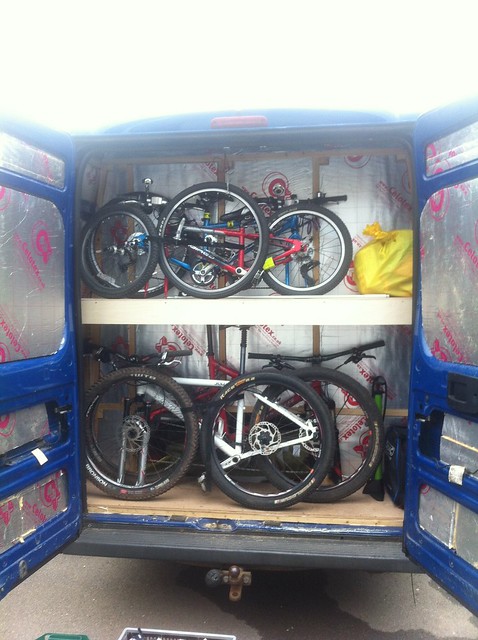 [/img]
Having prototyped this, the finished version will probably have a double shelf so odds and ends (shoes, pumps, hookup lead, blah) can go between the two pairs of bikes. It'll need the seats to be taken out of the lower bikes to give a bit more vertical space, but I don't think that's a big deal.
Next up, the split charge setup. This connects the leisure batteries to the vehicle battery while the engine's running, so the alternator charges the LBs as well. With that and the solar panels, we should be OK for power. The LBs are quite a way from the vehicle battery (which lives under the passenger footwell for some reason), so some fat wire is called for:
[img] 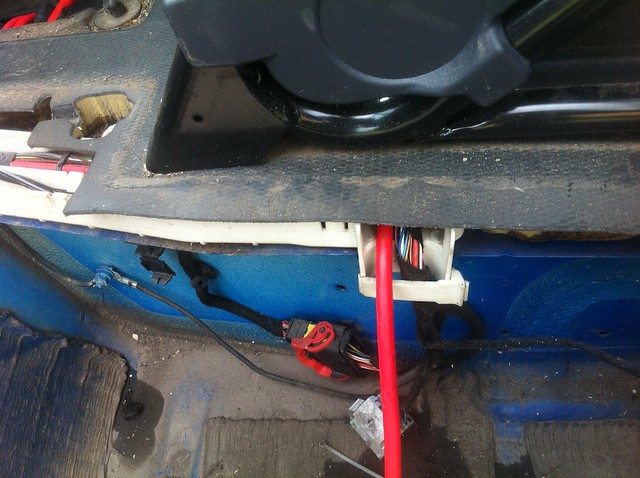 [/img]
That's 16sq mm welding cable, which is actually surprisingly easy to work with. Usefully, the van has existing cable routes across the cab under the front seats, so I could run the cable under the passenger seat as shown above, then pick it up in the middle where there's a hatch to access the top of the fuel tank:
[img] 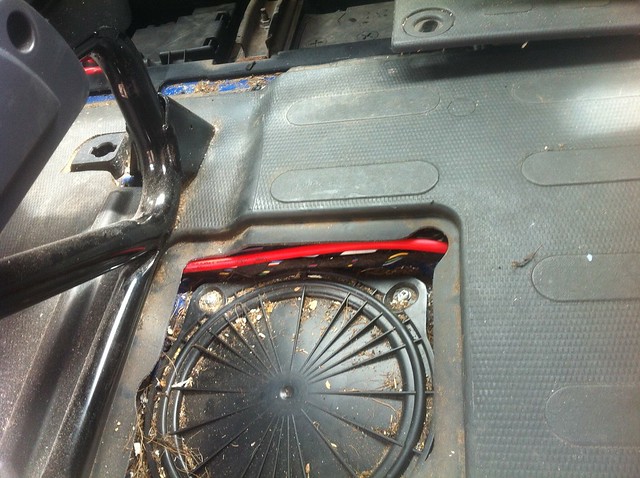 [/img]
And continue under the driver's seat:
[img] 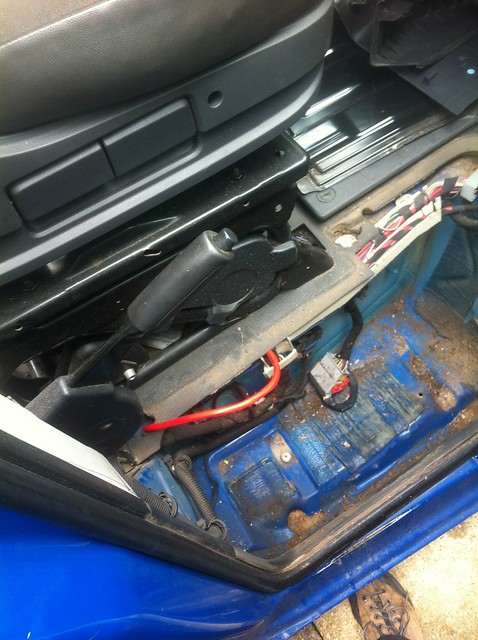 [/img]
From there it can come back into the main bit of the van and around the edge to the rear seats:
[img] 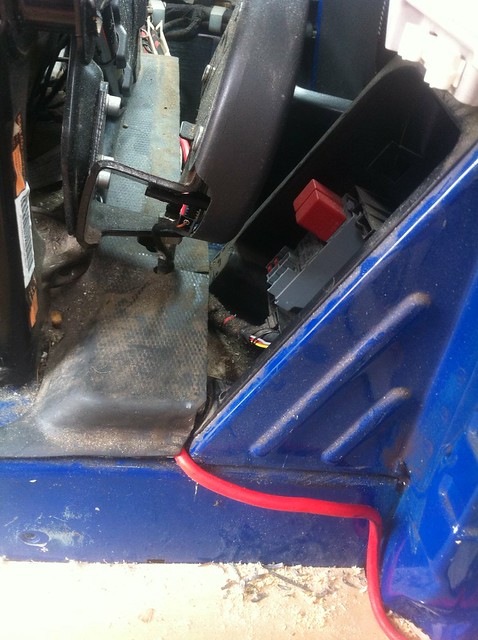 [/img]
To gain access to this corner we had to take the seat/bed out. Fortunately, and not a little amazingly, despite having been built in situ we could take it out in one piece:
[img] 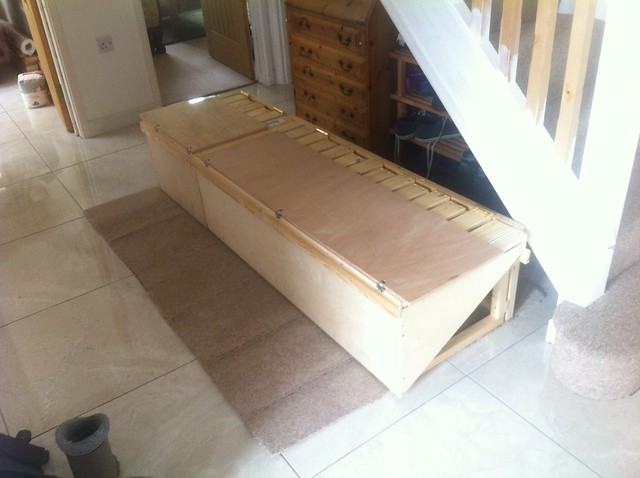 [/img]
It's not as heavy as I thought it might be either, which is reassuring. Do need to weigh the whole thing at some point just to check...
To connect the fat wires to useful things, it needs ring connectors on the ends. I'm using crimp connectors, but because ones this size really need an (expensive) hydraulic crimp tool I soldered the cables in instead with a micro blowtorch off ebay. Worked great until it stopped working, but it was only £2 😉 Bit of heatshrink to finish off:
[img] 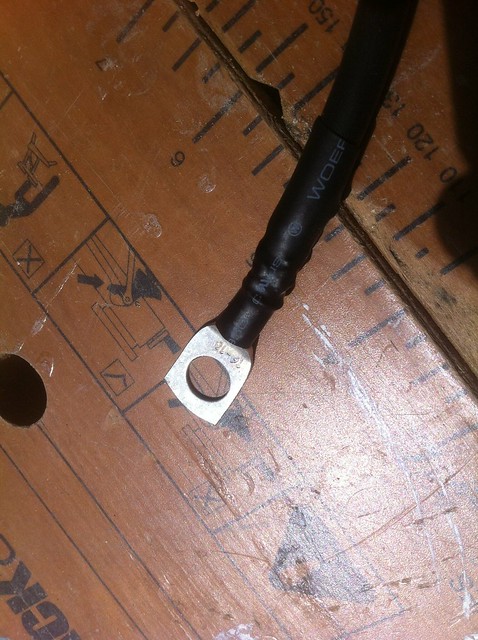 [/img]
The wire connects to the +ve of the vehicle battery via a big fuse at one end, and to this unholy agglomeration at the other end:
[img] 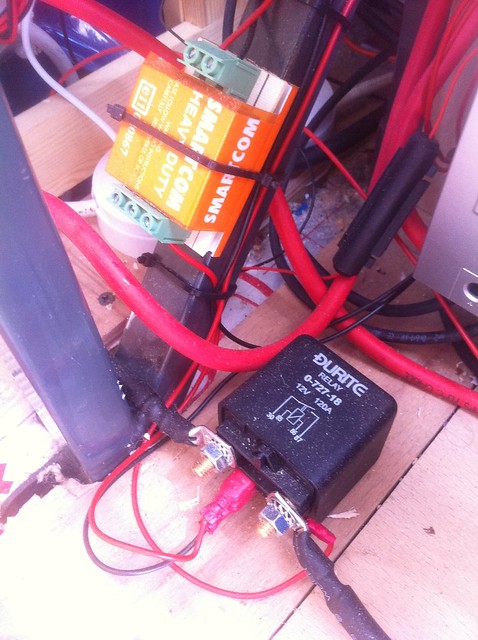 [/img]
Yes, I need to tidy my wiring :/ The setup uses two relays. The orange Smartcom one is voltage-sensitive. With the engine off, the voltage across the VB is lowish and the relay's off. Start the engine, the voltage goes up, the relay energises. The downside of the Smartcom is that, despite saying "heavy duty" on it, it'll only handle 30A. So it in turn triggers the black proper-heavy-duty relay that's good for 120, so we can get as much charge as possible.
From the relay the feed goes into this fusebox:
[img] 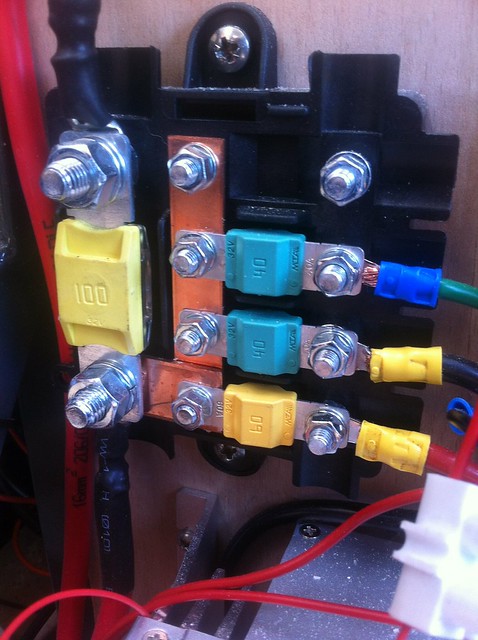 [/img]
The wire out of the top connects to the LBs, which are wired in parallel. The other wires on the right are one from the solar charger, one to the fridge (which is the biggest power draw in the van) and one to another fusebox to which a whole bunch of other stuff is connected:
[img]  [/img]
Then there's the Earth Point Of Destiny tucked away behind the seats, which really, really, really needs tidying up a lot:
[img] 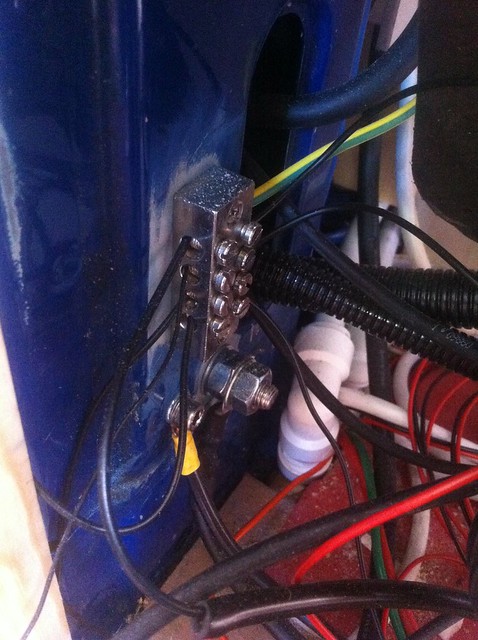 [/img]
A lot of this stuff has been chucked in just before going away on trips, I'll be gradually redoing it more tidily... The big nuts are the LB ground, which is on an M10 bolt through a section of a pillar. The metal earth block is screwed to a patch of bodywork with the paint rubbed off. There are also a couple of other earth points in other places in the van so that not everything has to come back to here, which saves a lot of wire...
We also got some seat covers from ebay, which could have looked a bit rubbish but we took all the plastic off the seats first and refitted it afterwards, so they actually look pretty good:
[img] 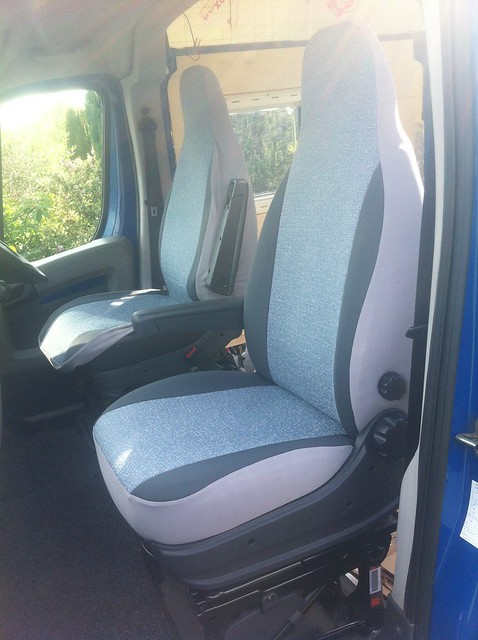 [/img]
More soon!
Thanks Mike_D 😀
20+ years in commercial motor sales. Seen loads of campers and conversion work done by most of the big brands like hymer etc. This thing is 10x more interesting than them. I sell vans but don't really get involved in campers, its too specialist for me but I am currently speccing a £100k + camper conversion for a local couple at the moment and even that doesn't have some of the attention to detail this has.
1) Its personal to you
2) You know every nut and bolt
3) It is very very well thought out
Hats of to you.
How have I not seen this before? Fantastic thread, and huge respect for doing it all yourself. I've done bits and pieces to my van, but not even in the same league. Bookmarked the thread as inspiration!
While the seat/bed was out, we put a floor down. It's 3mm vinyl in what some might consider a fairly brave pattern:
[img] 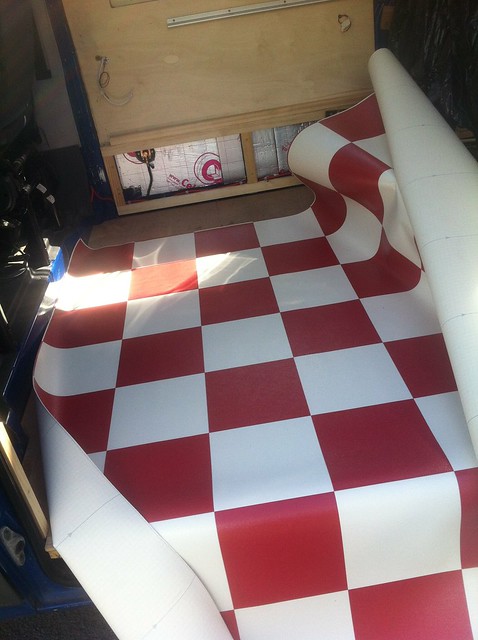 [/img]
Measure, mark, trim, repeat:
[img] 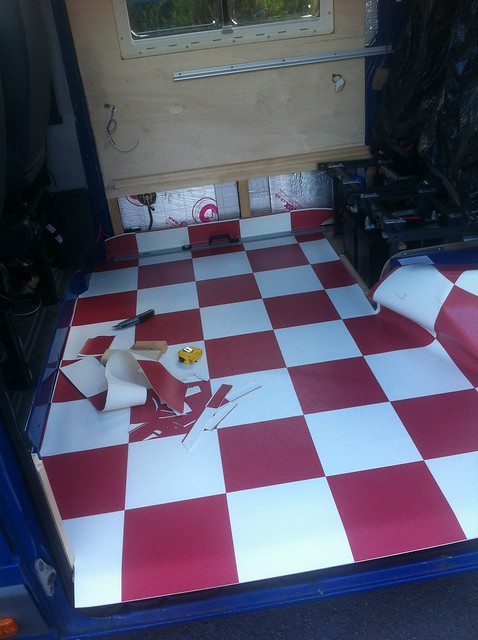 [/img]
Getting there:
[img] 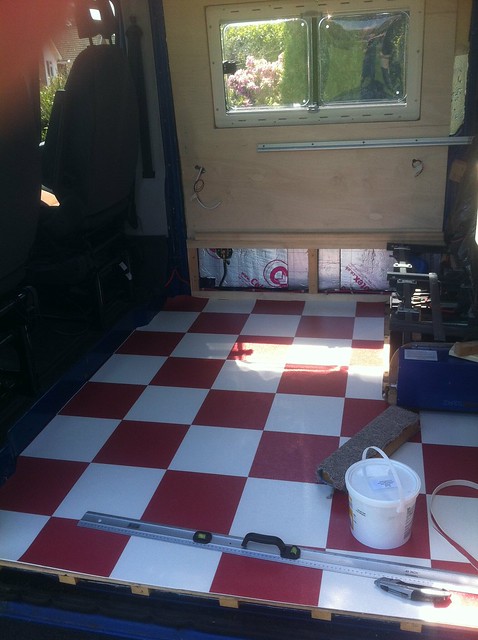 [/img]
Seats back in:
[img] 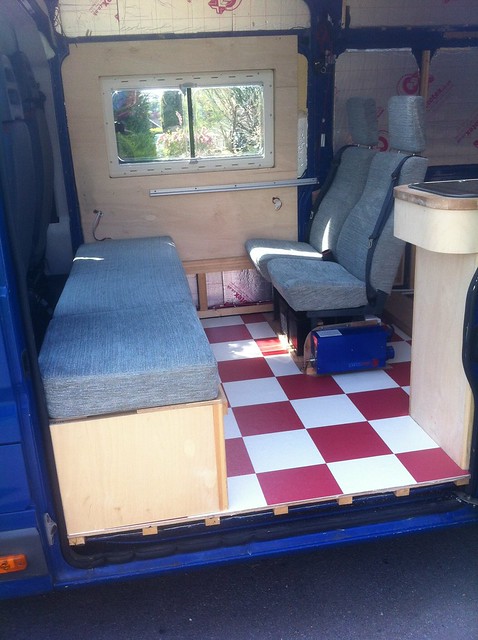 [/img]
Fiddly job. Next, front wall of the washroom. Here's a sheet of 4mm ply cut to the appropriate shape:
[img]  [/img]
Then out with the router to round off the edge of a length of timber and to put a 4mm rebate in that the ply gets glued into:
[img] 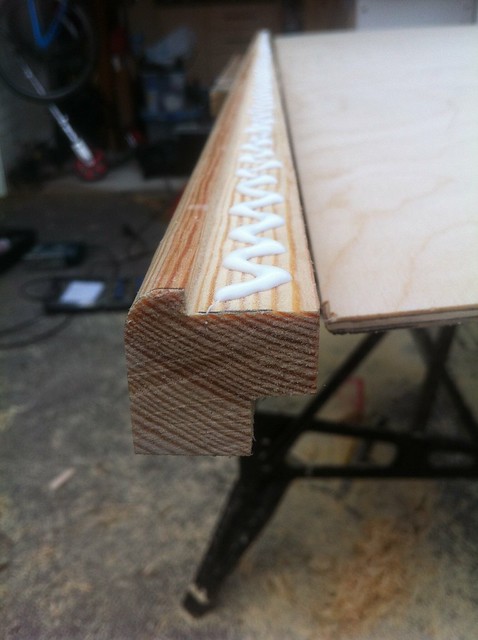 [/img]
With the corner post on and in place:
[img] 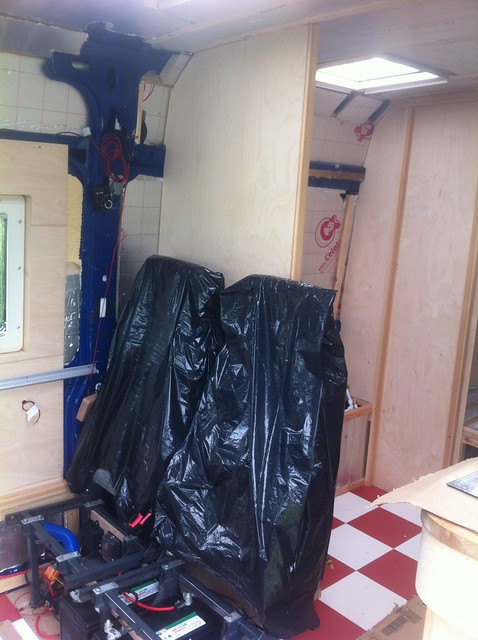 [/img]
And from the other side, with the loo offered up in position:
[img] 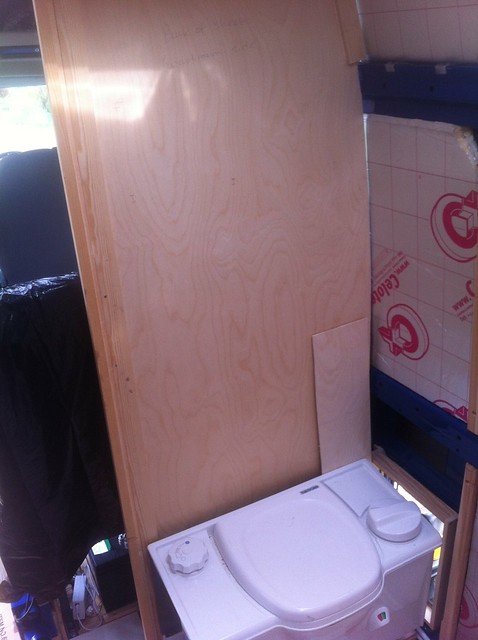 [/img]
Added some more framing around the edges of the ply and secured it to the van -- screwed down into the floor, up into the usefully-positioned ceiling battens, sideways using metal brackets into the horizontal ribs in the van wall.
On the other side of the wall, ie the inside of the washroom, we're using hard glaze ply -- it's 3mm plywood with a sprayed-on coating of PVC, so it's waterproof and impressively hard-wearing:
[img]  [/img]
Also around this time, with a multi-hundred-mile trip to the Lakes imminent, we decided that new tyres were in order. Turned out the local tyre place wasn't hugely busy, so we ended up with four or five fitters on the job at once and All Of The Jacks:
[img] 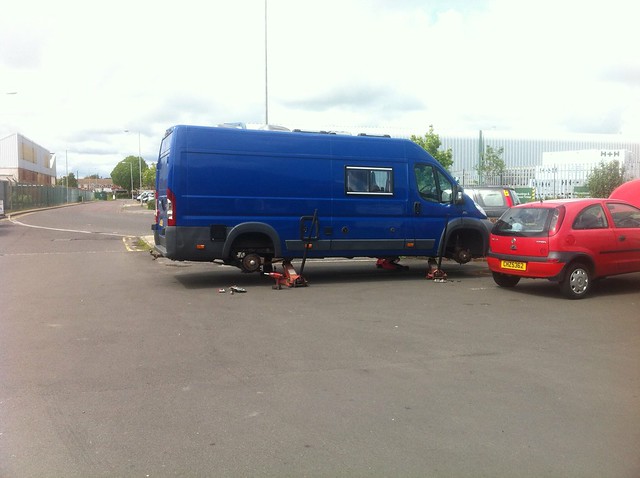 [/img]
Formula 1? Pfft.
Brilliant, not sure about the floor mind you but hay its your van. Looking forward to the next post.
Was the flooring cheap? 😉
This is very inspiring, I need one and I love the way you have made the access panels look about 10x more expensive than they probably cost. But going back to the flooring I have seen something similar in VWs and it looked great with the right colour coordination on the interior so I will wait and see what you come up with.
There is some kind of colour concept at play. The main thing is that the kids love it 🙂
Please Sir, can we have some more?
Yeah Mike, I need some inspiration for doing bits on my van!
never seen this thread before, but by god i've just wasted the last hour and a bit reading it... good work sir.
MOAR!!!!
Amazing stuff.
Hope you are getting away in the sunny summer!
Have you got a link to the ebay seller of the solar panels?
Cheers!
Suggestion for rear shelf (shelves) if not too late. see 3 weeks ago instalment:
Go for a double shelve but size it using Ikea or similar plastic storage boxes. You'll get 4 or 5 decent ones in that gap with timber supports. They'll be easier for sorting stuff and it wont fly about quite as much.
You win at vans! (Still proud of my mini version though) 😀
Love these threads, top work oh and Sazters mini van is ace too. I've got my eyes out now looking for a suitable donor!
You must be back from your hols by now! 🙂
Yeah Mike, where's the update? If you don't post something soon, I'll have to do something on my van and you don't want that (because people will see how rubbish mine is compared with yours).
Bump!
We need more pics and an update!
An amazing thread, I'll never do this but still very inspired...any updates?
Wow. Shes a monster! (in a brilliant way). Looks like you could handle a trip to outer mongolia in five star luxury.
FWIW, we have a Ducato at work, and while the body work is ruined due to it having a very hard life at the hands of neanderthals, the engine (2.5L i think)(is tight as a drum and the underside is in great condition.
Hmm, inspiring enough to make me go and find another job on our ongoing T5...
Chapeau! Mike.
Blimey, I've neglected this -- my profound apologies. Imagine a wibbly-wobbly back-in-time effect and we end up here, fitting a mains hookup:
[img] 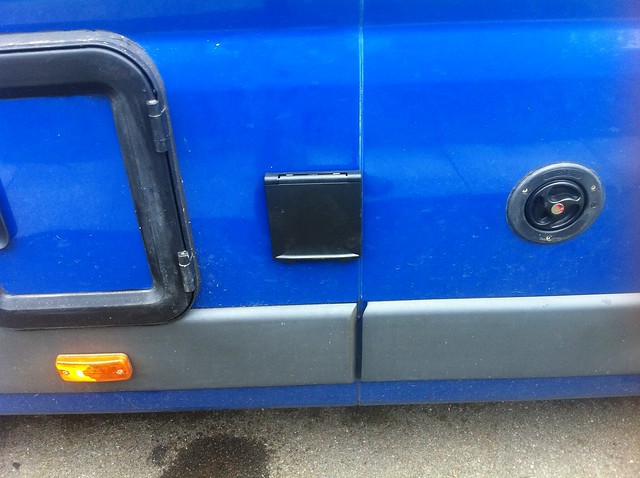 [/img]
I'm not wild about it being right up against that bodywork seam, but it's actually inside a pillar on the other side and there's basically no scope for it to be anywhere other than where it is. Inside the cable heads up the wall and ends up here:
[img] 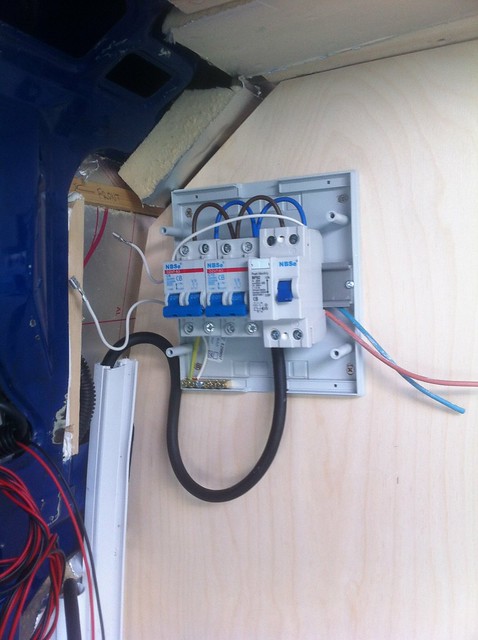 [/img]
I hardly need to point out that the wiring isn't finished in this picture 😉 From there cables head out to various locations, including the water heater at the back, a connection for a charger under the seats and a couple of sockets:
[img] 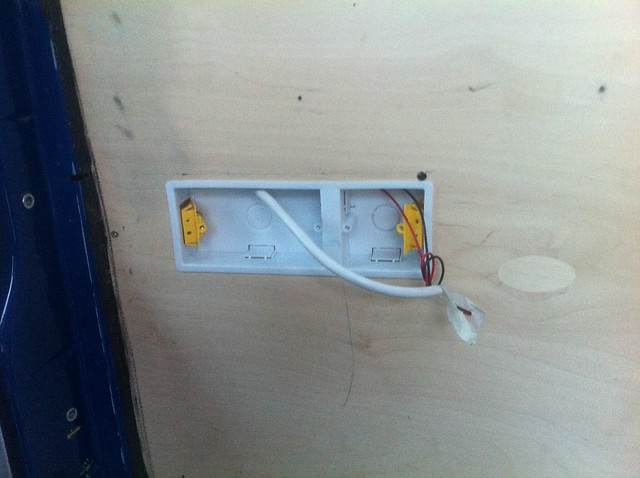 [/img]
The single space next to the socket is for a 12V socket, which is made from a normal cigar lighter socket mounted in a standard blanking plate:
[img] 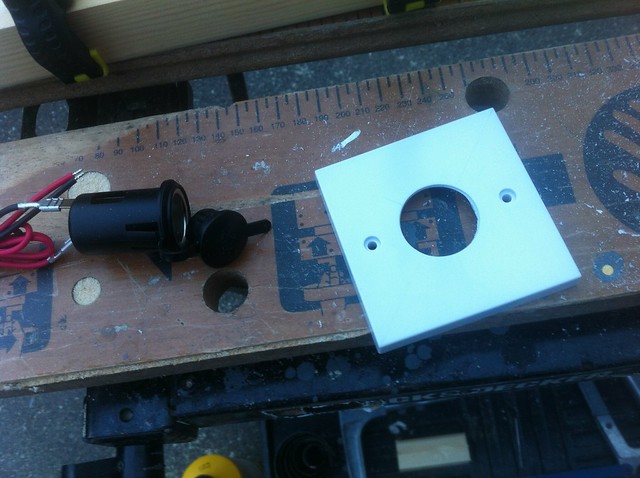 [/img]
At this stage there was a whole load of exposed wiring (and bodywork and insulation) between the ply panel around the front window and the front washroom wall. So I made this bit:
[img] 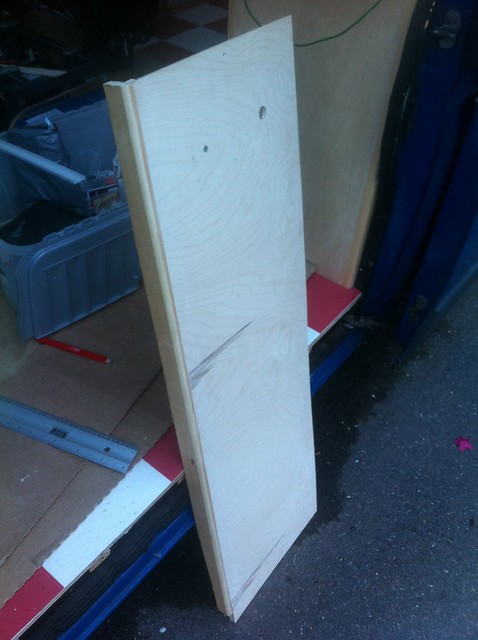 [/img]
Which goes here:
[img] 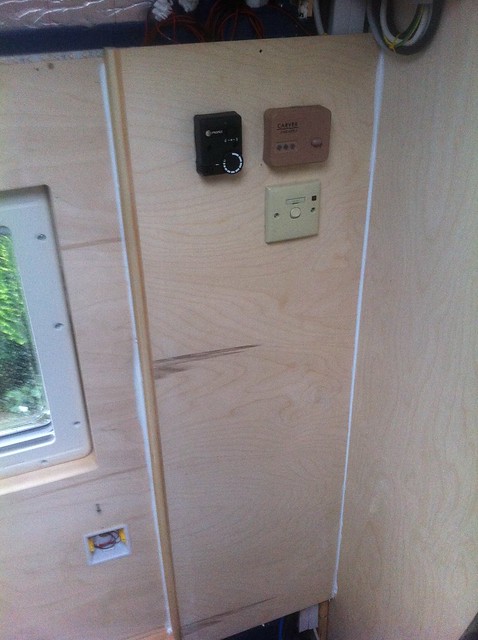 [/img]
Propex control top left, water heater gas control top right, water heater mains switch bottom right -- those are the nasty brown controls that came with the (second-hand) water heater, I'll be changing them for nicer ones in The Fullness Of Time (which is pretty damn full). The overall effect is something like this:
[img] 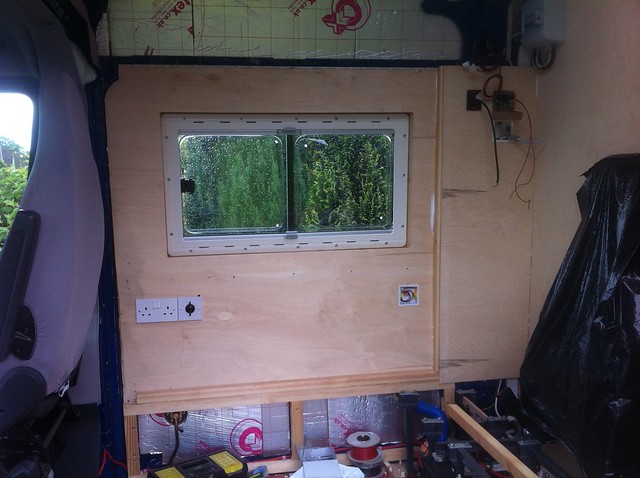 [/img]
The space above the panelling will all be taken up by overhead locker, eventually. In a bid to hide some more bare insulation before our summer holiday, I started making a ceiling:
[img]  [/img]
[img] 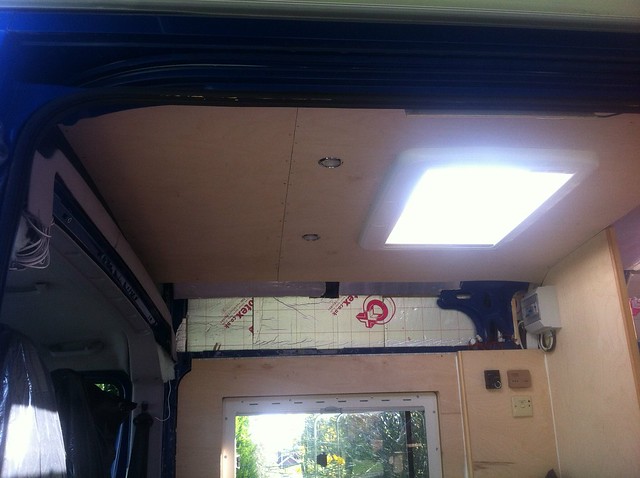 [/img]
It's 3mm ply, which is light and bendy and follows the curve of the roof nicely. Lights are recessed LEDs. Another bit further back:
[img] 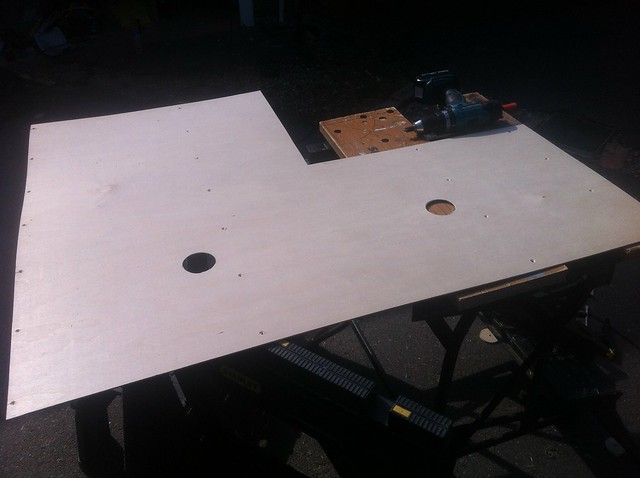 [/img]
Not forgetting to route lighting wires first:
[img] 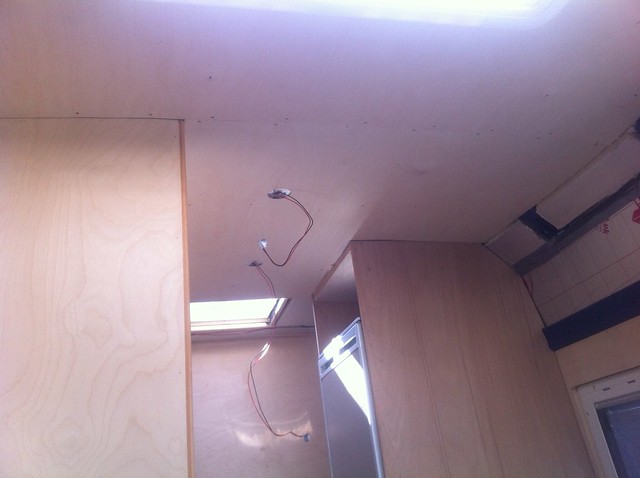 [/img]
Not looking bad:
[img] 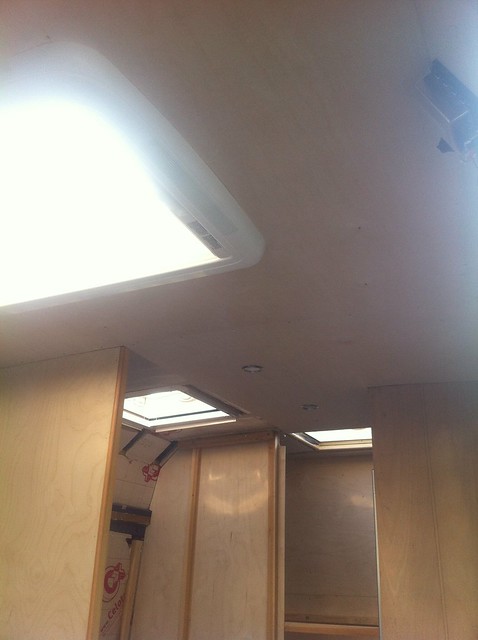 [/img]
A final piece over the rear bunks:
[img] 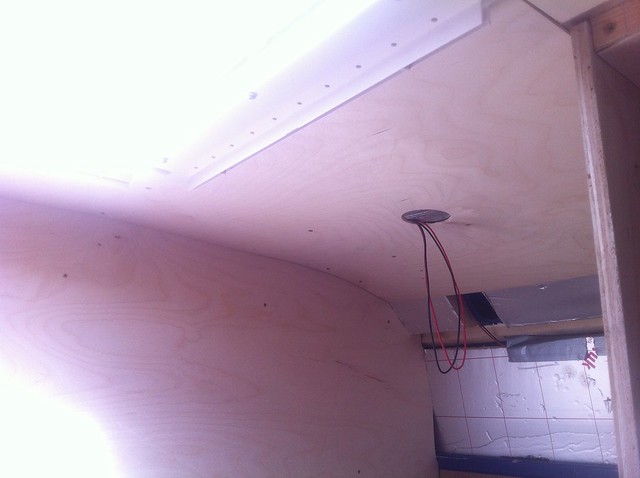 [/img]
And while I was at it, lining the walls -- this was an arse of a job because we'd put the bed frames in and then put walls up so the frames wouldn't come out in one piece, so I had to dismantle them and then put them back together in situ:
[img]  [/img]
Once it's filled/sanded/painted it'll be pretty tidy. On the subject of tidy, a couple of little tidying jobs -- finish off the edge of the floor at the sliding door:
[img] 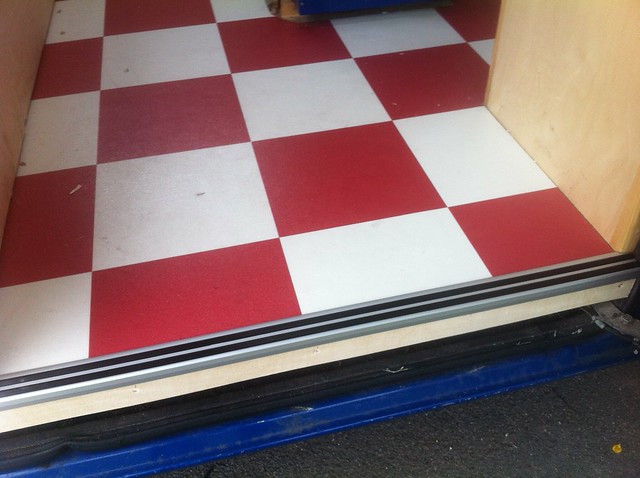 [/img]
Line the gap between the toilet cassette hatch and the actual toilet:
[img] 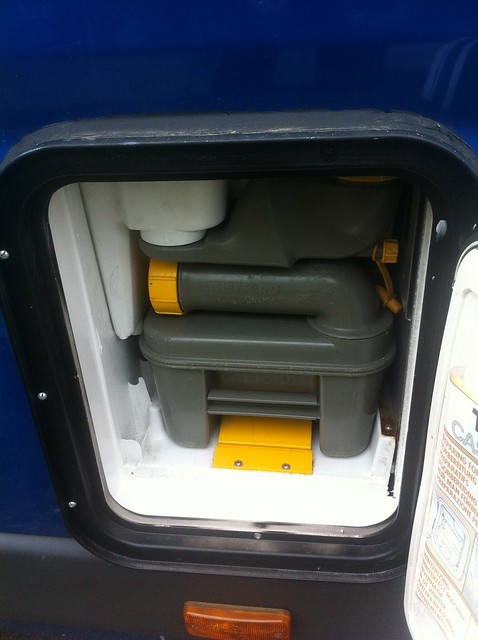 [/img]
Rebuilt the temporary framework in the rear washroom wall and stuck some insulation in it mainly because there was some lying around (but it also stops the hollow wall sounding hollow):
[img]  [/img]
And line out with PVC/ply stuff:
[img]  [/img]
Line the outside wall and make a start on framing for the inside wall and door frame:
[img] 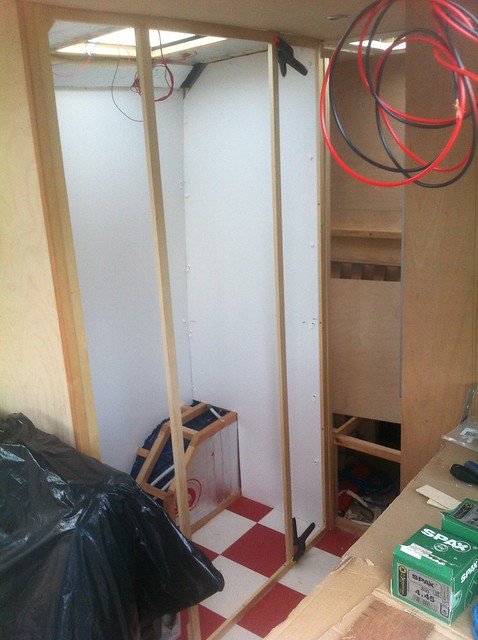 [/img]
And that'll probably do for this update. More soon, there's a bit of a backlog 😉
Have you got a link to the ebay seller of the solar panels?
Go for a double shelve but size it using Ikea or similar plastic storage boxes.
Good plan. It's now double shelved but in a kind of "make it so the bikes go in" way and spacing them at what they end up as. With any luck we'll find some boxes that'll fit 😉
Postscript: Trip to Lakes wholly successful, and even managed to sort the minor smoking issue that we had -- the van had been belching black smoke under power for a bit, but having hoofed it up a couple of Lakeland passes it magically cleared 😉
Up to this point the boot/garage space was distinctly unfinished, being all exposed timber and insulation. Got around to sorting that, first by lining the doors:
[img] 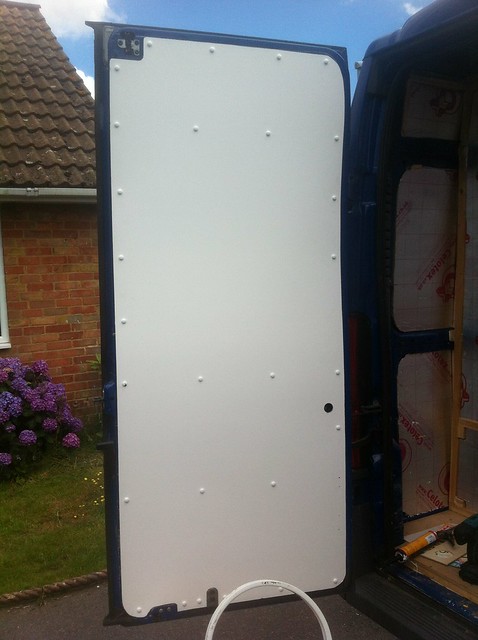 [/img]
[img]  [/img]
(the little round holes are to access the stay releases so you can open the doors 180 degrees) and then lining the rest of the space:
[img] 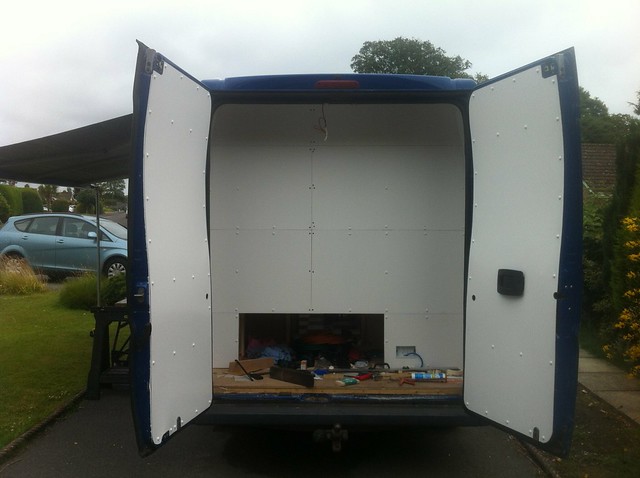 [/img]
It's a bit jigsawish because we were using up offcuts from the washroom -- the stuff comes in 8x4 sheets which isn't really a very convenient number for the inside of a van. We'll be covering the joins with some PVC strip eventually. Redid the shelf as two shelves as discussed:
[img] 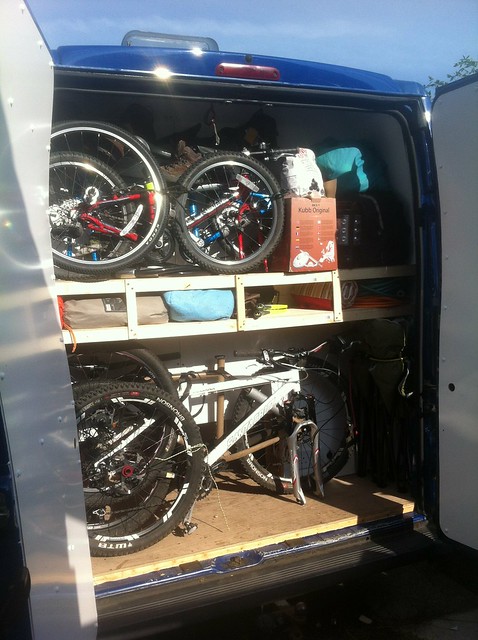 [/img]
The vertical bits are temporary, I'll be making a ply panel with access holes in it to go there. We made the useful discovery that if you take one pedal off then three bikes will go on the bottom layer, which is potentially handy.
Made a couple of shelves to go over the foot end of the bunks for the kids to keep books/toys/etc:
[img] 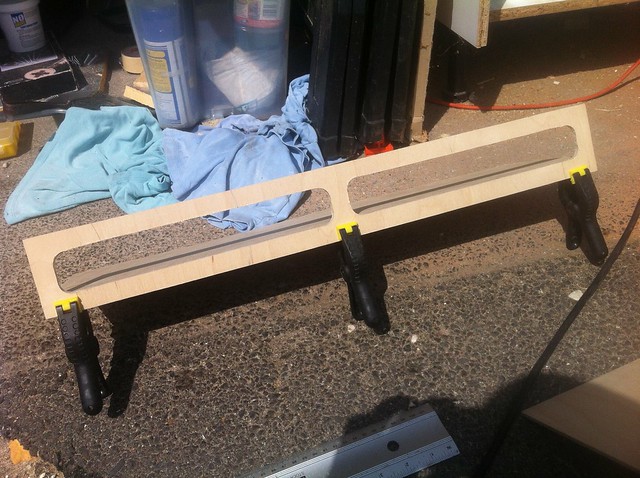 [/img]
4mm ply base and front with a 15x12 batten to join them (underneath the front edge), supported on more 15x12 batten on the sides of the van. Seems stiff enough:
[img] 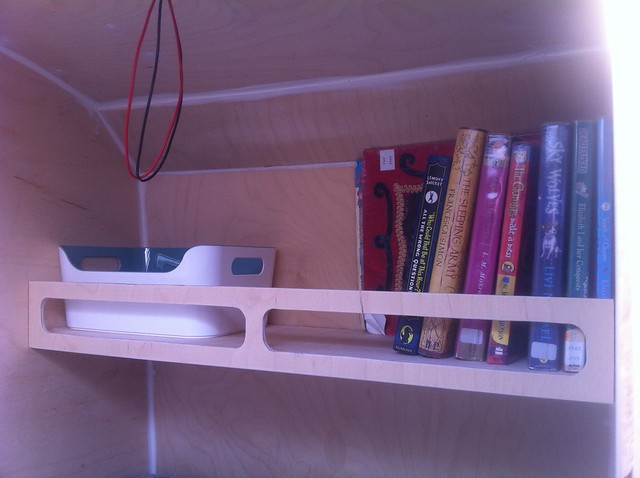 [/img]
And put in a surround to cover the front door pillars where the bulkhead used to be:
[img] 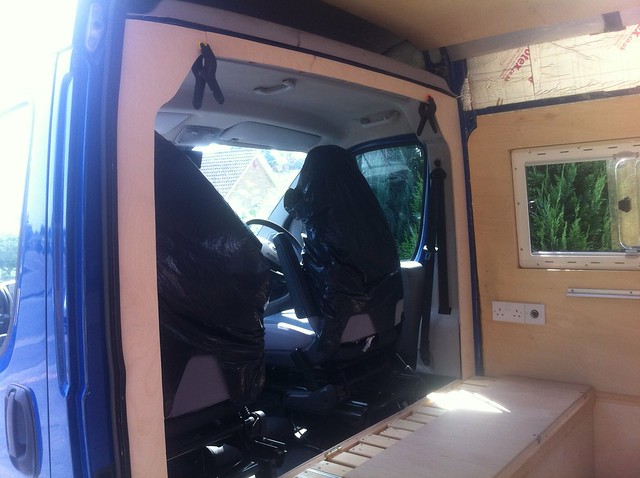 [/img]
Looks fantastic - thanks for the Solar panel link - they look very reasonably priced.
Liking the wipe-clean boot very much.
They were the cheapest panels I could find from a UK supplier, they've been fine so far. We're using 2 x 100W ones.
Boot space needs some sort of suitable flooring, not quite worked out what to do there yet 🙂
[img]  [/img]
This?
Nice thread.
Checkerplate is the obvious answer, but it's not particularly cheap (if I go for aluminium) and I'm not entirely sure if I like it or not. On the other hand, it's the boot floor, I probably don't have to like it 😉
