DrP - MemberDado rail in the post (router), glue, and will buy/make some screw in fixings.
DrP
Nice one (although a dado rail is a different beast to a dado joint). I've only just got a router (small Trend thing) - will try it out on the finishing touches to the shed.
hora - MemberAlexSimon I've got two spaces eitherside of my chimney breast that are crying out for something- shelves would just look naff but I love what you have. Idea- Is there anywhere that I can source pre-existing boxes that I can stack/tack/concealed bracket every so often irregularly up like that?
Yes, I looked at a few. The randomness is the tricky part.
This was the best system I found:
http://www.cubit-shop.com/en#1
although a dado rail is a different beast to a dado joint
Indeed it is...was on auto pilot typing!!
Regardless, I can hardly come from a position of authority as I've not used a router for YEARS... and never on a project like this either!
Regardless, the wood is all bought and in the boot of the Skoda as we speak!
At just over 190cm for the longer bits, I've had to really scoot the front seats forward - cue me driving round, nose to windscreen, ike a NASCAR driver!!
And... Despite Wenban-smith in Worthing quoting circa £72 per sheet (1220*2440 in 15mm), the Horsham branch could do them for £54 per sheet, AND cut them to size...
Noice!
DrP
EDIT - I was also trying to pervey the fixing I wanted to hold it in shape too - The chaps there have 'table leg fixings' in stock, which will also be great for pulling the structure into shape:
[img]  [/img]
[img] http://t2.gstatic.com/images?q=tbn:ANd9GcRqhUTwffYfkfGD36TZsatdYCeJ3Pp6LQ4u9-KQvN5CU0Sp5XgC [/img]
Very good price that
Good luck!
So, a few hours of sunshine today allowed me to make a routing template for the 'steps', and to make a jig and start work on the corner posts. I'm just waiting for a mate to drop round a table saw so I can cut the legs to the correct size.
Very happy with the dado groove though.
[img]  [/img]
[img]  [/img]
[img] http://farm8.staticflickr.com/7443/8724064114_caa273eae5_z.jp g" target="_blank"> http://farm8.staticflickr.com/7443/8724064114_caa273eae5_z.jp g"/> [/img]
[img] 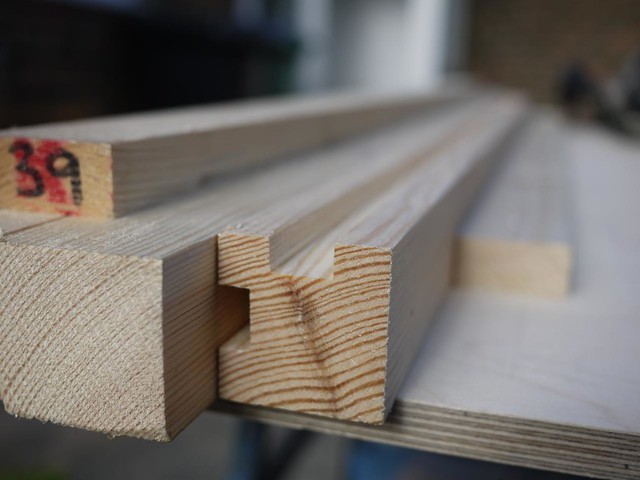 [/img]
[img] 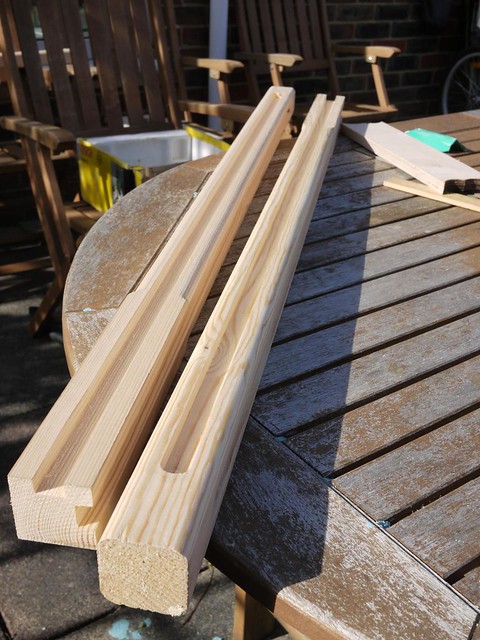 [/img]
And a quick mock up to get a rough visualization of the size - always handy to have an ambulanceman nearby too...!
[img]  [/img]
This weekend's plans will also mostly involve being covered in sawdust...
DrP
Pretty much 12 solid hours getting sawdust in my eyes today!! Satisfying though!
Will update pics in a bit....
DrP
Conservatory workshop (the wife was away!)
[img] 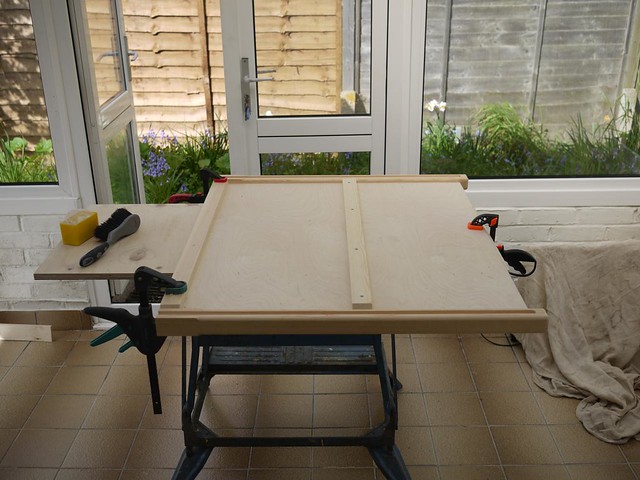 [/img]
[img] 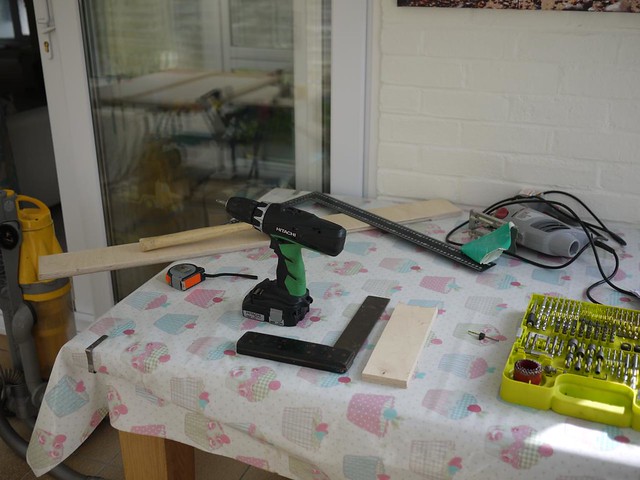 [/img]
[img] 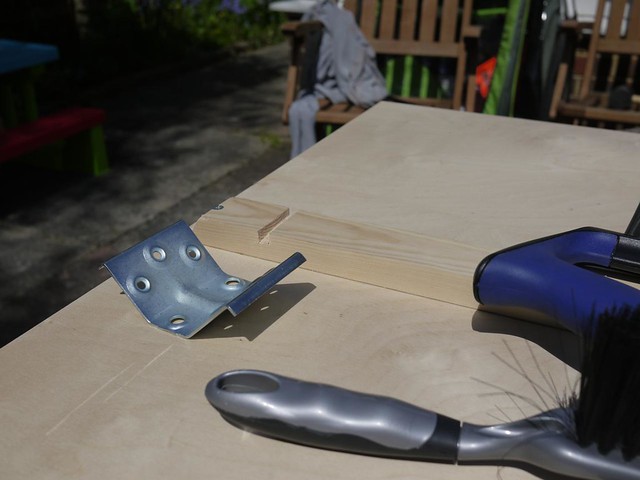 [/img]
Where the leg fixings will, erm, fix...
[img] 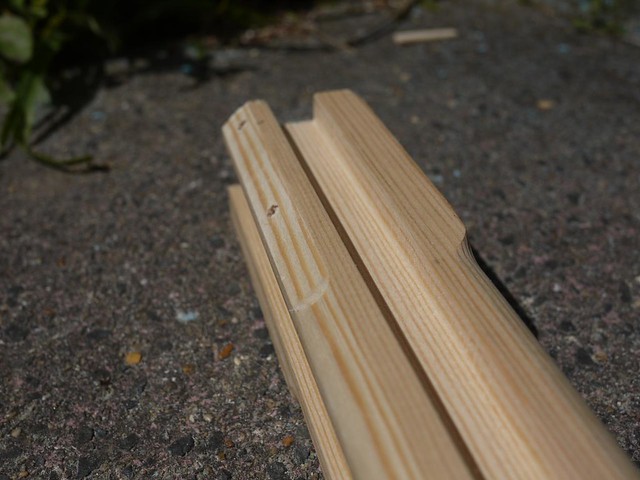 [/img]
It's just a big coffin for now..
[img]  [/img]
This piece took all the hard work and planning
[img]  [/img]
[img] 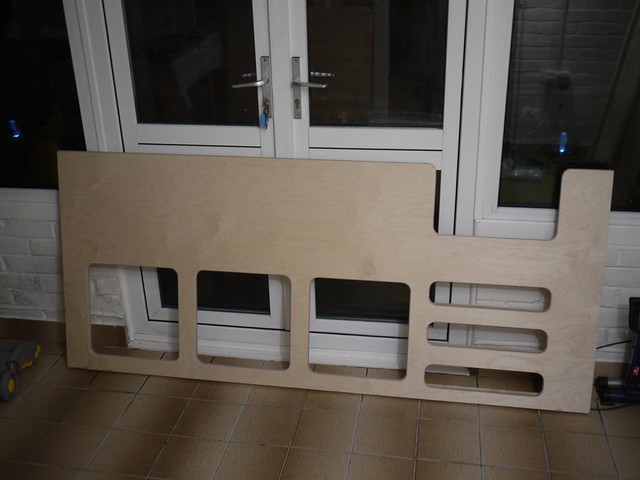 [/img]
All I've left to do is finish the storage bins, and think about paint/varnish/finish...
DrP
looking ace DrP.
sis-in-law is pitching for something similar from me for my niece, so will follow this thread for more ideas and tips.
I like the idea of the table leg fixings. Although personally Id usually just throw glue and more wood at it myself, but then would need to take the chainsaw to it to disassemble 🙂
PS Am I the only person who absolutely hates using a router?! Hateful machines with the power to wreck your work with one sneeze.
Cheers - can mail across the basic plans I made if you fancy?
The thing with the router is, once you find a straight line (wood baton guide) or make a decent template, you can't go wrong when using the 'Bearing guide bit' - as long as the guide piece is clamped tight!
The router was used on every piece here - grooves, edges etc...
DrP
Coming together very nicely indeed! My own DIY skills are solid but basic, yours and AlexSimons are pretty superb!
gaps are much too big in the bottom bit of the panel - that will never work as a prison
Hate it when people come along and disprove the cliche that "yeah, he may be a clever bloke, but he's got no practical skills".
Some people are sickening. 😉
Righto...All done!!
The little'un is all tucked up, but "as he's in a big boy bed, the dummy fairy has come". Alas, no dummy, so he's not really settling!
All in all, I'm pretty chuffed with it - not bad for my first proper attempt at woodworking. Plus, having designed the bed/made the plans all from scratch, it's got a nice personal touch to it I'm sure my lad will appreciate at some point!
I've been crawling around in the 'den', though for me it's a bit tight!
I think I might install some small LED lights under there 🙂
[img]  [/img]
[img]  [/img]
[img]  [/img]
[img] 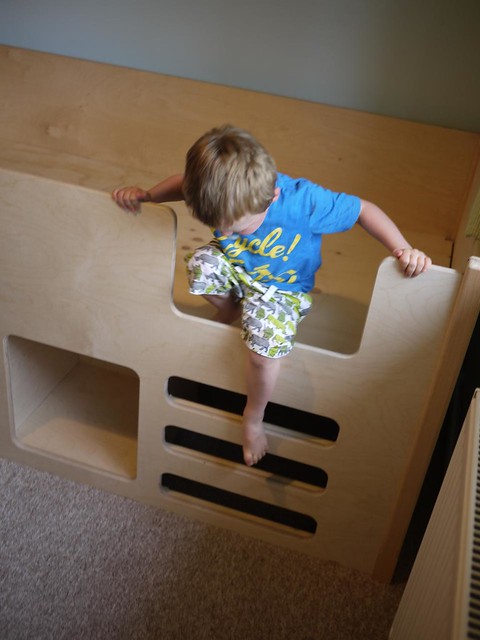 [/img]
[img] 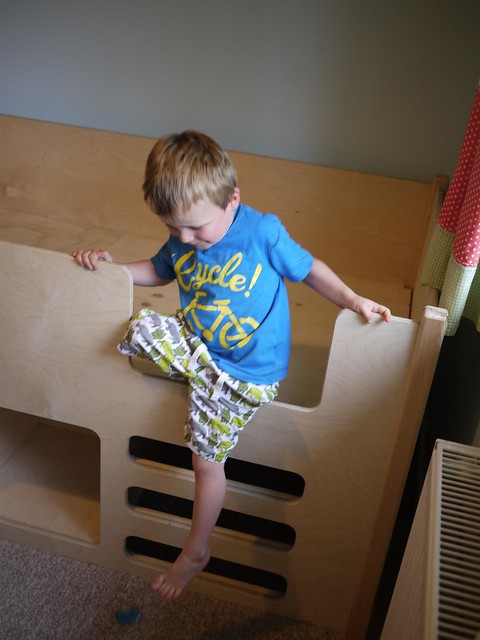 [/img]
[img] 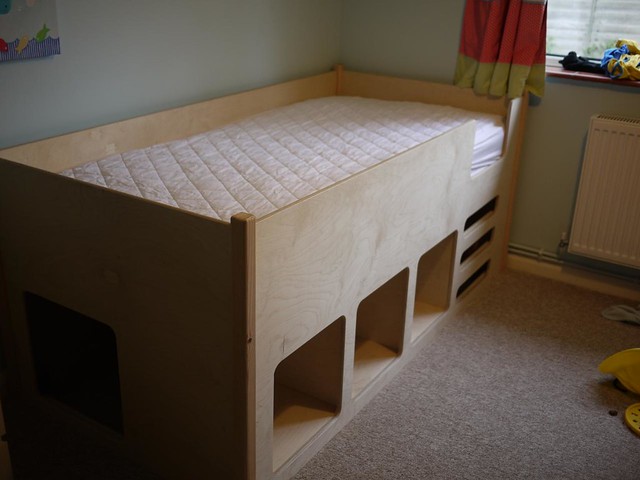 [/img]
[img] 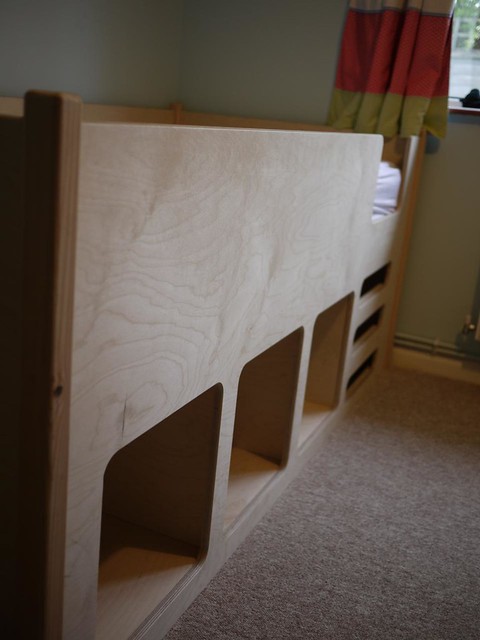 [/img]
[img] 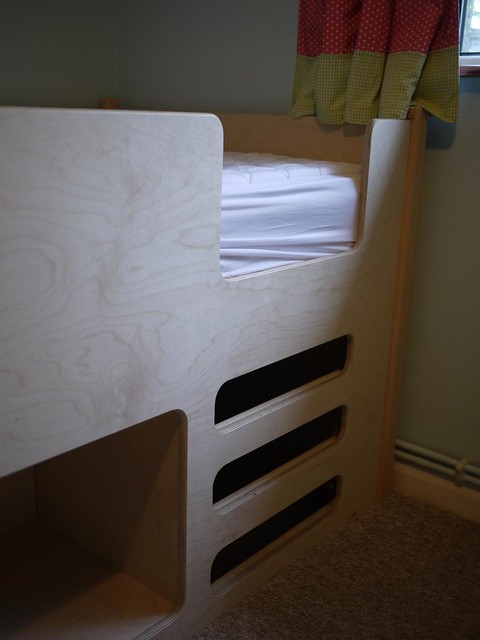 [/img]
And one of the prisoners....!
[img] 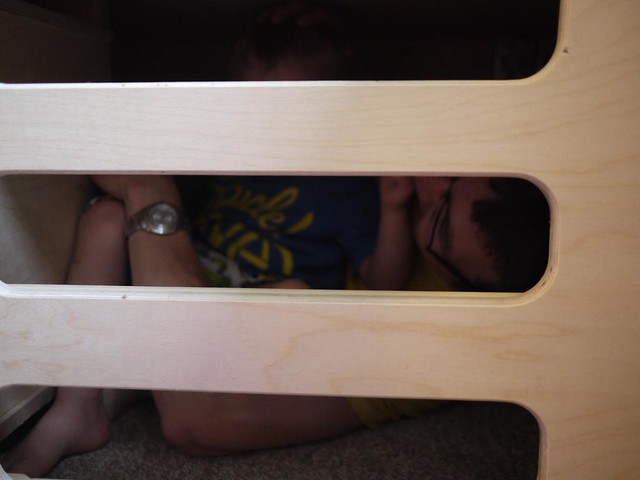 [/img]
It's still unvarnished; we're still deciding on the final finish, and if to have colour or not....
Cheers for the help all who gave it 🙂
DrP
Very impressive! You should be really proud of that.
What wood are the side panels?
Awesome work DrP, quick turnaround too
15mm birch ply (circa £55 per sheet, 3 sheets in all) for the side panels and storage bins.
15mm far east (cheaper at £32 ish) ply for the mattress platform (which need vent holes drilling, just remembered!)
Redwood pine corner posts.. about 16 quids worth..
Cheers for the positive comments 🙂
DrP
I slept in DrP's bed! 😀
(The one he built.)
It held up to my huge bulk without so much as a creak.
An impressive thing of marvelous marvelousnous.
