Am nae shy.
My mate said something similar about me fitting a clear roof light " you not worried that people will be able to see in that window" - " na mate if someone can see through that window I'll be oot side giving it get tae **** aff they roof o my van ye wee gobshites
Is it just me that thinks a better solution would have been a bigger roof light covering that whole oblong giving a flat surface to work off? The placement on the back one is just as bad (if not worse by virtue of the fact that moving it about 100mm would be working with a completely flat opening)
Not knocking your work btw, just the muppets that built it.
I was thinking the same about why they cut them like that in the first place.
The mind boggles about many things. The toilets my biggest why.....
But for what I paid and the adventure it'll bring I'll live with it.
As for why not a bigger roof windows .... A heki midi to fit that gap would be 200quid....
The mind boggles about many things. The toilets my biggest why.....
But for what I paid and the adventure it'll bring I'll live with it.
As for why not a bigger roof windows .... A heki midi to fit that gap would be 200quid....
I think some converters just do whatever is quick and cheap with whatever they have to hand (especially where nobody will look).
Best one I saw at work was a company doing seat conversions where the purchasing guy shaved a few quid replacing long 12.9 cap heads with some grade 6 threaded bar and a couple of nuts. Only discovered by the design engineer when they failed the next test and the half attached seat ripped the floor of a brand new body shell. I think that one ended up a negative cost saving....
Wasn't questioning your purchase, as we discussed before caravan suppliers are crooks!
Ah that roof profile brings back memories, including the annoying bits that fill with water and don't drain. Should be well sealed now though, nice job.
I've got two midi hekis (secondhand ones) and they still don't fit the roof corrugations :d Pain in the backside but I knew that when I got them!
I think they are sized to suit coach roof windows/escape hatches.
Switch - I bet its for the mystery round thing on the roof thats been blanked. Might have been original fit for Parcelforce.
Can the double glazed plastic caravan / camper windows be fitted as roof light or will they just leak in that orientation?
Can the double glazed plastic caravan / camper windows be fitted as roof light or will they just leak in that orientation?
Rooflights have a substantial upstand and a seal to prevent standing or wind driven water from getting in. Windows only have a seal.
Its quite normal to have water still pooling against the rooflight after several dry days, that would all come in as soon as you'd open it. And even if the rooflight was watertight, the seal would often be full of water....waiting to drain 🙂
Brilliant.
this springs to mind though.. 😉
http://www.wiltsglosstandard.co.uk/news/15063640.Vandals_attack_elderly_man_s_beloved_banana_coloured_car__blamed_for_destroying_picturesque_view_in_Bibury/
haha senor j i live in horse country. + none of my neighbours can see it as im end of terrace - equally what used to live there in that spot was a land rover discovery shell i stripped out.
Horse boxes are common place around me - especially now the equestrian centre down the road is being built.
By horse box standards - especially the ones near me , this things both modern and good looking........
But your right it could be a little more incognitus...... While up on the roof i spotted some bits and bobs of surface rust that could do with treating and spraying ..... i couldn't help but think the whole thing would look better in a medium green with not those stickers all over....... we are going to need a big shed and a lot of paint .....wheres kenneththecurtain when you need him.
the fiamma has nearly 50mm of upstand between the roof and the "opening part"
Switch - I bet its for the mystery round thing on the roof thats been blanked. Might have been original fit for Parcelforce.
possibly and today while i'm doing the rear roof light - and can reach the round thing - ill take the three screws out and whip the top off for a look at whats inside.
Took it out for 150 mile round trip at the weekend . its a surprisingly wafty kind of drive on the dualcarridgeway . Its hardwork on the road from mine to the dualer - 15 miles or so of twisty ups and downs - continually up and down the gear box and slowing for corners especially as it was "damp" on saturday it certainly has understeer on greasy roads. Was much better coming home on the dry roads so i suspect it has ditchfinder tires on the front.
Its not as bad on fuel as folk say - 150 miles on 1/4 tank will work for me but i do tend to drive it like my landy - 55ish or the cooker , fridge and other metal bits like to rattle about - it seems to hit resonant frequency about 62 and drives me nuts 😀
Cruise control topped the list as a requirement though - 55 puts the throttle pedal at quite a height in 5th ....
That's an awesome van. I don't have a lot of use for one really... but doesn't stop me wanting one !
I assume its got cruise fitted? Easy and cheap upgrade if not as the van is already wired for it.
No cruise. But I've already spied out what's needed. 🙂 Plug in and play.
More pressing issues first.
Found the source of the damp in the back corner.
Some nugget who couldn't live without tv fitted the maxview in be corner using hopes and dreams to seal it.....Cue water ingress.
Solved now and only the insulation is banjoed- easy fix....It's sealed now and the dehumidifiers dryinbit out as we speak. Once moisture meter says so I'll get new insulation in there.
Moved onto that rear window yesterday. Soon as I removed the window it became clear that the main thing keeping water out of the interior at the aerial was hopes and dreams.....Not an ounce of sealant -and lots of water in that corner of the van....
[img]  [/img]
As soon as I removed the window my telltail was this black mouldy glass fibre. It'll all be replaced once the woods dried out . The wood is wet but it isn't mouldy Or gone soft But I've mould killered it and scrubbed it anyway as a precaution.
[img] 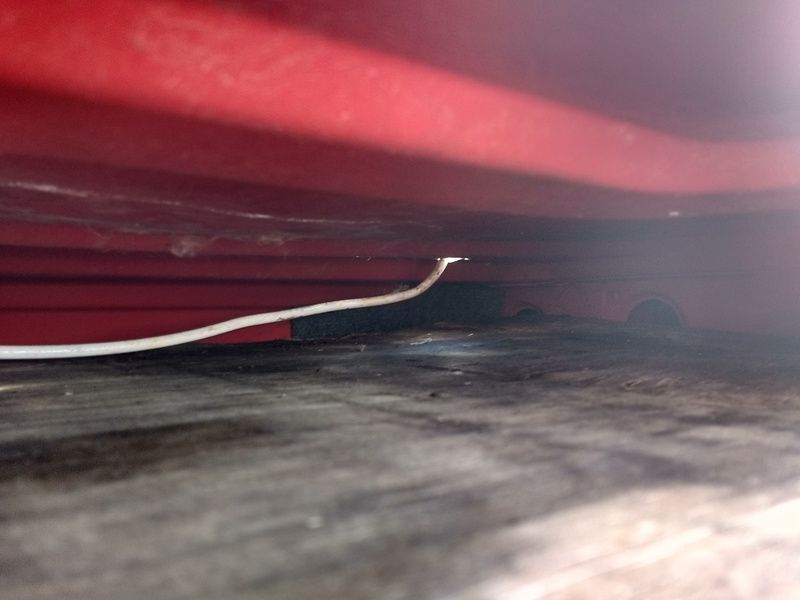 [/img]
Left that open yesterday and then because it wasn't raining last night I just put the roof light on it unsealed and ran the dehimidifier all night with the cavity vented.
Tonight once it was all dry on the moisture meter I reinsulated it with fresh glassfibre and fitted the roof light the same way I did the front one. - I must say I do like the fiamma system better from a fitting point of view it makes more logical sense in my mind.
I also fitted the reversing camera today while I had the back of the living area open and easy access.
[img]  [/img]
It's hiding a bank of 6 empty switch covers. Was going to flush mount it lower down where the coin tray is but I needed it to be angled to view nicely.
[img] 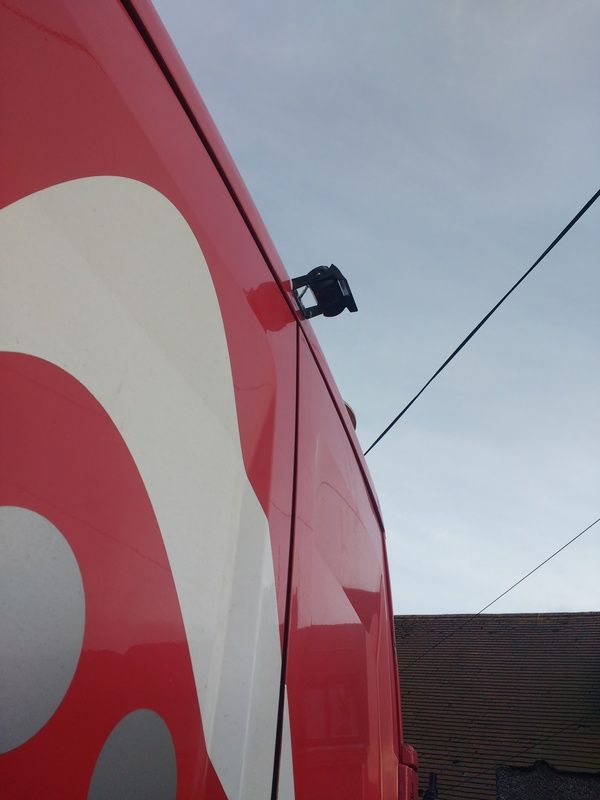 [/img]
The camera at the back
[img] 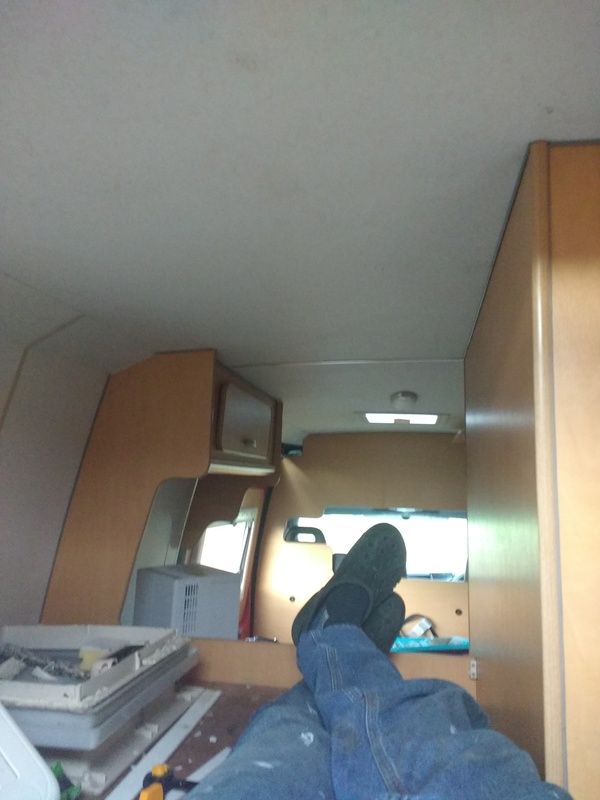 [/img]
The view from my bed.
[img] 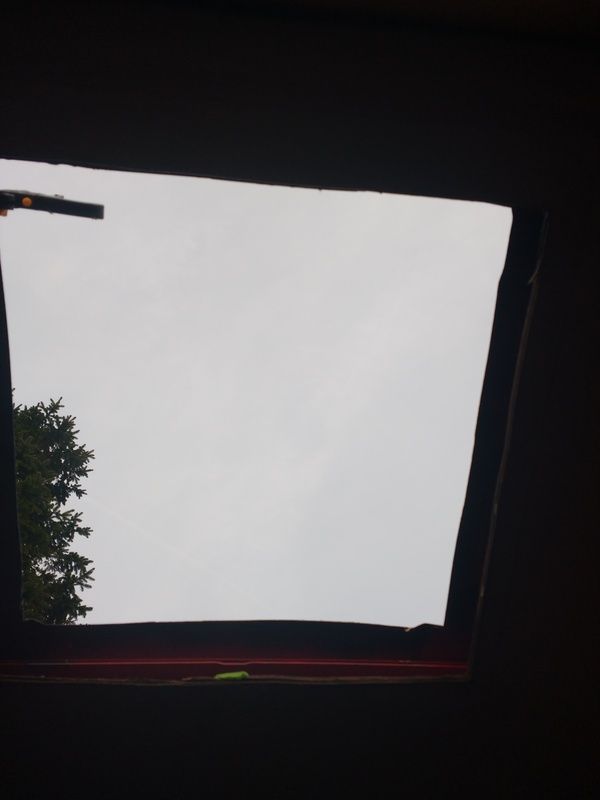 [/img]
Looking straight up from the same place. This is where the mini heki now resides. Has the roller insulated blind and fly screen fitting for under to keep sun/condensation off my face.
[img] 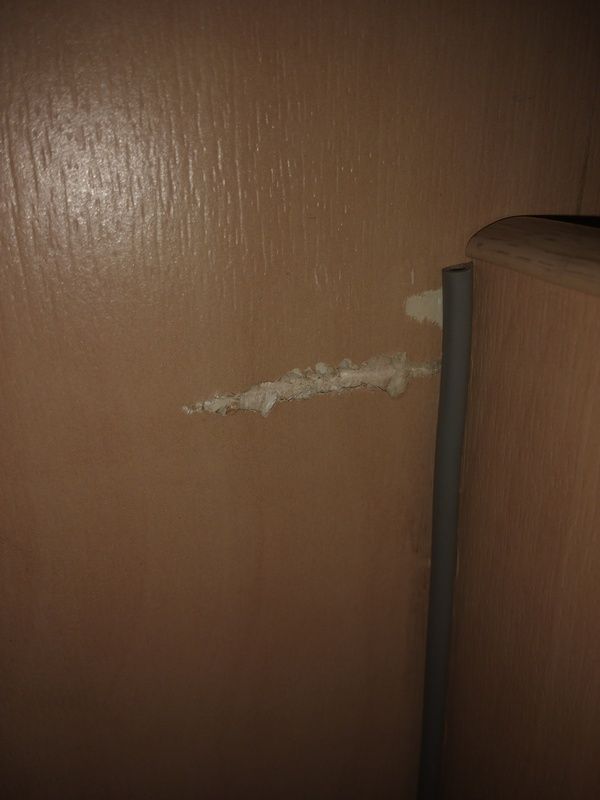 [/img]
Anyone got any clever tricks for repairing this neatly. It's a light oak veneer I was thinking a light sand -fill with light filler - Sand over again .
It's all because poor fixtures were used for stresses applied in the wrong plane by a hanging ladder. Going to fit a floor standing ladder with fiamma hooks so I can still remove it and put it in the cupboard as the kitchen doesn't work with it in situ.
Anyone got any clever tricks for repairing this neatly. It's a light oak veneer I was thinking a light sand -fill with light filler - Sand over again .
Thats pretty much about all you can do I would say. Maybe get a couple of different shades and apply it randomly to minimise that its all one splodge of patch.
Van looks good.
Are you not worried that that face on the underside of the basin is going to be watching you every time you go to the toilet???
That expression suggests it has seen too much!
remember i said not to ambitious ....
well the dash boards out ..... van was sold to me as not having central locking.... so when i found out it did and it just wasnt working quite right well that made it a mission to sort ....
Turns out there was a timer delay relay under the dash that had gone haywire - part of some kind of postman security system to keep the back locked. When ever you unlocked it would relock its self. Which in a camper leads to all sorts of paranoia about where the key is everytime you get out ....
Central lockings now working as it should how ever upon looking into why drivers door didnt lock it appears the drivers door loom is missing and the solenoid fires perfectly when tested - presumably no fitted so postman pat didnt lock him self out. ebay turned up the relevent sub loom for 10 quid and i also found all the cables for cruise control so ordered up a wiper stalk with the cruise functions on and spookys mates assure me its plug in and play 😀
Today ive been doing fault diagnosis on the truma heater... main fault being it wont bloody go off. after a few phone calls and some stabbing about with a multi meter the experts tell me its banjo'd so a new one of them then.
on the plus side - my roof repairs have stood up to doris. No moisture inside at all today. plywoods reading 13% pretty much all over which is a bonus as it was damn near 100% when i started.
Well after 2 weeks solid graft (I'm on days off ATM) and about 500 earth pounds I now have a van I can proudly say looks no different to when I bought it....To the naked eye.
How ever it's clean. And it's not leaking from the roof nor from the sink in the bathroom. That sink can never have been used since fitting as who ever fitted it hadn't applied Newton's laws. The drain hose went higher than the level of the sink so it would never drain.
Plan for wed-thursday is timing belt , water pump, thermostat and a full filters/fluids service
did timing belt and water pump in my iveco recently, was much easier than i expected.
Cool have done dw8s and 200tdi so hoping it's no worse than dw8.
Access looks alot better at least.
Can be done without removing the front end by all accounts but I think I will take the front off and paint the subframe etc while it's open
yeah, i watched a youtube vid where a guy had the whole front off, i didnt do that though, just took off the intercooler.
Aye looks like it could be done that way nae bother but I'd quite like to get into the engine bay and give it a check and get under the battery tray. I suspect there may be a hole there .....There apparently usually is and from the underside I think I thought I saw one when I was viewing it. Have welder will weld. 🙂
Front comes off nice and easy, probably not worth trying to work around it 🙂
[img]  [/img]
you done the timing belt on your old one then ?
any tips or special tools required ?
That removable front section is a great idea. I've just done the TB on my Iveco powered MH. The engine's transverse and the TB cover doesn't remove completely unless due to the proximity of the wheel well and the AC pipes. It was an interesting experience I'm not in hurry repeat any time soon 😀
[img] 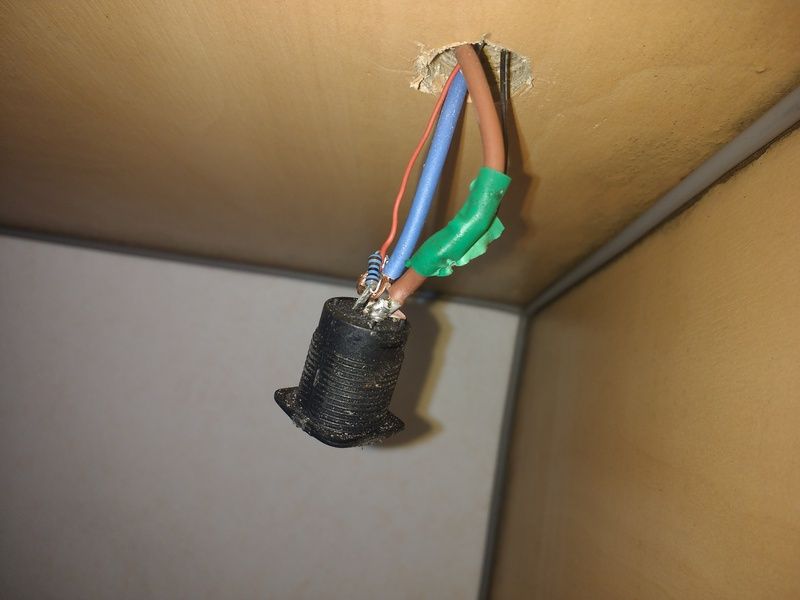 [/img]
[img] 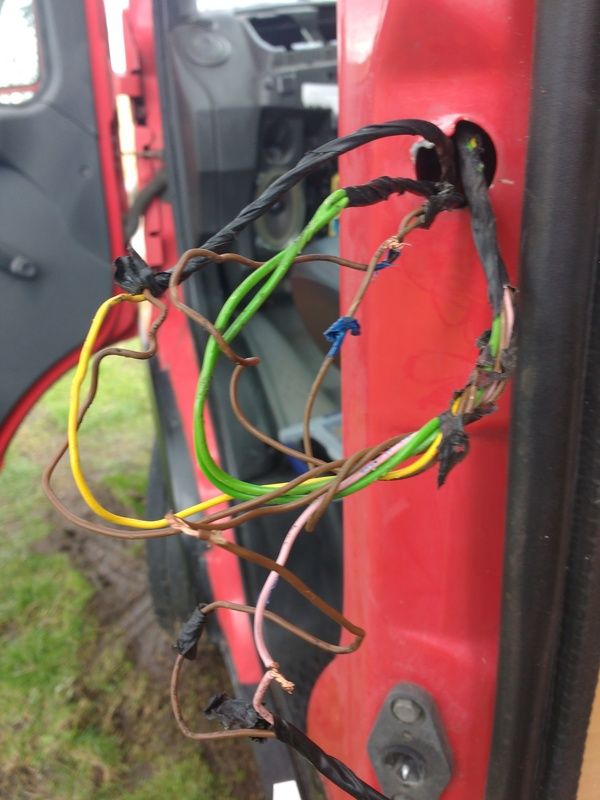 [/img]
some of the quality wiring ive come across.....
[img] 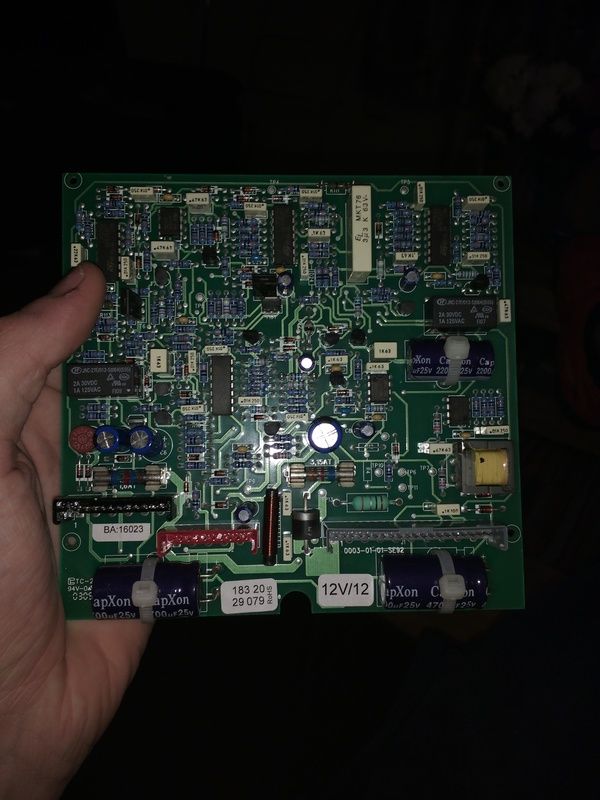 [/img]
any idea whats up with that .... no me either despite extensive prodding with my multimeter and resoldering of dry joints. . 230 quid later and my truma e2400 works again heating the van from 0-15 degrees in 10 minutes or so.
what you need is a helpful meerkat...
[img]  [/img]
Loving this, wish I had the time to do a project like this....
any idea whats up with that .... no me either despite extensive prodding with my multimeter and resoldering of dry joints. . 230 quid later and my truma e2400 works again heating the van from 0-15 degrees in 10 minutes or so.
Most annoying. The board on my Combi wasn't opening the gas valve intermitently. No dry joints visible and no obvious sign of any components overheating. Truma's diagnosis involves putting the suspect PCB in a known to be working unit to see what happens. So no fault finding as such. The bugbear for me was the way they dealt with the problem which resulted in a load of long delays. Eventually a very helpful receptionist suggested I send the PCB in for testing. They did this free gratis and the problem was solved. The next hurdle was that they won't sell the spare parts to non approved repairers. What they don't tell you is that [url= http://www.miriad-products.com/ ]Miriad[/url]who are on exactly the same postcode will. Local "approved repairer".....Useless...and a long story.
Glad your sorted. 😀
I didn't do my timing belt, never done one. I'd want to practise on a banger first 🙂
That was the first of two replacement radiators.
Local approved repairer didn't even. Get a look. 60 quid plus vat per hour asked what he was gonna do and it was no more than I'd already done.... No thanks I'd probably have had a 230 quid billl ontop of my 230 quid bill.
Great thread. Have added to favourites!
I'm just glad my shonky wood working skills have not made it into this thread.
Timing belt was ok to do, there was good instructions with the belt/tensioner kit. The one thing I didnt have was a tension gauge, but I'm happy enough doing without it.
strangely i have a tension meter for timing belts.....
did your kit come with a tension pully and a toothed pulley ? mines only came with the tension pulley - but was the one noted for my engine number - and the one with the tension pulley and the tooth pulley was for another engine number.....
might have to reevaluate my 188 quid insurance as well ... docs came through today and having a read of them its a specialist policy - thats cool. How ever its basically a classic car policy but for motorhomes. I need one of my vehicles to be insured regularly (IE using and accruing NCB) will need to phone the lads up and speak to them as his is not what i was sold - i was asked if i had another car .... i said yes and i do .... but its a classic on a modified classics policy - which also accrues no NCB
Bollocks.
[img] 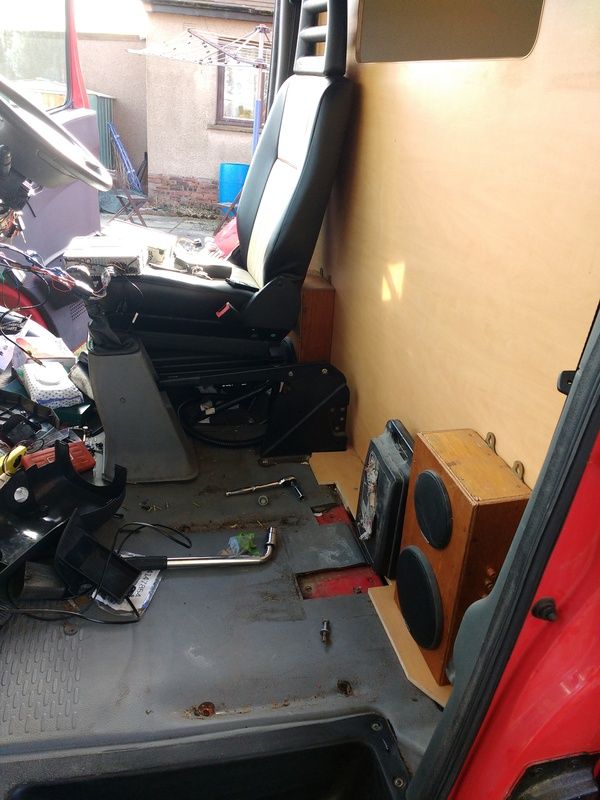 [/img]
check rustymacs lovely wood work there with the speaker boxs. I repurposed his old shed 12v stereo system (now upgraded to garage with power) for the van ... so its got 4 inch and 6 inch rounds stuck under the seats where you cant see em ----or retrieve em without pulling the double out..... and 2 regular speakers in the dash hooked up to some sony bluetooth ipod stereo thing with remote.... i just need to work out the wiring to have selective switched live - Ie ignition off it uses leisure battery or defaults to igniton live when ignitions on .... i was just going to wire it to the leisure battery but i dont want to have to turn the stereo off every time i get out the car. I think it can be done i just havent had time to work it out yet.
yep mine came with replacement toothed pulley, i think it was a gates one.
My stereo is off leisure battery only, i usually manage to turn it off, or turn the volume down at least.
You could have the switched and permament live both from the leisure battery, but have a relay in the switched live which is operated by the ignition. And then have a overide switch in parallel with the relay so you can power the stereo up whilst ignition is off.
That's exactly how I will be wiring my radio, relay on the switched live, with an override switch to turn it on when parked up.
I also read about a technique where the relay latches on with key on, and only releases when a door is opened.
This van has daytime running lights and no accessory position on the ignition which is really annoying, you have to have the front sidelights on and all the dash lights on ready to start, just to listen to the radio!
Turns out the insurance couldn't give a hoot. So long as I can prove I have access to drive multiple vehicles and that the ivecos not my only car life is good. I have to send them the docs to prove it. Equally they will stick my ncb on the camper and it will accrue but they cannot apply the ncb to the price as it wasn't earned on a vehicle of this size and they have already taken into account my driving experience of smaller vehicles in the price.
Armed with that good news I popped out side and dealt with the nasty gouge in my wood work.
[img] [/img]
Got on it with the filler and stain pens and got something good enough for the girls I go with. It used to really draw your eye now you have to look for it.
[img] 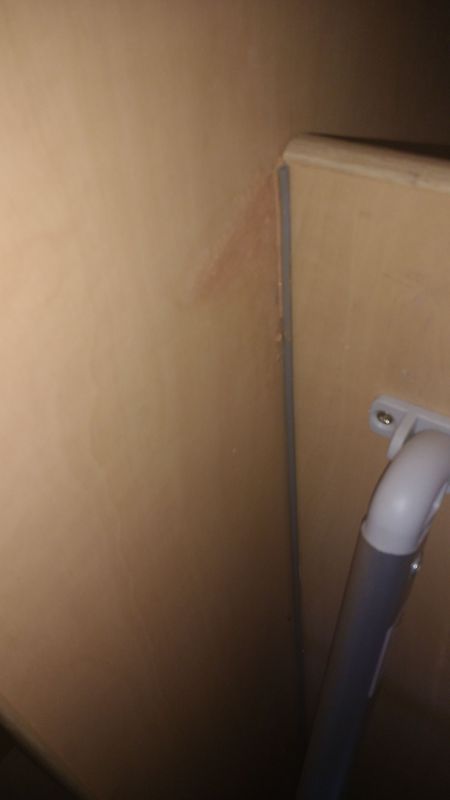 [/img]
So I came in for a cuppa
[img]  [/img]
Also spooky is what I want a double pole change over relay and a single pole change over one-off switch
That once I trigger the over ride that should stay latched bias to the leisure battery until I turn off the override switch and engage the engine but there's no risk of connecting the front battery to the rear if I forgot to turn of the over ride if I do it through the relay right ?
So you will take a permanent live off the leisure battery, and then behind the dash, break out a separate positive feed into the relay. The permanent and switched (relay out) then connect to the radio.
The existing vehicle switched live will head into the relay, and the permanent vehicle live will head into the over-ride switch. The output from the switch will re-join the switched live at the relay. Negative at the relay can also come off the existing radio loom.
The only risk I can see is if the relay breaks down and a large current tries to flow through it to equalise the vehicle and leisure batteries...I would just fuse everything as low as possible, presumably you could go for the smallest 1amp blade fuse for the vehicle feeds at the relay?
The only unknown is what else might get turned on when you feed 12v onto the switched live...might get some other items turn on. Hopefully nothing big like the air blower!
Edit: I just got a radio loom 'extender' off ebay, both male and female power and speaker plugs for less than £3. So I can just chop the lot in half and plug them in, leaving me with all the wires ready to solder up. Don't need to start pulling pins out of the existing plugs 🙂
In my camper I had two changeover relays, one for each the permanent and switched lives to the radio. Normally radio was powered via the van battery / ignition. Then an override switch in the back triggered the changeover relays so that both permanent and switched lives switched over to the leisure battery. The override switch being in the back meant I could switch the radio on/off from the bed. Remote control on the radio was also handy but didn't work from the bed as line of sight through the bulkhead window was required.
The leisure battery live behind the dash came from the split charge relay that I handily located in the engine bay next to the van battery right by a big cable grommet to behind the dash. The radio change over relays went under the dash behind the removable glove box compartment.
