Forum menu
Based on my previous post about advice on building guitars, a few people were interested to see how my build was going to progress.
So here's the very little progress I have made so far....
(I'll update as I go along, but it won't be fast going!)
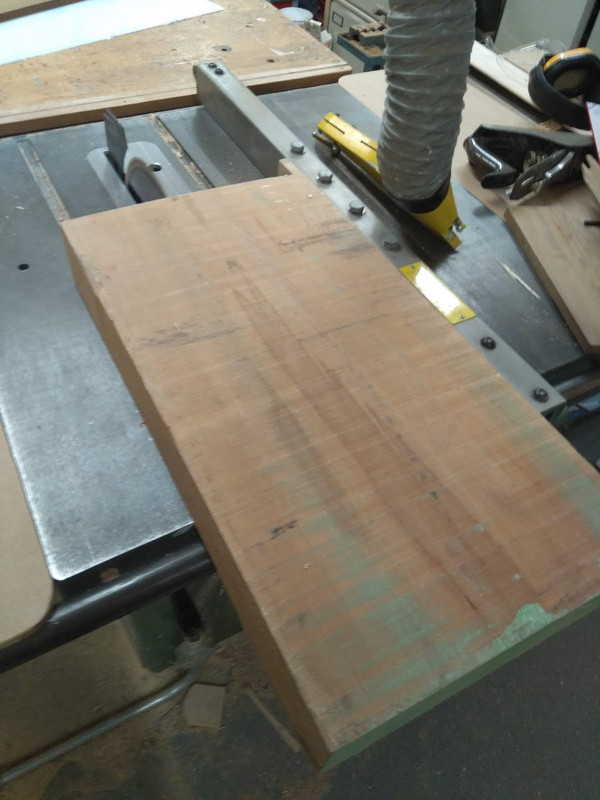
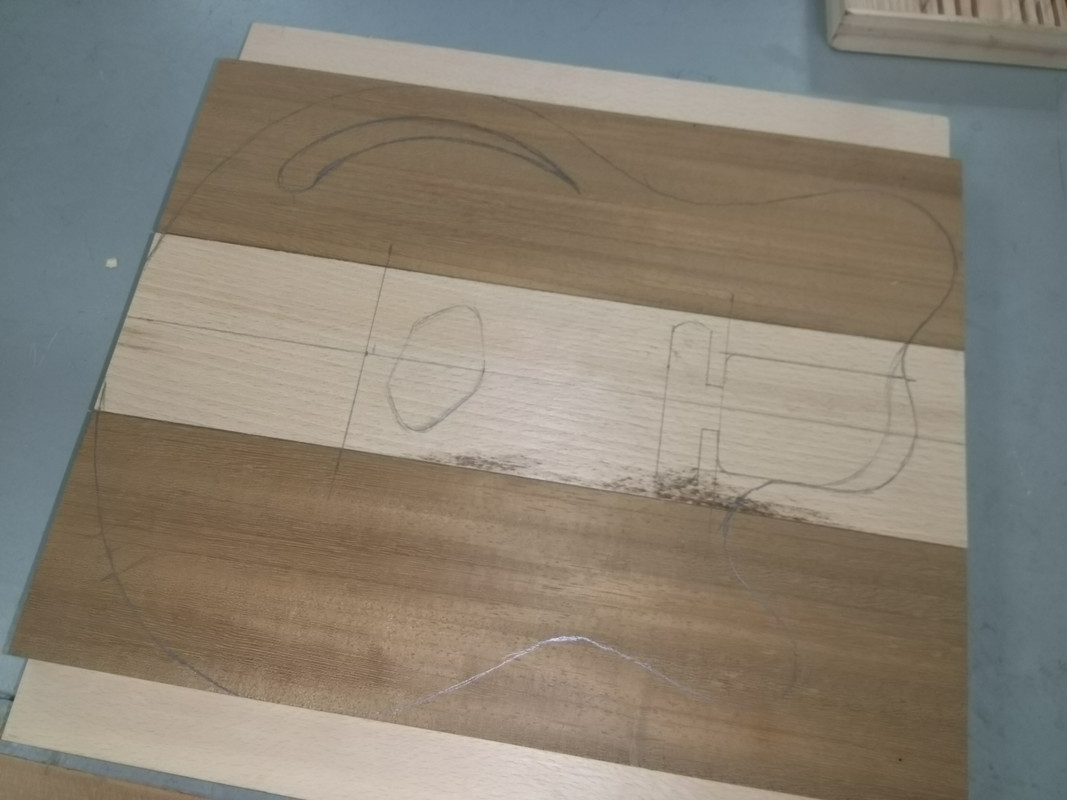
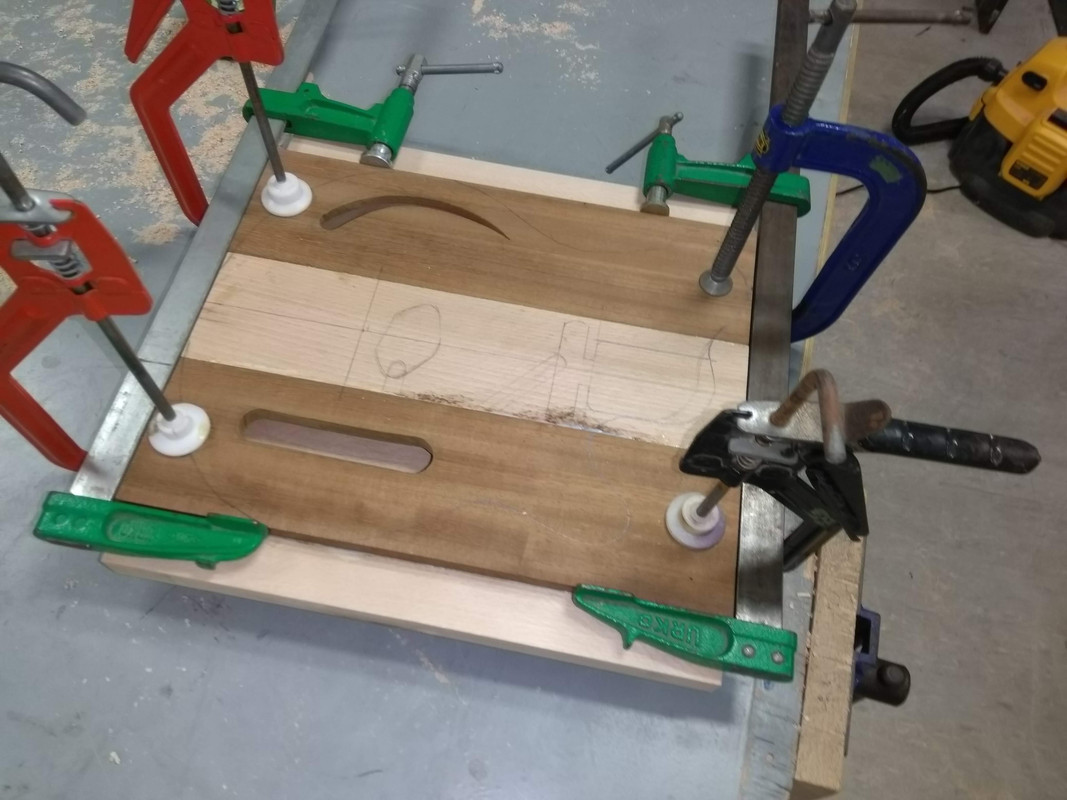
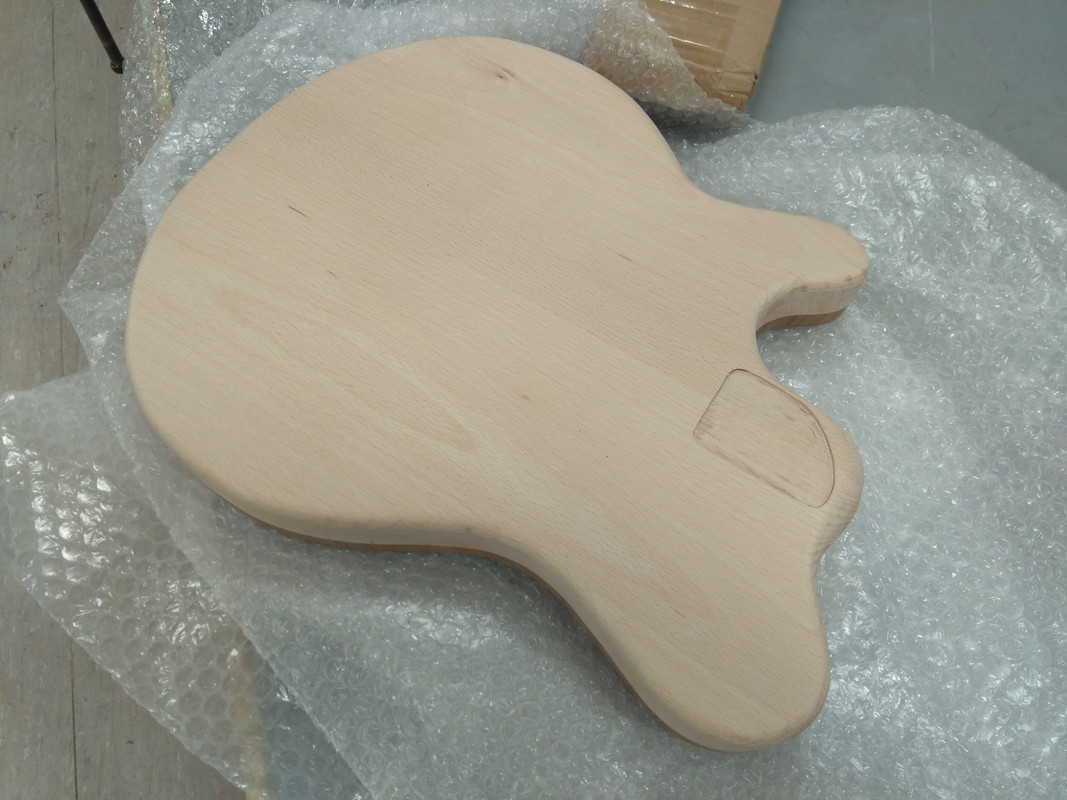
Found a decent size block of wood, and planed and cut to basic size for the base of the main body. Going to use some Iroko and Ash strips as a cap on the body.

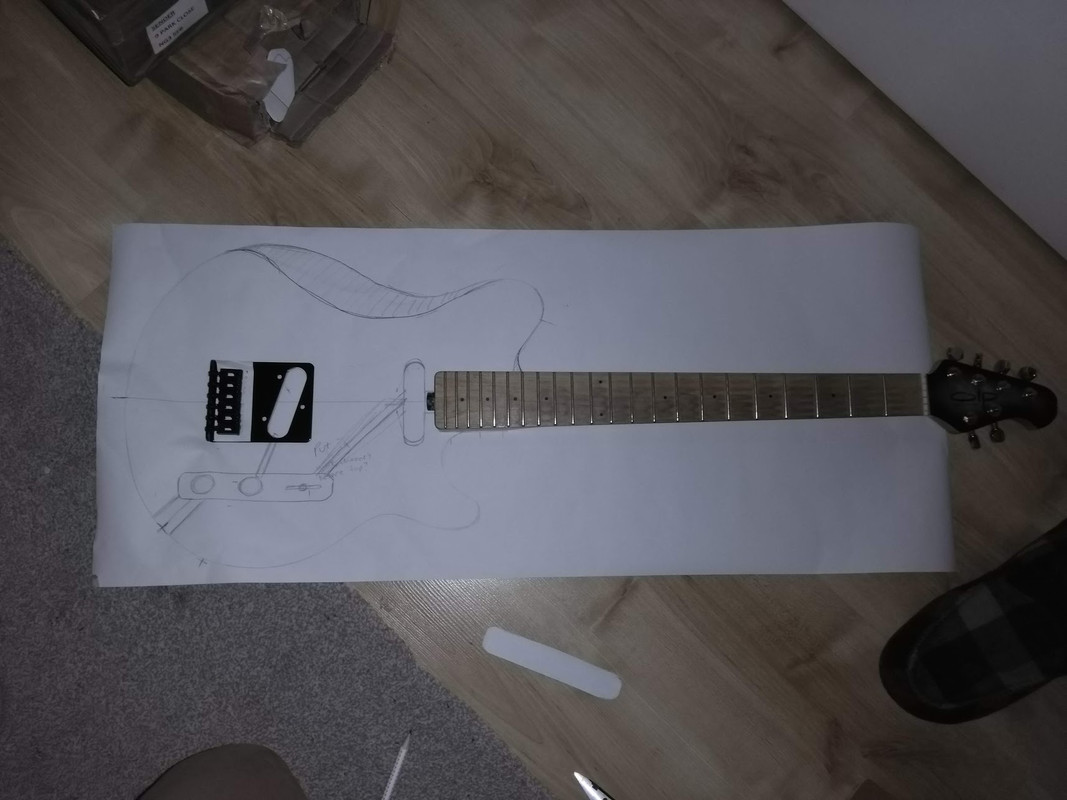
I've decided on a bit of a mashup style wise.
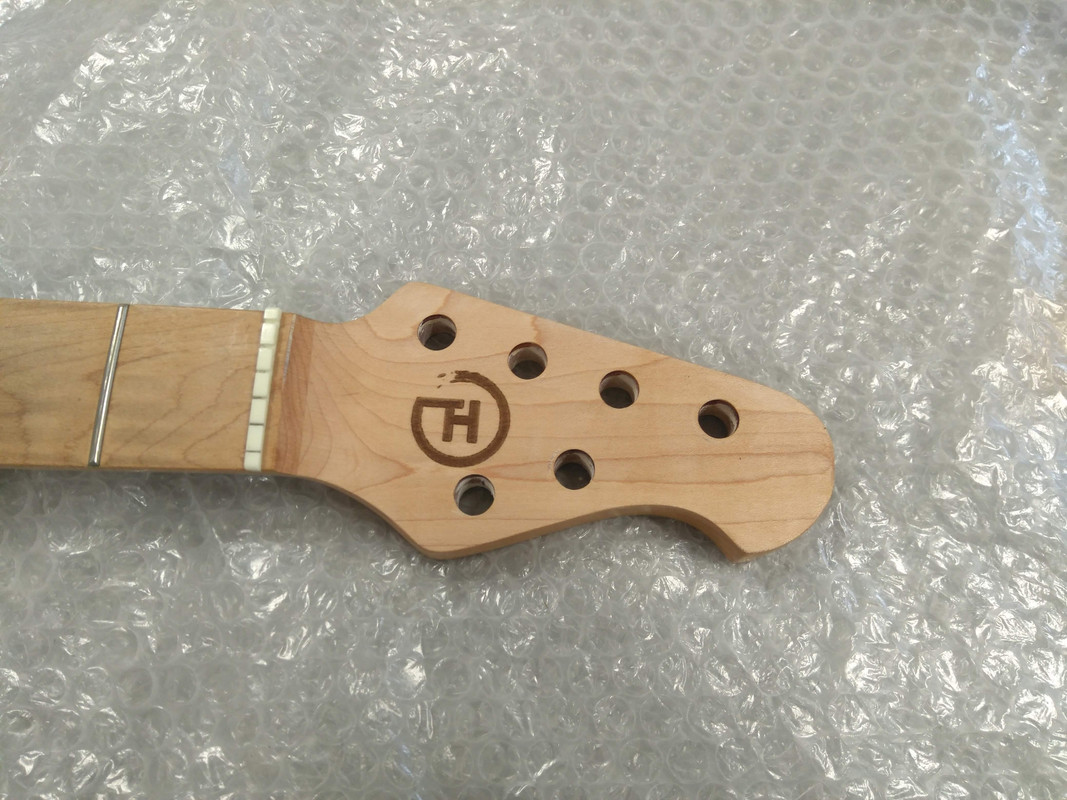
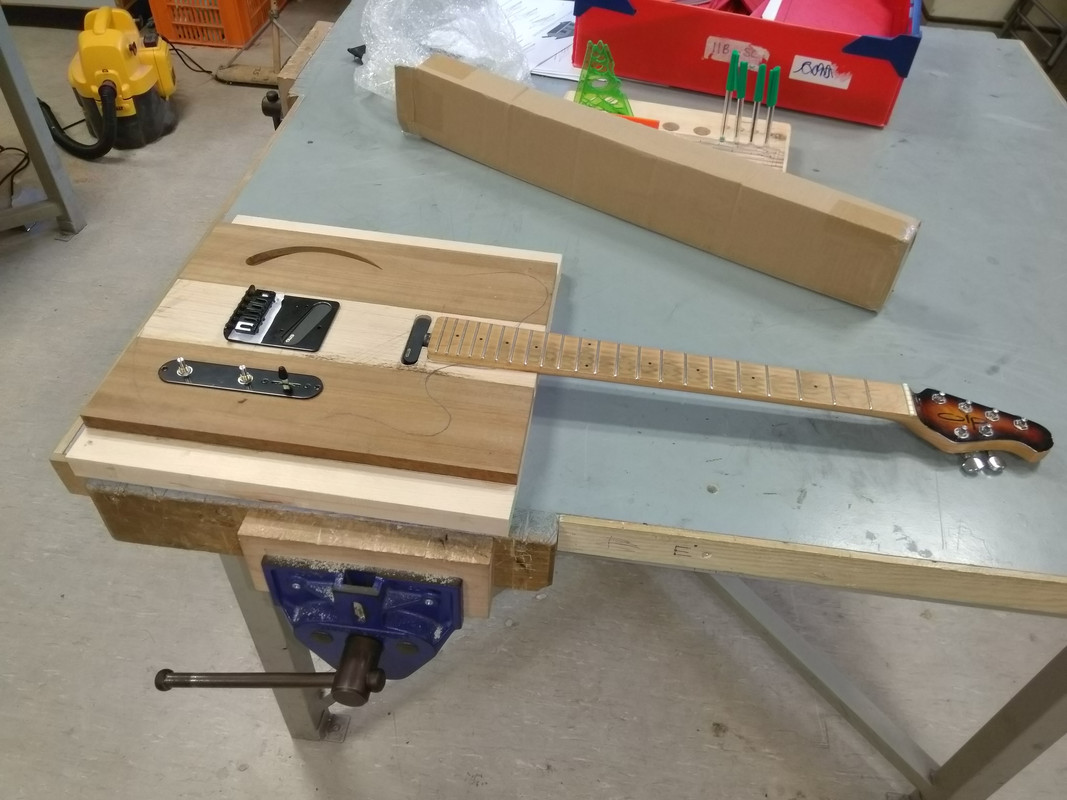
I'm using Tele hardware, but as I acquired a used but very nice Musicman Axis style neck (it'll do until I make my own neck - project Pt2!) and I've always loved the Musicman style bodies I'm using that as a template....so a Tele-Axis hybrid.
I like it. except the contouring that looks like its completely in the wrong place?
It's the back contour, but over-drawn.
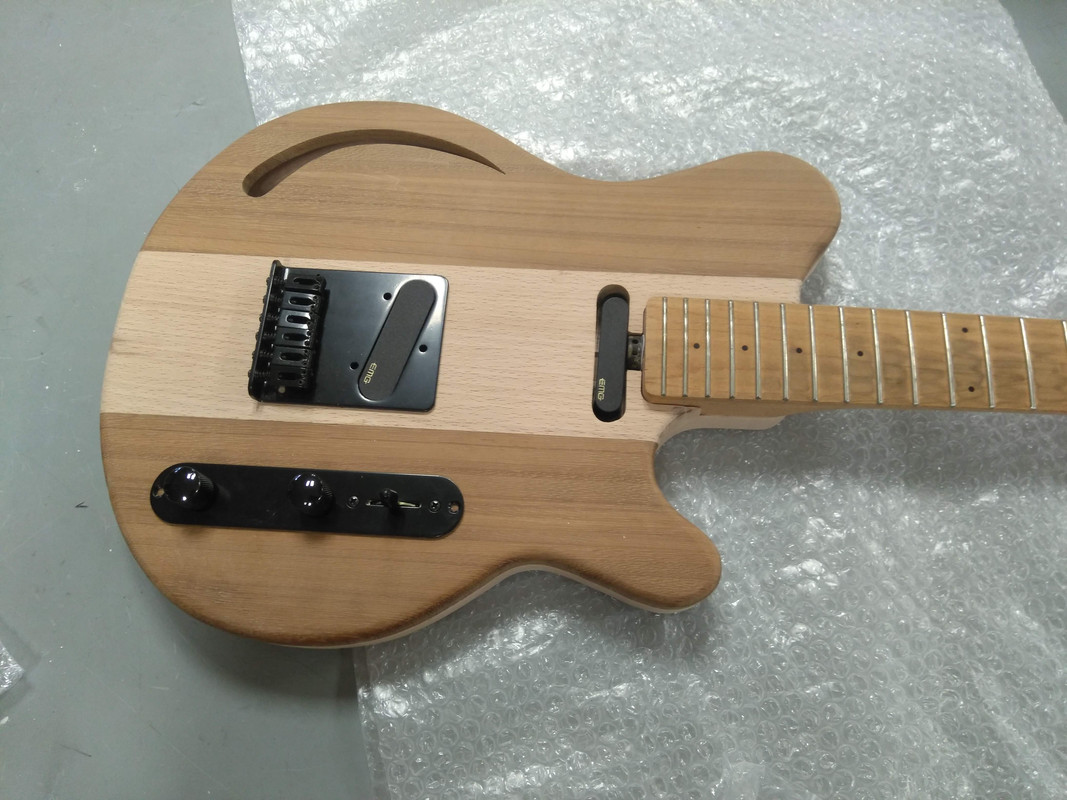
I've also ordered some nice EMG active Tele pickups, Single coil look and sound, but no 60 cycle hum 🙂
Awestrum 🤠
HA!
Yep that would make sense.
/LIKE/
Watching with interest - good luck with the build 🙂
Active pickups? That's a bit early 90s isn't it?
We've just replaced some EMG active pickups on a partscaster with some nice Fender Custom Shop pickups - looks and sounds a lot nicer IMO.
JP
Early '90s was my time man 😉
I had a go on a guitar with some of the EMG Tele pickups a while back and was very taken with the sound.
Bear in mind this isn't going to be a retro Tele, but a bit of a weird hybrid. I'm hoping they suit the build!
EMG Tele pickups a while back and was very taken with the sound.
With which amp and pedals? If you're worried about hum (or the scream you get with high output single coils with very high gain amps/pedals) then either Duncan or Fender N3/4 stacked single coils eliminate the hum but still sound like a telecaster.
ace ! Interested in seeing how you get on with the neck pocket and drilling the cable routing. I'm sure the EMGs will be fine, because it's hardtail the sound between the one you tried and your build shouldn't be that different
Good luck : )
Envious of your skills mate.
Interested in seeing how you get on with the neck pocket and drilling the cable routing.
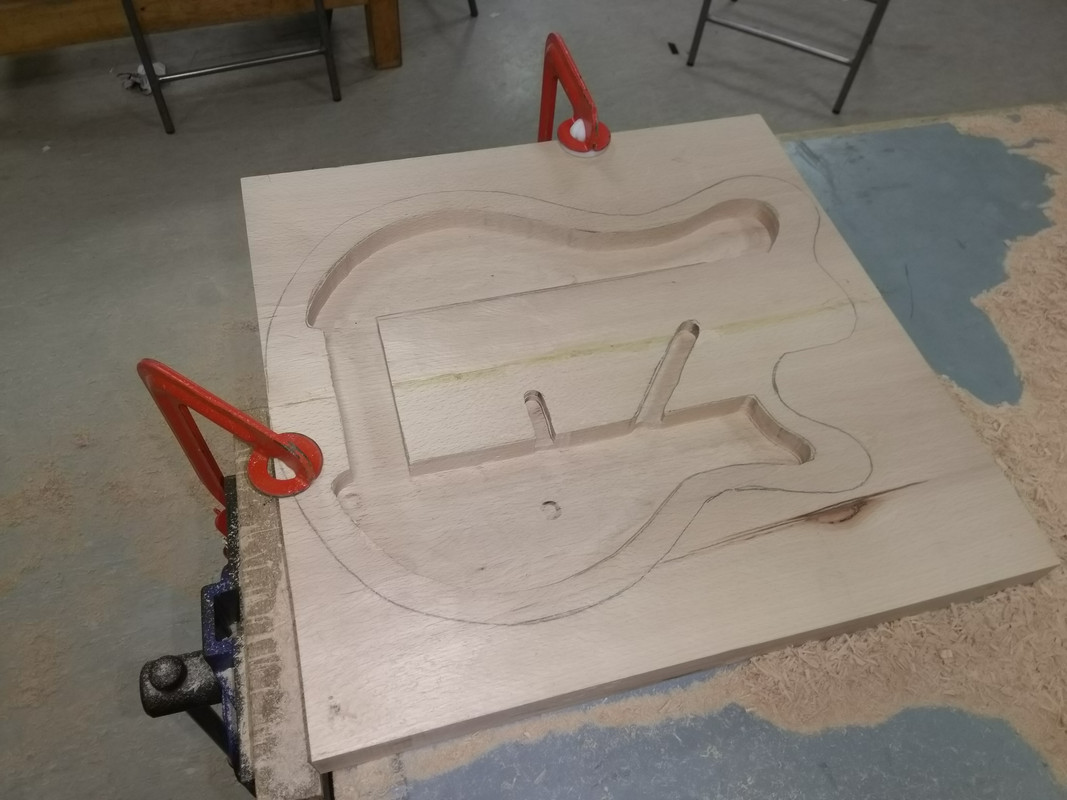
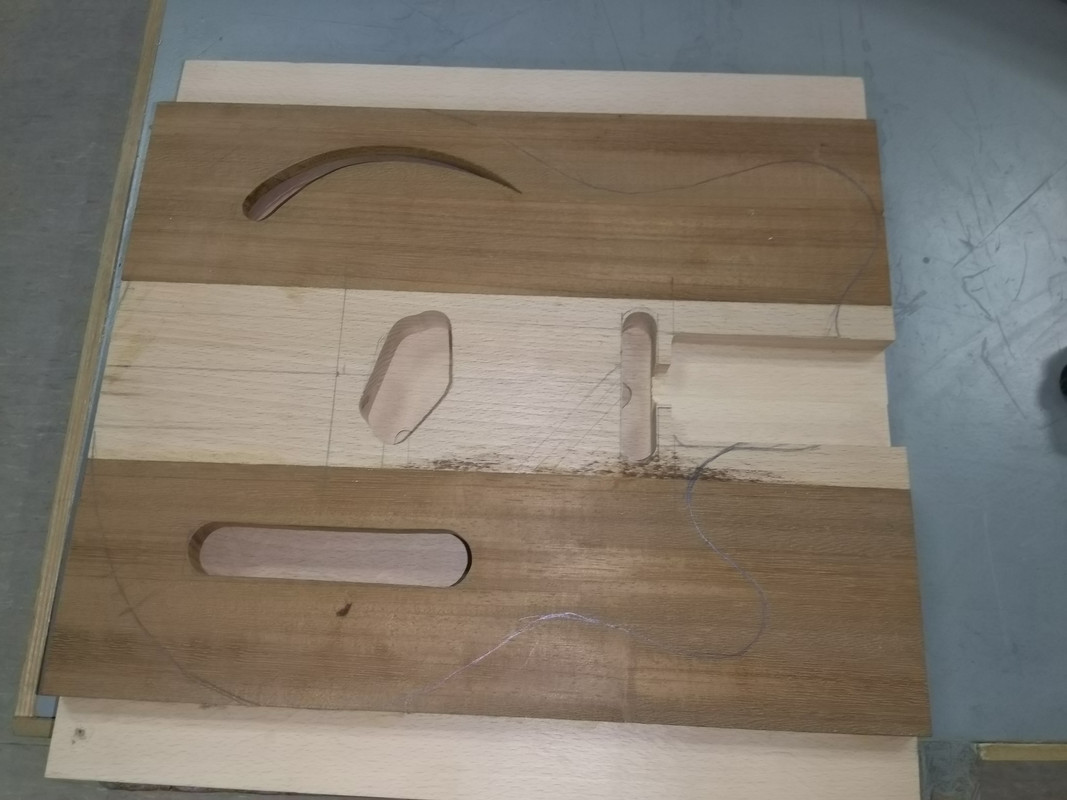
As I'm putting a top layer on the body I'm going to route out the cable routing first, so it's in place when I route the pickup and neck cavities.
I've got a plunge router, so as long as my templates are sound then it shouldn't be an issue (hopefully!)
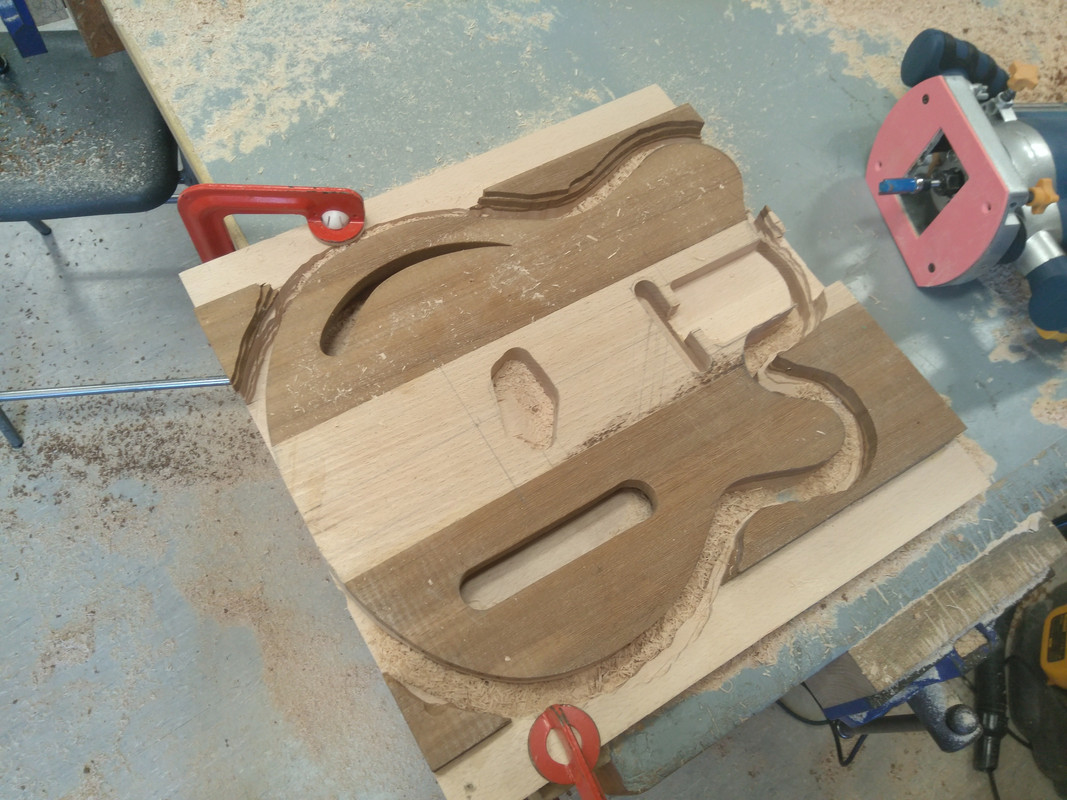
Slight change of plan, decided it's going to be a semi-solid body.
Gives me a chance to play with the router a bit more 😎
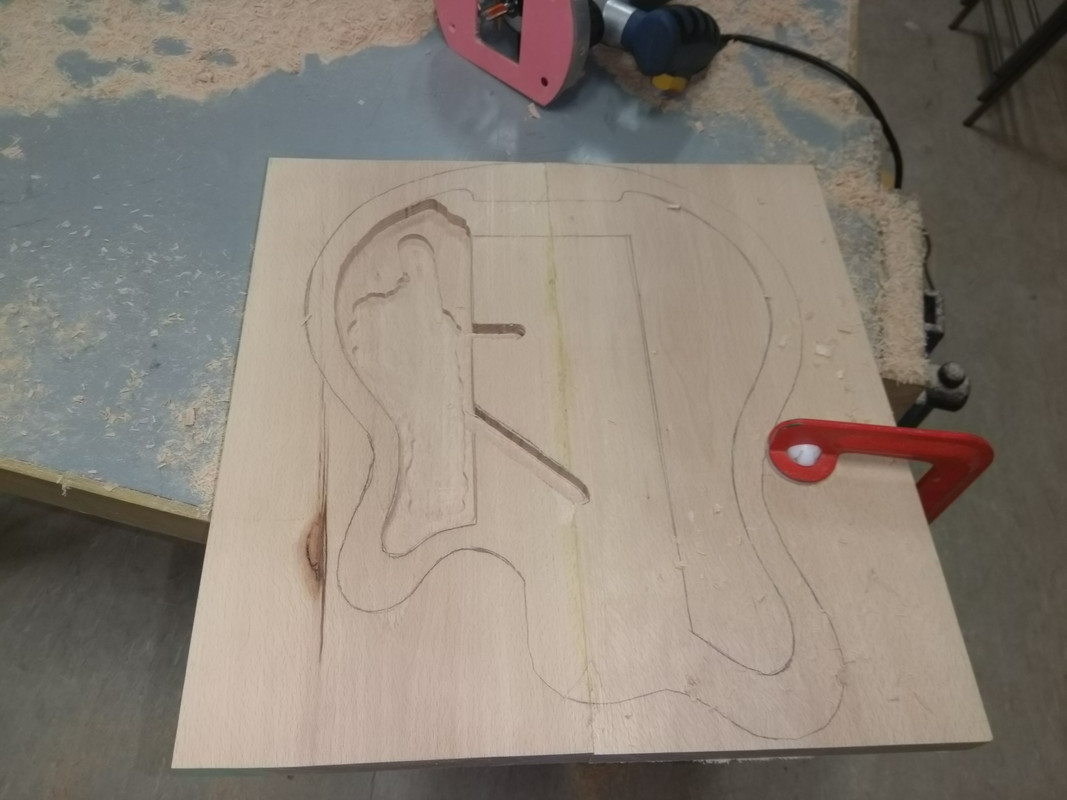
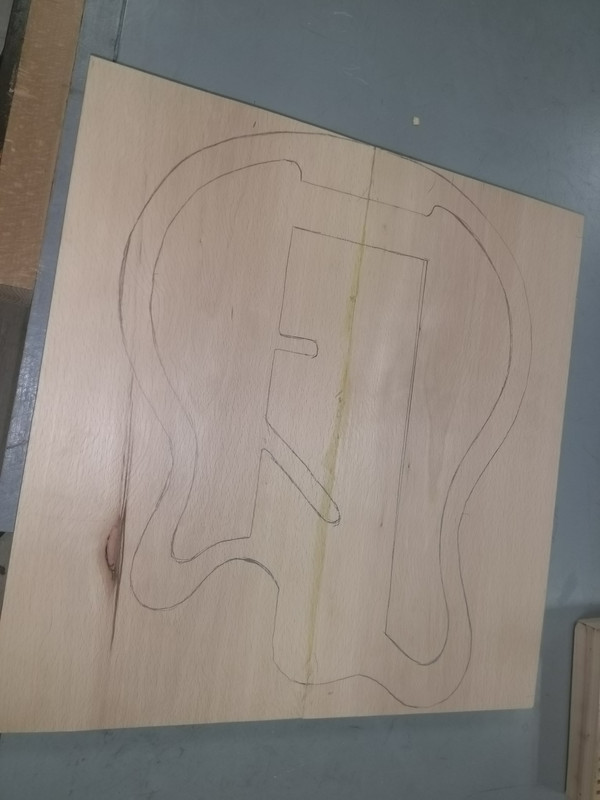
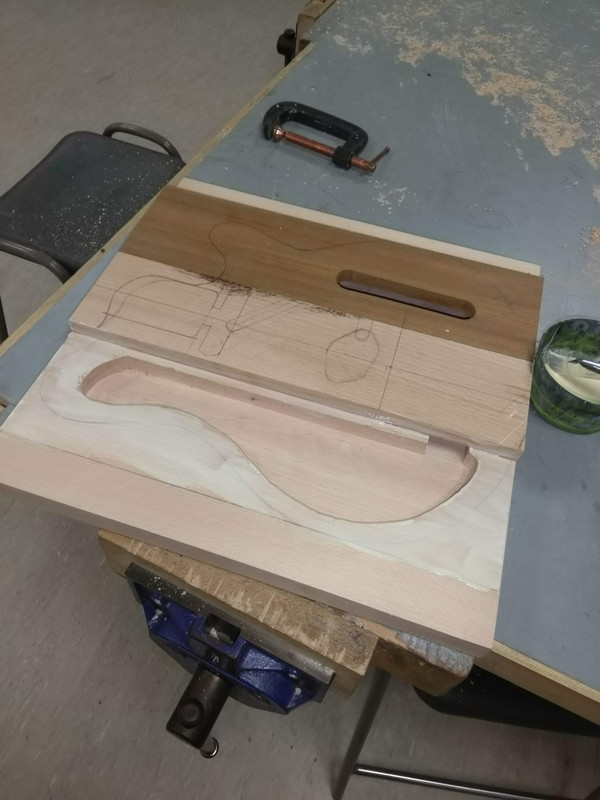
Body and cavity marked on wood.
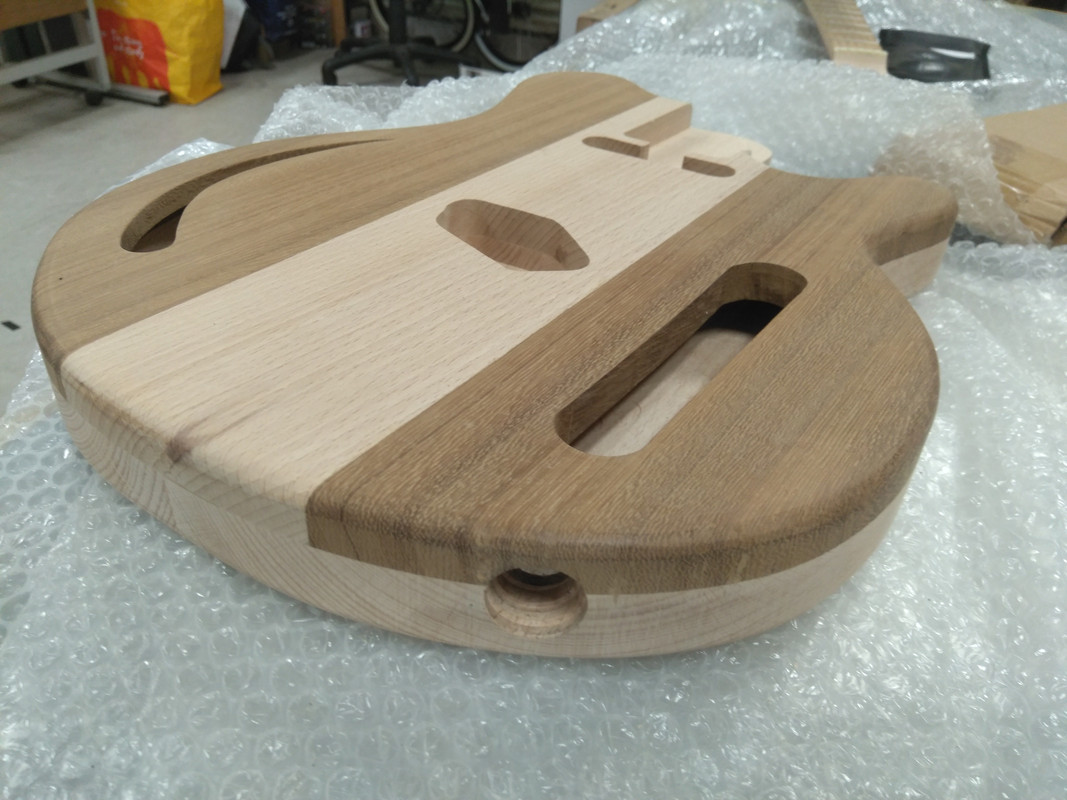
Top pieces planed and body + pickup cavities marked.
Routing has begun....
Niiiiice, adding a bit of technicality to your build.
Very neat, and I'm sure it'll sound brighter for it.
Quite pleased with that for freehand routing....

Had a bit more time today....
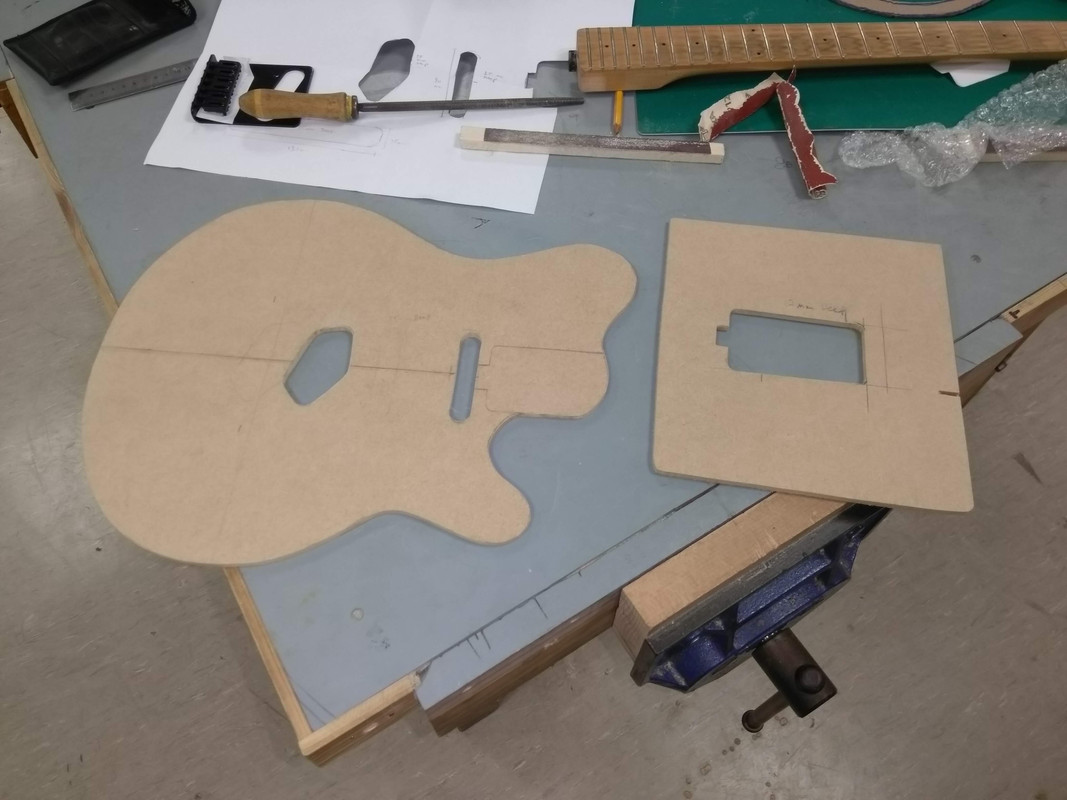
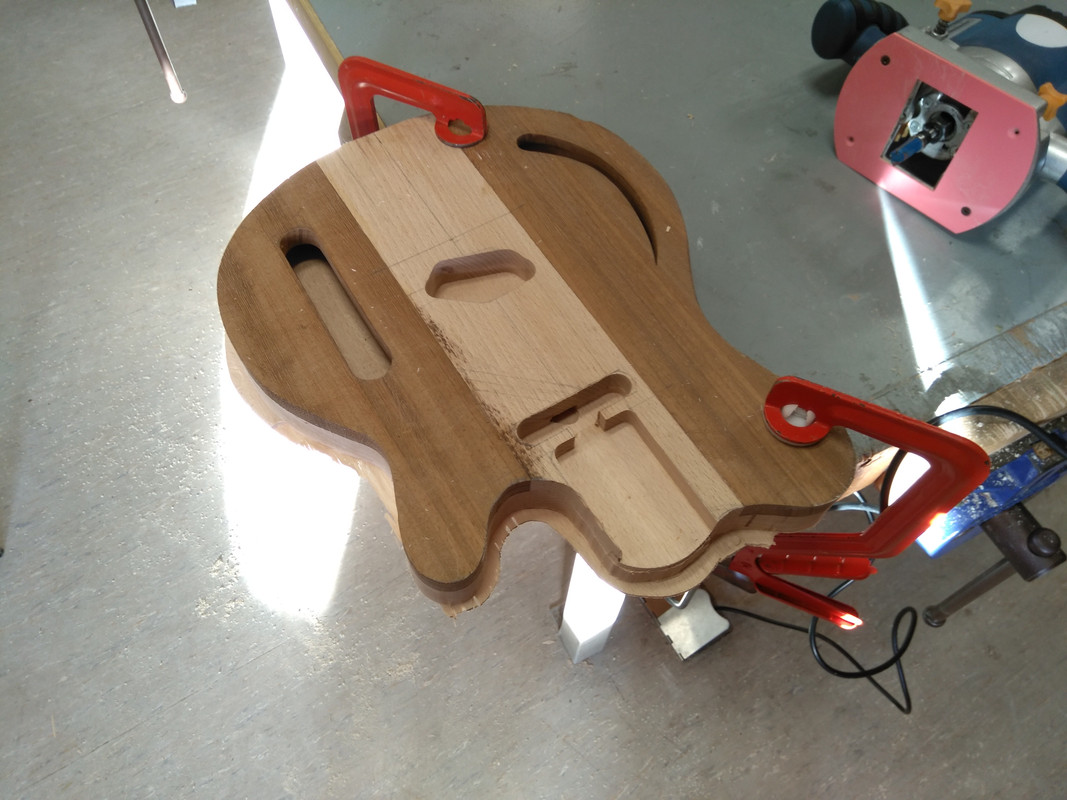
Made routing templates for the pickup cavities and the neck pocket, and glued the body.

Not enough spikes, but still, brilliant project. I like that big back contour, my weird cheap tele copy was a lot like that and it was really comfy
Before you cut the back contour try it without standing with a strap. I've got a blacktop tele with a contour but find the top of the guitar tips towards me which means the wrist is more bent which makes it less comfortable to play. I prefer just rounding the edge so it doesn't dig in under the ribs rather than a contour.
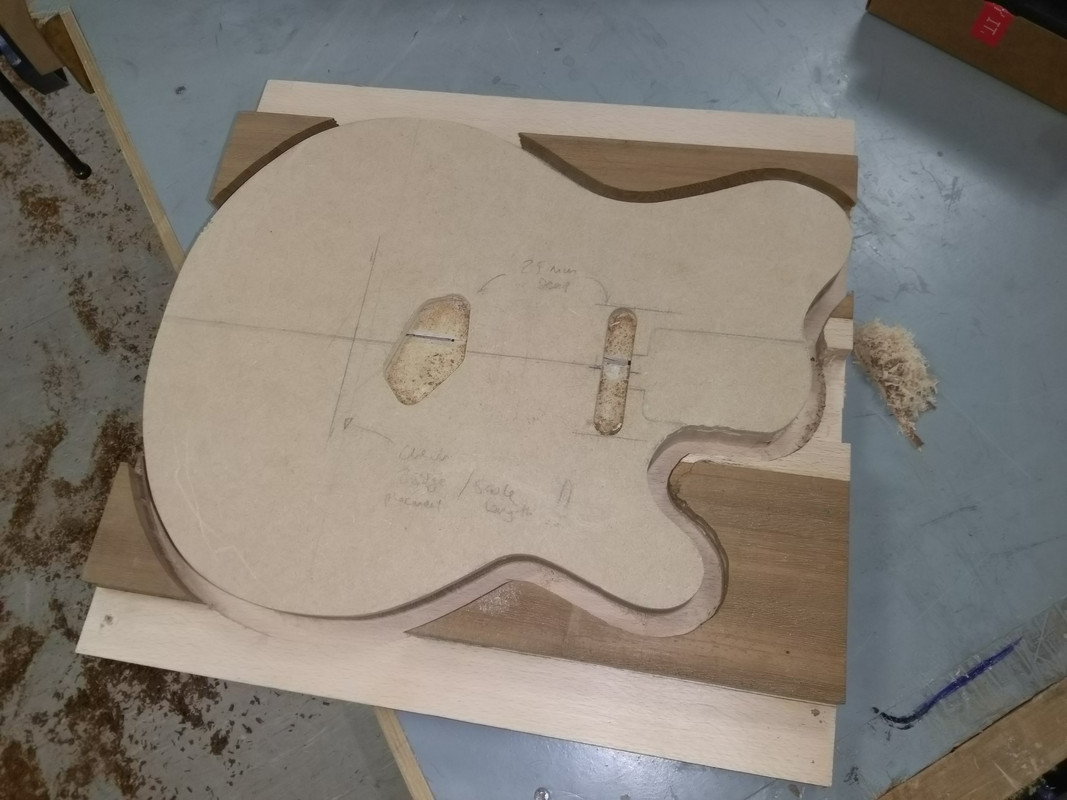
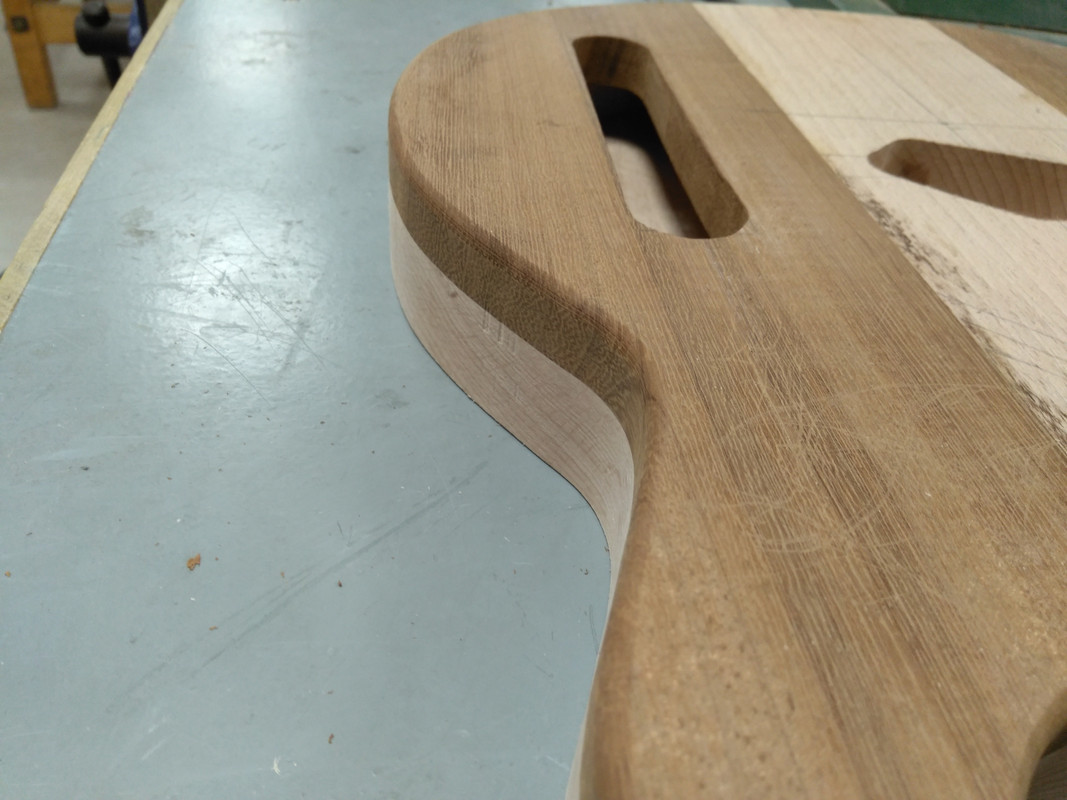
Actually I'm not sure the back contour as planned will work now due to the cavity.
I'll round off the edges, but not go as deep as I was planning.
Any ideas on painting it?
Currently my plan is to give it a really good sand (probably down to 1200/1600 grit) and then a wax and polish, or maybe a satin finish varnish. Something that will bring out the natural wood grain and colour.
(It's not like I'm making it up as I go along or anything 😉)
Nice work - keep it coming! 🙂
Something that will bring out the natural wood grain and colour.
Has Sir heard of Tru Oil?
No?
May I introduce Sir to a very large internet rabbit hole...
Tutorial / how-to from the person that posted the video
https://www.thefretboard.co.uk/discussion/235/
Look at Bruce Bennett's postings here:
And various threads on ReRanch
https://www.reranch.com/reranch/viewtopic.php?t=38192
Loads and loads of info and discussion on line.
I did my Firebird in Tru-Oil loosely following Bruce Bennett's method:
The guitar only needs to be sanded to ~240 grit.
First, soak the guitar with tru oil, wipe off and leave to dry 24 hours...
Apply 2nd coat of tru oil, rubbing in with 240 grit paper, then wipe off again and leave for 24h. It looks like this step takes more off than it puts on, but it fills the grain. It is also really hard work - it took about 3 hours to do the whole guitar, excluding breaks because my arm was knackered.
Apply 3rd coat of tru oil, rubbing in with 600 grit paper, wipe off & leave for 24h. (Here I found that Halfords waterproof paper is rubbish & falls apart in oil or water.)
4th Coat is rubbed in with 1200 grit paper (wipe off, allow to dry for 24h etc... etc..) and it starts to look shiny.
Then there is a coat wiped on with a cotton pad (wipe off, 24h etc... etc..) and it looks really, really shiny. I'd use a coffee filter to apply this coat now, rather than the cotton pad - it's much easier to get a streak-free finish, and it's what I used on the Tele neck.
[url= https://live.staticflickr.com/65535/49243522476_a4f8c7d62e_b.jp g" target="_blank">https://live.staticflickr.com/65535/49243522476_a4f8c7d62e_b.jp g"/> [/img][/url][url= https://flic.kr/p/2i2tVBA ]DSC_2381[/url] by [url= https://www.flickr.com/photos/40141861@N00/ ]tillydog[/url], on Flickr
I like the finish it gives - YMMV
Is Tru oil the same as Danish oil? Description looks similar (i.e. boiled linseed oil + additives).
I've used Danish oil on projects before, and you can get a lovely finish with a bit of elbow grease.
*Edit...had a quick read of the process he describes. Not far off what I've done before, though I like to get the wood really smooth (1200 grit w&d) before starting on the finish. I think it gives a better final shine.
I've already got a large bottle of Rustin's Danish oil, do I might give that a go.
I think Tru-Oil is a mixture of polyurethane and linseed oil. It's similar to Danish oil to use, but not the same - it builds more than DO and forms a sort of very thin, hard wearing lacquer. (I like Danish oil too, but I'm not sure it would stand up to wear and tear on a guitar body).
Looking forward to seeing what you come up with.
Getting there...
Neck pocket and pickup cavities routed, and started to route out the body shape.

Nice work. I built my own guitar a few years ago as I couldn't get what I was after for a sensible amount of money at all. I really enjoyed the process and there is a great feeling in playing something you built yourself. It's also really cool seeing people's faces when they ask where you got it and you say you built it.
There's a build diary here: https://www.thefretboard.co.uk/discussion/63903/now-complete-first-guitar-build-project-underway-project-diary/p1
and the finished product thread is here: https://www.thefretboard.co.uk/discussion/83655/ngd-custom-build-jaguar-strat-hybrid-inspired-by-john-squires-original/p1
Have fun finishing yours off
I've never so much as held a guitar, but this is a cool thread - keep it up 8)
Matthew_h, that really is a beauty. Fantastic thread, following with interest.
Yeah, that Jag-Strat is proper 😎
One of the nice things about doing a project like this at school (lunchtimes and a bit of after-school too) is how interested the kids are in it.
I had an audience of 5 yr10/11s whilst doing the routing yesterday.
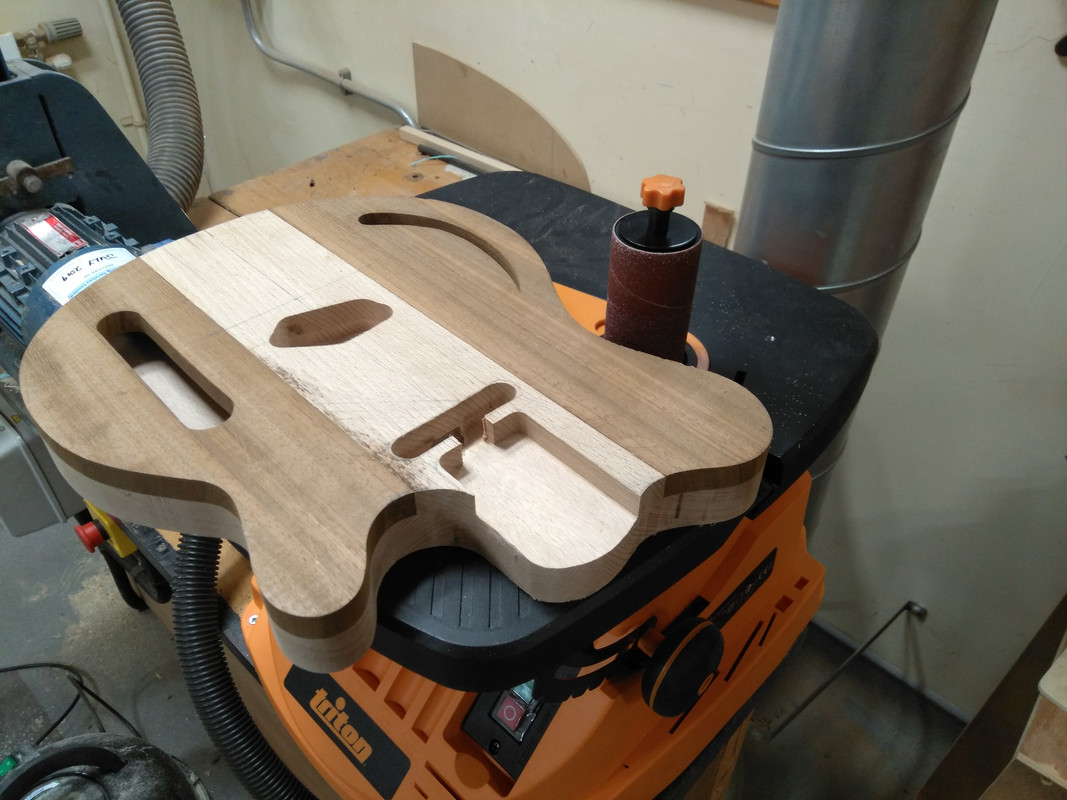
Finished off the body routing, quick shape and sand on the oscillating sander, and some edge routing.
Wasn't sure if I was going to curve the front edge or leave it crisp, but a slip of the router when cutting out the body decided it for me!
Lots of fine sanding now.

Looking good. Envious of your skills. All I ever did was bolt a bunch of Warmouth bits together.
Well the proof will be in the playing. It could still sound like a pile of poo!
Nice control on the routing if it was by hand. I always find that a little tricky to control
Nice 🙂
Hand routed, though using pattern bits with a bearing.
So as long as your template is good and you have steady hand it's not too difficult.
I always rush it though and try to take too much off per pass. Meant I got a bit of end grain pull out 🙁

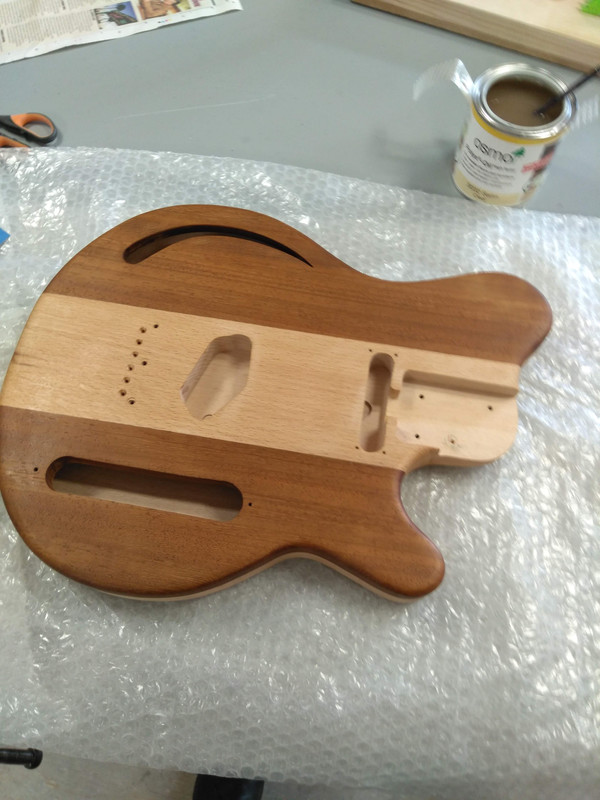
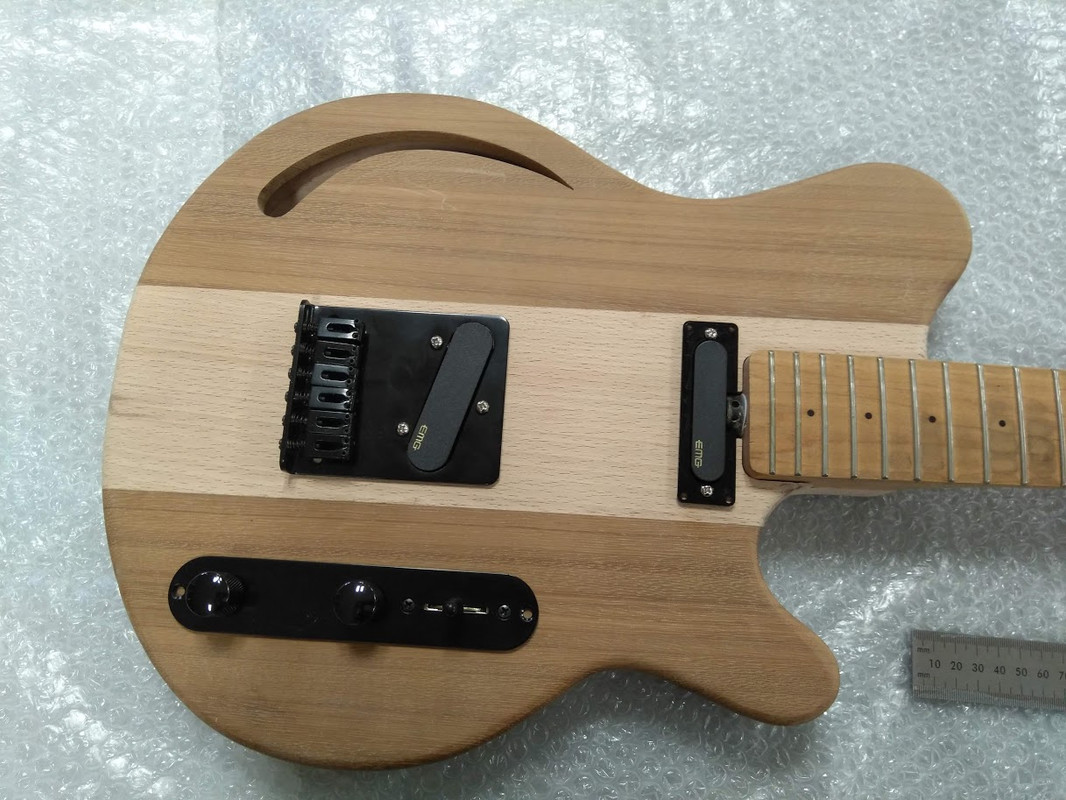
Getting somewhere now....
Bit more sanding and shaping and a mock-up with hardware.
Also laser cut a surround for the neck pickup, as I think it looks nicer.

Make loads, sell em...
I think EBMM might sue the shite out of me 😉
That's looks great.
Given that the control plate is further forward than on a normal tele I'd be tempted to put the switch at the back like a blacktop to avoid unwanted switching to the bridge pickup. It's a problem I have on Strats. I also wire Strats like a tele with just the lower two knobs, The standard Strat has no tone control on the bridge pickup which is really bright, tele wiring cures that too.
Stunning. 🙂
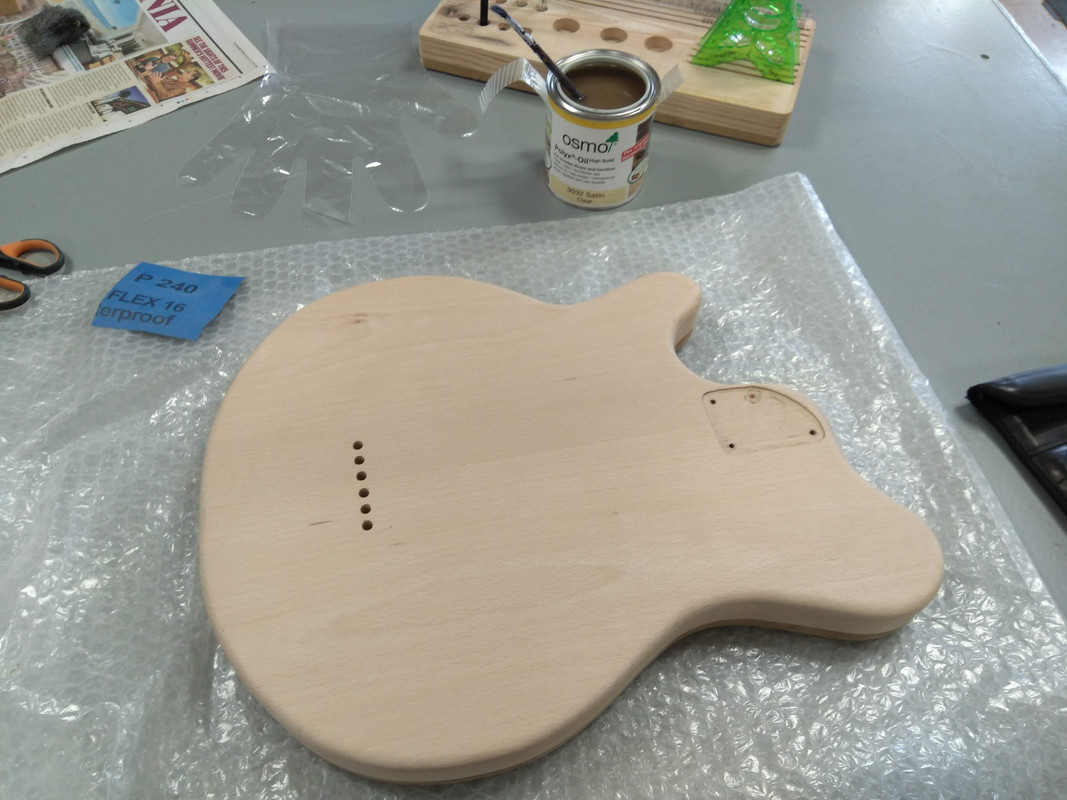
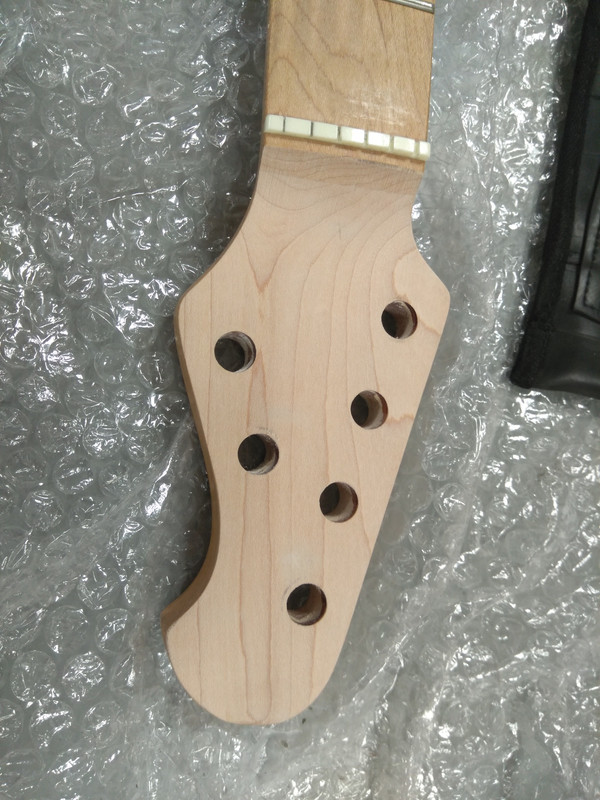
A little more progress.
Jack socket drilled, routed out for a recessed neck plate, and sanded off the head of the donor neck...
👍
Work's been busy, so only a little progress made.
Holes for hardware drilled, laser cut/etched logo on headstock, and started finishing with Osmo Polx Oil.
Wasn't impressed with the finish to start off with, but I'm up to 3 very thin coats now, and it's starting to look ace.