Kawasaki Ninja 1/12 by Tamiya – a work in progress:
I saw a modding video on that kit... blimey.
Ooh found it:
Wow
I’m calling this finished now:


Kawasaki Ninja HC-R in 1:12 scale, by Tamiya
I think that’s the first one I’ve finished this year. Built straight OOB
Really nice work. That and the Tamiya 1/32 Mosquito are the only things that appeal to me at the moment.
I spend far too much time watching this guys builds.
He did a standard jet kit just using the stock parts recently that was still amazing, but stuff like this is museum grade.
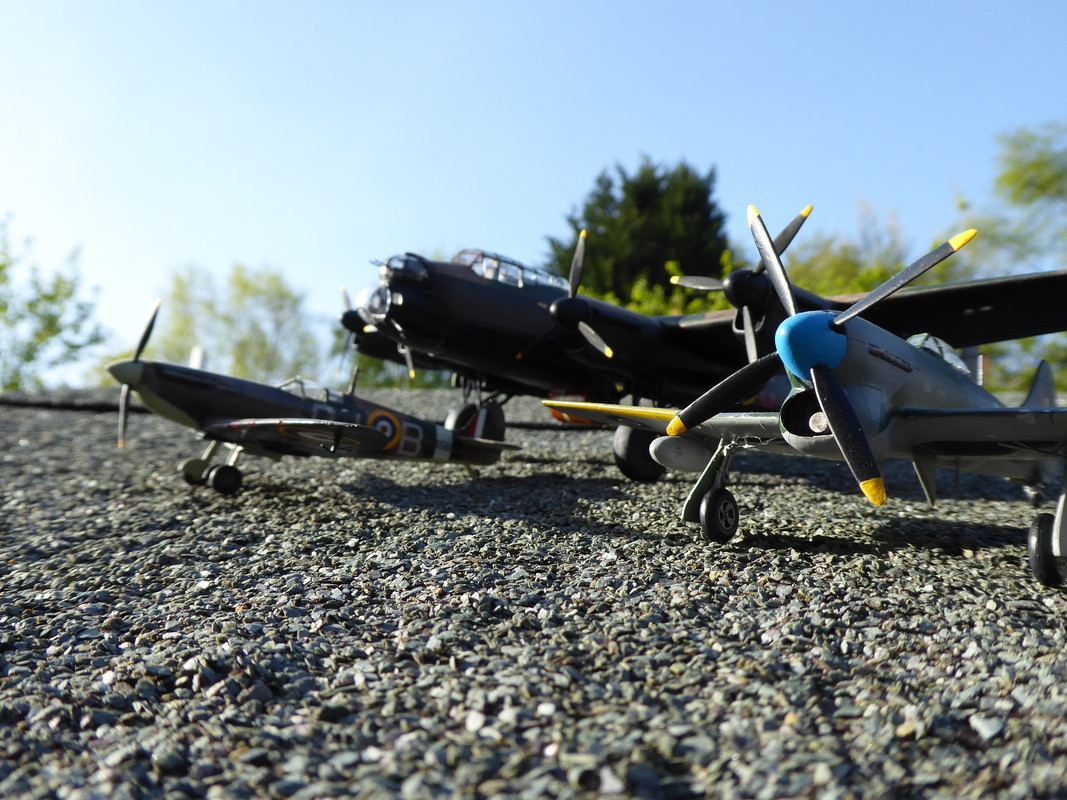
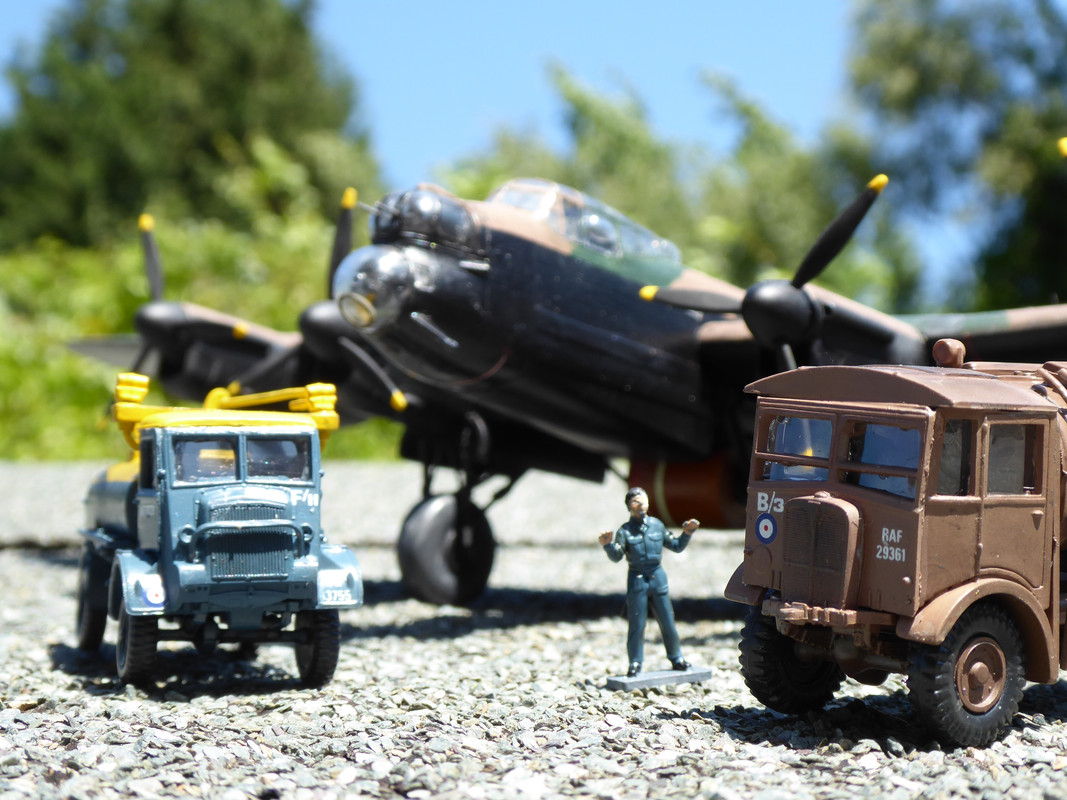
Guy Gibson's Lancaster.


Build thread https://www.britmodeller.com/forums/index.php?/topic/235068557-revell-dambuster/
Nice one. I remember that kit being launched back in the day. I think the bouncing bomb details were still technically classified for quite some time. I think it was Airfix that had to redesign their kit after the accurate details came out.
Guy Gibson’s Lancaster.
he's smaller than photos would suggest
It is the newer release, although I managed to lose half of my Upkeep so had to scratch build it.
Going to add a fuel truck and groundcrew.
That Lanc looks excellent.
Support your local model shop!
Mine is doing postal deliveries even though the shop is shut. Just put an paint order in as The Lancaster consumed a lot of greens and brown and my next build will be even bigger.
Mostly trains, but they stock Tamiya and Humbrol paints along with adhesives, decal setting solutions and so on.
The Locoshed, whitefield.
01617720103
Better pictures now that the wind has dropped.
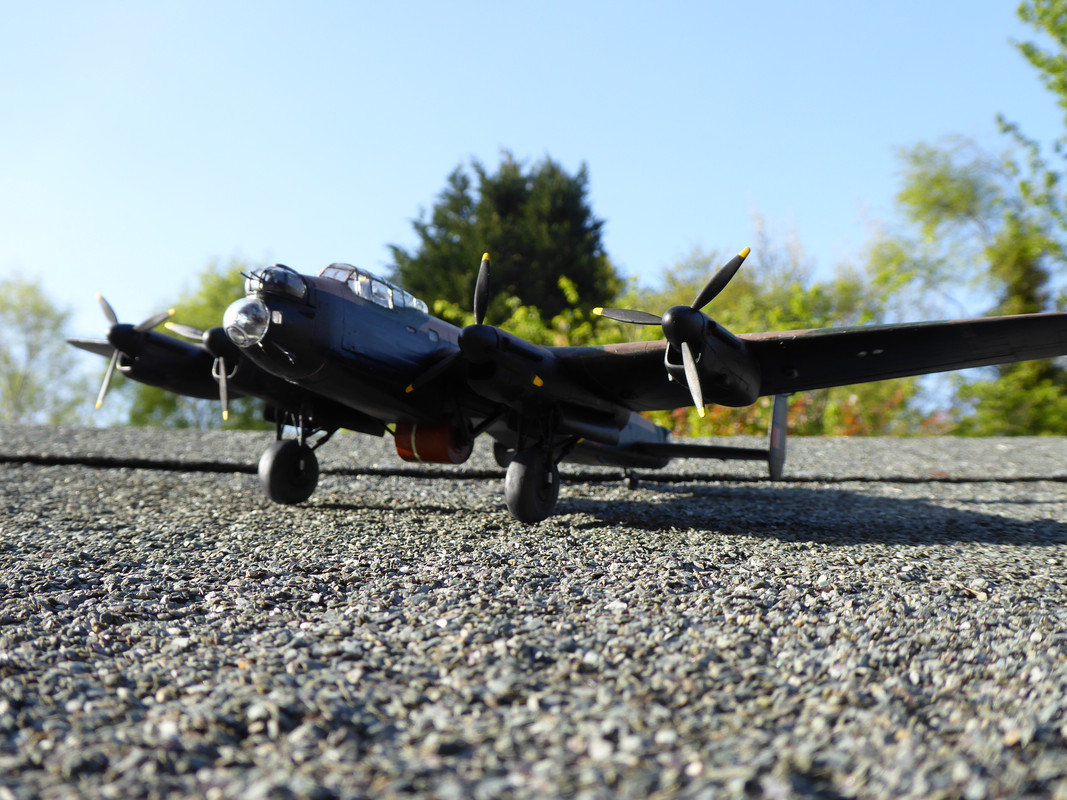
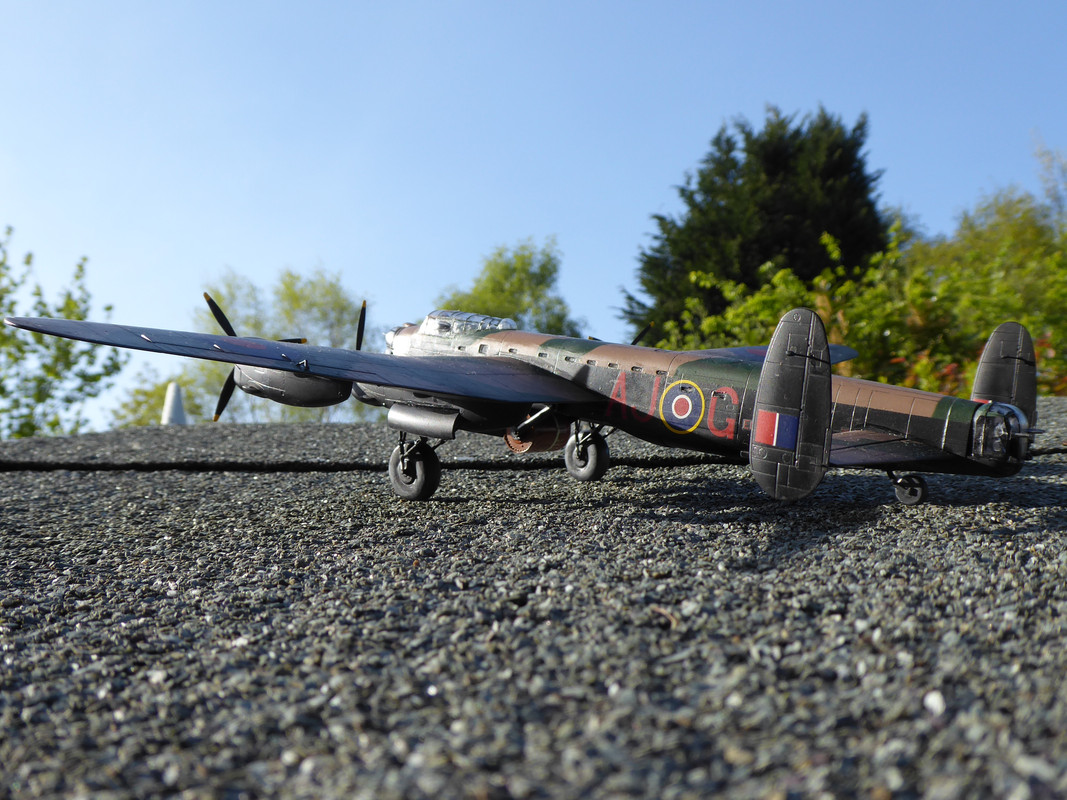
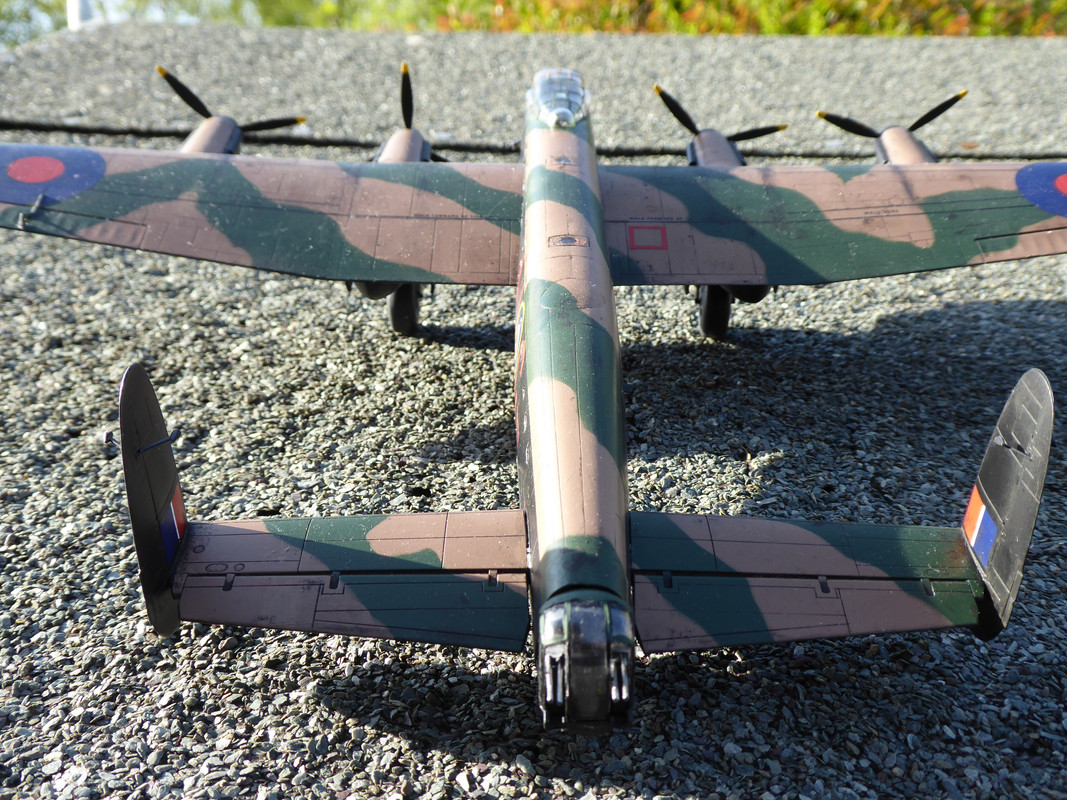
Truly great work HTS, the Lancaster is very, very well done. The exhaust staining, subtle variations of tone and the panel wash are all excellent.
All of a sudden, I'm a key worker as of the beginning of April so I'm still having to go into the office. This means that Project Dooleybird is going slowly. That vallejo metal stuff is truly excellent, it's pretty robust if given ample drying time and will turn dull, grey plastic into a pleasingly deep duralumin. I'm on a steep learning curve, so the unfortunate P-51 has been stripped of paint twice due to my own ineptitude but perseverance has got me to a point that I'm now spraying light aluminium and dark aluminium to give tonal variation and sparing use of Tamiya Smoke along the panel lines to give the panels dome depth.
Thanks. Flory dirt wash and Tamiya pastels are difficult to get wrong!
Nice work Harry! Agree ref the local model shop - mine is Halifax Modellers World and it’s an awesome shop. I tend to try to stick to only going in for consumables now though as I have a huge stash and no time!!
What witchcraft is this? I actually have something I can share? Impossible, yet here it is!
[url= https://live.staticflickr.com/65535/49902696772_be486f6f14_4k.jp g" target="_blank">https://live.staticflickr.com/65535/49902696772_be486f6f14_4k.jp g"/> [/img][/url]
[url= https://live.staticflickr.com/65535/49901875343_23d56cb68c_4k.jp g" target="_blank">https://live.staticflickr.com/65535/49901875343_23d56cb68c_4k.jp g"/> [/img][/url]
[url= https://live.staticflickr.com/65535/49902696757_4d70b2b15a_4k.jp g" target="_blank">https://live.staticflickr.com/65535/49902696757_4d70b2b15a_4k.jp g"/> [/img][/url]
[url= https://live.staticflickr.com/65535/49902696797_fa323744dc_4k.jp g" target="_blank">https://live.staticflickr.com/65535/49902696797_fa323744dc_4k.jp g"/> [/img][/url]
In the past couple of years I have been sidetracked from scale model kits as I got back into another childhood hobby of mine, wargaming. Instead of building and painting scale models, I've been building and painting sci fi and fantasy soldiers (well more building than painting, but I have painted a few).
After my last big wargaming project I decided to do something completely different so I pulled this Tamiya 1/48 M1A2 Abrams out of my disturbingly large stash and had a go at it. It is a very nice kit, as you'd expect from a modern Tamiya kit it goes together like a dream, so any ugly bits are my fault and not the kits.
Nice. It looks real, and that is as good as you can get.
Thanks! It was a nice change of pace from the spooky undead models I was painting up beforehand. I had a go doing preshading and it had some effect but by the time I'd airbrushed on enough of the main colour to get the average colour looking about right, most of the difference between the light and dark preshaded bits had been lost. Also, I have painting the tyres on road wheels!
Here's some of the not-quite-appropriate for this topic undead I painted up before I built the tank:
[url= https://live.staticflickr.com/65535/49871258248_406dfd0e5c_4k.jp g" target="_blank">https://live.staticflickr.com/65535/49871258248_406dfd0e5c_4k.jp g"/> [/img][/url]
[url= https://live.staticflickr.com/65535/49871777031_e95c83a2b6_3k.jp g" target="_blank">https://live.staticflickr.com/65535/49871777031_e95c83a2b6_3k.jp g"/> [/img][/url]
@ChrisL- the figures are stunning. I sued to do a bit of WH40k stuff back in ye day, but nothing like that!
Anyway - another one done. Airfix Blenheim MkIV F. Kind of an irritating kit - the main bulk of it moulded to extremely tight tolerances, so getting it to fit was hard work, but ultimately successful, but a lot of the silly little ancillaries like aerials are just "glue on where you feel like" - no pins or sockets, even when trying to fit a flat edge to a curved surface. I was a bit sloppy on the masking too in places, but it doesn't look too shabby.
[url= https://live.staticflickr.com/65535/49908792502_0c2cb36bb4_b.jp g" target="_blank">https://live.staticflickr.com/65535/49908792502_0c2cb36bb4_b.jp g"/> [/img][/url]
[url= https://live.staticflickr.com/65535/49908793812_520a0fc9cf_b.jp g" target="_blank">https://live.staticflickr.com/65535/49908793812_520a0fc9cf_b.jp g"/> [/img][/url]
[url= https://live.staticflickr.com/65535/49908814292_58551a0026_b.jp g" target="_blank">https://live.staticflickr.com/65535/49908814292_58551a0026_b.jp g"/> [/img][/url]
[url= https://live.staticflickr.com/65535/49907977633_f1453e6077_b.jp g" target="_blank">https://live.staticflickr.com/65535/49907977633_f1453e6077_b.jp g"/> [/img][/url]
[url= https://live.staticflickr.com/65535/49907976728_bd05535b05_b.jp g" target="_blank">https://live.staticflickr.com/65535/49907976728_bd05535b05_b.jp g"/> [/img][/url]
[url= https://live.staticflickr.com/65535/49908493071_6706067188_b.jp g" target="_blank">https://live.staticflickr.com/65535/49908493071_6706067188_b.jp g"/> [/img][/url]
Thank you for your kind words. 🙂 I really like your Blenheim too, though even the thought of having to mask all its cockpit transparencies gives me the heebie-jeebies!
Nice Blenheim! I like the shading on the upper wing camouflage, how did you do that as I've failed miserably several times?
@ChrisL - Eduard mask kits FTW!
@spursn17. A bit long winded I'm afraid:-
Prime
Preshade the panel lines in black, preshade the middle of the panels with a fairly mottled white.
Spray the brown (lots of dilute coats until you get the correct level of preshading showing through)
Mask
Top up the preshading, both black and white, on the non-masked areas
Spray the green. (lots of thin coats as before)
Pull off the masking, hoping the paint stays attached to the plastic, not the tape!
Yep, done all of that. Still looks pony! 😂
The first one that I've ever entered in "competition".

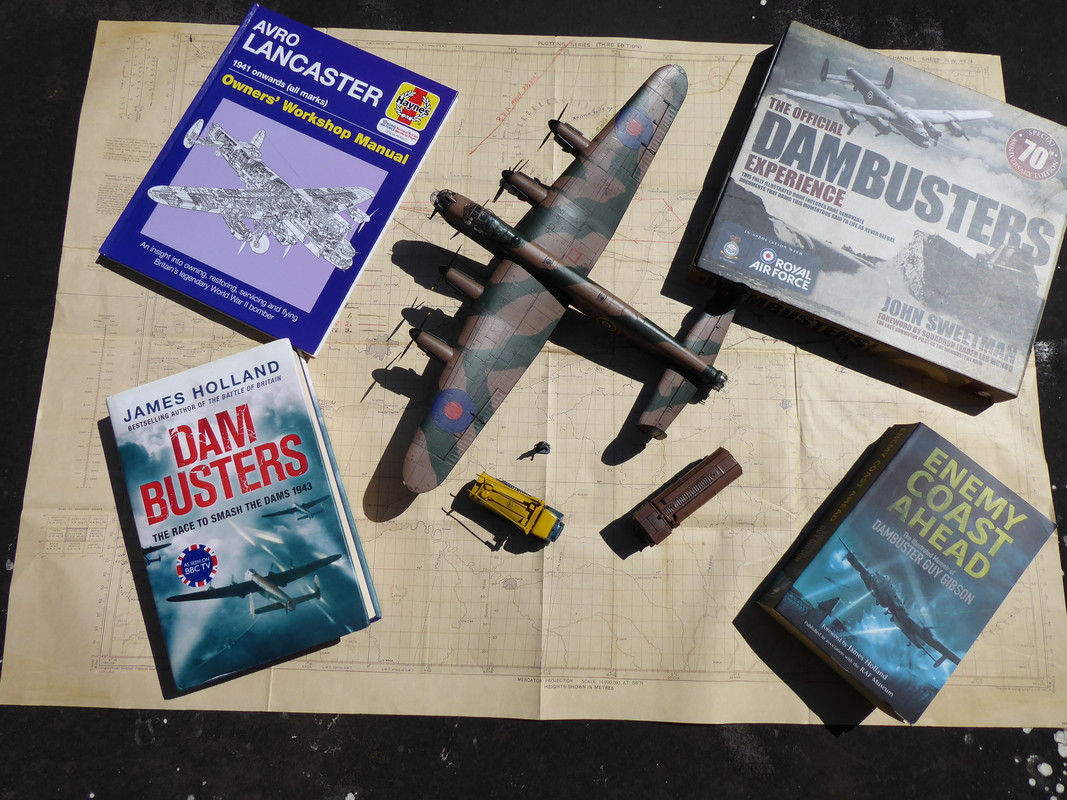
Gallery of Lancasters.
https://www.britmodeller.com/forums/index.php?/topic/235068390-avro-lancaster-stgb-gallery/
Build thread.
https://www.britmodeller.com/forums/index.php?/topic/235068557-revell-dambuster/
Got a free(ish) weekend and a huge stash of kits so I grabbed this.
...then changed my mind, put it way again and grabbed this instead.
Well I’ve only gone and started work on my 1/35 Miniart T-54 ; only 1030 Pieces to put together. Done about 4 nights of 2-3 hours at a time. So far I’ve built the engine and the suspension, plus a bit of the interior, doing about 1 page at a time.
Suspension is a working torsion-bar set up. Well, mostly working. The front- and rear-most set of road wheel suspension pieces on each side sadly are now fixed due to over-exuberant application of Tamiya liquid cement 🙁
Here’s the listing at Model Hobbies: https://www.modelhobbies.co.uk/miniart-135-t-54b-soviet-tank-early-production-interior-kit--37011-90367-p.asp
Come to a bit of a standstill now, I need to paint the interior but the Revell Blue-Grey Aquacolour I was going to use has dried up. Now have to rely on online ordering & Royal Mail, shame I can’t just pop into Hobbycraft or my LMS
Whoa! 1030 pieces - that’s radio rental! How on earth do you find and keep track of all the right pieces?! Your bench must be far more organised than mine 😀
1030 parts?!
You need to post up a progress picture or two of that!
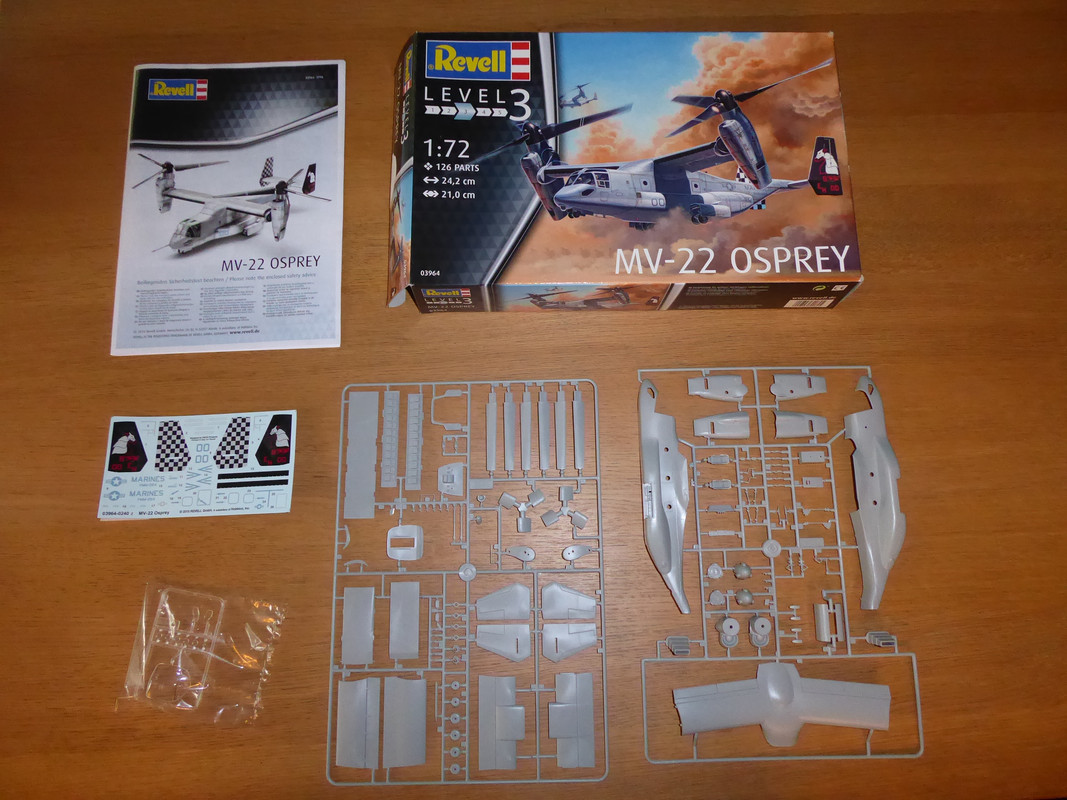
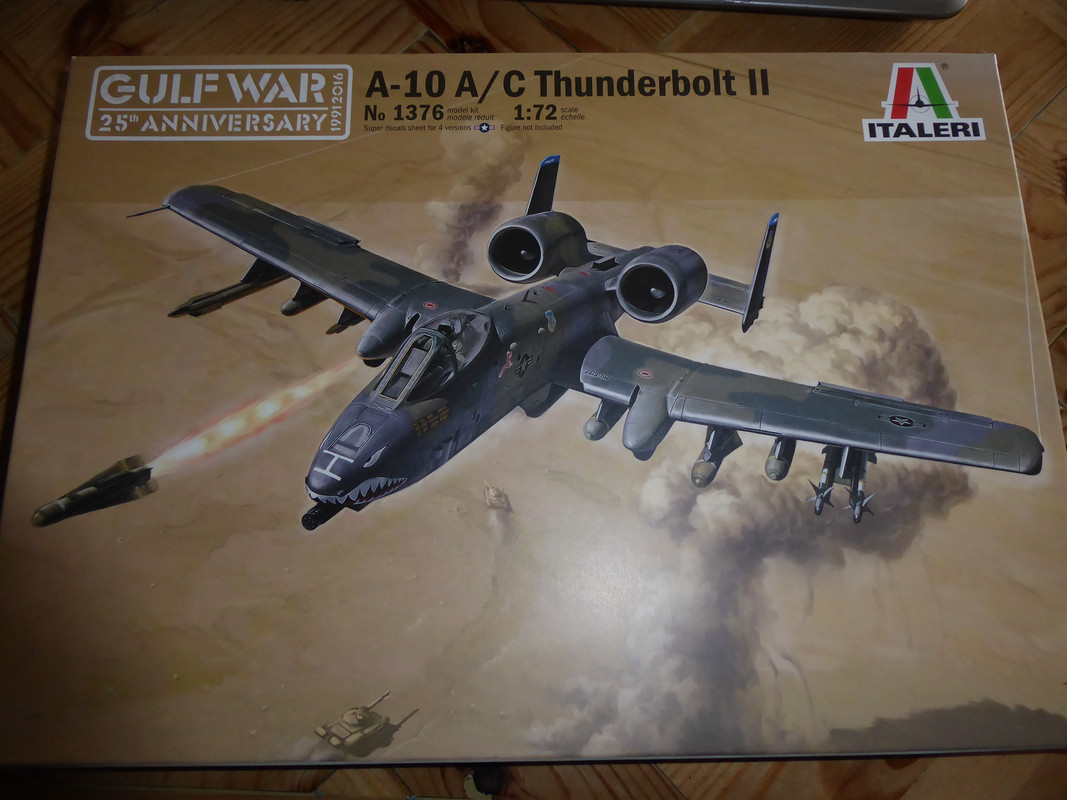
I've got the Osprey too. Also got a Chinook on the way for Fathers Day and about to pull the trigger on an A10. It's the Revell version though. Also got a Fairey Swordfish stashed away somewhere. Probably wait until the autumn before starting up again though. Plenty outdoors stuff to be getting on with.
Ooh a Stringbag. Good luck with the rigging
The box:

The manual - 24 pages plus colour instructions:

Contents:

Track links. There are 10 of these sprues:

Road wheels - 10 or so of these sprues. I think I have a choice of which type of wheel:

The engine:


Driver’s seat:


The hull interior (so far):

Moving torsion bar suspension. Plus, to it’s left, a non-moving part:

https://i.imgur.com/77jyRVh.jpg
Gear & steerImg levers:

This is going to take me a while, I think
Yikes! There's a lot going on in there.
About 15 parts - some of them barely visible with the naked eye - go into each suspension arm.
Needs painting now, I’ve made a bit more progress but I really am depending on the paint arriving.
Right, what else is in the stash? Ah, yes, a crew for this beast!
Ooh a Stringbag. Good luck with the rigging
Funnily enough, exactly what I'm doing at the moment! <<my eyes hurt>>
Wow! Just wow!
And when that’s finished, there’s an M3 Lee by the same company, again with full interior...
Sometimes I think it would be nice to do a simple 1/72 Spitfire
Just done a Revell 1/72 Spitfire. Can't believe the quality of the kit over the Airfix one, worlds apart!
Well I didn’t have a 1/72 Spitfire handy, so I started on this...
Three & a half hours later, I’ve assembled much of the airframe and given the cockpit interior a coat of grey


Wet paint!

If anyone has a 3D printer then this is a useful thing to make.
[img]  [/img]
So the Swordfish is complete...
I used to hate biplanes with a vengeance - horrible trying to get the wings on and lined up without everything turning into a horrible gluey mess, fragile when finished, impossible to paint. The idea of rigging one never even occurred to me. The one exception I recall was an Airfix (I think) Swordfish in white plastic. It was still a sticky mess, but it was actually robust enough to last the course.
So as a bit of a challenge - having got most of the basics to a passable standard - can I get a biplane together and rig it...? At that point memory pointed me in the direction of a Stringbag and here we are...
The rigging element was a lot of thinking and planning first. I ended up painting all the wing halves individually, assembled the lower wing upper surfaces and the upper wing lower surfaces onto the fuselage, getting all the wiring done (Uschi line - impressive stuff) through predrilled holes, then sticking the outer surfaces on to hide the grot. Somewhat stressful, and I can't say I'm desperate to do it again, but I know the theory works now!
Anyway - the pics...
[url= https://live.staticflickr.com/65535/50006523387_8ab8ca725c_b.jp g" target="_blank">https://live.staticflickr.com/65535/50006523387_8ab8ca725c_b.jp g"/> [/img][/url]
[url= https://live.staticflickr.com/65535/50006523842_172a124aaa_b.jp g" target="_blank">https://live.staticflickr.com/65535/50006523842_172a124aaa_b.jp g"/> [/img][/url]
[url= https://live.staticflickr.com/65535/50005739038_8720625a69_b.jp g" target="_blank">https://live.staticflickr.com/65535/50005739038_8720625a69_b.jp g"/> [/img][/url]
[url= https://live.staticflickr.com/65535/50005740963_c82ed9ac57_b.jp g" target="_blank">https://live.staticflickr.com/65535/50005740963_c82ed9ac57_b.jp g"/> [/img][/url]
[url= https://live.staticflickr.com/65535/50006268201_fd6f27dfb9_b.jp g" target="_blank">https://live.staticflickr.com/65535/50006268201_fd6f27dfb9_b.jp g"/> [/img][/url]
[url= https://live.staticflickr.com/65535/50006526122_a23bce3aa0_b.jp g" target="_blank">https://live.staticflickr.com/65535/50006526122_a23bce3aa0_b.jp g"/> [/img][/url]
[url= https://live.staticflickr.com/65535/50006526637_ef9da74139_b.jp g" target="_blank">https://live.staticflickr.com/65535/50006526637_ef9da74139_b.jp g"/> [/img][/url]
Booo! Pics don’t link. I need to see.
EDIT: now they link and it looks epic. Really nice rigging on a great build. 👍🏼
Nice.
Is that a fuel tank between the pilot and gunner? 😯
That's stunning, excellent work!
Is that a fuel tank between the pilot and gunner?
Yup. Battle of Taranto they apparently left the observer behind in preference for a bodged in tank of juice!
