I'm thinking about an On-One Inbred, but would probably need to remove the seat tube cable stop to allow me to use a child seat.
Is there any reason not to? And what's the best way of going about it?
Cheers!
need to remove the seat tube cable stop to allow me to use a child seat.
how small are that you need a child seat? 😉
I'm 2ft 6in.
Nobody else done this then?
At 2ft 6in your the perfect height to just saw it off with a junior hacksaw obviously (or you could grind it off if you have one and are careful), and then be real carefull and file it nice and flush, you will probably find that some of the area of weld has sunk below the tube height and might want just a bit of P38 to fill it and wet and dry it back, prime it and paint it.
Not done exactly the same thing but removed some welded on V brake bosses from some forks using the exact same method.
I've done something similar:
[img]  [/img]
[img]  [/img]
[img] 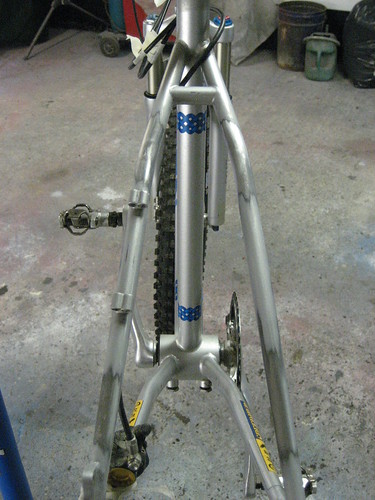 [/img]
[img] 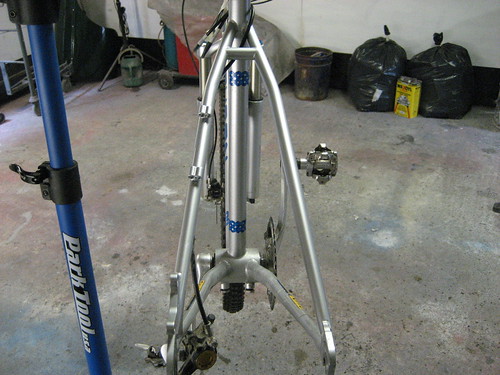 [/img]
[img]  [/img]
edited as the 3rd pic hadn't loaded when I made my flippant remark.
Did you use emery cloth over a file woodsman?
Anyhow not a bad tip for getting the last bit of boss removed without scratching into the tube with the file.
I didn't use a file at all. After I'd hacksawed leaving plenty of waste, I then teased most of the material off using an angle grinder - leaving just a small amount of brass (braze) proud, knowing that I hadn't gone down to the tube. Some masking tape around the tube is a good indicator, I tried to work leaving this intact, again knowing that would ensure I hadn't gone down too far. I then used an orbital (D.A) paint sander, with a 120 grit disc, and sanded off the braze. That was the metal work done. Etch prime and paint then.
cha****ng - let us know how you got on!
Thanks for the info guys, and that's a very neat job Woodsman.
I think you've put me off the idea tbh, have decided I'm far too ham-fisted to risk it.
Your input has been invaluable though - I probably would have just gouged away with the power tools otherwise.
I attacked them with an angle grinder until there was only a bit of material proud of the surface and took the rest off with a file to get it flat - I was about to repaint it though! Depends on how good your painting skills are as to the final finish - or if you're not bothered about looks, just make sure it's covered to stop it rusting.
[img]  [/img]
[img]  [/img]
important poit to note is regarding the child seat.some nice thin stiff butted frame tubes dont take well to having child seats clamped hard around them.the lateral twisting can dent the tubes and i belive i may have seen an actual on one frame with this damage...
