MegaSack DRAW - 6pm Christmas Eve - LIVE on our YouTube Channel
I’m thinking of doing my first bike build after finding a cracking deal on a frameset; I have a couple of questions that I’m hoping the STW hive mind can help me with:
1/ Are there any common mistakes to watch out for?
2/ Are there any good methods for helping figure out what bits will fit together technically / aesthetically?
The bike is a Croix de Fer and used mainly for commuting along a sometimes muddy canal path with a few tarmac sections, and for the occasional foray into weekend adventure trips where it'll be loaded up with a few bags for a good old explore in Devon / dales and the likes.
Croix de Fer frameset, Shimano 105 disc groupset, Hope 20five hoops running with WTB nano 40c tyres.
The little bits such as bars and tape, stem, seatpost, and seat are all in flux at the moment – mainly as I don’t know how they’ll look / fit me just yet.
Is it generally worth getting the main bits together and then seeing what stem length and angle suits afterwards?
As always, advice, suggestions, and pi%% taking welcome 😉
Finally, I have a small niggle wondering about the mudguard clearance on the Croix de Fer... does a small niggle mean I haven't yet found my ideal bike
If you're thinking of doing any touring (and you should, it's great), and before you settle on the 105 disc groupset have a read of this:
http://singletrackworld.com/forum/topic/do-roady-triples-exist-these-days-for-touringnstuff
Good point. I went from a Alu cross type bike with a triple, because there are a lot of hills where I live, to an Escapade with a double, 34-52 to 11-32. The bike is never loaded up (beyond pump, tube etc) but sometimes 34x32 is hard going. I'm happy with my choice but if I was gonna load it up with panniers I think I'd want more gears, maybe not just for hills but that last 5km to the overnight stop after a tough day...
Should the gear outers and brakes lines go on the inside of the frame or the outside?
Thank you for the input - the thing about the triple is very interesting, and yep, I've been thinking about the routing of gear / brake cables (hoses)
cheers
M
1 - tidy your garden
2 - valves/logos
3 - tidy your garden a bit more
Ask Northwind about getting your forks correctly fitted
Grass in manicured state for final shot,
Valve,logos, woodshed tidied.
ha - if you'd seen my garden you'd know that I'll be taking it elsewhere for pics 😉
I did it once, was a learning experience but wouldnt do it again.
Planned to buy some bits and use some old bits, bought all new bits in the end. Loved the bike, but probably not cost effective.
Found I needed more tools for different standards I didnt know about.
Realised I wasnt very good at that sort of thing, but has helped with me fixing things and upgrade bits since.
If you enjoy tinkering, could be enjoyable. I took a lot longer than I wanted and was without a bike in that time, need backup bike to ride in the meantime.
thanks zer0cool, that's pretty much how I expect my build to go too with extra tools, and time required to make up for my lack of mechanicking ability.. just hope it's fun though.
Fortunately I've got other bikes I can use while waiting for this one to come together.
Unfortunately, I've already found that I'm experiencing feature creep as I see other bits I'd like - with the associated additional fund requirements
Measure twice, cut once... especially when cutting stearer tubes and forgetting upper headset parts etc!
I’m thinking of doing my first bike build after finding a cracking deal on a frameset; I have a couple of questions that I’m hoping the STW hive mind can help me with:
[b]1/ Are there any common mistakes to watch out for?[/b]
Yes, yes there are... 😀
[img] 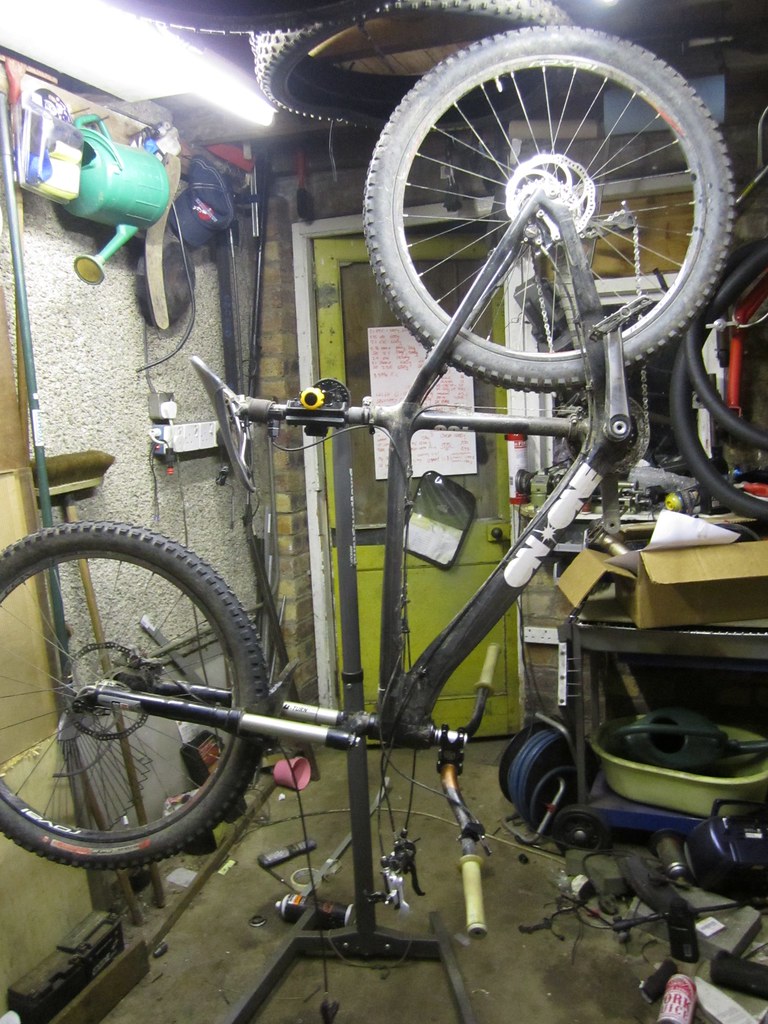 [/img]
If that's a genuine error that's hilarious. Still pretty funny either way.
I've done a partial build, started with a rolling chassis so only had to consider drivetrain, brakes and contact points. It's satisfying even if it isn't the cheapest route, as you mention, feature creep can take hold. Leave the steerer tube as long as you can until you have sorted out the actual height you want - a slammed stem may be fashionable but it might not be right for you. Apart from that, just make sure you buy compatible components and don't do what kayak has done and have a messy workshop. 😳
Oh, and gear and brake cables are different and have different outers 🙄
1/ Are there any common mistakes to watch out for?
measure twice, cut once.
Brake cables, steerers etc etc.
Just spent £40 on new cables. learn from MY mistake. 😆
Building your own is more about the satisfaction of doing it yourself and learning a skill - any money saved is really a bonus.
With road bikes there's thankfully less to worry about in terms of part compatibility.
In terms of stem length etc best to start with the measurements of a bike you already own or use an online bike fit calculator?
Cutting outer cables for brakes and gears is probably the most daunting - start by getting the bars and levers in the right place e.g. stem spacers, etc. Hold the cable outers in place with electrical tape first, turn the bars lock-to-lock to make sure there's enough slack / no rubbing then mark and cut the outers - investing in good cable cutters is worthwhile - remember to remove the inner cable first!
With electrical tape you can remove and refit the cables as much as you like to get it right - and you can fit the bar tape over the top and peel it off again easily too.
Finally, don't be tempted to rush things and there's lots of help available online.
If it helps any, I have just finished a CDF build, there is loads of mudguard space.
ha haaa... yes I can see me putting the forks in the wrong way, but thankfully they're coming fitted (I think)
I like the idea of taping the cables in place to start with... I'll be using that for sure.
thanks for the inputs everyone - it's been helpful.
I've TWICE cut outers with the gear inner cable still inside.
Both times brands new inners.
Both times had to go to the shop for more
Unless you are brutal about searching ebay for the best value used parts it will cost at least twice as much as planned. It'll also take twice as long as planned as you'll decide to scrimp and save for the boutique option rather than the non-brand. You'll agonise over colours, widths, manufacturers...and you'll change your mind and discard seatposts for being ‘the wrong shade of green’ that you'll never 'ebay'. You'll spend over £100 on postage alone resulting with rolls of used bubble wrap at the back of the shed you're ‘saving for later’. Your tool collection will treble as you learn bodging it also often means chipping it. But in the end though you'll have learnt more then you ever knew before and own a bike that you’re more connected with than any other in the shed. The only problem is that during your quest you’ll have come across so many interesting things that nag at your creative subconscious until you click ‘Confirm Order’ on a Surly LHT frameset just to, you know, use up those left over parts…
I've TWICE cut outers with the gear inner cable still inside.
Both times brands new inners.
Both times had to go to the shop for more
Not just me then... 😳
Made a start on the build, bearings and stuff... but was surprised to find that the steerer tube was about 40mm longer than the spacers provided combined with a typical stem...
[url= https://c1.staticflickr.com/4/3768/32935588702_6e6a864b13_b.jp g" target="_blank">https://c1.staticflickr.com/4/3768/32935588702_6e6a864b13_b.jp g"/> [/img][/url][url= https://flic.kr/p/Sbpv4C ]CdF Steerer[/url] by [url= https://www.flickr.com/photos/123339003@N04/ ]Mikey Scott[/url], on Flickr
... pipe-cutter ordered.
With my build, guess who ordered brake cable outer rather than gear cable outer 😳
oops, first mistake... my star nut is in there - probably just about where I want to cut it 🙄
If that's a carbon steerer you do NOT want a star nut in there! You need a carbon friendly compression doodah instead.
f that's a carbon steerer
thankfully it's steel 8) ...going to just keep pushing it down as I cut a bit off the top
Take your time! Stop when you get tired or frustrated.
with cabling I find it best to build up the bike then see where the cables run neatly ie cross the headtube or not. Remember you want each bend in the cable to be a single smooth bend not an s bend. cut them too long to start with - yo can always shorten them a bit if you need to later. Steer - also leave too long to start with. extra spacers on top of the stem .
That's all right then! Trim 10mm off at a time and keep bashing it down! 🙂
Steerer cut down to size, Yippee! - pipe cutter used (thanks to the [url= http://singletrackworld.com/forum/topic/tools-you-wish-youd-known-about-years-ago ]Years Ago[/url] thread.
I've installed the bars now, and the gear cables are in and all set to go (the Shimano group set pack saved me a lot of cutting and measuring). It's very cool seeing it come alive bit by bit - one of the best things I've done with cycling beyond actually cycling, which is also questionable.
[url= https://c1.staticflickr.com/3/2810/32385979684_e5665637a8_z.jp g" target="_blank">https://c1.staticflickr.com/3/2810/32385979684_e5665637a8_z.jp g"/> [/img][/url][url= https://flic.kr/p/RkQBs5 ]WoodChipper2[/url] by [url= https://www.flickr.com/photos/123339003@N04/ ]Mikey Scott[/url], on Flickr
Anyway... onto the sticky bit at hand...
I've got an RS4 centrelock hub and while trying to fit a IceTech rotor to it I've run into an issue with the splined tool (cassette tool) - it doesn't fit... well, technically it fits the rotor lock 'nut', but it doesn't engage.
From the images, I hope you can see that there is a lip on the hub that the tool doesn't have a large enough internal diameter to slide over it.
I tried first with a generic tool I had, and when that didn't fit I figured I needed a Shimano one, but that hasn't worked either. Any ideas?
[url= https://c1.staticflickr.com/1/491/33073768242_cfba7af662_z.jp g" target="_blank">https://c1.staticflickr.com/1/491/33073768242_cfba7af662_z.jp g"/> [/img][/url][url= https://flic.kr/p/SoBH2u ]Hope RS4 and IceTech Rotor[/url] by [url= https://www.flickr.com/photos/123339003@N04/ ]Mikey Scott[/url], on Flickr
[url= https://c1.staticflickr.com/1/515/33230266115_10f3d1fbfb_z.jp g" target="_blank">https://c1.staticflickr.com/1/515/33230266115_10f3d1fbfb_z.jp g"/> [/img][/url][url= https://flic.kr/p/SCrNoF ]Centre Lock Tool Clash[/url] by [url= https://www.flickr.com/photos/123339003@N04/ ]Mikey Scott[/url], on Flickr
Thanks to everyone throwing in ideas... it's really given me confidence to give this a go without throwing money at my LBS.
Ask Hope?
Havent read the whole thread, but am i right that these hubs can be adapted for different axles?
If so, is that lip not just on the axle end cap, and if you remive it you cant then fit the tool and attach the rotor, then refit the end cap?
am i right that these hubs can be adapted for different axles?
yes apparently it can be adapted, and I think you're right that is likely to be the way forward, I've just tried and I can't get them off... not sure if I'm missing something obvious
[edit]... applied more force and you're dead right.... onward bound 😀
Nice one. Very satisfying building your own bike.
finished other than helitape, and a rear derailleur cable crossover I'd like to re-route...
[url= https://c1.staticflickr.com/3/2846/32880544080_41845da646_z.jp g" target="_blank">https://c1.staticflickr.com/3/2846/32880544080_41845da646_z.jp g"/> [/img][/url][url= https://flic.kr/p/S6xodq ]Croix de Fer[/url] by [url= https://www.flickr.com/photos/123339003@N04/ ]Mikey Scott[/url], on Flickr
[url= https://c1.staticflickr.com/1/276/32880549950_4313a13352_z.jp g" target="_blank">https://c1.staticflickr.com/1/276/32880549950_4313a13352_z.jp g"/> [/img][/url][url= https://flic.kr/p/S6xpXC ]Croix de Fer[/url] by [url= https://www.flickr.com/photos/123339003@N04/ ]Mikey Scott[/url], on Flickr
[url= https://c1.staticflickr.com/4/3809/32880556430_53cb26719e_z.jp g" target="_blank">https://c1.staticflickr.com/4/3809/32880556430_53cb26719e_z.jp g"/> [/img][/url][url= https://flic.kr/p/S6xrTm ]Croix de Fer[/url] by [url= https://www.flickr.com/photos/123339003@N04/ ]Mikey Scott[/url], on Flickr
chuffed is an understatement!
8)
State of that fence......
Never mind the fence...
Tyre logos and valves!
First time. Being gentle.....
Very tidy! Bike that is.