Like many on here, I get very cold feet in the winter. I don't ride a huge amount in the winter so the rather high cost of winter boots is hard to justify.
Then I had a notion..........I modified a pair of old Karrimor KSB eVent walking boots to accept Shimano cleats.
I wore them for 3 hours today (0 - 1°C) and my feet were not numb at the end.
Great success.
[img] 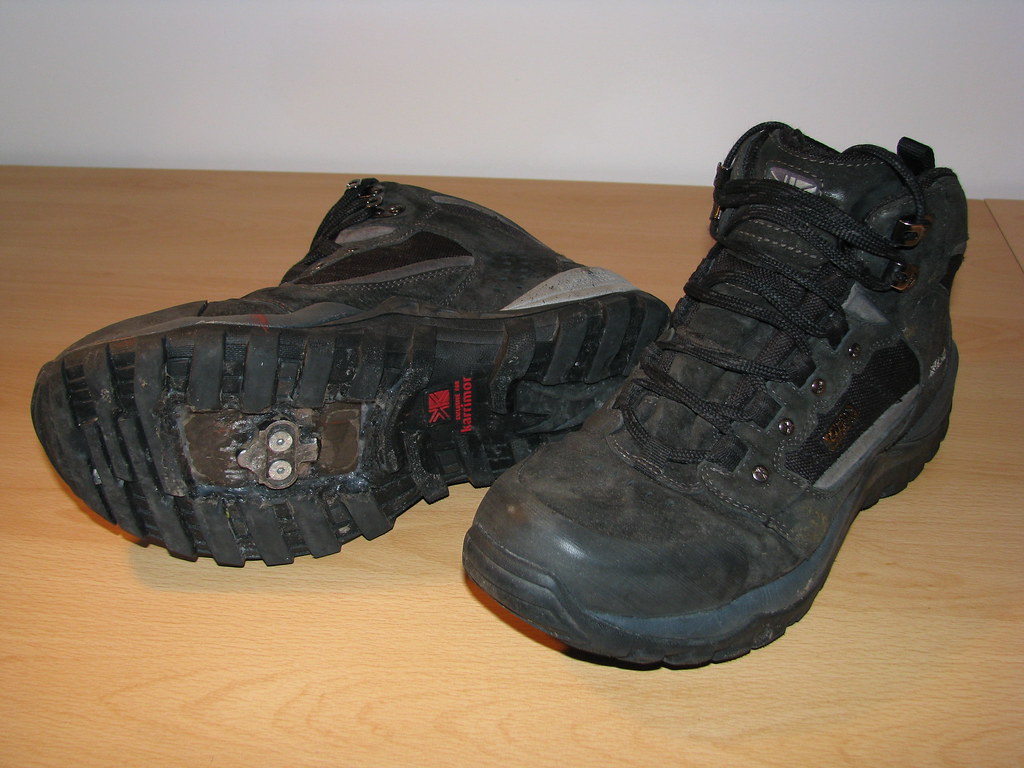 [/img]
[img] 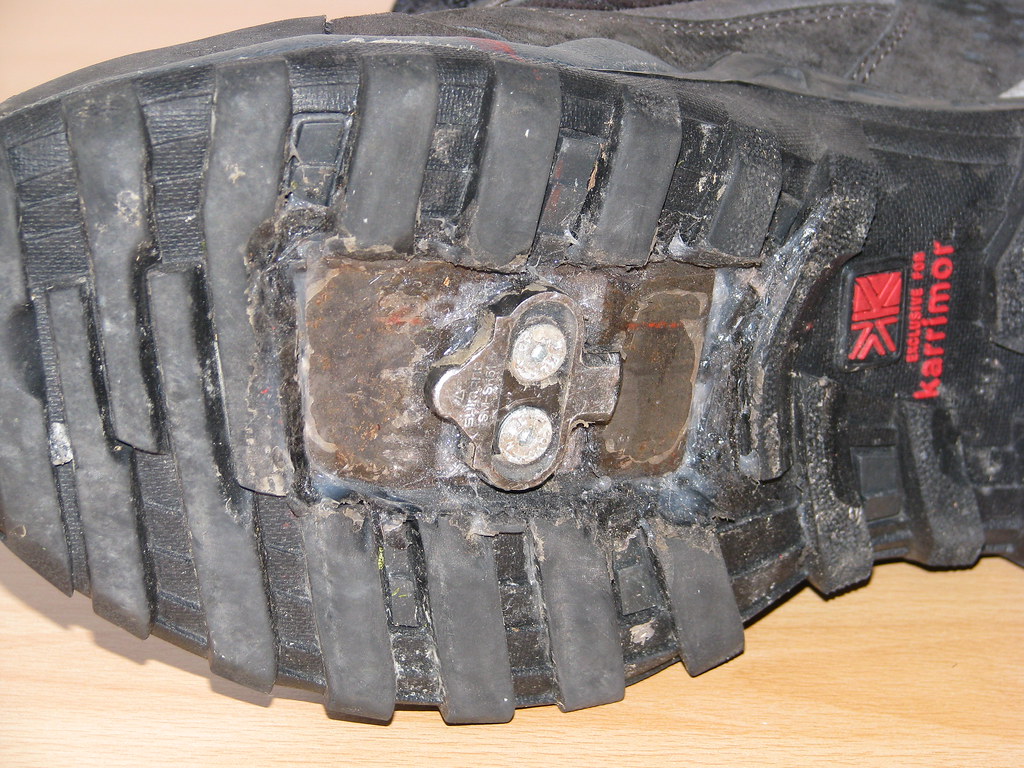 [/img]
Like it - been wondering about this myself. How did you fix the cleats tot eh boot? Did you drill thru the shank?
Excellent stuff, more detail on how you went about it please.
I spent several hours in the bat-cave on this project. Hopefully I've remembered most of the steps.
It's a bit long winded, but here goes (I should have taken some pictures).
Sorry I've drifted into engineer mode for the following:
I also had an old pair of cycling shoes from which I removed the 4-hole threaded plate that fits inside the shoe. I suppose some other threaded plate design could be used.
You'll need longer countersunk head M5 screws than the standard cleat screws, depending on how thick the sole is.
The boots had a stiff inner shank (thanks for that terminology TJ, are you a cobbler by any chance?) about 4mm thick and then an 8mm thick rubber layer and then the thick tread on the outer sole.
The original boots were quite stiff in the bending department BTW.
1. Mark off the area of the sole to be cut away - I used existing cycling shoes as a guide.
2. Mark the point (on the side of the boot) where you want the cleat to be.
3. Cut out a bit of the sole deep enough for the cleat and an extra 2mm for a steel plate. I used wood chisels for the cutting.
The cleat should be about flush with the tread of the sole, or a bit under-flush perhaps. It's best to go too deep and then shim out later if needed.
4. Mark off the cleat position on the recessed sole and drill through the shank using a drill, Ø6.35mm, assuming a standard 4-hole threaded plate.
5. If using a standard 4-hole threaded plate, drill additional holes to allow the plate to sit flat inside the boot. I actually elongated the holes into a slot but that's not really much use provided the cleat position doesn't need adjusted.
6. Cut 4 bits of tube about 10mm OD x 6.5 mm ID to slightly less than the thickness of the rubber sole layer.
7. Make the holes in the outer layer of shank big enough for the tubes to fit into. The tubes act as spacers to prevent the rubber sole being squashed too much.
8. Cut a steel plate to the shape of the cut out that was made in the sole at step 3.
9. Drill two holes in the plate at the position where the cleat will be.
10. Now glue the threaded plate inside the boot - I used silicone RTV stuff. The threaded plate can be held in place by fitting the two tubes into the rubber sole and placing the steel plate on top and fitting two M5 screws to squeeze the lot together.
11.When the glue has set, remove the screws and outer steel plate.
12. Bend the outer steel plate to approximate the profile of the rubber sole - I simply but two bends in the plate forward and behind of where the cleat will sit. There's no need to try to emulate the curvature of the sole
13. Now glue the outer steel plate in place using plenty of silicone stuff. The plate can be held in place using some M5 screws into the threaded plate that's been glued on the inside. Make sure the sole is sealed all around the steel plate.
14. When the glue has set remove the screws.
15. Fit the cleats on top of the steel plate. put silicone around the screw holes to prevent water ingress. Tighten the screws to squeeze the whole lot together.
16. Cover over the top of the threaded plate on the inside and smooth it over so as to provide a gradual transition between inner shank surface and the plate. Ideally the threaded plate will have sunk into the shank when it was clamped in place at step 10. If the plate sticks up too much then a thin insole with a rectangular cut out could be inserted.
The silicone will help insulate the threaded plate too.
17. Fit the original insoles.
I think that's it.
TJ, are you a cobbler by any chance?
No - but he does talk a lot of cobblers!
IGMC
Reminds me of the Simpsons where Homer ruins two jackets by cutting 'fabric' elbow patches from one jacket, and sewing them to his leather jacket...!
Good craftmanship though, as long as both pairs were originally gathering dust!
DrP
[i]
Reminds me of the Simpsons where Homer ruins two jackets by cutting 'fabric' elbow patches from one jacket, and sewing them to his leather jacket...!Good craftmanship though, as long as both pairs were originally gathering dust!
DrP [/i]
Yes indeed, you'd need to be very confident in boot anatomy to tackle this on a new pair. Mine were destined for the bin, 'middle age foot spread' rendering them no good for walking.
