A few years ago, a prime bikepacking opportunity came my way and I decided to try something different in terms of shelter. I wanted to go ‘ultralight’, or at least as ultra as my limited budget would allow, as the suggested route would involve plenty of climbing and rough gravel with a dash of singletrack. I’d tried the standard ultralight shelter choice, a bivy sack, a.k.a. a glorified plastic bag—damp and claustrophobic. I had a tent, but it was heavy, and stuffing it into the sleek frame/saddle/handlebar bags I wanted to use would be next to impossible. Casting about, I remembered a hammock laying neglected among my camping gear. Could that be the answer? The internet told me it could. That trip (documented here) proved to be a successful foray into the world of hammock camping, and I’ve enjoyed many since then. Here are some of the things I’ve learned from research and experience.
Site selection
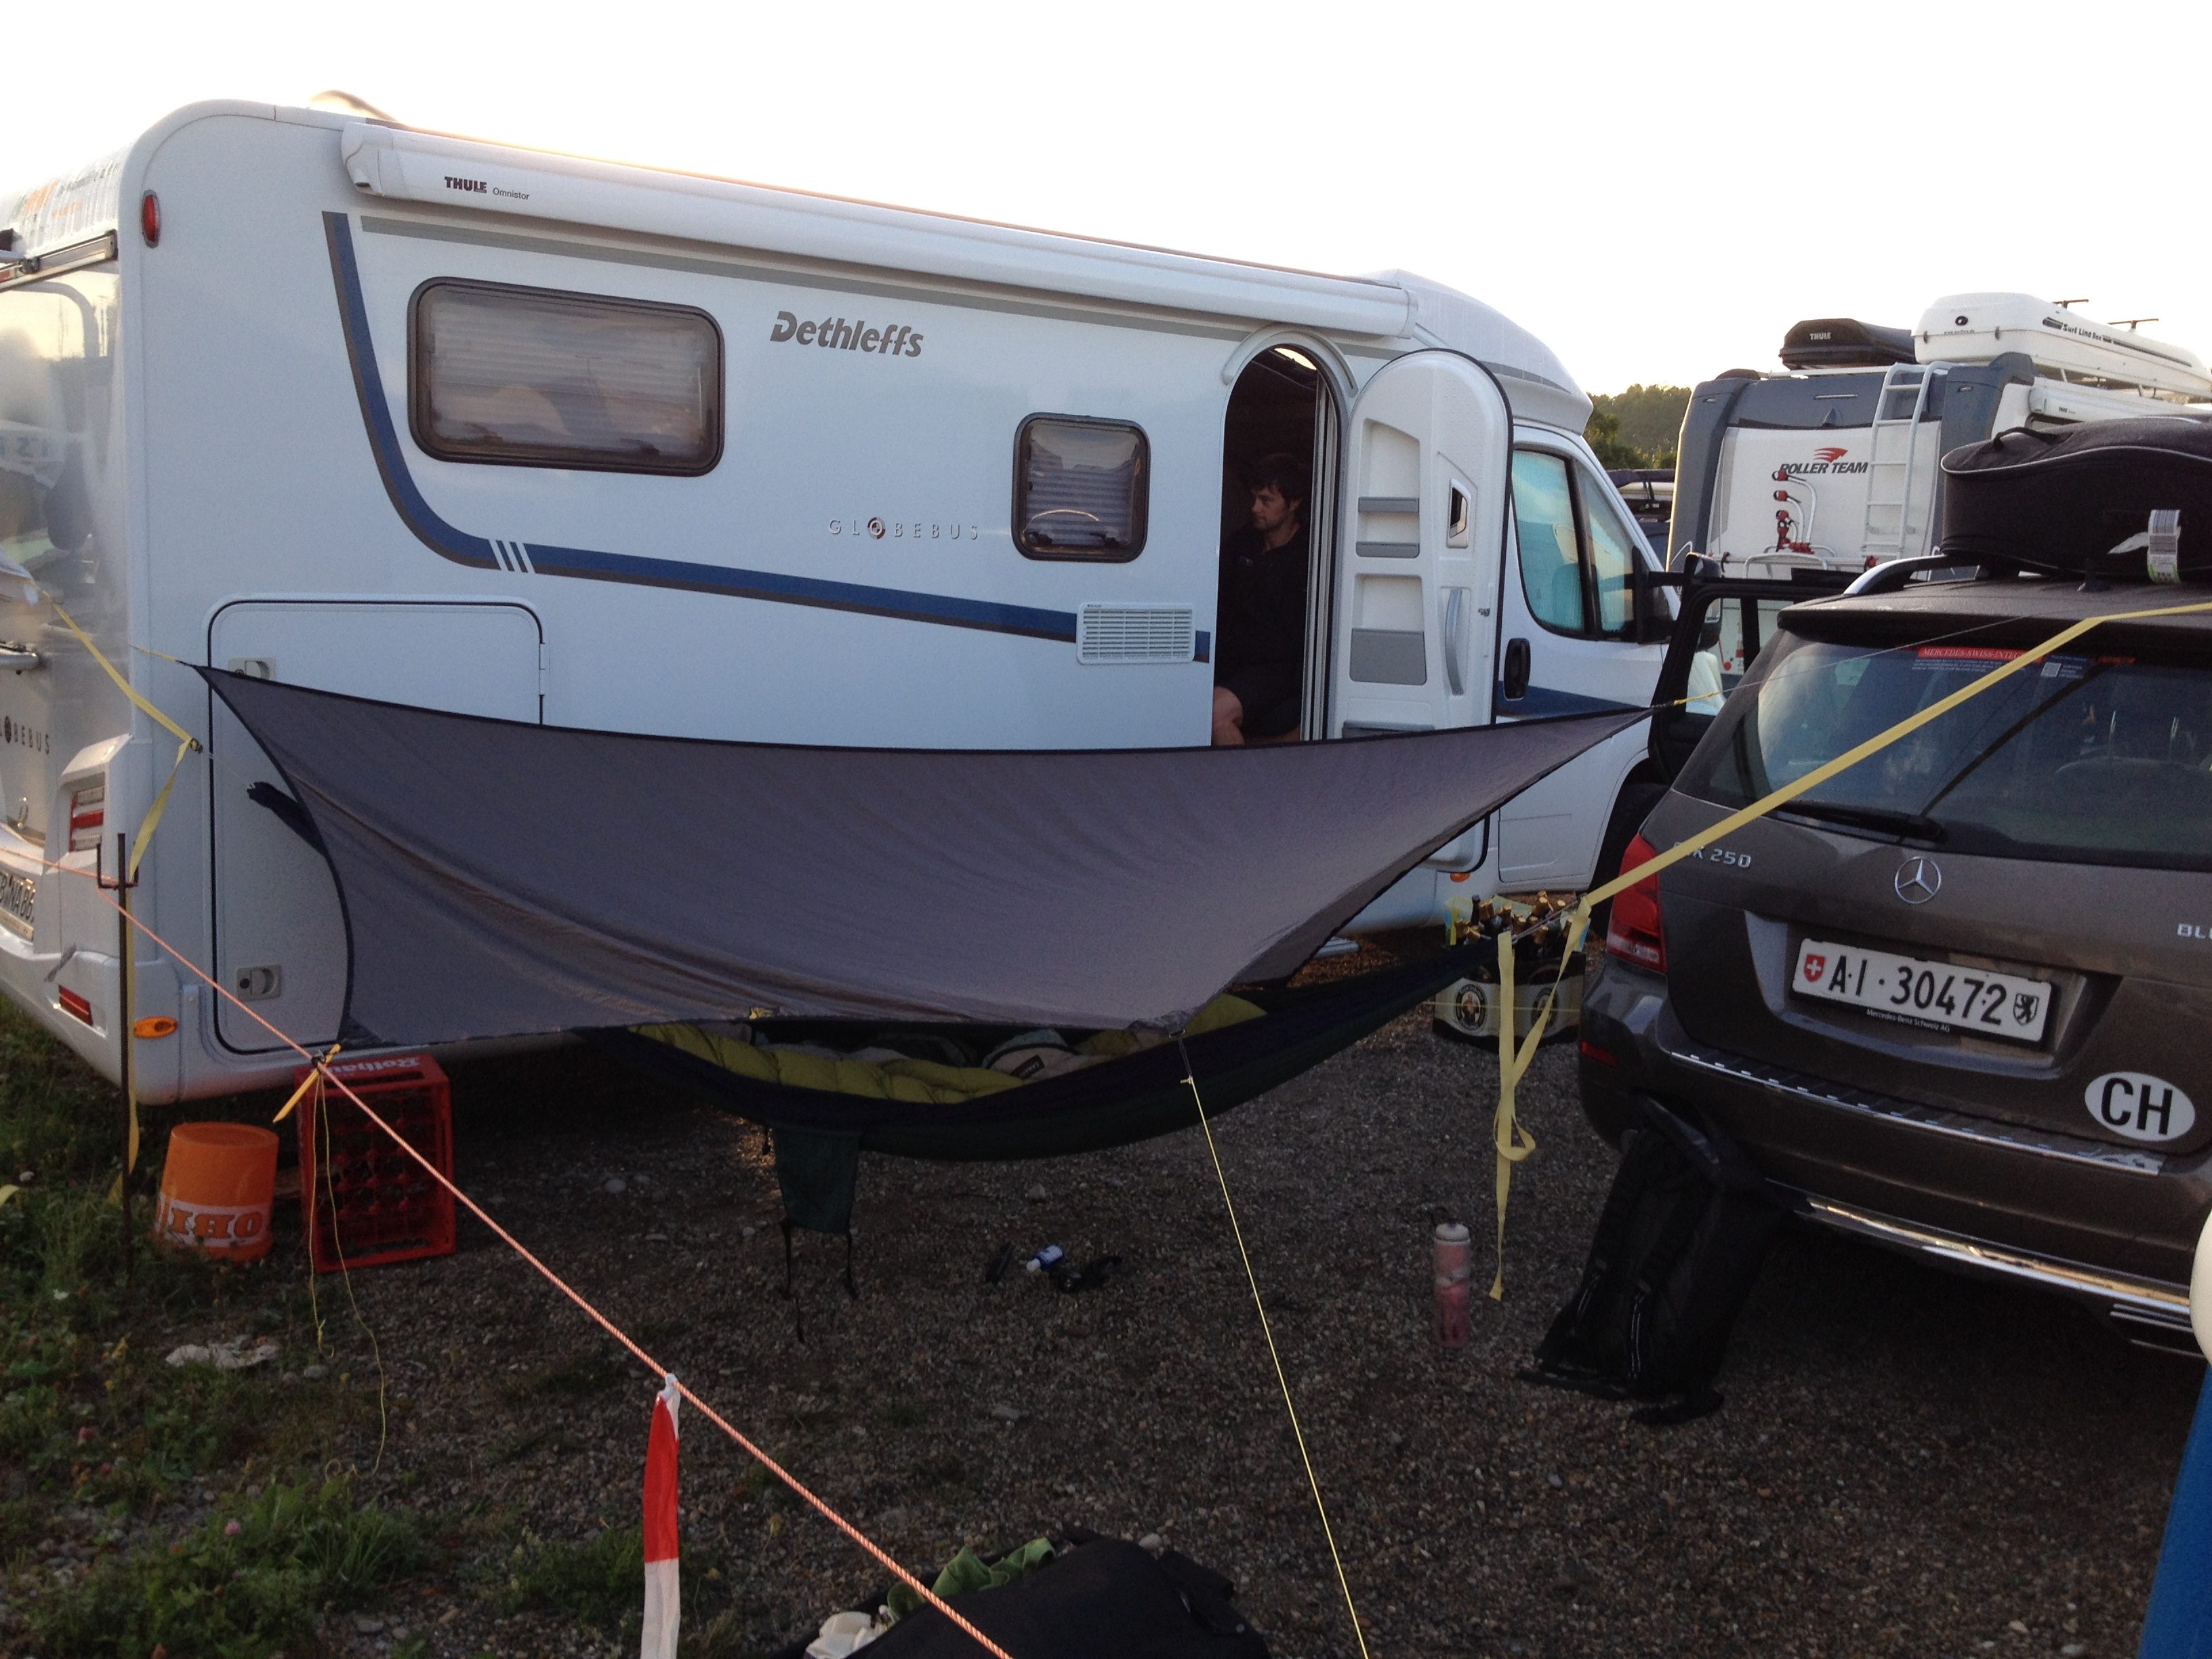
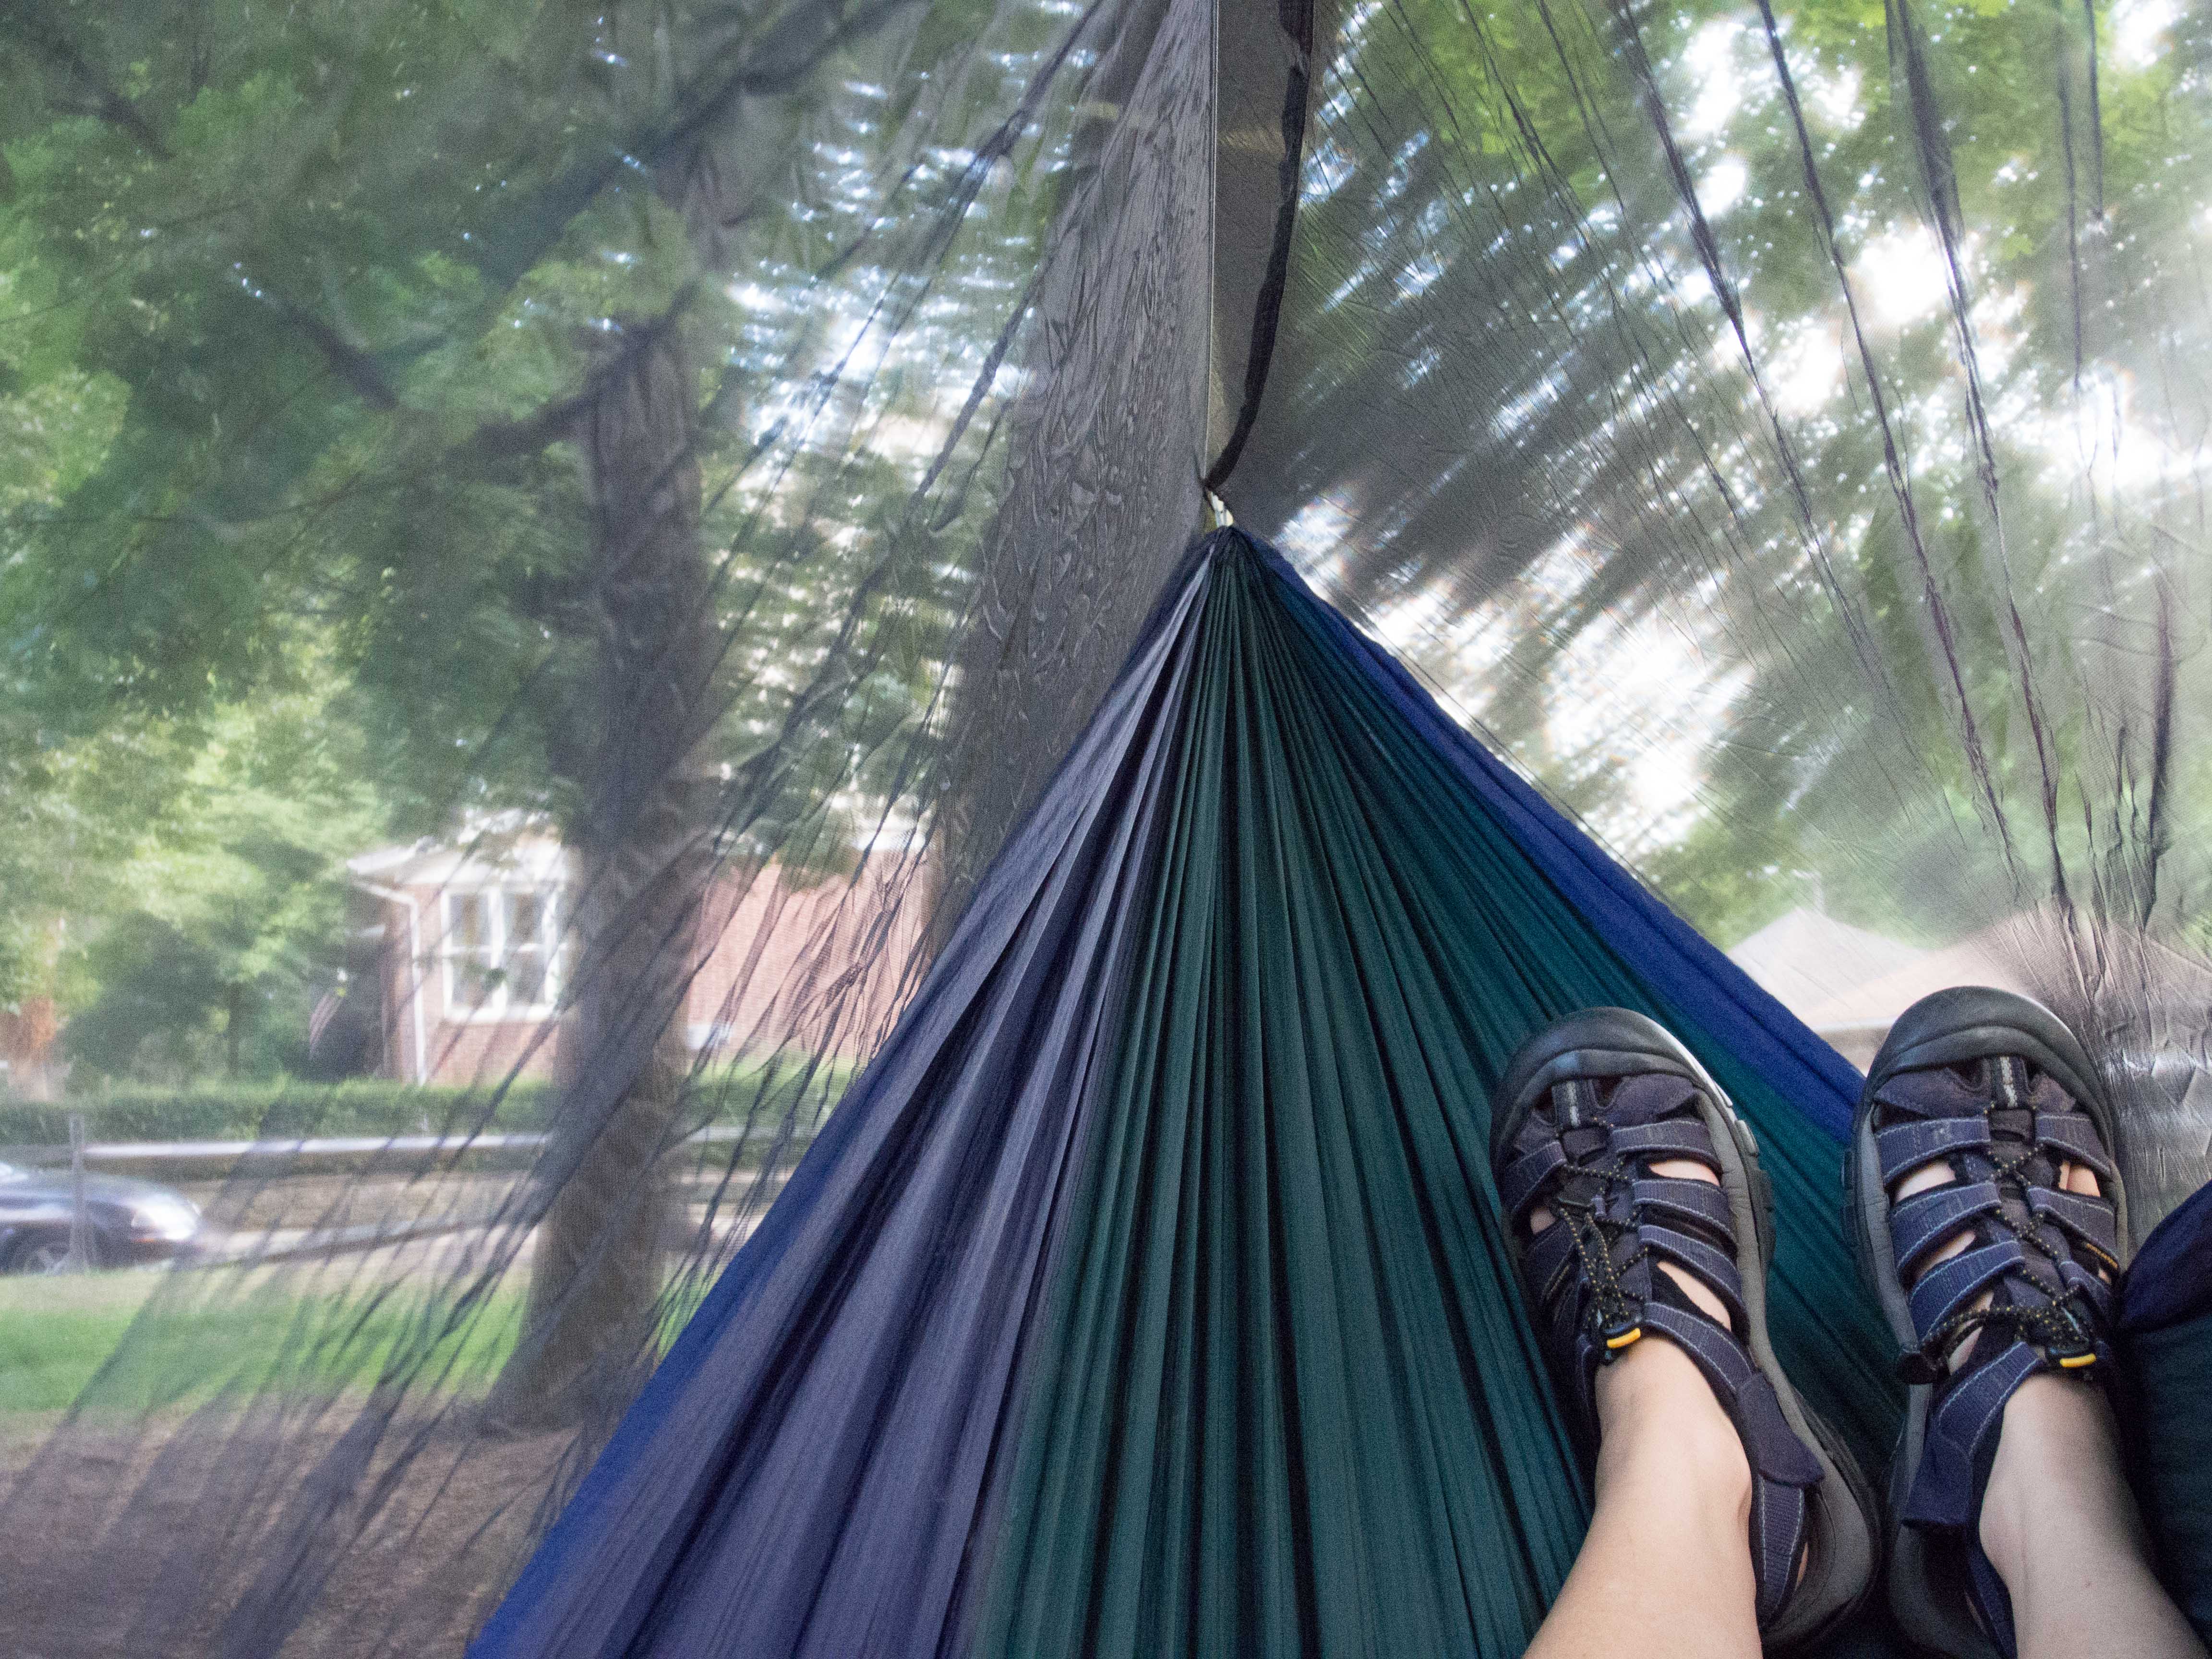
We’ll get this out of the way: you need well-grown trees on which to hang your hammock. Yes, this fact renders some prime bikepacking areas ineligible. However, with a little ingenuity, you can substitute any two solid and well-placed attachment points for actual trees. I’ve hung a hammock in the corner of a chain-link fence and from the bike racks of two cars in a gravel lot. Those familiar with rock-climbing have used their gear to hang from boulders. The possibilities are not quite endless, but much more prevalent than one might expect.
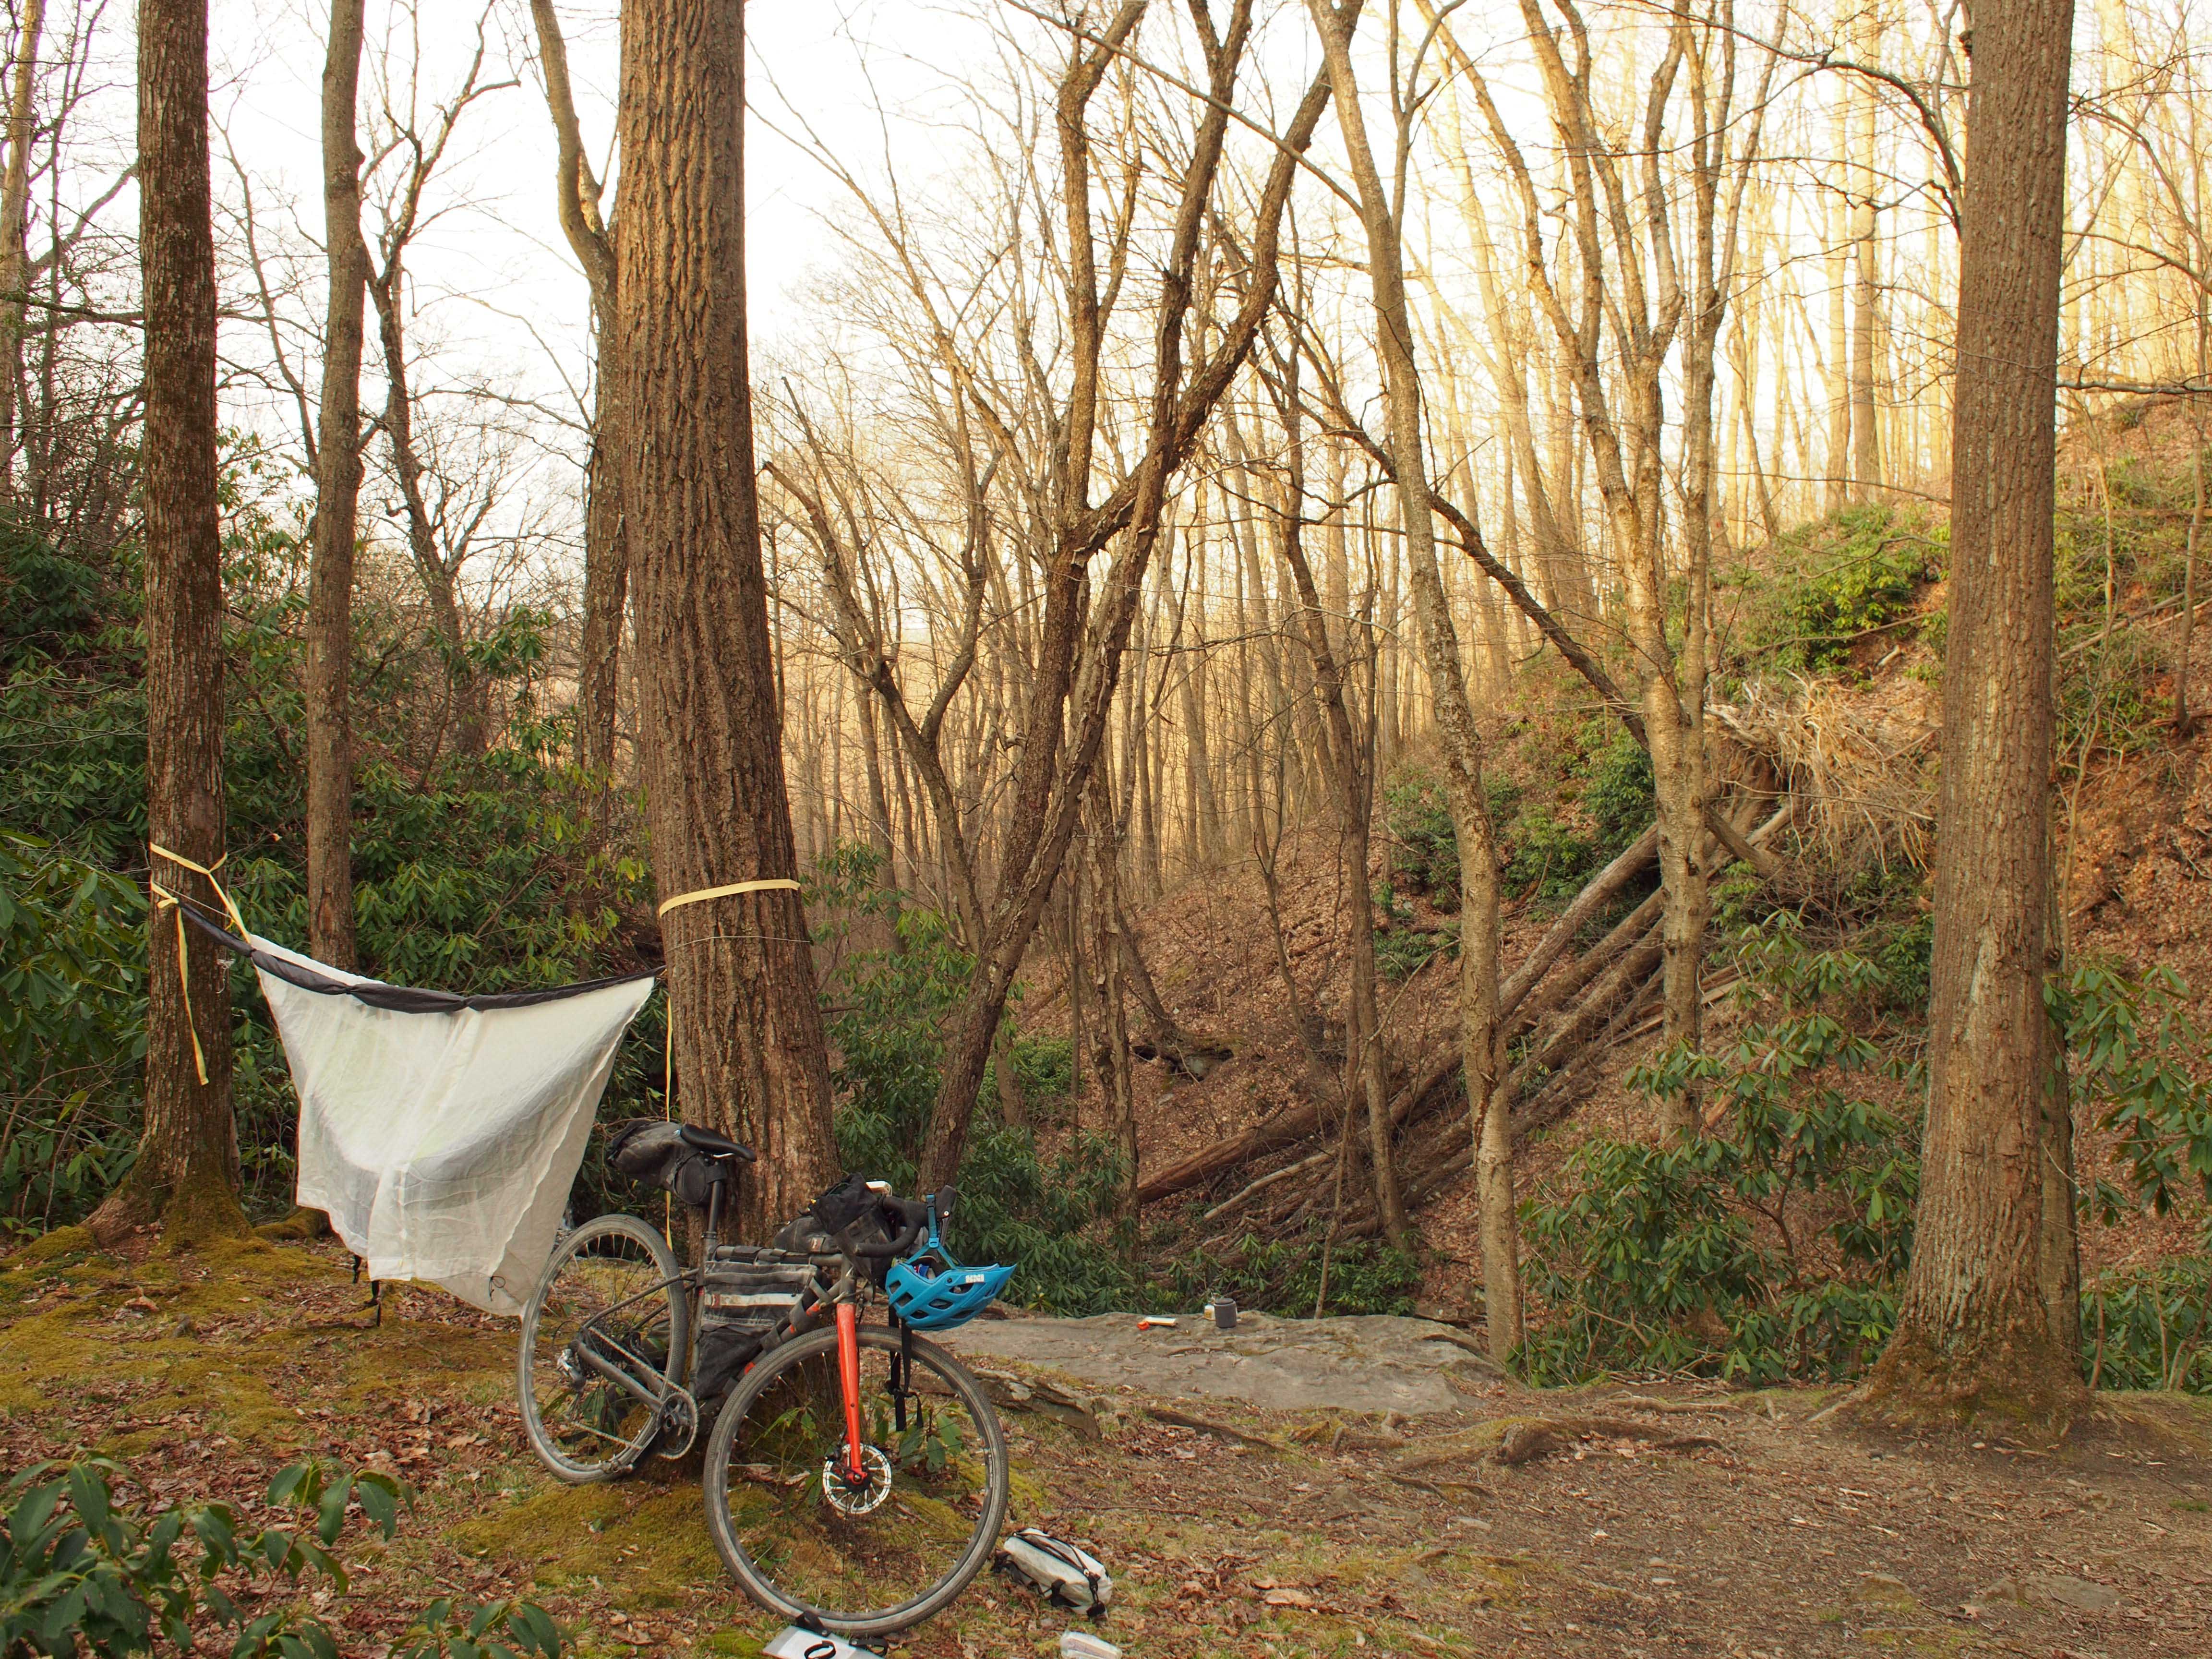
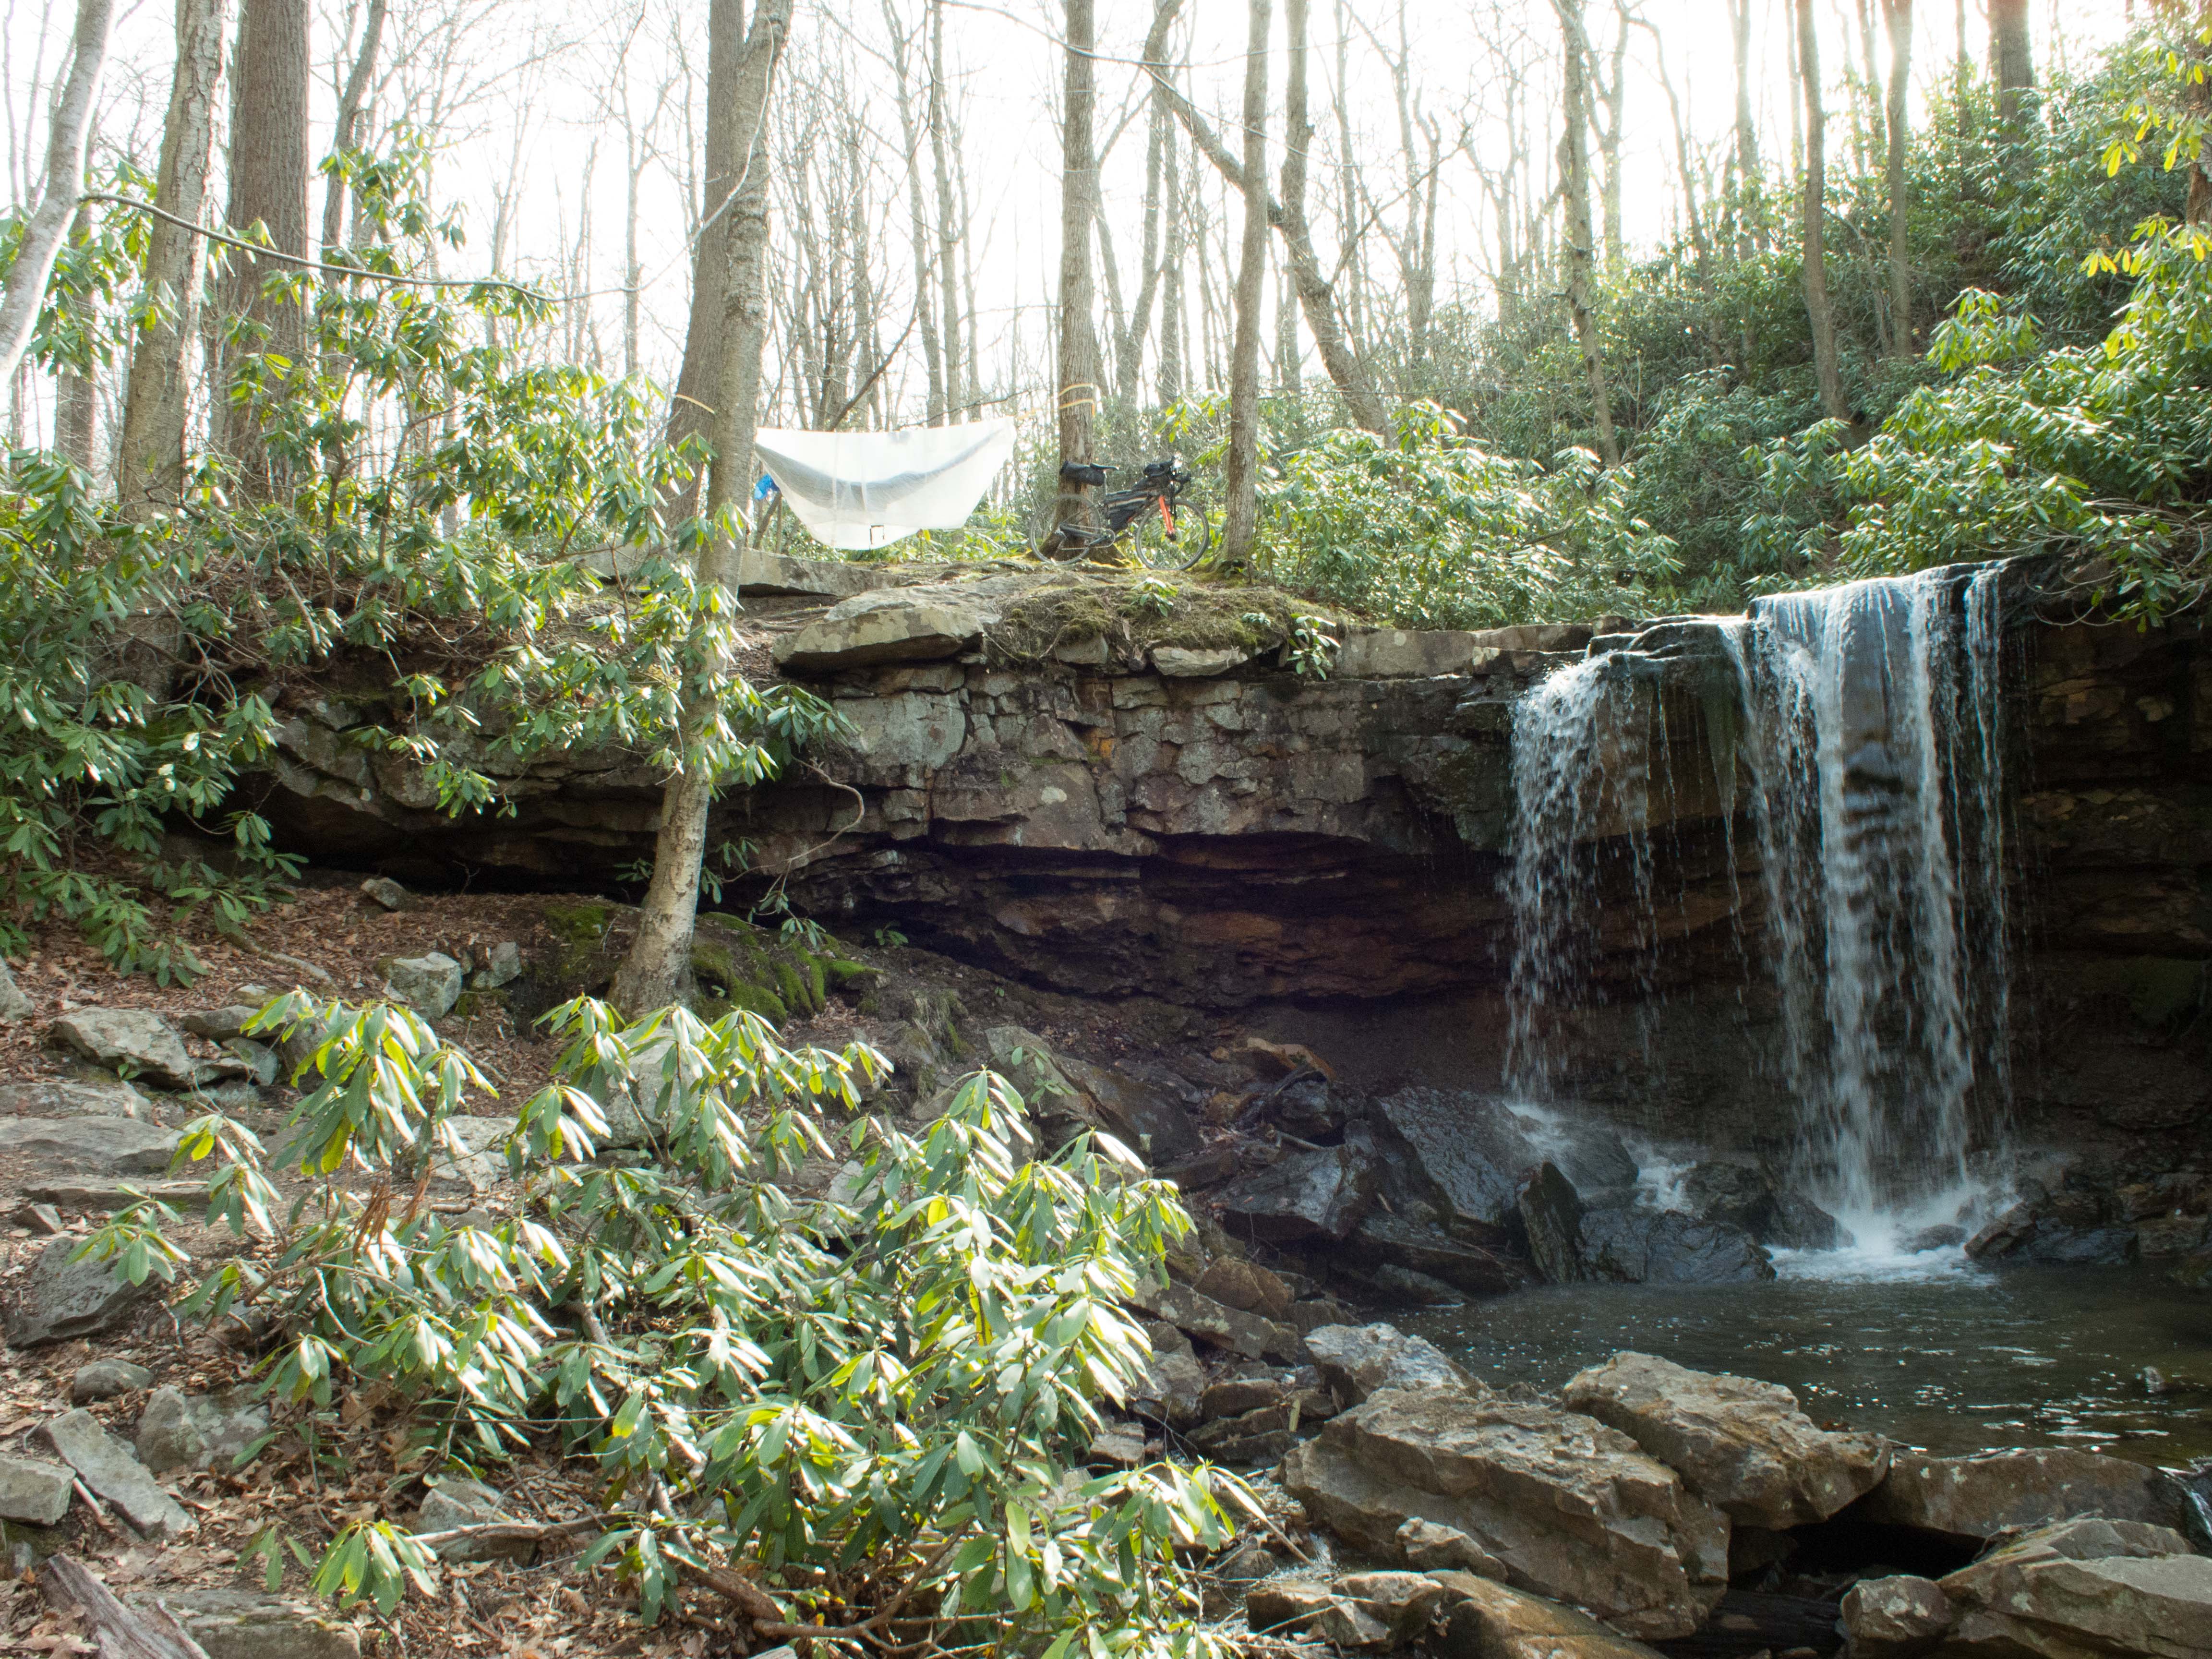
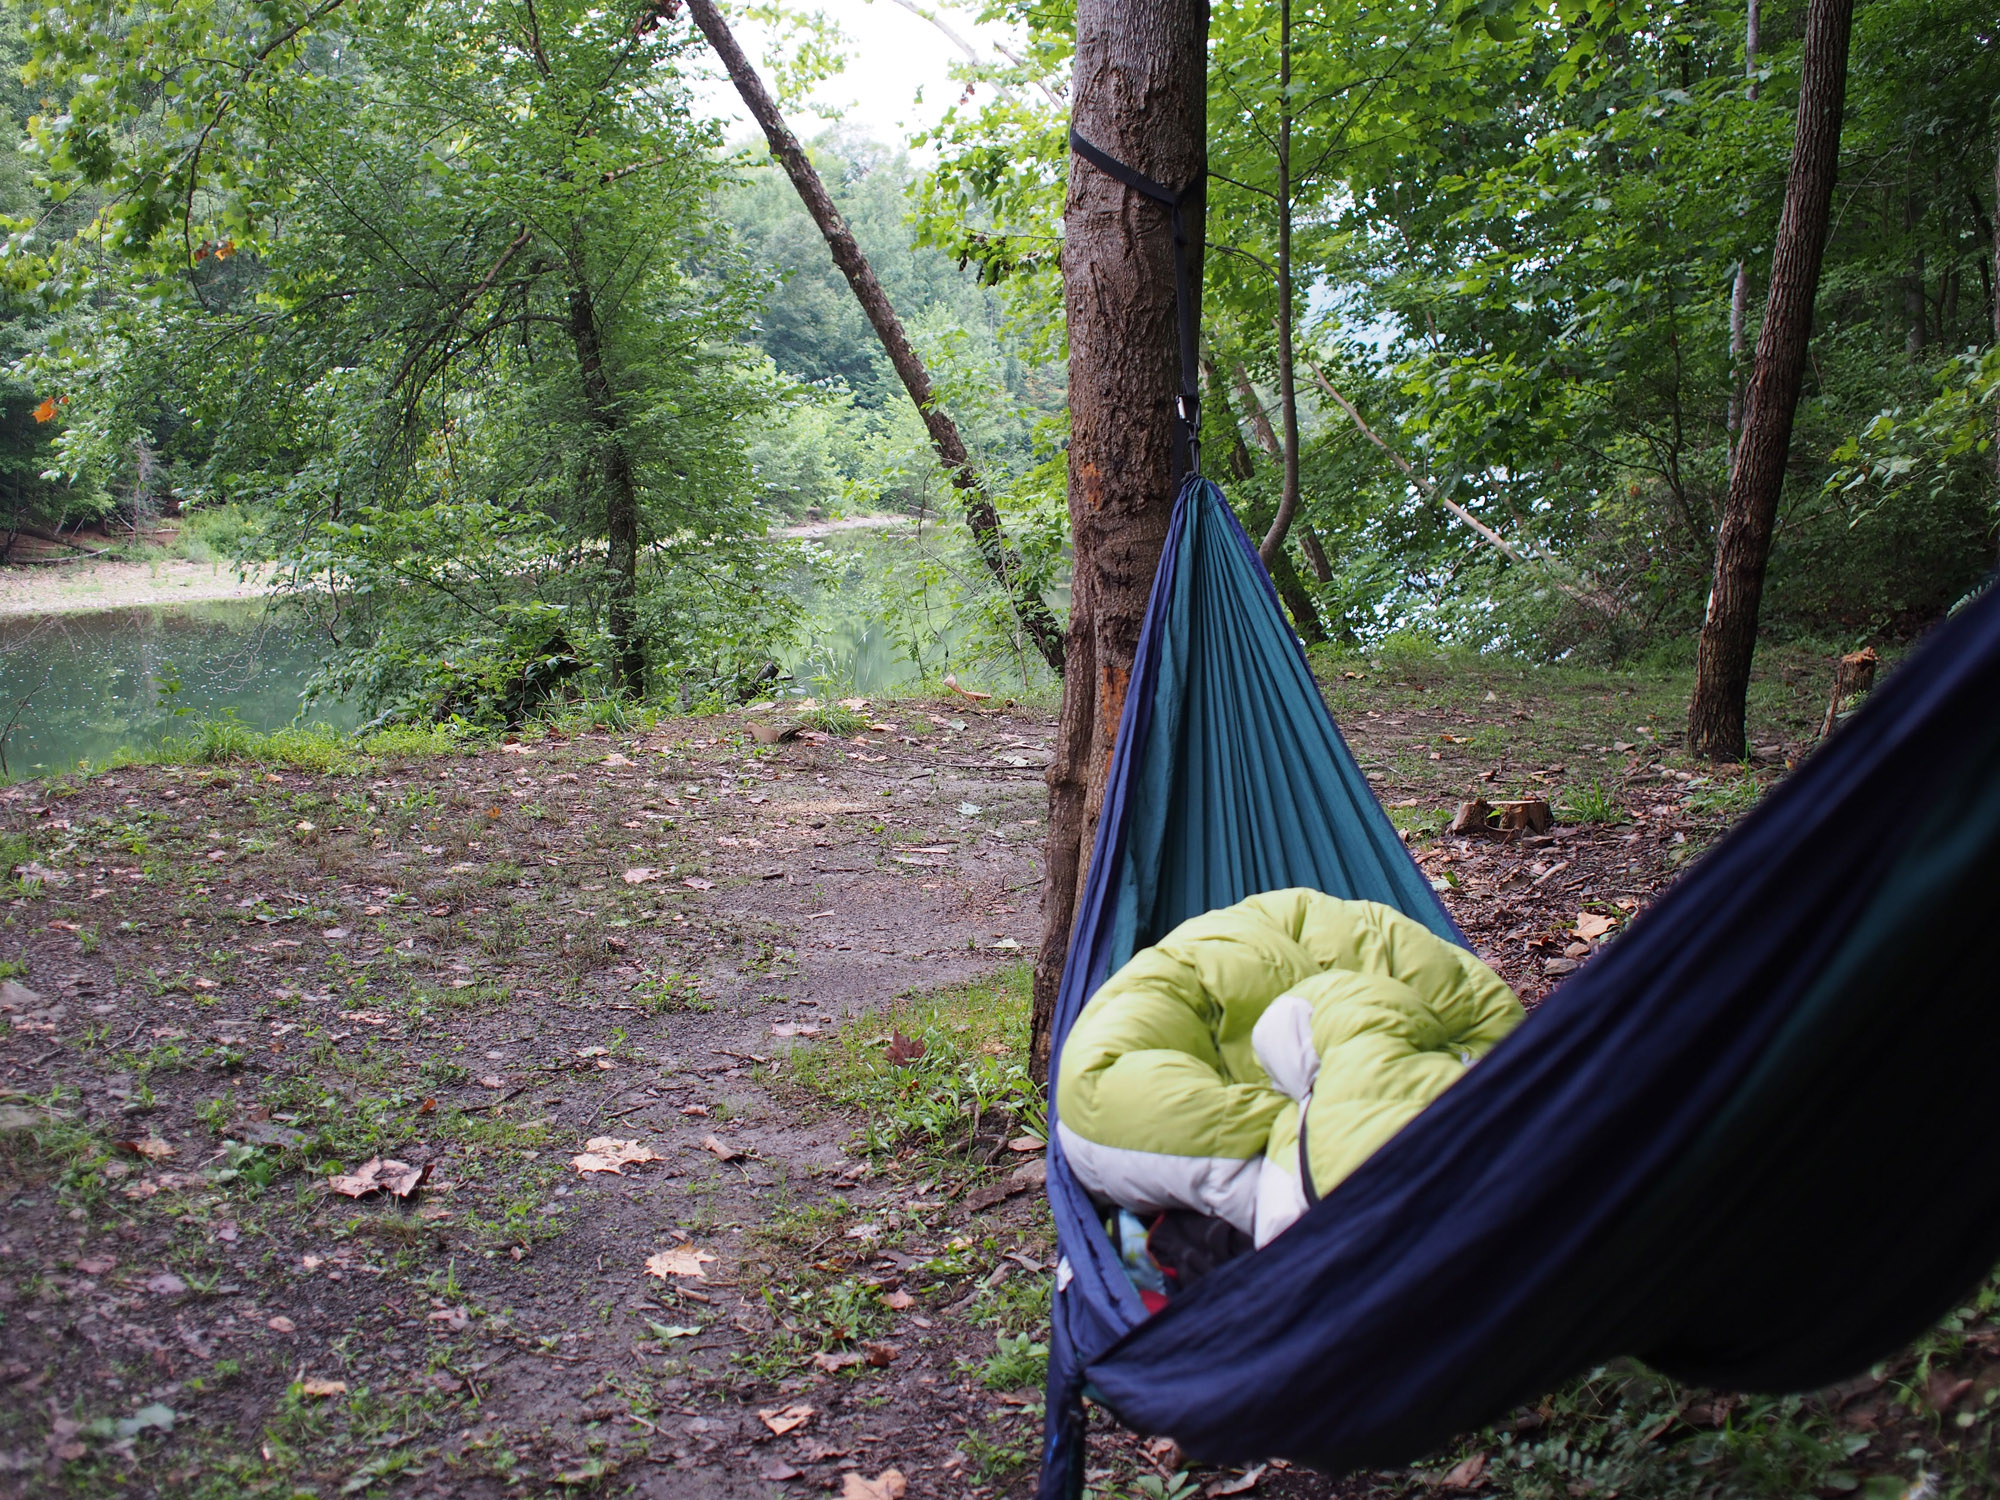
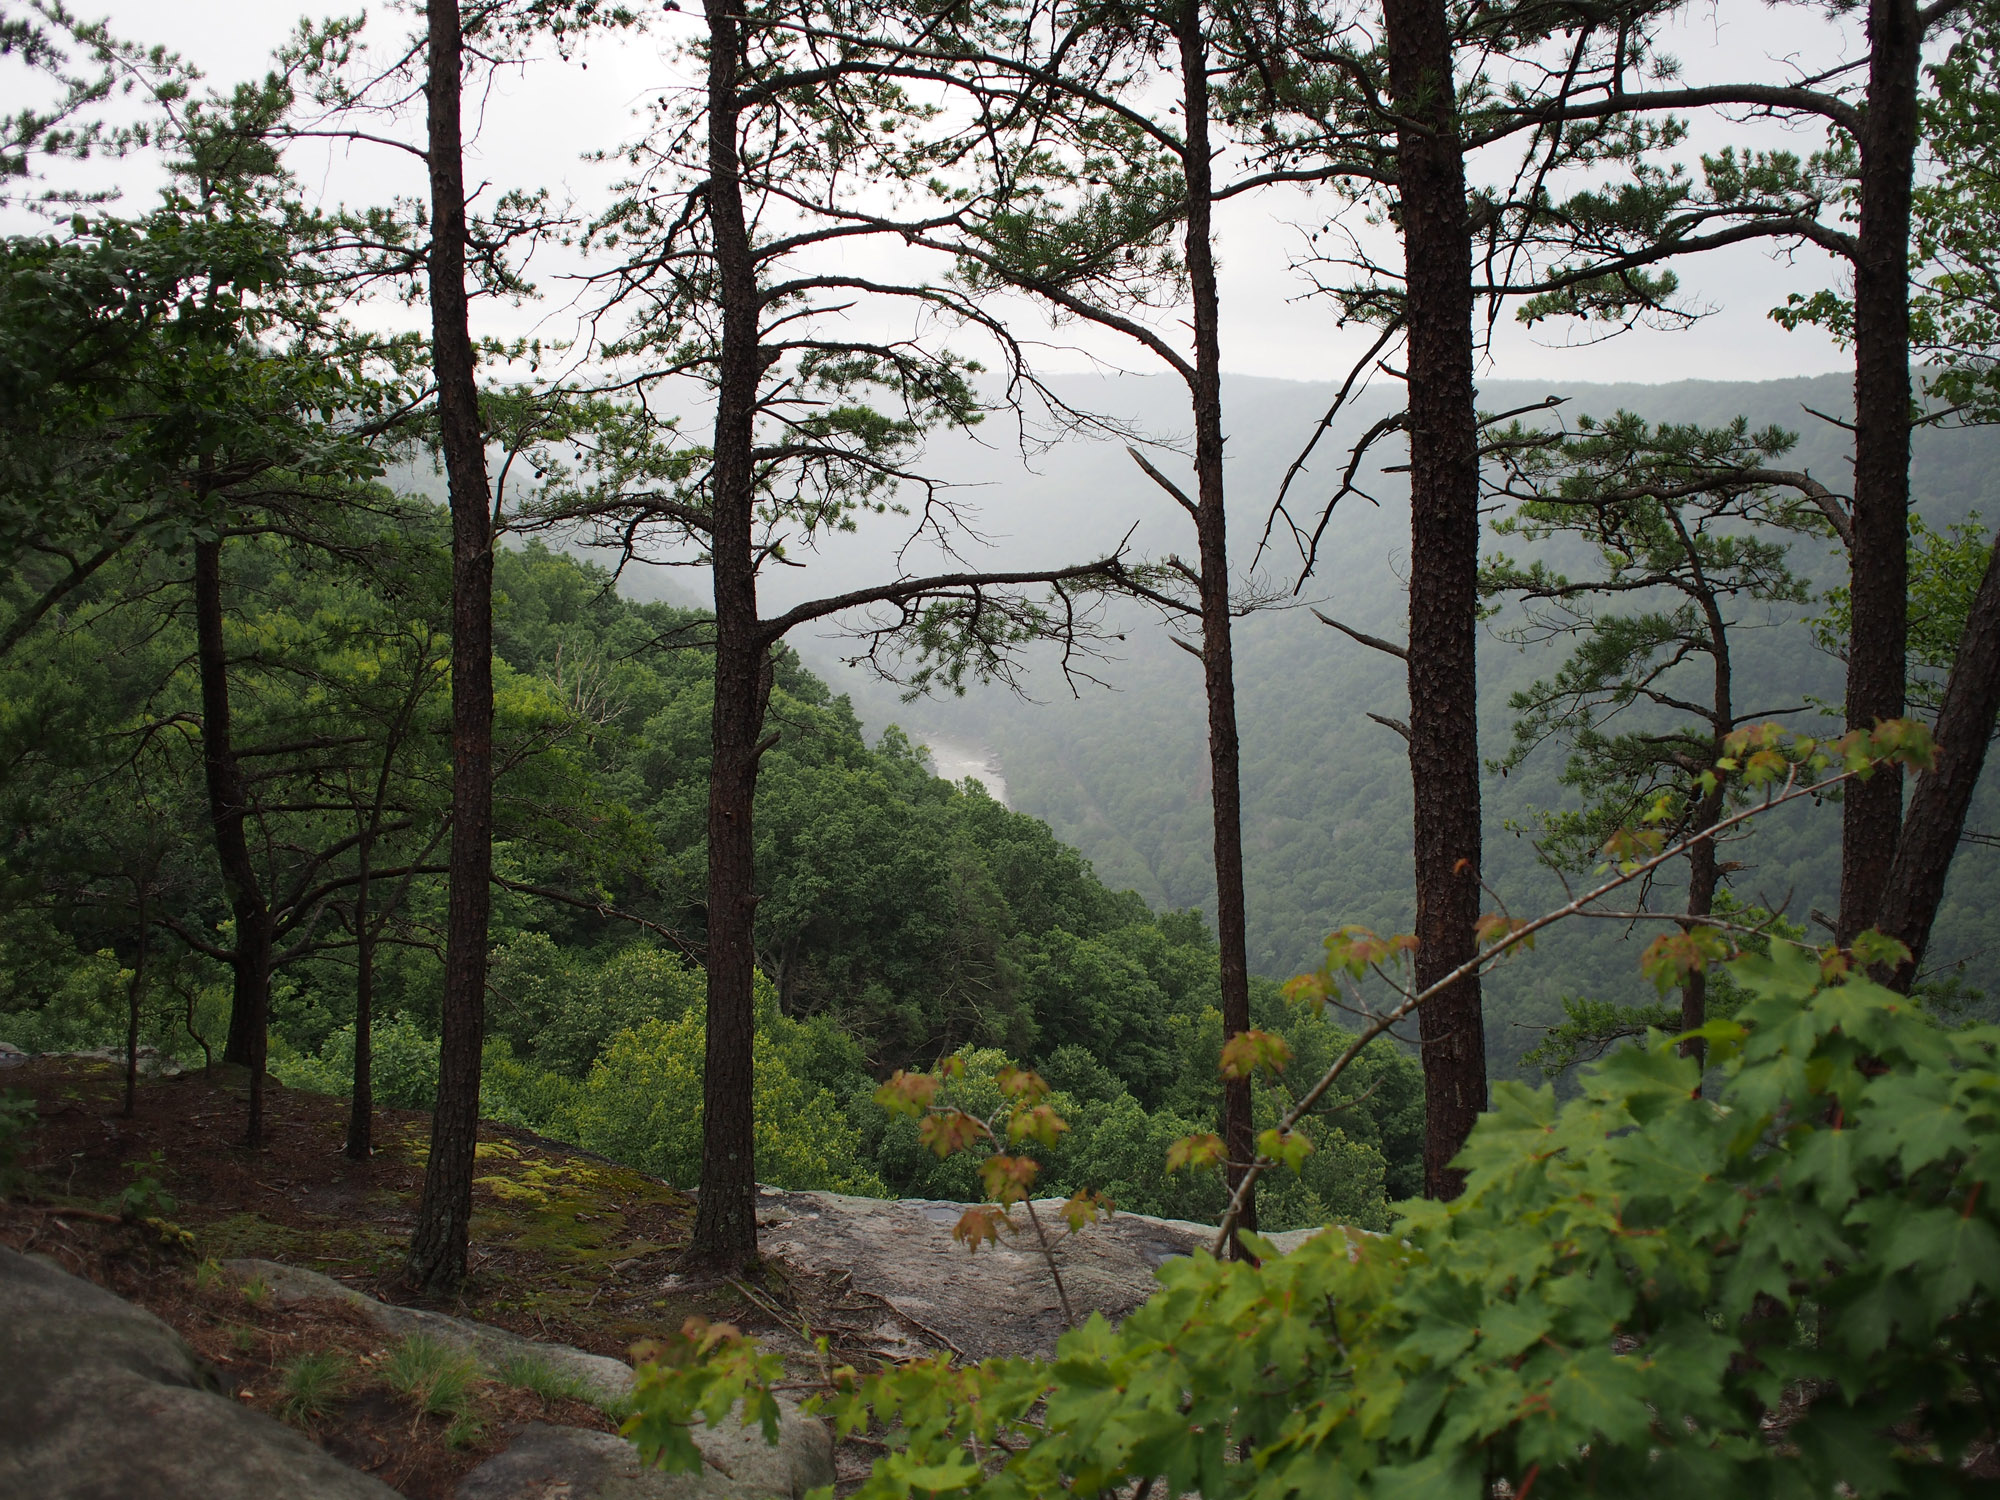
If you’re traveling in a well-forested area (such as the eastern U.S., where I live), finding two appropriate trees to hang a hammock can be easier than finding a flat, dry spot to pitch a tent—sometimes much easier. A hammock also allows you to choose a site with more privacy or better views than the standard tent-camping site, as long as you’re in an area where ‘wild’ camping is allowed.
The ‘Hangle’ and the ‘Lay’
My first attempts at camping in a hammock were not very comfortable because I lacked two crucial bits of knowledge: how to properly hang the hammock, and how to lay in it. It’s quite easy to get the hammock up in the air and to get yourself inside it; getting comfortable enough to sleep soundly all night is something else altogether.
First off, the hammock should be strung so that the straps are at about a 30º angle relative to the ground. If they are too tight (the most common mistake), not only does the hammock become tense and wobbly, the physics of it all causes the straps exert much more force on the trees. You can easily find a rough 30º angle by holding out your hand with thumb pointed up and forefinger pointed horizontally—line the tips of that ‘L’ up with the strap, and bingo, the perfect ‘hangle’.
The distance between trees to get this ideal ‘hangle’ depends on the length of your hammock and straps, but it’s fairly easy to adjust where the hammock attaches to the straps to accommodate more or less distance. Occasionally I’ve gotten into a situation where I needed to scoot the strap up high on trees that were far apart. If you’ll be hanging in an area with very large trees, make sure to bring long enough straps. (More on straps later.)
The second main ingredient to a blissful night of sleep is to lay in the hammock diagonally. If you lay on-center, you end up in a weird banana shape that is not very comfortable. The trick is to angle your head to one side and your feet to the other—this lets you lie flatter, closer to what you’d experience on the ground, but cradled in a way that many find more comfortable even than a bed. It’s possible, in a hammock, to lay not only on your side or back, but in various semi-side positions, my personal favorite. You can also hang the foot end slightly higher to help clear out that nasty lactic acid from the legs. Add to this a gentle swaying from the breeze, and it’s an addictively comfortable experience.

All tangled up
Just looking at a hammock setup, it becomes obvious that the straps are pretty crucial, as the means of suspending you off the ground. Fortunately, the suspension need not be complicated… though like many things in life, you can complicate it as much as you want to. The easiest setup to get the hang of (sorry) consists of sturdy polyester webbing straps with loops sewn in every few inches; wrap these around the trees, then attach the hammock with carabiners going through loops of thin rope in each gathered end. You can also get crafty with knots and go without carabiners to shave off some grams. Another popular option is a combination of webbing straps and thinner lines, called ‘whoopie slings’ (believe it or not). My titanium addiction has bled over into hammock camping and I’ve picked up a few pieces of bling, including ti buckles to attach the hammock to the straps.

Climate control
One huge benefit of hammock camping is immediately obvious to anyone who has woken up in a sticky, sweaty, airless state in a tent (especially when hungover): the air flow all around you in a hammock is very refreshing. The downside is that this same convective cooling can rob your precious warmth on chilly nights. Add to this the fact that when laying in a sleeping bag in a hammock, the bag’s insulating material gets squished underneath you, rendering it less effective.
There are a few ways to deal with this. The ‘pro’ way is to use a pair of quilts, one attached under the hammock and one on top of you. Not only does this system insulate better, it is way more comfortable than trying to wrangle yourself into a sleeping bag while suspended on a moving piece of fabric. The pair of quilts can end up being heavier and more bulky than a sleeping bag (depending on how ‘pro’ you want to go, read: how much money you want to spend), but from all reports, it’s worth it. Eventually I’d like to go this route; looking at relative weights and temperature ratings, a set of quality quilts would weigh the same as my 10-year-old sleeping bag and would keep me just as warm.
Some hammock users choose to use a regular sleeping pad, inflatable or foam, placed under the bag or between two layers of a double-layered hammock. My personal solution was to get an inflatable pad with spaces in it, the Klymit Intertia X Frame, that allow the down on the underside of my sleeping bag to remain un-squished. This works pretty well down to about 40ºF/4ºC.
The roof over your head
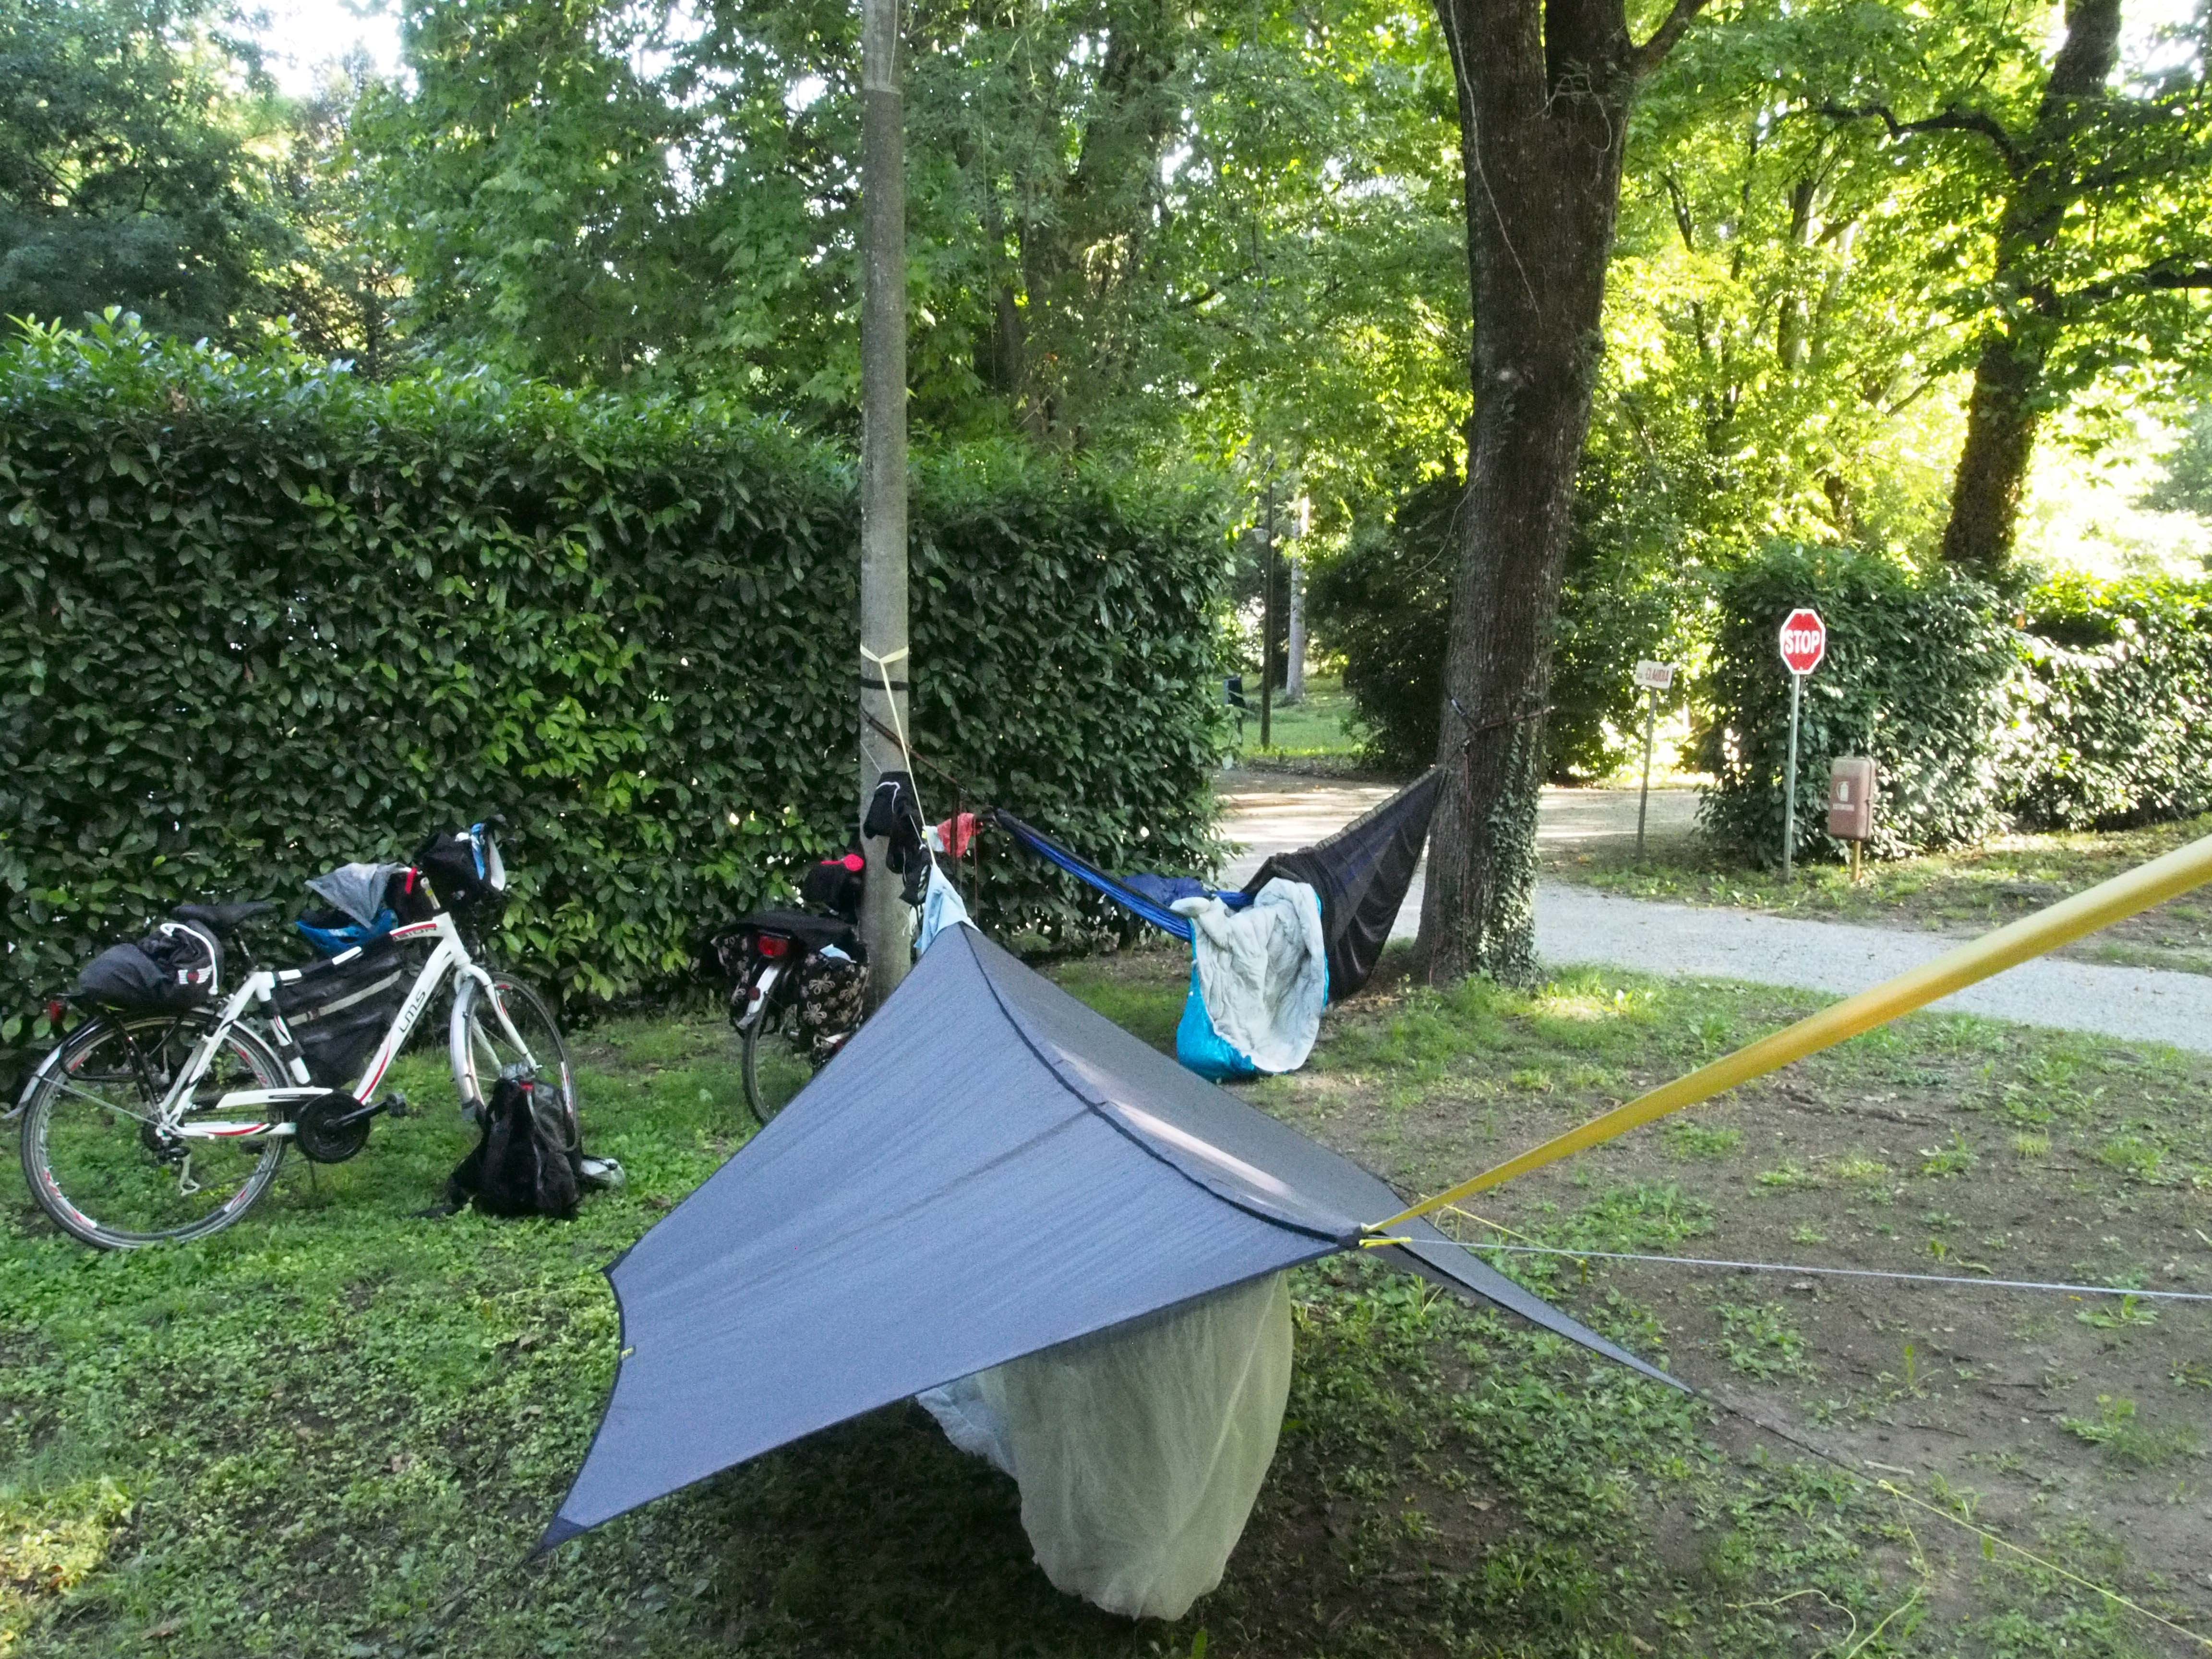
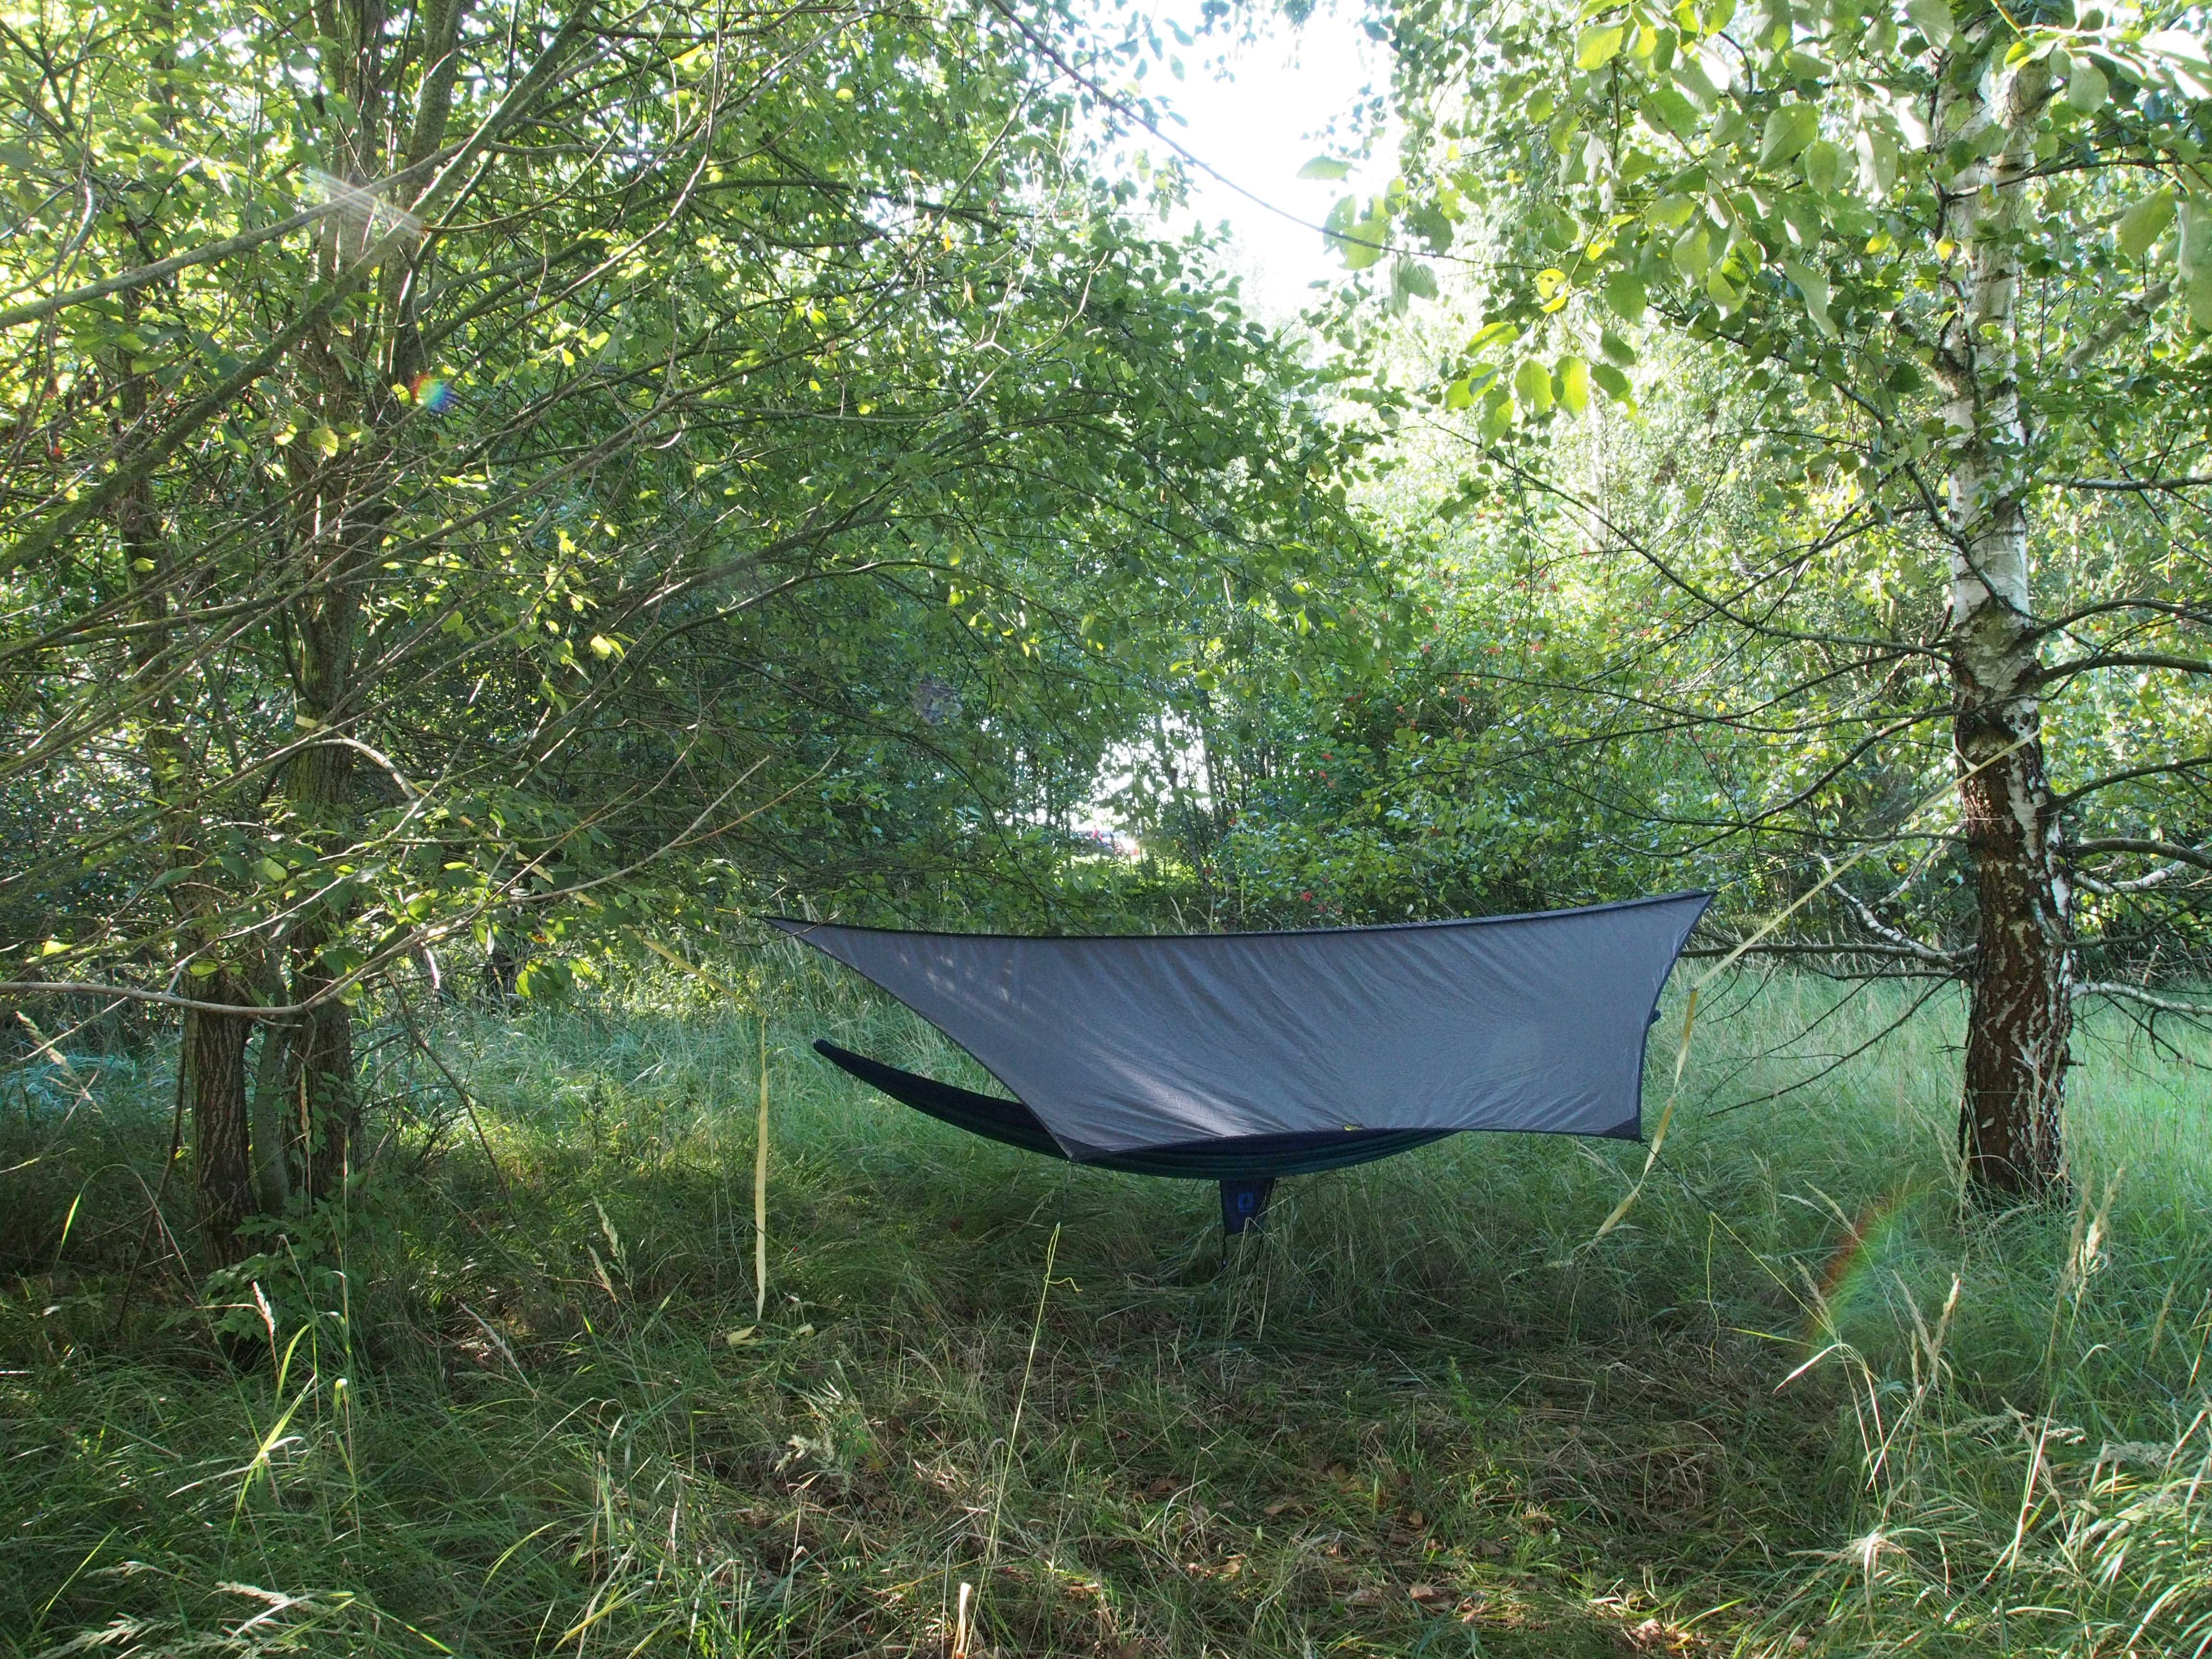
Most of the photos you see of hammock users show happy people hanging out (the puns just keep coming) without a care in the world, open to the elements. Obviously this doesn’t work much of the time—you need to be protected from rain. A tarp does the trick, either a plain camping tarp or something shaped specifically for hammock use. These range from just-big-enough to large expanses of fabric that resemble floating tents.
It’s best to hang the tarp separate from the hammock via its own lines so that it doesn’t get pulled with the hammock swaying in the breeze. The rope used is thin and light, and once again, you can use knots, hardware, or a combination of the two to string the tarp up. Then the corners need to be either staked to the ground or tied to trees or other objects. One favorite trick is to put one side of the tarp up high in ‘porch mode’, allowing me to look out and enjoy the view from the hammock. It’s also nice to sit in the hammock under this ‘porch’ while cooking or waiting out the rain.
Creature comforts
The woods where I typically go bikepacking are home to many tiny creatures creeping and flying about. In some areas, mosquitoes will practically carry you away if you don’t shield yourself. So a bugnet is a good idea. My first bugnet was simply a pair of sheer curtains sewn together. I’ve since made a better one out of no-see-um netting. Plenty of commercial options are available.
To suspend the bugnet above your sleeping space, and to give you a place to hang a light or other items, a ‘ridgeline’ can be strung between the hammock ends. You can buy or make a ridgeline organizer to hold small stuff. The ridgeline, if measured carefully, can also serve as an indicator that the hammock is hung at the correct angle.
DIY fun
At this point you may be thinking that a good ol’ tent is much simpler to set up and use. You may be right. There is a certain ‘fiddle factor’ with getting all of the gear sorted, and all of the adjustments right, for a perfect hammock experience. But if I didn’t enjoy fiddling to a certain extent, it could be done faster. Once you dial in your gear and practice, it’s no more difficult or time-consuming than setting up a tent.
One of the biggest benefits of hammock camping, to my mind, is the modular nature of the gear. There are endless combinations of hammock, straps, tarp, lines, quilts, etc. to get the best setup for your particular needs. And because each of these components is relatively simple, making or modifying them yourself is entirely possible—lots of DIY plans are available online. The hammock itself is one of the easiest pieces to make, since it’s basically just a rectangle of fabric. You can even make one out of a tablecloth. Even simply learning a few useful knots can give you that special Boy Scouts feeling of accomplishment.

Brands and prices
I’ve avoided much talk of brand names and prices because hammock camping (at least in its modern, commercialized form) is new enough that the markets are still very different from one country to the next. So far, the hammock trend seems to be centered in the U.S., but there are new brands and distributors emerging in the UK and in Europe. Aside from one ‘big name’ brand in the States with products made in China, and some knockoffs available only online, there are many small, dedicated manufacturers who produce their goods by hand in their own countries… sometimes in their own garages and basements. The passion is similar to that of the cycling trade.
Resources
TheUltimateHang.com and The Ultimate Hang book — The best place to start. Author Derek Hansen explains every aspect of hammock camping. The illustrations are particularly helpful.
HammockForums.net — A very friendly and helpful community of hammock aficionados and those wanting to learn. Offers many ‘stickied’ threads on commonly asked questions and a good search function. The site is generally geared toward backpacking, but there are a few of us there who use hammocks for bike trips. A good source for hammock vendors outside the U.S.
Shug Emery YouTube channel — Shug is a true performer. You’ll get a dash of circus antics with deep hammock and camping knowledge. There are lots of other helpful hammock videos online, but Shug is the king.
