- This topic has 2,120 replies, 23 voices, and was last updated 3 years ago by wonnyj.
-
Cannondale Trigger? Bargain
-
crazymac680Free MemberPosted 7 years ago
I was planning on setting up a firmer ride in my trigger 4. So thought I’d follow the setup guide again. So I checked my pressures and then tried to remove the pressure from the negative chamber. Oil poured out the pump and valve.
I seen longmover had this issue. What was the damage? Did you go straight to mojo or through Pauls and warranty?
Thanks for any helpcrazymac680Free MemberPosted 7 years agoI phoned mojo this morning. They said just send it in and it will be fixed under the two year warranty.
I took it off last night. Easy job. 2 Allan keys and make sure there is more pressure in pos chamber than the negative.
I was also tempted to send the fork in as they have a deal at the moment.
£170 for a service and an upgrade to the fit4 2016 performance damper.
Then I remembered. I’m happy with the fork and can service it myself.Dekerf853Full MemberPosted 7 years agoI seem to have collected a few 1.5″ stems. 🙂
I have an unused Truvativ 40mm
A well used silver Sunline 50mm
And the original Cannondale 80mm, also unused.Let me know if interested.
parkesieFree MemberPosted 7 years agoMy shock is on its way to mojo. Seems to be that air has got out of the neg chamber into the oil side. Hopefully find out and have a working shock again next week.
zaskar75Free MemberPosted 7 years agoHi all anybody having a nightmare with there front mech not shifting up correctly , had the guys at LBS
take off the crank and deraliur refit and retune .
Mile down a trail ,same problem.
Have I bought a lemon here!!!
Would this be a warranty issue.
Considering conversion to 1×11 or even 1 x 12Could this be a problem solver;
thewormFree MemberPosted 7 years agoThe actuation lever for the fox dyad rear shock on my trigger 4 has fallen to bits after some heavy duty off roading, does anyone know where I can get a replacement
eddiebabyFree MemberPosted 7 years agoqwerty and Dr Cannondale usually have them. Bad news: not cheap….
thewormFree MemberPosted 7 years agoYou weren’t joking, 79 euros!! how far do you think I will get with a phone call to Paul’s cycles for a free replacement as its only 6 months old
swainy90Free MemberPosted 7 years agoHas anyone got a Thompson elite covert dropper post on a trigger 4. Just bought one and wanted a bit of help setting it up and how to run it internally though the frame. Cheers in advance
swainy90Free MemberPosted 7 years agoPhotos of your stealth dropper on your trigger 4 would be greatly appreciated
crazymac680Free MemberPosted 7 years agoDown from the top of the seat tube. Pop the little grommet out. Catch the hose with something like a small Allen key. Under the rear shock is another grommet. Feed your hose into it. I used pliers as access was tight since I hadn’t removed my shock.
Keep looking into the whole at the top of your down tube. When you see it. Try and catch it with your Allen key.
Hard part done.
Unless like me you forgot to put the grommet back on and you need to start again.
 parkesieFree MemberPosted 7 years ago
Shock is back from mojo all sorted and as good as new under warranty no hassle. Pauls were helpfull in detailing some reset procedures to try before sending it away. None worked so pop in a box with a copy of the recipt and its back inside a week.
kneebiscuitFree MemberPosted 7 years agoSo the oval guide from 77 designz has arrived and unfortunately it doesn’t seem to fit…damn. torn between modifying it or selling it on. It seems that the iscg tab doesn’t sit far enough away from the bottom bracket cup and so the mating face is uneven. I could grind a bit off the back of the guide which would allow it to fit. I thought the whole point of “iscg” was that it was a standard fit??!
zerolightFree MemberPosted 7 years agoI had my first crash this weekend on my TC2. Managed to survive a day of speeding through rocks, climbing loose gravel, navigating technical single-track, etc. Then one the way home I pulled up off a speed bump on the road in a lame attempt to get air at speed, feet left the pedals, landed behind the bike. For a moment I thought I was gonna manage to ski it out, then the bike washed out and I went down on my side under it. Roadrash on my right elbow, shin, and hip are a pretty good argument for elbow and knee pads.
Only marks on the bike are a scuffed ODI bar plug and scuffed pedal. Had the fork been anything other than a Lefty it’d be scuffed up I imagine.
First crash in a decade. Still a bit shaken up.
crazymac680Free MemberPosted 7 years agoFirst crash in a decade! I Crash once every 4 rides. I now wear hard shell knee elbow and shin pads so my crashes rarely end my day.
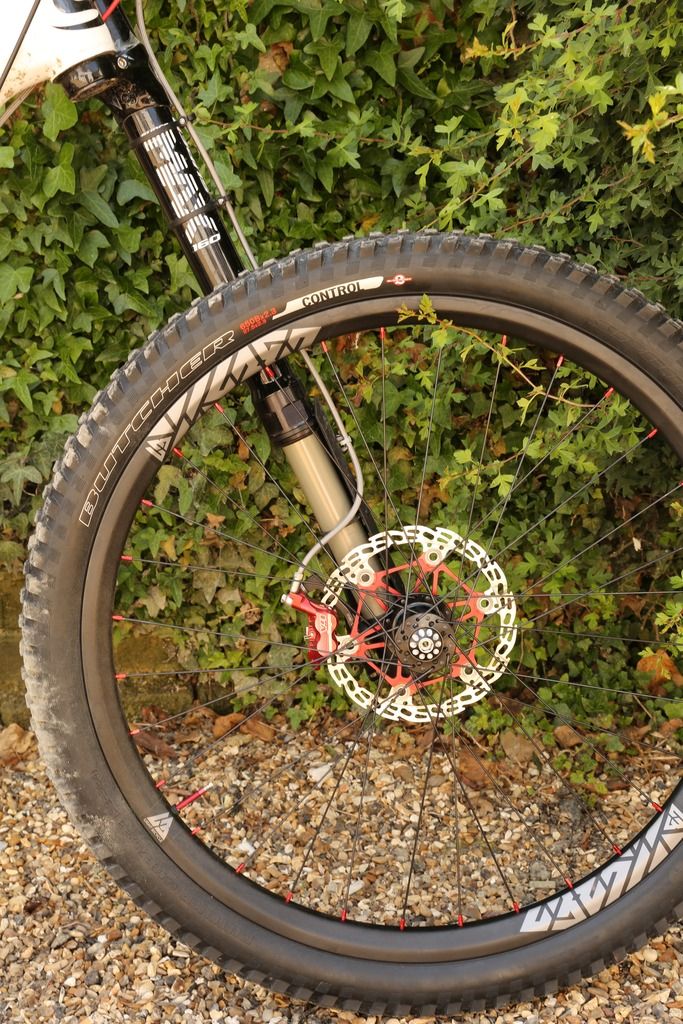
I’ve crashed the trigger about 10 times and my old hoodoo about 20.eddiebabyFree MemberPosted 7 years agoFinally got the bike back from Weymouth at the weekend and today I fitted my new Light Bicyle rims. A buther up front and a Slaughter at the back. The tyres went on with no need for levers and inflated first time with a bit of soapy water and a track pump.
Pop in slime and job’s a good un.
The rear brake caliper needed moving a fraction of a millimetre but that was all.They seem to be staying inflated so time for a quick blast.
MrCrushriderFree MemberPosted 7 years agoSuccessfully/easily fitted a sram x0 double grip shift to act as a dyad remote last night. 5 minute job and it works perfectly!
kneebiscuitFree MemberPosted 7 years agoEddiebaby, do you want the 77designz chain device? I’ll send it back if not. Email in profile.
ChriseddiebabyFree MemberPosted 7 years agoHi Ashy, ygm.
So ive been out bashing a few miles out in the hotness around here, and even without gnar I feel the bike now is approaching perfection. The LB 30mm inside with rims and the tyres seem so right even though I’m still playing with tyre pressures. The only pain is that I’d got the Dyad set up perfectly but now I think I’m going to have to tweak everything as the tyres seem to be doing so much more. The tyre pressures aren’t quite as sensitive as a fat bike but on these rims it’s almost a step towards plus size.
joolsburgerFree MemberPosted 7 years agoQuick update on mine after the failure of bike one, been up to Afan and round my local trails did the same drop as before and all is well. Bikes holding up no problems and taking the use I’m going to give it with no complaints. Can’t believe the difference in speed with bigger wheels, whodathunkit.
Still feel the bars are a tiny bit low for me on the climbs, I suppose due to the 1.5 steerer the only way round that is new bars?
kneebiscuitFree MemberPosted 7 years agoGlad to hear it’s all working for you! I hammered mine round Stainburn last night, soooo much fun!
@eddiebaby, interesting to hear that about the change of rims, did the Jekyll also come with the mavic crossrocs? I’ve set mine up tubeless but the rims are quite narrow and taking advantage of the lower tubeless pressures means the tyres are squirming about a bit. How much were the LB rims if you don’t mind me asking?
eddiebabyFree MemberPosted 7 years agoHi Chris, the wheels cost $1010 inc postage and at the time that was £690. The exchange rate will no doubt have changed since. The tyres now feel totally planted and the worries about the hookless rims vanished the second I rode it.
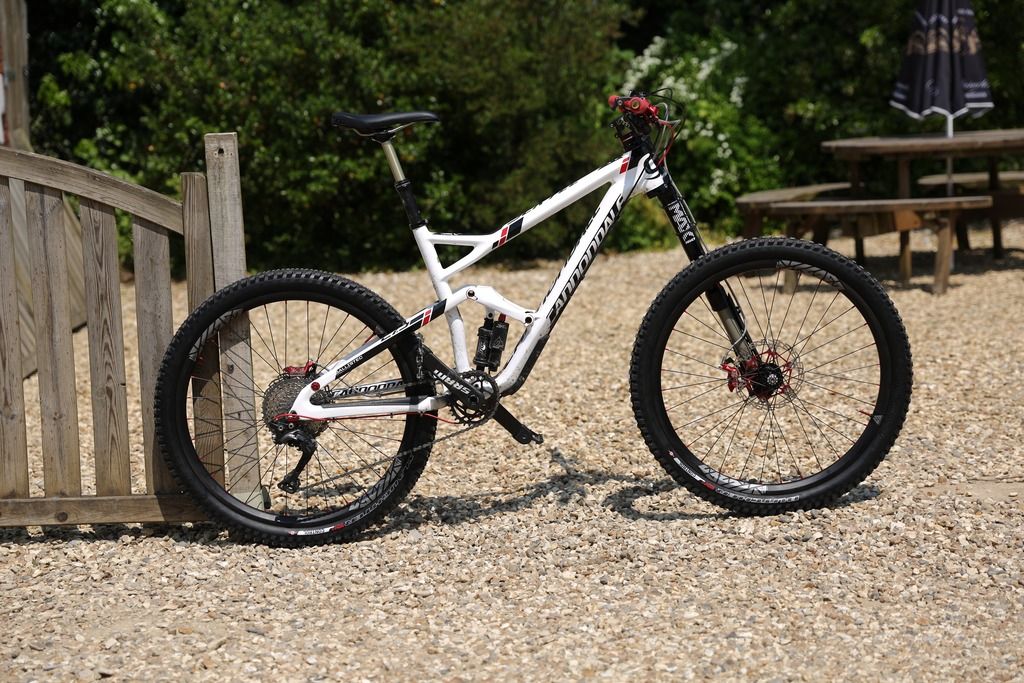
It’ll be interesting to go back to the Crossrocs and see how they compare in a month’s time, but side by side with the LBs the tyre looks really squeezed in. At some point I’ll try the Nobby Nics on the LBs as well.Although my bike is a Jekyll it ought to be called a Trigger’s Broom as since buying it I’ve changed bars, grips, saddle, brakes, tyres (twice), wheels, oval chain ring and gone XT 1×11. I’m going for a longer dropper next so I can get the saddle a cm higher.
Obligatory pics:parkesieFree MemberPosted 7 years agoJools good to hear your back on the bike and enjoying it. An option for raising the bars would be a stem with more rise or you can get spacers to raise the stem. Depending how much you want to raise it you may need a longer steerer if they are available.
kneebiscuitFree MemberPosted 7 years agoMan alive that’s a great looking bike! Thanks for info on the wheels-bit out of my budget at the moment, but they look great. Was that price for the rims only or with hubs too?
Chrisssmith1979Free MemberPosted 7 years agoSo whilst I am enjoying my trigger team, it has become a bit of a clicky, grindy graunchy beast over recent weeks. Not helped by the dry weather I’m sure but it is playing a tune from virtually every pivot point, headset and BB.
Time for a little TLC I think. What are people using to keep their sweet? Just some Teflon lube or something more sophisticated?
(chain is fine a lubed regularly).
Thanks.
sargeyFull MemberPosted 7 years agoHi, does anyone know what the code is for the main pivot bearings on a trigger 4 before I strip the bike so I can order them as mine are knackered.
Cheers dave.
swainy90Free MemberPosted 7 years agoThanks for all the information crazymack680. How did you get the rear shock off? Did you release the air pressure from both the negative and positive air chamber before removing? Cheers
eddiebabyFree MemberPosted 7 years ago@Chris
That was complete with Hope Pro rear and Project321 Supermax hubs.
Full spec below.Product Option Unit Price QTY Unit Total
WM650BC05 All Mountain matte UD 32H
DT SWISS Competition black J-bend
DT SWISS PRO Lock Red Aluminium
Hope Pro 2 40T Black 142mm 12mm 32H Shimano MTB 10/11S J-bend 6-bolt
Project321 Lefty SuperMax Black 32H J-bend 6-bolt LB black
Pair $898longmoverFree MemberPosted 7 years agoSwainy just unbolt it and take it out, no need to release any air.
swainy90Free MemberPosted 7 years agoThank you longmover. Will the shaft not like ping out or is it because it’s a pull shock?
longmoverFree MemberPosted 7 years agoThe shock always wants to contract, you have to put force through it to extend it.
crazymac680Free MemberPosted 7 years agoAs long as the pressure in the negative is lower than the pos it will stay contracted. Its only 2 bolts and 2 Allen keys needed to remove the shock.
zerolightFree MemberPosted 7 years agoSsmith I don’t have any bearing squeak issues. I do find my chain gets creaky when dirty, more so than any other bike. A quick clean usually resolves that. I presume that’s just a quick of the 10 speed chain that I presume is narrower than my old 9.
Crazymac I can’t imagine falling off every few rides. You must be riding way harder than I. I feel like I’m getting too old and too busy at work to handle roadrash or broken bones. I’ve invested in some knee and elbow protection – hopefully I won’t feel to much of a muppet to wear it.
hammeriteFree MemberPosted 7 years agoI got some knee pads that I wear when I take the bike in to the bike park. Went out on an XC loop with a friend and people he knows last week, turns out I was the only one not wearing knee pads.
No need to feel like a muppet zerolight.
kneebiscuitFree MemberPosted 7 years agoI wear kneepads on virtually every ride after smashing my knee to bits with my knee pads in my bag. No need to feel daft!
zerolightFree MemberPosted 7 years agoSo, just in case it’s not been mentioned before, it turns out the little metal bar on the dyad sag indicator, the bit with the % scale stamped on it, it’s a push fit into the upper plastic mount of the indicator.
If like me, you hate the squeak that the sag indicator develops with the metal bar rubbing on the plastic loop, you can pull the indicator bar out of the mounting and stick it in your tool box when sag setting is done.
To set the sag again, rather than push it back really firm, I just push mine in a little bit until the first click – seems like it would fall out real easy. Then I adjusted the position of the little loop until the bottom edge of the loop lined up with the zero travel indicator line above the 30% mark and tighten that back up (I imagine you’d move that just once to compensate for the new position of the half inserted sag indicator bar.
Now I set my sag by making sure the bottom of the loop aligns with the centre of the white square, and when happy I pull the indicator bar, stow it in my tool box for safe keeping and ride without the squeaky indicator. It’s easier to be able to pop it in quickly from time to time to make sure the shock hasn’t lost pressure, rather than my previous fix which was to remove the entire indicator assembly, which takes more time to re-affix for a quick sag check.
zerolightFree MemberPosted 7 years agoSo what are peoples thoughts on stem length with this bike? I believe my carbon 2 comes with a 60mm stem, which is the shortest stem I’ve ever had on a bike and my be contributing, along with the wider bars, to much more confidence on the trails vs my old SC Superlight which had a 90mm stem and relatively narrow bars. The SC did have a riser on it, not sure by how much now – I’m guessing somewhere around 20mm.
My only complain with the Trigger is that my hands can get a little sore, like I am putting more weight on them than I should be. I don’t find it overly long, or short. Would a 45mm stem take pressure off my hands? I don’t find it so easy to get the front wheel up when approaching obstacles, yet I don’t feel too perched forwards on the tricky stuff either.
I recently put a 40mm Truvativ on my sons Btwin, but its way too small a bike for me to get a feel for what that does to geometry – his bike was way too long for him.
kneebiscuitFree MemberPosted 7 years agoAnyone got an opinion on the Crossmax XL Pro wheelset? Very tempted as quite sick of my super flexy crossrocs…
crazymac680Free MemberPosted 7 years agoI think the trigger 4 has a 65mm stem on it and I’m happy with it. I’ve considered getting a shorter one to make it even more stable on the steep stuff but the majority of my riding is less demanding so I am better off keeping it as a jack of all trades.
A shorter stem would take some weight off your hands but so would sliding your seat forward.

The topic ‘Cannondale Trigger? Bargain’ is closed to new replies.