Nice bearings. Got any pictures of the bridge?
Nice bearings. Got any pictures of the bridge?
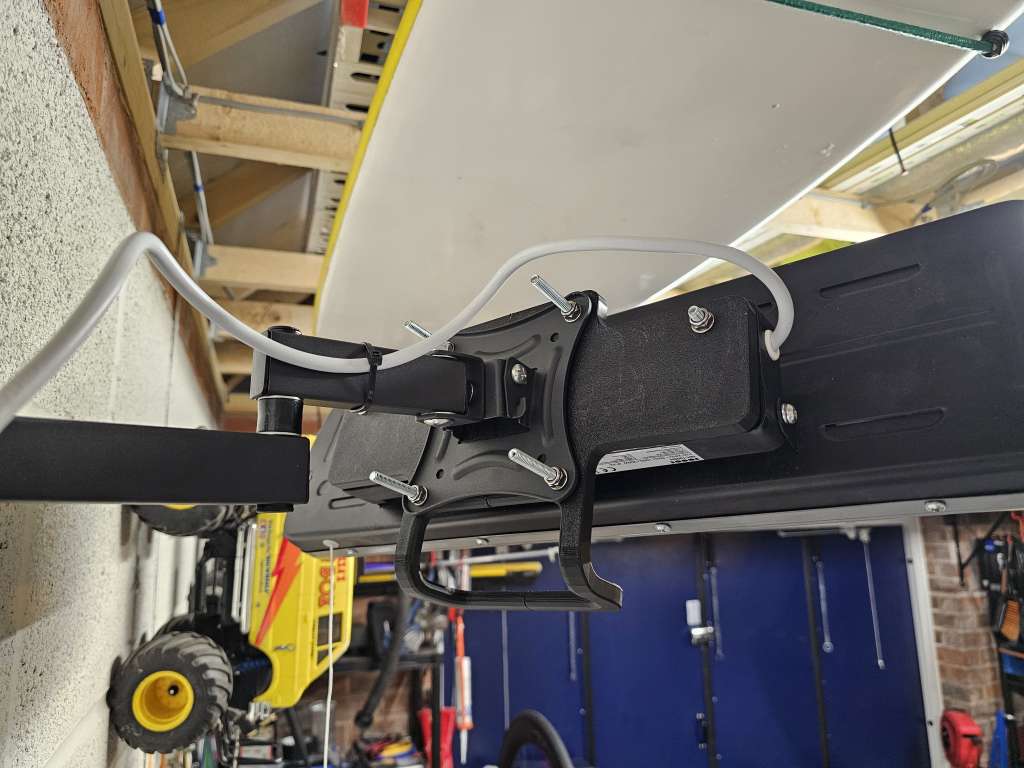
Its this rusty POS, it transfer big blocks of PU foam to various locations - not my department or remit but I'm the only person on site with Solidworks. The original collapsed wheel/roller is adjacent to the new bearing, the problem is the bolts are threaded into a blind section and were rusted and snapping in removal. Rather than spending hours drilling them out I made a pair of complete new assemblies and mounted them inboard of the originals.
Sandwich plates go on top of the existing 100mm RHS and clamp everything in place. Just tested it - working fine.
[url= https://i.ibb.co/52MNxFH/IMG-9967.jp g" target="_blank">https://i.ibb.co/52MNxFH/IMG-9967.jp g"/> [/img][/url]
I have tripped over that bloody pile of wood so much in the last few weeks i promise i will send it!
Not as exciting as the stuff above but first cake this year
Pecan, prune and chocolate with lots of brandy. A little dusting of icing sugar and the festive gluttony can begin....


Excellent!
Thanks. I should point out they were under strict instructions to customise them.
So they went nuts with a sharpie. ?
@joshvegas love this!
Did you make the boxes yourself? If so, what thickness wood did you use? I fancy having a go at making my kids something similar.
Did you make the boxes yourself? If so, what thickness wood did you use? I fancy having a go at making my kids something similar
Every thing was made from recycled wood i had lying around.
Boxes were recycled ash and meranti cored plywood, about 4mm thick. They were a real pain to be honest. I hate gluing up boxes:-D
I thought i had added more detail in an edit.

Inspiration was mainly from Del Pucket on youtube for "just do it ethos". But i put a bit more effort in refining.
The neck is through the end of the box and sits in a notch at the back, i did that rather than go all the way through so they sit flat on the floor.
Hopefully you can see how i constructed the boxes thick oak ends rebated all round for the ply mean the box os pretty robust. Of it was for me i would have used a nice cigar box or possibly made a more refined box, but wanted kid proof.
Scaled length of the bigger one was 560mm and i just marked the other two fretboards starting at the first fret position. So about 530mm ish?
Frets were from chickenbone John, he seemed to have the best price for them. Tuners were amazon specials.
Boxes were 200mm by 250mm ish. In retrospect i would probably drop two or three frets off the high end and moved the bridge back a bit so they were a little shorter overall. But keeping the biggish fret spacing (lots of scope for ****y fingers when barring the chorsd)
They are DAD tuned.


That's ace Daffy!
Love the lamp.
Great lamp 🙂
Very clever. Nice work.
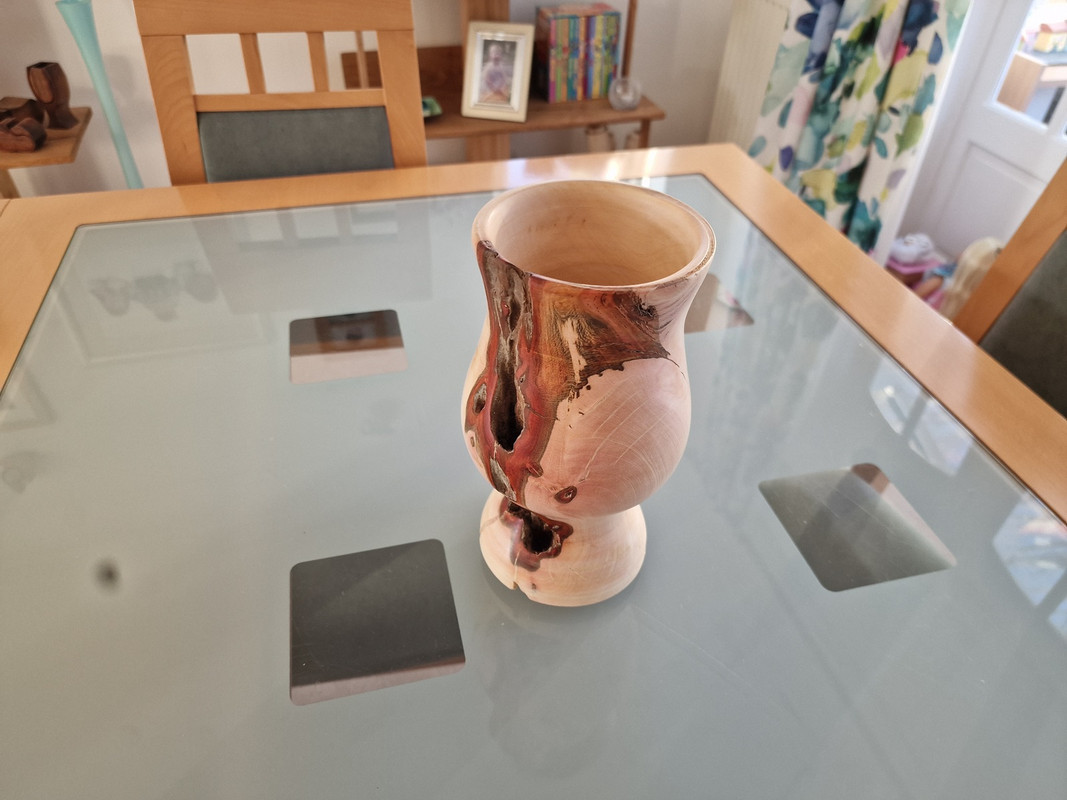
I need to practice with my new lathe so I picked up a log from the local woods and cut a piece to turn. I think it is laurel.
[url= https://i.postimg.cc/Pf2jhkcN/Turning-1-log.jp g" target="_blank">https://i.postimg.cc/Pf2jhkcN/Turning-1-log.jp g"/> [/img][/url]
It is very fresh so likely to crack but I don't care as it is a practice piece. I also wanted to try a 'live edge' cup which, I think, is what you call it when there are ragged bits of bark and stuff showing so a few extra cracks won't matter. Here is it on the lathe as I rough out the shape.
[url= https://i.postimg.cc/RVT5Gx1v/Turning-2-Rough.jp g" target="_blank">https://i.postimg.cc/RVT5Gx1v/Turning-2-Rough.jp g"/> [/img][/url]
I was quite please with the end result. I think the brown bits add interest and as it serves no practical purpose they don't matter. I like the small amount of brown on the inside too.
[url= https://i.postimg.cc/XqCdQf1t/Turning-4-other-side.jp g" target="_blank">https://i.postimg.cc/XqCdQf1t/Turning-4-other-side.jp g"/> [/img][/url]
That's really cool that. It's a pleasing shape and you're clearly getting to grips with it.
Be interesting to see what it does as it dries out.
Nothing artistic like you smart lot, but useful for me.
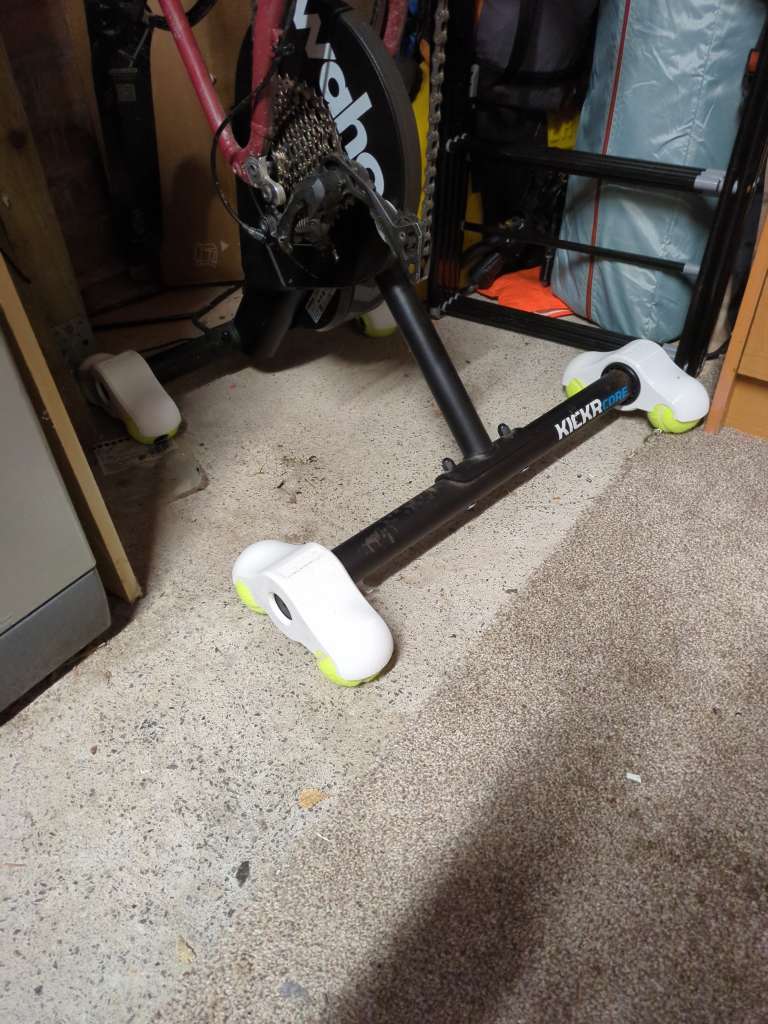
Decided to try a rocker plate for the turbo so used a standard STL file for a foot then made some adjustments for a better quality.
Today I did a quick design for a riser block to account for the additional height it adds on the Turbo, featuring Zwift team branding.
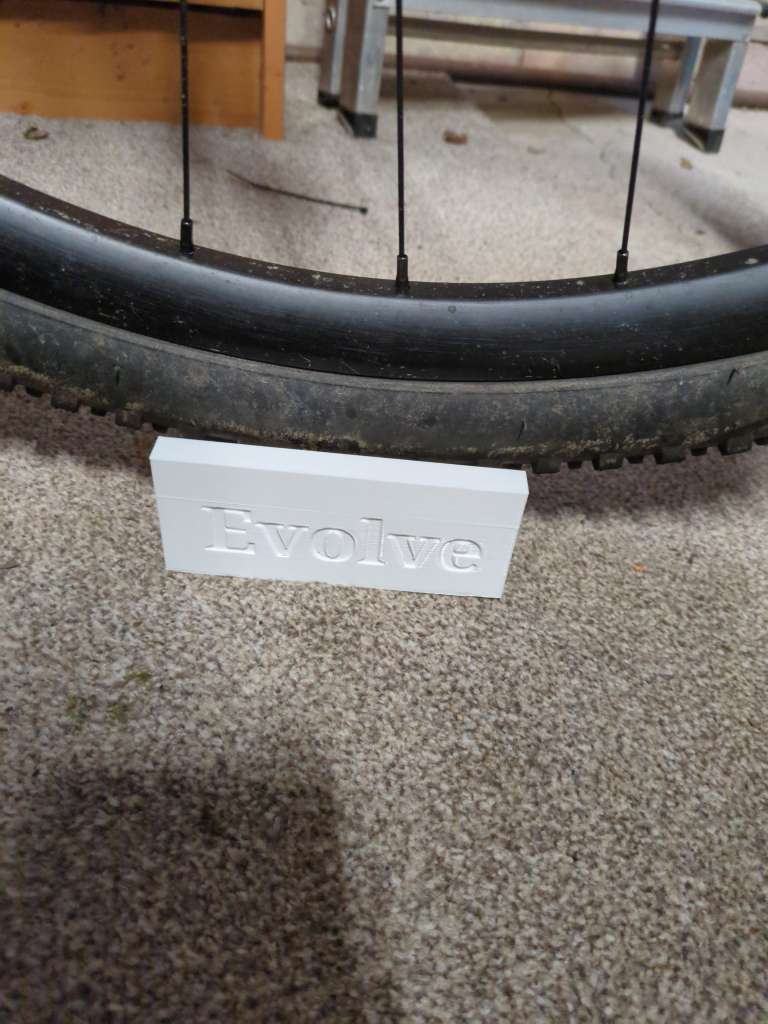
I use a brick, yours looks better!
I use a brick, yours looks better!
Thanks. Bricks are all in use being a house. And this is the right height and the tyre slot is sized for 45mm gravel tyres.
If that's laurel I wouldn't drink from it due to the poisoning risk but looks very nice.
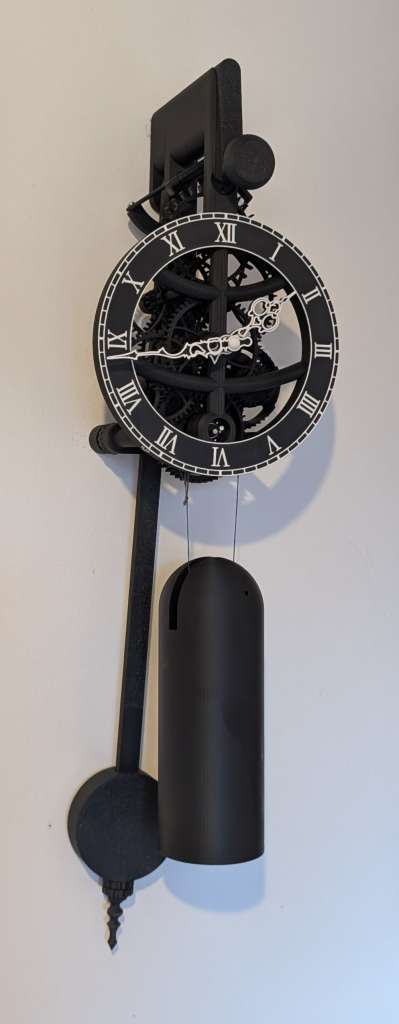
3d printed clock from https://www.myminifactory.com/object/3d-print-small-8-day-clock-337387
I've remodelled the hands to add white details. Printing was done on a Bambu Labs P1S without AMS so I had to learn how to do manual filament changes mid model.
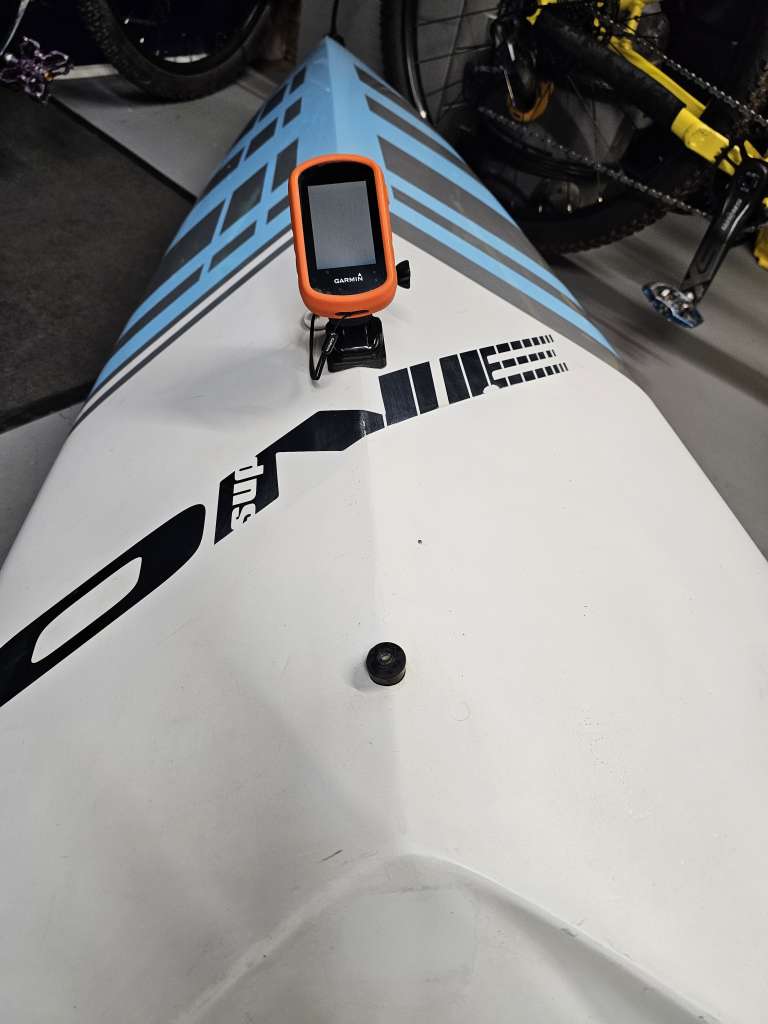
Getting to grips with the Bambu a1 mini and using it for actual useful things. First was a shaped spacer to mount my garmin centrally on my race paddleboard. Second was an adaptor to fit an infrared heater to a cheapo VESA tv mount in the workshop so it can be positioned as required.
Very happy with both and now looking for other problems to be solved!
Are those bolts long enough, monkey p? ;0)
Yeah yeah, I know! They'll be trimmed down at some point.


Rebuilding my Volvo XC90 which shares the same differential as a Freelander2. The bearings need replacing which requires specialist tooling to loosen the pinion but.
It cost me £17:50 (and a bit of stolen time at work) for a 23spline quad bike back axle adapter. Turned the remains of the 41mm socket to became the drive boss for the spline 'socket'.


I made the form work for some curved walls above a concrete spiral staircase.
Not finished yet mind.


Not made but painted to match.
From The Shed of the idiot that brought you the Frankenflator, I give you the Frankenstand!

Loving seeing all the curvy work in the building but other than the wee bit spindly handrail spaghetti western style top left 1st pic it looks like a dodgy site for health and safety
looks like a dodgy site for health and safety
Too right!! What the heck are you doing working there Kayak, get the client to sort it out with some edge protection at least.
Yeah, it's not great I know.
I'm not working there much longer actually.
I need to do something like that with my fire extinguisher inflator. It's still in standard colours, could prove somewhat incendiary if someone grabbed it in an emergency!


My bike wash stand was a bit of rotary washing line pipe/ pole with a shelf bracket jubilee clipped to it. Now much more secure as I have cut an damaged alloy frame up leaving two arms, down and seat tubes. I then beat the devil out of it to force the BB onto the pole.
Last year I posted a couple of pics of the garden renovation I'd started, back on page 87
https://singletrackworld.com/forum/postid/13214675/
https://singletrackworld.com/forum/postid/13214677/
I forgot to follow up later on.
By early June the retaining wall and sunken patio were finished, but the lawn was left in a bit of a state. I did everything myself, apart from actually laying the slabs (I dug it all out and laid the base, but paid someone who knew what they were doing to lay them).

It stayed largely like that until the beginning of March this year, when I completed the far end of the retaining wall and set boundaries for the edges of the lawn, then yesterday nearly destroyed myself laying new turf. Very happy with the result

This is included to show an almost "Before" pic to the one above

@jimw has made his best bird yet. I might be biased by the fact i provided some materials...
With his permission i will post it
Fresh from the mould and not close to finished but if you watch the last episode of the DS911 build you will understand why I am no happy to have both front wings in carbon fibre. These panels probably have the biggest visual effect on the overall design and I think they look great, or at least as I wanted them to.
https://photos.app.goo.gl/FiE9xvQdtJzSQrc47
[img] https://photos.app.goo.gl/FiE9xvQdtJzSQrc47 [/img]
not sure what format photo links need at the moment so have tried three in the hope that one will work.
The original thread should have said I am SO happy with the 2 wings, and here is a working photo link.
https://photos.app.goo.gl/Gf8W8pF4gsVax8vM6
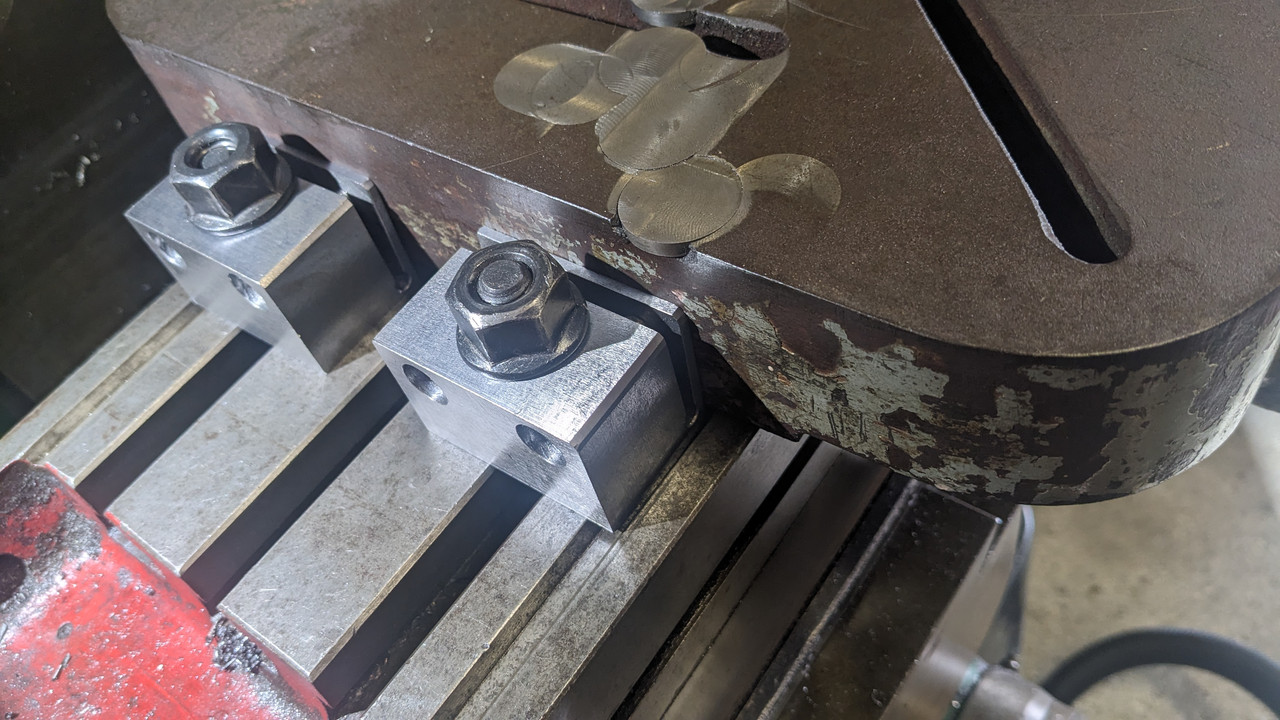
I finally found a correct table for my pillar drill. It had a whole load of holes drilled in it which I filled but then had the problem of how to re-surface the top. All my clamps clamp on the top which is no use so I made a couple of side clamps so I could machine the table.
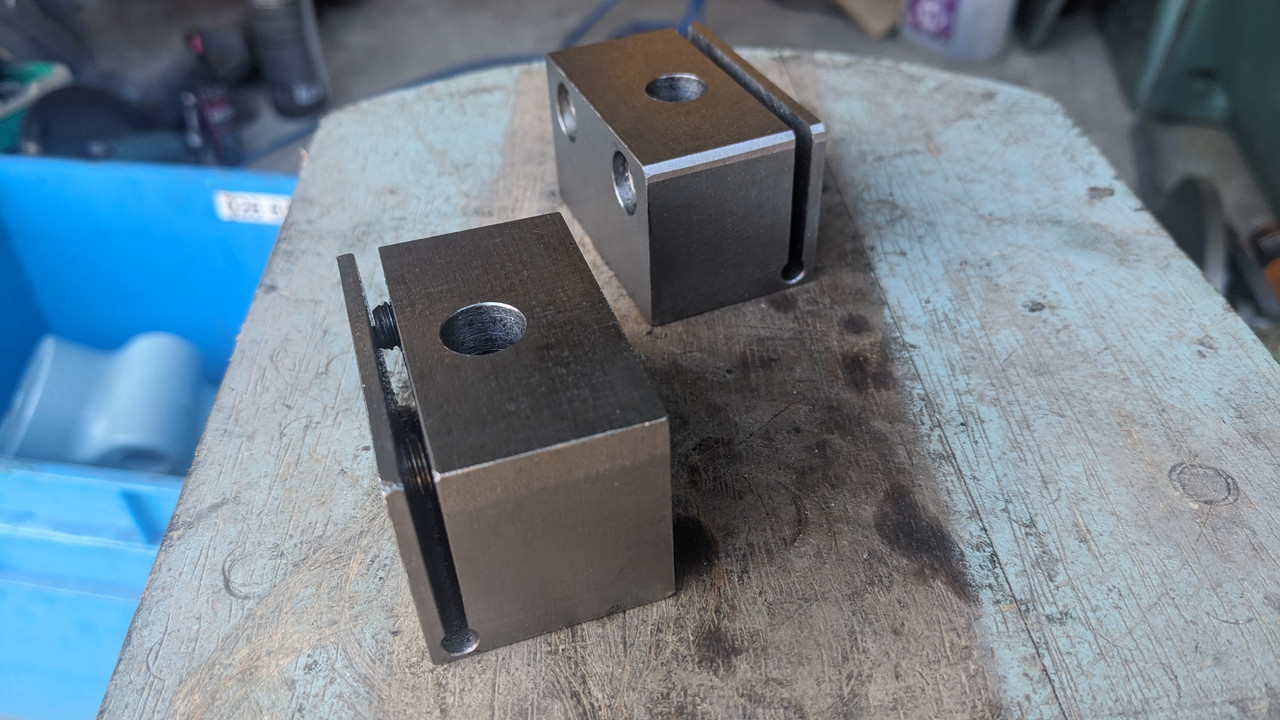
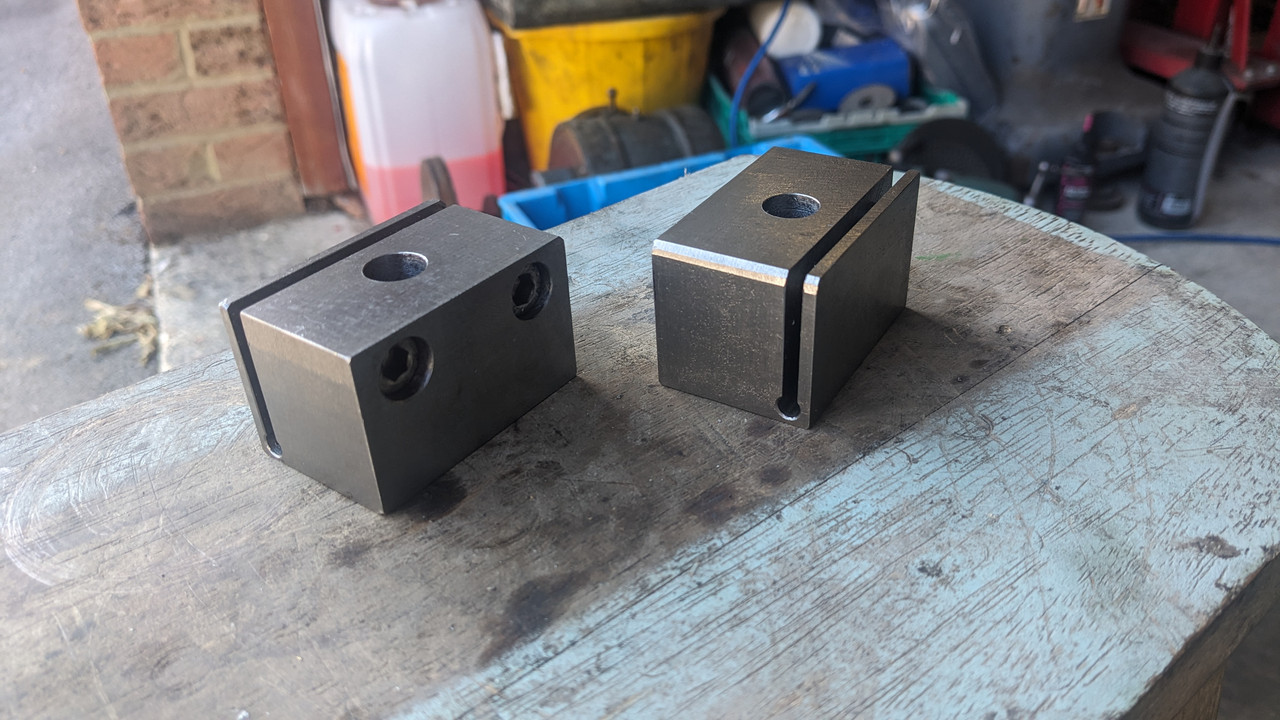
Clamps in use
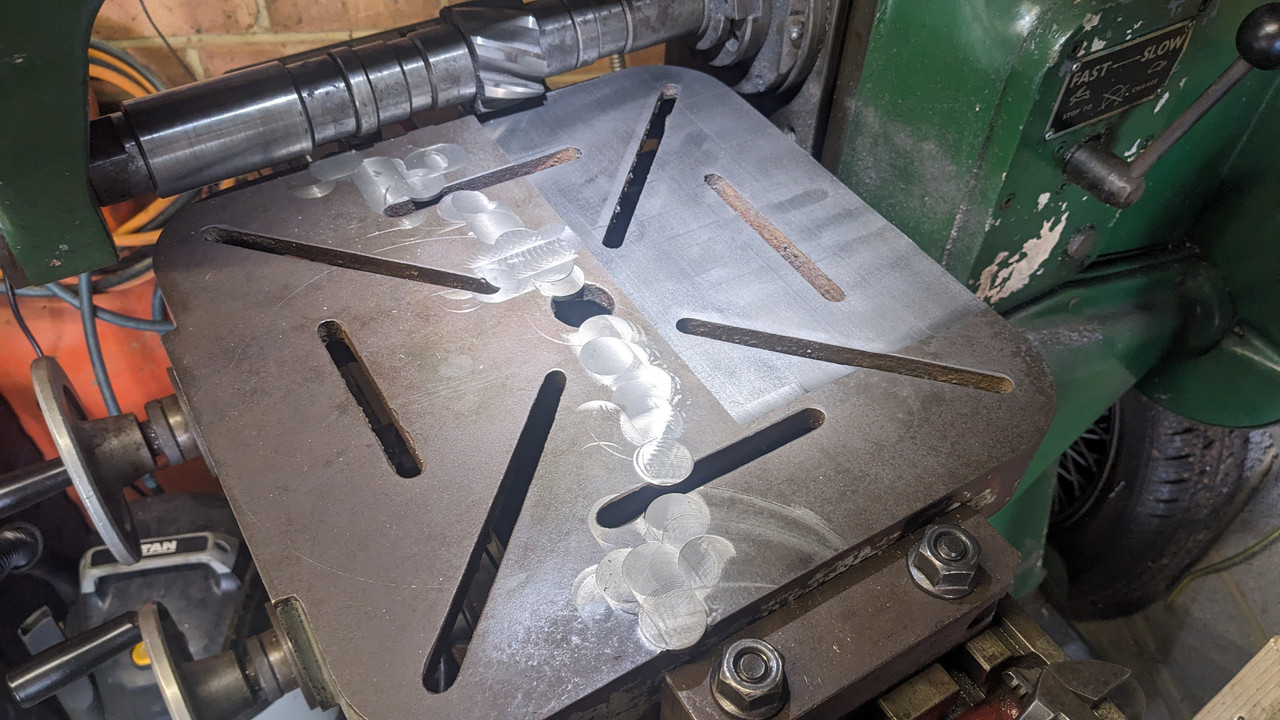
Unfortunately my milling machine doesn't have the travel to do the whole width in one go but this is it part way through. The surface finish on this is excellent
I'll show the whole repair process on the last thing repaired thread when it's finished

