- This topic has 44 replies, 22 voices, and was last updated 6 years ago by supremebean.
-
Cutting a hole in a ceiling (builderstrackworld!)
-
ahsatFull MemberPosted 6 years ago
The shower in the en suite in our attic bedroom is leaking into my office below. It was all installed by the previous owner and since we have lived here we have filled every conceivable gap in and around the shower with sealant, we have fitted a new seal on the base of the shower door and have pulled up the floor boards in the neighboring bedroom to look underneath with an eBay inspection camera to look for damp (nothing found from what we can see). However, it still leaks. It now takes about 3 showers before you see new damp in the office below (so we have made some progress) but enough to stop us using it.
Next step appears to be to cut a hole in the office ceiling to try and get to the underside of the en suite floor and look for any small leaks in the waste system or to at least try and work out the direction it is coming from. This is Victorian house and the office looks to still have old lathe and plaster and the ceiling feels very solid (good considering the damp) – and hard to identify the cross beams above. Any suggestions of how to go about this, and create as little as damage as possible so that a couple of people with limited DIY (but some common sense) can repair it again? As it is an office, and behind my head when at the computer, it doesn’t need to be PERFECT (I am a bit OCD, but trying to be realistic).
Cheers
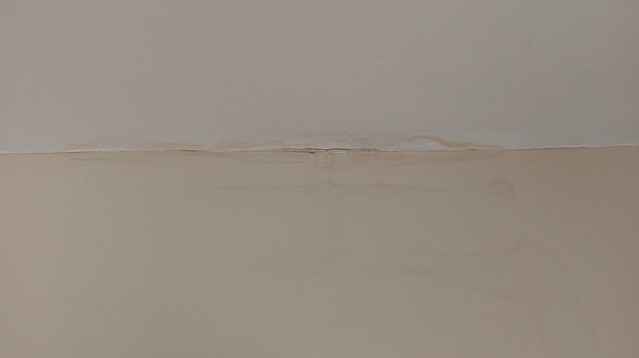
The offending damp mark – currently dry as we have stopped using the shower. The visible crack in the middle of the damp is about 20 cm long.
 [url=https://flic.kr/p/XjdZbe]2017-09-09_10-47-08[/url] by Tasha, on FlickrT1000Free MemberPosted 6 years ago
Is it a built in mixer?
Once spent ages tracing a leak from a shower tray only to find it was the concealed mixing valve
siwhiteFree MemberPosted 6 years agoWe have lath and plaster in our house. Stud detectors are of limited use owing to the varied thickness of the plaster, and metal detectors to find plasterboard fixings are frustrated by the numerous lath fixings.
My method is to drill a small (3mm-ish) hole and try to feel resistance as you drill. If you hit a joist the drill will offer resistance all the way in, but if you are clear of a joist there will be initial resistance followed by the drill freeing up as it reaches the air gap behind the ceiling.
ahsatFull MemberPosted 6 years agoYes, it is a built in mixer. We cant get the damn front plate off the mixer – but have managed to peer behind it and looks dry – maybe we should have another go.
TheBrickFree MemberPosted 6 years agoI had a similar problem.
Before you cut a hole try and really narrow down the leak.
First thing I did was ran the sower for as long as I knew it took for the leak to appear into a large bucket. Emptied bucked down another drain if needed. This eliminates the mixer.
Pored water down the drain several time from a bucket being careful not to over flow shower tray up to sealant level. This eliminates the drain.
Next ran show in each corner for as long as need. Starting low moving higher. Use a focused shower pattern not the wide spray one. This was where I found my fault. This eliminates each corner.
I would have continued in similar fashion along each side. This eliminates each side.
To cut a whole in a ceiling I use multi tool. Don’t worry about stud detection devices. First cut a rough hole in the middle of where you want to go then you will be able to peer in / feel when the beams are then mar and cut to a tidy bigger size. IF you are pulling down lime try to replace like with like.
footflapsFull MemberPosted 6 years agoCutting a hold will be messy whatever you do…
Repairing is pretty simple, buy some modern plasterboard and cut to fit the hole, screw into the lathes / joists etc to hold it up. Make sure it’s set back a few mm from the existing ceiling. Skim over the new section to form a flush finish with the existing ceiling paint over the lot. You might need to repaint the whole ceiling to get a perfect match but the repair should be invisible once painted.
For a small repair job, you could just buy ready mixed plaster finish – it’s no where near as good as proper stuff but quicker and you don’t need as much experience e.g. to know when the plaster is ready to apply etc.
timbaFree MemberPosted 6 years agoHave a look at the floor above, the joists will be at 90deg to the floor boards (you’ll have to find original floor, floating wooden floors can be misleading 🙂 )
The first joist might be tight to the parallel wall, so don’t cut too near to the wall
Either take a guess with careful* drilling ^^^, or measure between lines of nails on the floor to give a joist spacing*Be careful of drainage and cables that may be close to the ceiling
Edit: leave the hole open for a few days to let things dry
ahsatFull MemberPosted 6 years agoThanks all. Some really useful pointers there. Will have another look over the next couple of days.
pocpocFree MemberPosted 6 years agoIf you’ve got the eBay inspection camera can you drill a hole just big enough to get it in the ceiling?
From there you can either see where the leak is if you’re lucky or at least see where it is good to cut a bigger hole for access.
We had to do this in to one of those ceilings finished with the spiky textured effect. It was fun trying to recreate that with polyfilla!greyFull MemberPosted 6 years agoI made a hole in the ceiling last week with my foot, it was surprisingly effective :lol:.
Still to finish plastering it up.dirksdigglerFree MemberPosted 6 years agoWe cant get the damn front plate off the mixer – but have managed to peer behind it and looks dry
Is the leak water passing by the trim/face plate. It would run down the inner face of the wall or between tile and wall so you probably wouldn’t see much.
bear-ukFree MemberPosted 6 years agoI did a leaking shower job where a hole was needed. The Lath and plaster was soaking wet so I cut a square section out and found the Shower tray cracked, but only leaked when stood on. Replaced the tray with ease do to the hole and fitted an oversized thin ply cover over the ceiling hole and painted it.
Not perfect but it looked fine and the customer was very happy as very little mess created.TheFlyingOxFull MemberPosted 6 years agoThing is, with these things is the leak could be coming from anywhere. My money would be on the water feed to the shower, behind the wall. Any chance of a pic of the shower itself?
For science, obviously. I don’t have a shower fetish.
fifeandyFree MemberPosted 6 years agoCheck out youtube, there’s a couple of good guides.
Still got a hole in ceiling over my bath from leak i’m having trouble tracking down.
Anyway, don’t need to be too neat with what you cut out as new plasterboard comes in large sheets and you’ll be cutting to size.
Doing a good job of the plastering looks like the hard bit.Good luck, and hope you have more joy tracking it down than me
slackaliceFree MemberPosted 6 years agoIt’s possible that the floor is not level and may not be the shower itself, but a weeping joint in the pipework a little further uphill, so to speak.
Check the level, either on the ceiling in your room below, or the floor of the shower room if it is the original boards.
On a few occasions I have resorted to removing all the existing silicon beads, cleaning and renewing the silicon. This generally reveals the source of the leak, more often lack of sealant between the tray and surrounding walls.
If it’s an acrylic tray, is it well supported? Flex can either crack it, as bear-uk commented, or a gap appears in the silicon bead between the tray and tiles/wall/panels.
Removing lathe and plaster ceilings is a messy business too. Clear the room below, tape the door and wear a good dust mask 😀
timbaFree MemberPosted 6 years agoJust re-reading…you already know the joist direction 😳
Once I’d made a hole in a safe zone I’d use a holesaw (you can buy them individually).
Pulling lath and plaster ceilings down isn’t an option for me with the decades of mess above. Anything beyond the reach of a tube of mastic is likely to need to be achieved from the en suite
The crack between ceiling and wall can be covered with a flexible acrylic caulk, and some stain covering primer over the whole areaahsatFull MemberPosted 6 years agoThanks all. You have given us some things to think about. For one – we realise we dont know how the pipework gets to the en suite. It comes up through a cupboard on the other side of the house, and somehow must cross the stair void to get to the bathroom, but p20 doesnt remember seeing it when he had the floorboards up a few months ago.
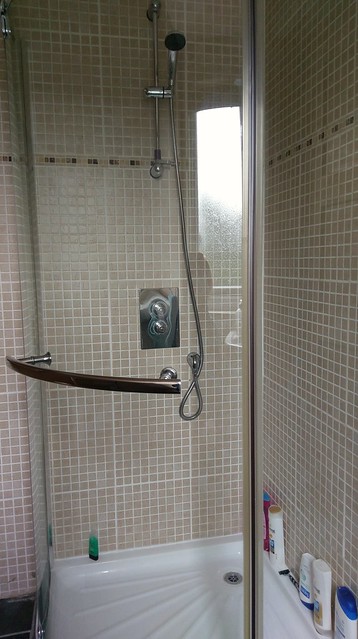
This is the shower
[url=https://flic.kr/p/Xj1mR5]2017-09-10_11-09-46[/url] by Tasha, on FlickrI have put sealant in around it, and my Dad put masses around the plug, when stood in the tray, so hopefully that resolved the flex issue. The mixer valve itself is in the dial, but has been replaced as it didnt work properly. We havent managed to get to that front plate off.
We are going to try some of the other suggestions above before we try cutting that hole, as sounds like we could end up a shower of s**t!
Cheers
P20Full MemberPosted 6 years agoOk. Update.
I’ve ran about 90gallons through the shower and into a bucket, isolating the waste and any shower enclosure issues. There is a very, very slight weep on the hose outlet at the wall end. I’ve pulled that apart and the wall/plaster/insulation is all relatively dry. Certainly nothing like the problems we’ve been having. I’ll get that reconnected and resealed properly. Likewise I’ve managed to remove the face plate of the mixer, again all dry.
Next job is multiple buckets down the waste. That can wait for another day.
Thanks for all the advice so far, it’s very very helpful and very much appreciatedBearFree MemberPosted 6 years agoVery common for the tray to be sealed after the screen has been fitted leaving a section of the tray/wall unsealed.
Was the screen sealed on the inside of the shower as a lot of screens you only seal the outside.
Just pumping silicone into everything generally doesn’t work if it hasn’t been installed correctly in the first place.
supremebeanFree MemberPosted 6 years agoWhat Bear said!
The most common shower leak i see as a bathroom installer is the shower screen/panel being installed before the tray has been sealed all the way along to the end of the tray.
Also check that the enclosure has not been sealed inside. Shower enclosure’s should always be sealed from outside so any water getting in to the frame should drain to the inside.
Also, those tiles have been installed incorrectly, shouldn’t be any spacers used with them, the spacer lines are obvious and should be closed up so the grout lines are the same thickness as the lines on the tiles themselves.
ahsatFull MemberPosted 6 years agoHave to admit I put sealant down the inside of the frame in desperation as it would piss water out the bottom of the outside of the frame when cleaning the shower. My sealant has stopped that and we don’t get any dampness in that direction any more. However sounds like I’ve just bodged a more fundamental error. This whole house is like this…the guy who owned it refurbed it from an old lady owning it, but it’s becoming very apparent there was a lot of bodging, which we are slowly having to undo. Fortunately the main house is solid and sound. It’s internal things.
I wonder if we are getting to a point of needing to pull the shower out and refit. We were trying to avoid the costs of new tiles etc as we need to retile the main bathroom too. Hummm….
Thanks for the help.
footflapsFull MemberPosted 6 years agoAlso, those tiles have been installed incorrectly, shouldn’t be any spacers used with them, the spacer lines are obvious and should be closed up so the grout lines are the same thickness as the lines on the tiles themselves.
That’s just a cosmetic issue. Highly unlikely to be the cause of the leak as grout is waterproof.
ahsatFull MemberPosted 6 years agoSo we think that, as the good folk of stw suggested, the enclosure hasn’t been fitted properly as we have excluded everything else.
As a result, we have decided to replace it. It’s not the best and we have wasted so much effort trying to bodge it to date. Plus with what looks to be now impending knee surgery, it would be good to get sorted rather than climbing out of the bath.
So, we have costed up a new enclosure, tray, shower and tiles from Victoria Plumbing. The thing is we’d like to keep the existing slate floor tiles, mainly due to cost and liking them. Is it realistic to think we can get the old tray out and put a new one in (if they are both 900 mm quadrant trays) without needing to replace the floor?
smiththemainmanFree MemberPosted 6 years agoMake sure it’s all clean and dry then buy a grout aerosol sealer and seal all the grout, I’ve seen it passing through grout that looked perfect, kept sealing and resealing the tray to shower gap and all the time it was passing through the grout and down behind the tray, it can be very porus
supremebeanFree MemberPosted 6 years agoThat’s just a cosmetic issue. Highly unlikely to be the cause of the leak as grout is waterproof.
I never said that that could be the cause of the leak, was just an observation in true STW form, like when folk on here point out that tyres/logos etc are not lined up. 🙂
Is it realistic to think we can get the old tray out and put a new one in (if they are both 900 mm quadrant trays) without needing to replace the floor?
Shouldn’t be a problem if you have a capable installer.
andykirkFree MemberPosted 6 years agoWe have the same problem with our shower. The moral of this story is always buy a properly designed shower unit that doesn’t need any sealant to maintain watertightness. Sealant (in this usage) is crap and is the botch job way of doing things cheaply.
supremebeanFree MemberPosted 6 years agoWe have the same problem with our shower. The moral of this story is always buy a properly designed shower unit that doesn’t need any sealant to maintain watertightness. Sealant (in this usage) is crap and is the botch job way of doing things cheaply.
Wrong! It’s all in the install. In 23 years of bathroom fitting i have never had a leaking shower enclosure as i was taught to install in the correct manner. If people who are installing shower enclosure’s would read the instructions properly there would be no problems.
100% of leaking shower enclosure’s that i have attended over the years have been because of poor installation or damaged trays/screens, probably during installation. Even cheap showers from B&Q etc can be installed without leaks.
rmacattackFree MemberPosted 6 years agowhat above says. the amount of houses i’ve visited with leaky shower trays,mine included. if its not done right from day one by a fussy/tidy/expert installer it will never be right. unfortunately we had a hack install ours.
ahsatFull MemberPosted 6 years agoIn 23 years of bathroom fitting i have never had a leaking shower enclosure
Supremebean – you don’t happen to be West Yorkshire based do you? 😛
Yes, we’ve decided to go down the recommended installer route, rather than considering trying to do it ourselves. Just trying to find someone who could do it before Christmas (operation date not yet know but trying to plan ahead) might be tricky!
supremebeanFree MemberPosted 6 years agoSupremebean – you don’t happen to be West Yorkshire based do you?
I’m afraid not. I’m in the Black Isle, north of Inverness. Fully booked out till next April too.
Although I have travelled to Sussex and Portugal to do installs. Both for the same guy who has a holiday home near me which i renovated. 🙂
andykirkFree MemberPosted 6 years agoSupreme – Right! We only need sealant because the junction hasn’t been designed well in the first place. I am not saying there is not a right and wrong way to install sealant, I am saying you should not need to use it in the first place.
ahsatFull MemberPosted 6 years agoDamn 🙄
Great, thanks though that it sounds like it might be achievable…if anyone is available! Who knew how booked up bathroom folk get! Guess it’s typically not a spontaneous decision in most cases…
supremebeanFree MemberPosted 6 years agoOk! Can you show me one of these well designed shower enclosures that don’t need silicone?
Don’t get me wrong, i have installed silicone free enclosures, but there are reasons why most manufacturers don’t go down this route.
supremebeanFree MemberPosted 6 years agoWho knew how booked up bathroom folk get!
It’s called Reputation. 😆 The shite ones won’t be booked out for that long.
95% of my work is through previous installs, friends and family of customers. I don’t advertise locally, have a website but it’s not something i really keep on top of.
ahsatFull MemberPosted 6 years agoAye it’s good. My parents both run small businesses and it’s the best way.
I’m just hoping a decent one locally get a cancellation… 8)
andykirkFree MemberPosted 6 years agoSupreme – Kinedo, Coram, Matki all do them. Sealant has its place but not in high humidity/ high water/ high bleach/ high shampoo/ high soap/ high movement environments.
dave28Free MemberPosted 6 years agoall of those manufacturers recommend sealant is used during install
. all in the exterior of screen.
and you need to use silicone internally where the tile meets the tray and the interior corners
just use a decent siliconesupremebeanFree MemberPosted 6 years agohigh humidity/ high water/ high bleach/ high shampoo/ high soap/ high movement environments
Is exactly what it is for. What on earth are you thinking? Silicone is used on corners etc because it allows for movement, grout just cracks. Good quality silicone applied correctly and cleaned regularly will last for 15+ years. If silicon fails it’s always down to bad workmanship or poor cleaning regime.
Silicone is used on those manufacturers you mentioned, maybe a little less than some others but by god they are ugly.

The topic ‘Cutting a hole in a ceiling (builderstrackworld!)’ is closed to new replies.