Forum Replies Created
-
Issue 157: Busman’s Holiday
-
 2mikeydFree MemberPosted 8 months ago
I have one for sale!!
2.5td, 4×4, 120k, 12months MOT, pop top, unconverted! Recent new head and all that entails.
genuine reason for sale: leaving the country!
based in Devon (Ivybridge), drop me a message if you’d like some photos etc
 mikeydFree MemberPosted 2 years ago
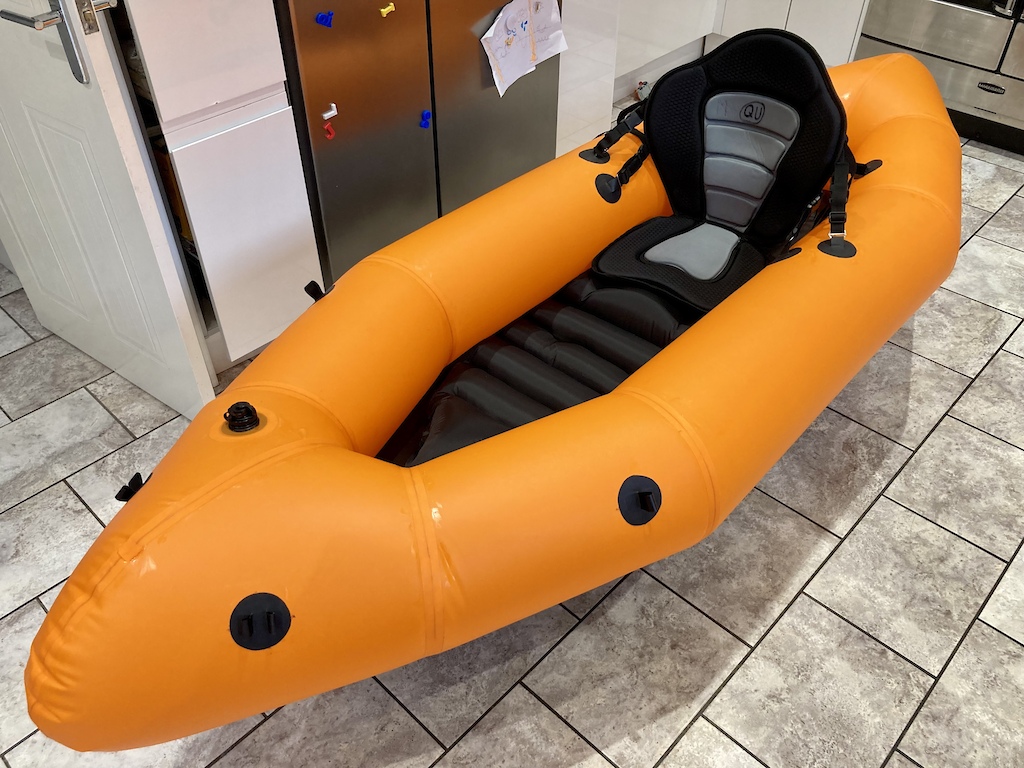
Final fit out..
Decided to make a proper floor/seat arrangement rather than butcher the sleeping mat
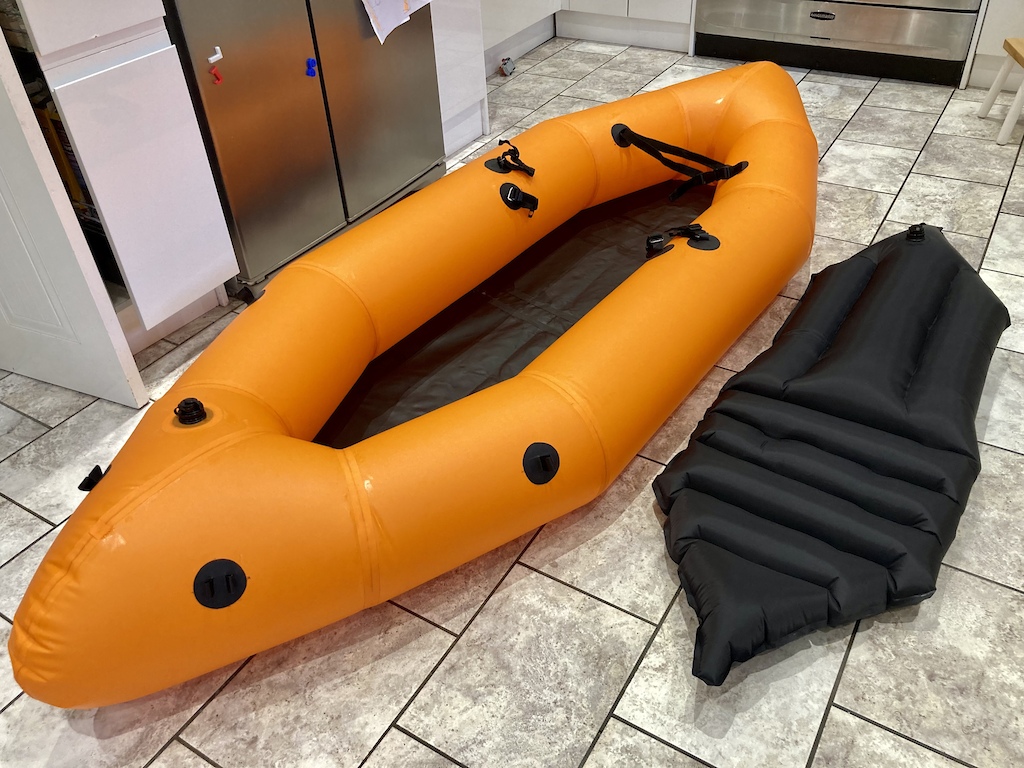
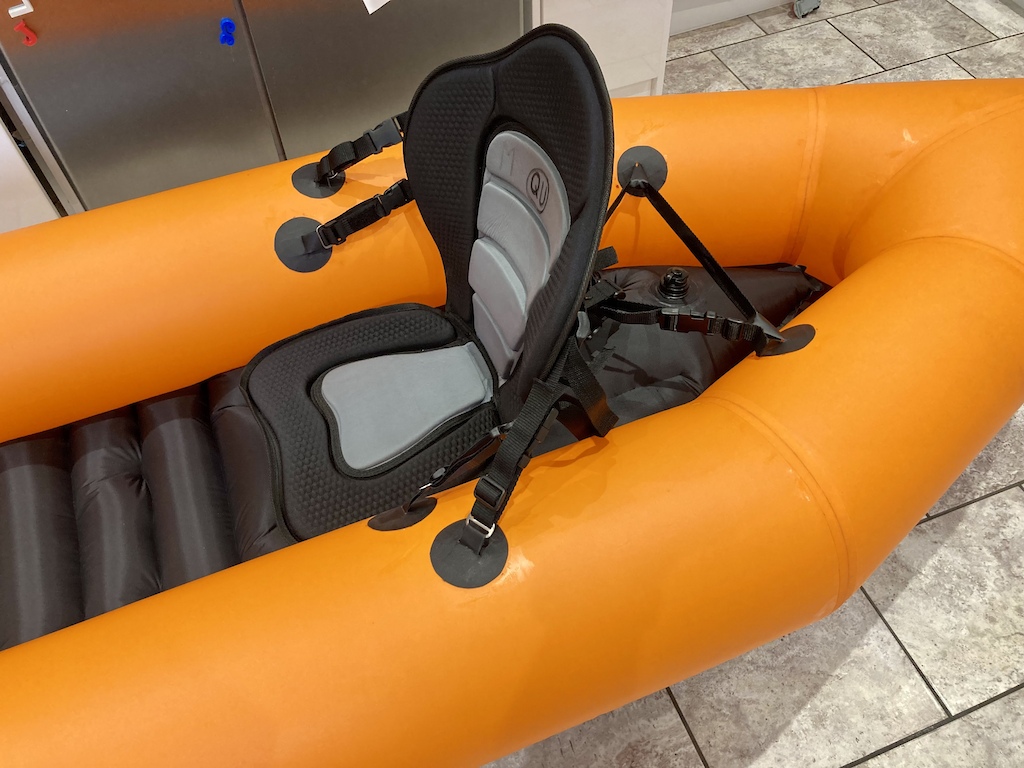
Sit on top kayak seat for comfort, although this almost doubles the total weight!
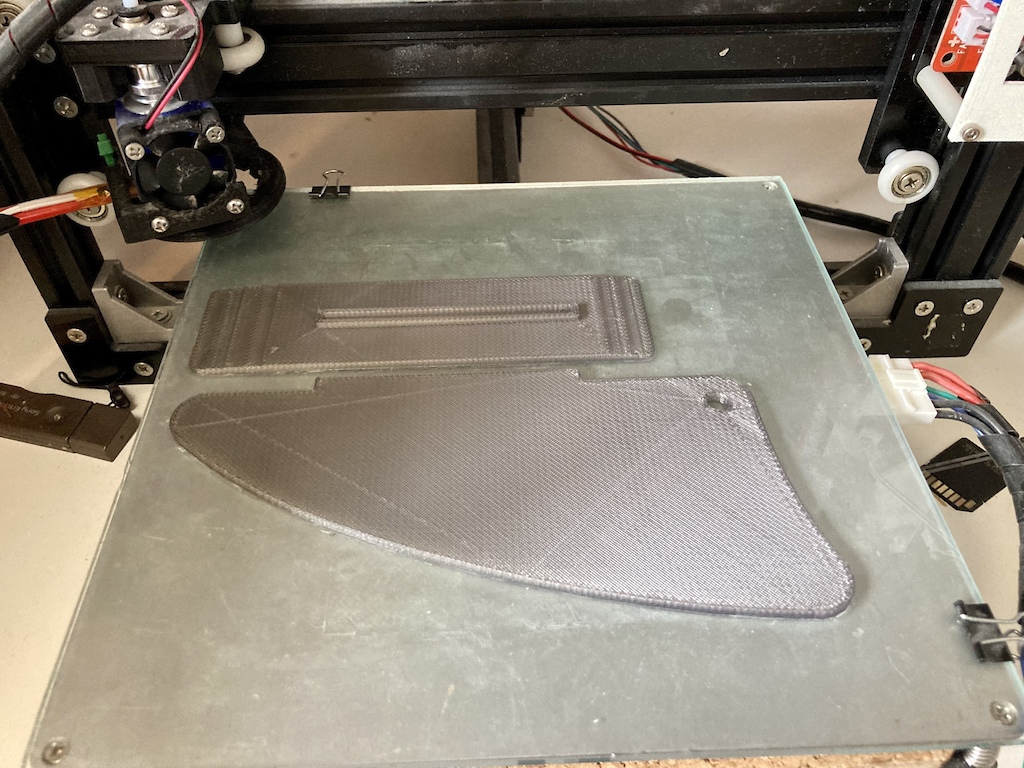
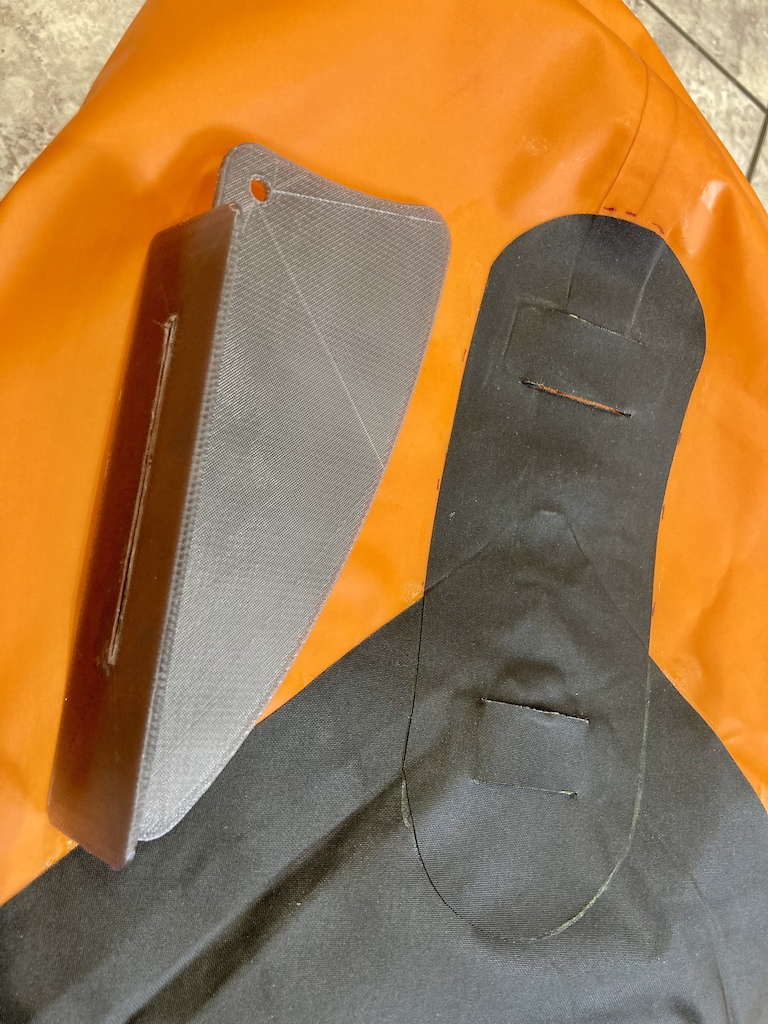
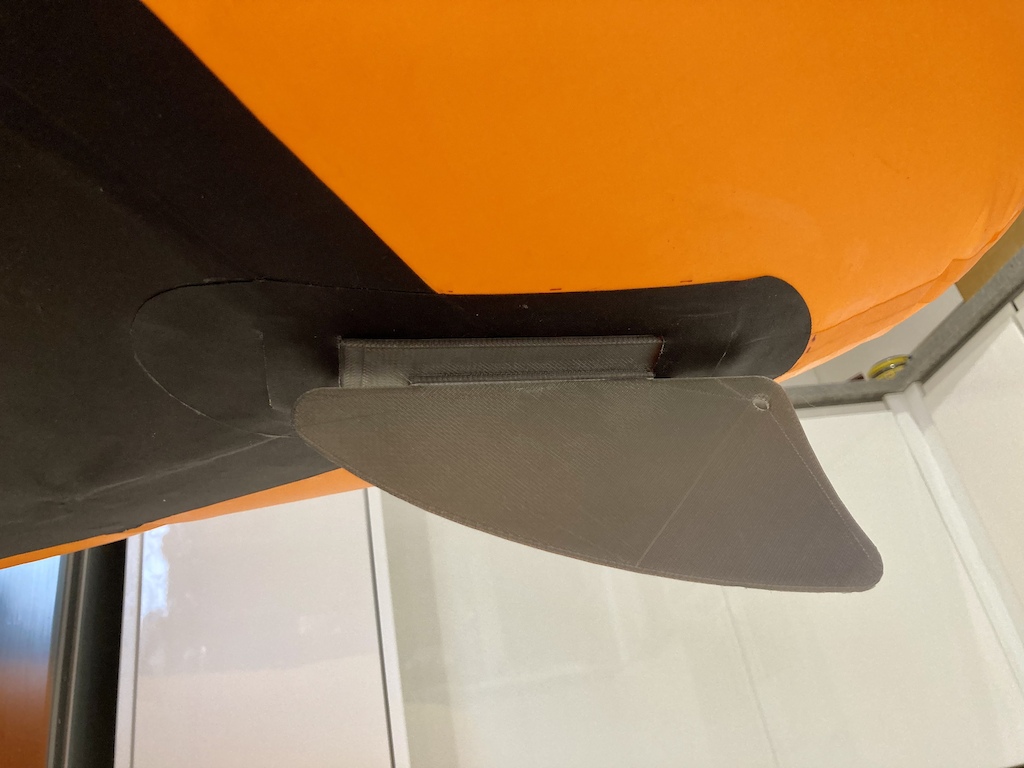
3D Printed skeg in PETG (drinks bottle material)
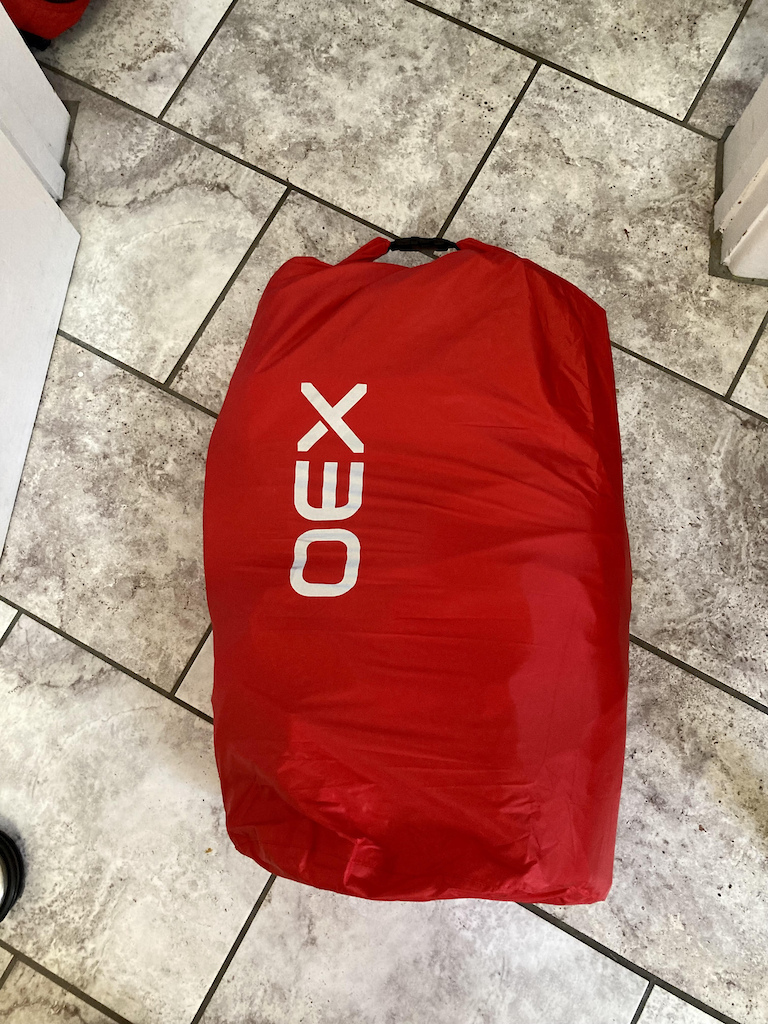
40L dry bag, approx. 550mmx 350mm x 150mm
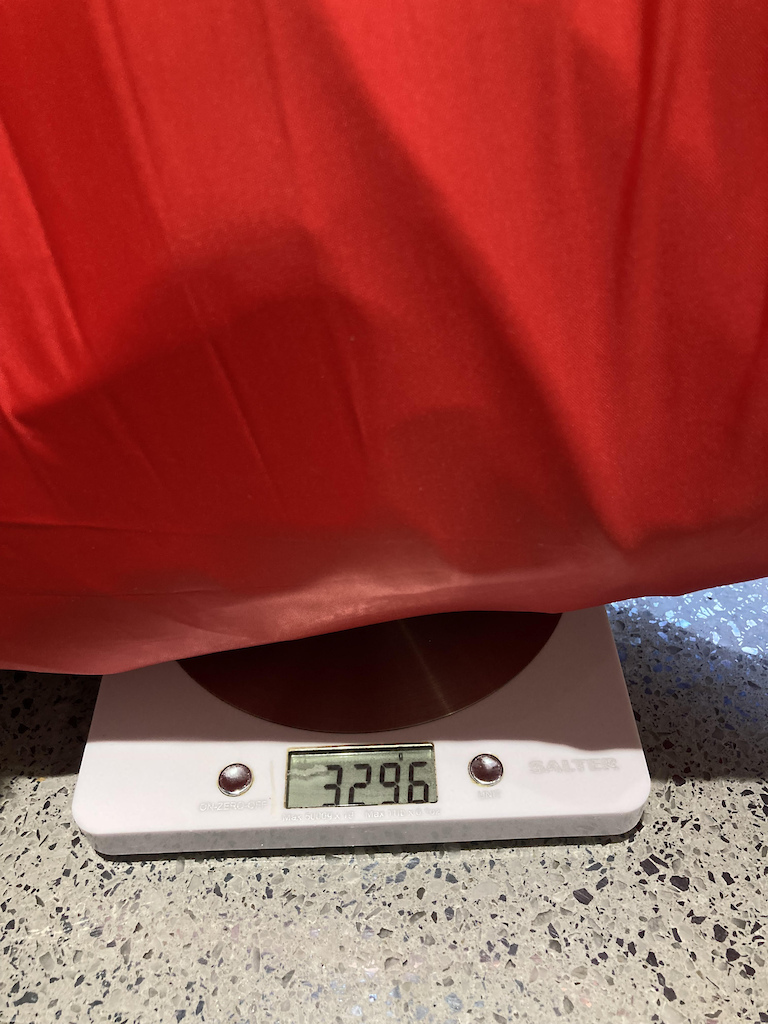
Weight approx. double that of the Mk1, however this includes the heavy kayak seat. Add another 1kg or so for the paddle
 mikeydFree MemberPosted 2 years ago
Iron raft is a great resource, their instructional videos take you through everything: https://youtube.com/channel/UChXzinYOJi5gJ9rFrfKZHMg
A packraft kit from them is pretty good value tbh – £190ish which includes adhesive and a valve.
I bought the TPU material from them this time round ~ 5m @ £17.50/m
It’s a shame they only sell one design.
mikeydFree MemberPosted 2 years agoReally cool project, would you consider selling them?
The trouble is, it probably took about 20hrs to make, so I’d have to charge about £700!… which is about the price of a “professional” one!
I reckon I’d get this if I were in the market: https://www.decathlon.co.uk/p/1-person-inflatable-river-packraft-kayak-100/_/R-p-332228
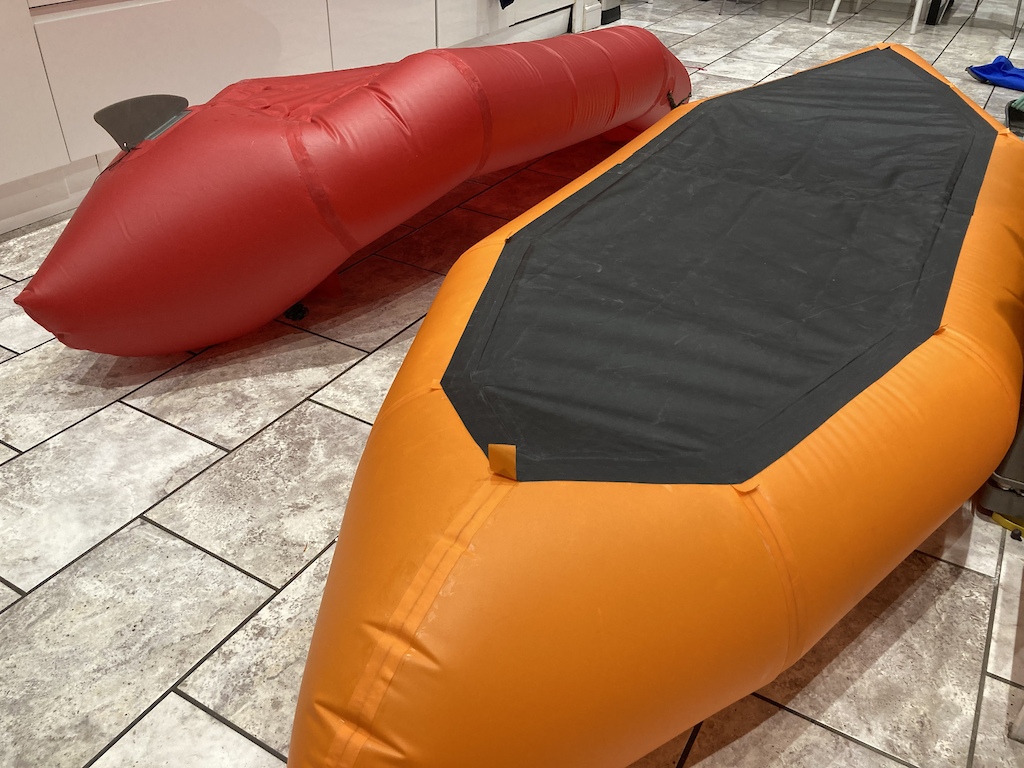
no need for the skeg on the longer thinner model? or still a work in progress?
Still WIP – still have a few details to add like seat, backrest etc. The skeg on the red one is 3D printed, so should just be a case of running another one off. Having said that, I believe this design will naturally track better anyway.
in life sized, inflatable form?
Sure, let me know a list of features you desire and I’ll knock something up
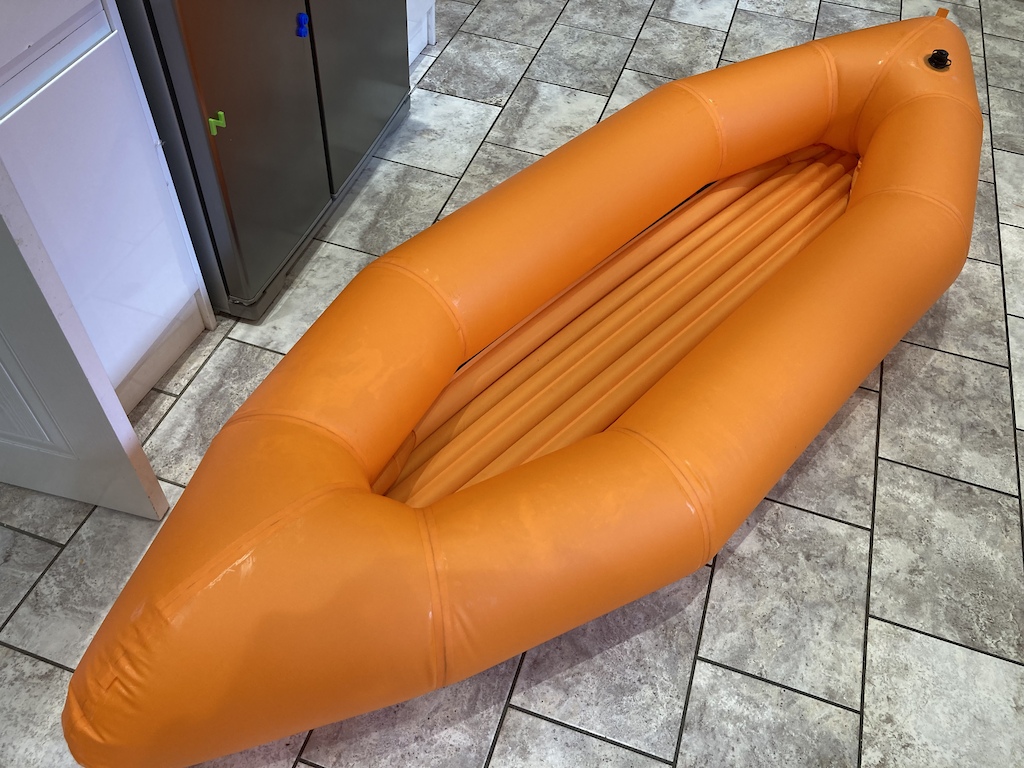
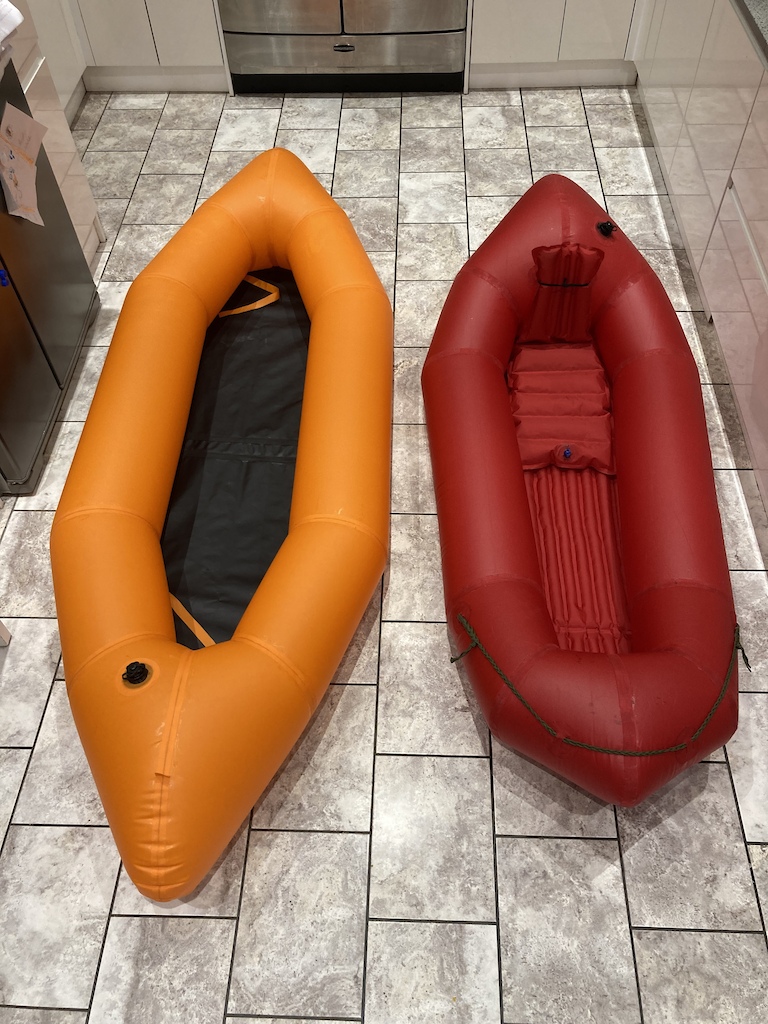
mikeydFree MemberPosted 2 years agoAnd it’s alive!
£17 Lidl TPU inflatable mattress seems to make a nice floor
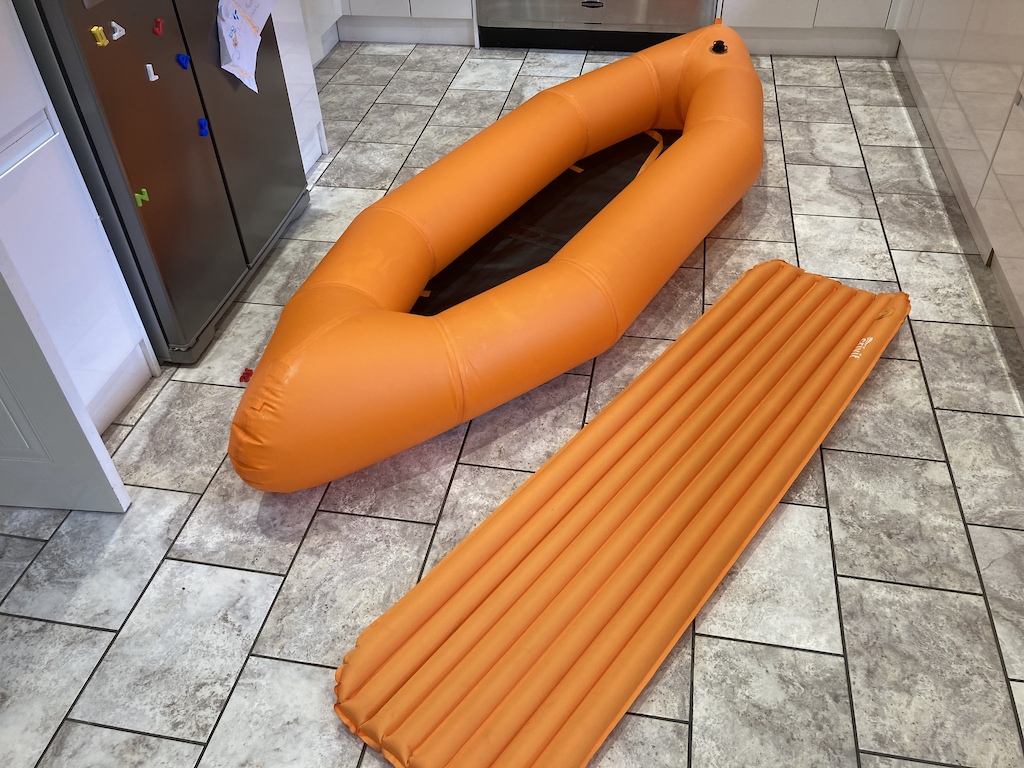
2019 & 2022 build comparison
 mikeydFree MemberPosted 2 years ago
Just out of interest, how did you scale up the more complex sections from the prototype?
All done in AutoCAD, just print it out full size on A1/0 sheets rather than an A3 sheet.
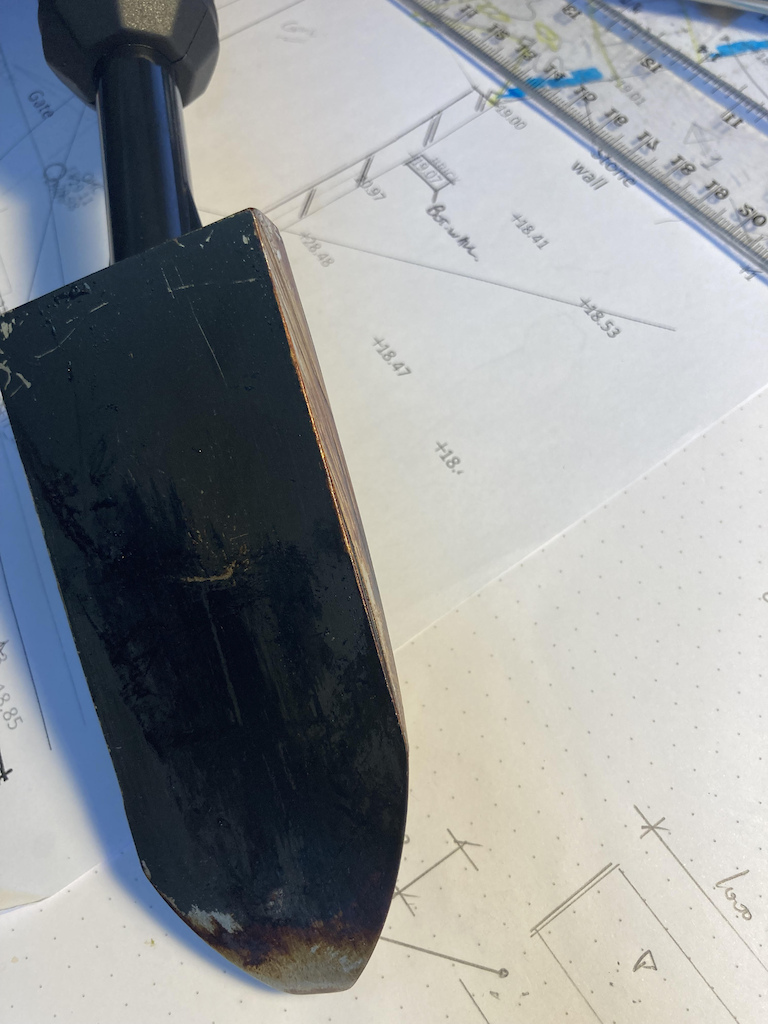
Out of interest, what are you using to weld the seams at home? I’ve got a sleeping mat idea, which could be an interesting home build.
cut off the sides with a chop saw to leave a flat 9mmx 70mm rectangular heat iron (side of iron).
 mikeydFree MemberPosted 3 years ago
I started this time last year after realising being able to weld is a huge capability upgrade.
Started on stick (MMA) (R-tech 135) which is a superb bit of kit – no sticking, starts easily, weighs nothing (inverter not transformer). You can do a surprising amount with it (and an angle grinder if it gets messy).
+points: minimal steel prep, will weld through millscale & rust, no gas, easy to access difficult welds, can weld outside in the wind
-Points: Messy, requires cleanup, slag everywhere, smokey, less than 2mm steel thickness is hard. Steel prep in terms of “fit” is important – a gap between the two bits to weld will result in bad times.You’ll quickly realise you’ll need a few things like chop saws, angle grinders, steel benders to make the most of metal work, here are a few things that I’ve made using MMA/Stick.
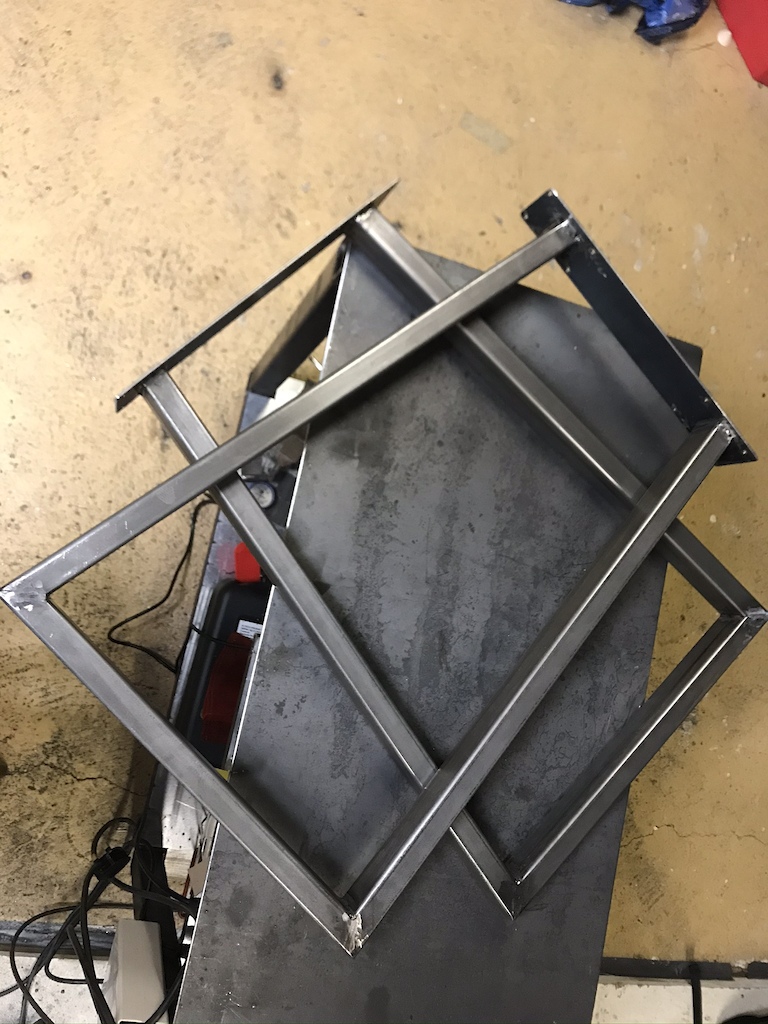
Welding table – that’s the first thing to do
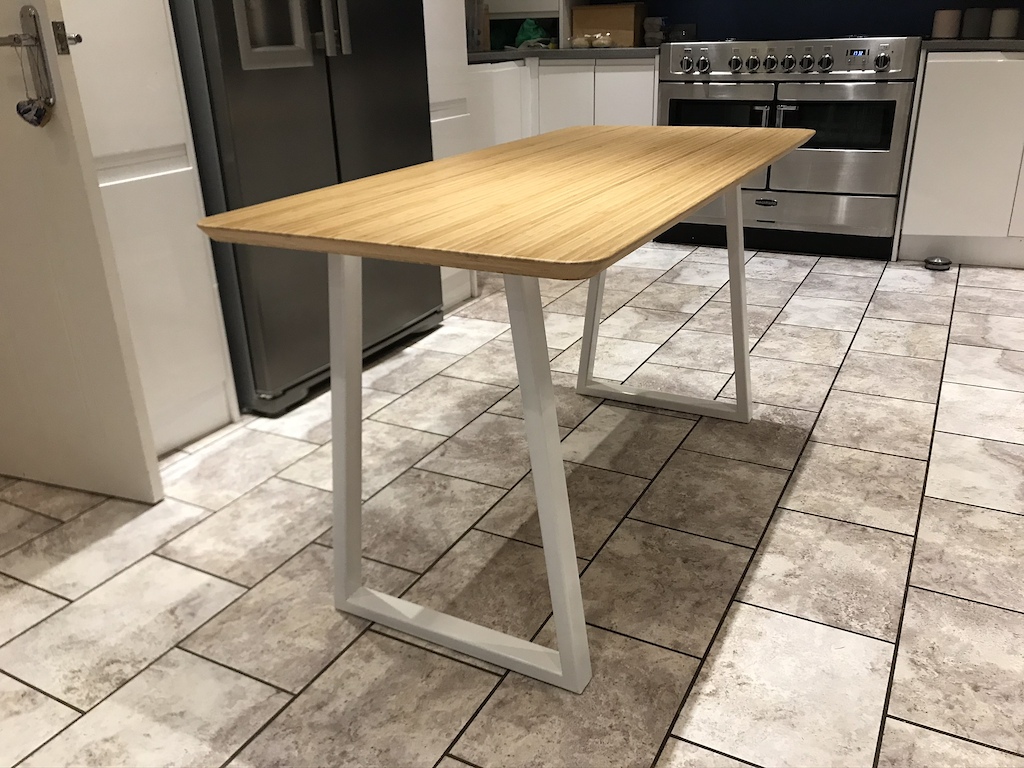
WFH office desk, inspired by CV19
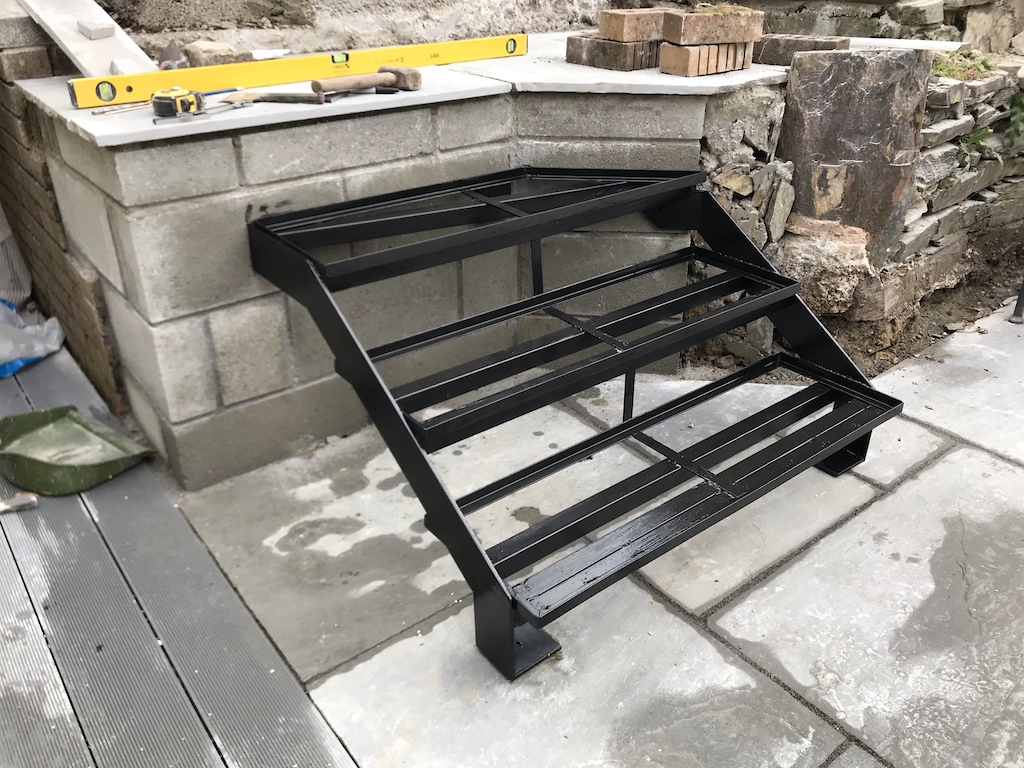
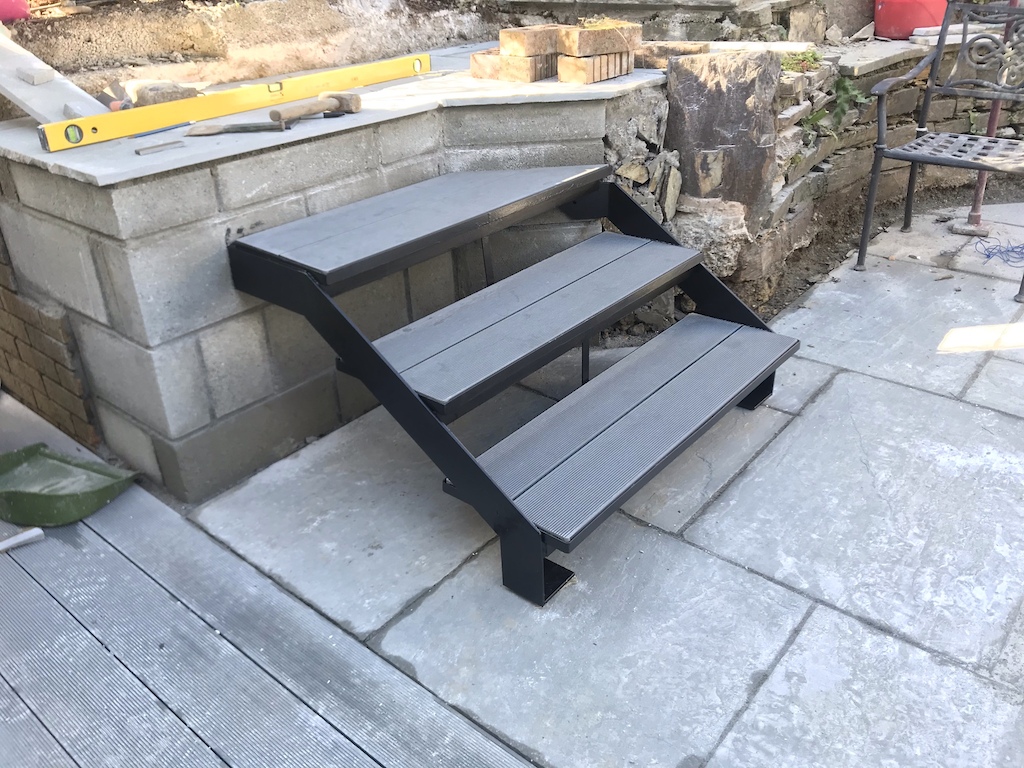
Garden steps
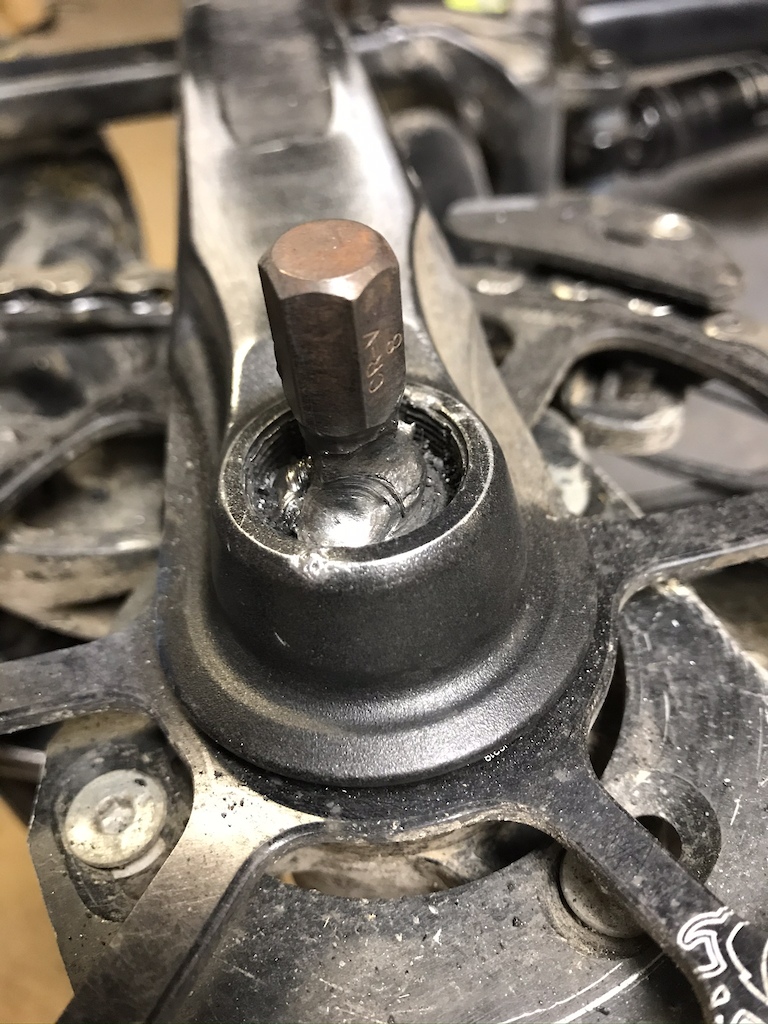
Rounded crank bolt removal
I then progressed onto TIG as my mate kept going on about how it’s the future etc.
Whilst it does produce very nice welds and is a nice process, material cleanliness is critical.
+points: looks great, very clean relaxing process (no sparks or slag flying off everywhere), you can ‘fuse’ stuff together without any extra filler rods etc, can do other materials (Stainless)
-Points: Material prep, can’t really do it outdoors, needs gas (pure Argon)A few things using TIG
Bracket for a TVR (S Series) bonnet hinge Mod.
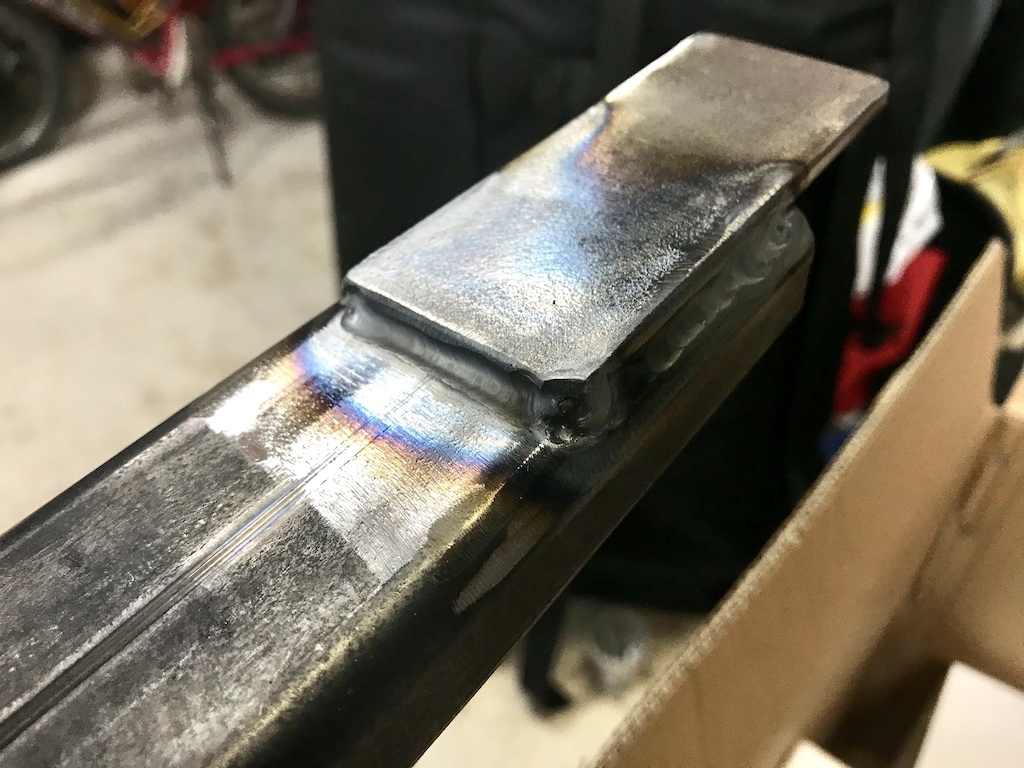
Piece for a table – this is fused, so the weld material is from the parts melting together
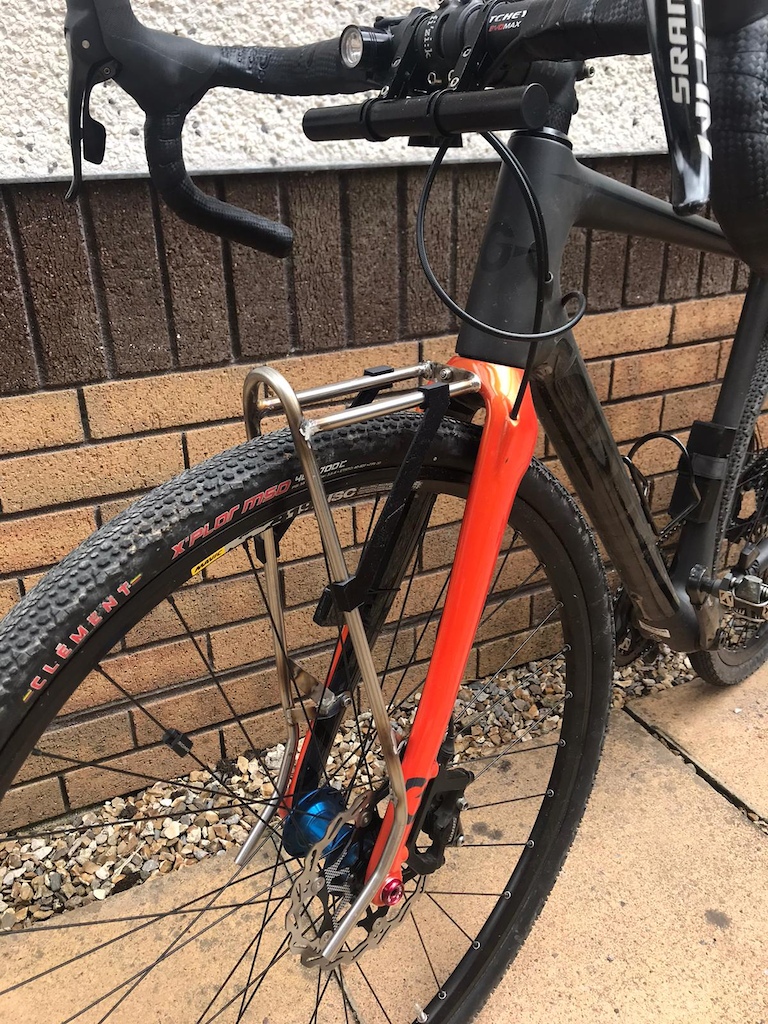
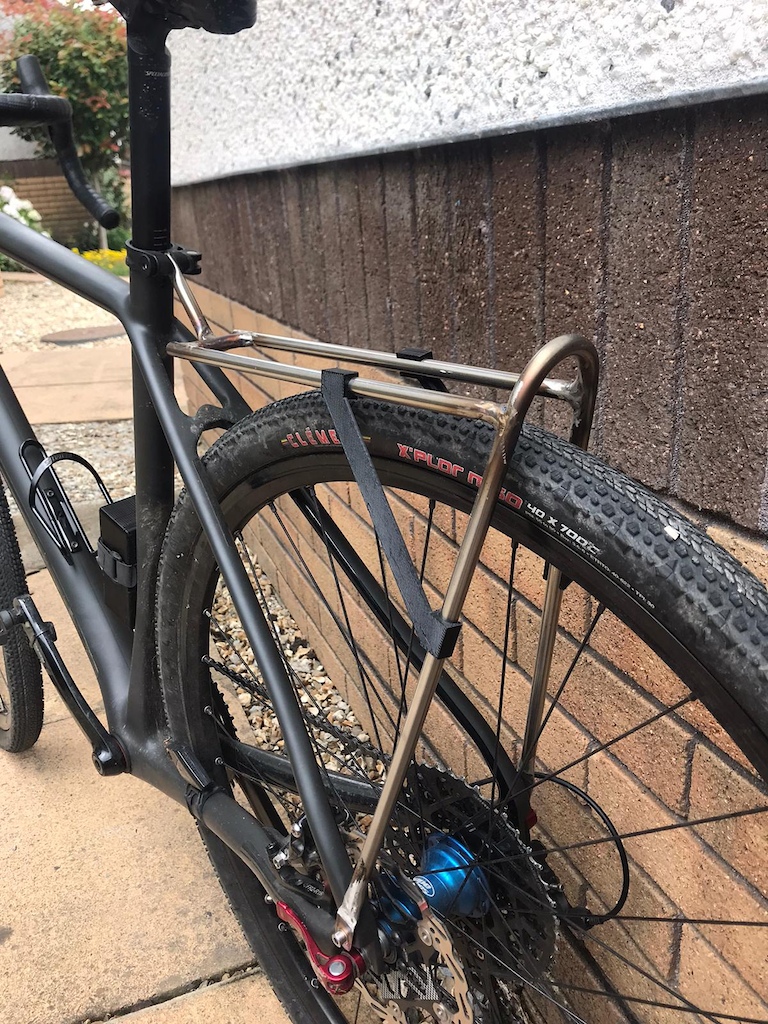
Bike Packing panniers – 10mm SS tubing, 1mm wall thickness. This was a pig to do tbh.
And a couple of weeks ago I thought I’d give MIG a go, I’d liken it to using a hot glue gun, quite easy to get the hang of, not as messy as MMA/ARC but not as nice as TIG.
+ Points: Easy to get the hang of, no mess (if using gas), less material prep than TIG or MMA, can weld thin metal (car body etc)
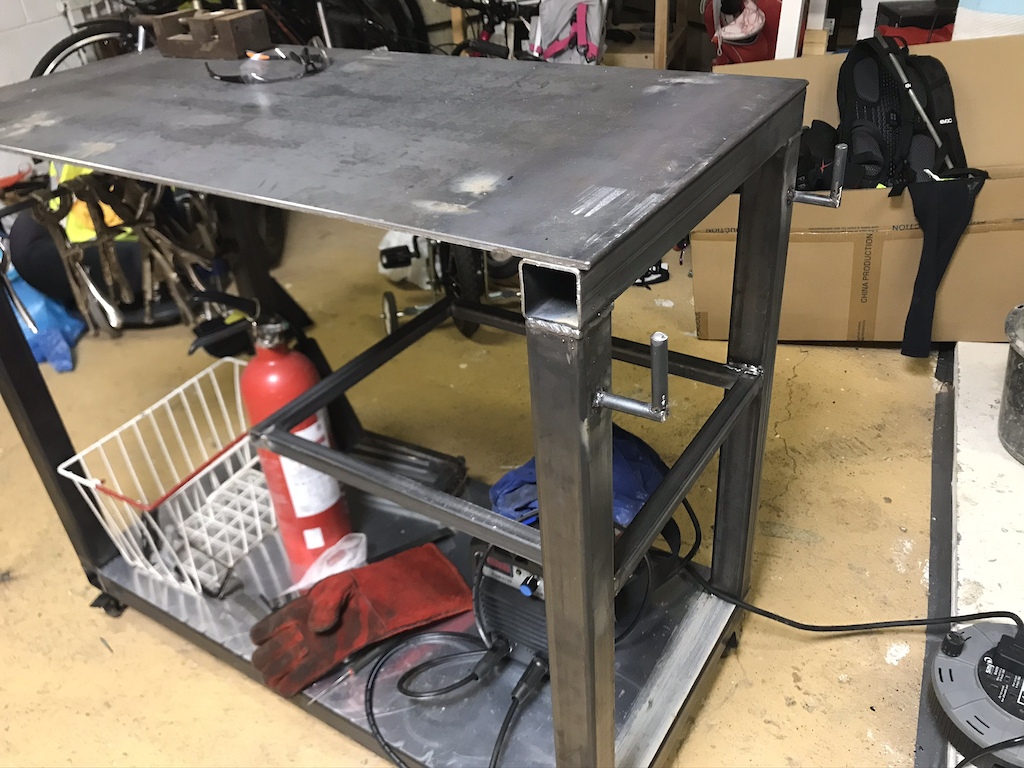
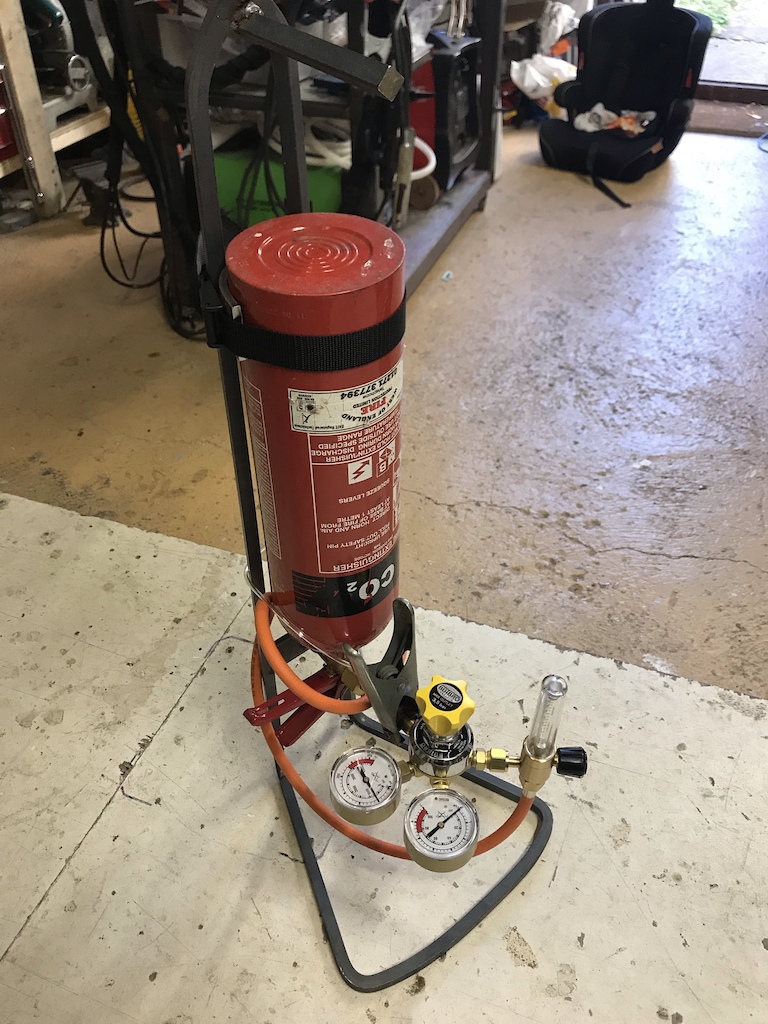
– Points: Bit of a faff (wire spool feed etc), needs gas (CO2/Argon), weld penetration not as good as MMAAs you can get away with pure CO2 for MIG (C02/Argon mix is better depending on what you’re trying to achieve), I’ve rigged up a fire extinguisher setup for the gas (I have a good supply of out-of-service extinguishers), which I’ve worked out will give about 20mins of continuous welding (at 10 litres per minute) – note it’s upside down as CO2 extinguishers have a dip tube to dispense liquid CO2.
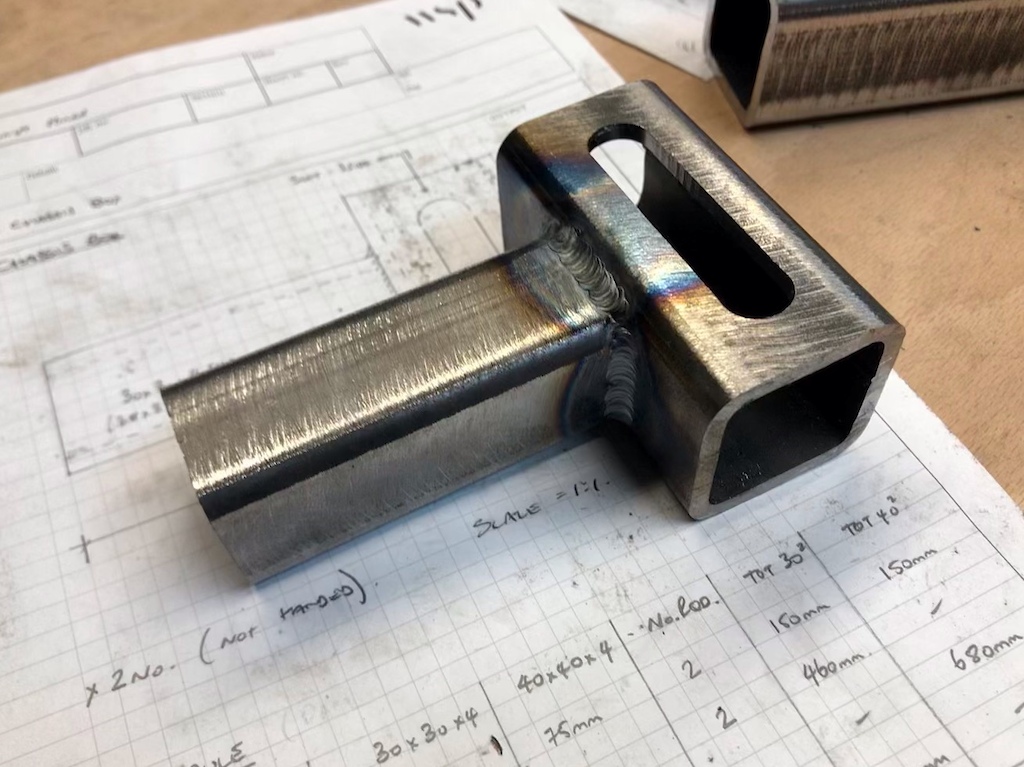
I made the stand using MIG, which is the only thing I’ve done so far. I’m definitely sold on it for quickly knocking stuff up that doesn’t have to be aesthetically pleasing.
I think you need to decided what you’ll want to be doing with it, but you’ll be surprised what you can do with a little MMA/ARC Machine (and an angle grinder to clean up…) to begin with.
More stuff here: https://www.pinkbike.com/u/mikeyd/album/Welding2021/
mikeydFree MemberPosted 4 years agoYGM, I have a connects2 kit for an A4 which I’ve long since disposed of!
mikeydFree MemberPosted 4 years agohttps://singletrackworld.com/forum/topic/guess-the-damage-vag-tdi-cambelt/
Car died from crappy oil pump issue causing catastrophic engine failure in the end @ 230,000 miles. Look it up… balancer shaft and/or oil pump chain drive.
I’d try and find a 1.9tdi in BXE, not the newer ones just before the first 2.0tdis. Or a 2.0tdi after ~2008.
mikeydFree MemberPosted 4 years agoYes, worn cassette. I’ve just revived an old 10spd cassette That was skipping on the 11t & 13t with these: https://www.ebay.co.uk/itm/253842567973
Took 3 weeks to arrive but seem to work well
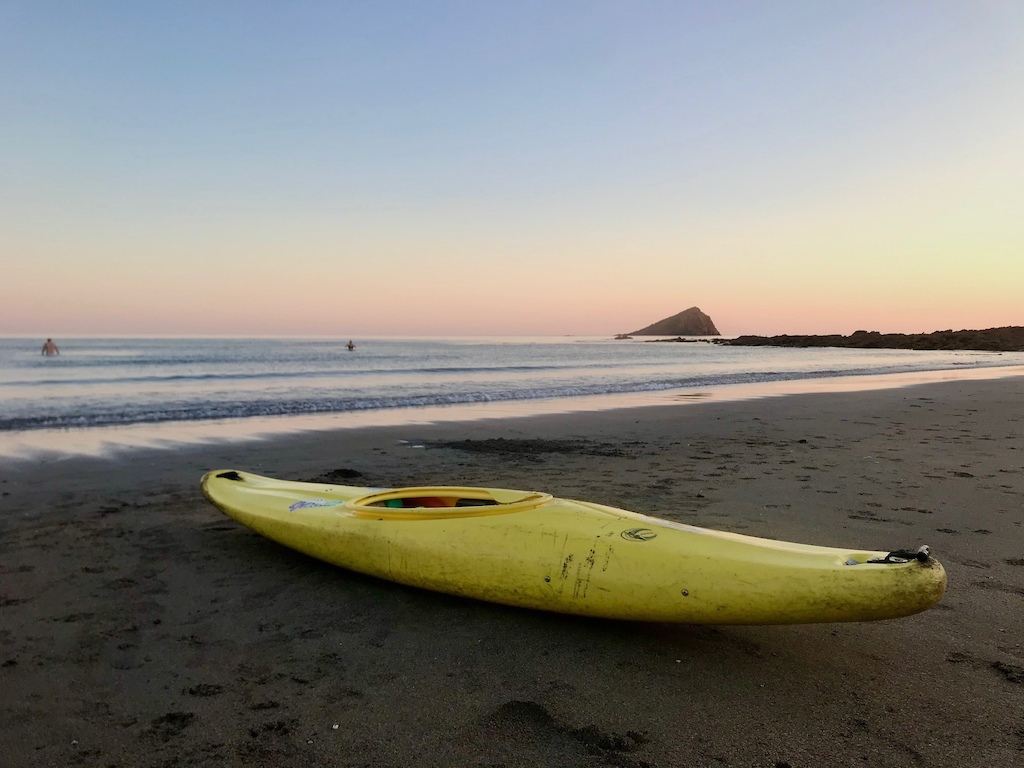
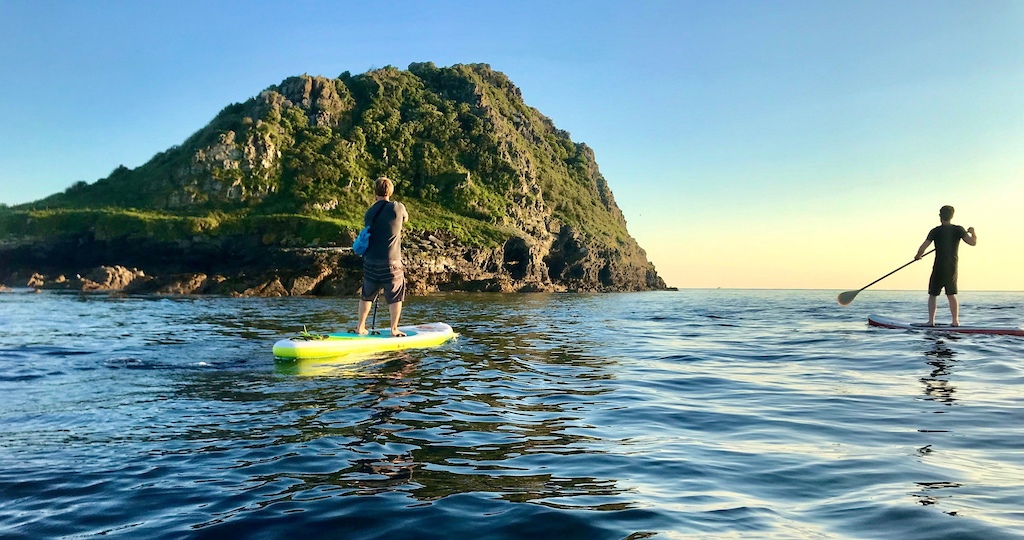
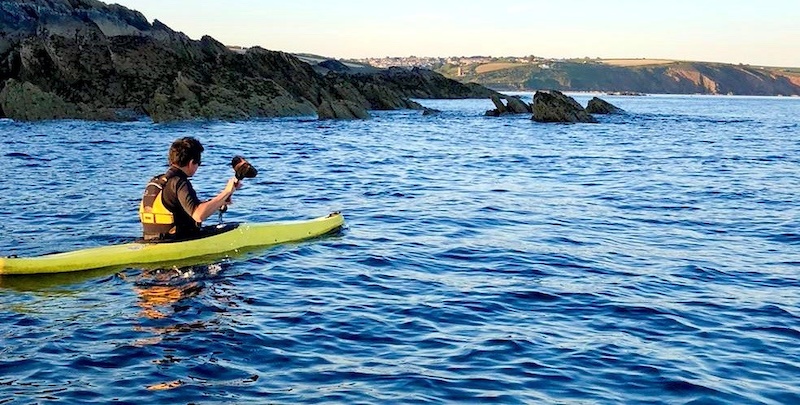
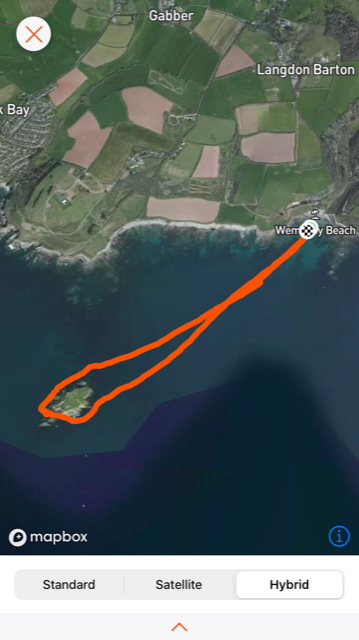
mikeydFree MemberPosted 4 years agoHer maiden voyage (with me) last night to the Mewstone
Buoyancy was achieved with a few pool noodles and a couple of empty milk bottles lashed in.
She’s not exactly a performance vessel, but I knew that and it was a fun trip.. could do with a back support and drain plug and lashings and… might be time to upgrade 🙂
 mikeydFree MemberPosted 4 years ago
Yeah, don’t look a gift kayak in the cockpit.
Looking forward to giving it a spin. Getting wedged in the bow sounds a bit rubbish, although there’s a bit block of foam in there just after the (folding) foot pegs
mikeydFree MemberPosted 4 years agoThanks all, sounds like the worst that’ll happen is it’ll be a bit crap.
The plastic doesn’t appear to have degraded, moulded knee braces all seem nice and flexible still. It’s got a PPCA sticker on it (funnily enough that’s the club I trained with) so I reckon it’s been looked after and stored out of UV.
mikeydFree MemberPosted 4 years agoI’ve just picked up a Forerunner 645 for £199.99 @ Argos. A colleague has one and rates it highly, although he paid £400 for it earlier in the year..
mikeydFree MemberPosted 5 years agoTo answer a couple of questions I missed:
can I ask where you got the material?
https://www.rivertex.com/en/
HT200 fabrichow much does the life jacket weight?
Cheapo 50N Helly Hansen jacket is around 500g, better white water style is a bit more but has some decent pockets/features.
mikeydFree MemberPosted 5 years agoSorry, I’m alive, didn’t have time last week for the testing..
Managed to get out for it’s maiden voyage today, thought a bit of surf, off shore wind and no lifeguard cover would be a good test…
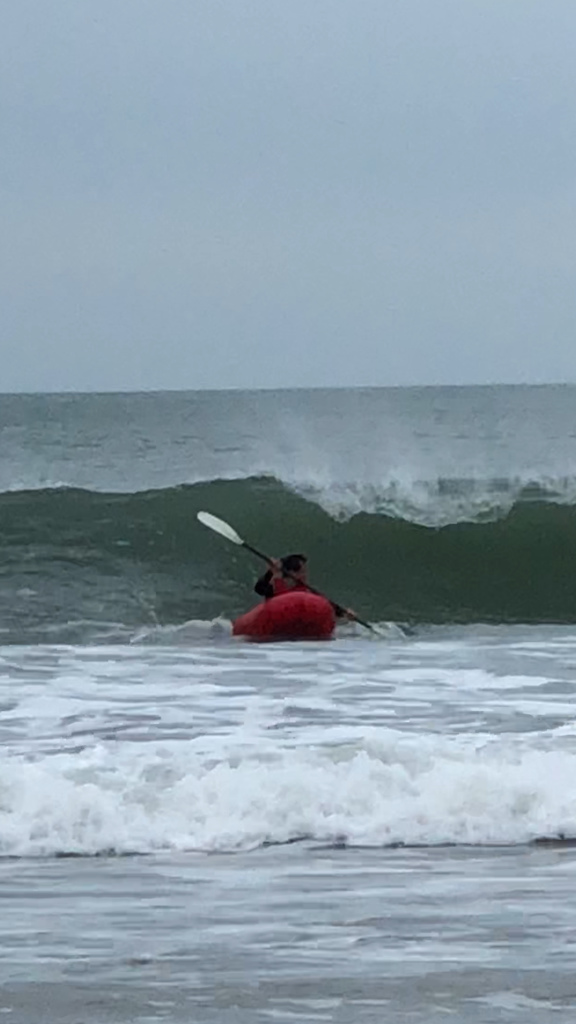
Vid: https://vimeo.com/364510145
Fairly terrifying/super fun in the surf, not so much of case of catching a wave, more the wave catching you!
Paddling position is a little odd in that you are very low in the water and have to make sure the paddle goes in very close to the raft as it turns on a dime, will be great fun on river whitewater.
Lack of spray-deck is a bit of an issue in the surf, fills up quickly which needs to be emptied after each big wave. All in, pretty pleased!
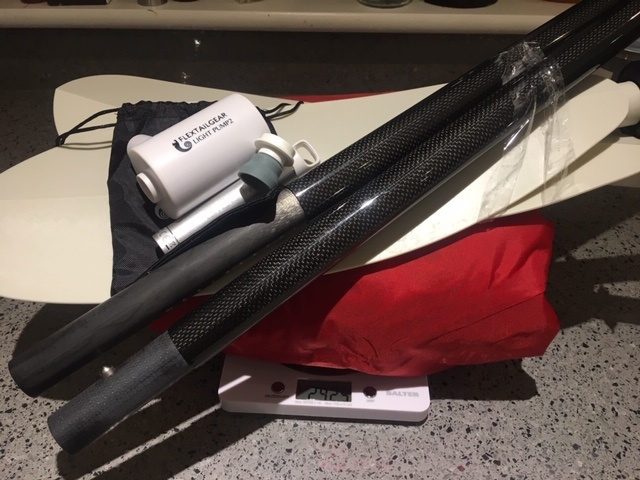
mikeydFree MemberPosted 5 years agoPlans to make a paddle were scuppered by Planet-X’s bargain paddle – DIY materials were going to be around £40 and their Carbon/Nylon offering was £55. At just over 1kg, it’s lighter than a few of the big name 4-piece paddles and has been designed so each piece is the same length which is great.
A bargain compared to something like this, similar weight, 6x the price and the pieces are different lengths.. http://wernerpaddles.com/paddles/packraft/pack-tour-m
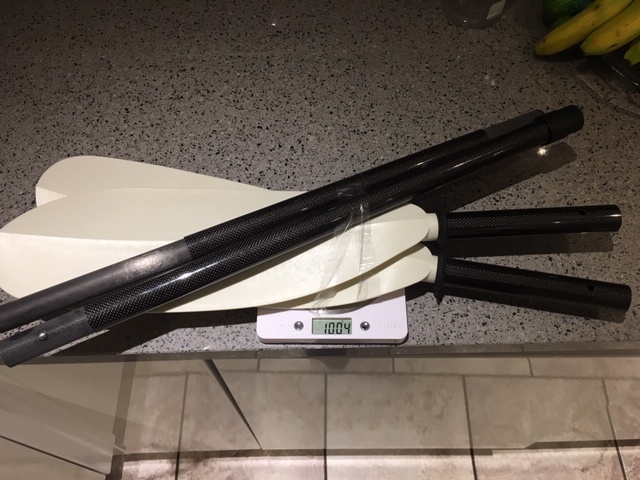
Total weight of the setup including paddle and mini USB air pump 2925g.the commercial offerings come in around 3-4kg for the packraft alone.
Possible sea trials tomorrow as long as the weather isn’t too bad..
mikeydFree MemberPosted 5 years agoWow, looks like this has turned into a marketing campaign for on-one 😉 DM me to arrange my commission – a paddle will do 🙂
Looks great Whitestone, maybe I should have done something like that before starting my design.. I thought it would handle like a tractor inner tube compared to a traditional boat so just cracked on.
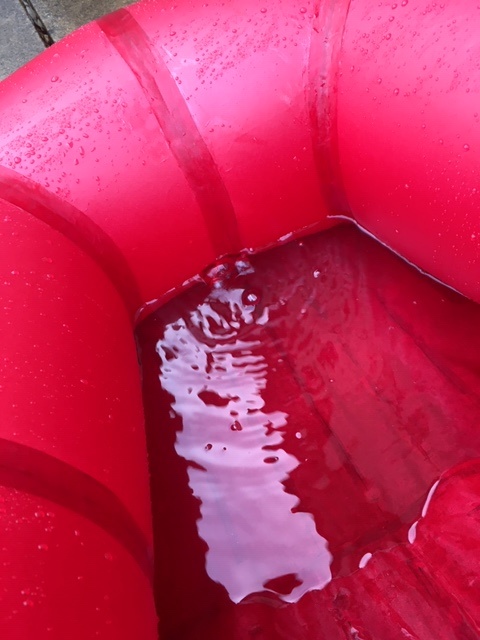
I knew this stage would have to be done, but I was kinda hoping I had been thorough with the heat sealing and aqua-sealing: Leak finding: a couple of holes found by sound, but had to do the old water test to find the rest:

 mikeydFree MemberPosted 5 years ago
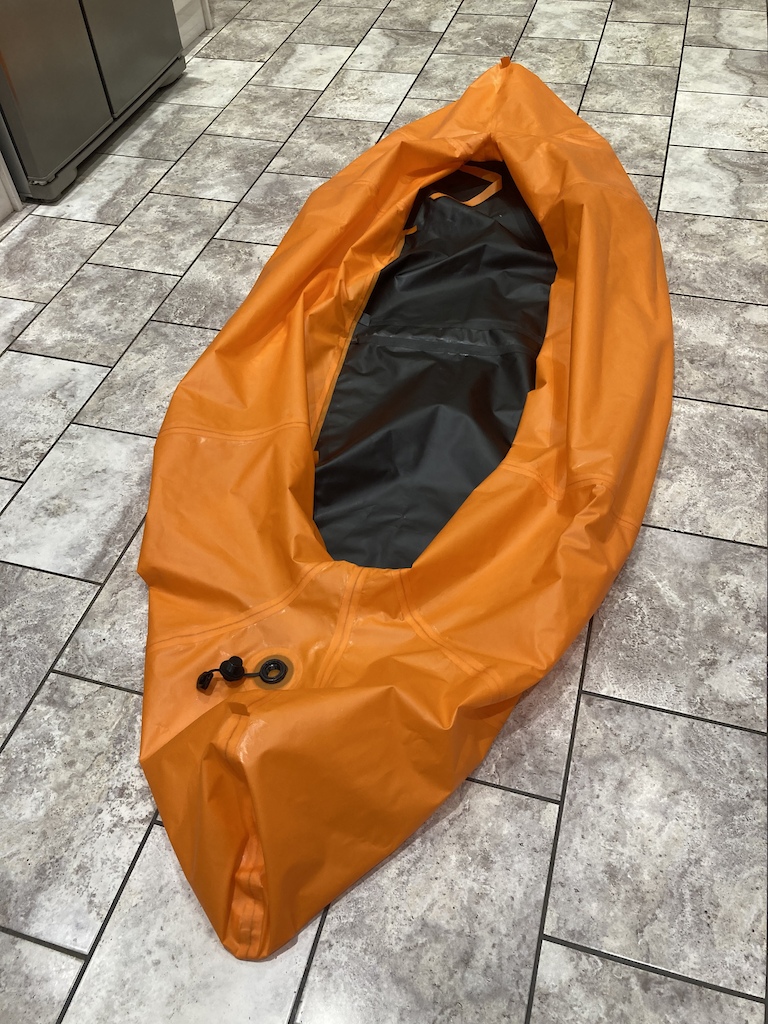
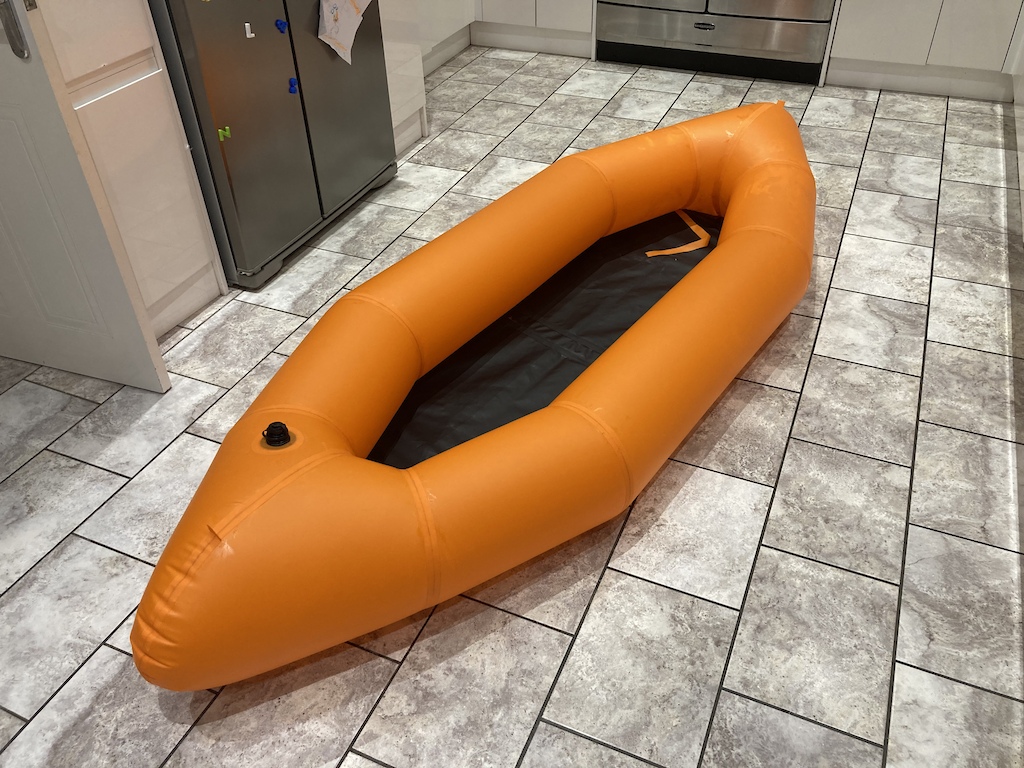
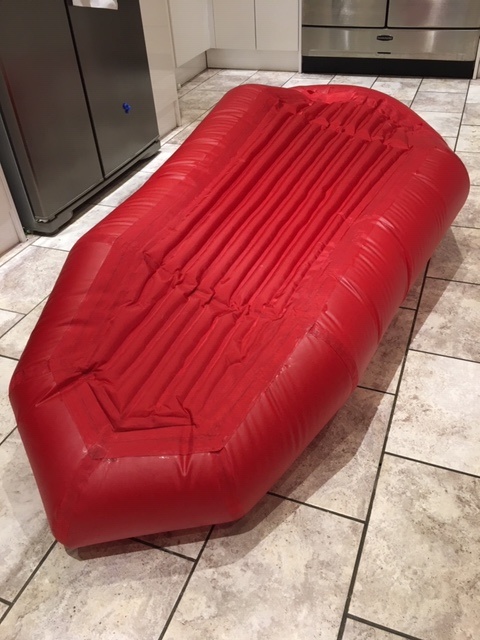
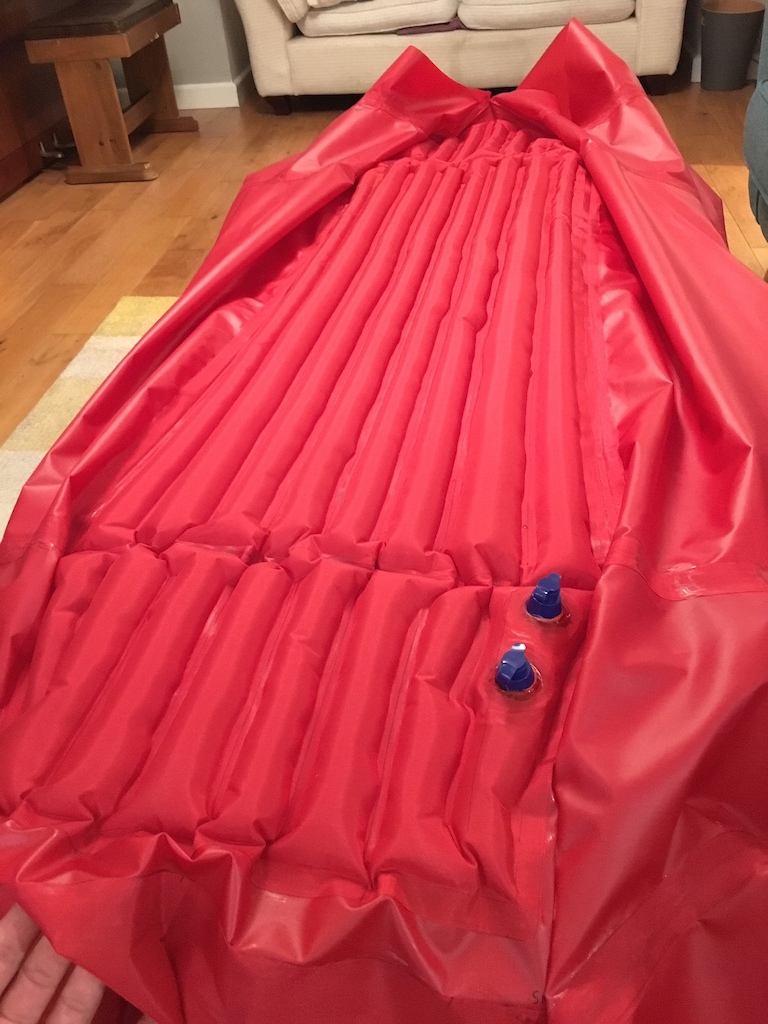
She’s alive!
Bow view

Stern view
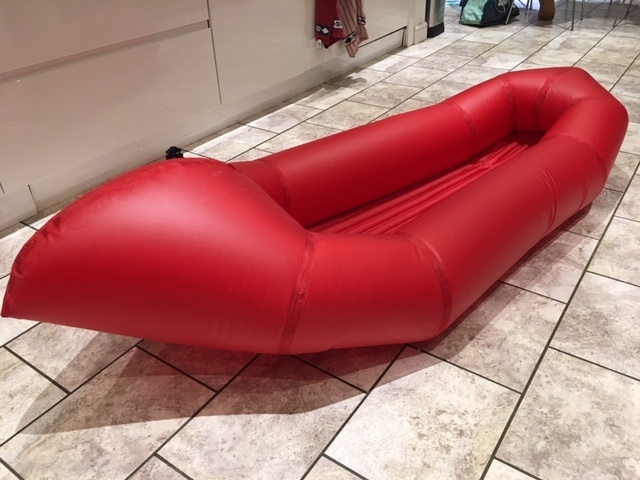
Underside – notice the tubes being pulled “in” slightly, this is due to the inflatable floor.
 mikeydFree MemberPosted 5 years ago
I trust the children won’t miss their armbands the next time they go to the pool…
It’s ok, I only used one arm band
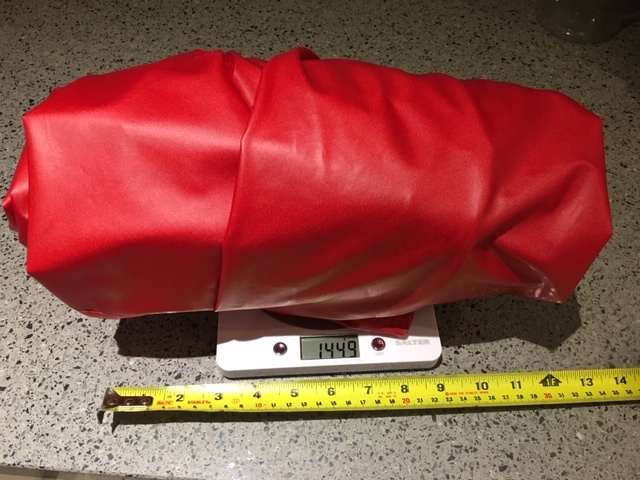
mikeydFree MemberPosted 5 years agoHow easy was it to use the seam sealer and how expensive was it? Would you be able to use it to make bags? How heavy is the material?
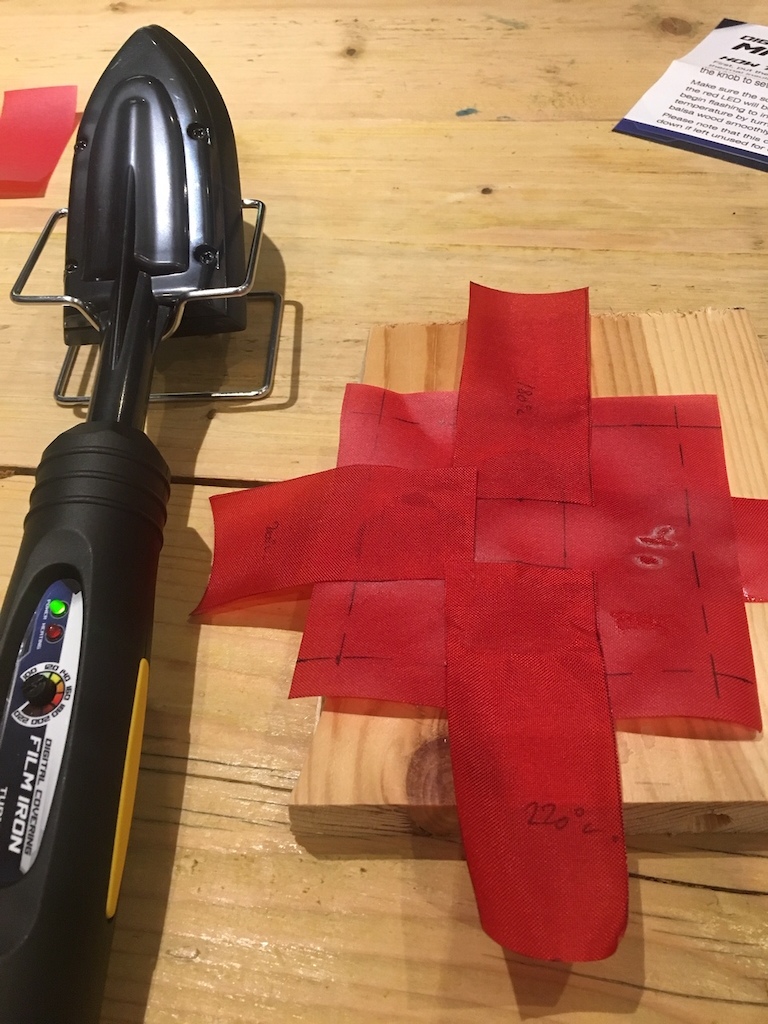
Seam sealer is a modified RC model film iron, was about £18 IIRC.
Fabric is approx 265g per sqm, packraft weighs in at approx 1400g so far (without valve)
Definitely suitable for bag or outdoor kit fabrication, I believe it’s used for life jackets and other safety gear.
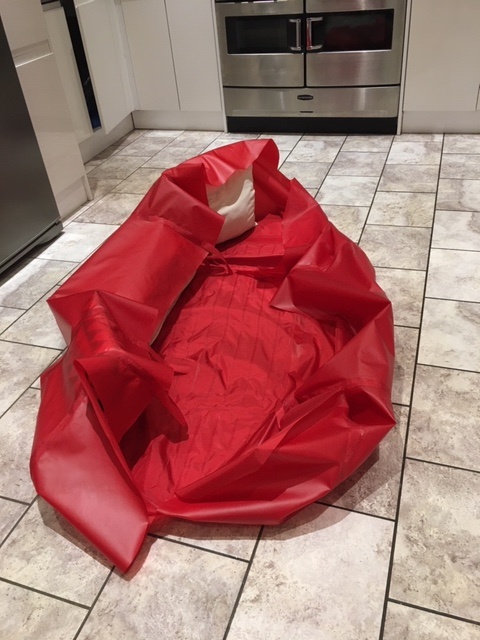
mikeydFree MemberPosted 5 years agoGetting there now:
Valves for inflatable floor – armband valves, 1 c/w 1 way valve the other one has the 1 way valve removed for ease of deflation. Not really a critical part of the packraft so the extra failure point isn’t really an issue.
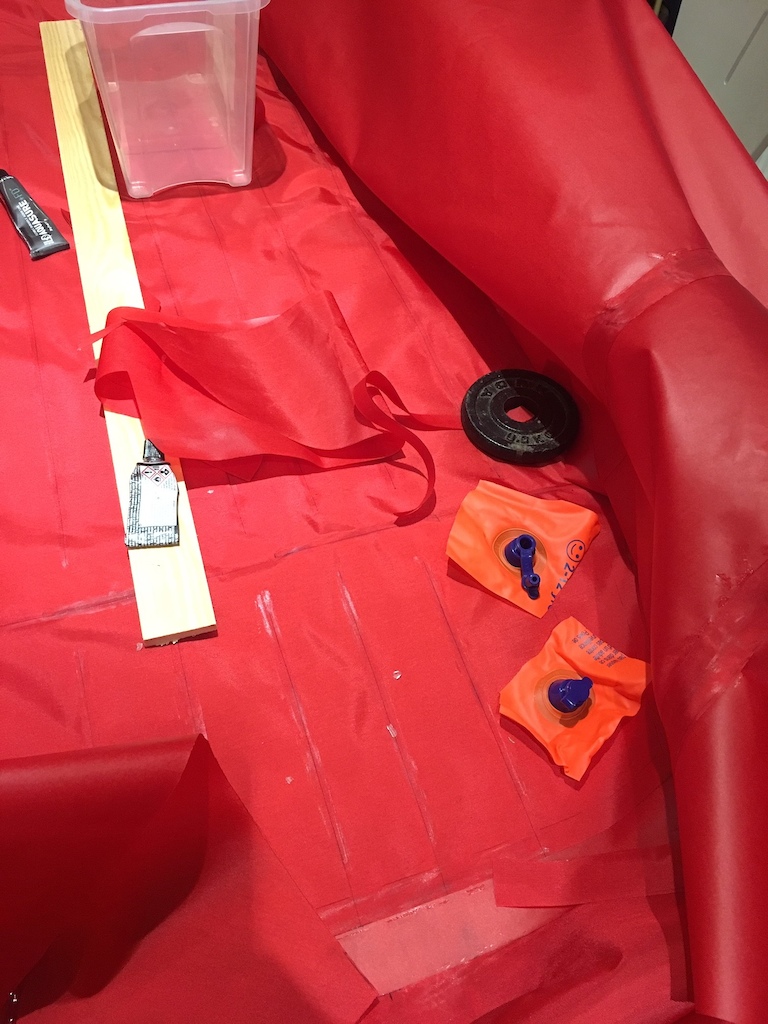
It works! jump test confirmed it’s airtight and not going to pop
95% complete, the Boston valve hasn’t arrived yet, fingers crossed it’ll arrive today. The last front and rear seams were very awkward and took ages, hopefully I’ve heat sealed them enough to get a good bond.
Time to start thinking about a paddle, tempted to cut an existing one into 4 at the moment but have seen some nice homemade carbon creations, however, material costs alone would be ~£50
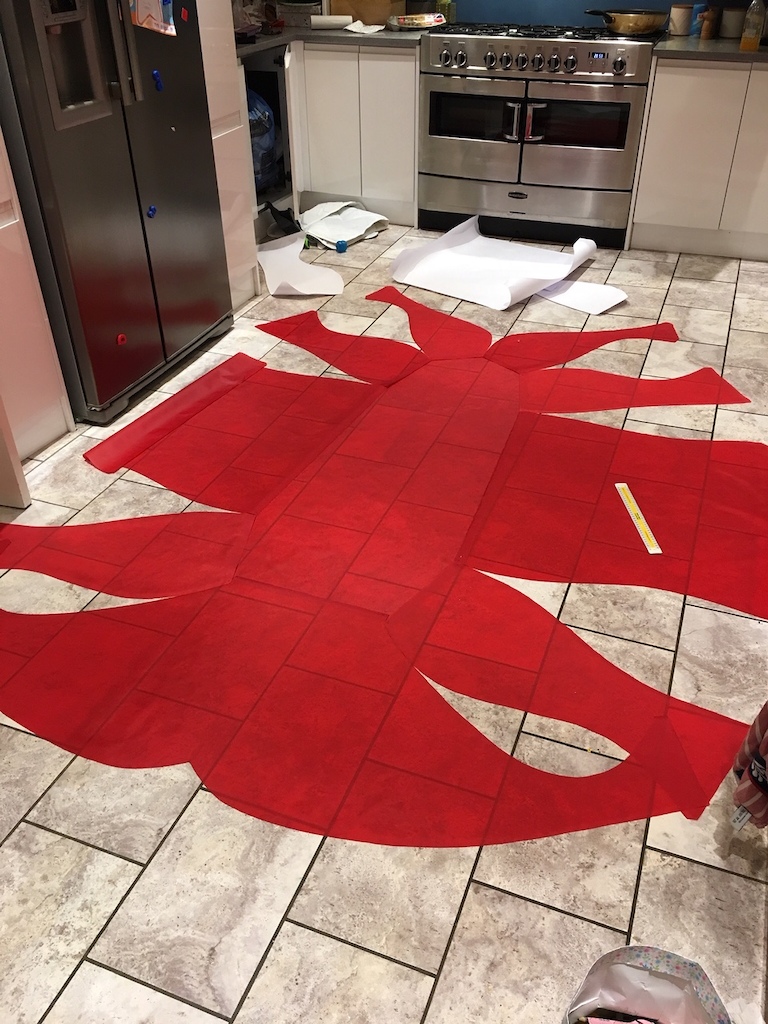
mikeydFree MemberPosted 5 years agoProgress Update:
Shapes cut out:
Temperature test – 180 degrees no good, 200 and 220 material is inseperable
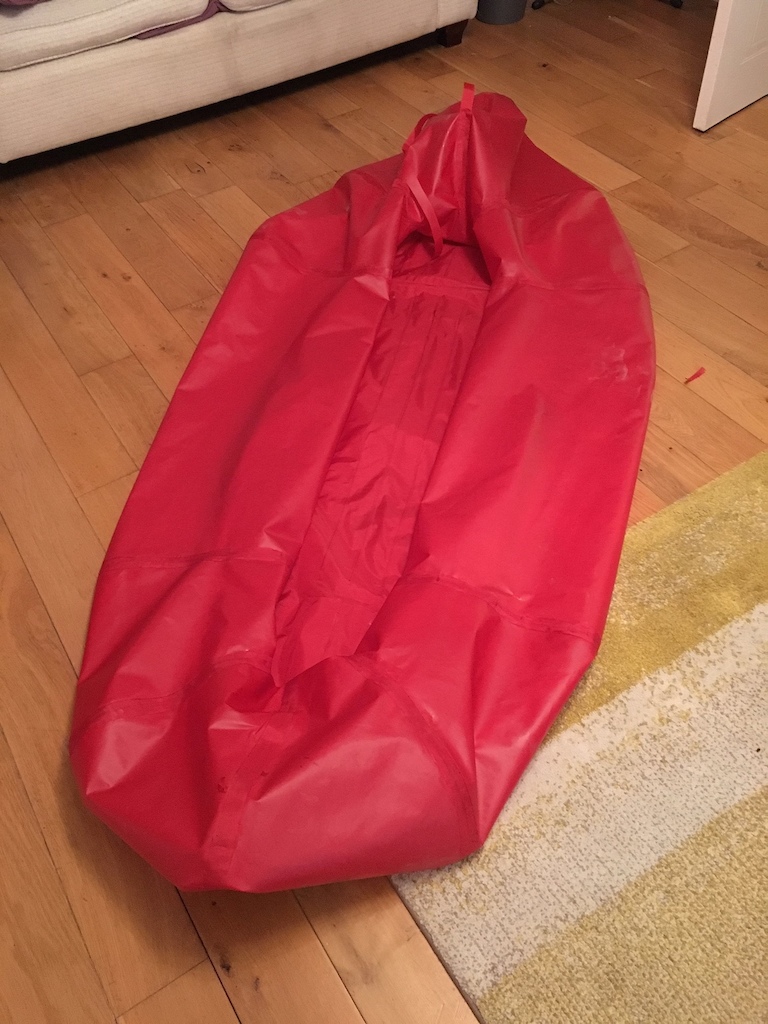
All shapes joined to centre, double layer bottom which will be inflatable on its own
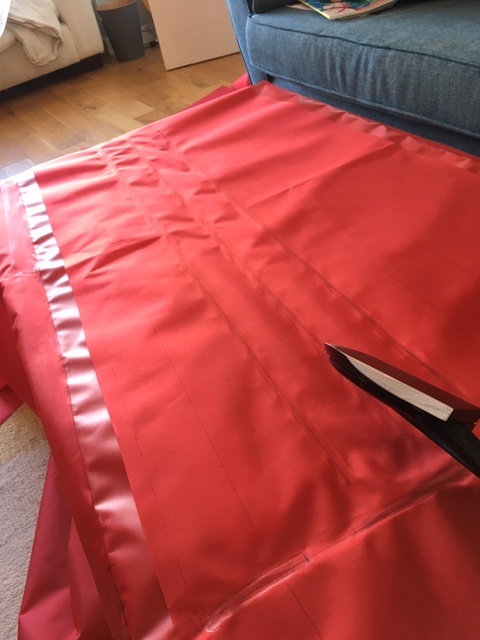
Sealing the curved parts to together, hardest part so far with each seam taking around 45mins (10 in total)
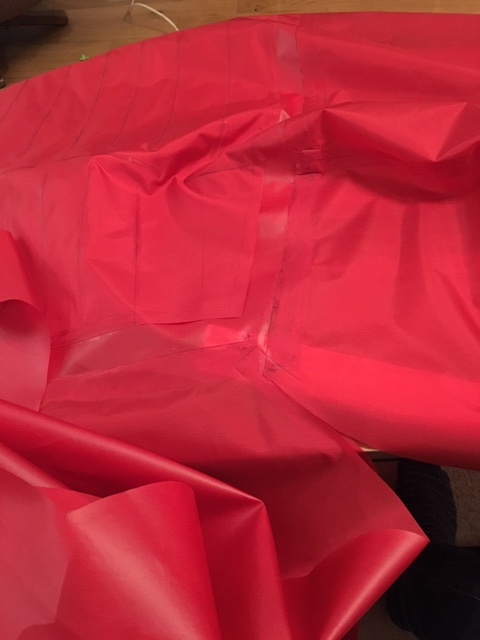
8 curved seams complete so far, next step is to aquasure/glue them internally to ensure they are air tight
Time taken so far: 2hrs tracing and cutting, 10hrs seam sealing
mikeydFree MemberPosted 5 years agoAlpacka ~ £800+
Planet X ~ £500 with discount
Second hand ~ £400+
DIY ~ £120 materialsHowever, even though I said cost was a factor in making one, if they were cheaper I’d probably still try and make one… you either get it or you don’t when it comes to making stuff that probably costs as much and doesn’t perform as well in the end.
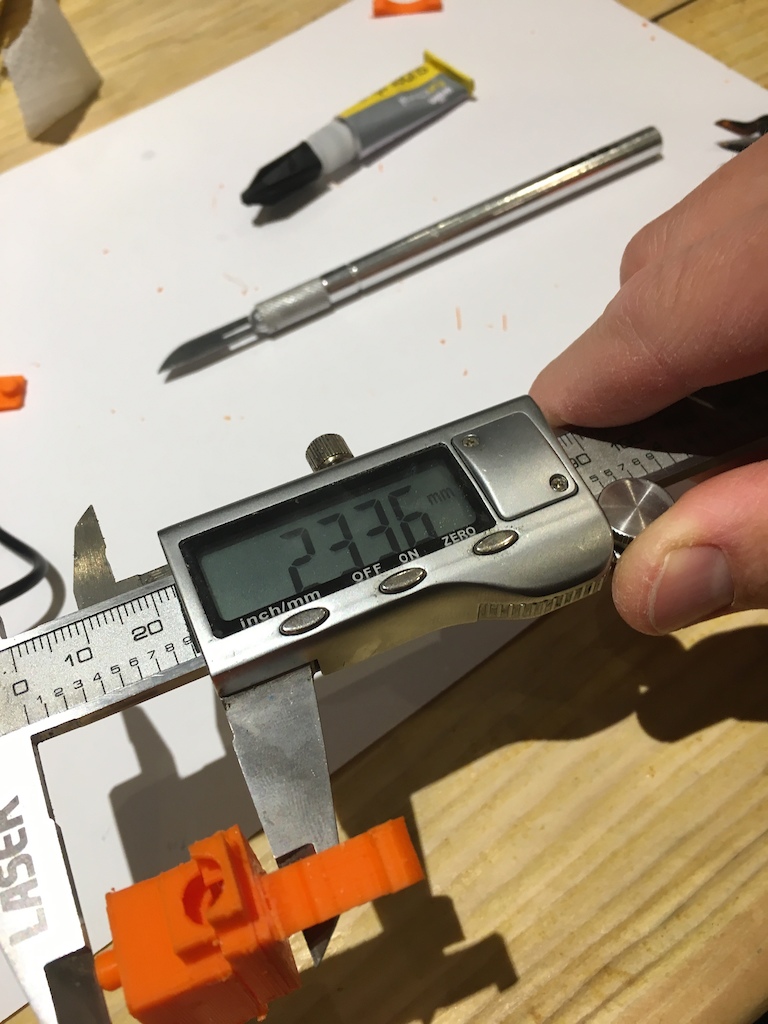
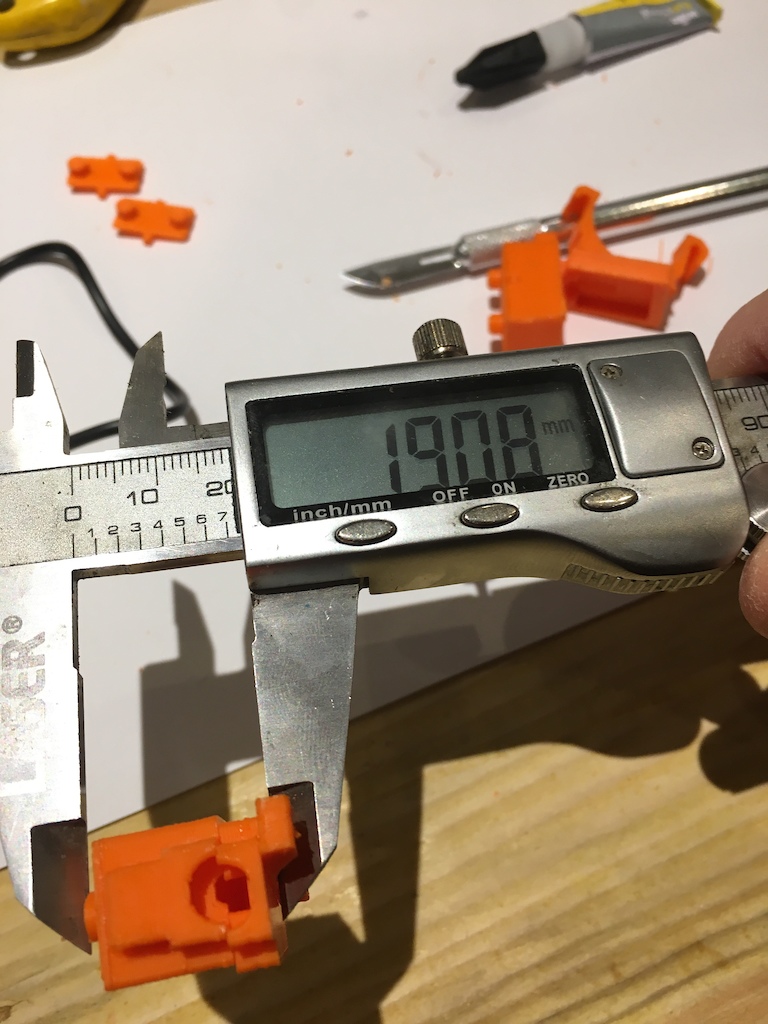
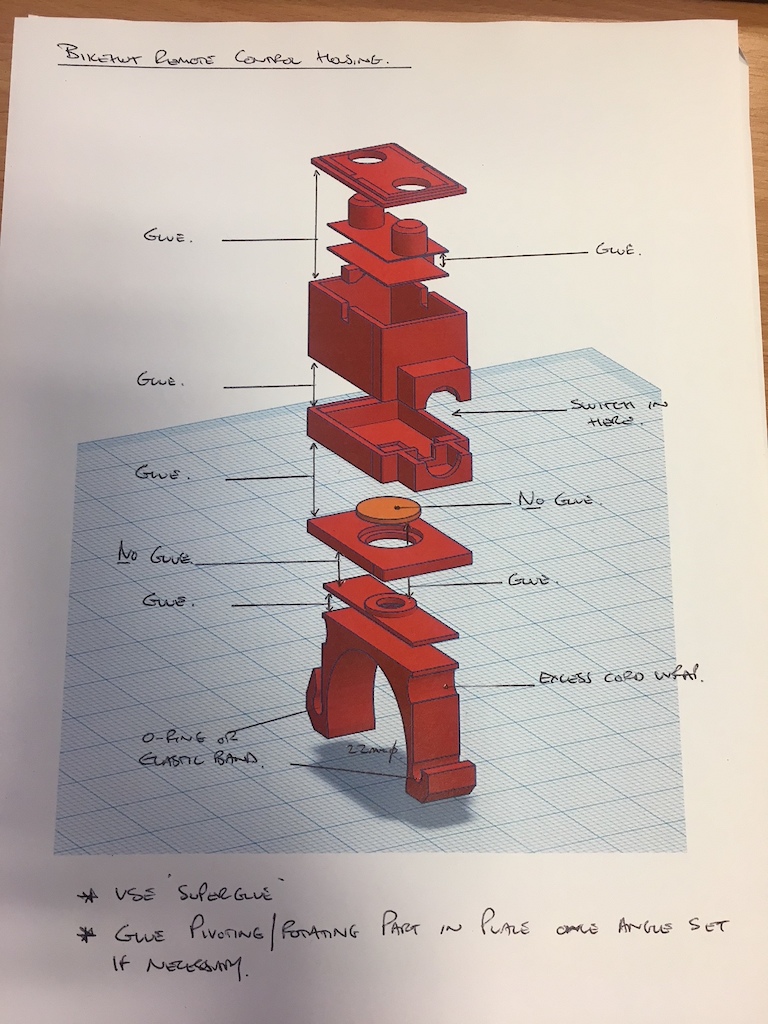
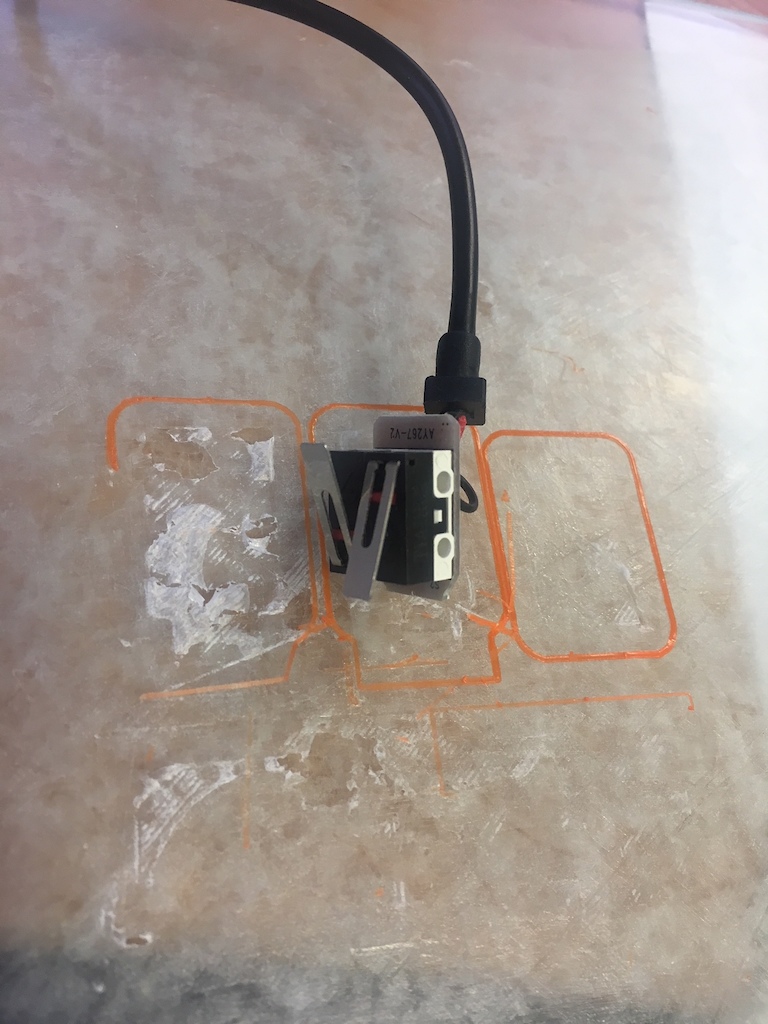
mikeydFree MemberPosted 5 years agoQuick update on the 3D printed switch.
Thanks to those who’ve given me some beer tokens for one, you’ve almost paid for the light! (at its black Friday price…)
Ongoing improvements with my testing team (Bentudder) has led to V3, which integrates the o-ring loops onto the main body to reduce the stack height by around 20% and makes the whole thing a lot sturdier on the bars.
 mikeydFree MemberPosted 5 years ago
Bent Udder, yeah, that pretty much sums up my experience with the stock lever.
YGM
Cheers
Mike
mikeydFree MemberPosted 5 years agoGeex,
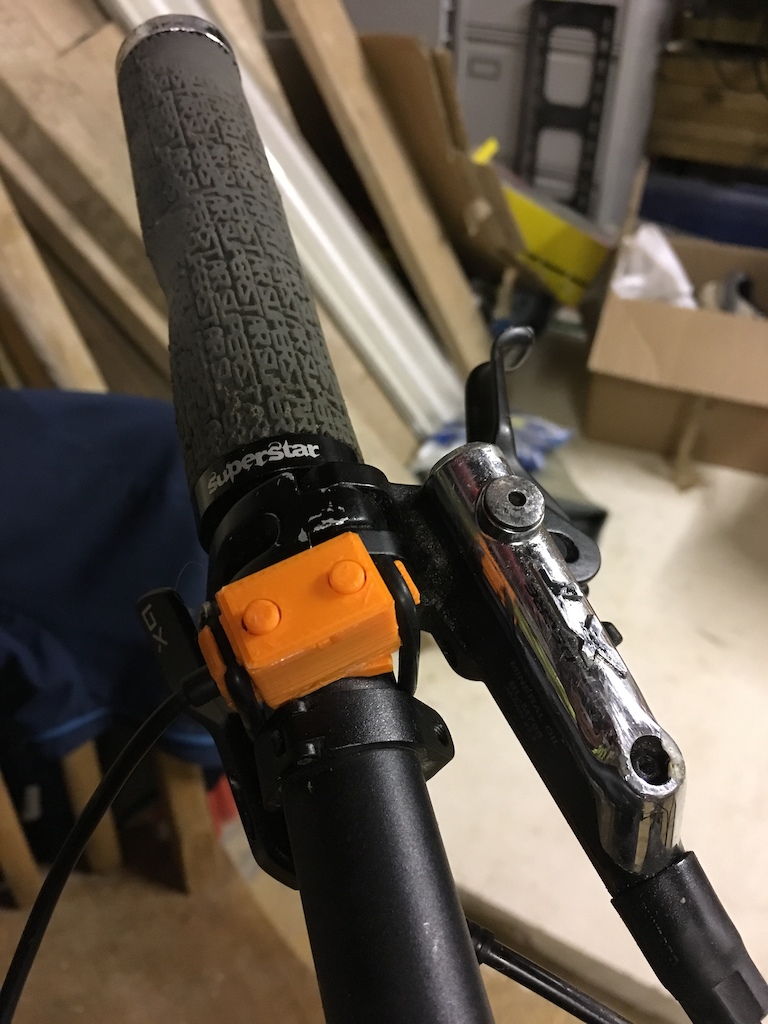
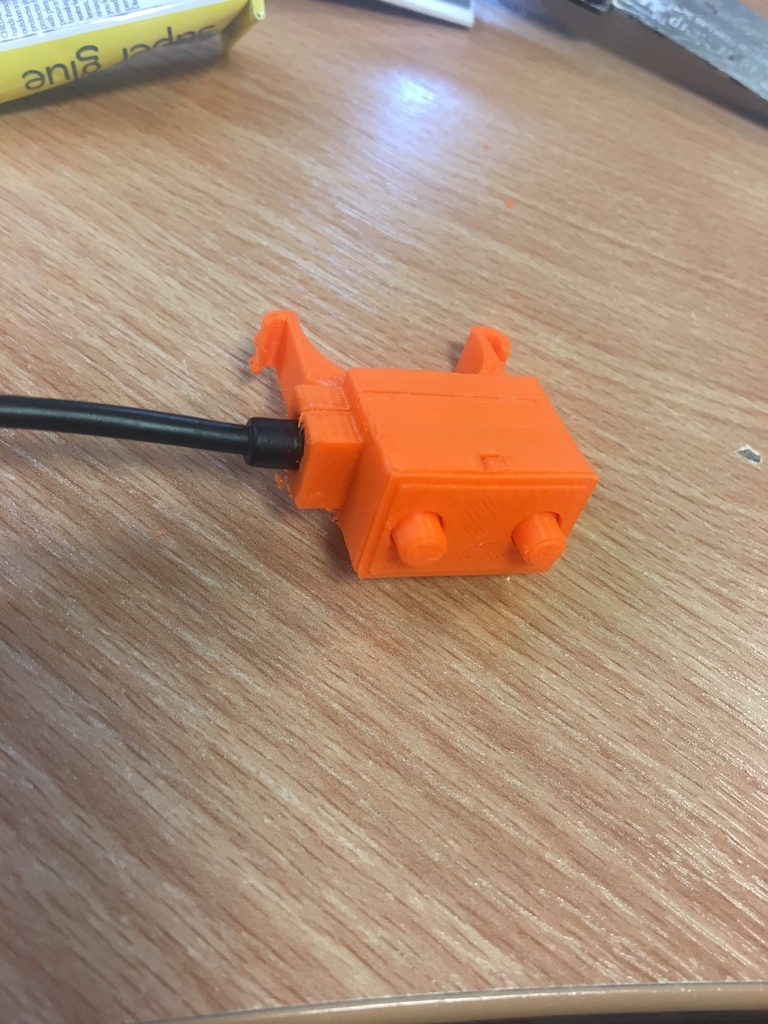
yeah, the buttons just do what the lever did (up was on/off, down was cycling the modes)
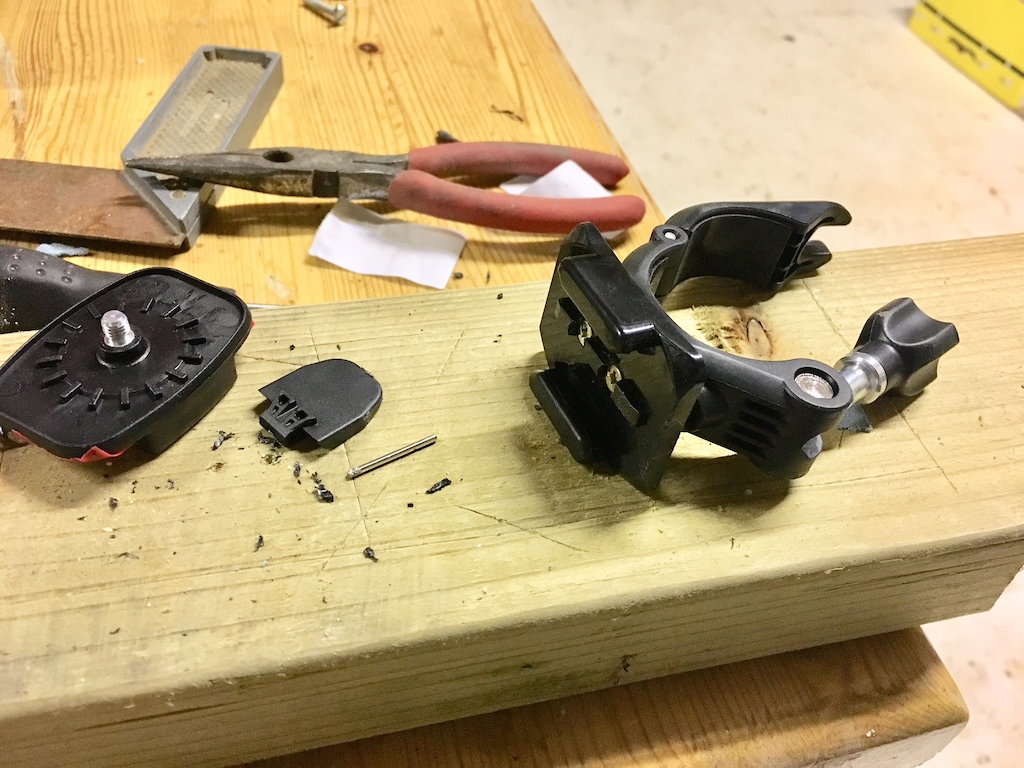
The reason I did it was I struggled to mount the stock remote anywhere, I had to strap it to one of the grips and kept accidentally cycling the modes. Plus it’s a pretty flimsy bit of rubbish tbh.
Not saying my version isn’t a flimsy bit of rubbish.. just less so IMHO!
mikeydFree MemberPosted 5 years agoGood idea Bent Udder,
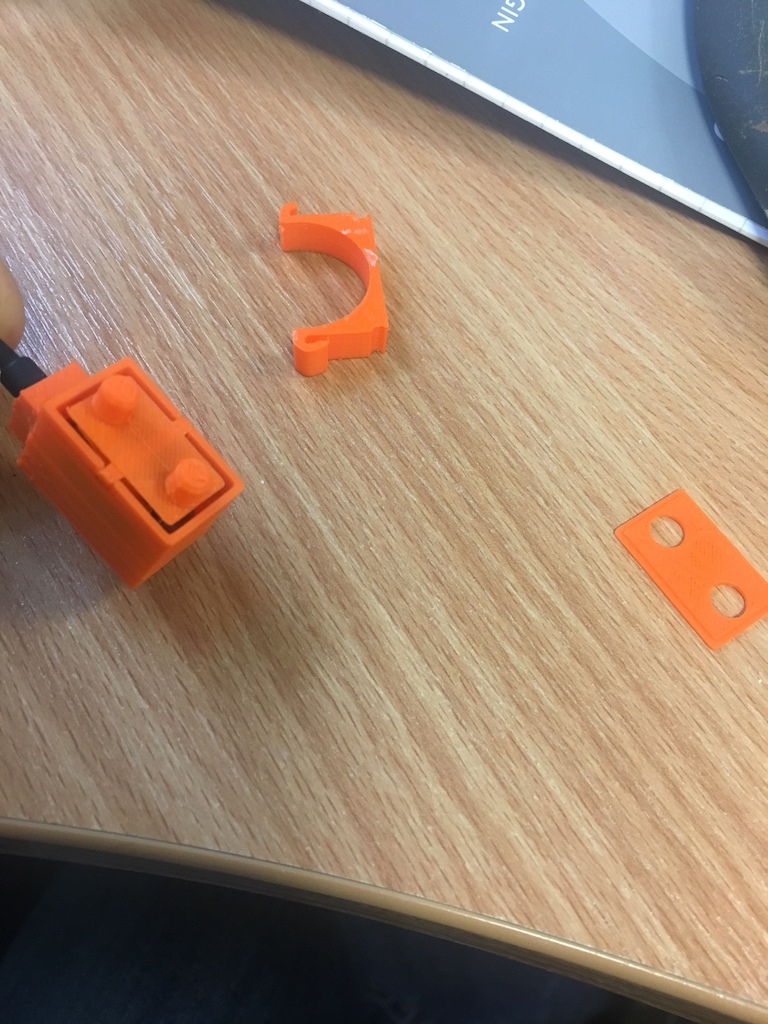
Mk2:
If anyone wants one, it’s 1 x beer token posted. (£4.50 around these parts)
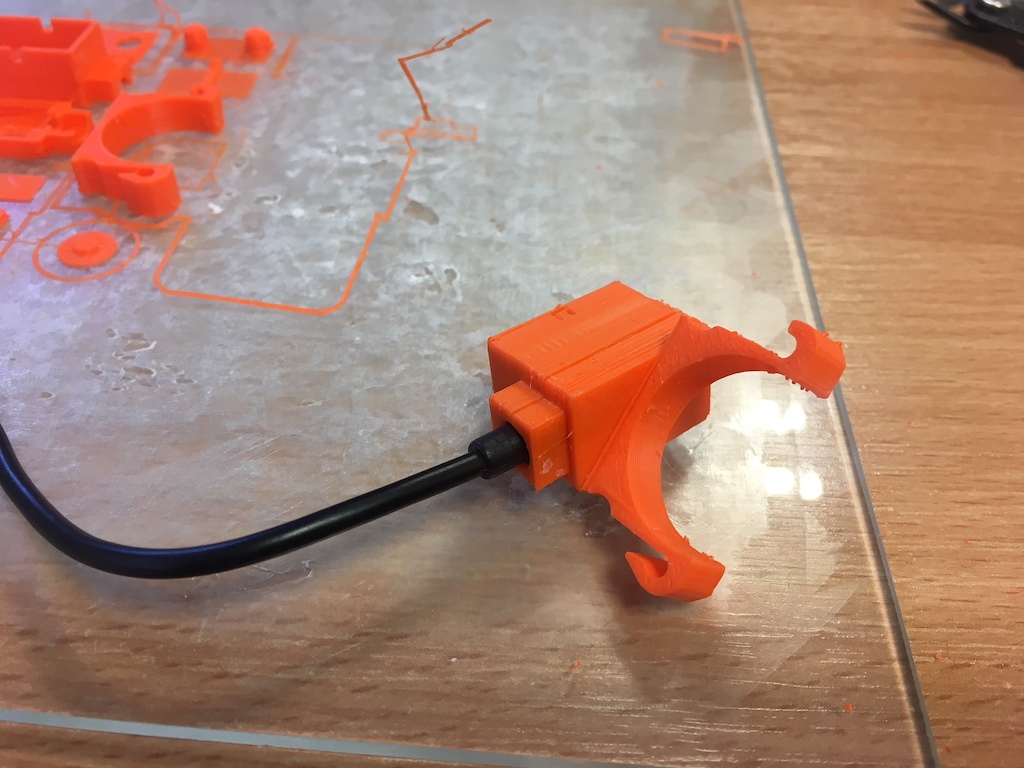
mikeydFree MemberPosted 5 years agoGreat light, let down a bit by the mount and flimsy remote which I found a bit cumbersome.
Go-pro style mount modified from £5 ebay jobby:
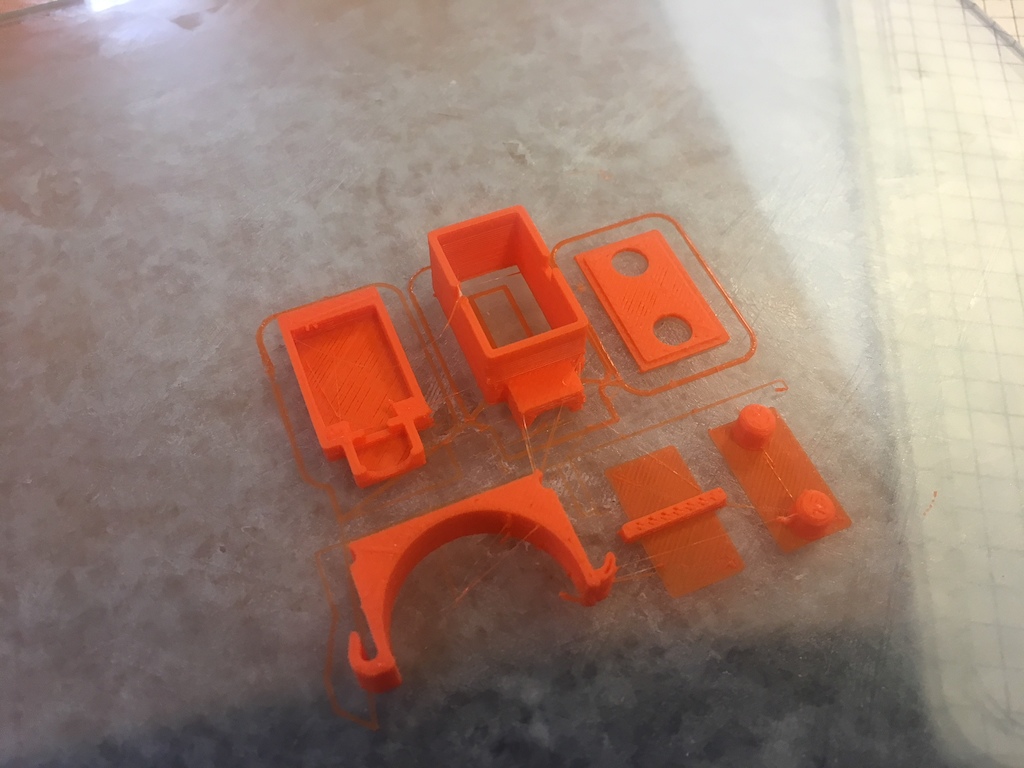
Re-housed the remote switch with a 3D printed jobby, happy to share the .stl file if anyone wants to print their own.
 mikeydFree MemberPosted 6 years ago
Did anyone see the ‘come dine with me’ where the Thai contestant used a whole catering size tub of green curry paste (48 servings IIRC) for 4 people?!
mikeydFree MemberPosted 6 years agoDouble bag a sample and send to TVS analysis: http://www.tvsanalysis.co.uk/
£12 for a 3 day turn around per sample
£18 24hr
IIRC
phone/email to let them know before you send
mikeydFree MemberPosted 6 years agoNice work Stevied
That jigsaw looks ace too.
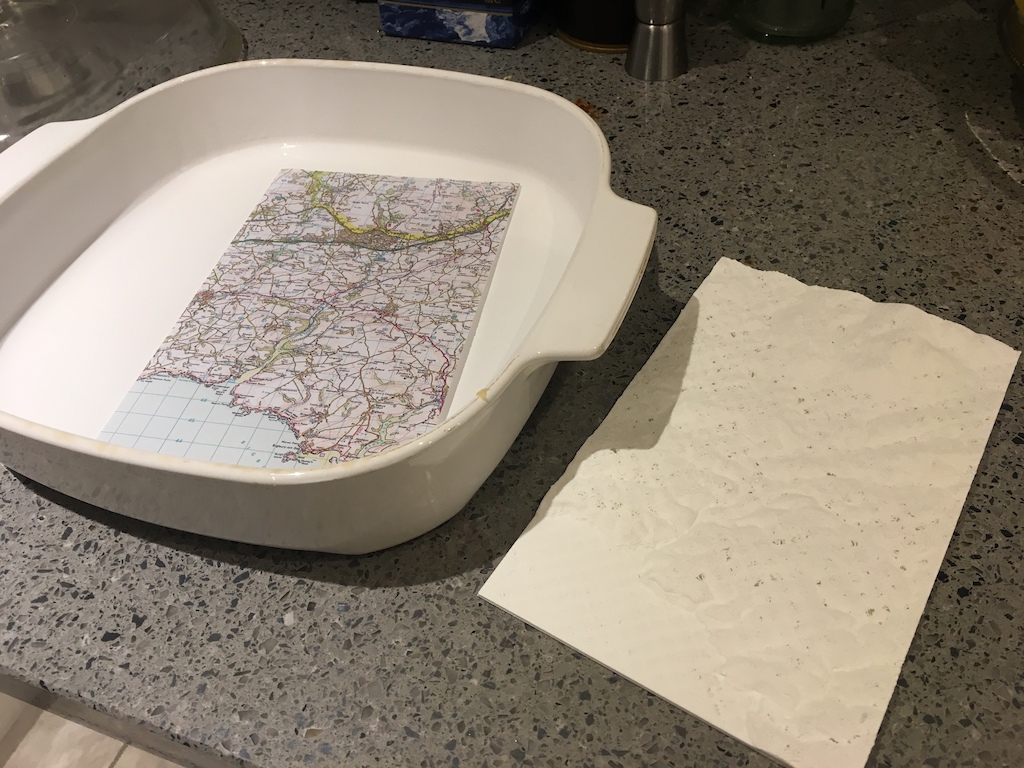
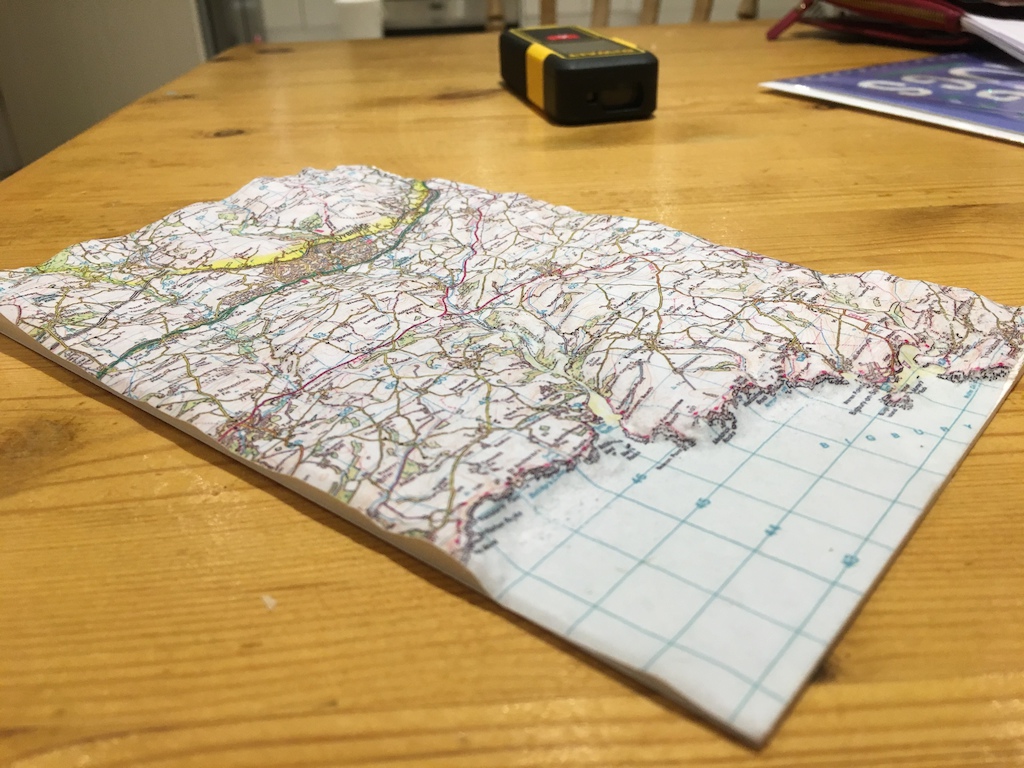
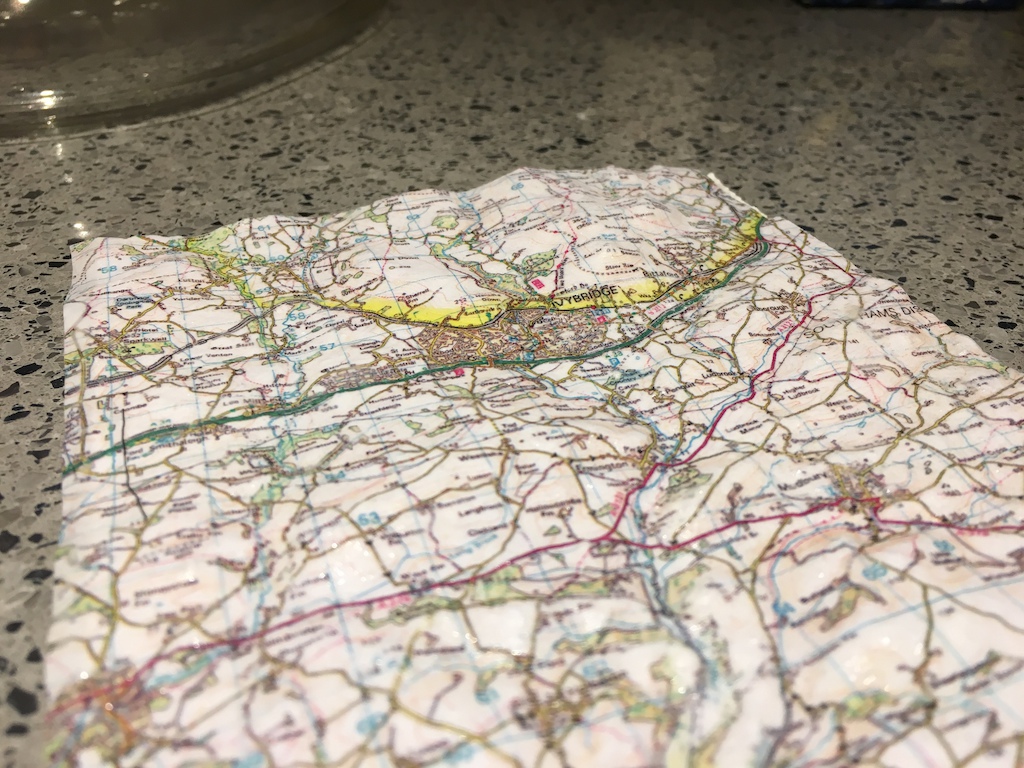
Been trying to work out a way to transfer maps to a 3D relief, the best I’v come up with so far is to print out on a laser-jet onto some thinnish paper, soak the paper then stipple onto the 3D relief. Used a bit of PVA too to keep it down. Fairly pleased with the results, however might try and rig up some kind of vac system (i.e. bin liner and vacuum cleaner) to suck it onto the relief.
 mikeydFree MemberPosted 6 years ago
Sorry didn’t answer some of the Qs above,
Milkie – yes, will set one up.
Redthunder – with difficulty to be honest. It would take ages to model and would be hard to print due to the amount of overhang. You would have to split it into parts.
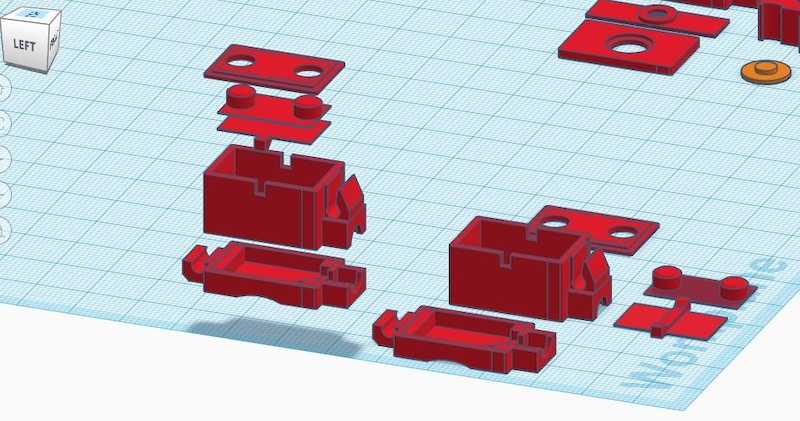
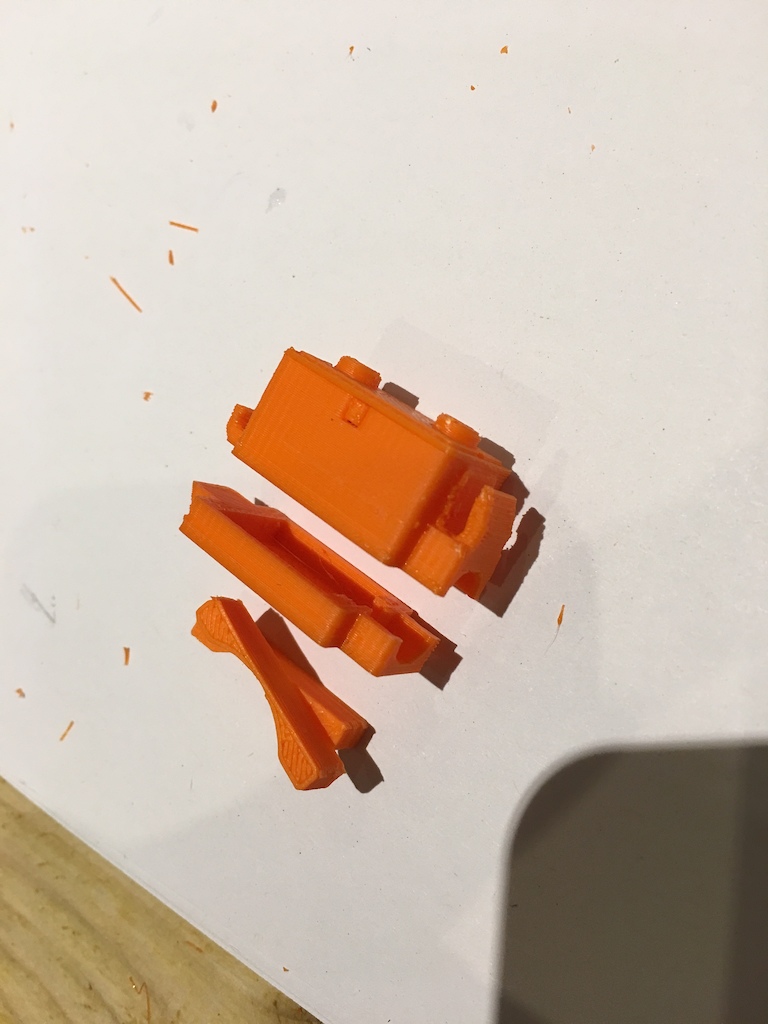
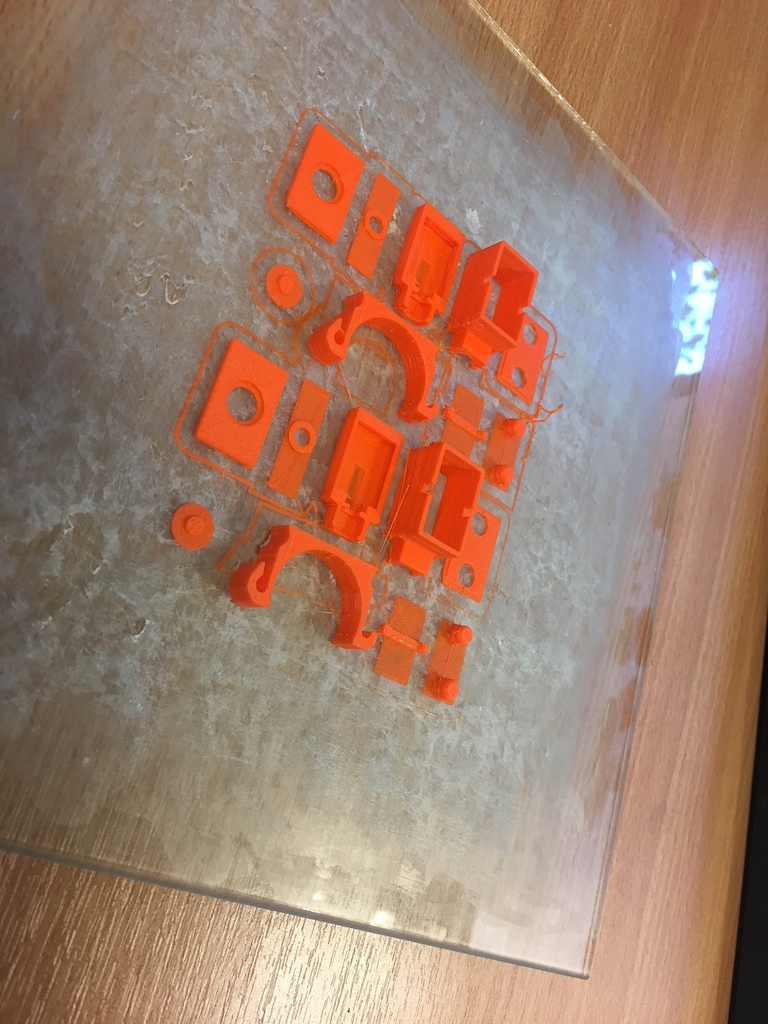
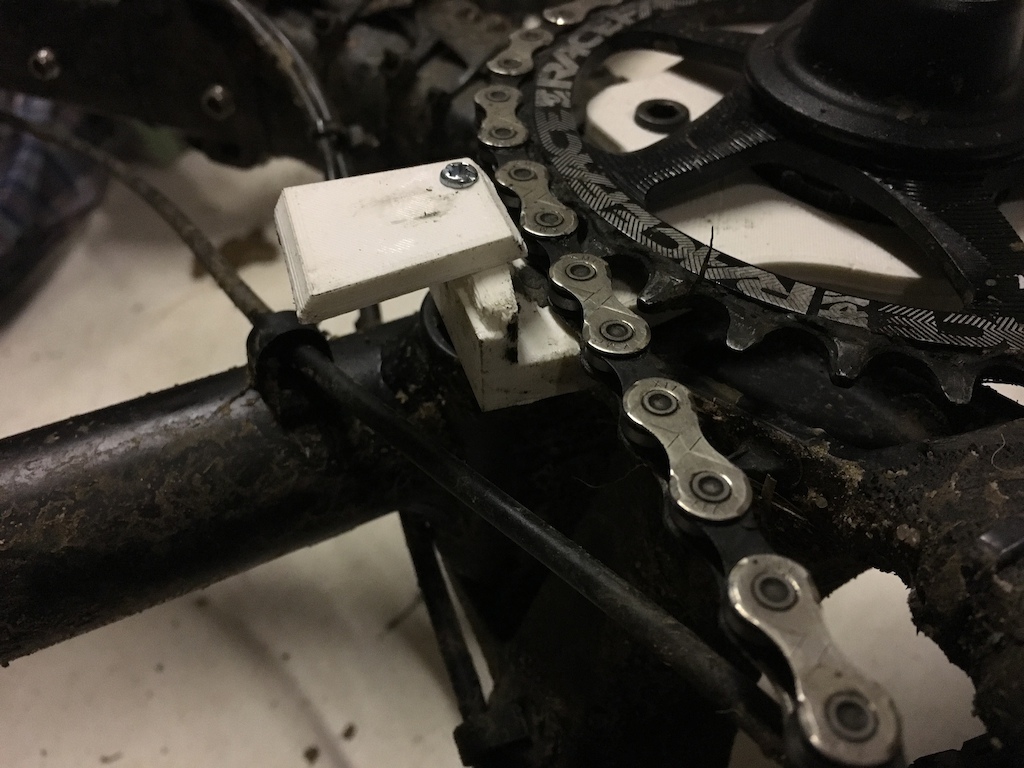
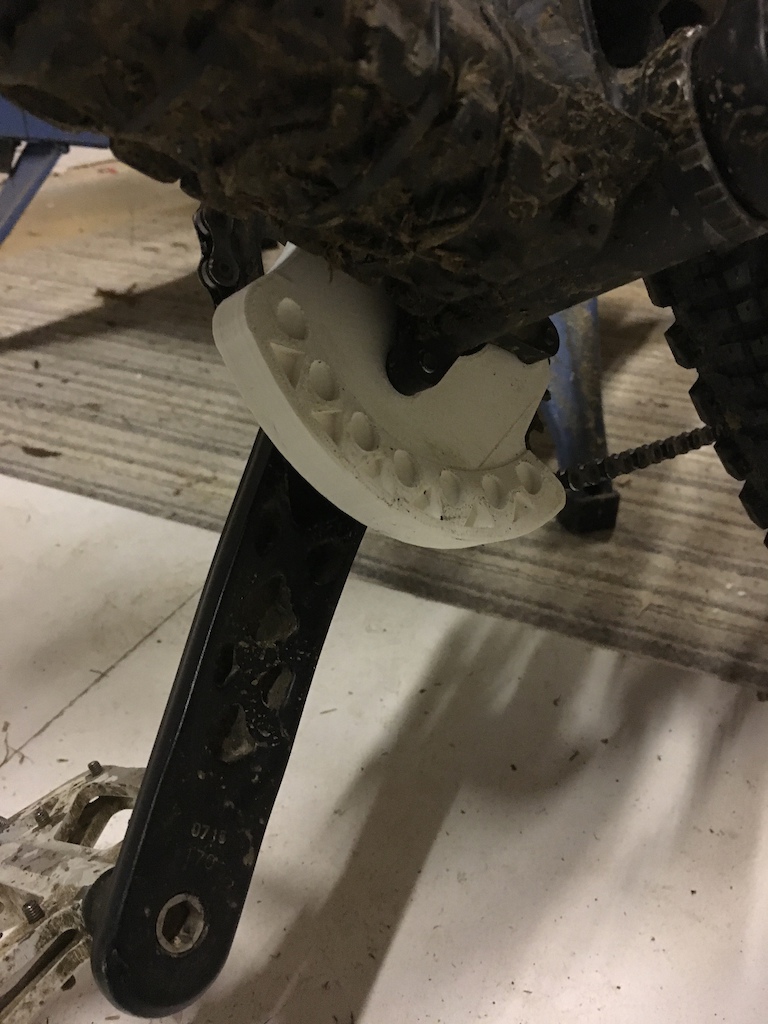
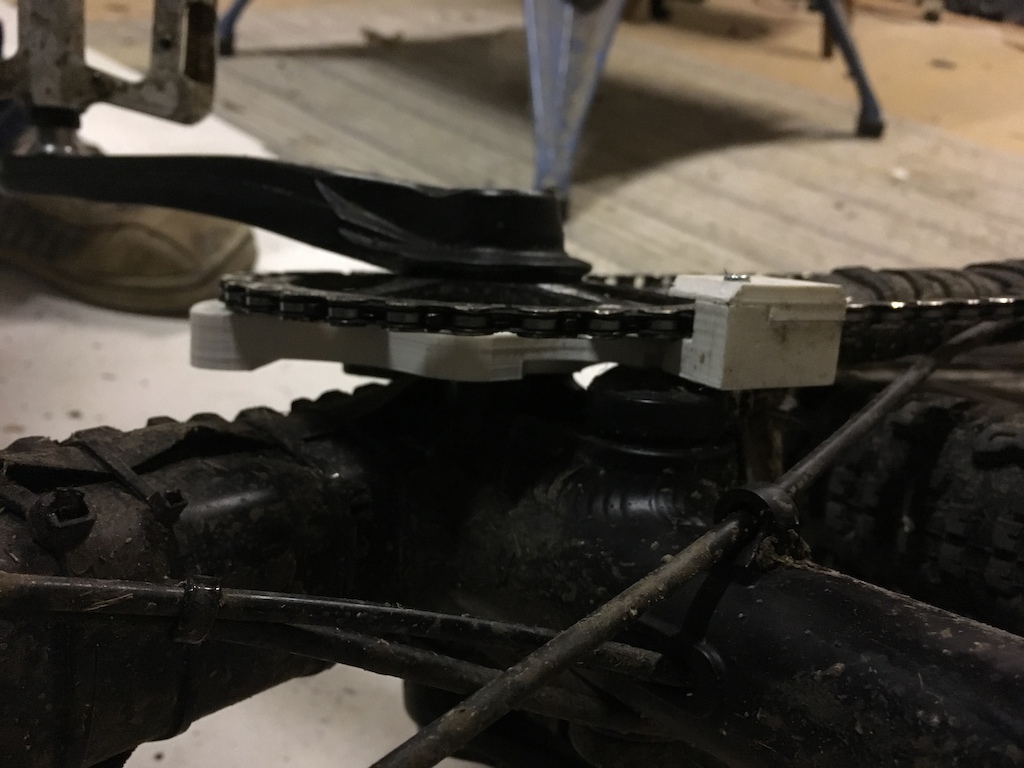
latest attempt at something functional;
Top to bottom; Initial prototype – Test prototype – Working prototype
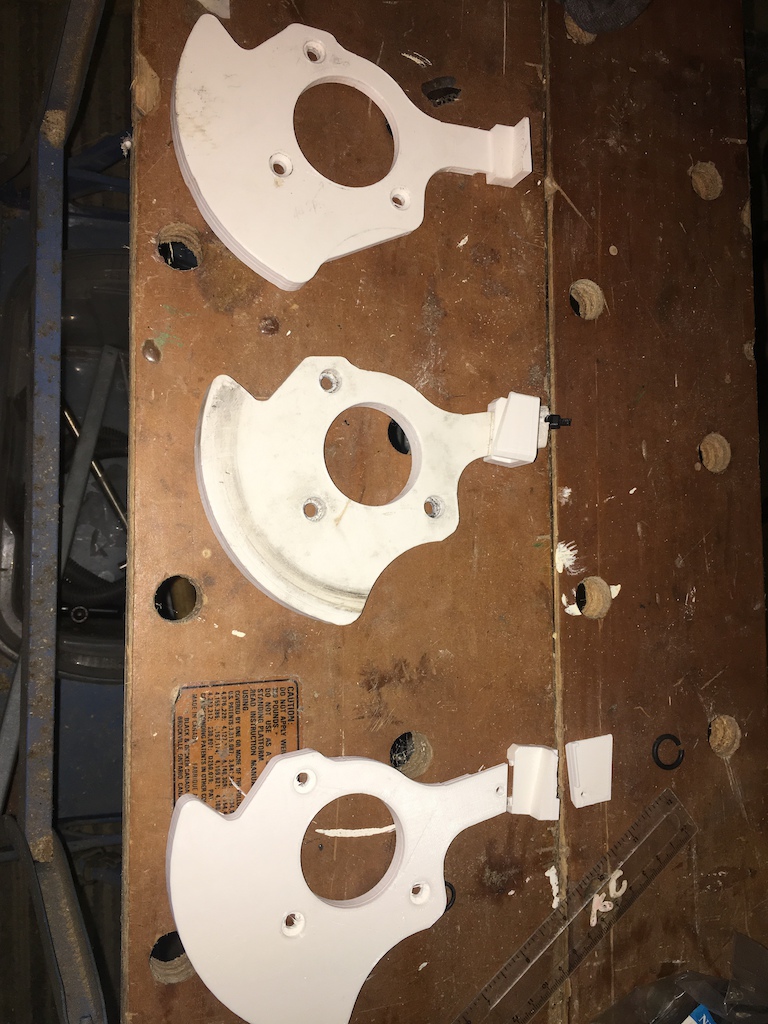
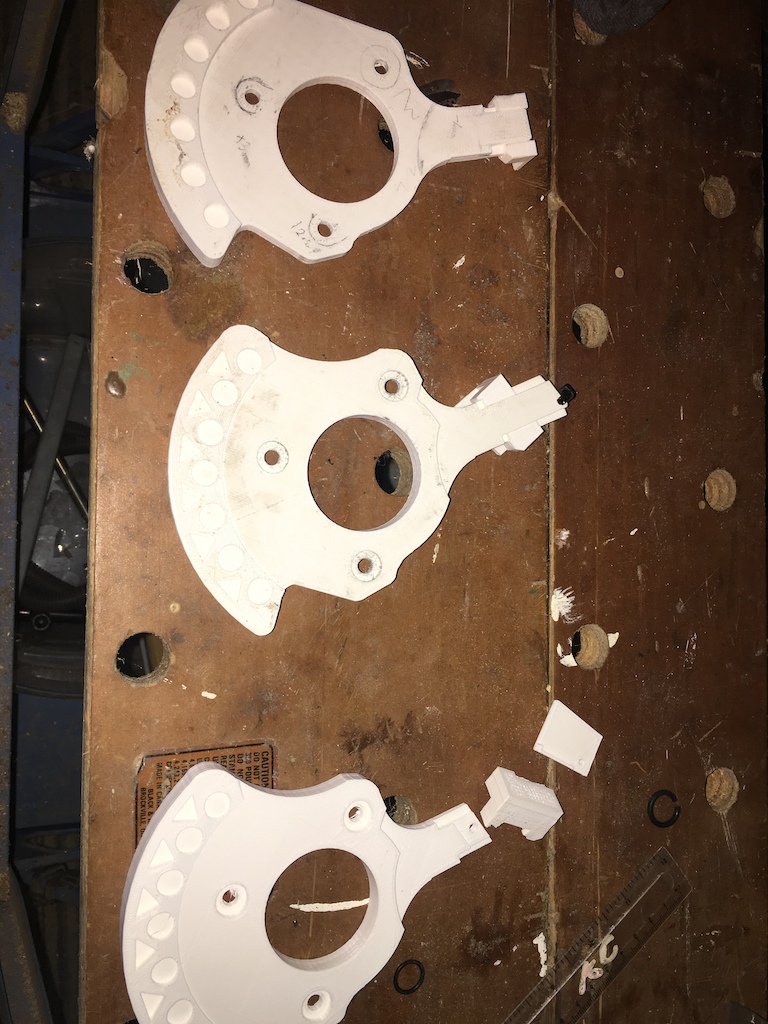

The initial modelling took 2-3hours in TinkerCAD, with the tweaks in-between taking 30-60mins. Print time approx. 4hrs for each prototype with a 40% fill and 1.4mm shell thickness.
The “put it in a vice and smack it with a lump hammer as hard as you can” test on the first prototype caused it to delaminate slightly, but that was expected tbh.
Will ride this for a bit and see if it needs anymore tweaking then print out of black PETG, probably with 100% infill.
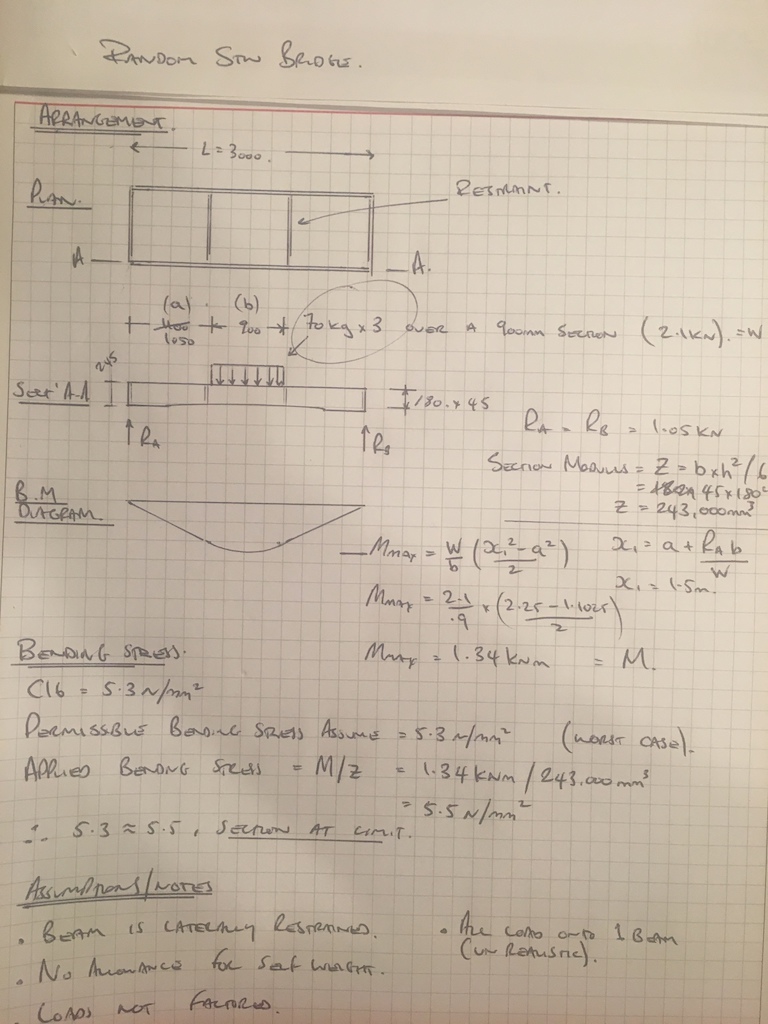
mikeydFree MemberPosted 6 years agoSee below. The loading is fairly high and the assumptions fairly conservative.
I don’t really know that much about structural timber, not sure what is done ref. load factors, I think there’s something to do with load durations. (i.e. don’t blame me if it collapses)
You have something that might look like an arch, in reality you have just weakened a bit of timber by cutting a bit out of the middle.
Increasing your 180mm beam depth, reducing your 3m span, load sharing between the beams, adding a decent handrail, not jumping up and down on it will all help. Make sure the depth of the beams are laterally restrained so they don’t buckle.
 mikeydFree MemberPosted 6 years ago
Google “mr muscle turbo”. As above, probably turbo vanes sticking.
Fixed two VAG tdis of mine and done as a preventative measure on my current.
Alternatively new turbo or get it cleaned by someone who knows what their doing.
Edit: maybe try Forte Turbo cleaner, this gave one of my Tdis another 6months, although I think I messed up the gearbox by ragging it a bit too much (280k on the clock)
mikeydFree MemberPosted 6 years agoI know, the “will I be crushed to death then found when my boss leaves” made it even better.
mikeydFree MemberPosted 6 years ago“Should you be getting on with some real office work?”
Singletrack?
mikeydFree MemberPosted 6 years agoIf you’re referring to the calpol vapouriser, it creates a Vicks like cloud of fumes that’ll decongest everyone in the house and maybe your neighbors