UPDATE: Reviews section refreshed, redesigned, searchable: Go take a look
Hello,
looking for some advice really - seen a few great threads on here with builds.
im not looking to build a huge shed as we dont have the space. I have to create a storage solution that looks nice as the current one is looking tatty. Liking the look of modern slatted wood cladding. I have found many examples done in the uk but here not so much (switzerland).
kind of in this style:
https://www.green-studios.com/our-products/garden-pod/
Im after tips with regards to the walls, lining etc.. What do i need to do? I have an idea for the basic structure that i'd use - pretty classic tbh.
It is going to be 1m deep but quite long (about 8m) as its to ge at the side of the house. Roof would be sloping away from the house. I can go high as is useful.
Any tips? looking fwd to the responses!
if you need more info just ask..
Does it need to be insulated? i.e. are you storing things in it that would ideally be in the house?
For a plain wood store I'd have slatted floor and end walls to allow air to circulate and dry the wood. Think along the lines of wood pallets, that sort of wood to gap ratio.
I used foil backed bubble wrap to insulate the inside of mine ...works a treat ...electric stapler was a godsend
Oil filled radiator on low thermostat keeps it toasty all year round
Whatever you get ,put a porch on it.
Porches are #amazbalz. 🙂
i wasnt going to insulate it, but if we could store the buggy in it i'll insulate..
one part will be to store wood and this will be left open, but the other part is realy storage of things like lawnmower and bikes and garden tools..
So from the responses, i need to add: Its not going to have power... i dont have that luxury! and its not going to be big enough to work in - i do that downstairs in the house in my room/our cave for wine..
Insulation will make little difference if it isn't heated. Ventilation is the key keeping stored stuff damp free.
For the slatted look you can make a simple panel wall from T&G or OSB or plywood. Cover it it in black breather membrane. Batten then fit the slats. Something self preserving like cedar, larch or sweet chestnut
this will be replacing a metal shed and pallet wood store..
Do i need to have the 'shed' structure walls, ply, membrane and then the cladding?
i would like to prevent water coming in.. the slatted look is just aethetic for me..
I have built your shed, mine is 3'6" deep by about 14ft long . We use our back yard to park the cars in so I couldn't go too deep but it's plenty long enough. I split it into two sections, one with barn doors for the bikes and at the other end a single door into it so I could put shelves either side.
The brick wall I was backing it onto is only single skin so had a pier halfway along the length of the shed. I built two frames and fixed them into the gaps between the piers then built from there. Used shiplap cladding to finish it off, it's now been painted a nice shade of pastel blue at the behest of her indoors as the kitchen looks onto it.
I was restricted by the height of the wall which is about 7 foot high.
[img] 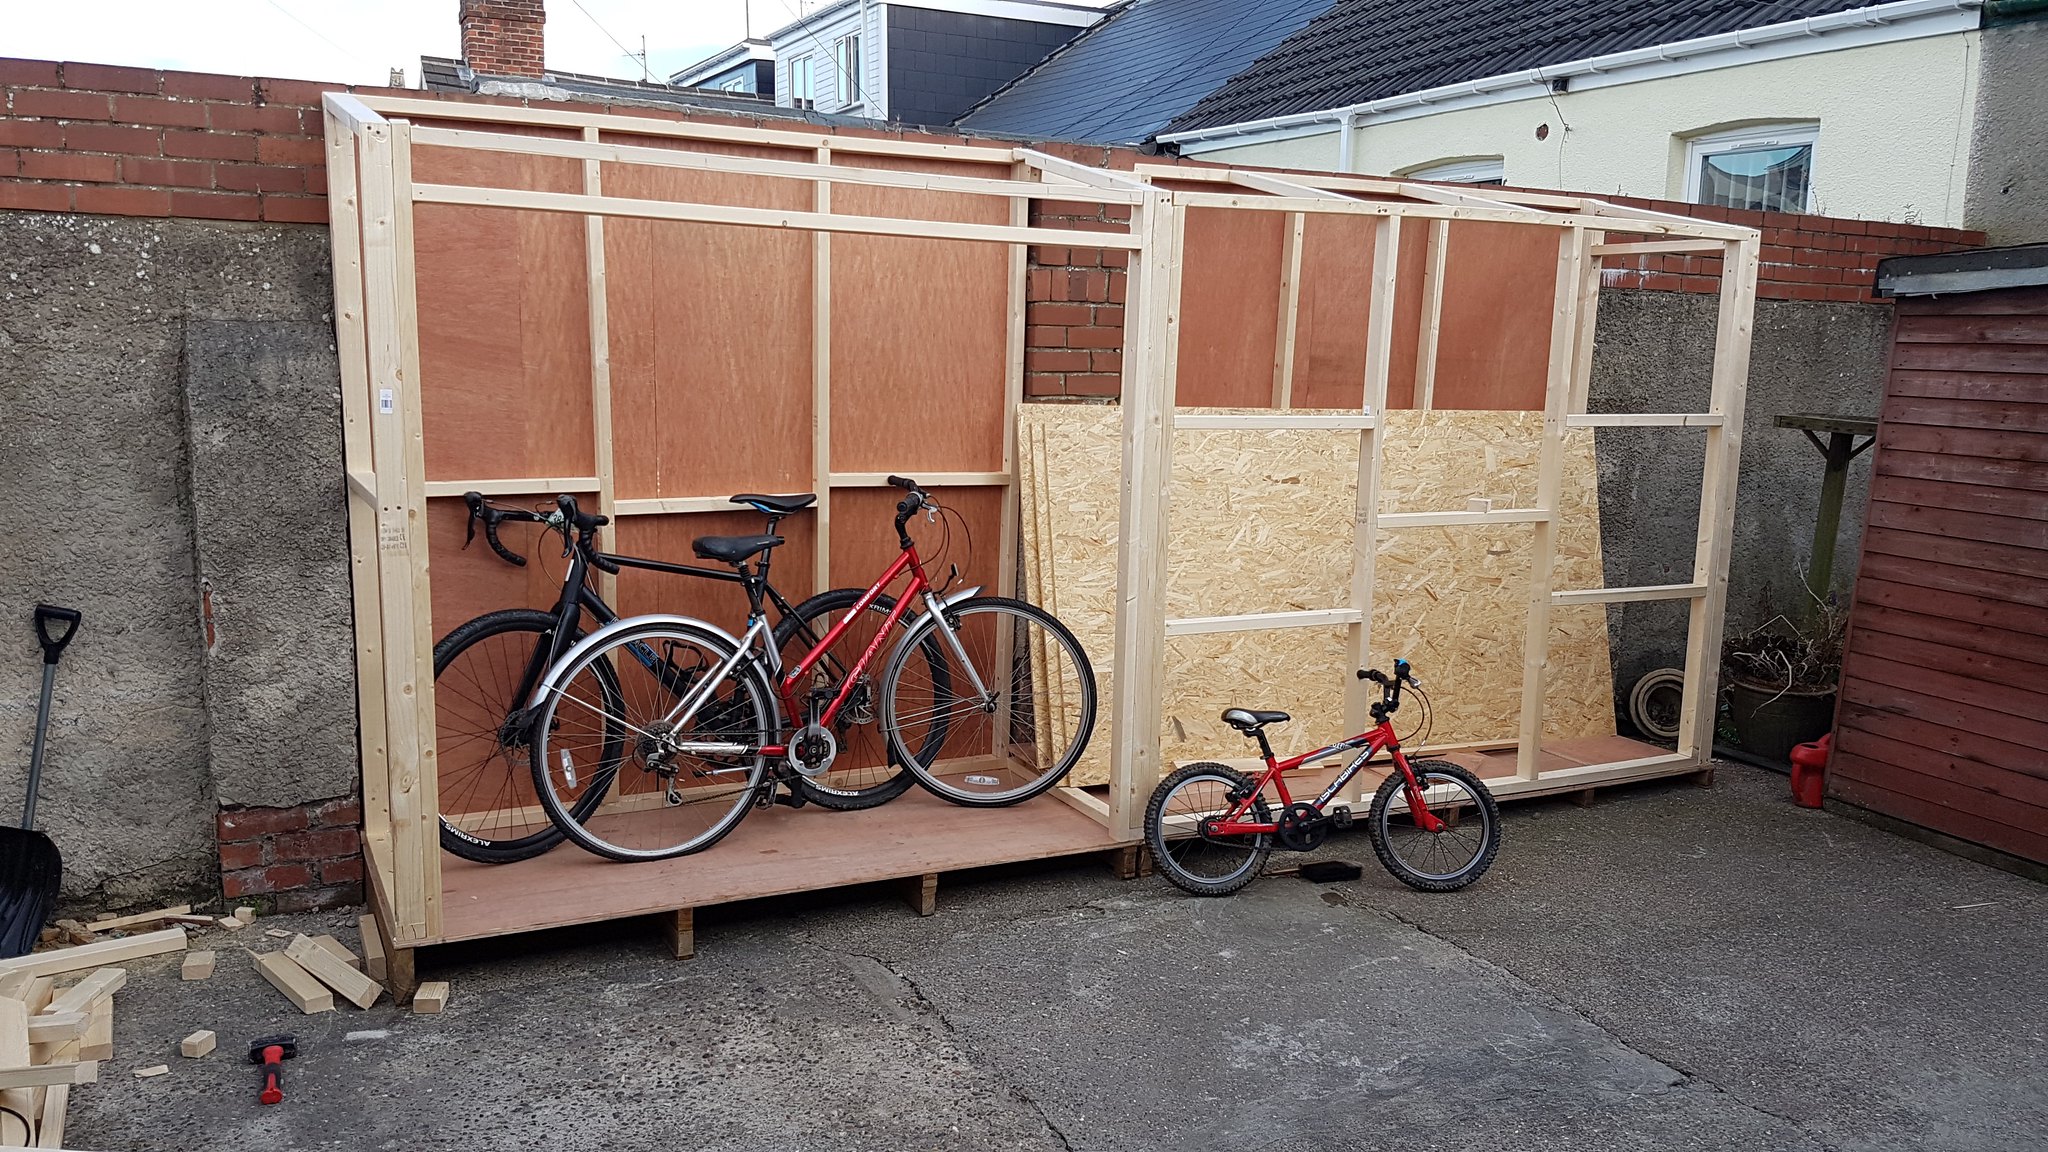 [/img]
[img] 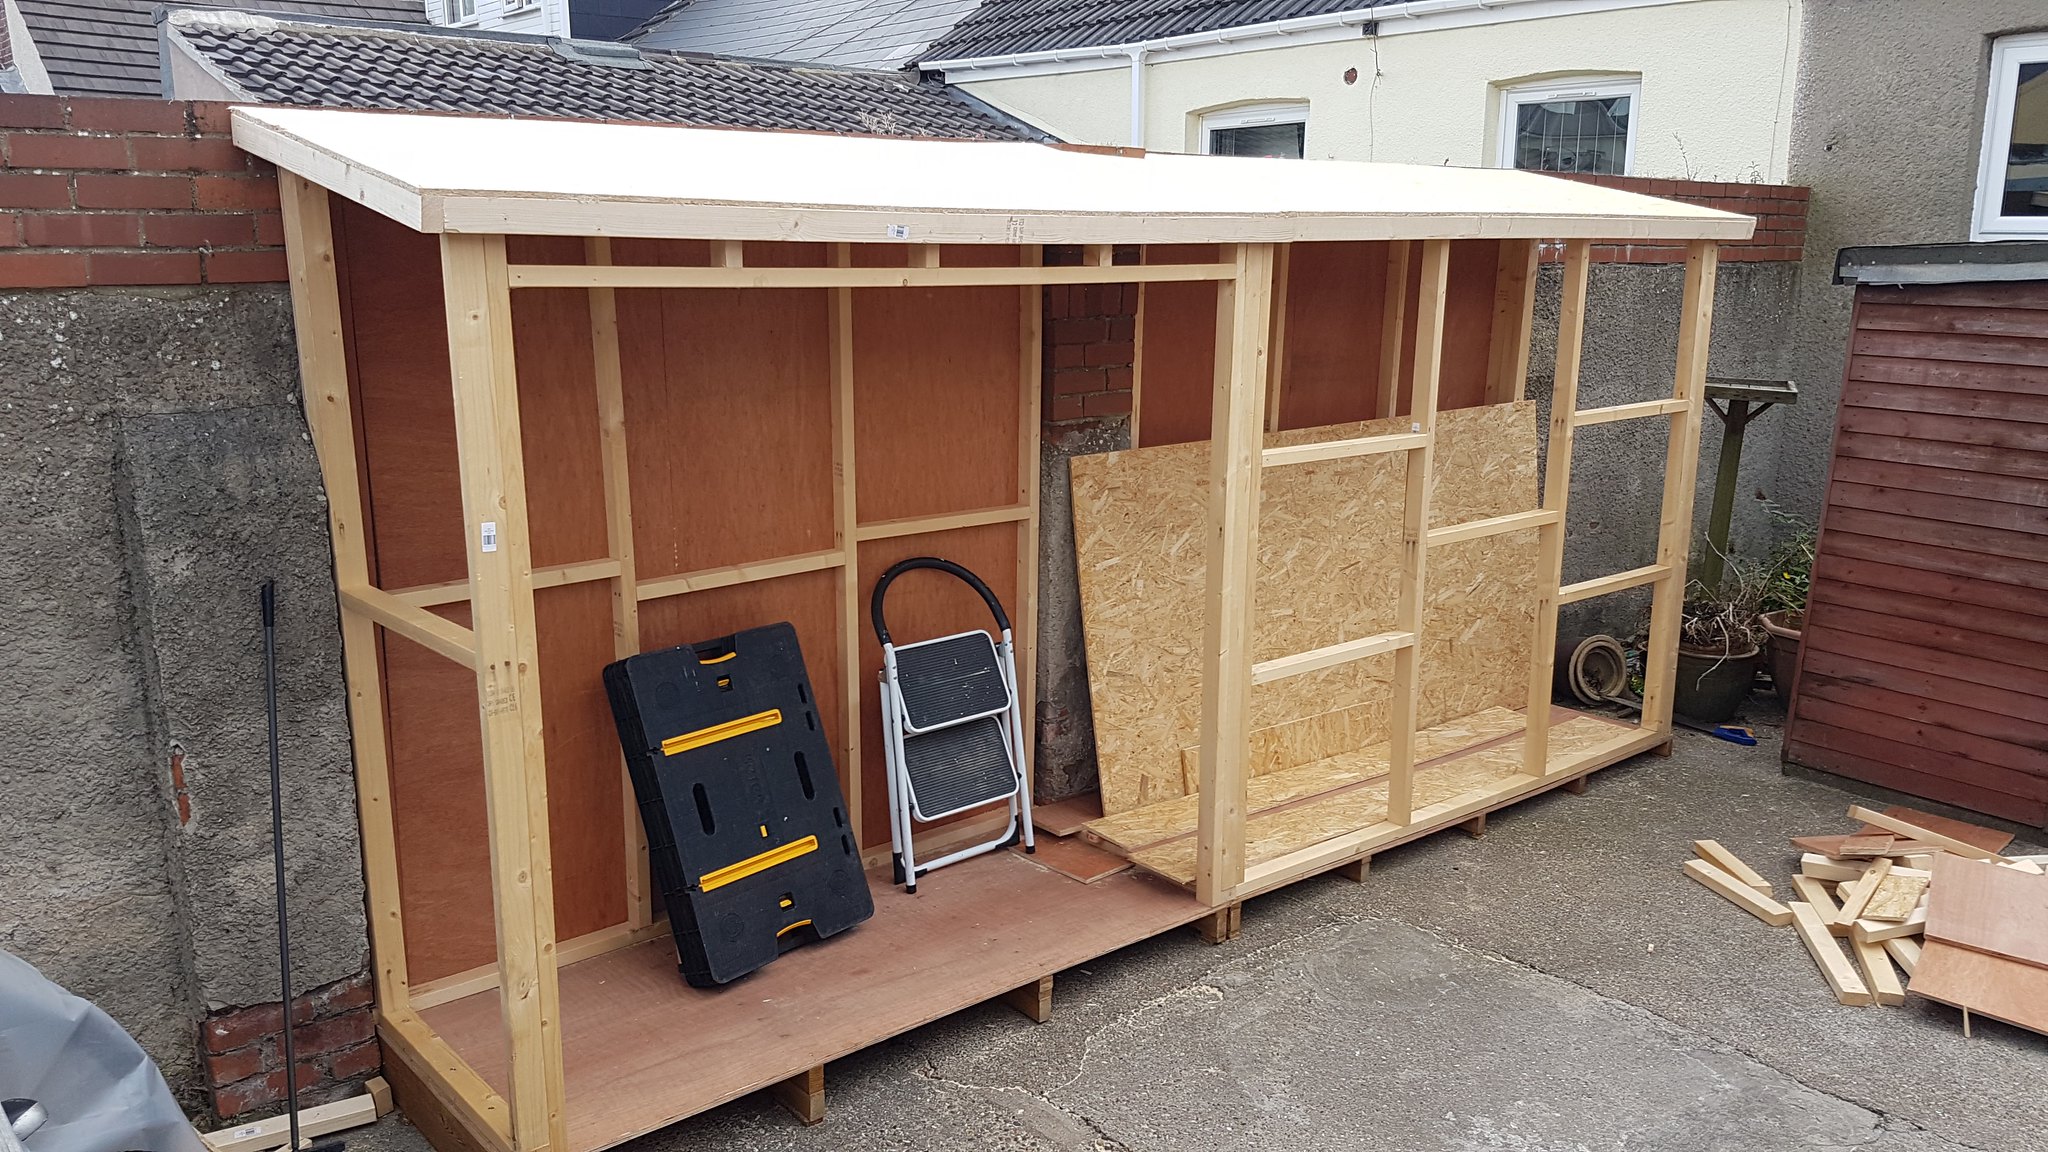 [/img]
[img] 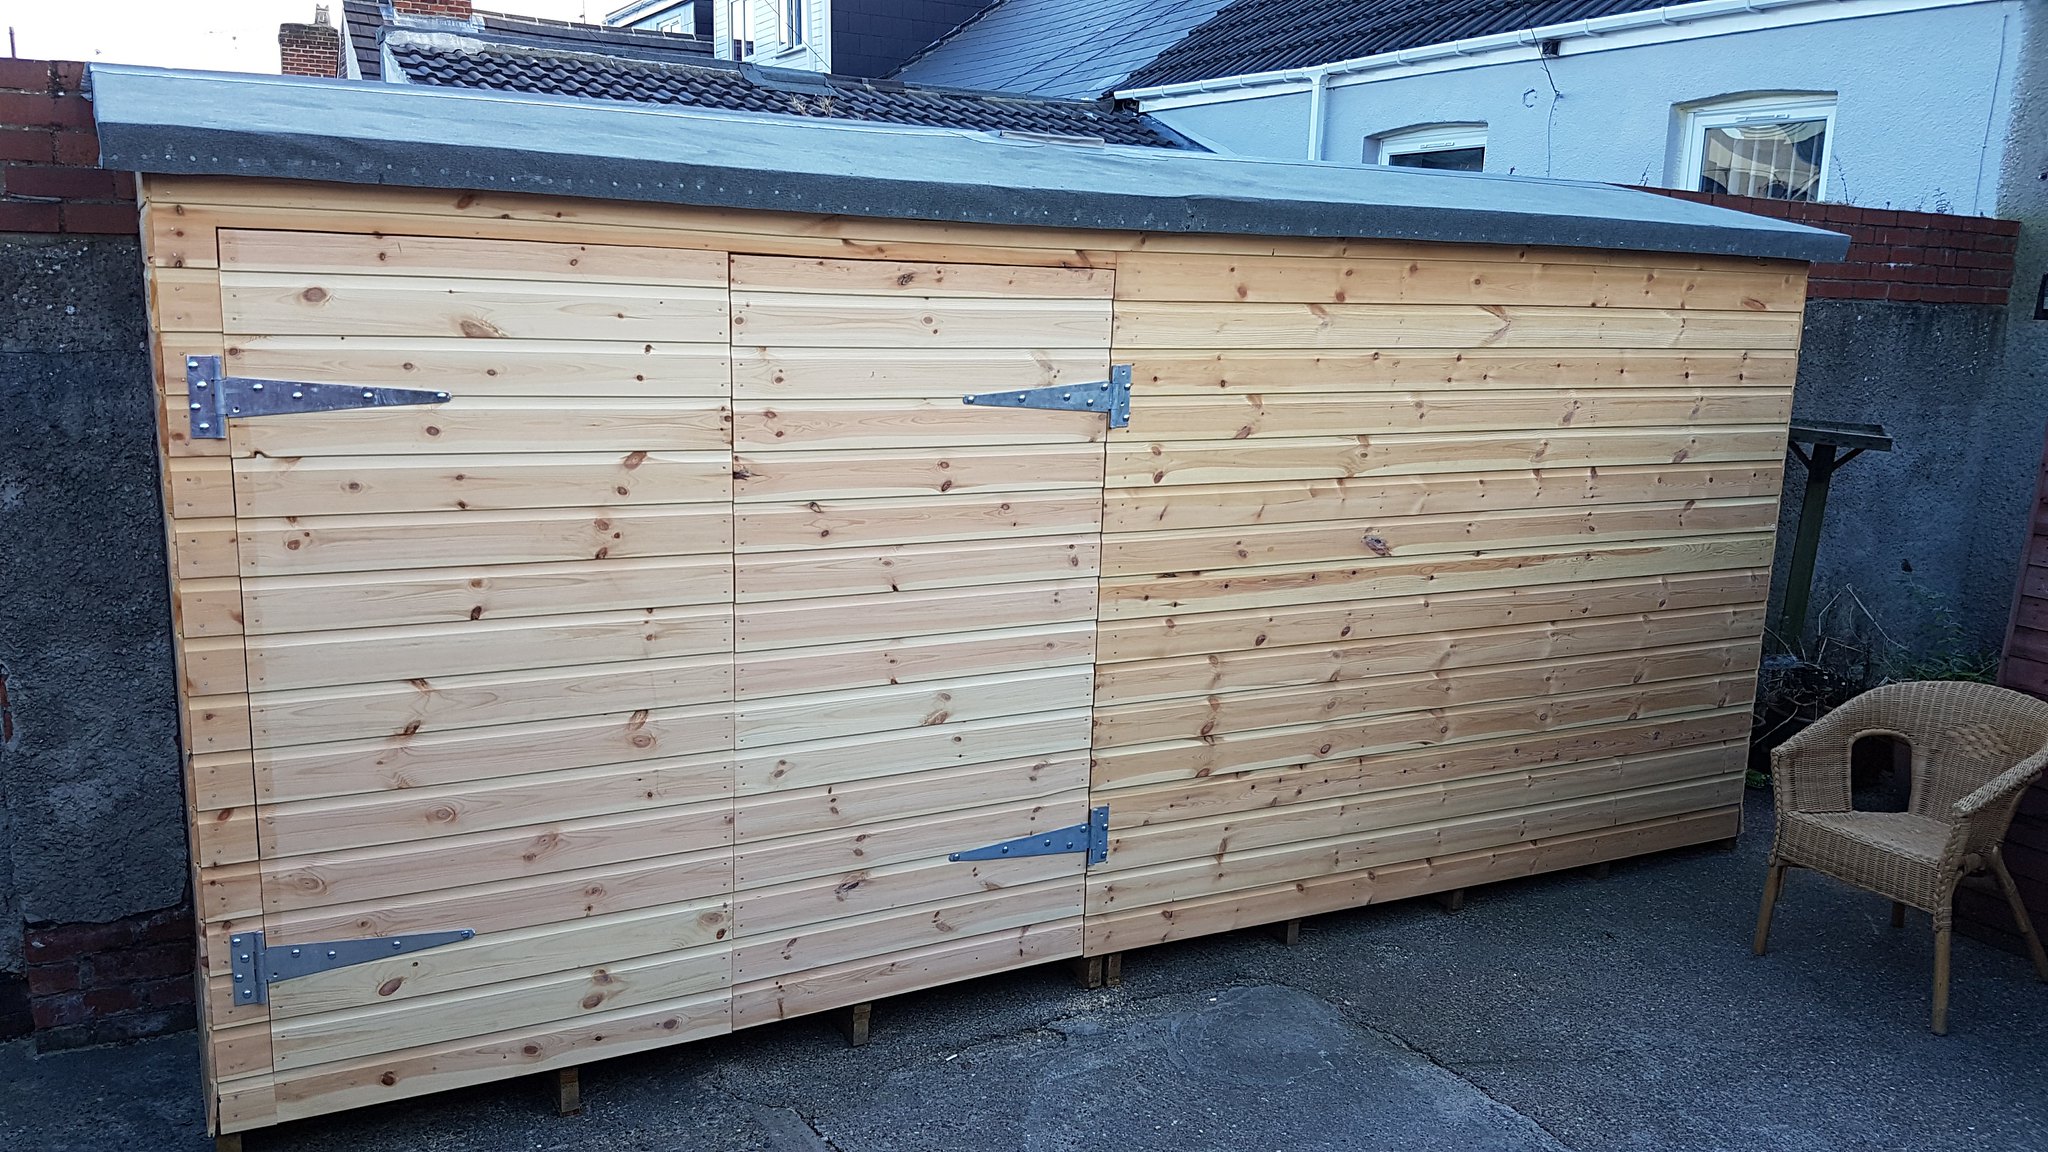 [/img]
With the slatted look you will still need some structure. The benefit is you can get away with that structure being less attractive and less weather resistant, eg OSB panels. The panels do the structure, the membrane and cladding does the aesthetic and weather proofing. The usual option is an all in one structure and weather proofing such as pressure treated shiplap (edit: as above).Do i need to have the 'shed' structure walls, ply, membrane and then the cladding?
The outer cladding in those kind of buildings is simply a way to stop the membrane (which is the real weather-proofing) from being damaged.
This type of wall is called a rain screen. For vertical cladding, you'll need horizontal slats to space it off the membrane (vapor barrier in this diagram)
[img]  [/img]
From inside-out in that diagram you'll have
2x4 or 3x2 framework
OSB or sheething ply boarding
Vapour barrier/Membrane
Spacing strips
Cladding
that is great, thanks alot! (and thanks northernmatt)
yeah i was thinking a basic structure like above and then clad it, just wasnt sure with regards to the substrate wall etc..
i'll have to get along to Hornbach (swiss B&Q etc)..
Roofing options as i see it:
felt
wood like the sides over felt (see: [url= https://www.google.ch/search?q=cedar+bin+storage&dcr=0&tbm=isch&source=iu&pf=m&ictx=1&fir=ZlZSiAth8ibMmM%253A%252CePxh-2L6Dl90oM%252C_&usg=__MuUj0iRoz8bplmfUXtemr_BaWkI%3D&sa=X&ved=0ahUKEwiW4ojhkYnXAhXJ1hoKHU0bDeQQ9QEILDAB#imgrc=9zlEoDmZyWZCZM: ]google[/url])
or...?
wood like the sides over felt (see: google)
The problem with that would be that everywhere you put a nail, you've got a potential for water to come in + everywhere you've got a gap, leaves etc could clog.
I'm not sure how you'd do it. You'd probably have to find a detailed description online.
I went with Opal 16mm Polycarbonate and I'm glad I did. The natural light is amazing. But then mine isn't just storage - it's a workspace for wood work, 3D printing and bike maintenance too.
thats what i was fearing for the roof...
i'll see what i can find.
i know AlexSimon - im more than jealous of your shed... the space you have is amazing. i dont have that.. here land is too much money..!
Thanks scotia. I didn't know you'd seen it.
Yep, I'm lucky to have the space. Unfortunately the house itself is tiny!
Garden office next probably. Extending the house into the garden just isn't practical due to access issues.
[url= https://www.hornbach.ch/shop/Bande-en-losange-meleze-de-Siberie-27x144x4000mm/8611779/article.html ]shiplap?[/url]
is this shiplap? ie tongue & groove find of thing? wouldnt need a memebrane if i use this kind of thing?
how do you attack the corners?
Yeah that is pretty much the same thing. Shiplap tends to not have the notch down the middle and be a bit thinner. I think the stuff I used was 12-14mm thick. You don't need a membrane if you use that as the water just runs down it.
For the corners I just ran it up to the flush to the end then put the next side over it. I haven't done it yet but I'll probably put some trim made from thin wood over it to hide the joint. I can't find a photo the show what I mean clearly so I hope that makes sense.
if i mitre the ends this should give a clean finish?
You could do. I didn't because I always manage to balls up mitres and it relies on everything being exactly square etc etc. Best just to do it rough then hide the horrible bits with wood trim.
Eventually I'll do the second one down on the link below. If I'd thought about it properly I would have done the top one.
https://www.vastern.co.uk/advice/fixing-corner-details-cladding/
Its not precision stuff. It'll move and shrink and you'll be left with a sharp exposed end. As above, just cover with trim. This is one of the benefits of the slatted look you started with. The structural bit can be quite rough and you can take your time on the cladding, which will be much easier to get looking nice.if i mitre the ends this should give a clean finish?
scotia - I have to say that shiplap link is a pretty nice profile!
27mm is a nice thickness (same as mine).
Larch is great - that's what mine is. I coated mine with Osmo to preserve the colour, but you really don't need anything as long as you're ok with it greying.
I mitred mine with a good mitre chop saw and it was all good. Gaps haven't opened up significantly in the 4 years since I built it. It takes longer to make though with little more wastage.
I didn't use a membrane and, as I have good ventilation, it seems mostly dry. Some tools have gained a slight patina, but I do stick wet bikes in it, so not totally surprising.
Ventilation is the reason why I put my shed off the ground. I used concrete fence posts.
alexSimon - thanks - i like it - v tempted by it.
do you have a link to your build thread - ive lost it..
AS - found it!
Alex, sorry im a numpty and didnt save the famous post when i found it.. all my googling and i cant get a handle on it.. Do you happen to have the link? are there photos showing the corners? would be very interested in seeing how you did it - was it like in that link above?
I have built your shed, mine is 3'6" deep by about 14ft long . We use our back yard to park the cars in so I couldn't go too deep but it's plenty long enough. I split it into two sections, one with barn doors for the bikes and at the other end a single door into it so I could put shelves either side.The brick wall I was backing it onto is only single skin so had a pier halfway along the length of the shed. I built two frames and fixed them into the gaps between the piers then built from there. Used shiplap cladding to finish it off, it's now been painted a nice shade of pastel blue at the behest of her indoors as the kitchen looks onto it.
I was restricted by the height of the wall which is about 7 foot high.
What felt is used on the roof? Is it expensive or just cheap shed felt, I bought something similar to this a while ago - https://www.gardensite.co.uk/garden-buildings/garden-storage/rowlinson-wallstore.htm but the felt is already getting very threadbare
Bookmarked.
Cheers
scotia - http://singletrackworld.com/forum/topic/shed-build-%e2%80%93-things-i%e2%80%99m-learning
I couldn't find it on google either, even though I knew all the keywords I'd used! Had to go back through my forum history.
I can't see any pics of the bevels, so I'll go out and take some now.
As you can see on one of the corners there was a slight vertical shift, but it's nothing I notice now.
[img]  [/img]
[img]  [/img]
If I were to do it again, I might be tempted to do invisible nailing through the tongues, but at the time I was thinking that I valued strength over everything else.
Edit: BTW this profile is T&GV
Just seen that my cladding is 21x145 with a 138 cover, so not 27mm as I posted earlier - that really is chunky!
oh - one more thing.
2 corners aren't capped or mitred at all. I just coated the end grain with wood preserver. Seems ok after 4 years, but I guess it's not very professional of me.
nice work! did you treat it atall - i see its going the famous grey colour?
Yes, but after that bit had greyed. The Osmo instructions said wait 6-8 weeks after installation, so of course I forgot and left it 6 months!
To be honest, I should be re-coating now. That face (the smallest side - greying in the photo) gets all the weather and is greyer than it was.
As - just a quick question re: roof - i am doing the rounds with regards to what to use like you did when you did your build... How is the polycarbonate holding up? We have no trees in the area so wont have leaves.. but here in summer it does get hot and in the winter we can get snow..
Did you fix your in alu channels? i saw one company that does it like that..
if not how did you join?
thanks!
Yes, fixed into aluminium extrusions called [url=ATQ40WH]Glazing Bars[/url]
Very very strong. Our 2x4s haven't budged a mm with 1ft snow on.
It's lasted amazingly. At first we were getting a green lichen type stuff growing on it, which water and multi-surface cleaner couldn't shift, but I looked it up online and found the vinegar does a great job! It's now sparklingly clean again (clean has lasted 8 months so far).
It does get hot on a sunny summer day (maxed at 30-degrees so far), but not enough for things to spoil (no explosions or anything!).
Absolutely love the light in there. It really was the best decision I made and what's transformed it into a lovely space to work in.
We siliconed-on all the trim, so I haven't investigated to see whether the alu tape of breather tape are still intact. It doesn't look like anything has got inside the box-sections though.
I think it looks pretty ugly from above though. We have a high area of the garden which looks down on the roof, and it's just a white piece of plastic. Ah well - there's always some compromise!
Whether it makes it worthwhile for a storage-only shed, I don't know. Makes it easy to see inside all the storage boxes, etc though.
I've got full electric and lighting in there now, but before I did, I used to work until dusk, then walk outside and it felt darker outside!
ok thanks - and sorry in advance to ask so many questions..!
one last one for now: windows - did you just put in panes of glass and wooden beading? ive done this in an interior door but hadnt thought for the exterior?
Yes, that's exactly what I did. Works fine. I charred the larch to give it some extra protection. I silicone sealed it too.
I guess a sloping sill would be a good idea but mine are just rectangular.
Worth noting that I have quite a large overhang on the eaves which give some protection to the walls/windows.
[url= http://www.naturhousecz.de/sysrefer/102/6/164/domek-na-naradi-s-plochou-strechou-naturhouse-s5-wuppertal/ ]inspiration[/url]
this is what im going to try to recreate but will take some time - got to get the design done and the commune to sign off on it..
if i do it this way, i can do any old structure with boards, membrane then add on the larch cladding?
how do people ventilate correctly?
Looks good. Ventilation isn't talked about much. I'd be interested also.
i might have a problem... i may need to build the shed on the patio and then move it into position... idocy??!
Totally finish it while on the patio?
i was thinking at least the outside as we may need to take it to the boundary - allowed here.. i'd finish inside after..
Not an insurmountable problem I wouldn't think, but it'll need careful consideration. No experience personally, but they move whole houses in the US/Aus/NZ.
Build it like a flat pack kit, floor, walls and roof all separate panels and bolt together at the joints and corners.
As above. Build it in panels and move into place.
Bookmarked
