update?
my bits/ bobs are 75% roughed....
I wasn't going to polish, but if it flattens well, I might.
Well, I've got most of it off, but jolly well have not had a go at it for a few days cos it's bin a bit chilly outside. It's taking a fair amount of elbow-grease to shift the stubborn bits in the nooks and crannies, but a bit of Nitromors to soften, then some concerted rubbing with sandpaper and a brass wire brush, and I'm getting there slowly. I'm finding using different sandpapers then some fine wire wool is leaving a nice smooth finish, not 'polished', but still quite nice. A go with aluminium polish will give it a good sheen.
I think it's gonna look quite industrial, rather than pretty. But I think it ought to come up nice.
Update: frame looks sketchy as hell,I can't get into the nooks and crannies at all, and I don't know what to do now. 😕
Update: frame looks sketchy as hell,I can't get into the nooks and crannies at all, and I don't know what to do now.
cheer yourself up. Get yourself some wet and dry / scotchbrite and set to work on a bit you think looks bad. Make it look all nice and you will know it is worth it.
NB I borrowed a very hard triangular scraper for the recessed parts . Looks awful at first but flattens out ok.
Dancake, thanks for that triangular scraper tip. The main tubes are stripped and looking fine really, it's just the fiddly full suspension bits that I'm struggling with.
What you need are some wire brushes that you can put in a drill. Brass wire though; steel is too hard and will ruin the frame. A Dremel type thing is handy for the very fiddly bits. And ffs wear eye-protection. Please.
I just wrap a bit of sandpaper round my index finger and rub away at small spots. Takes ages, but does the job. All round the BB area and where the tubes join. My Cannondale has nice smooth welds which are easier to do than standard welds.
Take yer time and don't rush it.
Hope to have mine done in the next week...
my frame is all done (ish) so I decided to spruce up some linkages. (basically remove anodising in drain cleaner then get polishing kit out)
got bored in the end so its a real half-job (one sided) . with time it could be nice though...
[url= http://farm3.static.flickr.com/2466/5787632002_f2260c6d05.jp g" target="_blank">
[url= http://www.flickr.com/photos/51529898@N08/5787632002/ ]IMAG0230[/url] by [url= http://www.flickr.com/people/51529898@N08/ ]Dancake2010[/url], on Flickr
UPDATE TIME:
Ok so. Not a lot of progression as I've bin busy, but here's a couple of pics.
Before:
[img] 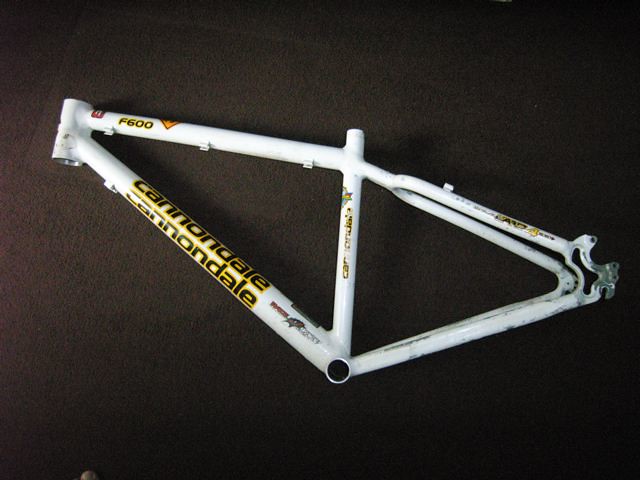 [/img]
During:
[img] 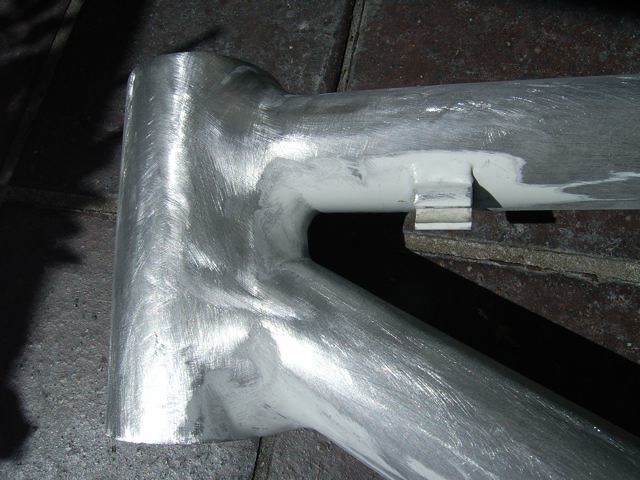 [/img]
[img] 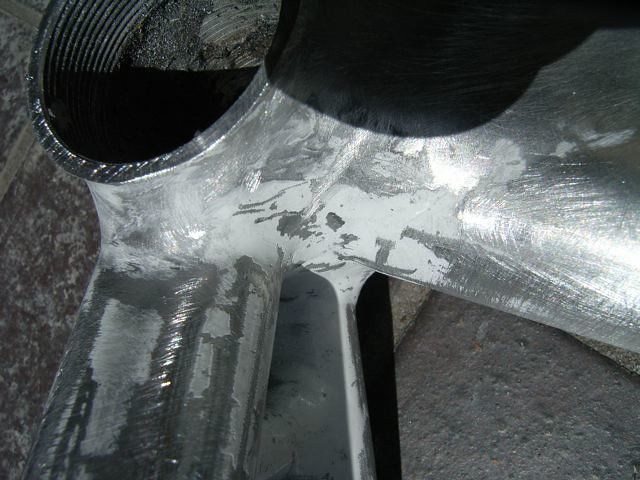 [/img]
[img] 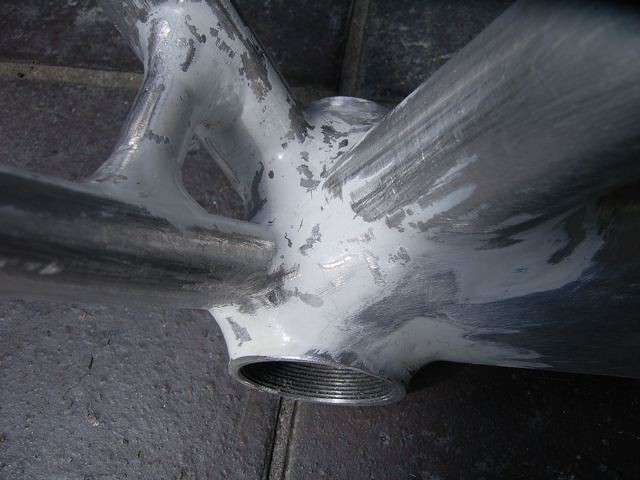 [/img]
After:
Not done yet! Hoping to get it finished this weekend. Hope reducer headset arrived (lovely!), so just frame to sort out. MM next weekend!
Plan is: take off paint with rough sandpaper/wire brush. then use finer and finer grades of paper right down to ultra-fine w+d. Then, right, some fine steel wool. Finishing off with Brillo pad with some alu polish, final rub down with alu polish, done.
It's a bloody long-winded process. Will look good once finished though. And I've saved a few grams off the frame! 🙂
Just spent a couple more hours on the swingarm of my Rift Zone. I've now decided I've got as much off as I possibly can and I'm going to see about getting the remaining 0.1% removed and then have it blasted. Still not sure about leaving it raw or having it anodised though...
Fresh back from holiday so it is thread resurrection time 🙂
Any updates? Anyone finished?
I am going the Wet/ dry - steel wool look. I have saved the polishing for small parts like the linkages/ cranks / dropouts maybe as it takes a while and I cant be bothered
next question is decals.Shall I or not?
[url= http://farm4.static.flickr.com/3585/5845245199_93eb1da176.jp g" target="_blank">
[url= http://www.flickr.com/photos/51529898@N08/5845245199/ ]IMAG0262[/url] by [url= http://www.flickr.com/people/51529898@N08/ ]Dancake2010[/url], on Flickr
[IMG]  [/IMG]
my recent effort.
Dont bother with paint stripper with dichloromethane missing, nitrmors etc is now rubbish, a days effort got me nowhere. Went to a local hardware store, got some dirty paint stripping without the active chemical removed, paint jumped off within 20 mins, minimal effort.
Yellow pages.
A lot of work - I'd happily pay someone to do it properly, although I much prefer paint. Fair play to all you guys who have enough spare time to fill doing this !
[url= http://farm4.static.flickr.com/3184/5859746318_56fb7c5321.jp g" target="_blank">
[url= http://www.flickr.com/photos/51529898@N08/5859746318/ ]IMAG0268[/url] by [url= http://www.flickr.com/people/51529898@N08/ ]Dancake2010[/url], on Flickr
its growing...
I did mine a while ago and it looks much better than the original poo brown. Nitromores was shite and it took ages half way through I wished I hadnt started it and nearly took it to the powder coaters and had it recoated. I finished it by just rubbing it down with wire wool and love that the paint wont chip off and look rubbish. Having said that I keep thinking about having it coated in primer grey with some metal flake over the top, maybe next time I need to do the bearings.
[url= http://farm4.static.flickr.com/3492/5842046756_4b1ab33800_b.jp g" target="_blank">
[url= http://www.flickr.com/photos/29930426@N04/5842046756/ ]IMG_0028[/url] by [url= http://www.flickr.com/people/29930426@N04/ ]i_ache[/url], on Flickr
deanfbm...can I ask, was your rocker red before, or did you get it done...? If so where ?
I've just ordered a polishing kit to do my Ventana. Hoping it comes out like this one on the Ventana site:-
[img]  [/img]
time has run out so it is back together...will tart up later. Hopefully a few decals etc..or maybe not. Dunno yet
[url= http://farm6.static.flickr.com/5105/5862970542_3623697a55.jp g" target="_blank">
[url= http://www.flickr.com/photos/51529898@N08/5862970542/ ]IMAG0279[/url] by [url= http://www.flickr.com/people/51529898@N08/ ]Dancake2010[/url], on Flickr
I did a "test-strip" on my Ventana last night. Paint bubbled almost instantly, so looks like its going to come off ok. The bare alloy looks like it has been lightly blasted before powdering so a bit of polishing to be done.
Now gone over with the autosol. Wasnt going to do this at first, but did a little test and sort of carried on
Came out so well, I regret not spending more time flattening the frame (was originally going for the rough raw look
[url= http://farm4.static.flickr.com/3287/5869470984_8598d0f705.jp g" target="_blank">
[url= http://www.flickr.com/photos/51529898@N08/5869470984/ ]100_2561[/url] by [url= http://www.flickr.com/people/51529898@N08/ ]Dancake2010[/url], on Flickr
nb getting a shine was no effort at all and took no time. Do it before you build the bike up though, kids
The last alloy frame I did was lightly sanded then Nitromorsed for a few moments to work into the tight areas.
A pressure washer is great for getting at the tight bits 🙂
I found the easiest way is to find a local alloy wheel re-spray company as they use a soft media blast rather than a sand blast so it doesn't blow through the frame. cost me £20.00 and a couple of hours to do the final polish up myself. Easy peasy
Just finished getting (almost) all of the paint off my Marin:
[img]  [/img]
There's still some paint in the nooks and crannies of the swingarm but I've had enough now. Never again!
OP - looks great. 😕
loving the pikey look 😉
IMO (although I haven't tried to strip paint from a bike frame) get it done professionally.
Never again!
That's kind of where I got to... 😆
Mine's just down to the metal. I could sand it and polish it all up, but tbh, after building it up in a raw unpolished state for Mayhem, I figured that it would only get scratched and chipped very easily (no hard anodising of the soft alu surface, see?), and all that effort would be rapidly undone.
I'm now contemplating having it powder coated....
RAL 1007 JCB/Lotus yellow:
[img]  [/img]
BH pink?
[img] http://t2.gstatic.com/images?q=tbn:ANd9GcQlG0Gm7j8g2fRerGgseuTiiUjvlGbTzEcpS9tSGfv7XhdMwWaF [/img]
Nah. My frame's not tough enough to cope with such a colour...
Mind you, now you mention it; black with tiny BH pink accents would look gorge, no?
Or what about black with tiny pink BH logos?????!
Bugger. This needs some thought....
What about BH pink fade to lacquered alu?
I'm taking my naked Marin to Steve The Anodiser on Friday 😀
Fresh from Steve:
[img]  [/img]
Makes all the toil seem worth it now!
I'm toying with respraying the frame I got for my GF but I'm not sure it's worth all the time and effort to strip it. what are the chances of keying the existing paint back, giving it a colour overcoat and as dash of lacquer actually sticking? I have a decent compressor and spray guns in the garage from my brothers stint as an allot wheel refurbisher, si I guess all I need is paint and thinners...
Just finished building-up the newly anodised Marin and took a quick pic:
[img]  [/img]
I've just left mine in it's raw tatty state. it's just a bike. If I do owt with it, it'll be getting powdercoated. I'm not wasting time polishing it when it'll only get scratched to buggery.
are santa cruz painted or powder coated?
bump
